
For years, I’ve seen quilters rave about Tilda fabrics and it’s always been intriguing. With curiosity getting the best of me, I finally purchased a 10 fat quarter bundle of Sunday Brunch Tipsy Blenders. The collection is absolutely adorable; the print is the same petite flowers in a variety of muted colors.
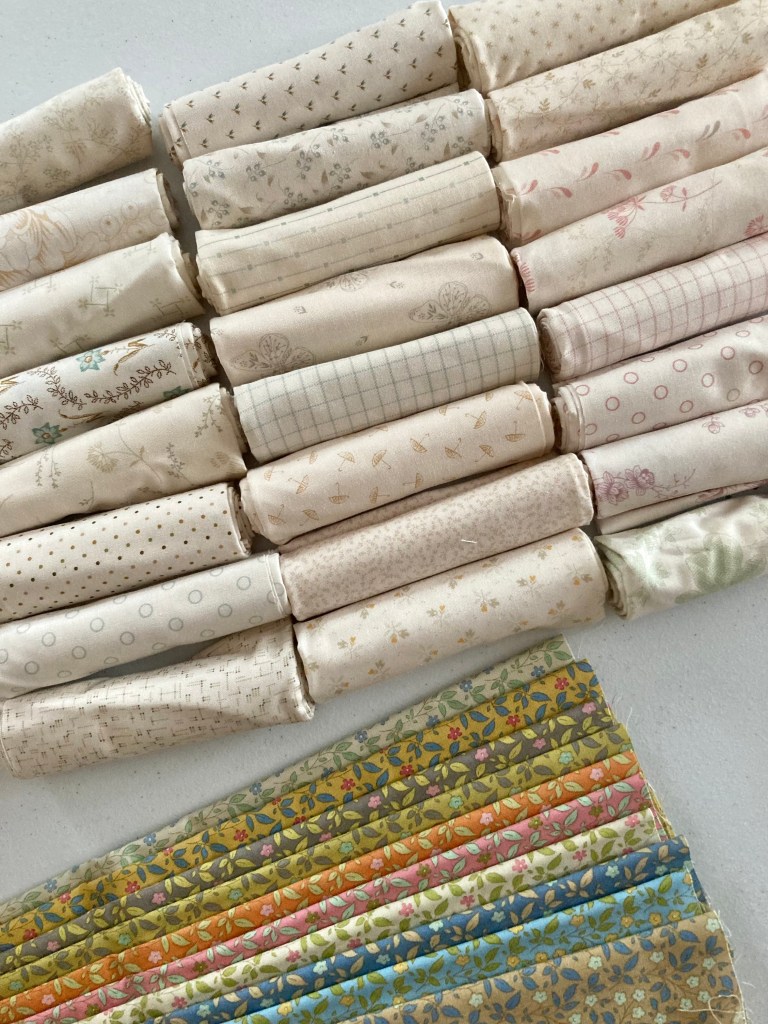
I’d also recently purchased a 24 fat quarter bundle of Andover’s Pebbles by Laundry Basket Quilts consisting of beautiful petite prints with neutral backgrounds. Admittedly, I had no idea what I was going to do with either bundle.
After seeing a lovely IG post featuring a granny square quilt pattern, I had my inspiration; I’d make one with smaller blocks using those two bundles.
Because granny square quilts are historical and timeless, my idea was to make mine with modern fabrics that give a vintage vibe.
I committed to making this quilt as a ‘slow process quilt’ where I didn’t rush during any part of it—just enjoy what I was doing. I had no other projects going and didn’t have the need to finish in a hurry, and I’m happy to say goal accomplished.
To get started, I chose the Tilda prints for the inner and outer squares due to the darker colors and wanting block consistency. I chose the most heavily printed and darker toned Pebbles fat quarters for the middle squares. I decided on Meadows from the collection for the background (which was an expensive additional order!). I usually go with a solid background but I wanted something different for this one.
For cutting and sewing, I could’ve cut for strip-piecing to save time but I didn’t think of it, and had I, I wouldn’t have chosen it. I cut everything into 2 1/2″ squares and chain pieced accordingly. Again, to enjoy the process.


Another different choice was to not press open. I pressed to the dark side so nesting would give crisply joined seams.
To keep pieces organized, once pressed, I clipped same-fabric block strips together and stacked them together. I couldn’t go any further at that point because I didn’t have the background fabric yet.
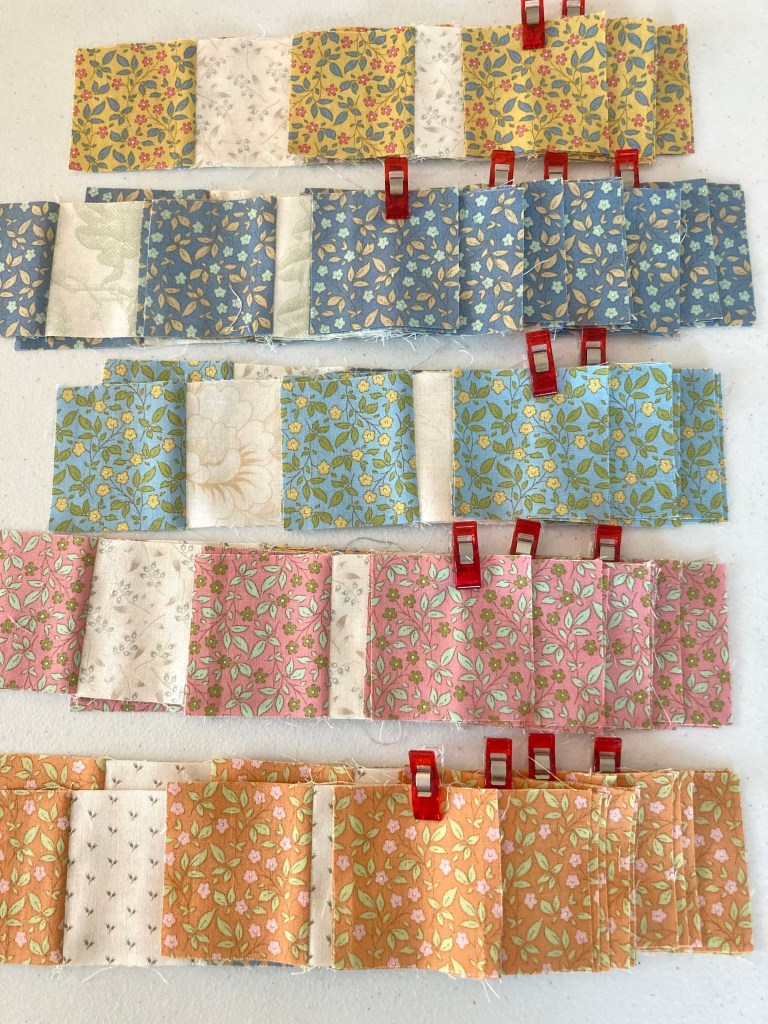
To keep my mind organized, I’d sew one outer square color combination at a time. I made 3-5 blocks out of one color. I also tried to not repeat the exact same fabric combination for a nice variety of blocks.
Once I received my background fabric, I was able to sew blocks together.


Right now I’m still working on blocks and am loving the whole process. It’ll be a while until they’re done and the quilt top is put together, but I’ll post again once I finish.
If you’d like to make your own granny square quilt, take a look at my tutorial using this same pattern from my Quilting on a Whim post.

This quilt is turning out really cute. Welcome to Tilda madness. The fabrics are so cute but it is hard to decide on what pattern to use. This has inspired me to make a Granny Square with one of the collections.
LikeLike
Thank you Florence, I really enjoyed the Tilda Fabrics. I’m glad you’ve decided to make a Granny Square quilt!
LikeLike