
There’s something about a red and white quilt, isn’t there? Ever since I started quilting, every time I saw one I knew eventually I’d make one for myself. But in my mind, it couldn’t be just any quilt pattern, it had to be a star pattern and a traditional one at that.
After recently finishing a few huge quilts, I figured it was a good time to make my long-awaited red and white quilt. I never know which should be decided on first, the pattern or the fabric? In this case, the main thing to consider was fabric. Last fall I started buying red fat quarters here and there, but I found the shades differed too greatly once put together, so I scrapped that plan and headed to a favorite online store, The Fat Quarter Shop. There I found a perfectly coordinated tone-on-tone red bundle. I was sold!

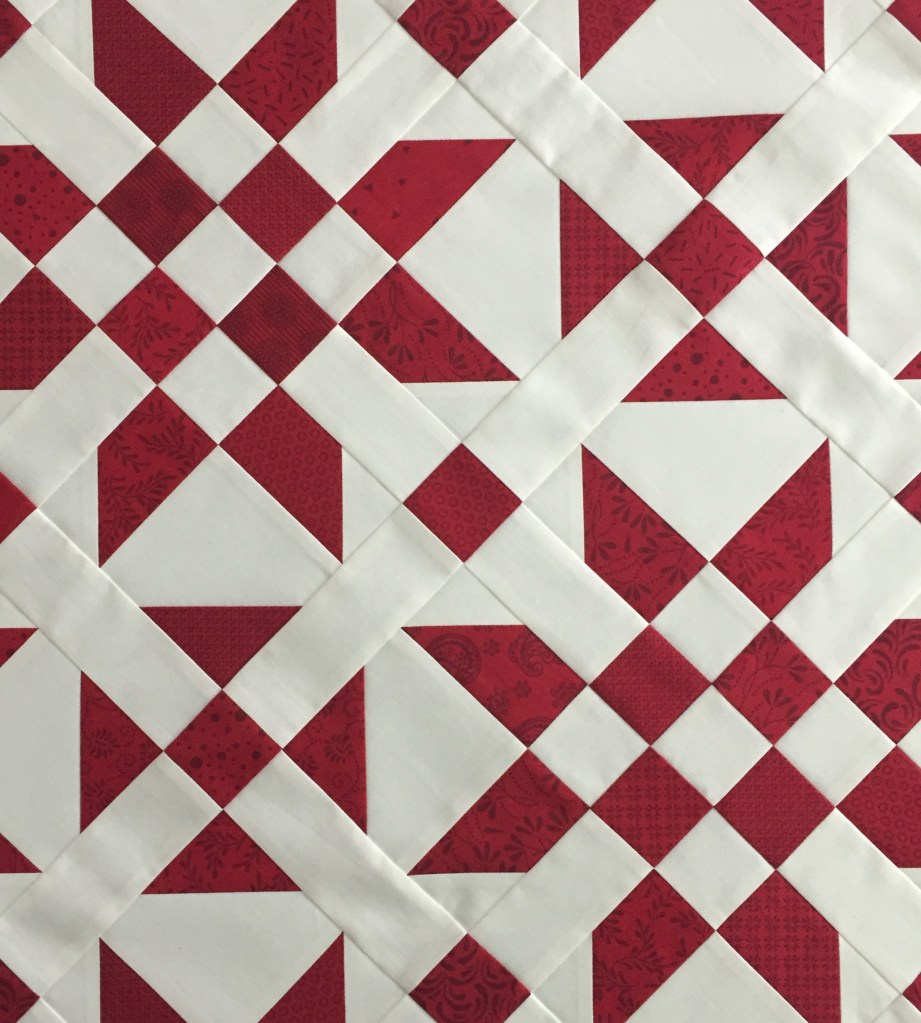
Bella Solids were on sale so I opted for Bleached White PFD yardage for my background. Next, the pattern. Finding a traditional star pattern for fat quarters wasn’t difficult; I decided on a free pattern from Moda, Illusion.
Once my fabric arrived, like a kid at Christmas, I opened it and started right away. As in many quilt patterns there was a lot of cutting. For me, I usually spend a day cutting and start sewing the next. After a few days I had some blocks made.
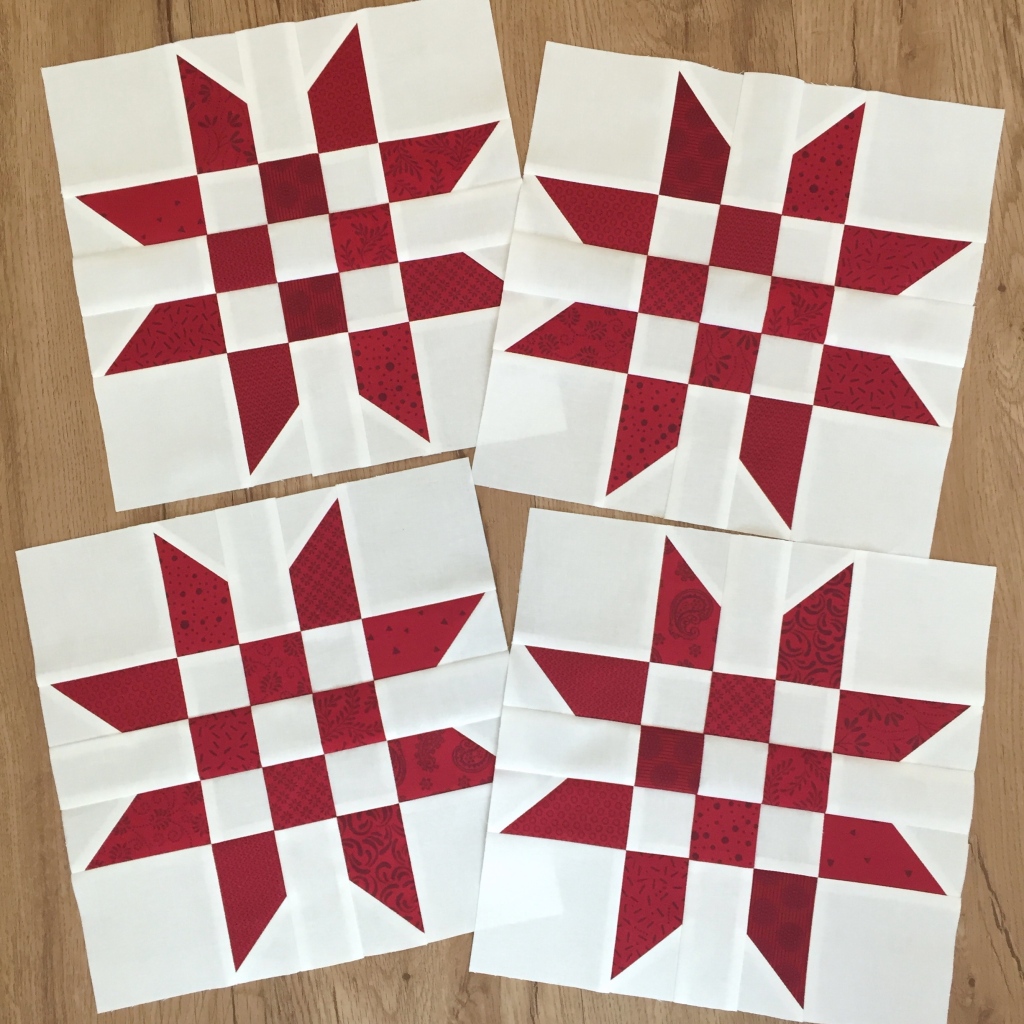
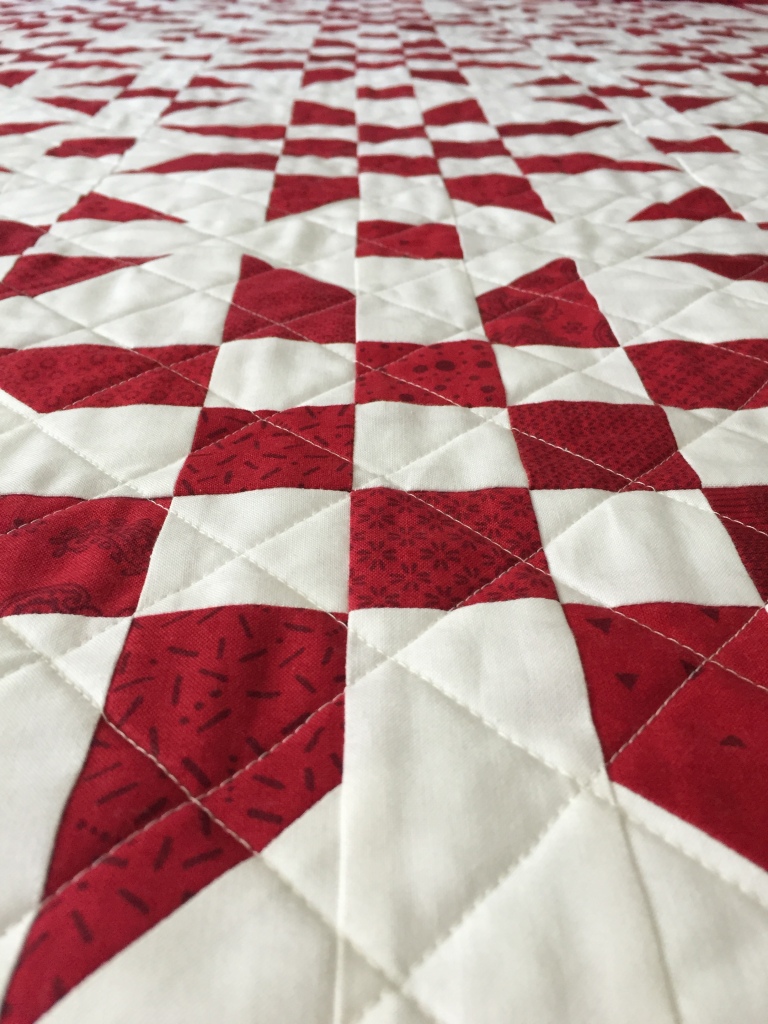
What I liked a lot about this pattern is there are no points that need lined up. The ends of the stars are made using the stitch-and-flip method, and a strip in between means there’s no aligning. Also, seams nest so you end up with nice, crisp corners.

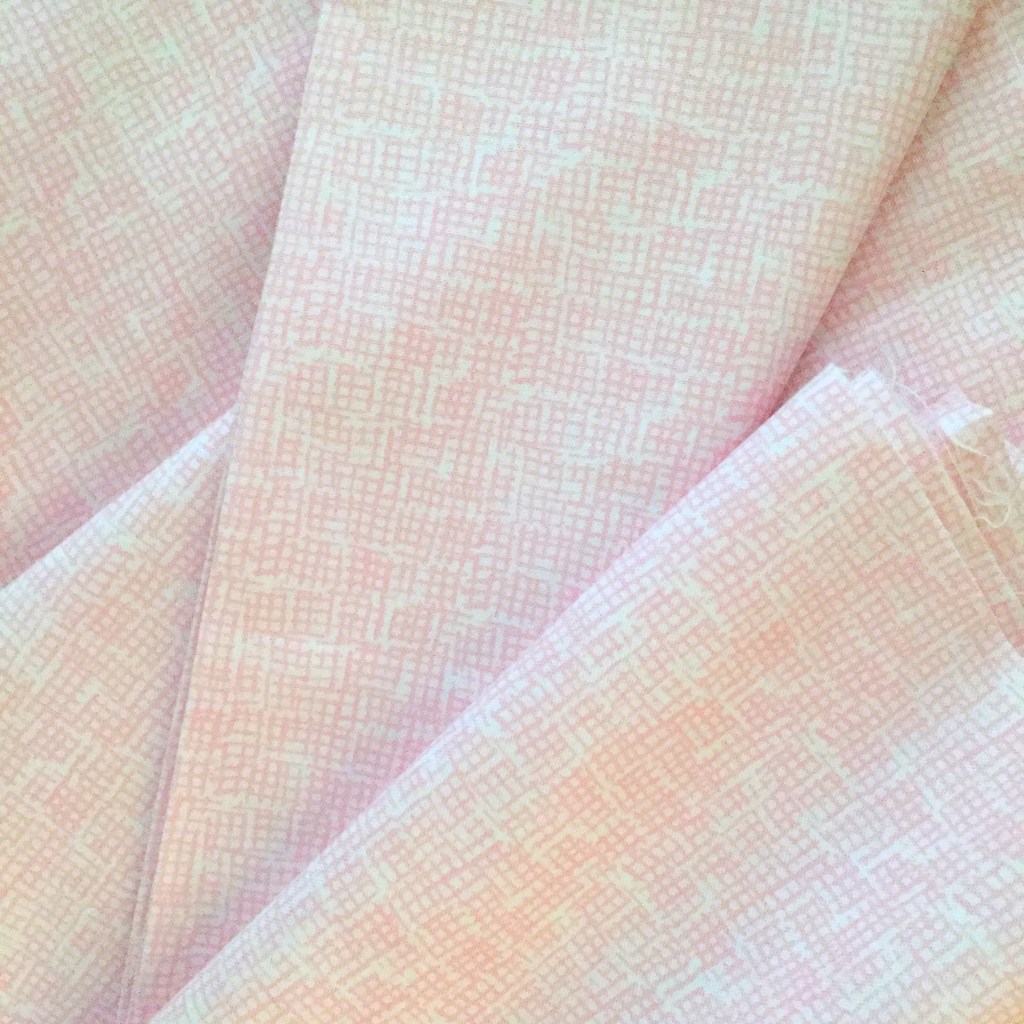
Since there’s a substantial amount of white on the front, I wanted something light colored on the back. I had Dear Stella Net fabric in light pink on hand which worked perfectly.
Longarming, unfortunately, isn’t always in the budget and this quilt wasn’t very big so I decided to quilt it myself. I quilted a crosshatch pattern—using my hera marker I marked every three inches and sewed on the line with a 3.0 stitch length. I used my guide for the in-between rows so I’d have less to mark.
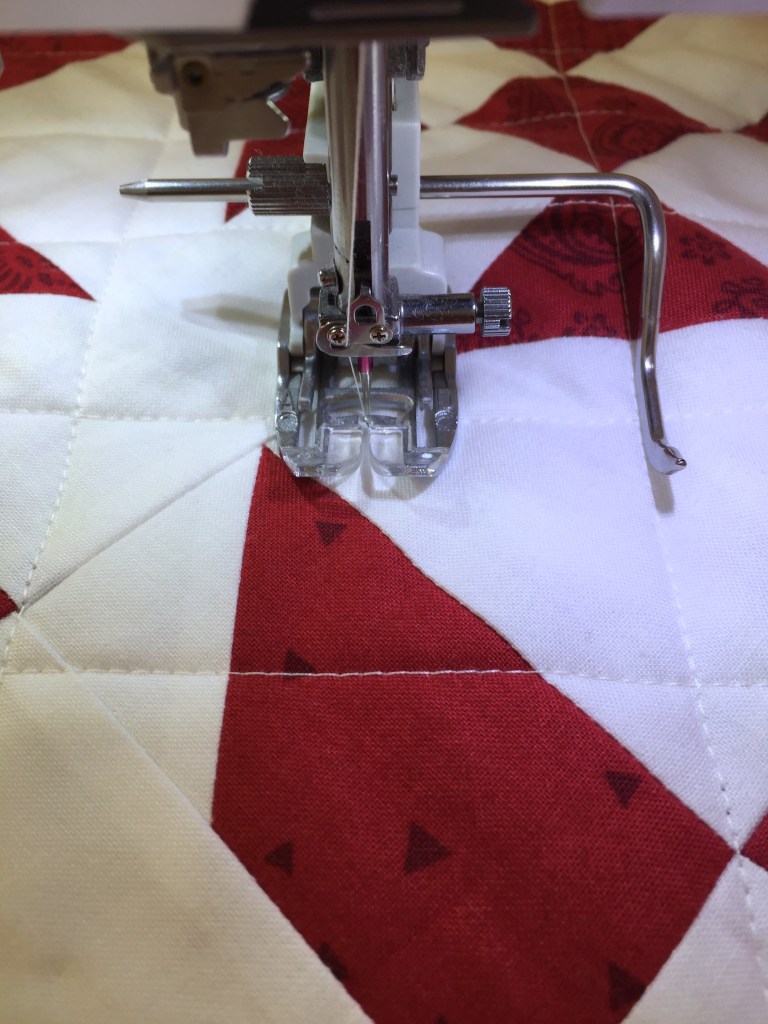
Crosshatch quilting can be tough because you’re sewing the quilt on an angle, meaning there’s a lot of bulk (from the center to the corners) when you run it through your machine. But…I love the look of a crosshatched quilt so I deal with the difficulties. 🙂

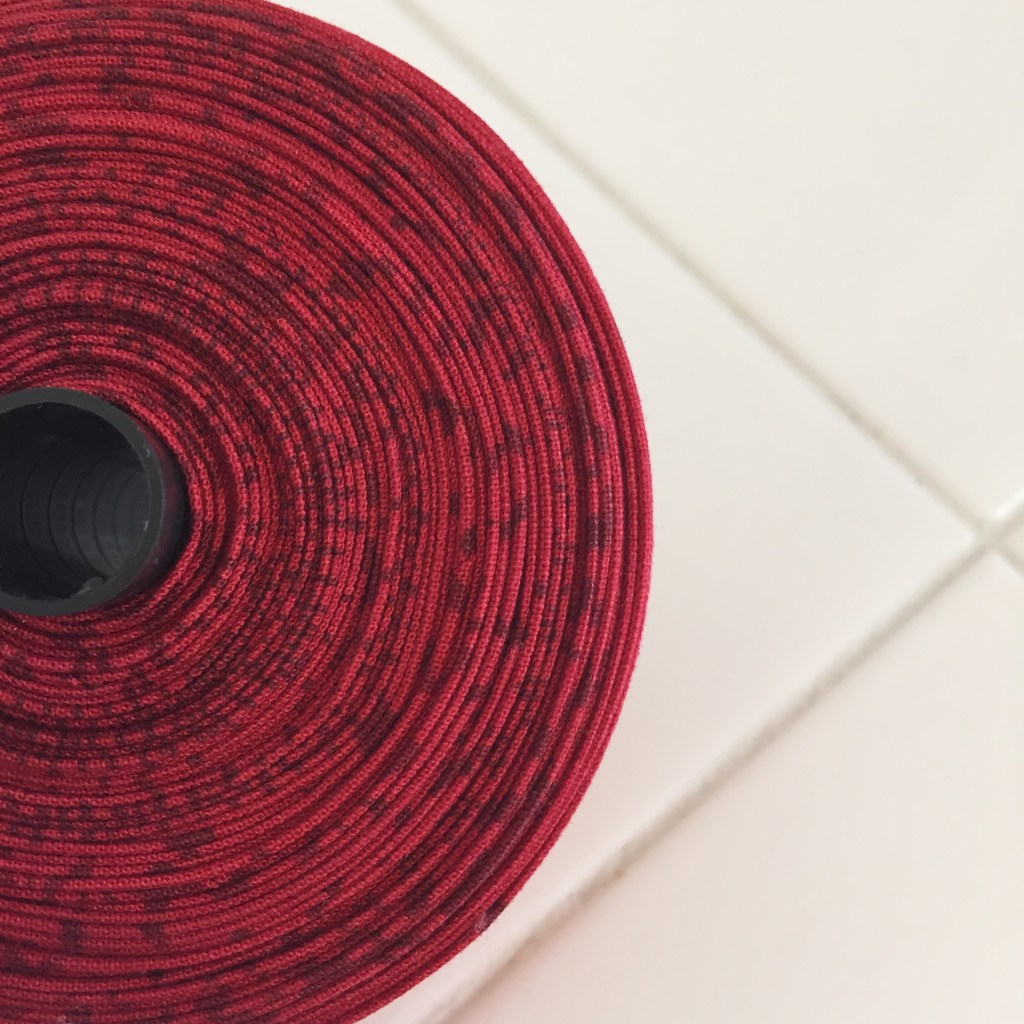
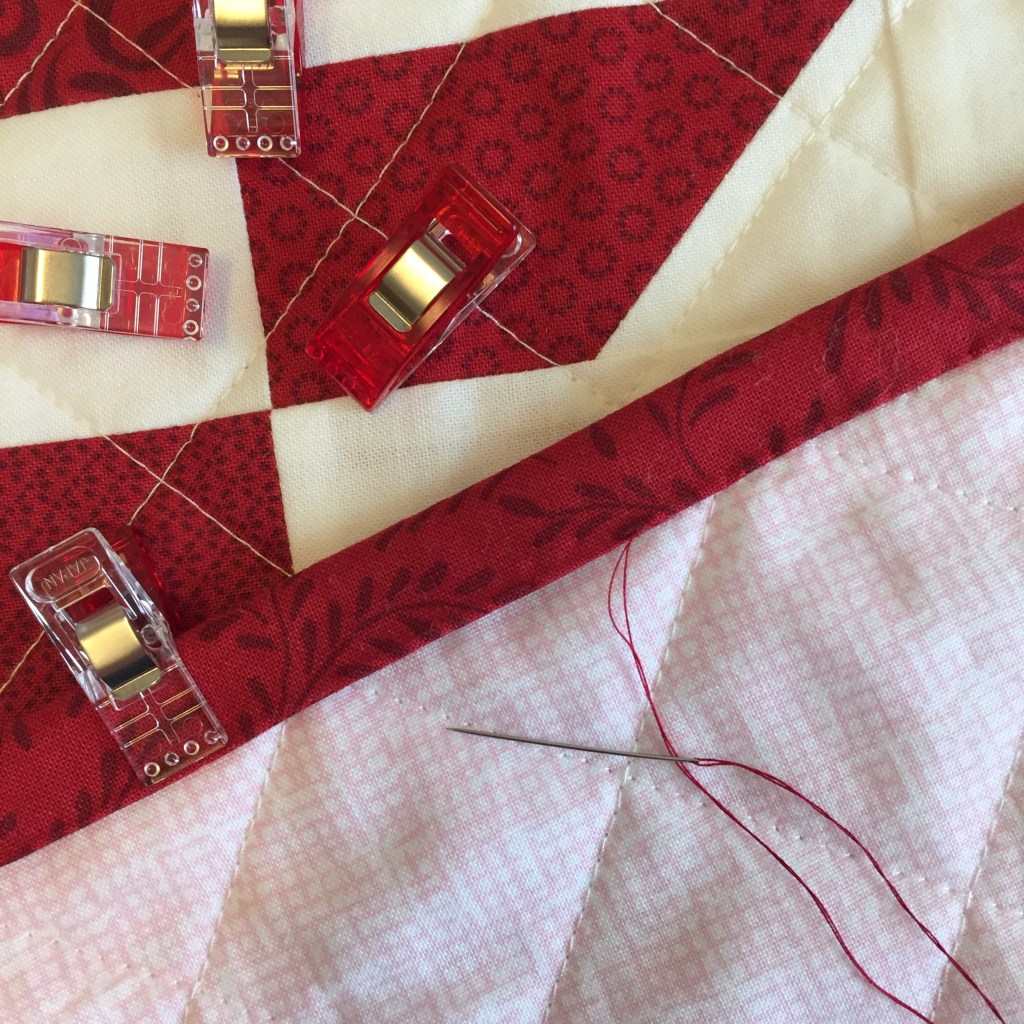
The binding took a bit longer to make because the strips were cut from the fat quarters which made for more piecing than usual. I love the fact that the quilt top required only 12 fat quarters and yardage. And I have quite a bit of lovely red fabric leftover for another project.
Lately I’ve been sewing on my bindings by hand. I find it relaxing and I like how it looks better than machined.
And here’s my finished Illusion quilt. I finally have my red and white quilt!
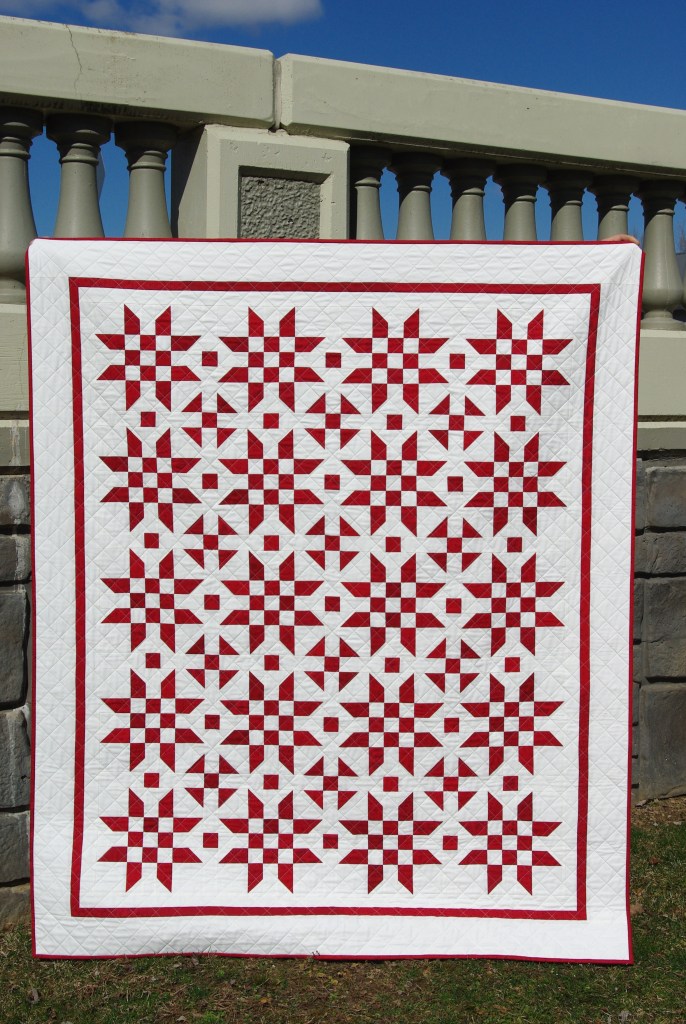
I enjoyed making this pattern and have considered making it again in another color combination. So many choices…

I LOVE this block you chose!! The fabric choice is perfect. I want to copy it! (But bigger). Well done!! Thanks for sharing!
LikeLike
Thank you Juddaca! I’m sure it would be easy to make this quilt into a bigger size. It’s a nice pattern to work with.
LikeLike
I love this pattern, too! I’m wanting to make a red and white quilt, so I may copy your fantastic idea also. I like the crisp look of the two colours and pointy stars. Thanks for sharing your quilt and the inspiration!
LikeLike
It’s a fun pattern to make, I definitely recommend it in red and white. I’m glad you stopped by my website and found something inspirational, too. Thanks Bev!
LikeLike
We’re can I find the pattern? I would love to make one for a friend.
LikeLike
It’s a free pattern from Moda called Illusions. You should be able to search and find it using that info.
LikeLike
Thank you for sharing your lovely quilt and giving us the pattern information. I so love it and want to make one for a wedding gift. One day I hope to make one for myself. I was scared of all those perfect points so I much appreciated your reassurance that I can do it 🙂
LikeLike
Thank you for all the lovely compliments on my quilt, Gwen. I’m happy to know you found my post useful. I hope you get a chance to make this quilt as it would make a great wedding gift!
LikeLike
Please tell me if you pre=wash your red fabric so it will not “bleed” on to the finished quilt, if washed?
LikeLike
Hi Pat,
No, I don’t pre-wash any of the fabrics. I’ve read that color catchers do the job for non-bleeds when laundering.
Thanks for stopping by! Deb
LikeLike
Love your quilt and I’m copying it but want to make it as a large queen size with ample overhang. I just ordered two red essential bundles for the red and will,purchase yardage for cream.
Will 2 bundles of red be plenty?
LikeLike
Hi Grace,
Thank you for the compliments on my quilt! I had some leftover fabric from FQ when I made mine in throw size.
LikeLike
Deb, love that quilt and am making it now; wondered if you had an issue with the pressing instructions? I am finding that if I press as directed I have two seams that don’t go the correct way to butt up against; I’m having to repress in opposite direction to avoid the bulk… am I doing something wrong? Appreciate your help!
LikeLike
Hi Debbie,
I made this quilt a few years ago & have since sold it, but if I’m remembering correctly, I probably didn’t follow pressing recommendations & I pressed all seams open, as I tend to do!
LikeLike
thanks for the quick reply! I will try pressing the seams open then. Although you did comment in your blog that the seams “nested” nicely, which I do find is true, just two seams don’t play nicely with others!! lol thanks again!
LikeLike
Oh jeez! I don’t remember them nesting, but if I wrote that they must’ve! 🤪 If I still had the quilt I could look & see what I did…although I do tend to press seams open! 😂
LikeLike
I love it but How do you prevent bleeding when washing?
LikeLike
Hi Jane, Thanks for commenting! I sold this quilt and hadn’t washed it. I’ve read that quilters use color-catchers to help with bleeding.
LikeLike