
I guess bloggers are guilty of showing (mostly) the pretty side of quilting, but there’s another side and it isn’t always good! When I designed my latest quilt pattern, Sweet Stripes, I designed it in two different layouts—offset and straight. Between the two there are four different sizes so I had plenty to choose from when testing the pattern myself. Of course there will be changes along the way, but everything went smoothly for the first time around.
Once the quilt top was finished and ready for quilting, I decided to use a horizontal serpentine stitch. OK, easy enough, I’ve done that plenty of times before.
As usual, my starting point was the middle of the quilt. Using my hera marker, I marked and sewed a line every 2 ½” until I reached the top. Looks great, right?

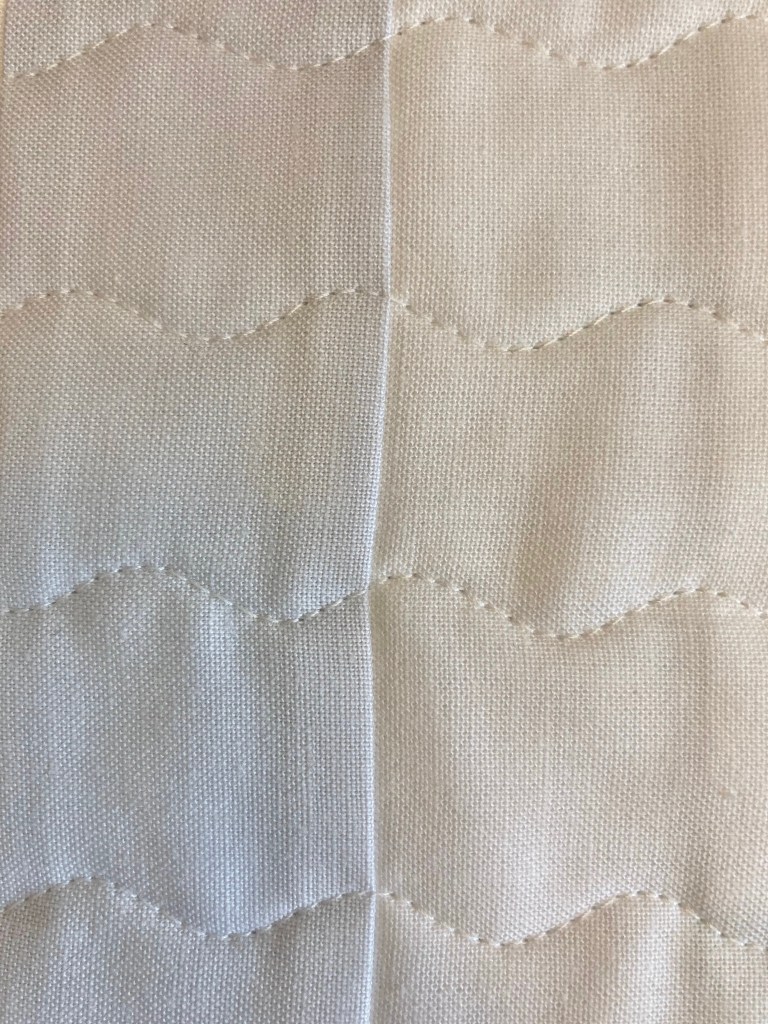
But then trouble hit when I sewed the lines in between…
See that ugly pull in the middle? That’s definitely not what you want. And the thing about it is I didn’t even notice until I finished the entire half! Let’s just say I had to walk away for a while… 😉
I obviously needed to fix this mess. I figured since it went so well when the first rows were sewn, it was the middle rows that were the problem and needed torn out. There was a lot of them and it was time consuming and frustrating work. But there’s an upside. I made sure to pick every five or so stitches on the front so I could pull away the back thread without breaking it and keeping it fairly long. By doing that I was able to salvage a lot of thread!

Luckily those strands won’t go to waste because I can use them when I baste down my binding. Or should I say several bindings to come…
In the end, this was a good learning moment for me. I’m pretty sure the problem happened because I didn’t use pins. I thought that once I had the marked lines sewn the layers would be secure enough to sew through the middle. Not so. I think the space was too wide to sew without it being pinned down and the drag of the quilt, the tension, etc. made the fabric shift. Note to self: use pins!
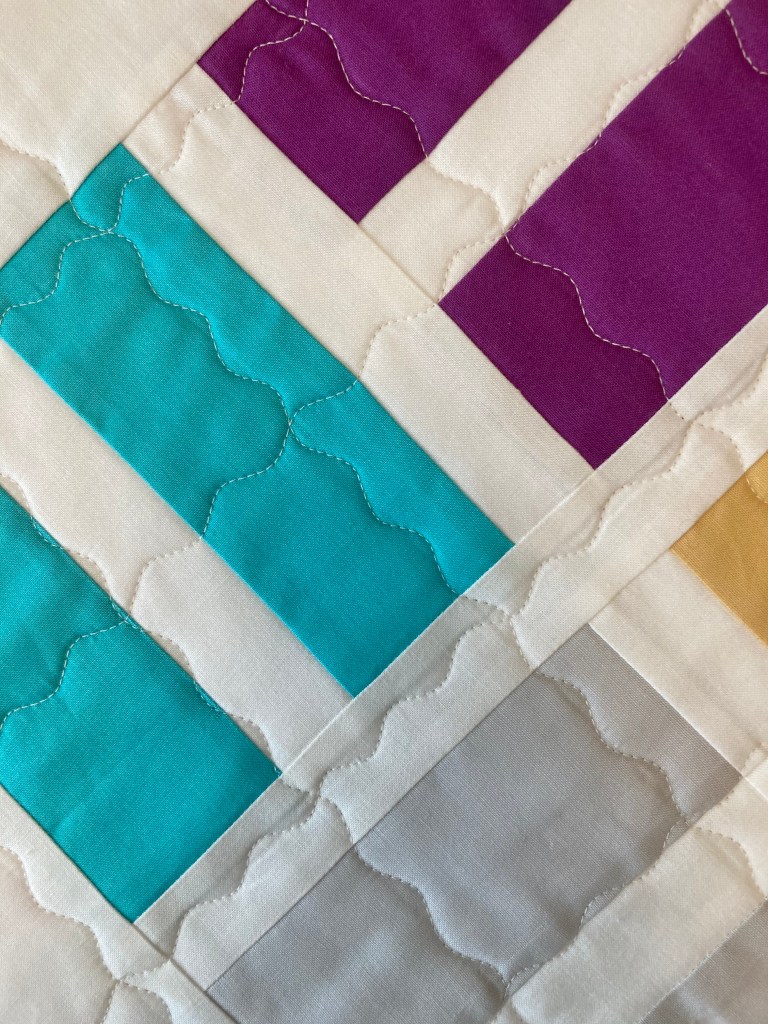
After all that, I decided to change my quilting design. Instead of sewing every line horizontal, I quilted the same distance apart vertically making squares. I wasn’t sure I would like it, but I do. I think the puffy little squares are cute and compliment the design.
It’s done now and time to move on to the next one. This beginner quilt pattern is currently out to testers but it’s coming soon!

The pull doesn’t look bad to me, but perhaps was distorting more on whole quilt. Once washed the crinkle effect will disguise little issues like this. But I also love your puffy squares. I did puffy squares on on the diagonal on my last quilt and loved the trellis effect. And thanks for sharing when quilting doesn’t always go as planned. I had a quilt disaster when quilting crosshatch straight lines on the bias. It looked great but then threads started popping. It was such a sick feeling. We called it the popping quilt and just used it as is because it was a mess. Lol.
LikeLike
Yes, quilting disasters do happen! I guess the whole quilt looked a lot worse when seeing all the rows pulled, but probably to a non-quilter there’d be no difference! I’m sorry to hear about your popping quilt, I completely understand that sinking feeling…I guess there’s always something to learn from these mistakes. Thank you for commenting!
LikeLike
I had similar situation using the curvy stitch on a large quilt where they came together near a corner. My favorite tool for ripping out a lot of stitches is an eyebrow razor. Because I was near an edge I could use a seam ripper and get started, but once I was able to lift the backing fabric a bit, I slide the eyebrow razor UNDER the backing along the batting. No poking holes accidently in the backing fabric or the top. My puckering was a result of not enough pins too. I steamed the corner of the quilt to get the fibers to relax and let it rest a couple of days. When I pressed it again, I added a little 505 spray basting on the batting and smoothed the backing down and pressed it in place. Then I turned it to the front side, making certain the top stayed square, steamed it again, pressed it in place and pinned it like nobody’s business. It all worked out – I restitched the area and it was perfect. 🙂
LikeLike
I’m glad you found a solution for fixing your quilt—it seems like it was a lot of work too! I have since quilted a few quilts using a straight line stitch and have pinned like crazy to avoid this from happening again. Thanks for sharing your experience, it’s interesting to see how others deal with the same problem!
LikeLike