
Scrappy binding is a favorite among quilters. Not only is it fun to make, it’s a great way to use longer scraps of fabric. I don’t choose it that often, but I do enjoy making it and I love how it looks. Going scrappy is also a fun way to add more color to a finished quilt. Never tried it before? No problem, this tutorial will show you how, step-by-step. Let’s get started.
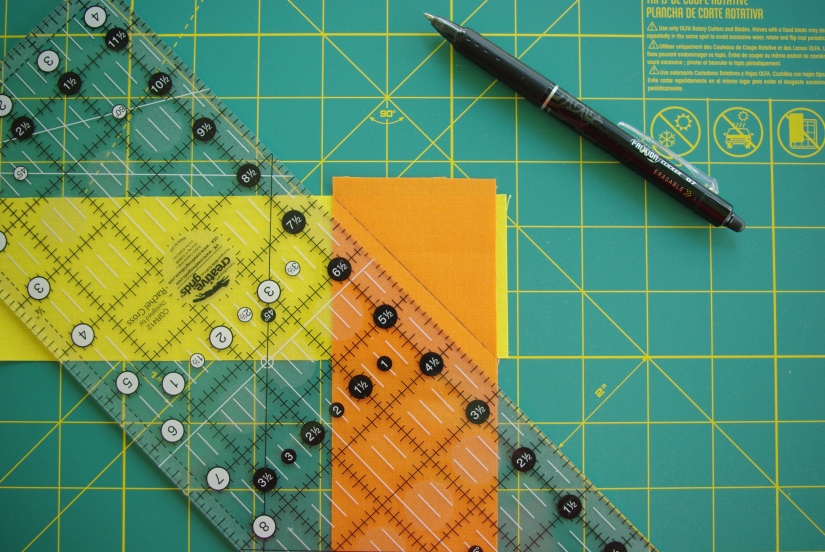
First, choose your fabric strips making sure you have enough to equal the total length required. For the project illustrated in this tutorial, I used Kona Cottons from the Citrus Burst bundle.

Next, cut your strips 2 ½” wide. The lengths of the strips will vary. I usually don’t use anything less than 8″ long and over 14″ long for a mini quilt; I’ll go as long as the length of a fat quarter for a throw quilt or larger. This is a personal preference; you may want to experiment to see what you like best. It’s important to note that you’ll be cutting off some length off of the strip ends when making the binding.
Once the pieces are chosen, there are a few options before sewing. You can go totally scrappy and sew your strips together in no particular order or you can plan your color order according to your quilt. I like to do it this way so like-colors don’t end up next to one another on the finished quilt. This method is easy to do and takes just a little extra time.
If you want to make your binding by controlling the color order, lay out your quilt. Place the chosen binding strips around your quilt in order that works best with the colors in the quilt. It’s always a good idea to take a photo in case you lose track of the order when sewing. You can also number the strips in an inconspicuous area.
Once your preferred method is determined, lay out the first two strips, right sides together, and draw a diagonal line, as shown. Pin strips in place.
Sew on the drawn line.

Line up the ¼” ruler line on the sewn line, as shown.

Cut away fabric ¼” from the sewn line, as shown.
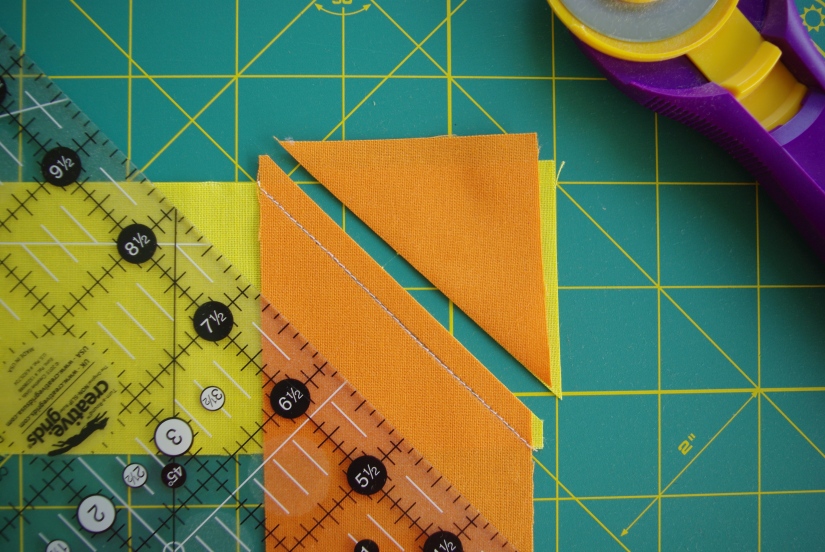
Cut off tips, press. Seams can be pressed either to the side of the darker fabric or open.

Repeat steps until you have sewn and pressed all the strips together, making one continuous strip of binding.


Lastly, fold your completed binding strip in half horizontally, pressing as you go, until the entire strip is pressed in half. Trim raw edges. Your scrappy binding will look like this when finished:

For this particular project, I made controlled color binding and I’m happy how it came together with the mini quilt.

Now’s the time to give scrappy binding a try and here’s to your next project! 🙂

Deb Geringer, Have been trying to contact for speaking engagement for Hands All Around Erie Quilt Guild. Please contct me at the email provided.
LikeLike