fabric project, home decor, sewing, Uncategorized

Autumnal Table Runner

With the fall season approaching, I’d decided to create an autumnal tablescape for my sofa table. Since June I’d been thrifting, something I’d never done much of before, looking for pretty and elegant items to coordinate with things I already had.

What I didn’t have was a table runner. My first thought was ‘What could I make using what I have?’, then remembering I’d stashed a narrow piece of white Essex Linen leftover from making napkins. Perfect!

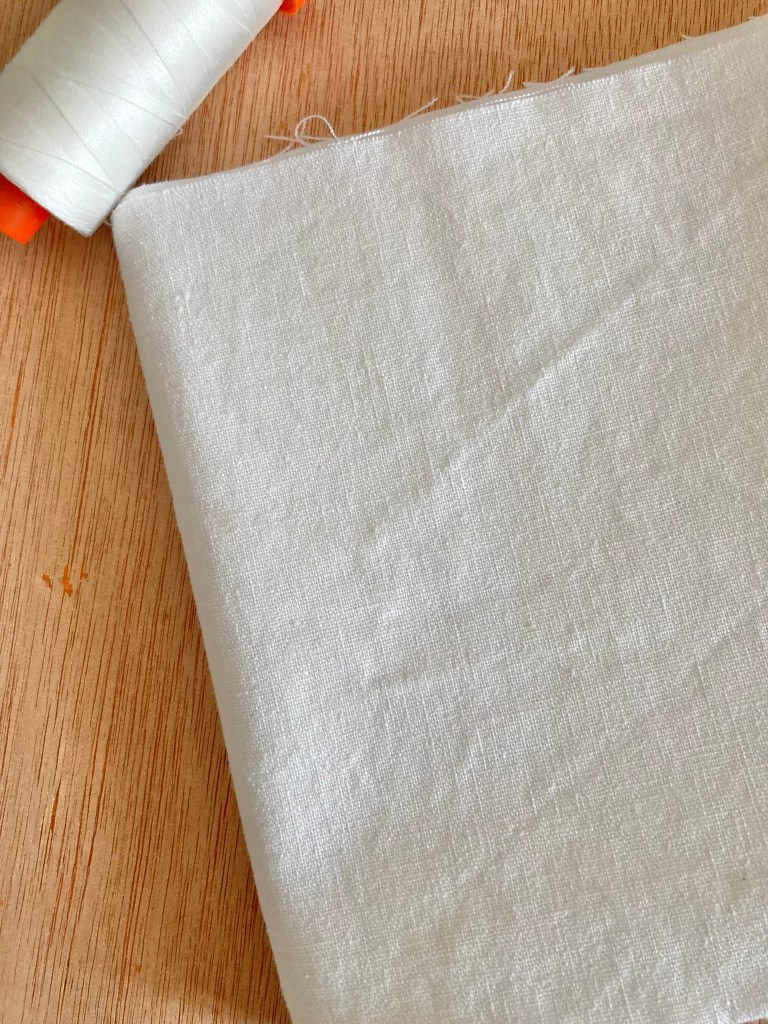
While the piece was WOF, it wasn’t long enough to drape over the table ends, so I trimmed the fabric to 9 1/2″ wide by 34 1/2″ long giving nice coverage for my table that measures 11 1/2″by 38 1/2″.

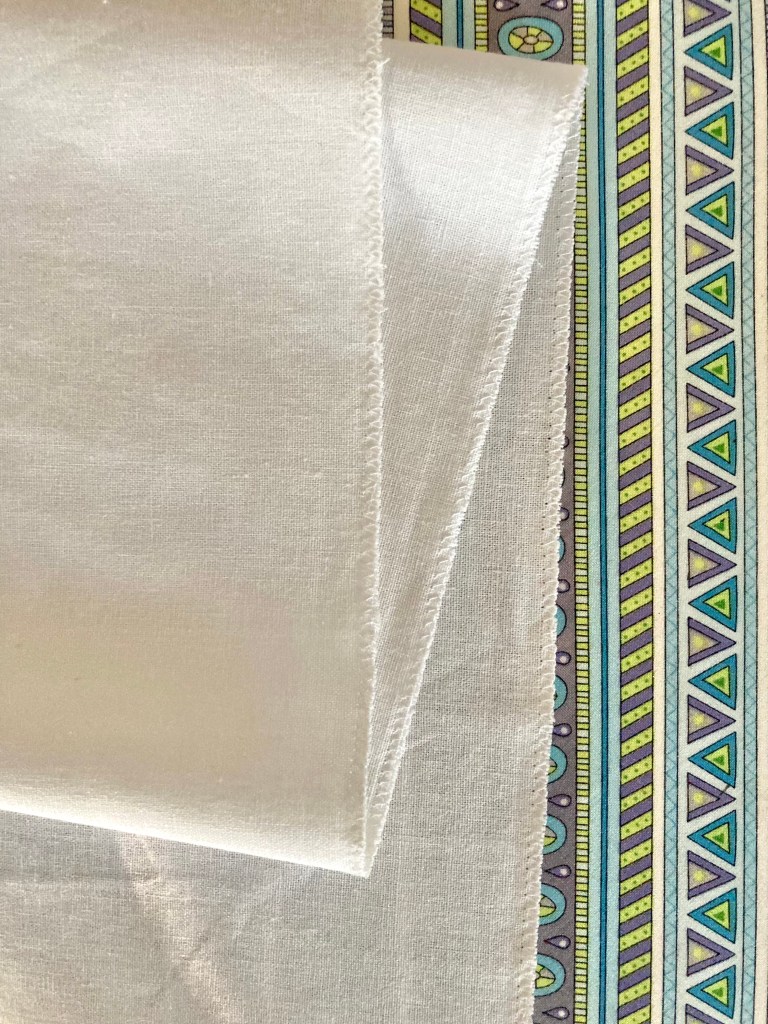
I planned to hem and top-stitch, but after pinning one side it was apparent that it’d be too bulky so I left the edges flat and ran a zigzag stitch all the way around, giving it a bit of a rustic look.

Since the linen was white and not fall-like, I decided to tea dye it. This wasn’t something I’d ever tried before but it was so easy and rather fun! I quickly found a YouTube video with all the info I needed.

Because the runner is a bigger piece of fabric, I doubled the recipe for dyeing: 5-6 tea bags to 2 cups of boiling water (this doubled, using black tea). If you’ve never tea dyed before, just boil the water, add the tea and let it set for 15 min. Remove the tea bags and place your item in the bowl, making sure it’s covered. Allow it set for at least 15 minutes, or until the desired color is achieved. I soaked mine for 2 hours, occasionally turning the fabric. NOTE: Tea dyeing works with natural fibers only.

Once it’s the color you want, remove and rinse with cold water. I gently rolled mine in a towel to remove the excess water. After unrolling and smoothing it flat, I placed it in the sun until dry.

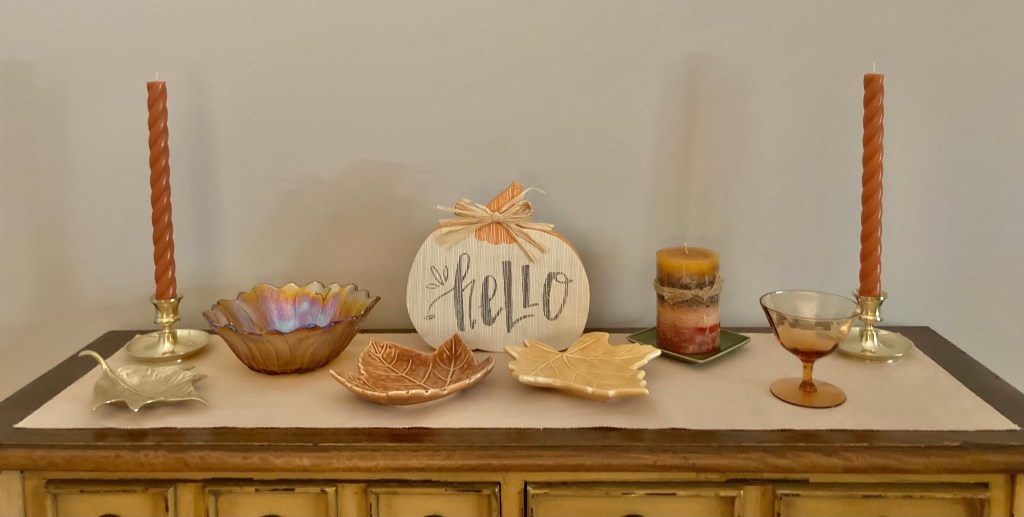
On the first day of autumn I set up everything and am really pleased. 🙂 It’s a lovely display for fall and will do nicely through Thanksgiving.

This is a great way to give your space some seasonal vibes, and if you’re a thrifter, it’s fun to go on the hunt for just the right things.

quilt blocks, quilting, Quilting 101, tutorials, Uncategorized

How to Sew Accurate Flying Geese

There’s no doubt flying geese are essential to quilting and they’re fun to experiment with. They give quilts an interesting perspective and can be addicting to make once you get started.

If you’re new to quilting or having trouble with your flying geese blocks, here’s an easy tutorial on how to sew an accurate flying geese unit that won’t need squaring up.

To get started, cut fabric to the required sizes. You’ll need a rectangular piece for the background and two squares for the sides. The flying geese I made in this tutorial are based on the measurements below.

Once your fabric is cut, draw a diagonal line on the wrong side of both side squares. Place a marked square on the right hand side of the rectangle, as illustrated, lining up the outside edges. Pin together.

NOTE: You can choose to sew the first square on either the left or right hand side, there will be no difference in the outcome.

The next step is sewing the pinned pieces together. But before sewing, be sure to follow this important tip…instead of sewing directly on the drawn line, sew just along side of it.

And here’s why. By having sewn along side of the drawn line, it frees up about a thread’s width of space so when you press the fabric to the corner, the new piece will line up accurately. That small width might seem minor, but it can make all the difference in your finished unit.

Here’s how to set your foot and needle before sewing…

And this is what it looks like sewn just to the right of the line…

A rule of thumb to follow is to sew to the right of the drawn line for the right hand side of the flying geese unit and sew to the left of the line on the left hand side of the unit.

Once you’ve finished sewing, cut ¼” away from the sewn line. Press the square to the corner.

Your results will be a nicely aligned corner. 🙂

To finish your flying geese, repeat the same steps for the opposite side. Place the fabric with the drawn line as shown. Pin.

Sew just along side of the line.

Cut away the corner and press.

And done! A finished flying geese with no trimming required. 🙂

Simple, right?

I made my blocks for a Swoon quilt I have in the works. If you’re making several for a project, they can be chain pieced, one side at a time. It’s a great time-saver.

Now that you’ve added the traditional flying geese block to your quilting repertoire it’s time to experiment and have some fun!

diy, quilting, Uncategorized

Make Your Own Precuts from Scraps

I am certainly not one to waste fabric. As a person who loves fabric and knows all too well how expensive it is, I like to save what I can, even really small pieces. If you’re not one for waste either, here’s an easy tip on how you can get the most out of your fabric and money.

Le Pavot by Sandy Gervais for Moda Fabric

We know that most quilting projects will leave us with left over scraps, maybe from trimming away corners or just from the initial cutting. If you don’t want to throw away perfectly good fabric, why not cut it for future use by making your own precuts?

Here’s an example of my latest ‘made myself precuts.’ The quilt pattern I’m currently making requires several flying geese units that leave a lot of cut-away corners. Because the units are pretty large, the cut-away corner triangles (approximately 2″ x 4″) are big enough to allow me to cut out one 1 ½” square from each piece.

After cutting out the 1 ½” squares, there’s barely any fabric left leaving minimal waste. Easy and economical, right?

For me, the biggest challenge with doing this is deciding when to cut the fabric. Because I’m usually excited to keep on sewing the project at hand (it’s hard to take extra time to cut scraps) but I usually do it as I go along so I don’t forget what they’re for, and I know it’ll save time later. It’s personal preference whether you cut as you go, or later on.

Keep in mind that you can make a variety of sizes of your own precuts based on the size of scraps you have left over from your quilting projects. Anything goes…

Since I have been doing this for quite a while, I have saved myself a lot of time and fabric – it’s definitely a win-win situation!

quilting, tutorials, Uncategorized

How to Make Half Square Triangles

Ahh, half square triangles…I couldn’t imagine the quilting world with out them. I think it would be a safe bet to say that the majority of quilt patterns include half square triangles. And I think most quilters would agree that we love of their versatility.

Learning how to make half square triangles (HSTs) with accurate results can make all the difference in your quilt. I remember my first quilt included HSTs, and I also remember that I had no idea what I was in for when it came time to make them! I didn’t know anything about trimming and the importance of accuracy which made putting the quilt top together a bigger challenge than I expected.

Half square triangles using Fig Tree & Co. and Kona Cotton fabrics

If you’re a new quilter, I have an tutorial on how to make half square triangles with ease. It’s a basic method where you make two at a time and bias edges are avoided. By using this method you’ll find there’s very little waste but it allows enough fabric for trimming, and it’s perfect for chain piecing.

For future reference, I’ve included a sizing chart that provides both the size of the cut of fabric needed and the size of the finished/trimmed HST. It’s really a great resource, I use it all the time. Click to download my Half Square Triangle Chart.

To make Half Square Triangles (HSTs) – 2 at a time

To get started, cut (2) contrasting color fabrics to desired size. The lighter colored fabric will be referred to ‘A square’ and the darker fabric will be referred to as ‘B square.’

  • Draw a diagonal line on the wrong side of A square
  • Place A square on B square, right sides together
  • Sew ¼” from the drawn line on both sides
  • Cut on the drawn line, press to B square
  • Trim HSTs to finished size
  • One sewn unit makes 2 HSTs

I made these HSTs for a pillow project using this method.

You can see that very little was trimmed away, but it does make a lot of difference when you piece your project together. I like to use a Bloc-Loc ruler for trimming my squares. Not only does it give great accuracy, it makes the trimming process go much faster than using a regular quilter’s ruler.

If you give this tutorial a try, I hope your triangles are stellar. 🙂 Let’s go have some fun creating!

Note: I am not endorsed by any products I have mentioned or photographed in this post; they are just items I like, use and wanted to share information on.

fall decor, halloween, mini quilts, quilting, quilts, tutorials, Uncategorized

Pumpkin & Stars Mini Quilt Tutorial

It’s not too late to make a Halloween themed project! This one came to be because I wanted to combine a cute pumpkin with colorful friendship stars (making it the third project this year where I’ve incorporated these stars)…anyway, my latest mini quilt, Pumpkin & Stars, goes together relatively quick and will definitely show off your festive spirit! The pumpkin in this project is pretty basic, made with scrappy strips; I’m sure you’ve seen it used in several other projects. For mine, all I did was make the easy strippy pumpkin and add stars all the way around, in the traditional black and orange Halloween colors.

IMGP8955.JPG

After finishing, I thought another variation could be to give it a general autumnal look, leaning away from Halloween by replacing the black with gold, green, tan or taupe…any fall-like colors would work well. It also finishes to a toss pillow size.

This was a really fun project, I recommend it! If you’d like to give it a try, here’s what to do:

PUMPKIN & STARS MINI QUILT

MATERIALS
Variety of 2″ strips of orange and black fabric
(1) 1 ½” x 1 ½” square of brown fabric
(1) 1 ½” x 3″ rectangle of green fabric
(1) Fat quarter for background
(1) Fat quarter for backing
(1) Fat quarter for binding
20″ x 20″ quilt batting

GENERAL GUIDELINES
RST = Right Sides Together
HST = Half Square Triangle
WOF = Width Of Fabric
Use ¼” seam allowance throughout.
Press seams open unless otherwise indicated.

To make PUMPKIN:
Cut print fabric:
(1) 1 ½” x 1 ½” brown square
(1) 1 ½” x 3″ green rectangle
(6) 1 ½” x 5 ½” orange strips

Cut background fabric:
(6) 1 ½” x 1 ½” squares
(1) 1 ½” x 3″ rectangle
(2) 1 ½” x 6 ½” rectangles
(2) 1 ½” x 8 ½” rectangles

RST, sew (6) orange strips together lengthwise. Press.

Place (1) background square on each corner of the strip unit. Sew on diagonal line. Trim ¼” from sewn line. Press toward corner. Finished unit illustrated below.

Screen Shot 2018-10-24 at 8.56.35 PM.png

RST, place (2) background squares on the green strip so that the diagonal lines start on the lower left and end on the upper right. Sew on diagonal lines. Trim ¼” from sewn lines. Press toward corners. Finished unit illustrated below.

Screen Shot 2018-10-24 at 7.57.46 PM

To make STEM/LEAF UNIT:

Place the 1 ½” x 3″ background strip on the left, the brown square in the middle and the green leaf unit on the right. Sew the background strip onto the left edge of the brown square and the leaf unit onto the right edge. Press.

Sew the stem/leaf unit to the top of the pumpkin strip set. Press.

Your finished pumpkin block will look like this:

Screen Shot 2018-10-24 at 9.16.06 PM

To attach BORDERS:
Sew (1) 1 ½” x 6 ½” background strip to each edge of the pumpkin block. Press toward the border strips.

Sew (1) 1 ½” x 8 ½” background strip to the top and bottom edge of the pumpkin block. Press.

Unfinished size: 8 ½” x 8 ½”

To make FRIENDSHIP STAR:

Cut print fabric:
(1) 1 ½” x 1 ½” square
(2) 2″ x 2″ squares

Cut background fabric:
(4) 1 ½” x 1 ½” squares
(2) 2″ x 2″ squares

To make HSTs:
Draw a diagonal line on the wrong side of (2) background 2″ x 2″ squares. Place a marked square on a 2″ x 2″ print square. Sew ¼” from the drawn line on both sides. Cut on the drawn line, press open. Trim HSTs to 1 ½” square. One sewn unit makes 2 HSTs.

Place 1 ½” HSTs and 1 ½” background squares in order as shown below. Sew into rows. Press. Sew rows together, as illustrated.

Screen Shot 2018-10-24 at 7.54.00 PM

Make (4) orange friendship stars and (4) black friendship stars.

Unfinished block size: 3 ½” x 3 ½”

To make the SIDES:
Cut background fabric:
(4) 3″ x 3 ½” squares

RST, sew (1) 3″ x 3 ½” square to the top and bottom edge of a black friendship star, as illustrated below. Make 2.

Screen Shot 2018-10-24 at 10.20.08 PM

To attach SIDES:
Fold the pumpkin unit in half lengthwise and place a mark in the center along both edges. Repeat for both friendship star side unit inside edges. Match up a pumpkin center/side unit mark and pin on a side unit, RST. Sew. Press sides toward the pumpkin unit border. Repeat for opposite side. Trim if necessary.

To make TOP/BOTTOM ROWS:
Cut background fabric:
(4) 3″ x 3 ½” squares**

**NOTE: The background fabric cut at 3″ in width may vary due to differences in ¼” seam allowances. For example, mine needed to be a bit less than 3″ wide—more like 2 ⅞”—as my seam allowances always measure slightly larger than ¼”. You may have to adjust accordingly.

RST, sew (1) 3″ x 3 ½” square to each side edge of (1) black friendship star. Sew (1) orange friendship star to each edge of the black friendship star/background square unit. Make 2.

Screen Shot 2018-10-24 at 10.40.18 PM

To attach TOP/BOTTOM ROWS:

Use the same method as ‘To attach SIDES’ above.

To make BINDING:
Cut (4) 2 ½” x WOF from fat quarter. Sew strips end-to-end, press in half. Attach binding using preferred method.

Lastly, sandwich backing sized 20″ x 20″, batting and quilt top, baste. Quilt as desired.

IMGP8956.JPG

Finished size: 14 ½” x 14 ½”, although mine measured 14 ¼” square!

I quilted mine with fun, wavy lines using Aurifil thread 2000, and I love it.

IMGP8958.JPG

I always make my mini quilts with sewn in corners on the back so I can hang them on my sewing room door, but I think this one would look great on a table, too. And I definitely will be quilting those wavy lines on an upcoming quilt…

I hope you enjoy making this project and Happy Halloween!

quilting, quilts, tutorials, Uncategorized

Quilting on a Whim (A Granny Square Quilt)

I admit, this is the first time I’ve ever made a quilt on impulse. It happened while scrolling Instagram and granny square posts kept showing up from the Moda Bake Shop. Almost instantly it clicked—I knew I wanted to make a granny square quilt and I had the perfect fabric for it. And since I recently finished a rather challenging and labor intensive queen size quilt, I needed something easy!

A while back I ordered a fat quarter bundle of Moda’s Chestnut Street for a fall quilt. While I cut what was needed for the pattern, I never made the quilt because I couldn’t decide on a background fabric. Since I had plenty of Chestnut Street left over, along with additional fabrics from other Fig Tree collections, I knew I had enough fabric and variety (plus I added two Dear Stella Mini Dots). I’d also been intent on stashing down, so it was definitely a go! I stopped what I was working on and started pulling fabric. And let me tell you, it was FUN. 🙂

Image-1.jpg

IMGP7220

There were so many things about making this quilt that made it fun…for example, I had no plan, it was literally on a whim. I randomly mixed and matched fabric, whatever I felt went together got put together. I was using what I had, and of all cuts – an older charm pack, scraps, fat quarters, yardage…including the background fabric, Kona Cotton Snow. I truly enjoyed the entire process.

IMGP8567.jpg

Once I finished 28 squares, I figured it was time for a plan. I decided on a throw quilt with six blocks per row, seven rows (42 squares total), 2″ sashing and a background border.

IMGP8601

IMGP8636

Because it came out so lovely, I had it professionally quilted with the digital pattern Daisy Delight.

IMG_7815.JPG

I did have to purchase binding fabric, luckily I found what I wanted from the Chestnut Street line. I also had to purchase the backing. Since the quilt has a lot of orange in it, I wanted to incorporate it onto the back as well. I decided on Tule Quietude in Sunset by Leah Duncan for Art Gallery Fabrics. I loved how this print blended nicely with the colors on the front.

IMGP8814.JPG

My Granny Square quilt finished at 64 ½” x 74 ½”. And I just love it!

IMGP8794.JPG

I mentioned that the granny squares popped up on IG from the Moda Bake Shop, so I visited their site for block instructions. Because I wanted to use scraps that I had already cut into 2 ½” squares, I had to do some recalculating for a more petite block. Also, this size block is great because it can be easily made with precuts, including 2 ½” strips, 5″ squares and 10″ squares.

IMGP8409

IMGP8478

Here’s a quick tutorial on how to make a granny square block with the dimensions I used. My blocks finished at roughly 8 3/8″ square.

FROM COLOR/PRINT FABRIC, CUT:

(1) 2 ½” x 2 ½” square (center square)

(4) 2 ½” x 2 ½” squares (inner squares)

(8) 2 ½” x 2 ½” squares (outer squares)

FROM BACKGROUND FABRIC, CUT:

(2) 2 ½” x 2 ½” squares

*subcut diagonal once

(2) 4 ¼” x 4 ¼” squares

*subcut diagonal twice

Lay out fabric as illustrated below:

IMGP8576.jpg

Sew pieces together into rows using ¼” seam allowance. I recommend pinning! Be sure to trim away dog ears. Pressed rows will look like this:

IMGP8577.jpg

Because sewn pieces are relatively small, I pressed all my seams open to reduce bulk. It definitely helps the blocks to lay nice and flat.

Next, turn the block sideways, as shown. Place the remaining triangle pieces in the four corners. Sew and press.

IMGP8585.JPG

The final step, trimming your block (and the remaining dog ears). Line up your ruler with the ¼” mark placed at the corners of the outer squares, as shown. Trim.

IMGP8590

Give your block one last press and you have a beautiful granny square!

IMGP8592.jpg

I know it’s common for quilters to finish a quilt and say it’s their new favorite, but this one really is for me. It’s different from most of the quilts I’ve made, mainly because of the fabrics, many were soft and feminine floral prints.

IMGP8810.jpg

I think every quilter needs to make a granny square quilt, well, just because…don’t you agree?

quilt binding, quilting, tutorials, Uncategorized

How to Make Scrappy Binding

Scrappy binding is a favorite among quilters. Not only is it fun to make, it’s a great way to use longer scraps of fabric. I don’t choose it that often, but I do enjoy making it and I love how it looks. Going scrappy is also a fun way to add more color to a finished quilt. Never tried it before? No problem, this tutorial will show you how, step-by-step. Let’s get started.

First, choose your fabric strips making sure you have enough to equal the total length required. For the project illustrated in this tutorial, I used Kona Cottons from the Citrus Burst bundle.

IMGP7450

Next, cut your strips 2 ½” wide. The lengths of the strips will vary. I usually don’t use anything less than 8″ long and over 14″ long for a mini quilt; I’ll go as long as the length of a fat quarter for a throw quilt or larger. This is a personal preference; you may want to experiment to see what you like best. It’s important to note that you’ll be cutting off some length off of the strip ends when making the binding.

Once the pieces are chosen, there are a few options before sewing. You can go totally scrappy and sew your strips together in no particular order or you can plan your color order according to your quilt. I like to do it this way so like-colors don’t end up next to one another on the finished quilt. This method is easy to do and takes just a little extra time.

If you want to make your binding by controlling the color order, lay out your quilt. Place the chosen binding strips around your quilt in order that works best with the colors in the quilt. It’s always a good idea to take a photo in case you lose track of the order when sewing. You can also number the strips in an inconspicuous area.

Once your preferred method is determined, lay out the first two strips, right sides together, and draw a diagonal line, as shown. Pin strips in place.

IMGP7565.JPG

Sew on the drawn line.

IMGP7569.JPG

Line up the ¼” ruler line on the sewn line, as shown.

IMGP7570

Cut away fabric ¼” from the sewn line, as shown.

IMGP7574

Cut off tips, press. Seams can be pressed either to the side of the darker fabric or open.

IMGP7580.JPG

Repeat steps until you have sewn and pressed all the strips together, making one continuous strip of binding.

IMGP7583.jpg

IMGP7561.JPG

Lastly, fold your completed binding strip in half horizontally, pressing as you go, until the entire strip is pressed in half. Trim raw edges. Your scrappy binding will look like this when finished:

IMGP7597

For this particular project, I made controlled color binding and I’m happy how it came together with the mini quilt.

IMGP8651.jpg

Now’s the time to give scrappy binding a try and here’s to your next project! 🙂

quilting, Quilting 101, Uncategorized

Quilting 101: Quilting Terminology for Beginners

When I started to quilt, some of the quilting language had me really confused. Everyday words referring to animals, winter and food with a quilting-related meaning….huh? It just didn’t make sense. If your experience is one of the same, this post will help clarify some of the terminology used that has other meanings.

I chose my top ten favorites, or I should say, my top ten most confusing quilting terms. 🙂

1. Dog ears – Dog ears are those small pieces of fabric that appear in quilt block corners and edges when two triangular pieces are sewn together—results of a diagonal seam. Always trim dog ears before finishing a quilt block.

IMGP8415.JPG

2. Feed dogs – The feed dogs are the metal teeth located in the slots in a sewing machine’s needle plate. Feed dogs are comprised of metal bars, crosscut with diagonal teeth that move back and forth; they grip fabric and pull it through the machine and away from the needle.

IMGP8411.JPG

3. Flying geese – Flying geese is a traditional quilt block pattern created by sewing a triangle at each end of a rectangular piece of fabric, forming a peak in the middle. Finished flying geese blocks resemble geese flying in formation, hence the name.

IMGP8428.JPG

4. Nesting seams – Seams that line up precisely at an intersection of a block or quilt are known as nesting seams. To achieve nesting, press seams in opposite directions to reduce the bulk created by the seam allowance.

IMGP8450

IMGP8454.JPG

5. Snowball – The snowball technique is used when a quilter chooses to give a square a rounded effect (like a snowball). To achieve this result, the quilter draws a diagonal line on a background fabric square (white or light colored), sews on the line, cuts away the corner and presses back the triangle. This process can also be done in reverse, using a central white square and a color triangle in the corner.

IMGP8457
Preparation to snowball a corner

IMGP8462
Snowballed corner

6. Quilt sandwich or sandwiching – Sandwiching is assembling the quilt top, batting and backing, then securing the layers together by basting with either quilting pins or glue–readying it for quilting. The batting and quilt backing are always cut a few inches larger than the quilt top to allow for fabric shifting while quilting.

IMGP8436

7. Chain piecing – Chain piecing is sewing together squares in one continuous length of thread instead of sewing piece by piece. This method saves time and is popular among quilters. Once multiple squares have been sewn in a strand, the thread is easily cut to separate individual pieces.

IMGP8432.JPG
chain piecing

8. Sashing – Sashing is a strip of fabric sewn between blocks on a quilt top. It gives a windowpane effect and shows off blocks individually. Most often lighter-colored fabric is used for sashing to make the other colors pop. As a variation, sashing can be used to contrast quilt block colors.

IMGP8159 (2).JPG

9. Stitch in the ditch – Stitching in the ditch is a technique where the quilting stitches on the quilt top are minimized by quilting ‘in’ the seams that were created when the quilt blocks were pieced together. Using a specialized foot helps makes this process neater with more accurate results.

IMGP8418.JPG

10. Fussy cut – A fussy cut is used when a quilter wants to showcase a specific section or element of a fabric pattern, e.g. a flower, an animal, etc. A fussy cut should always include a seam allowance.

IMG_7159.jpg

I hope this blog post helped clarify some quilting terminology confusion.

I plan to continue my Quilting 101 series with my next post delving into the variety of precut fabric.

diy, tutorials, Uncategorized

DIY Quilt Ladder Tutorial

Don’t you just love those beautiful leaning ladders for displaying quilts? I know I do, but I didn’t want to pay upwards of $200 for one. I knew my husband and I could do a DIY for a LOT less, and we did, we made ours for under $20!

Here’s what we had to buy:
(4) ¾″ × 1 ½″ × 6′ Select Pine boards = $3.83 each
Total cost of $15.32 (+ tax)

1 box (of 25) 1 ½″ construction wood screws
Total cost of $2.17 (+ tax)

We purchased the boards and wood screws at Home Depot. Any big box hardware store should carry all other supplies and tools.

I should note that that was our price was less than $20 because we had the additional necessary items on hand: paint brush/foam brush, wood stain, polycrylic protective finish, paint, primer, a variety of sandpaper and the tools. If you don’t have these items, it will cost more, but nowhere near what a retailer is asking.

I was so happy with the first one, I asked my husband to help out again and we made a second one. I finished them differently; the first one I stained and the second one I painted white. That way, I can move them around the house and always have a fresh, new look.

This was a fun project for both of us. It was really rewarding to make something for our home that not only is attractive, but useful, too. I also found that working with wood was relaxing and rather enjoyable. 🙂

The time spent on each ladder varied. Estimated time on construction was about 2 ½ hours and it took about 3 – 3 ½ hours to sand, stain and apply polyurethane. It was much more time consuming to paint. I applied one coat of primer and four coats of paint, which took several hours, but was worth it. I love both results.

IMGP8215.jpg

Finished ladder measures 6′ H × 19″ W × 1 ½″ D.

If you’d like to make your own, click here for my downloadable PDF DIY Quilt Ladder Tutorial. The tutorial is easy-to-follow with step-by-step instructions and plenty of photos.

Here’s to creating and saving a ton of money at the same time!

mini quilts, tutorials, Uncategorized

Corner Hanging Pocket Tutorial

Hanging mini quilts is a must-do, right? Whether you’re a quilter who hangs minis all over your walls or one like me who hangs one at a time—having an effective method of displaying them is essential no matter how many or how few. This corner technique is so fast and easy, in no time your minis will be ready to show off!

Required materials include two squares of fabric and a round dowel rod. I usually use 3/8″ width (oak) as it’s sturdy and doesn’t tend to bend or warp. It’s not necessary to go any larger than 3/8″ with most mini quilts. I’ve also used a 1/4″ dowel rod on a very small mini and through my experience, it held up well.

IMGP8091.JPG

Dowel rods can be purchased at any big box home improvement store for under $2 each (36″ length/oak). There are a variety of sizes and types of wood so you can choose what best suits your needs.

Let’s get started. Once your mini quilt is quilted and trimmed (but before binding), cut two 3″ x 3″ squares from your backing fabric (or from scraps). Press squares in half diagonally.

IMGP7611.JPG

On the back of the quilt, pin one pressed square onto each top corner.

IMGP7617

Attach binding, sewing carefully around the pins, making sure to keep the all the edges flat.

IMGP7619.JPG

Finish sewing on the binding using your preferred method.

IMGP7643.JPG

And it’s finished!

Measure from one end of the binding to the other, cut the dowel rod to measurement. Sand off any rough edges.

IMGP8089.JPG

Insert and hang!

IMG_5476

Got a lot of mini quilts? Need a few tips on storing them? Click here!