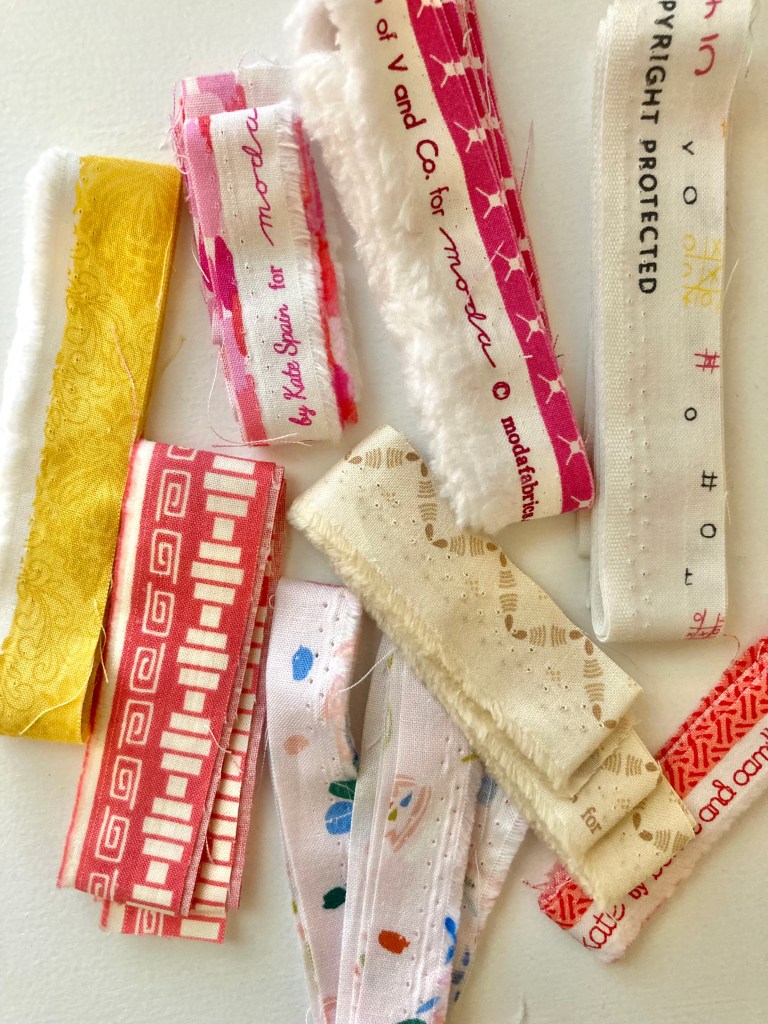
Ever since I started quilting I’ve been saving selvages. Even though I have plenty, I can’t seem to stop saving ones that have fun sayings and cute drawings printed on them.
Since I like to keep things to a minimum, I’ve found a great way to use some of those selvages—wrap them on gifts instead of ribbon—and this is the perfect time of year to do so.
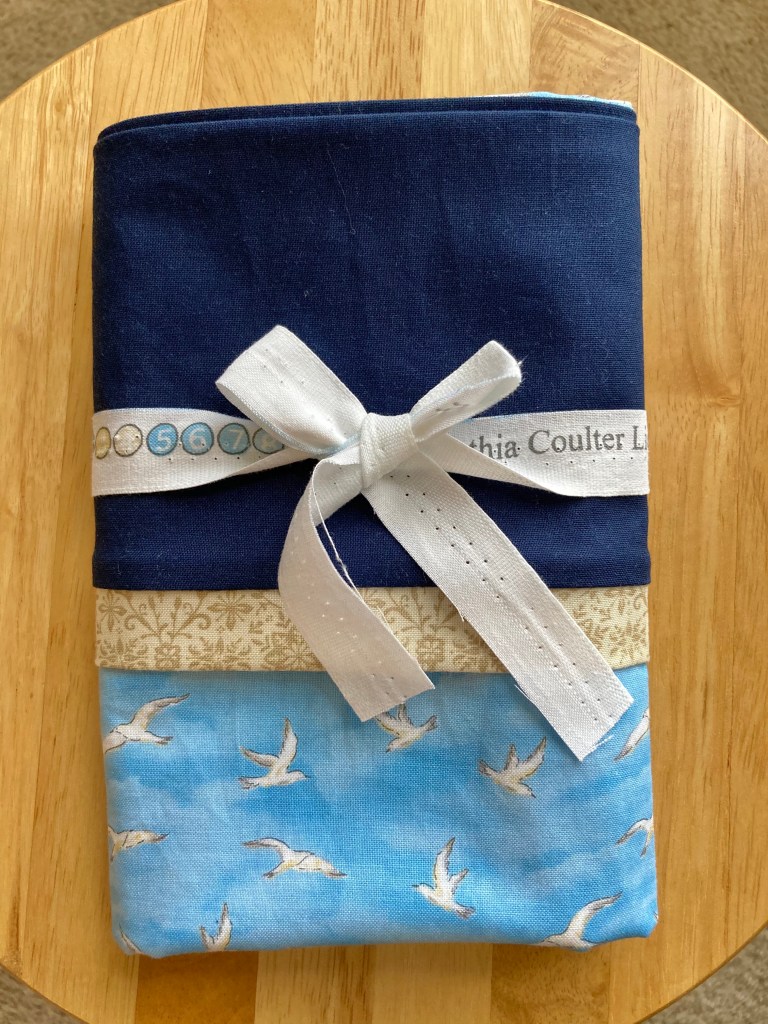
Each Christmas I like to give my family members something handmade, and because everyone has received at least two quilts from me, I’ve had to think of other things to make. For the last few every years I’ve gifted my husband a bird-themed pillow case wrapped with colorful selvage.
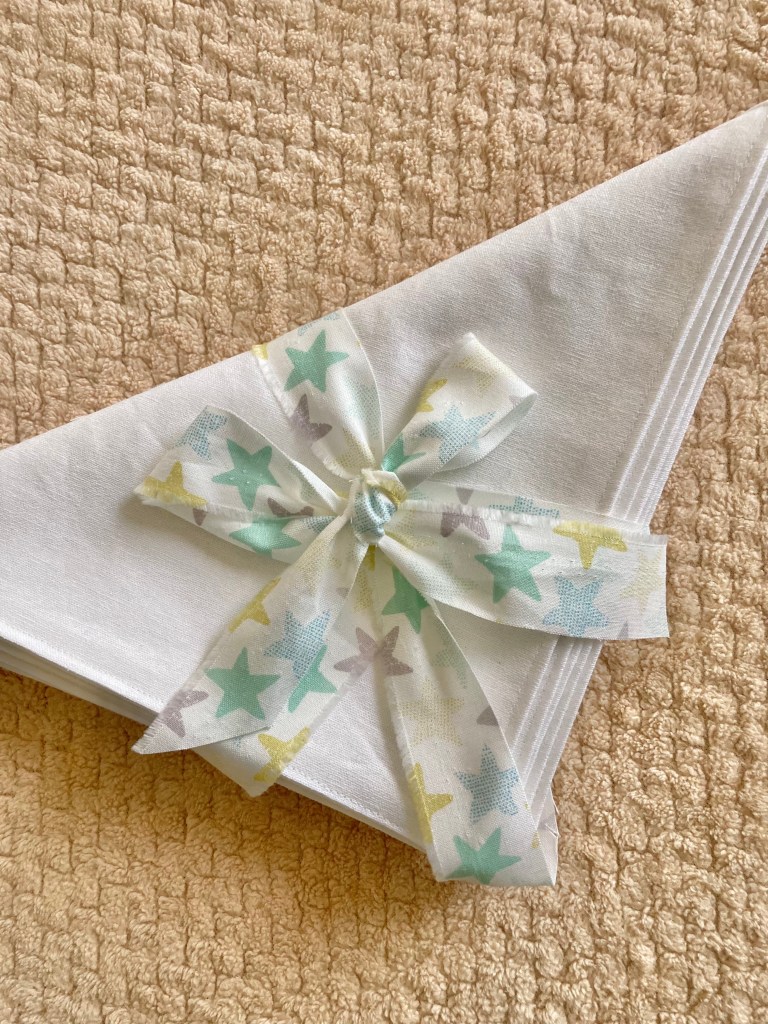
Other gifts I’ve dressed up by using selvage is table napkins made for my kids. When I completed this set I wrapped it with selvage and tied a pretty bow. I think it classes up the bundle and makes a nice presentation.
(If you’d like to make table napkins for yourself or as gifts, I have a PDF Table Napkin Tutorial available).
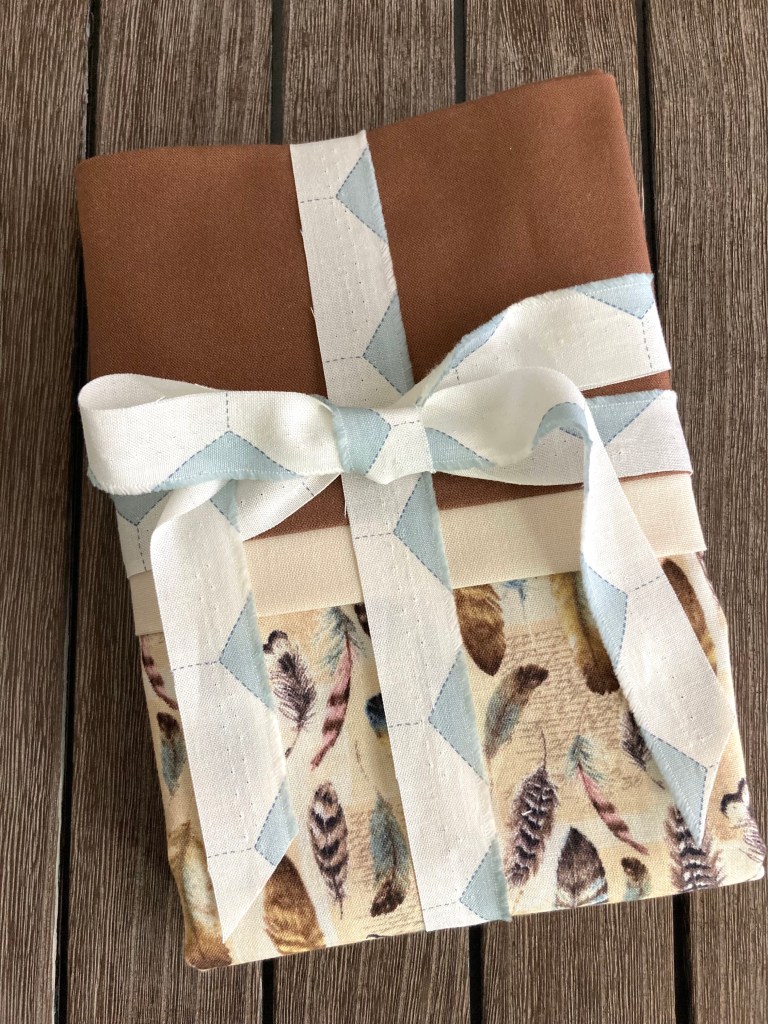
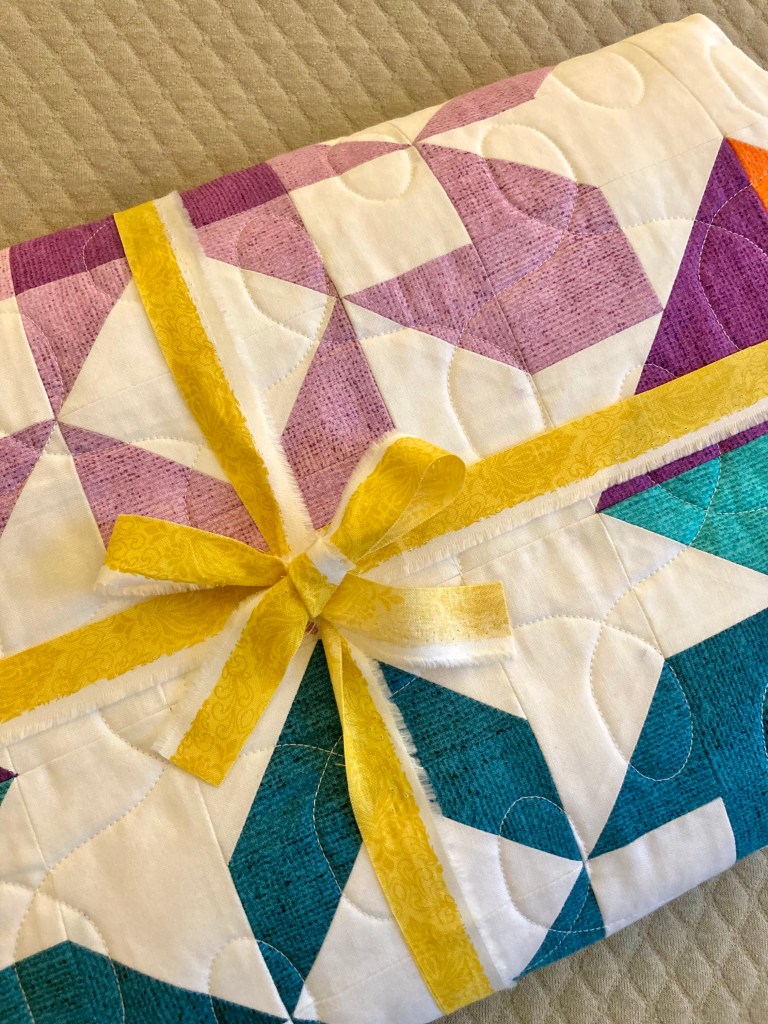
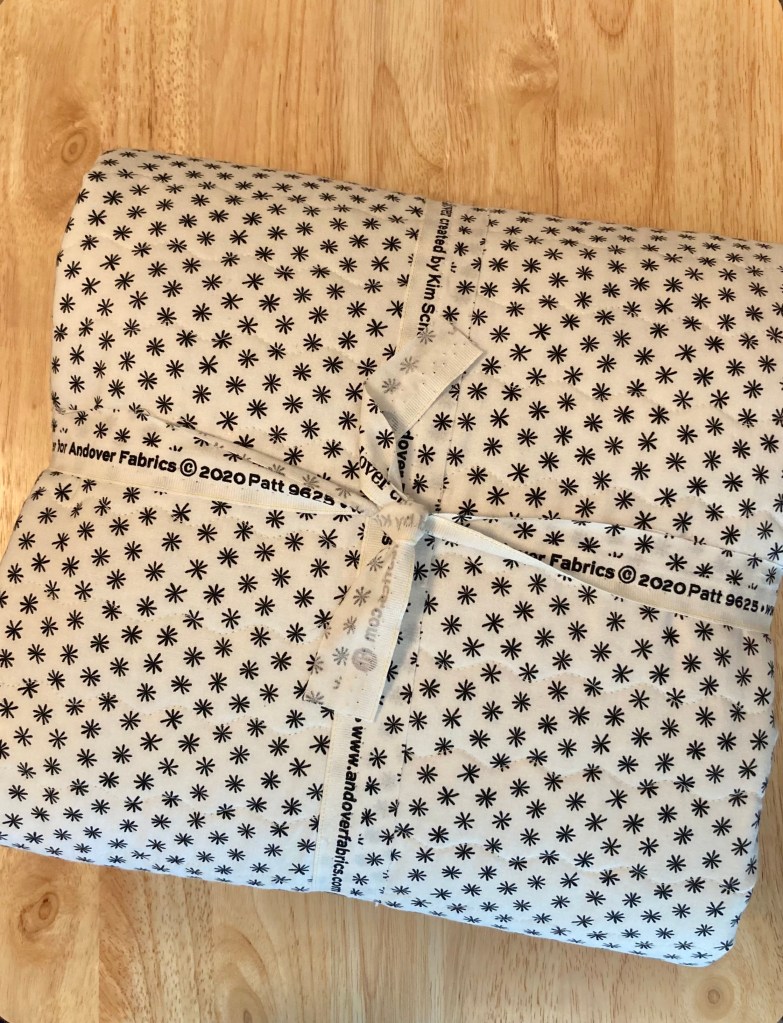
Of course another good way to use selvage is wrapping and gifting a quilt. When I gift a quilt I always find a selvage that compliments the fabrics. By doing this there’s nothing to buy and I’m ready to gift or ship without doing any shopping. Nothing like saving time and money!
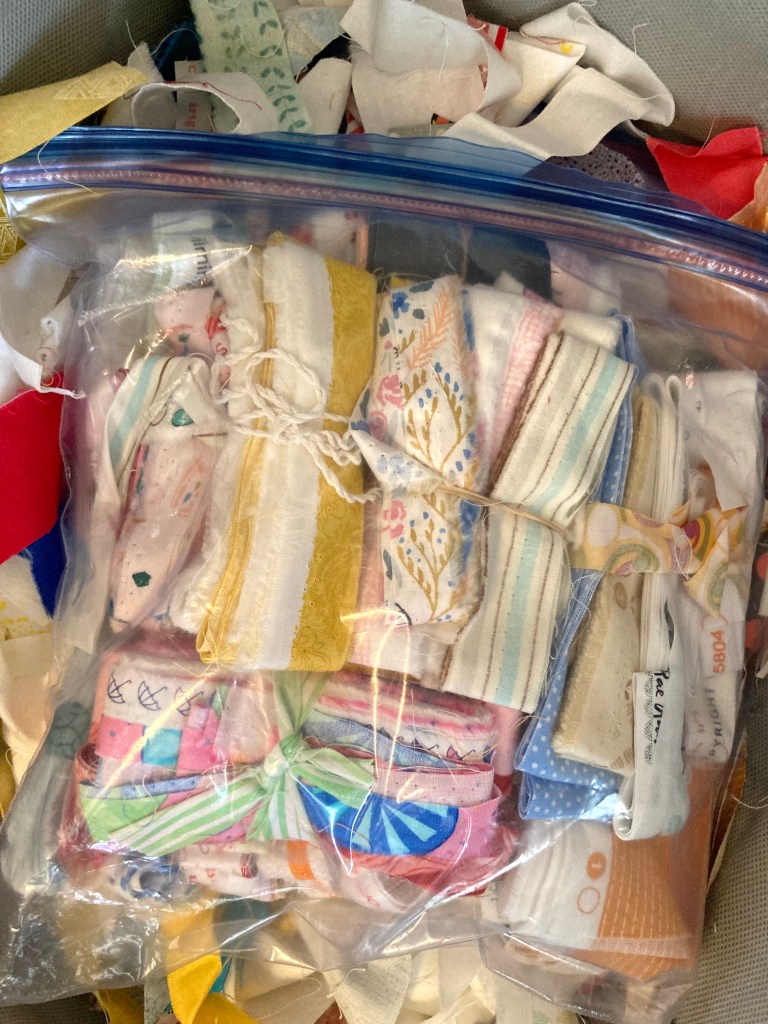
Another bonus to saving and using selvages is that they’re really easy to store. I just bundle a few together, place them in a large zip-lock bag and keep it in my scrap bin. It doesn’t matter that they’re creased and wrinkled, just press and trim when needed.
Not only does this put pretty selvages to good use (that may otherwise be tossed out), it’s convenient and environmentally friendly! 🙂
From time to time I like to write about sewing tools I use to make quilting easier, especially ones that help me make better quilts. I have 5 valuable items to showcase, and if you don’t already use them I recommend giving them a try.
STARCH
When my Sweet Stripes quilt pattern was out to testers last November, a tester asked me if the pattern should mention using starch. When I replied, ‘I don’t use starch, only when making minis,’ she was pretty surprised; its use must be more popular than I thought. Fast forward to my upcoming pattern where small squares will be stitched and flipped with seams pressed open—that actually need starched for best results—I’ll definitely recommend using it this time!
My starch preference is Flatter by Soak. I’m not one for scented products, but I’d just finished a bottle of unscented that smelled anyway so I chose pineapple this time. A 8.4 ounce bottle costs around $12 on Amazon putting it on the expensive side, but for a top-notch product it’s worth paying a bit more (my last bottle lasted one year). It’s great stuff; it doesn’t leave your fabric crunchy nor does it leave residue on your iron.
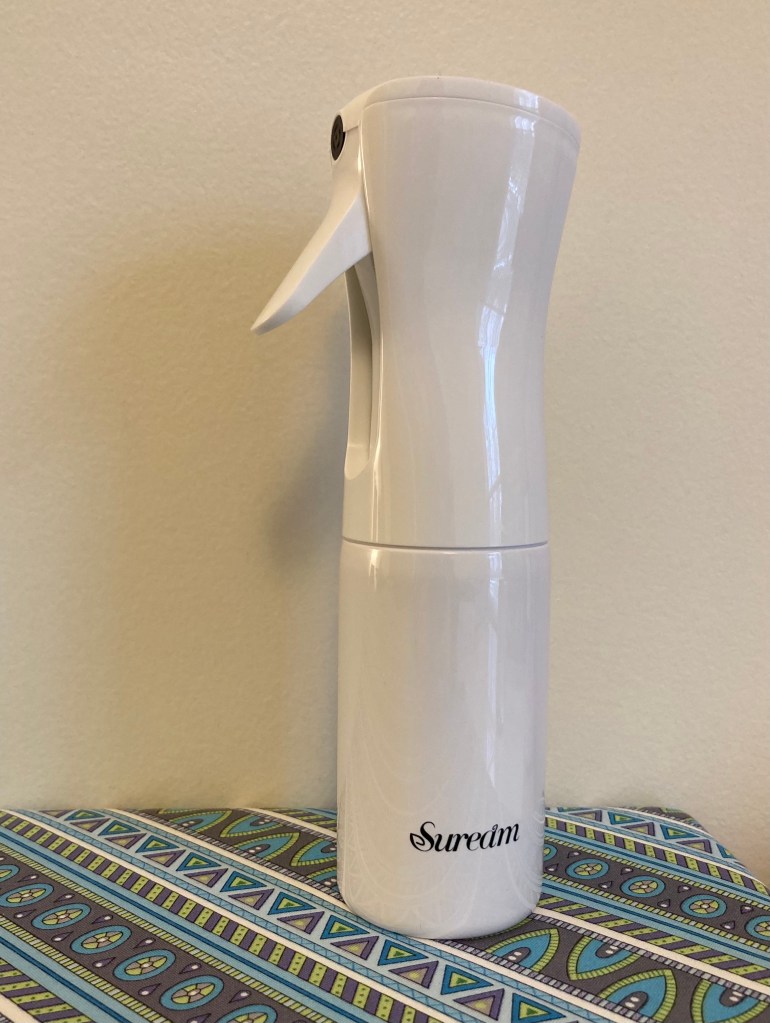
SPRAY MIST BOTTLE
Since every iron leaks eventually (even my costly Rowenta Focus started leaking after a year or so) I’ve quit putting water in them. While I really love using steam and I miss it, I’ve gotten used to going without. As an alternative, I use a water spray bottle when pressing. I’d seen this funky sprayer in a quilt shop over the summer but ended up purchasing one online a few months later. It’s a fine mist spray bottle and it is excellent. It holds 5.4 ounces of water and costs around $7 on Amazon. The pump sprays a really fine mist and if you hold the nozzle down it’s works like an aerosol. I love the clean look of white so it’s not unsightly on my pressing table.
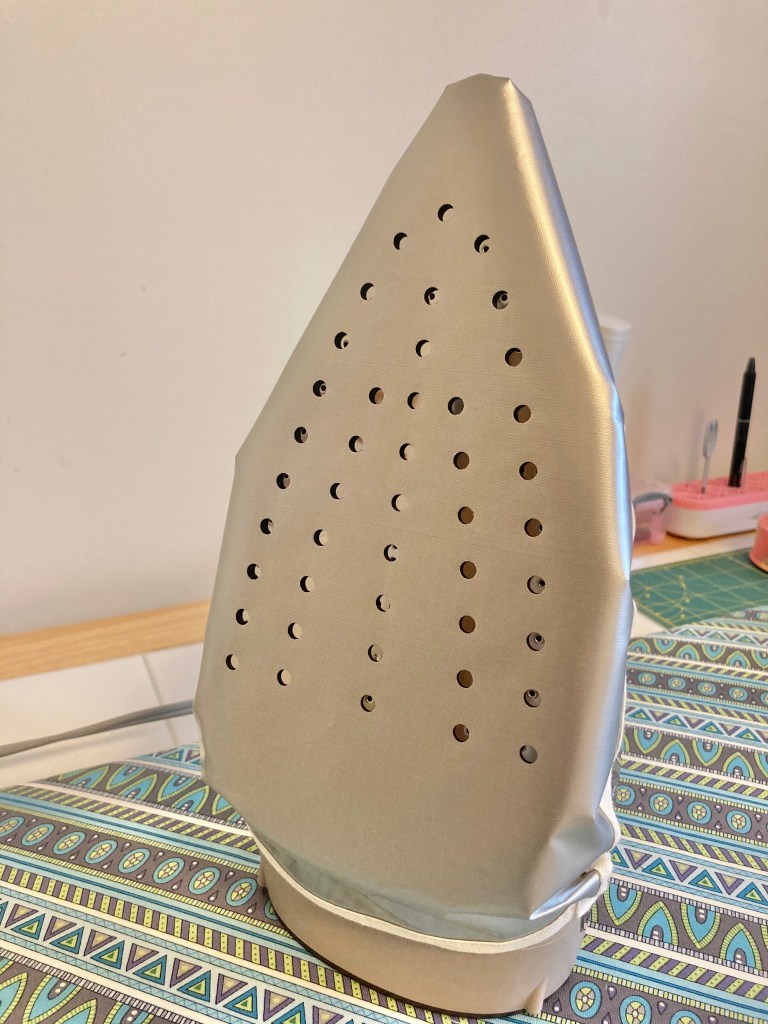
IRON SHOE
This is kind of an odd item, but it comes in really handy. I first saw one at the Fat Quarter Shop as a flash sale item and thought I’d give it a whirl, thinking it might help avoid the constant mess of getting interfacing adhesive stuck to my iron. It costs around $15 and is ‘made of fiberglass and is a non-stick surface that will save your fabric from scorching, shine and burns.’ It’s great when using interfacing and when pressing seams of pieced batting—nothing sticks! It’s easy to use; just tie it on your iron (fits any size).
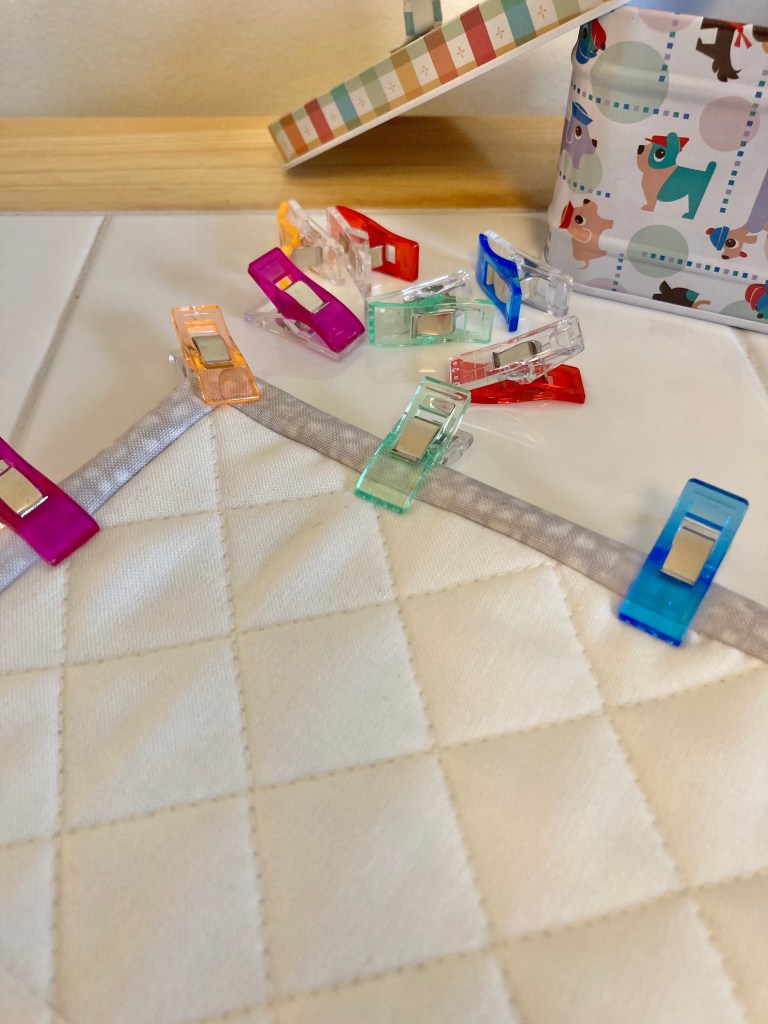
QUILTING CLIPS
My sister bought me this cute little tin of 100 assorted colored clips (including 10 large sized). I’m not calling them ‘Wonder Clips’ because they’re not actually Clover brand as ‘Clover’ isn’t stamped on. I have a couple hundred Clover clips and by comparison, they’re pretty much the same. They’re the same size, they look alike and they perform the same. These might even grip a bit tighter. I’m guessing they’re less expensive than name brand, and I was told they were purchased on Amazon. I use them constantly and love the fun colors.
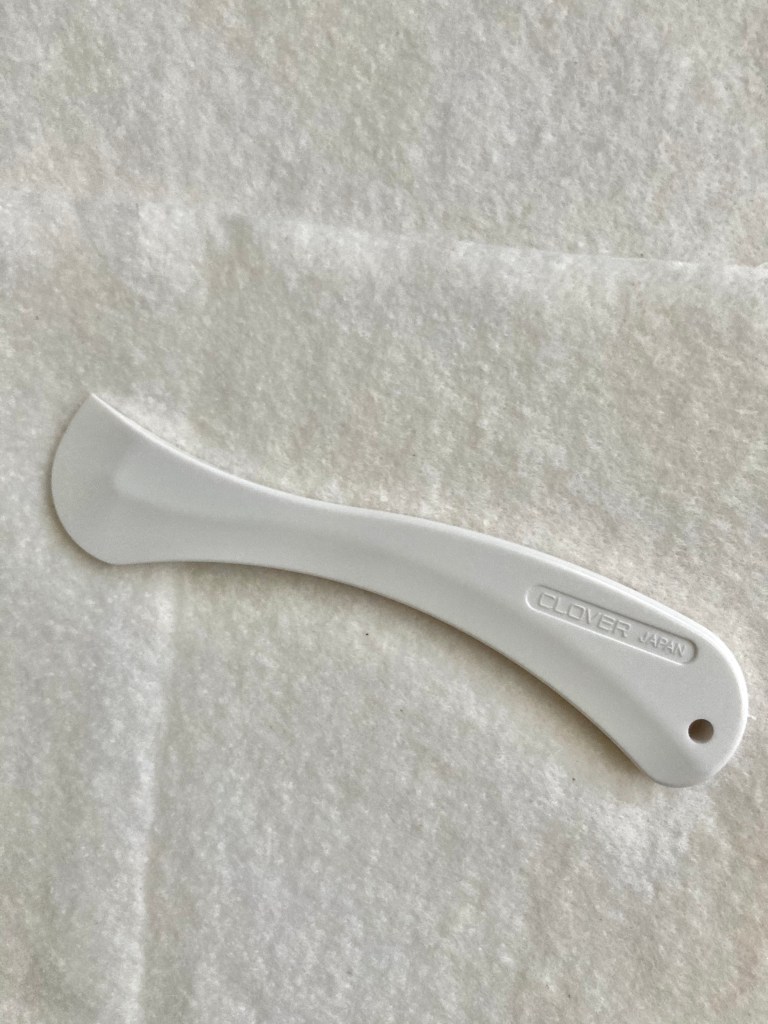
HERA MARKER
If you quilt your own quilts, using a hera marker is a safe and effective way to mark your quilt tops. If you’ve never used one before, they’re really easy to use. Just line up your ruler where you’re going to sew and mark a pressed line, just like you would using a pen or pencil. Since you have to see the line to sew, you’ll have to run the marker along the side of the ruler a couple of times to get a good indentation. In the end, the indentation is just a crease that’ll go away. This Clover hera marker can be purchased at JoAnn, online, or at your LQS, costing around $6. It’s a great tool and for such a low price, it’s well worth it. The sharper edge can eventually wear down, but it’ll take quite a while. I just replaced mine after about 4 years of use, and that was mainly because I had broken off the tip.
I hope this post is a useful guide if you’re looking for items to make quilting easier and more efficient…and to making more beautiful quilts!
Note: I am not endorsed by any product I have mentioned in this post; they are items I like, use, and wanted to share information on.
When I bought my sewing machine a few years ago, the sales lady gave me very thorough instructions on machine use, even though I didn’t think it necessary…then one particular thing got my attention—how to ‘unthread’ the machine. I’m sure it’s not really known as that, but changing thread is something we do all the time.
Until then I always pulled the thread from the spool back through my machine, but thanks to Karen I now know that can cause tension issues as the machine is made for thread to go out in only one direction via the needle. That said, the proper way to remove thread is to cut it from the spool and pull it through the bottom. Am I the only person who didn’t know this? Probably. 😉 It makes perfect sense, and I’m glad for the tip because tension problems are the worst.
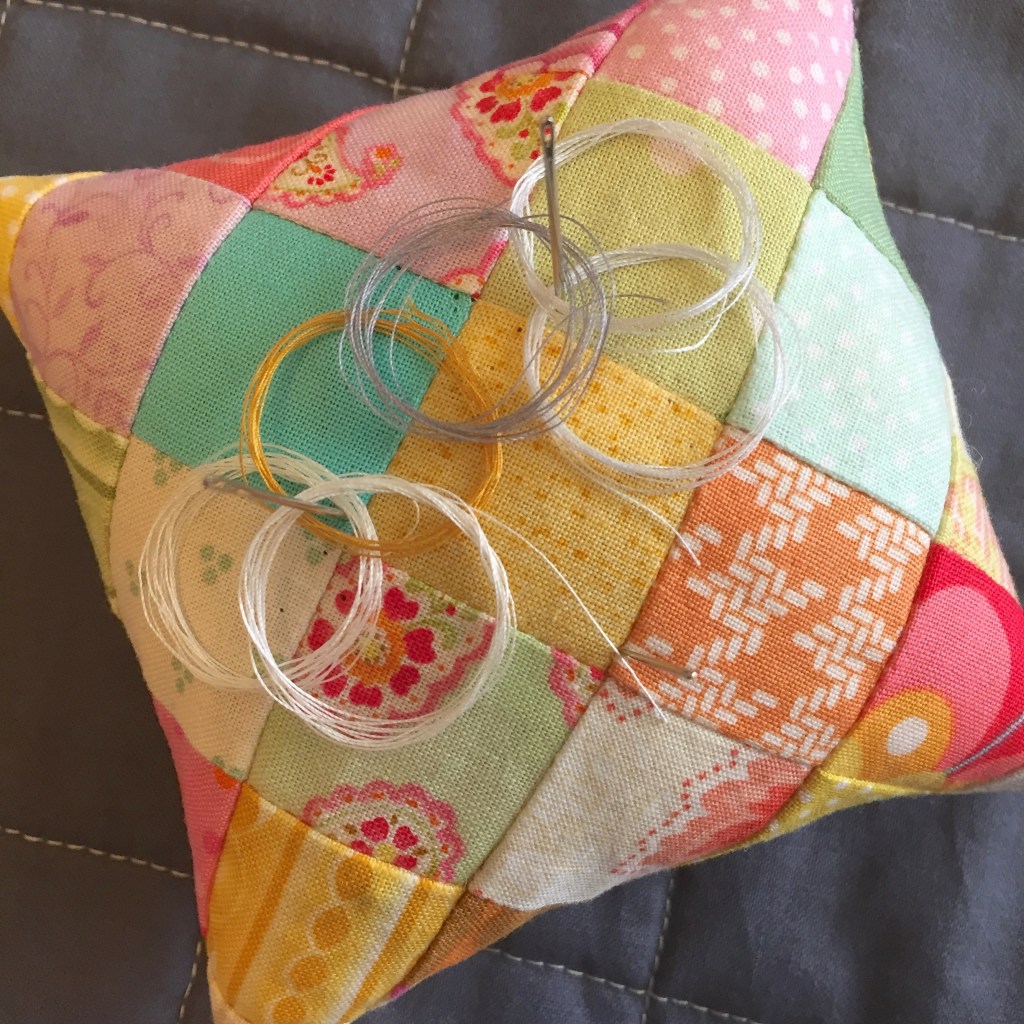
As time went by and after several thread changes, I realized it’s a lot of waste to throw those strands away. Since thread is expensive and I don’t like waste, I had to ask myself ‘what can I do with these strands?’ I didn’t know at first, I just started saving them on my pincushion.
My thread cutaways measure about 24″ long, so it doesn’t go all that far, but I’ve come up with a few tips on putting them to good use.
Keep a needle or two threaded, it’s a great way to save time when in a hurry.
Use threads for basting. I always baste my binding before machine sewing, I mainly use these strands for stitching them down.
Sew on buttons. A short thread length is plenty.
Clothing repairs. They’re just right for a minor fix.
If you hang on to your cutaway strands, you’ll be surprised how quickly they accumulate and in so many different colors, too. And mostly, you’ll see how much it’ll save on thread waste. 🙂
In 2017 I told my daughter I would make her a bed size quilt, but to be honest I never got around to it that year. Enter 2018 and I knew I had to keep my word. That said, I had her choose both the fabric and the quilt pattern because if I was going to take a lot of time to make something so big (and expensive), I wanted her to be happy with it.
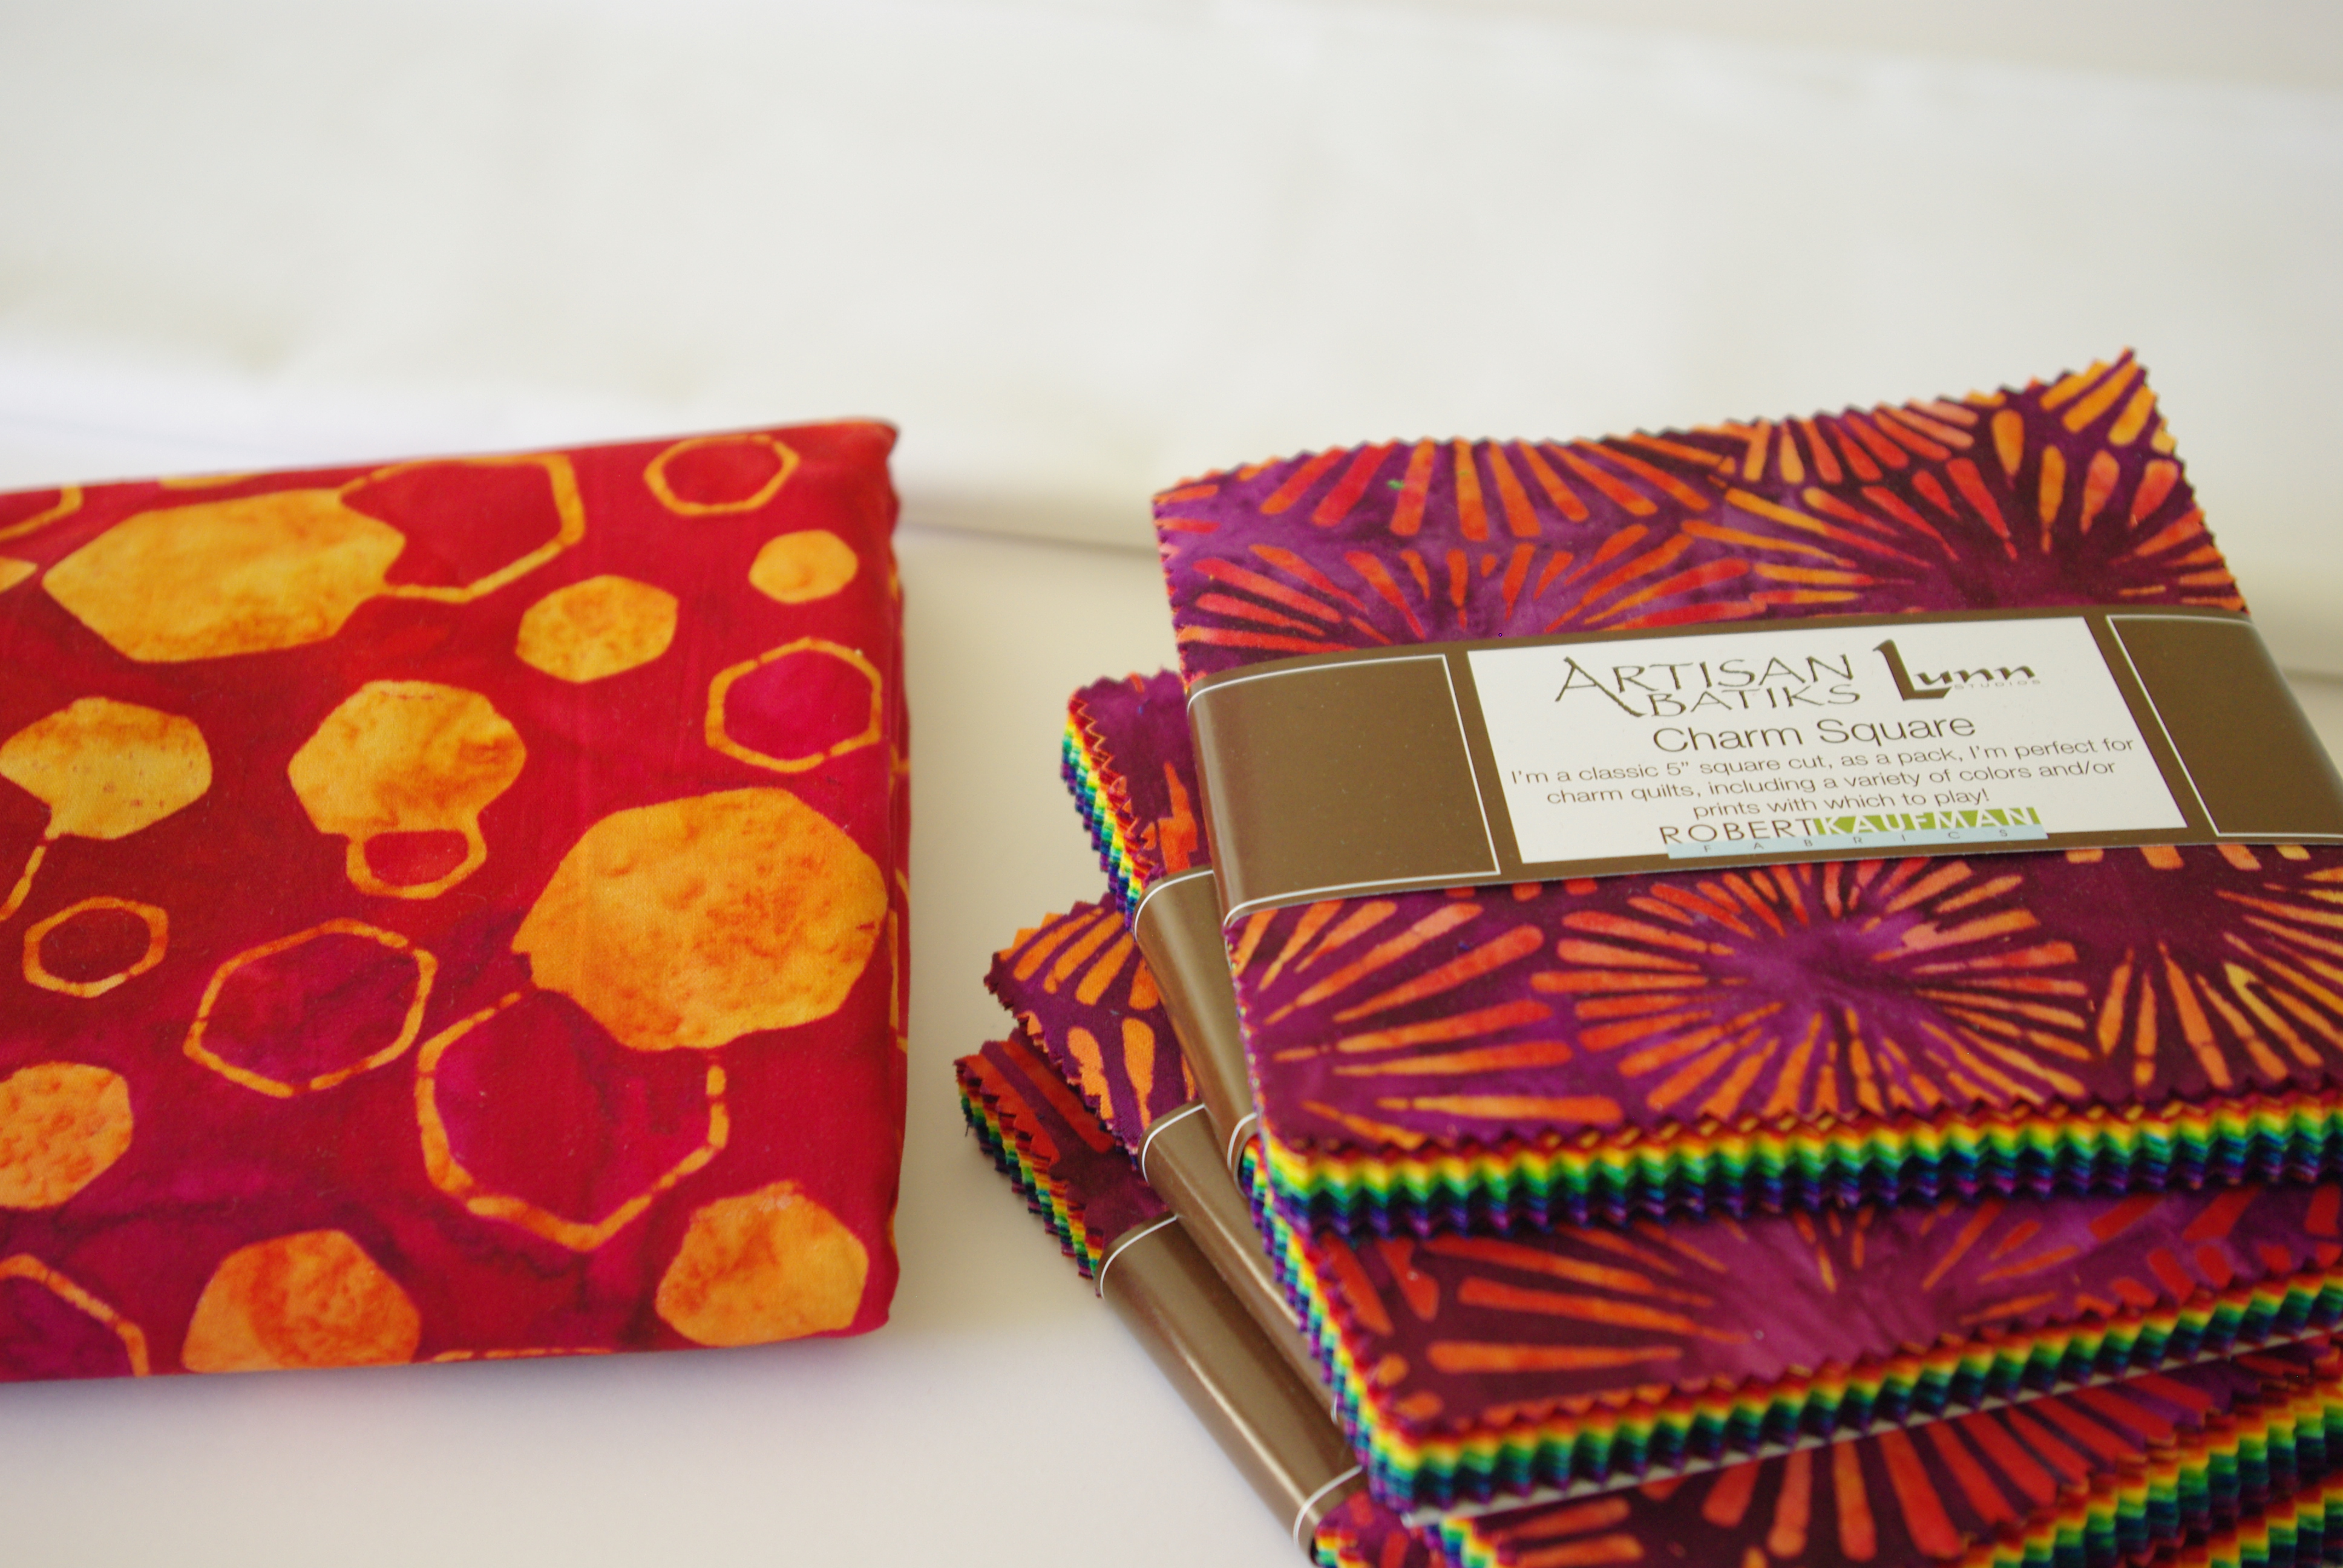
After searching around she decided on Robert Kaufman’s Artisan Batiks/Retro Metro by Lunn Studios. This would be my first time working with batiks and I was ready to try something new.
Her pattern choice was the Hunter’s Star quilt based on the video tutorial by Missouri Star Quilt Company. We all love Jenny Doan, don’t we? I know I’m a fan of her videos and patterns, and store too, for that matter. The video tutorial I followed is Hunter’s Star Made Easy. It’s a great tutorial but there were a couple of things I found challenging and I’d like to share them with anyone who decides to make this quilt from the video.
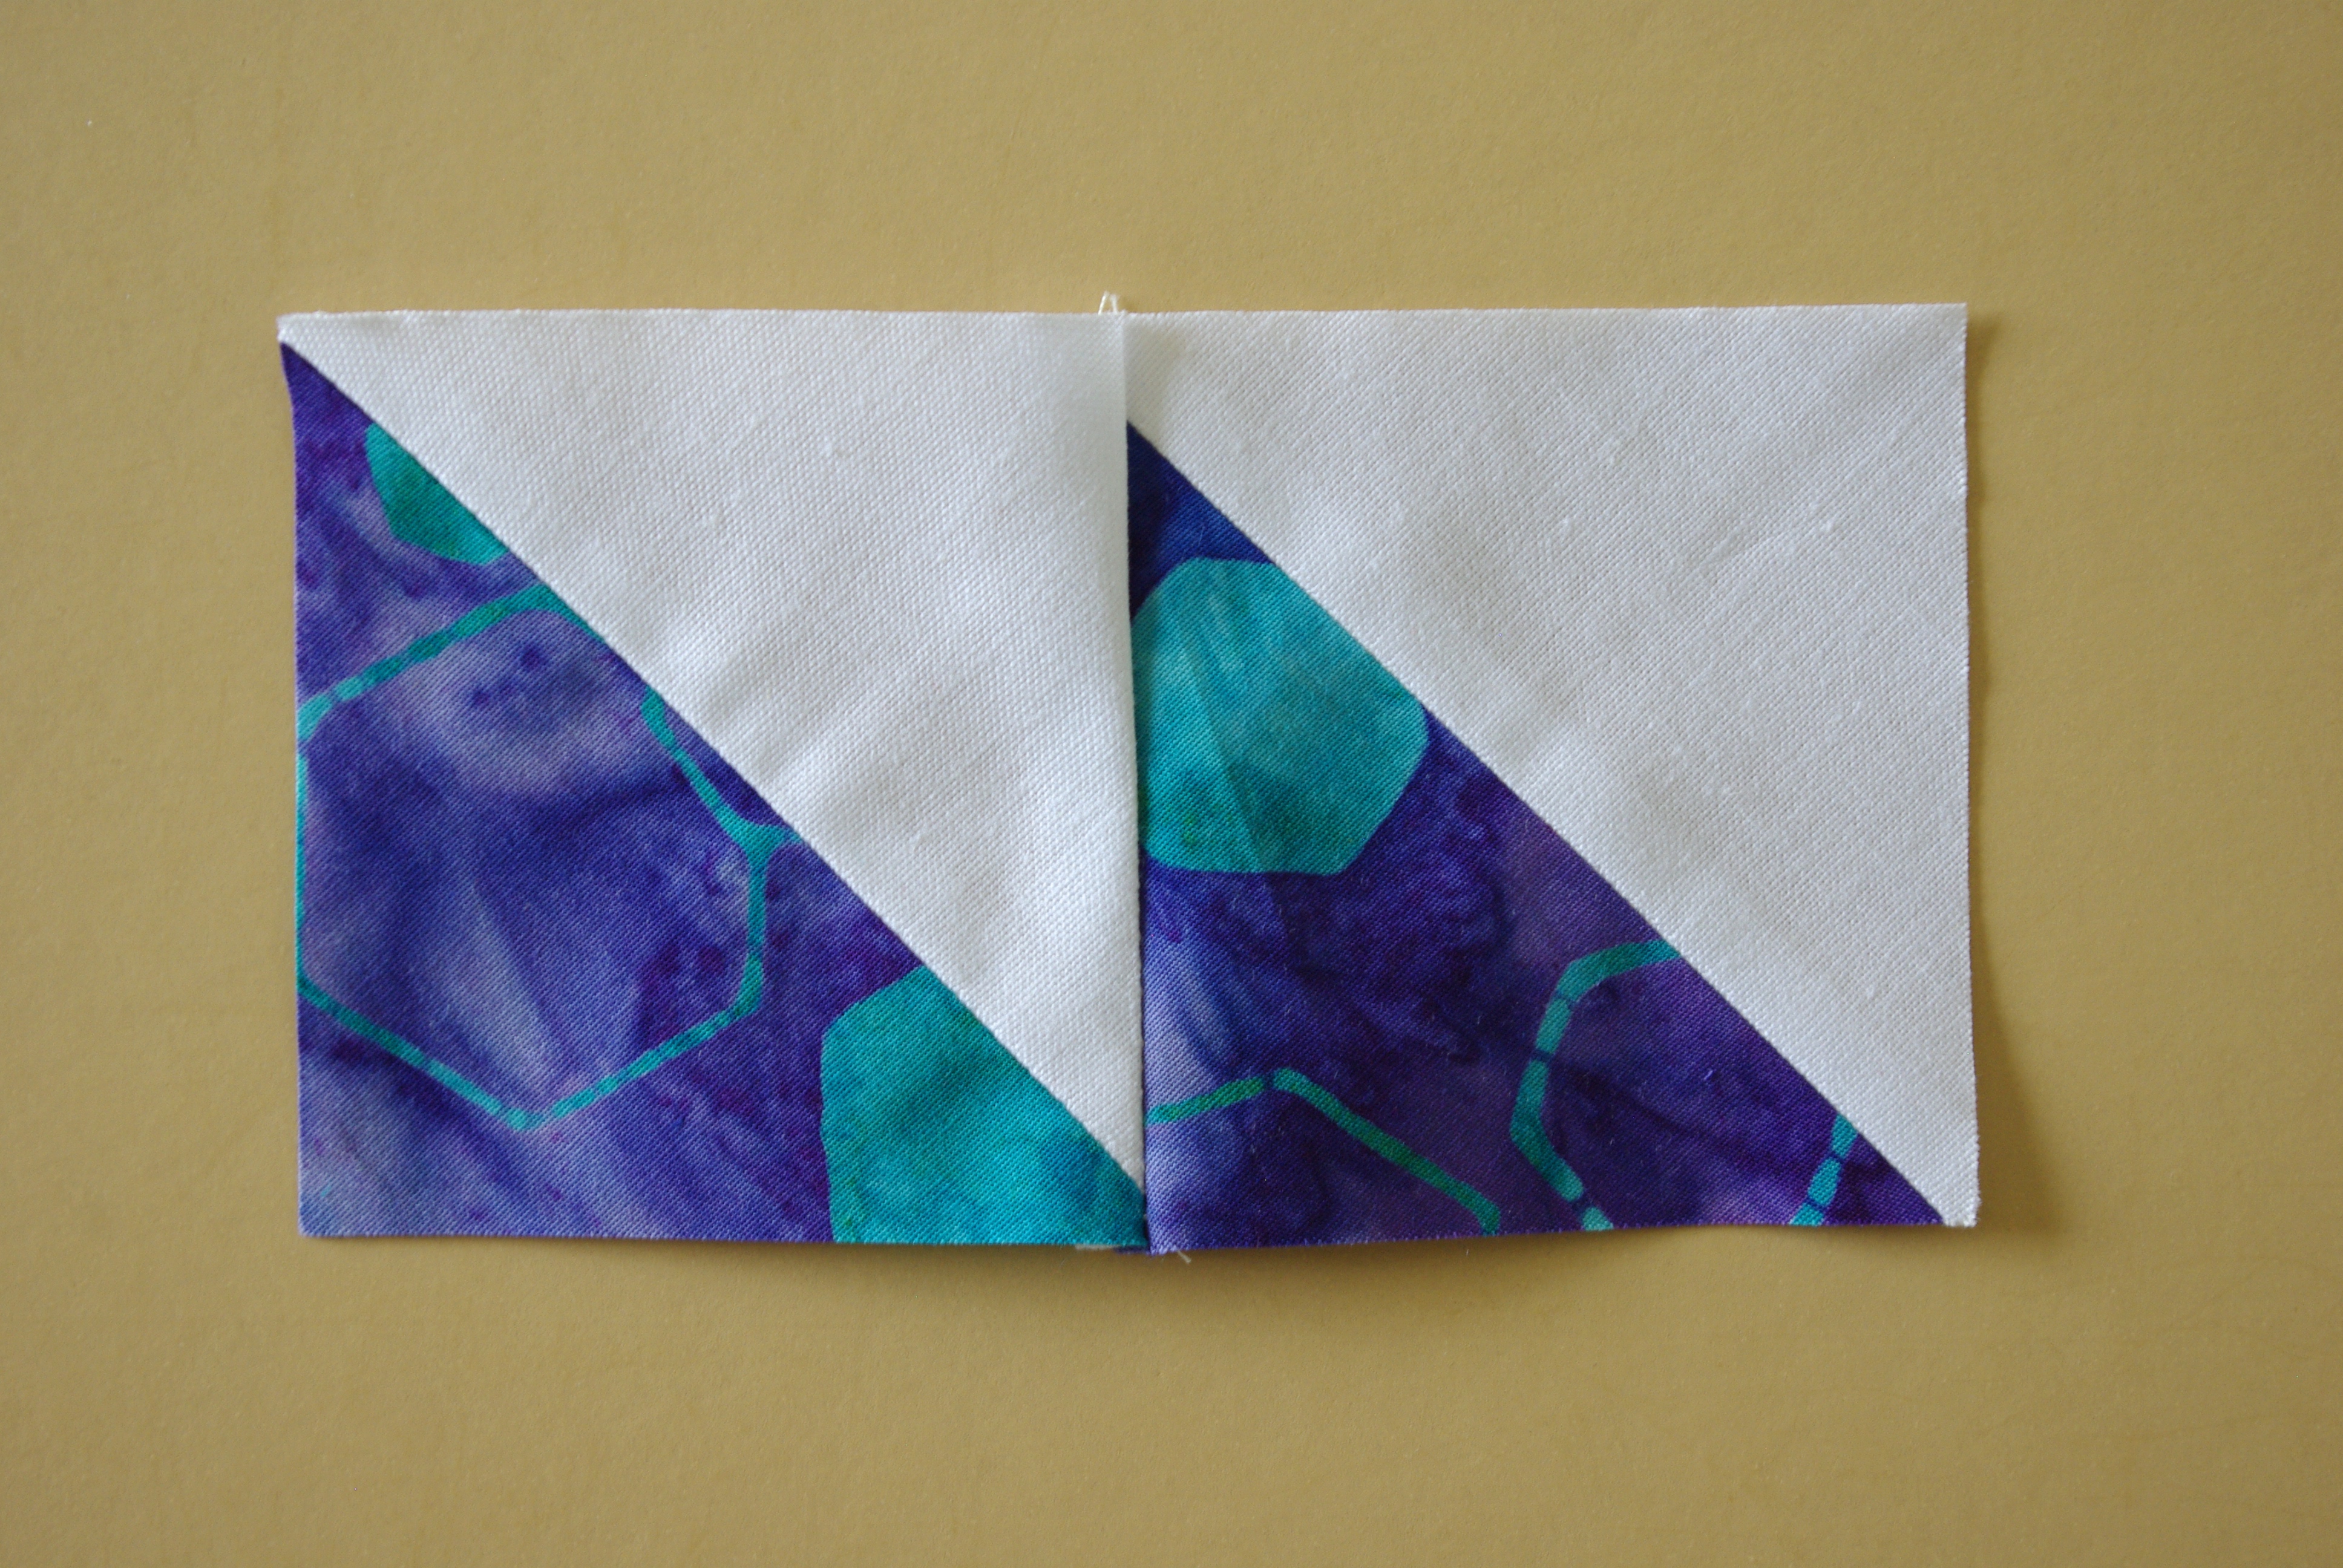
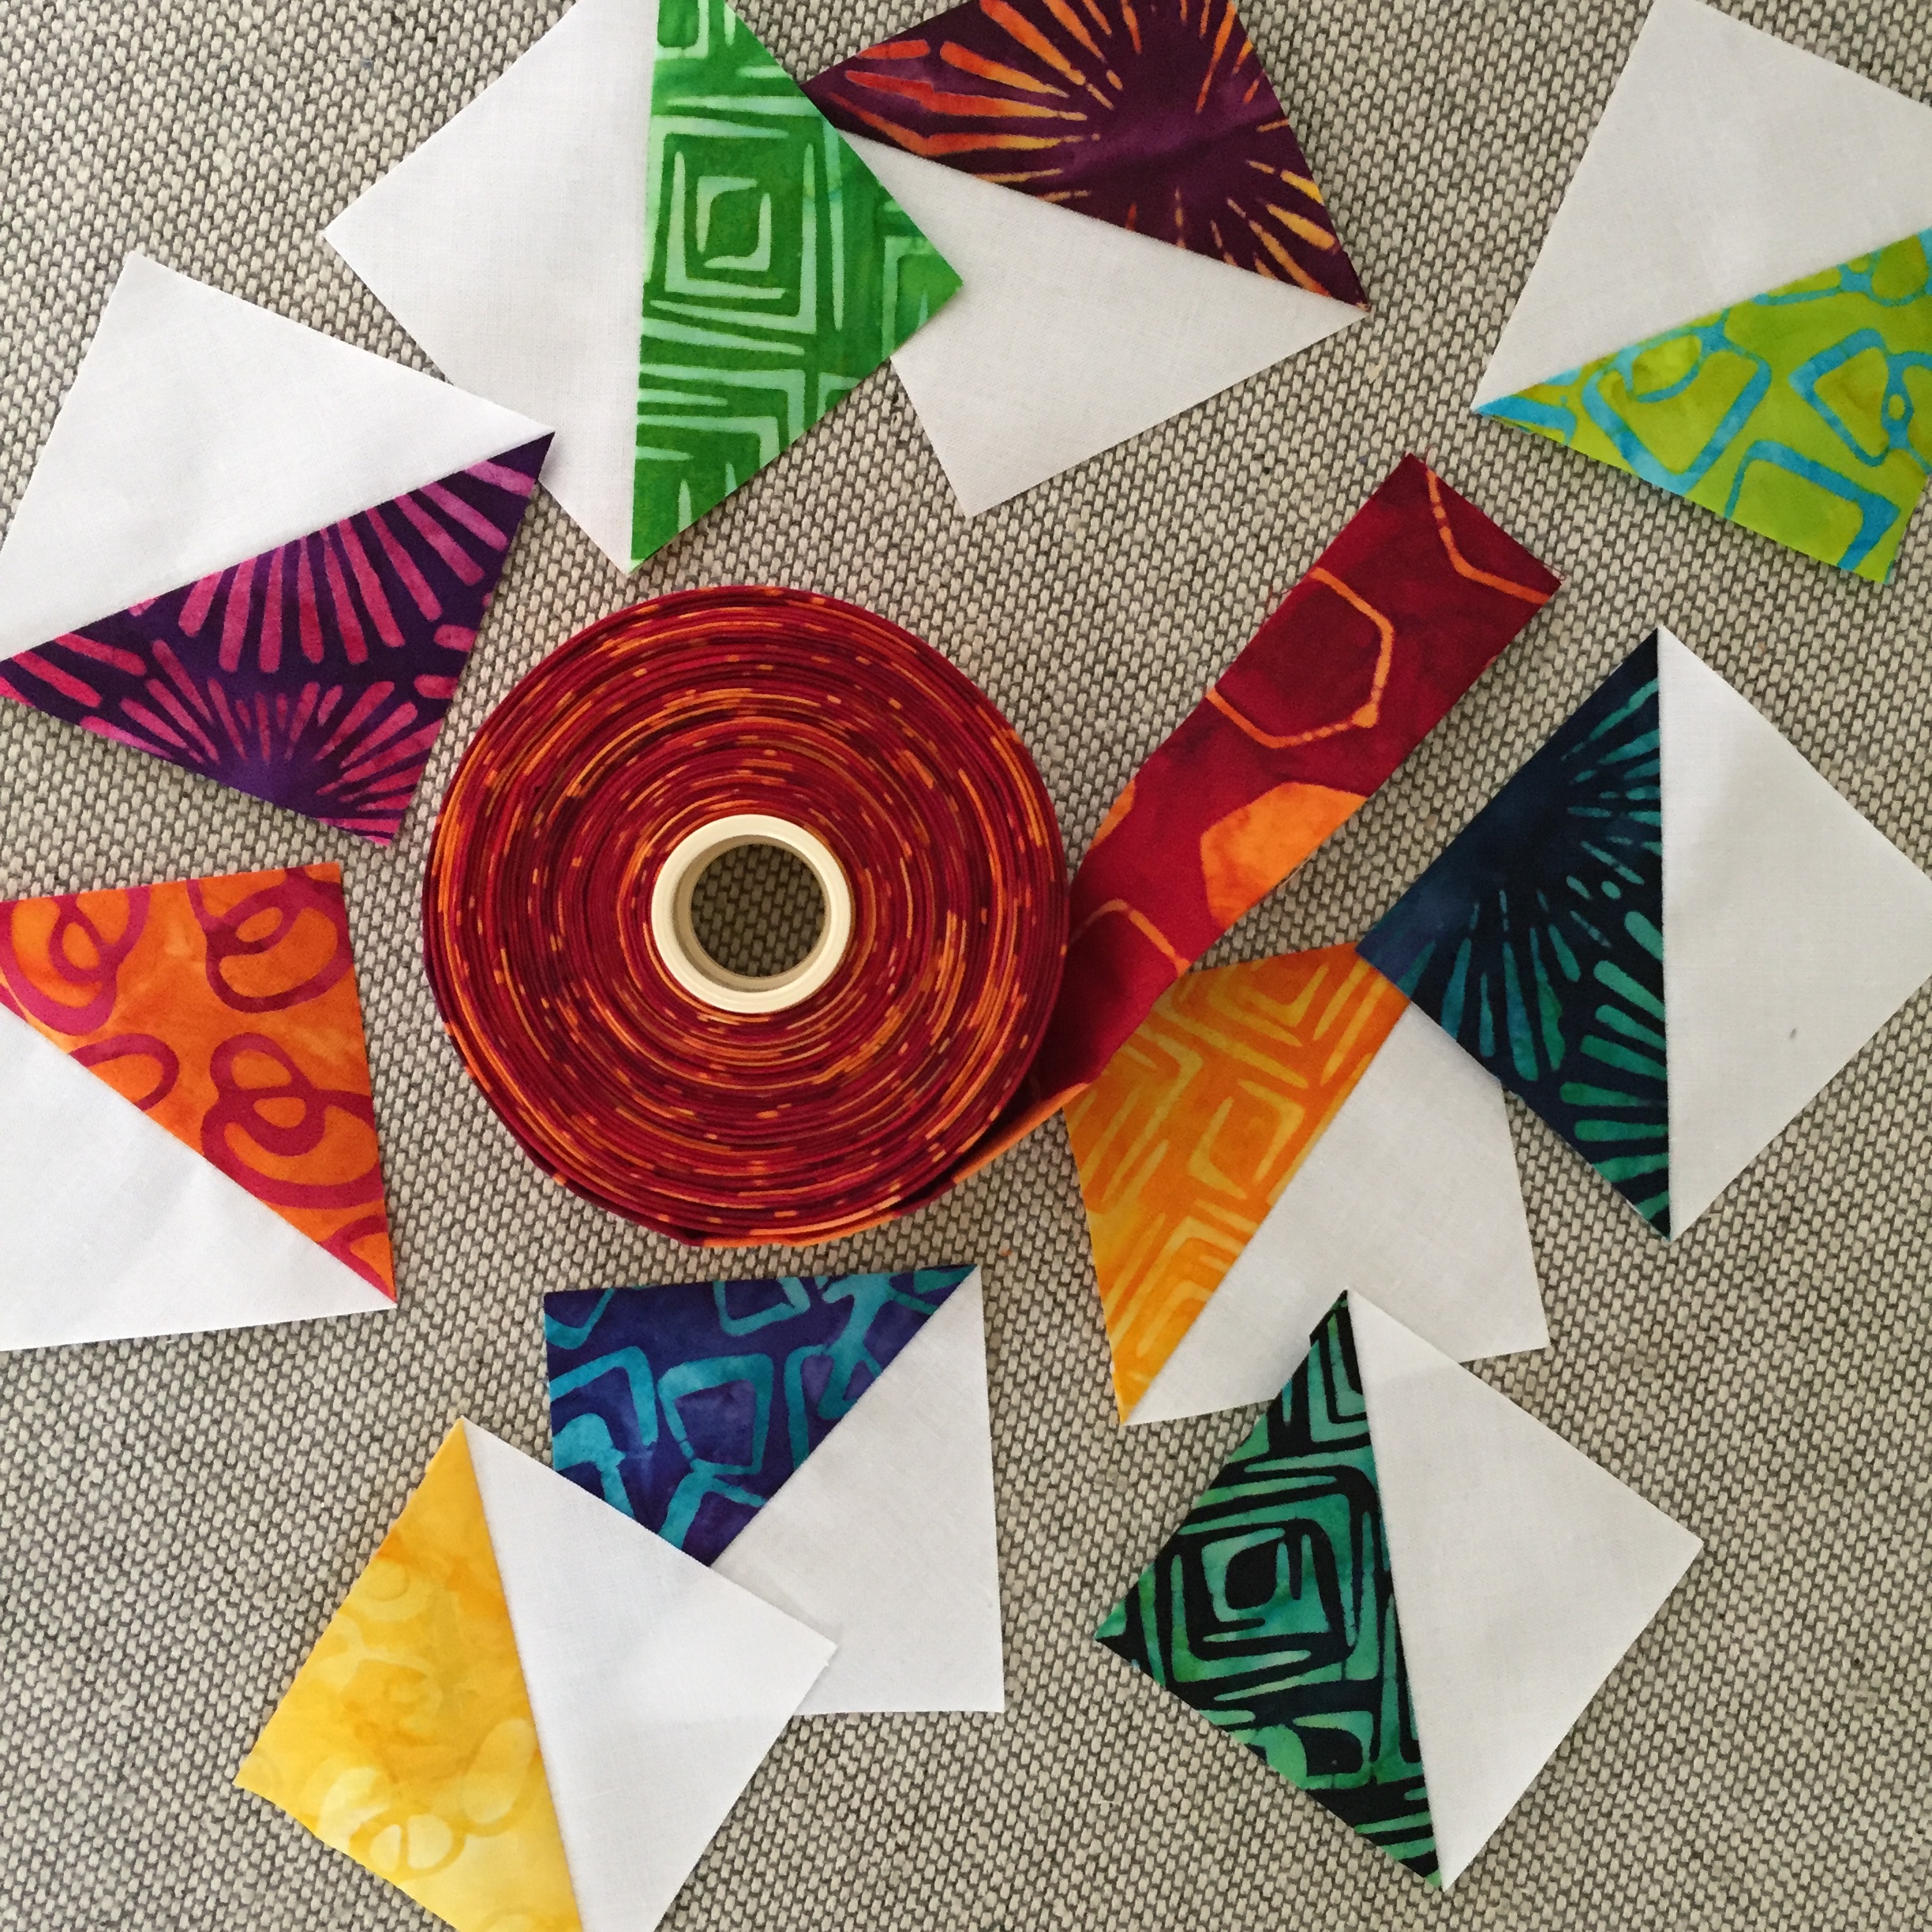
First, making the half square triangles (HSTs). By using the method in the tutorial you need to know that all the fabric edges will be on the bias! Meaning everything is going to be stretchy so handle with care. Personally, I don’t like making HSTs this way because of that, but in this case I just used extra caution. If you’re a beginner quilter be aware if and when you use this method.
I needed 720 HSTs for the entire quilt, that’s a lot! Here’s a stack of just 168, trimmed and ready for blocks.
How to press your seams is important, and I found it worked best pressing the HSTs seams open—but—if you’re using a Bloc-Loc ruler, trim them first, then press seams open. I pressed a few open first and they were off, so I didn’t end up with a ¼” seam once sewn. It wasn’t until afterwards that I realized why that happened, but thankfully I didn’t do too many.
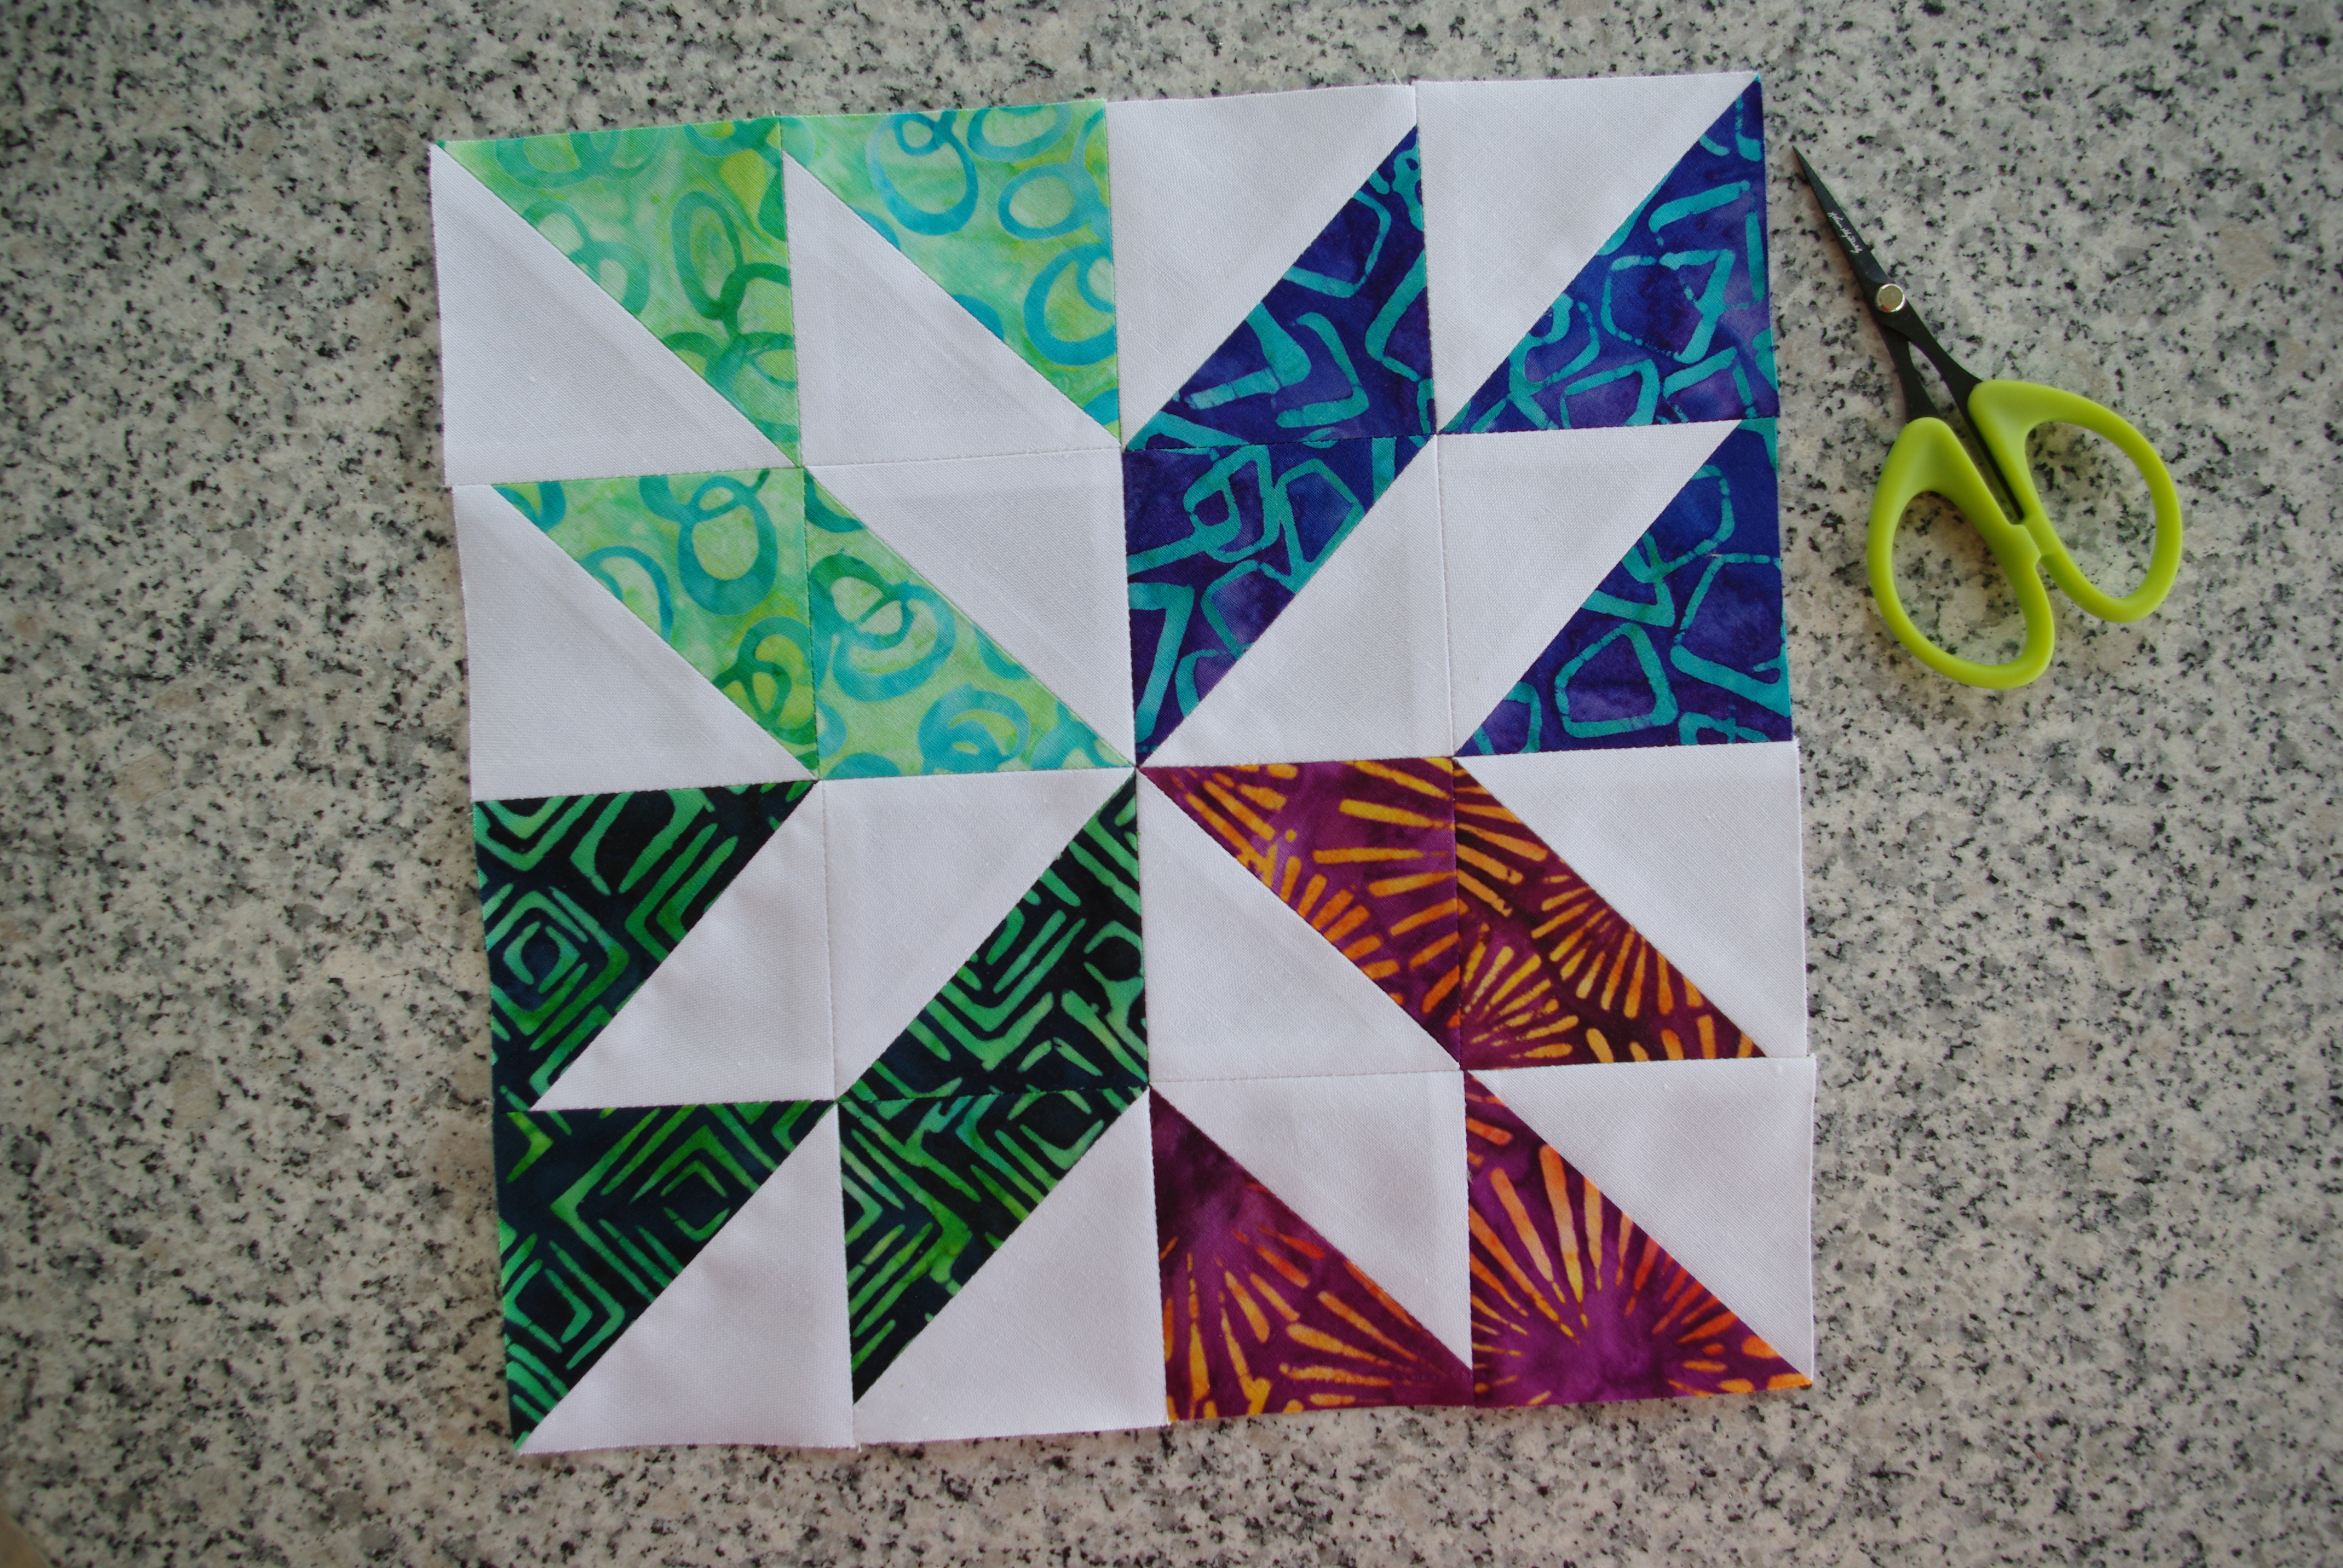
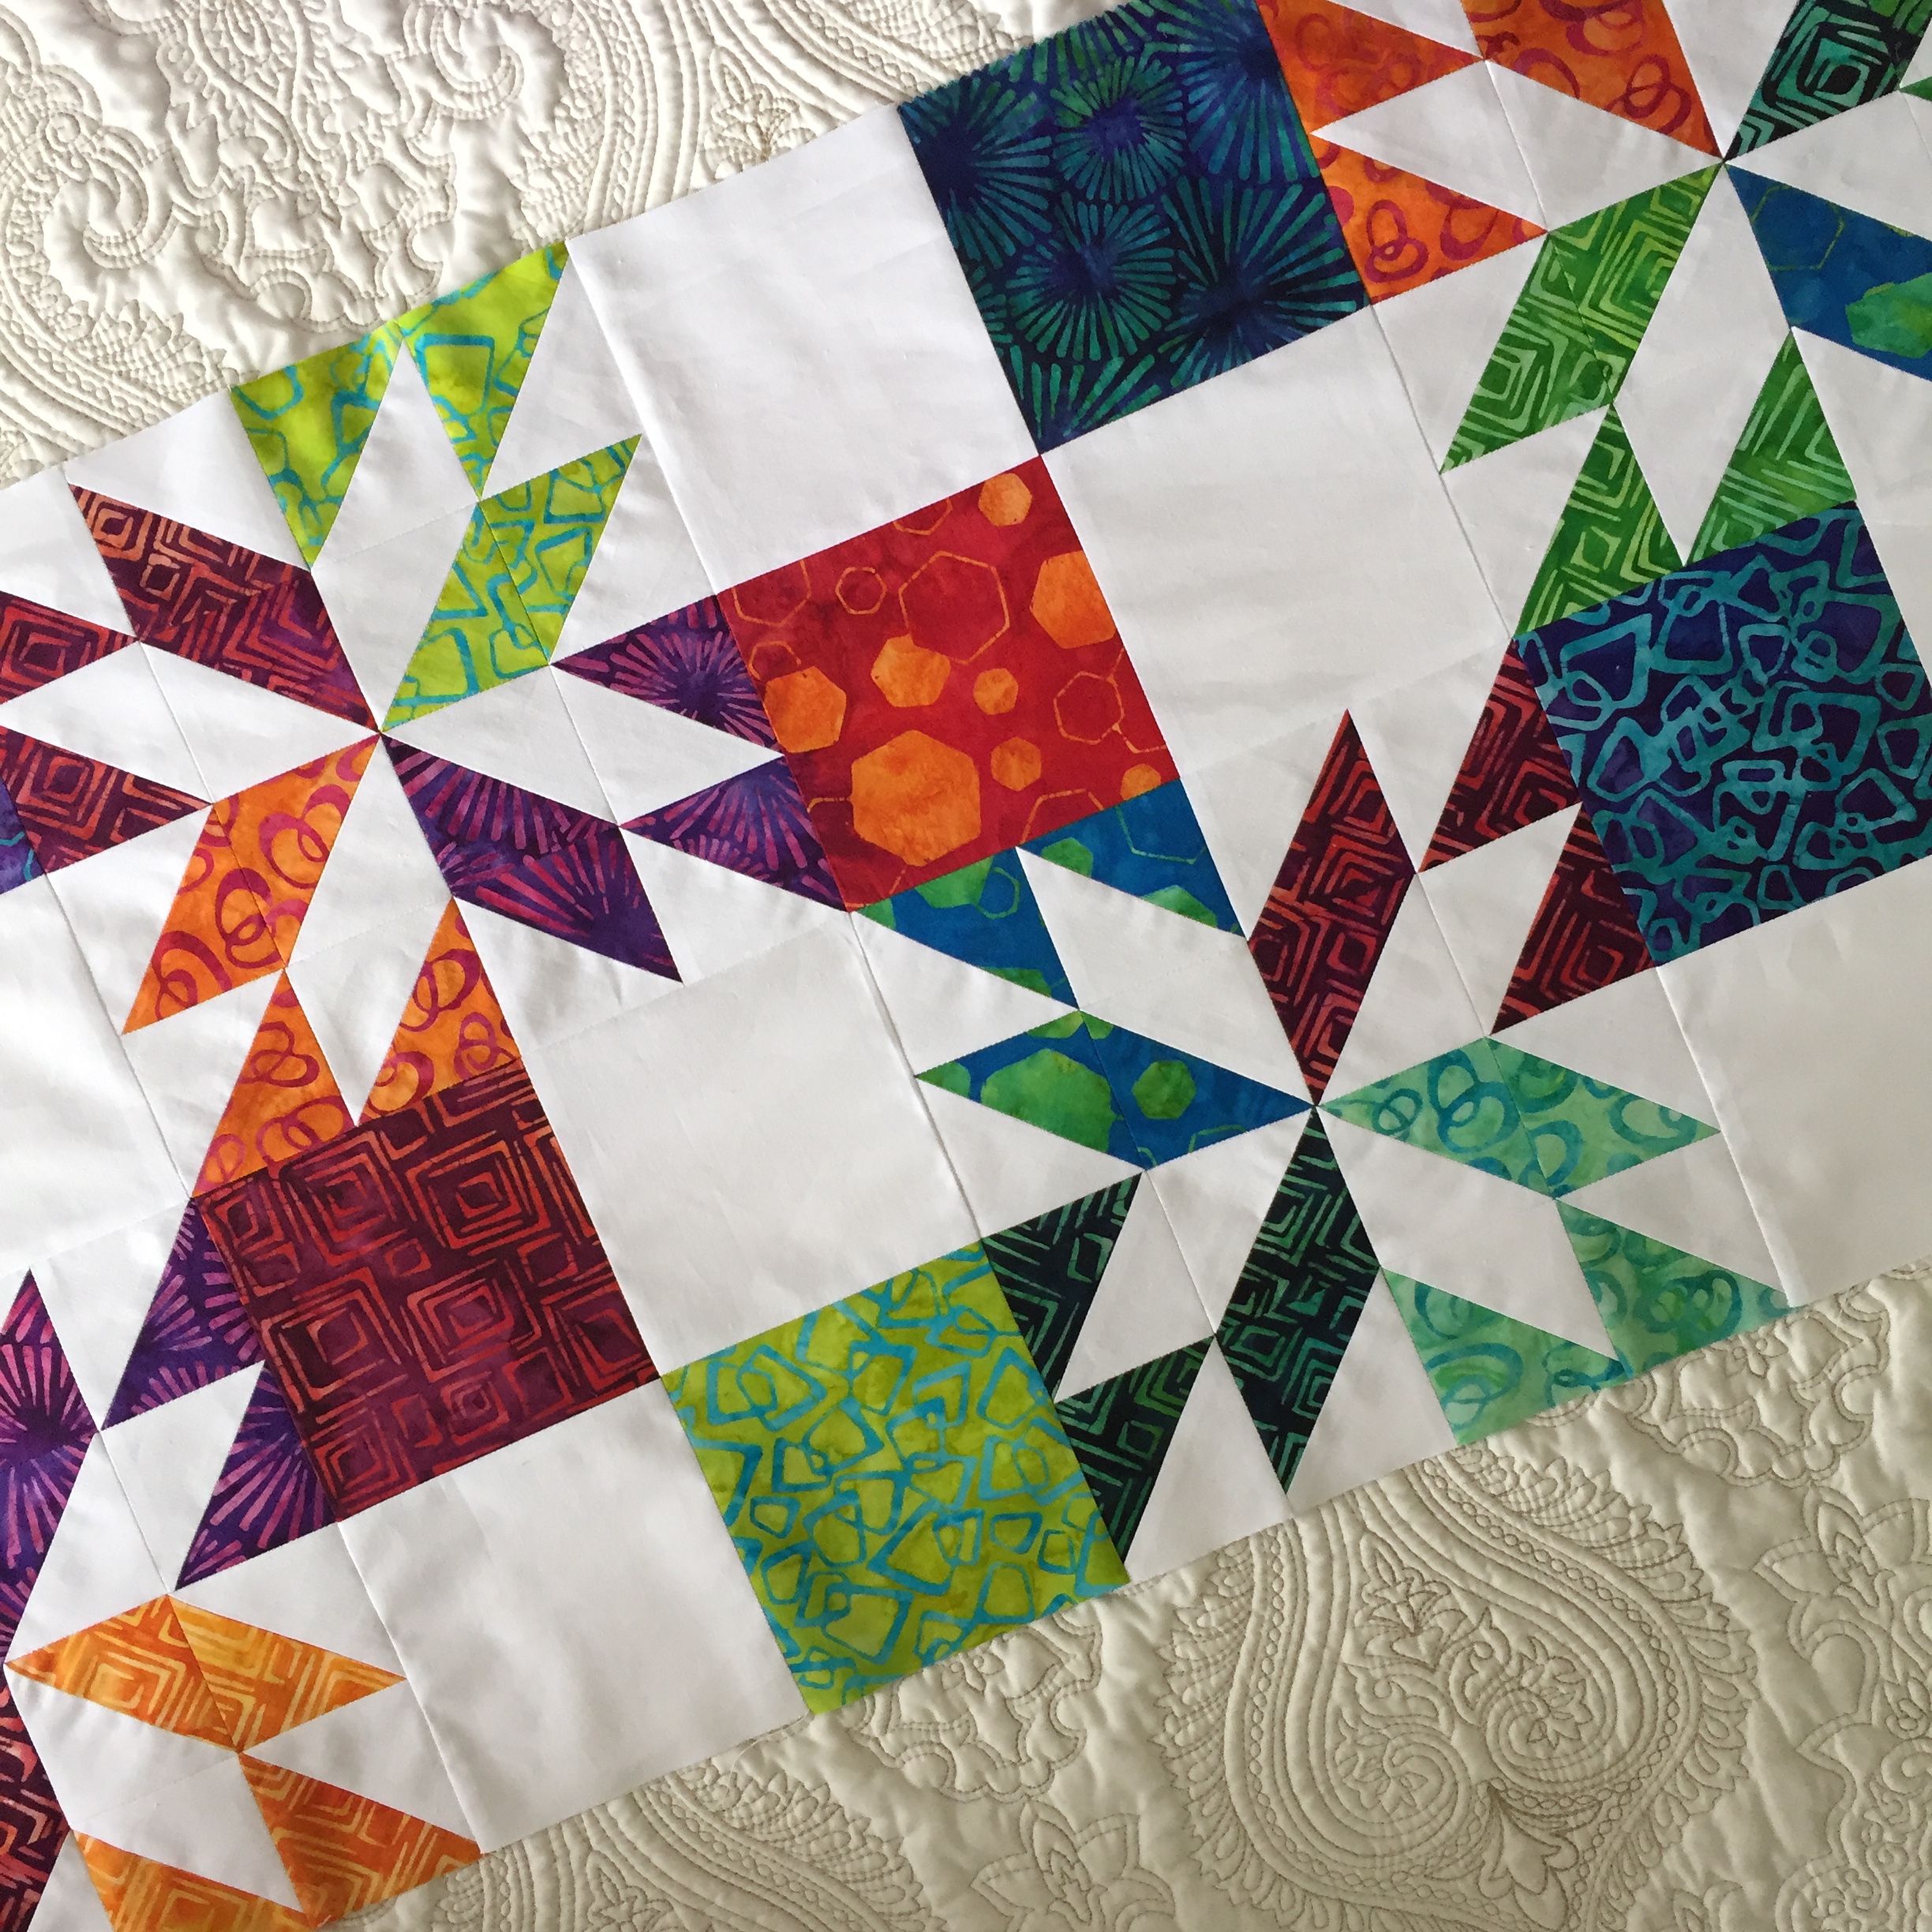
After I got that right everything lined up nicely! The pressed open seams made for a nice, flat lying block.
Here are a few more tips from my experience that are really useful.
After laying out the blocks, take a photo. It’s easy to get blocks turned around and having a photo reference is a lifesaver.
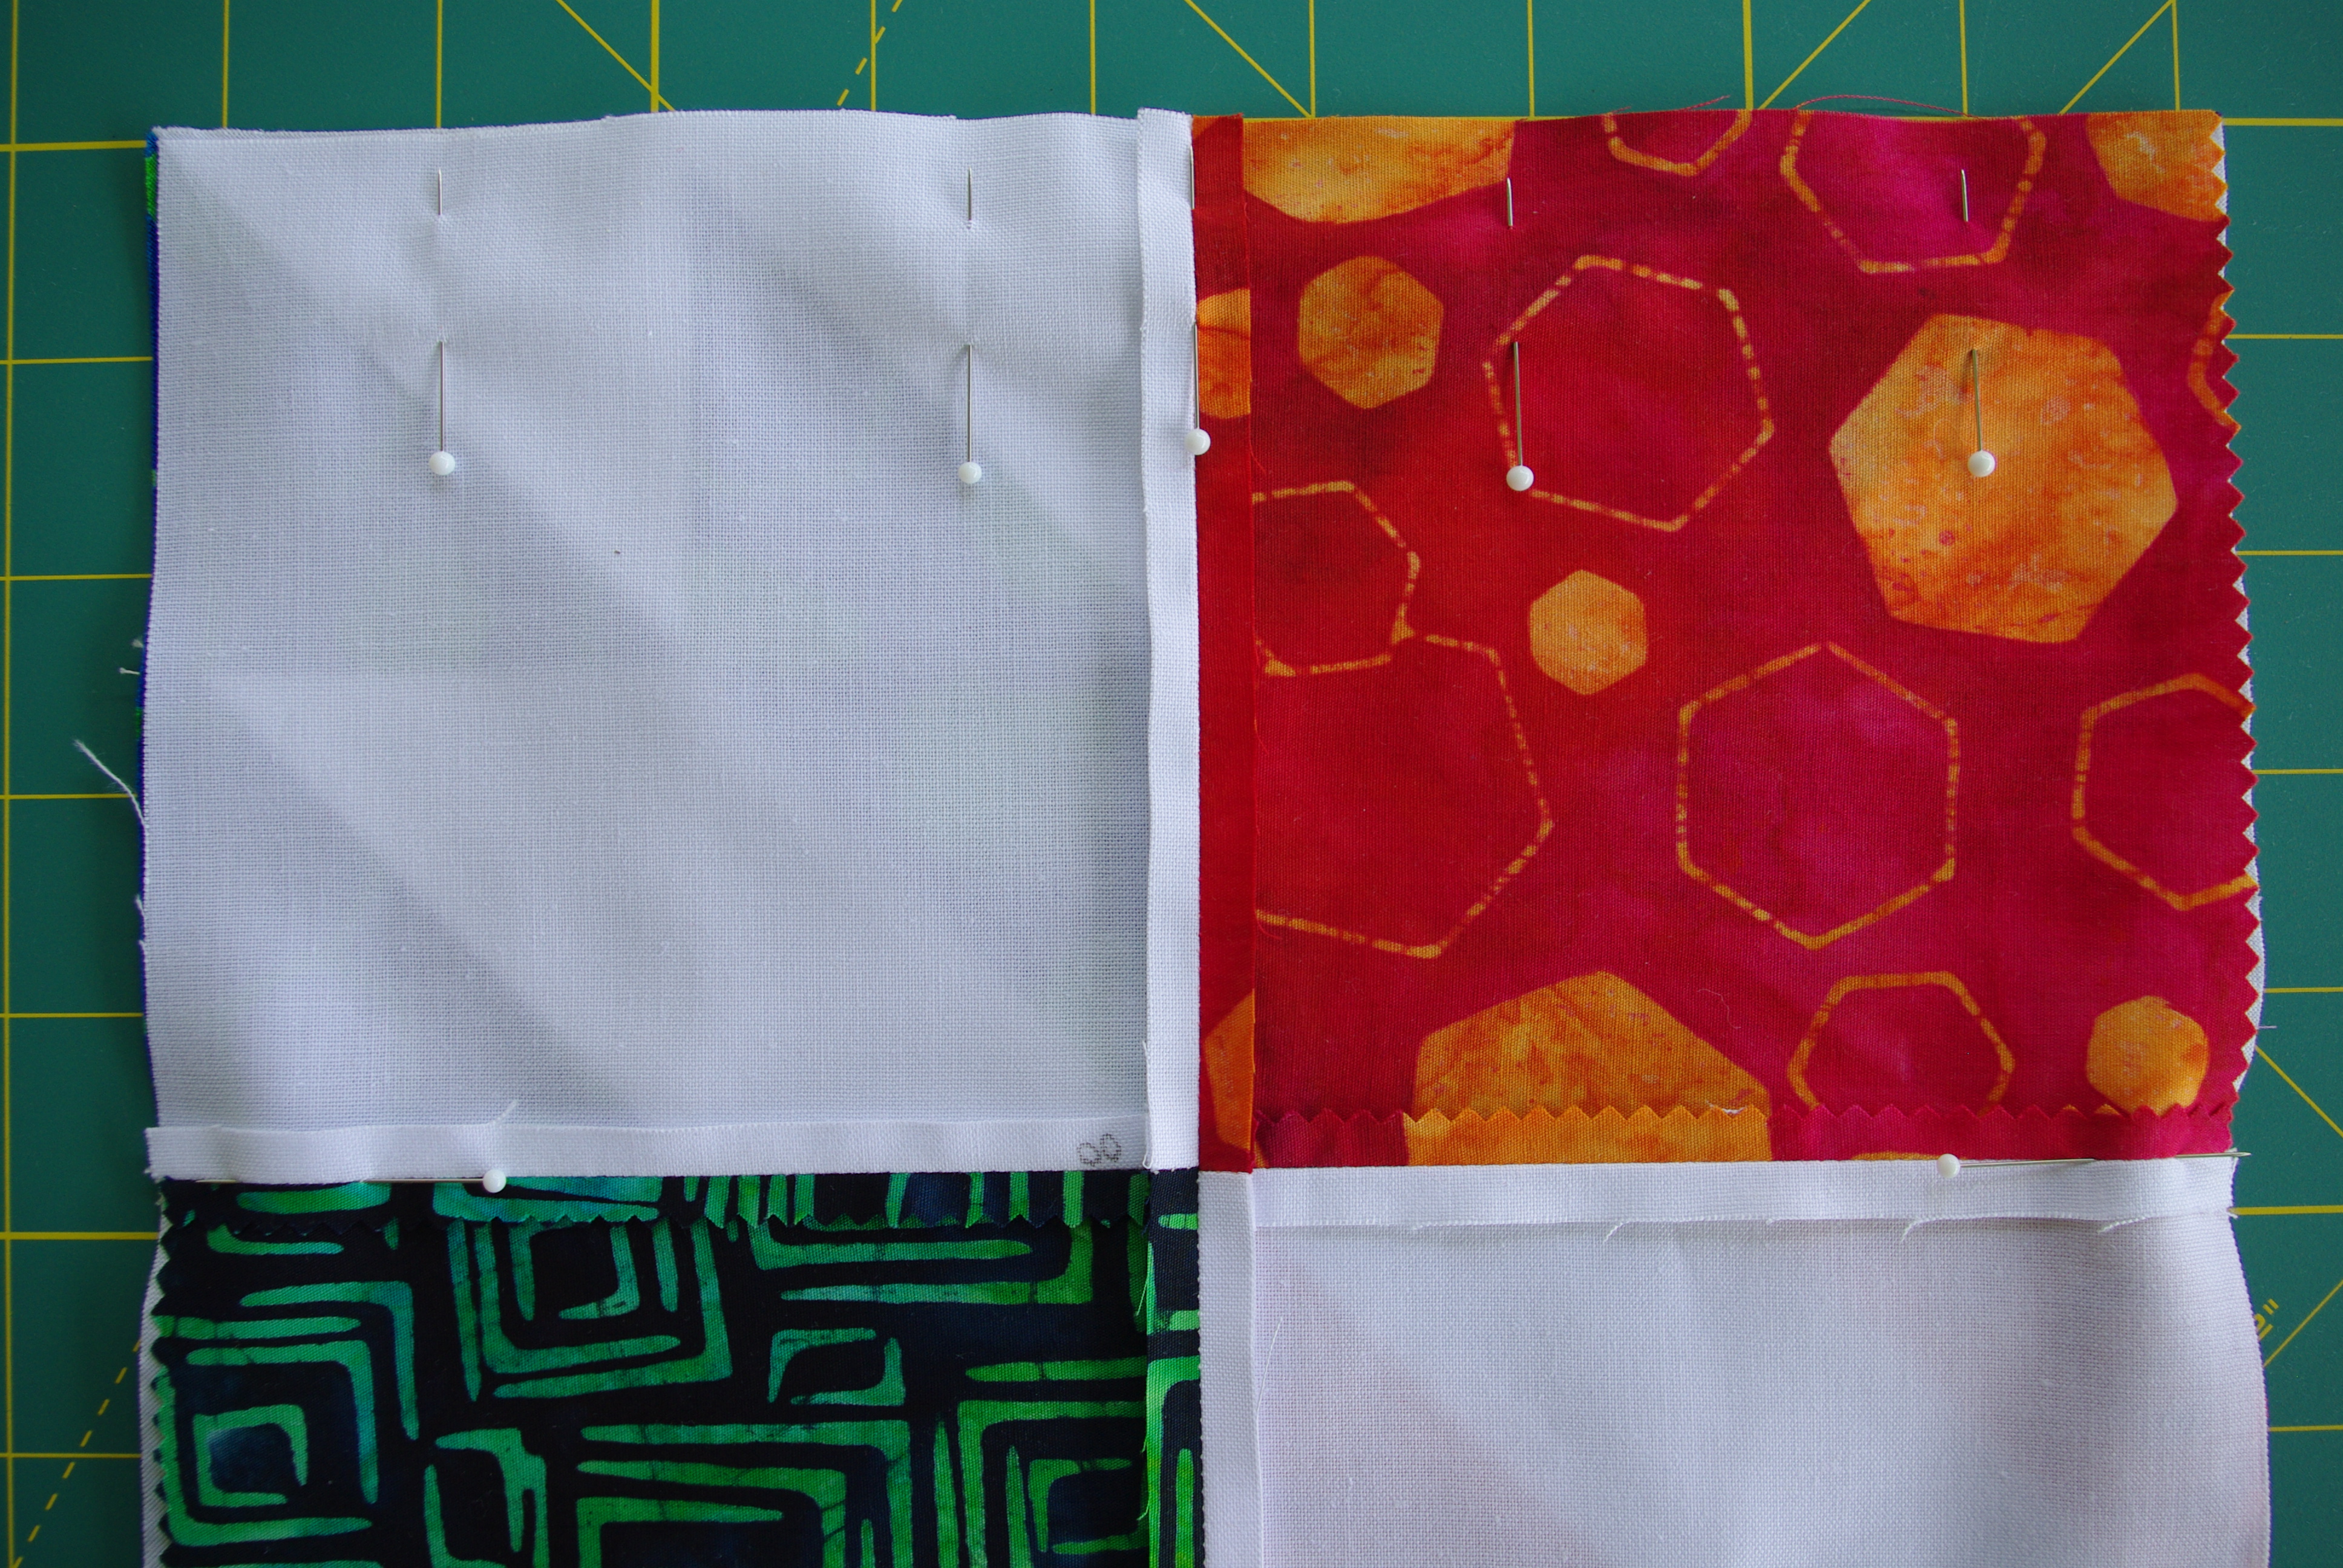
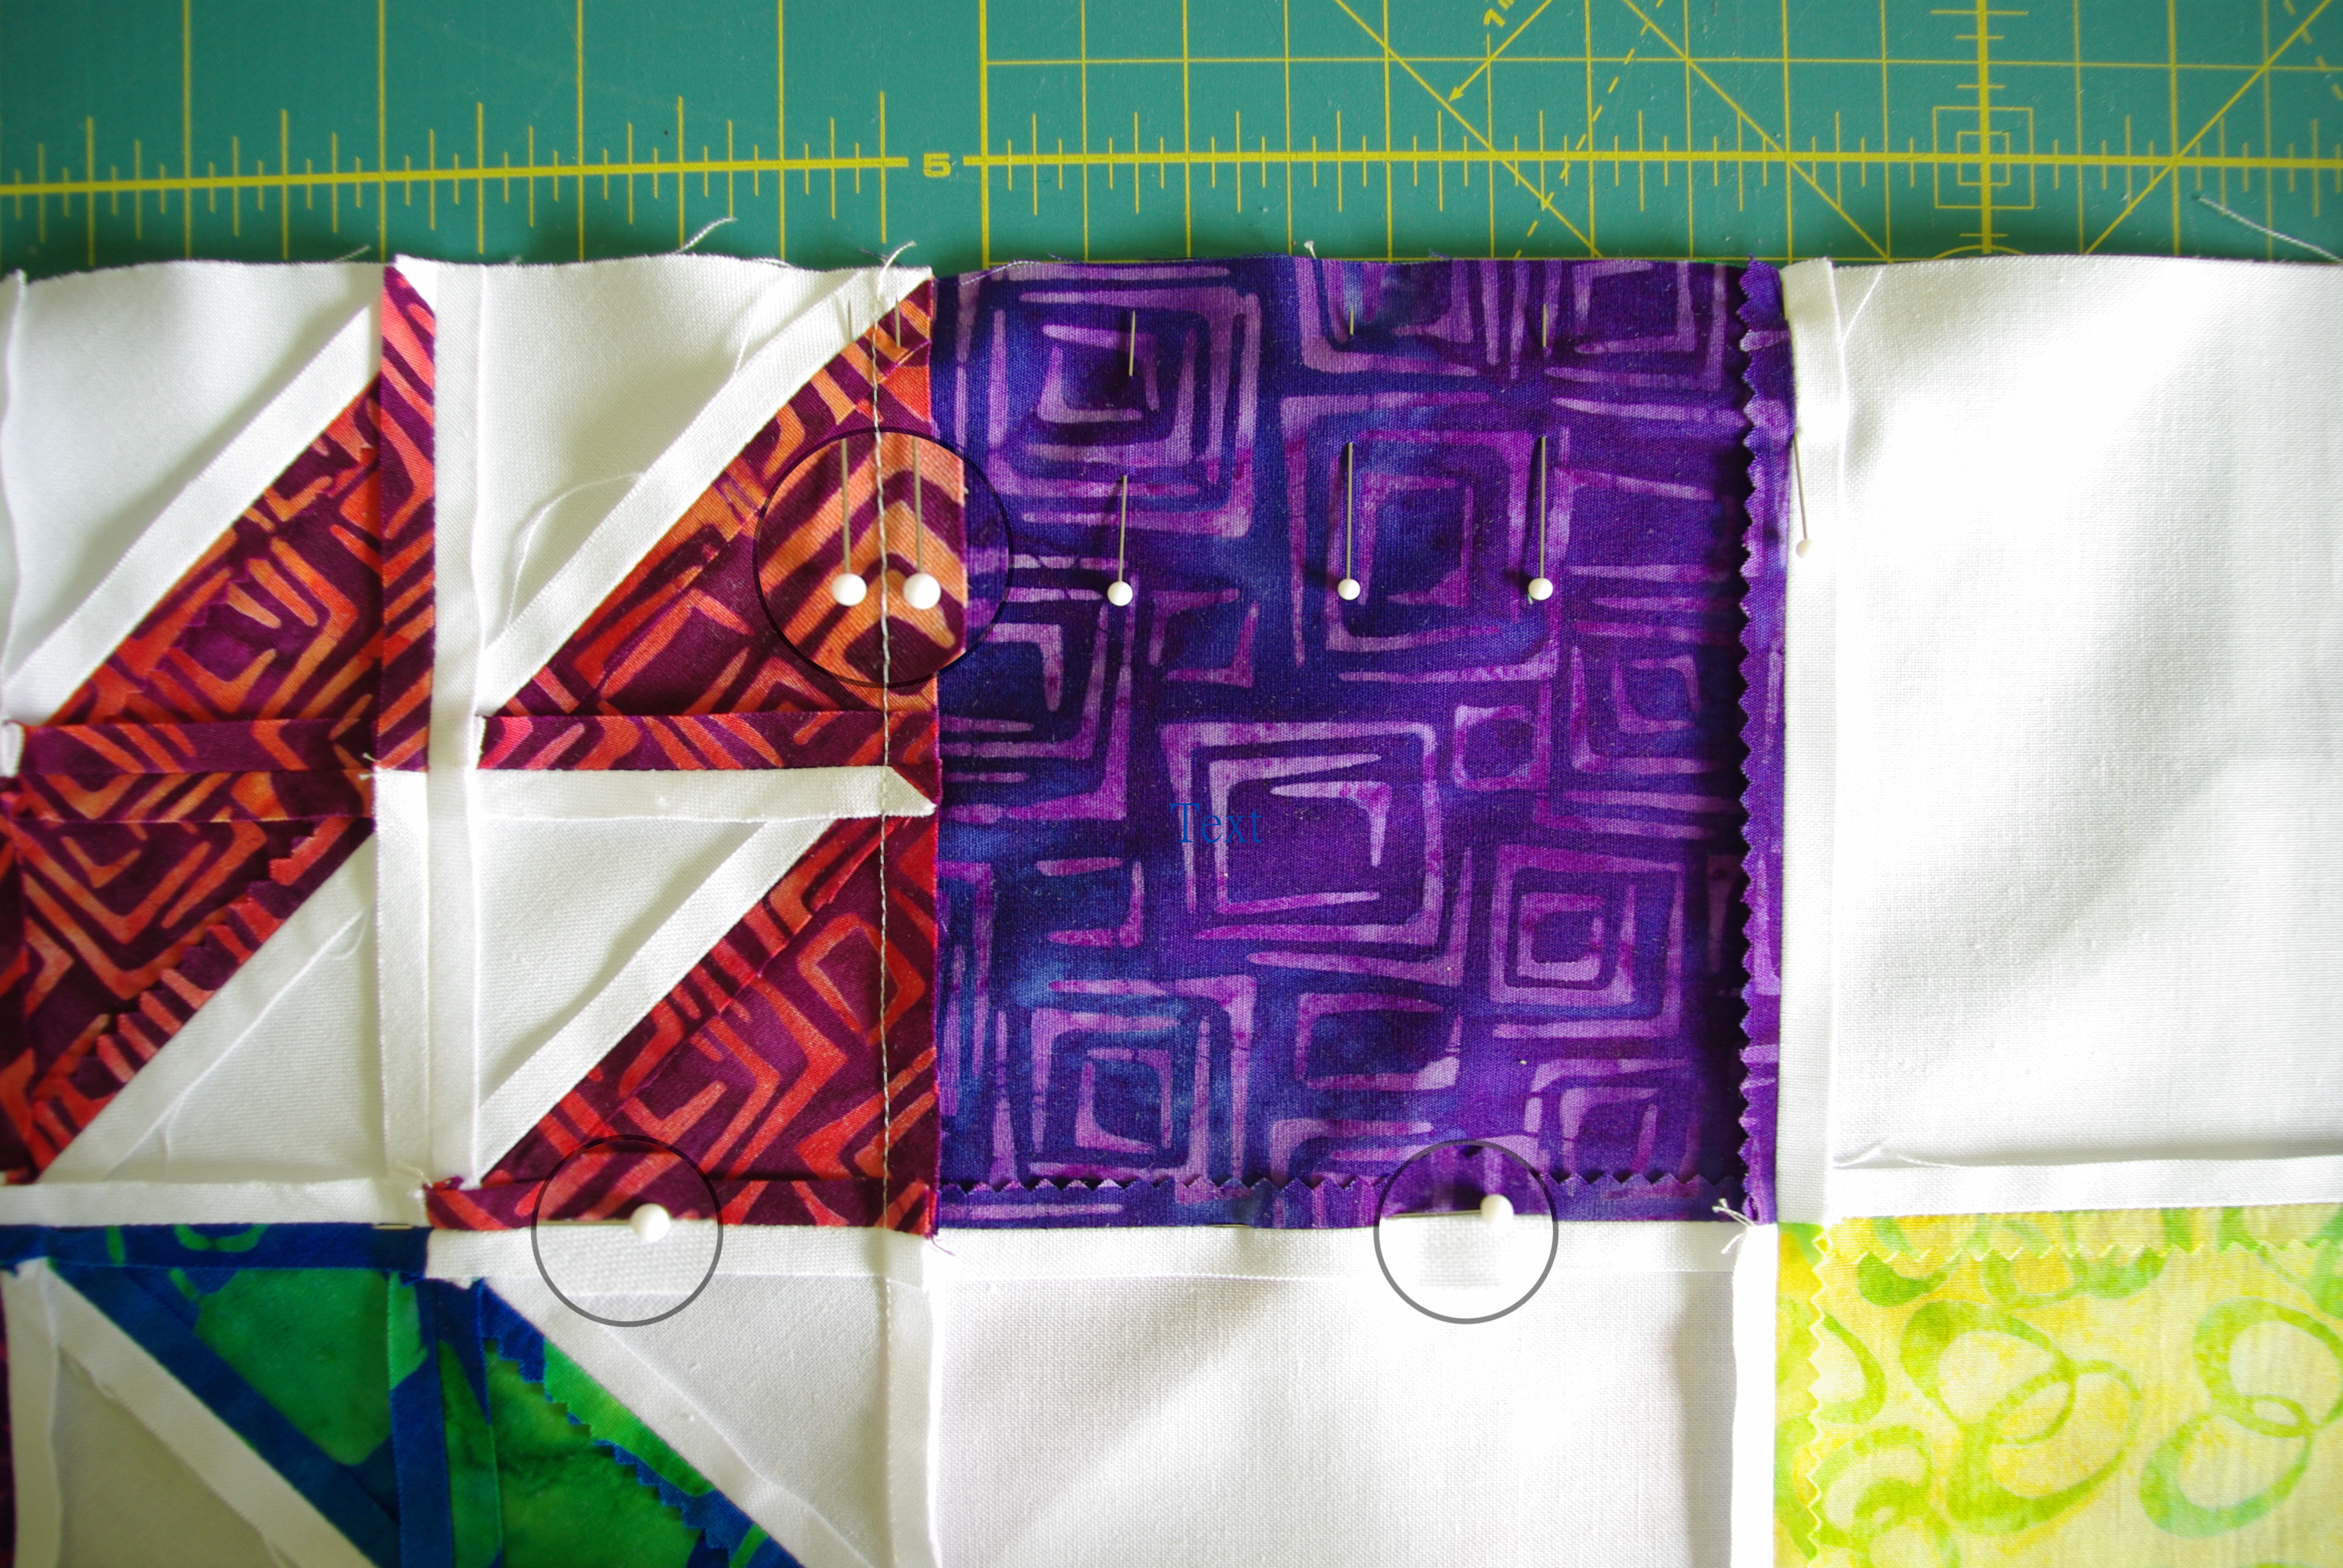
Pin, pin, pin! Some quilters don’t like to pin because it slows them down. I like the accuracy of pinning so I’ll take the extra time. It’s definitely worth it.
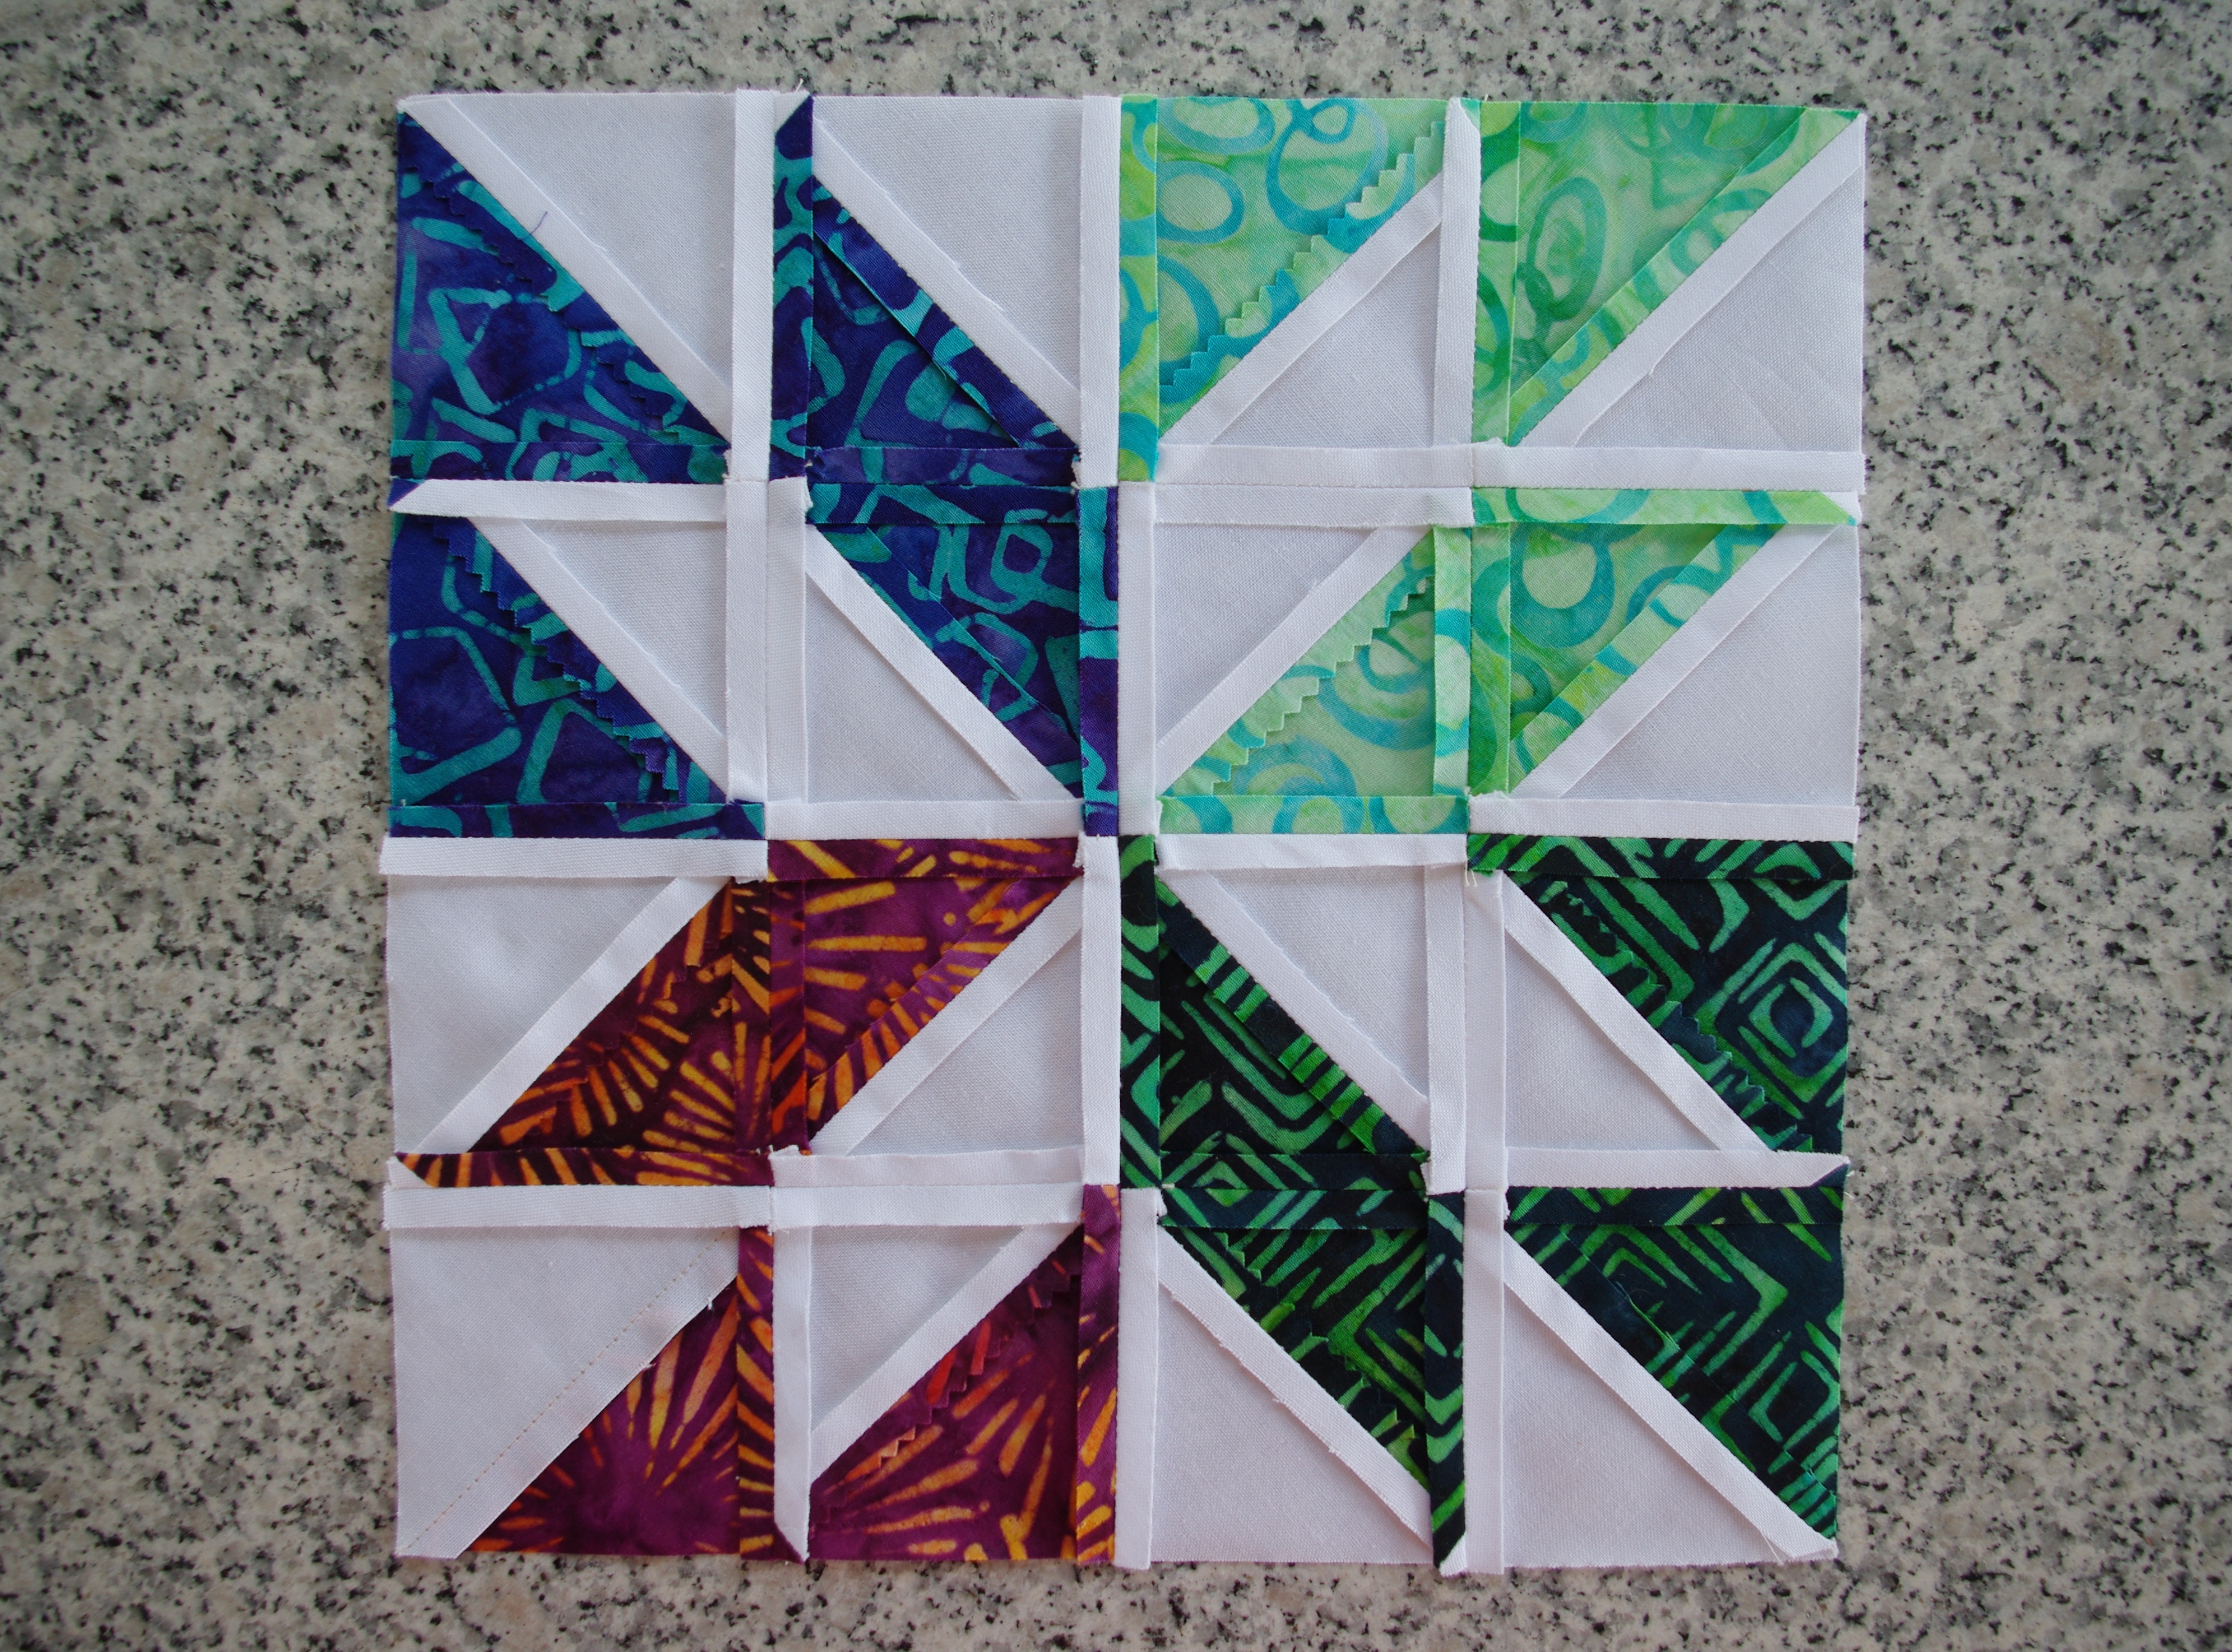
Before I began sewing rows together I numbered the back of each block in the seam, in order per row using a Frixion pen (you can see my sideways #8 in the above photo). If you end up making a mistake, having had the blocks numbered will definitely help. I actually sewed one entire row upside down AND backwards! I was glad I had the blocks numbered as it helped me fix the problem and it helped me to realize I had done it wrong.
I also pinned at both side seams and the center seams within the top block before I sewed my rows together. This keeps everything aligned.
Lastly, when I sewed the blocks into rows, I pressed seams to the four patch. That way, blocks in every other row were pressed opposite and my seams nested perfectly. Also, when I sewed my rows together I pressed seams to the row that had the most four patch blocks because pressing the star block seam flat cooperated better.
Here are a few photos of my process as I went along.
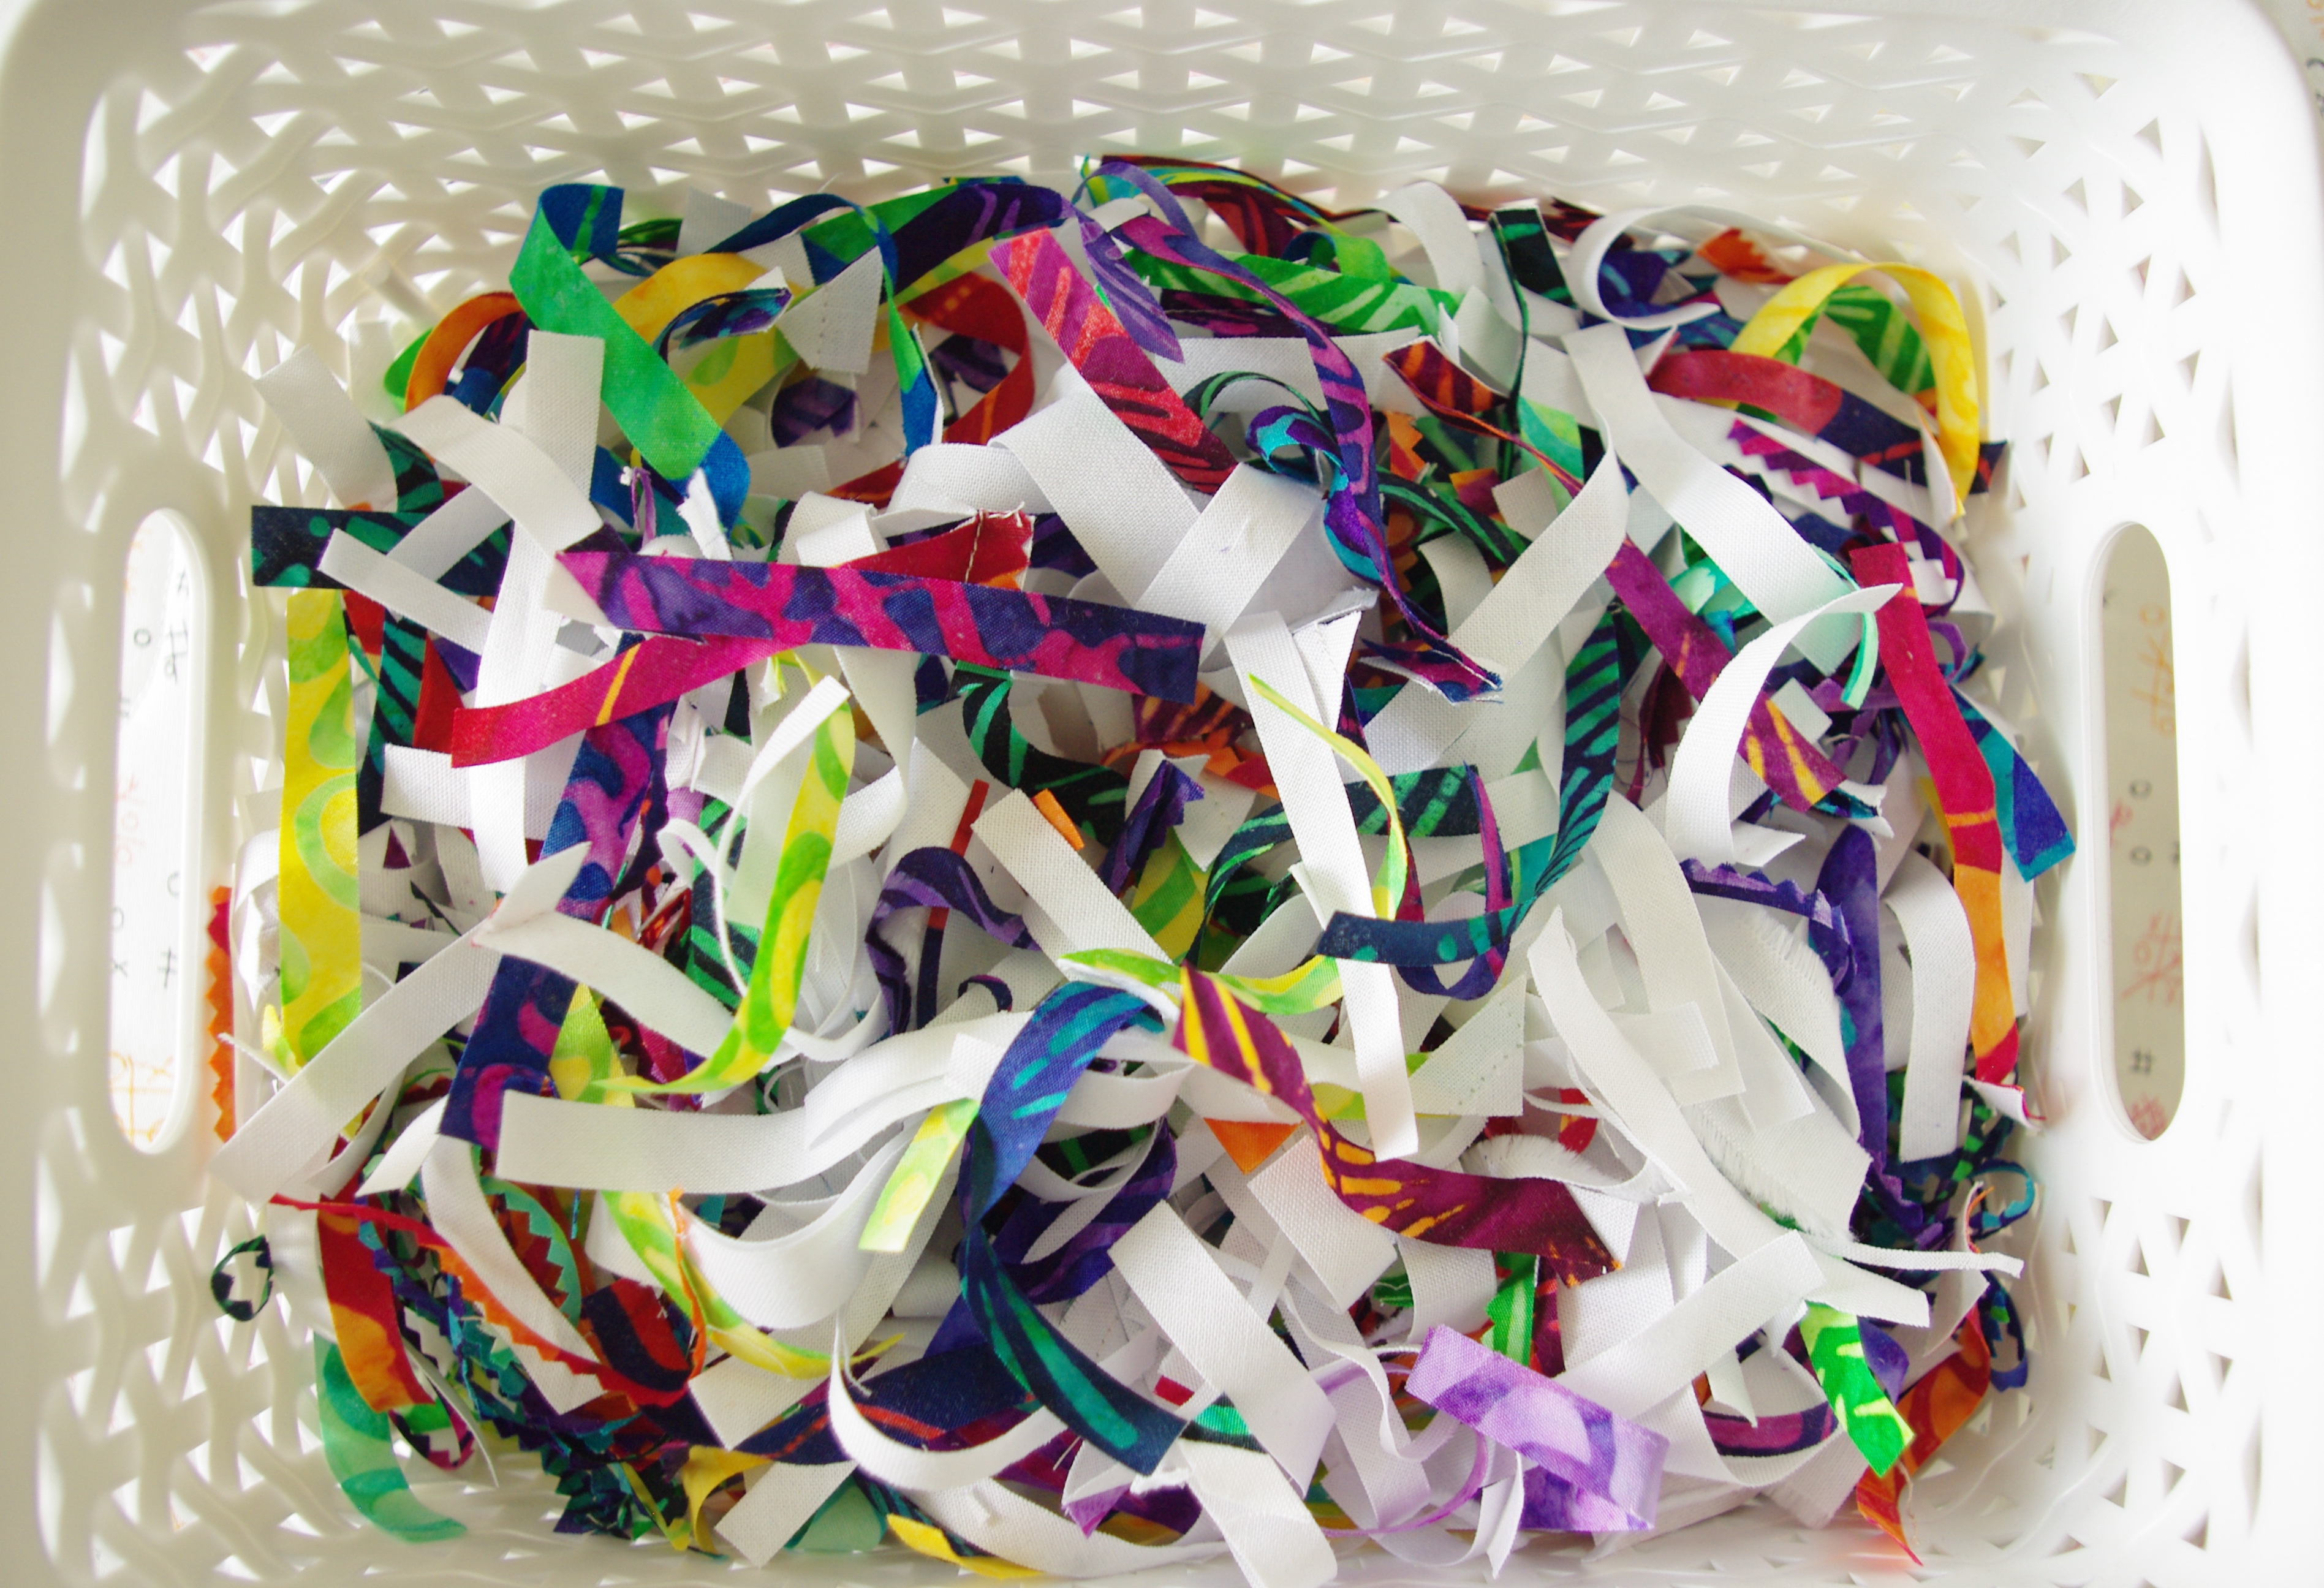
I absolutely loved the batiks. They’re so nice and crisp and are just a dream to work with. This collection has such vibrant colors that even the scraps were gorgeous. 🙂
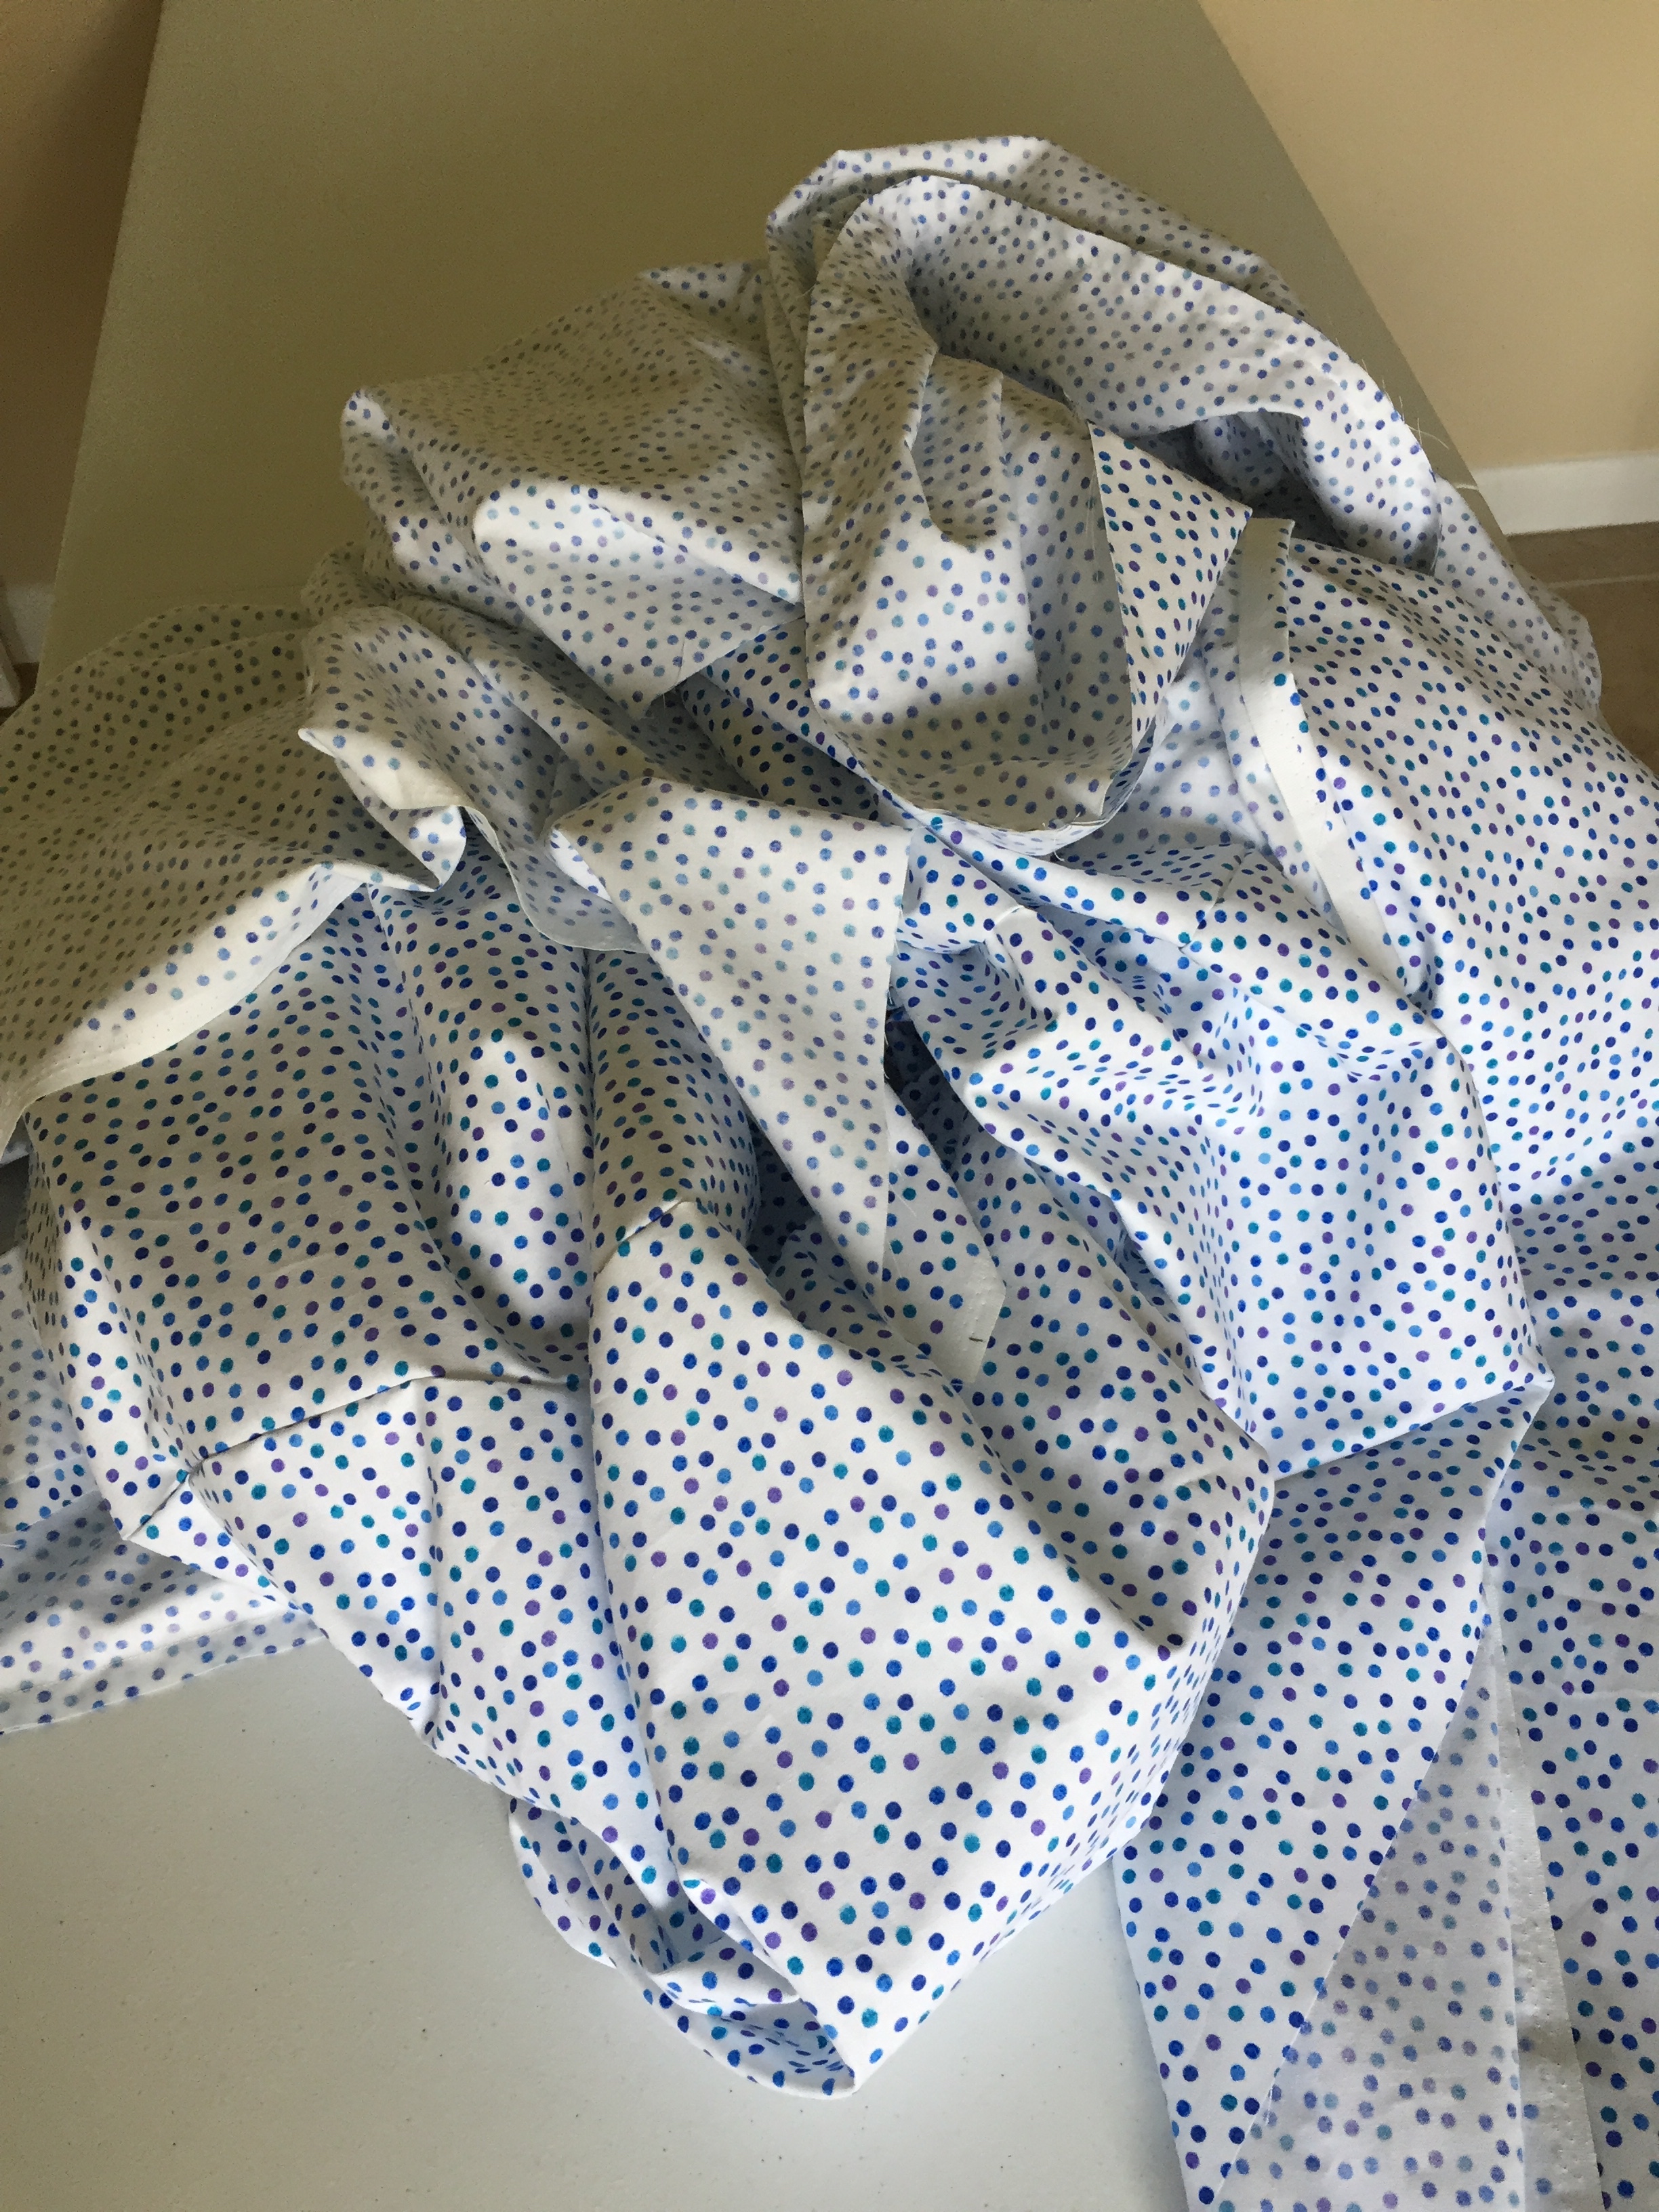
Because this quilt was so large I needed 9 yards of backing. So much fabric!
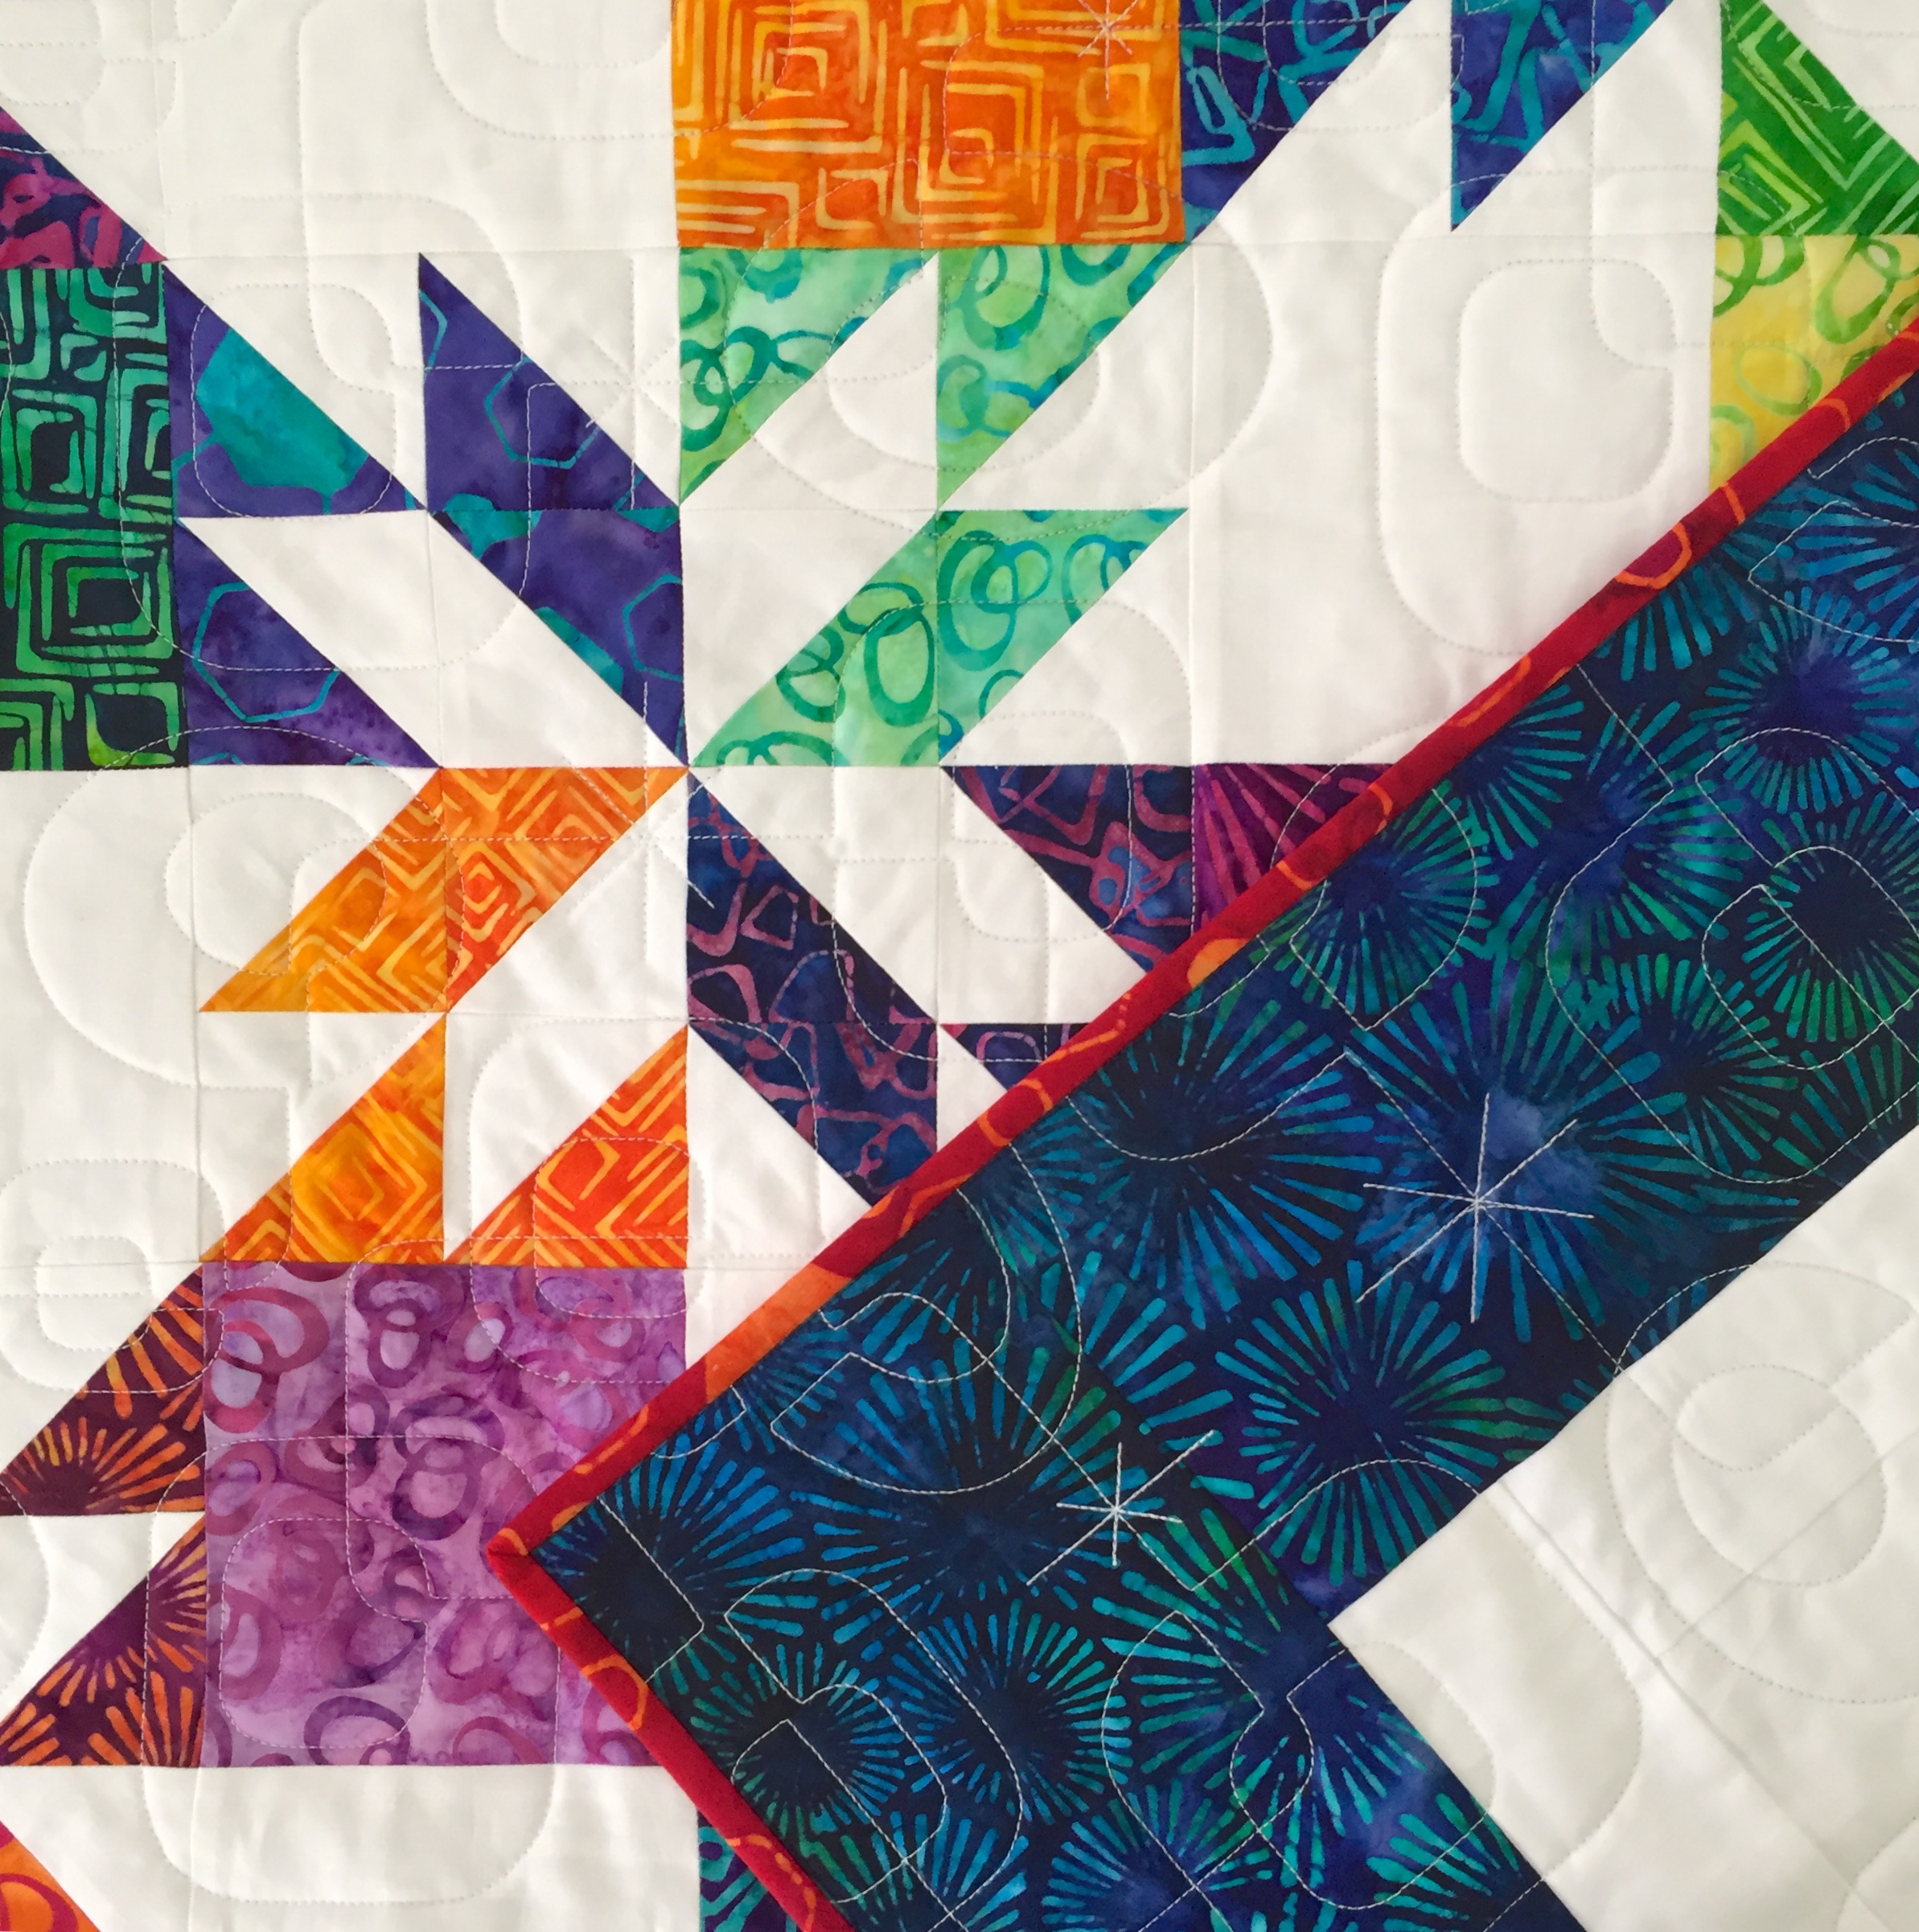
I also had my daughter choose what quiliting pattern she wanted. Here’s a close up of the mod squares motif she chose. I think it goes great with the fabric’s retro look.
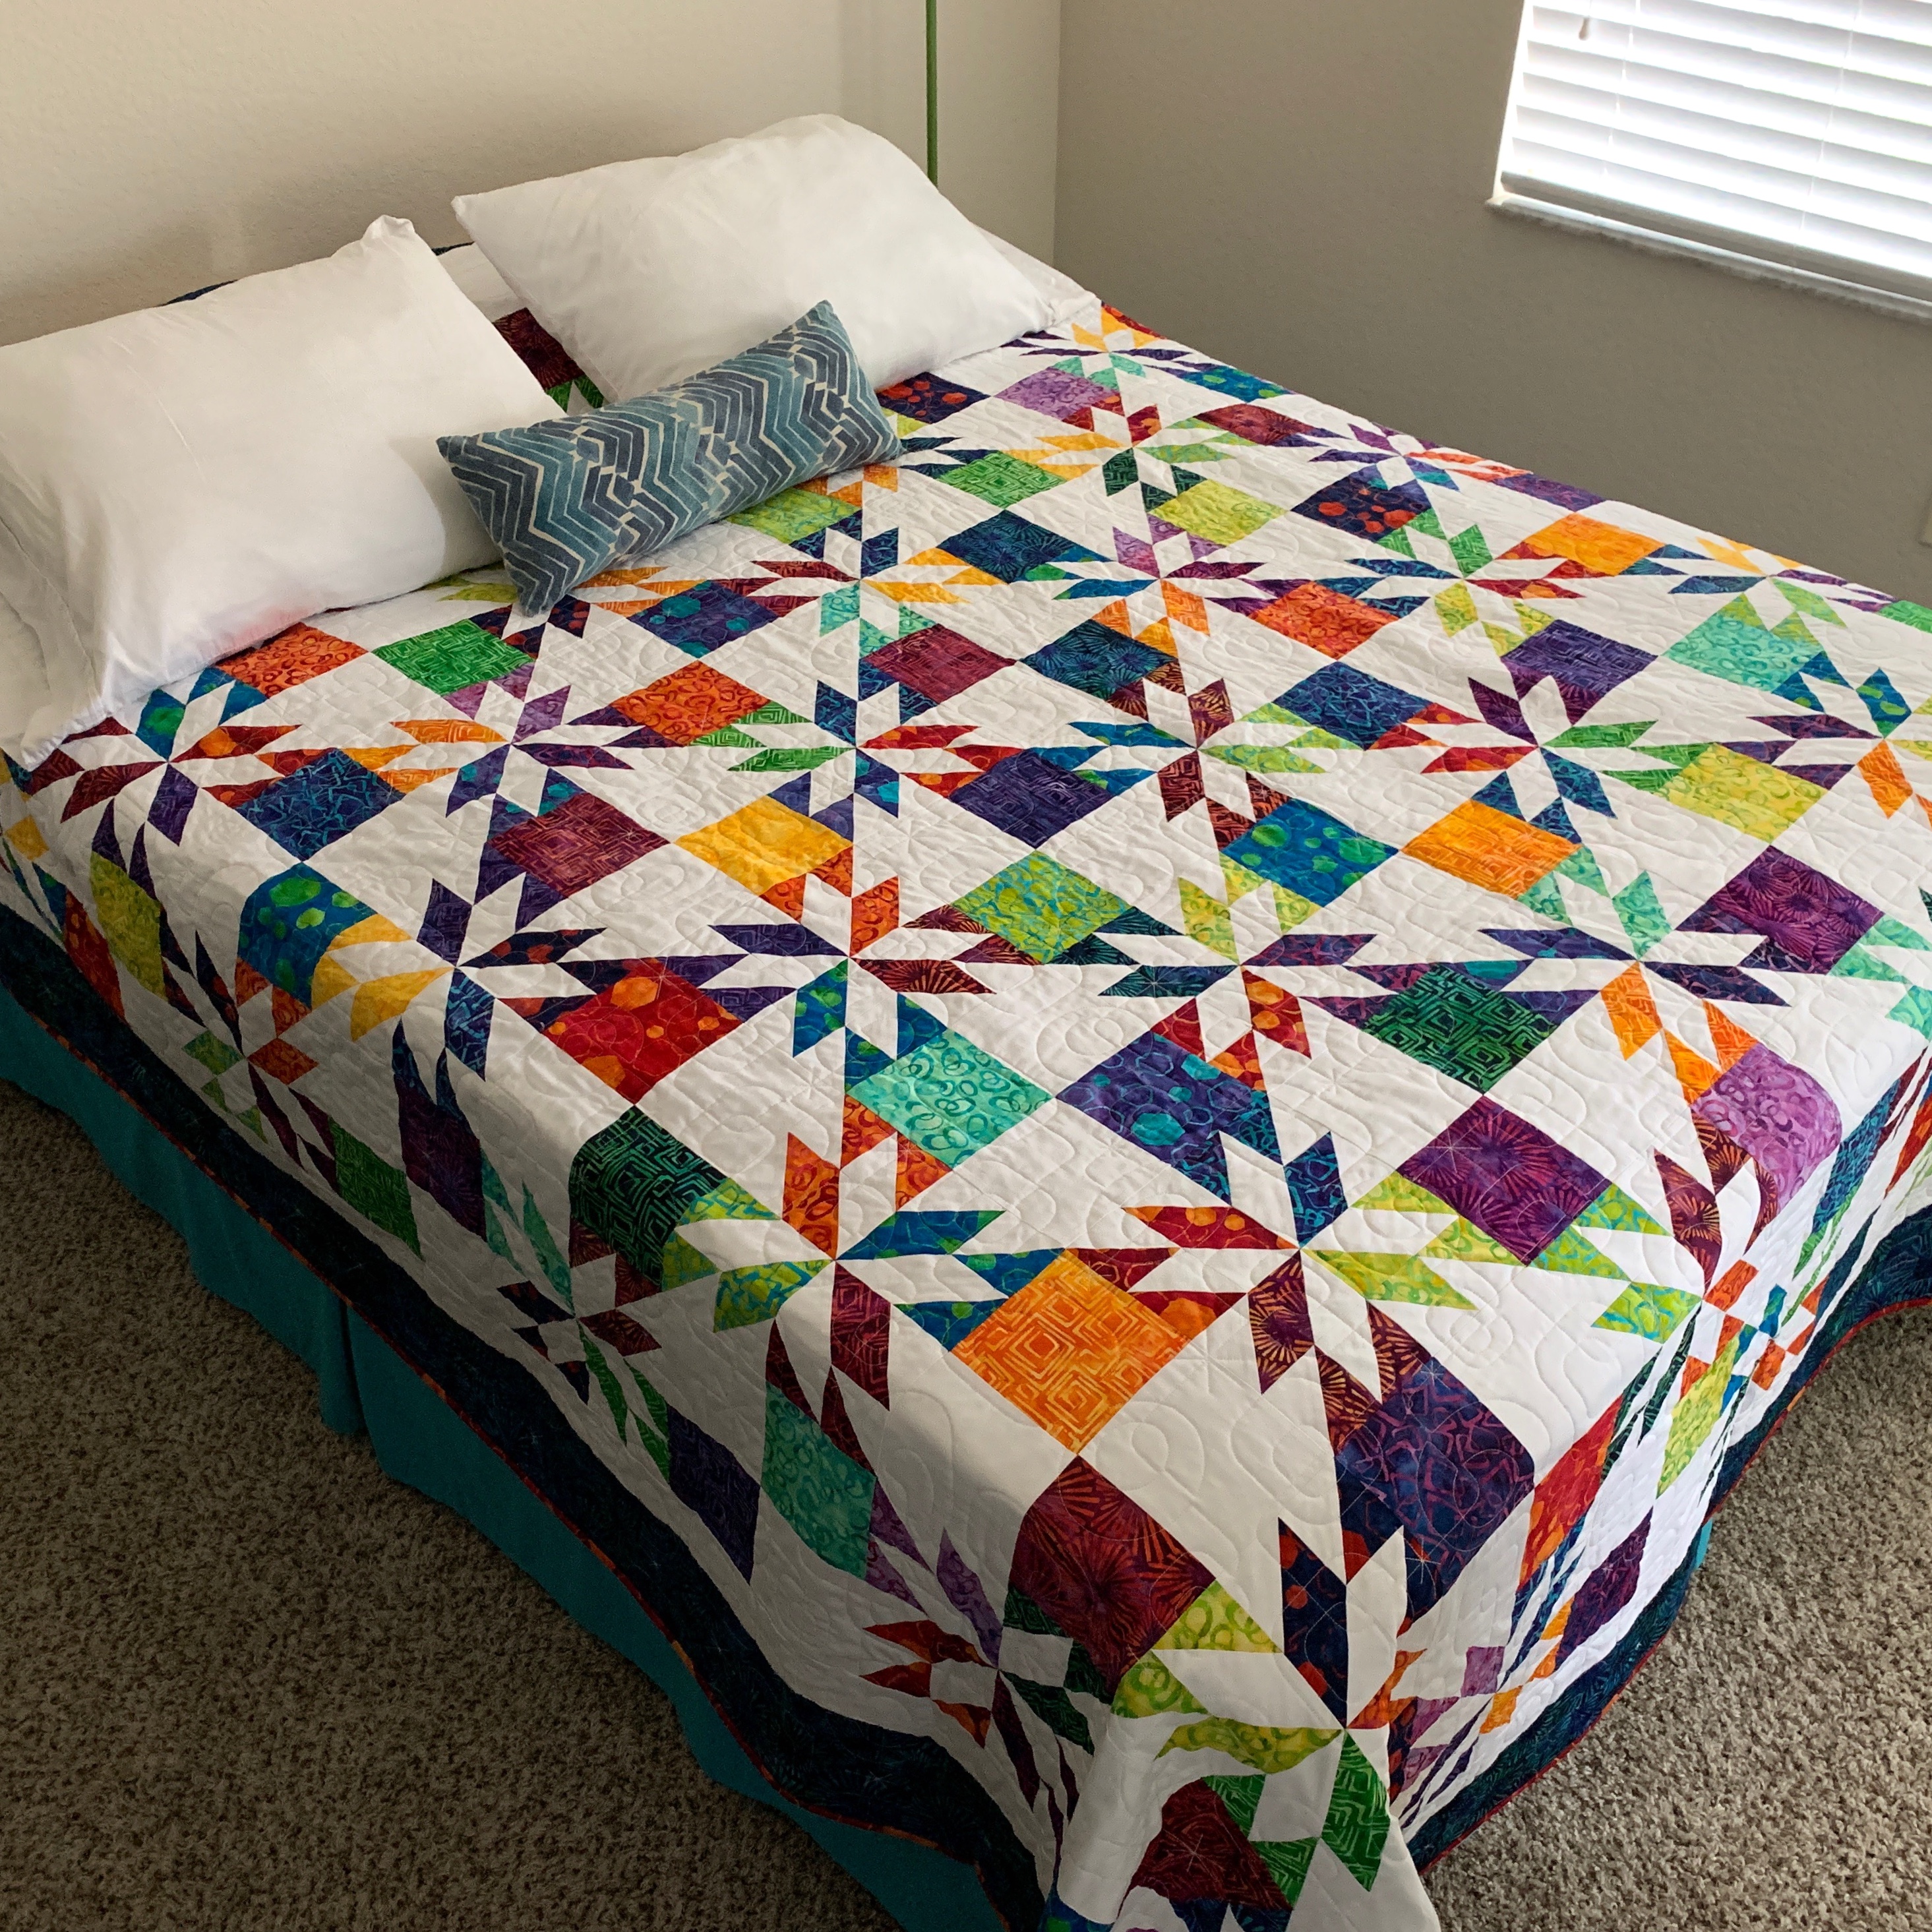
And finally, the finished quilt! By far, it’s the largest one I’ve ever made. It’s queen size and measures 95 ½” x 104 ½” which is pretty massive for a quilt!
My daughter was so happy with it and it brings tons of color into her bedroom, just like she wanted. And I’m pretty pleased with how it turned out too. I do have to admit that this was a huge undertaking and I’m pretty sure I’d only work that hard for one of my kids!
I promised my son one this year…I guess I better get busy. 🙂
When I started to quilt, some of the quilting language had me really confused. Everyday words referring to animals, winter and food with a quilting-related meaning….huh? It just didn’t make sense. If your experience is one of the same, this post will help clarify some of the terminology used that has other meanings.
I chose my top ten favorites, or I should say, my top ten most confusing quilting terms. 🙂
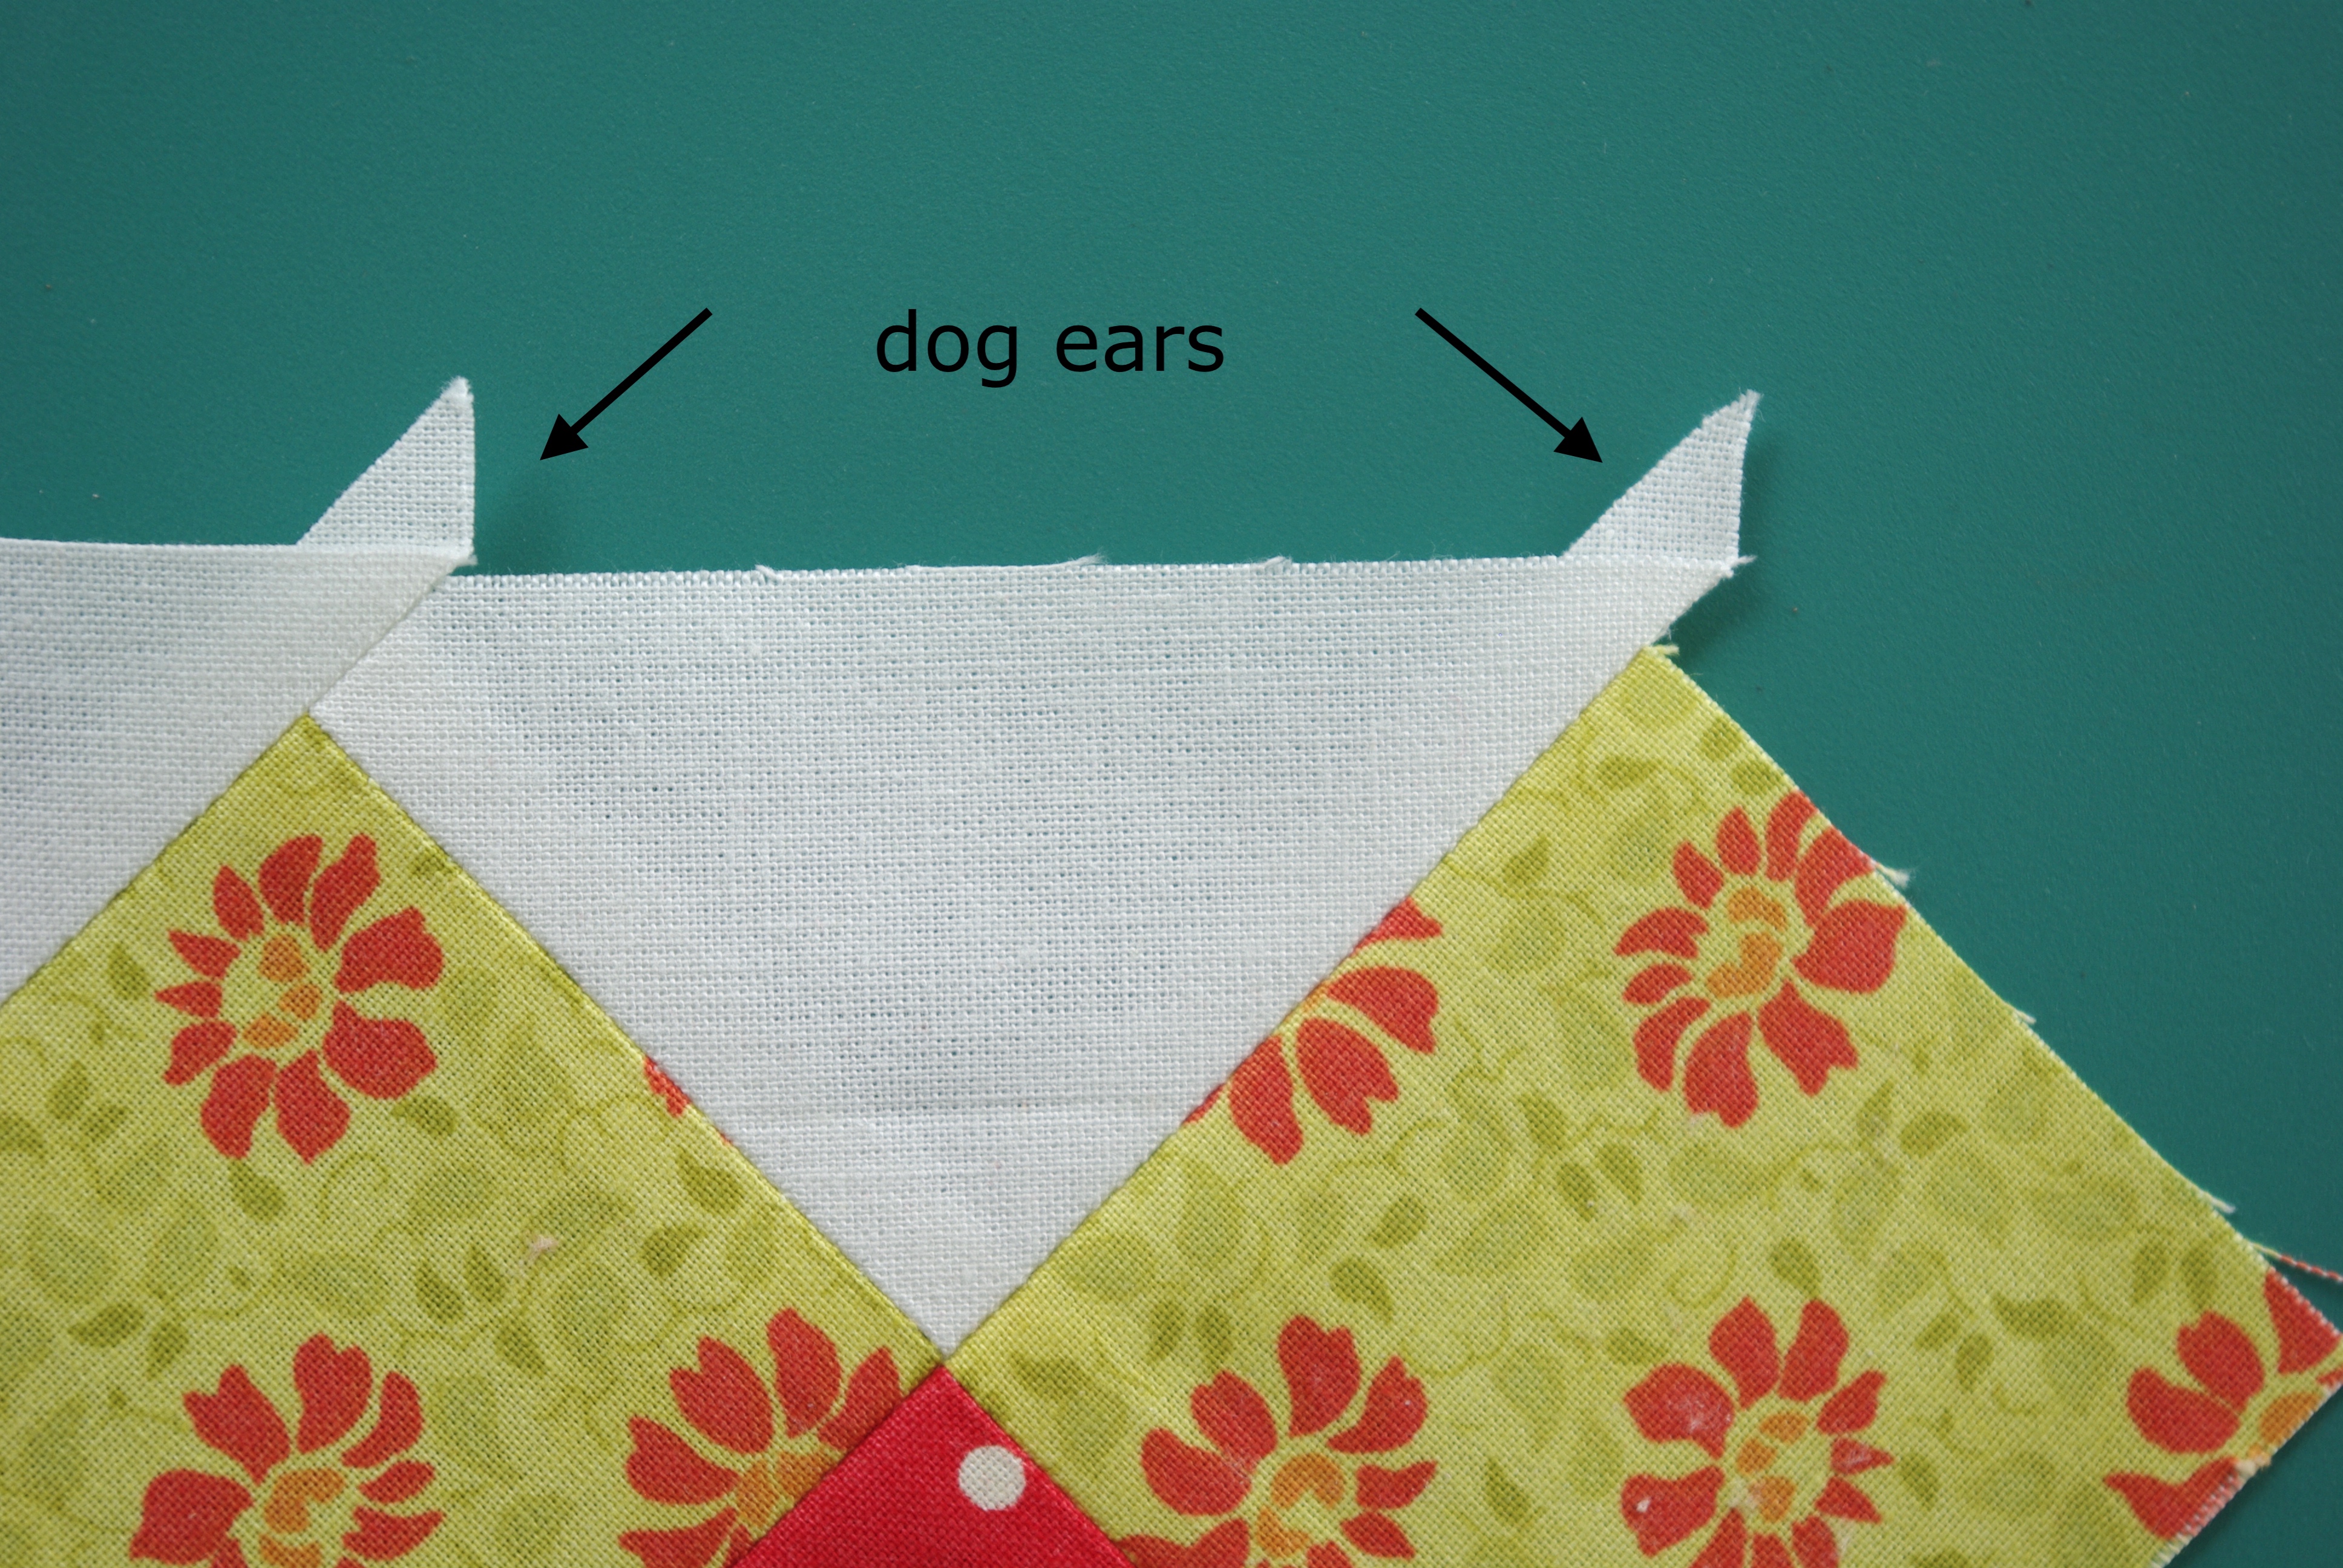
1. Dog ears – Dog ears are those small pieces of fabric that appear in quilt block corners and edges when two triangular pieces are sewn together—results of a diagonal seam. Always trim dog ears before finishing a quilt block.
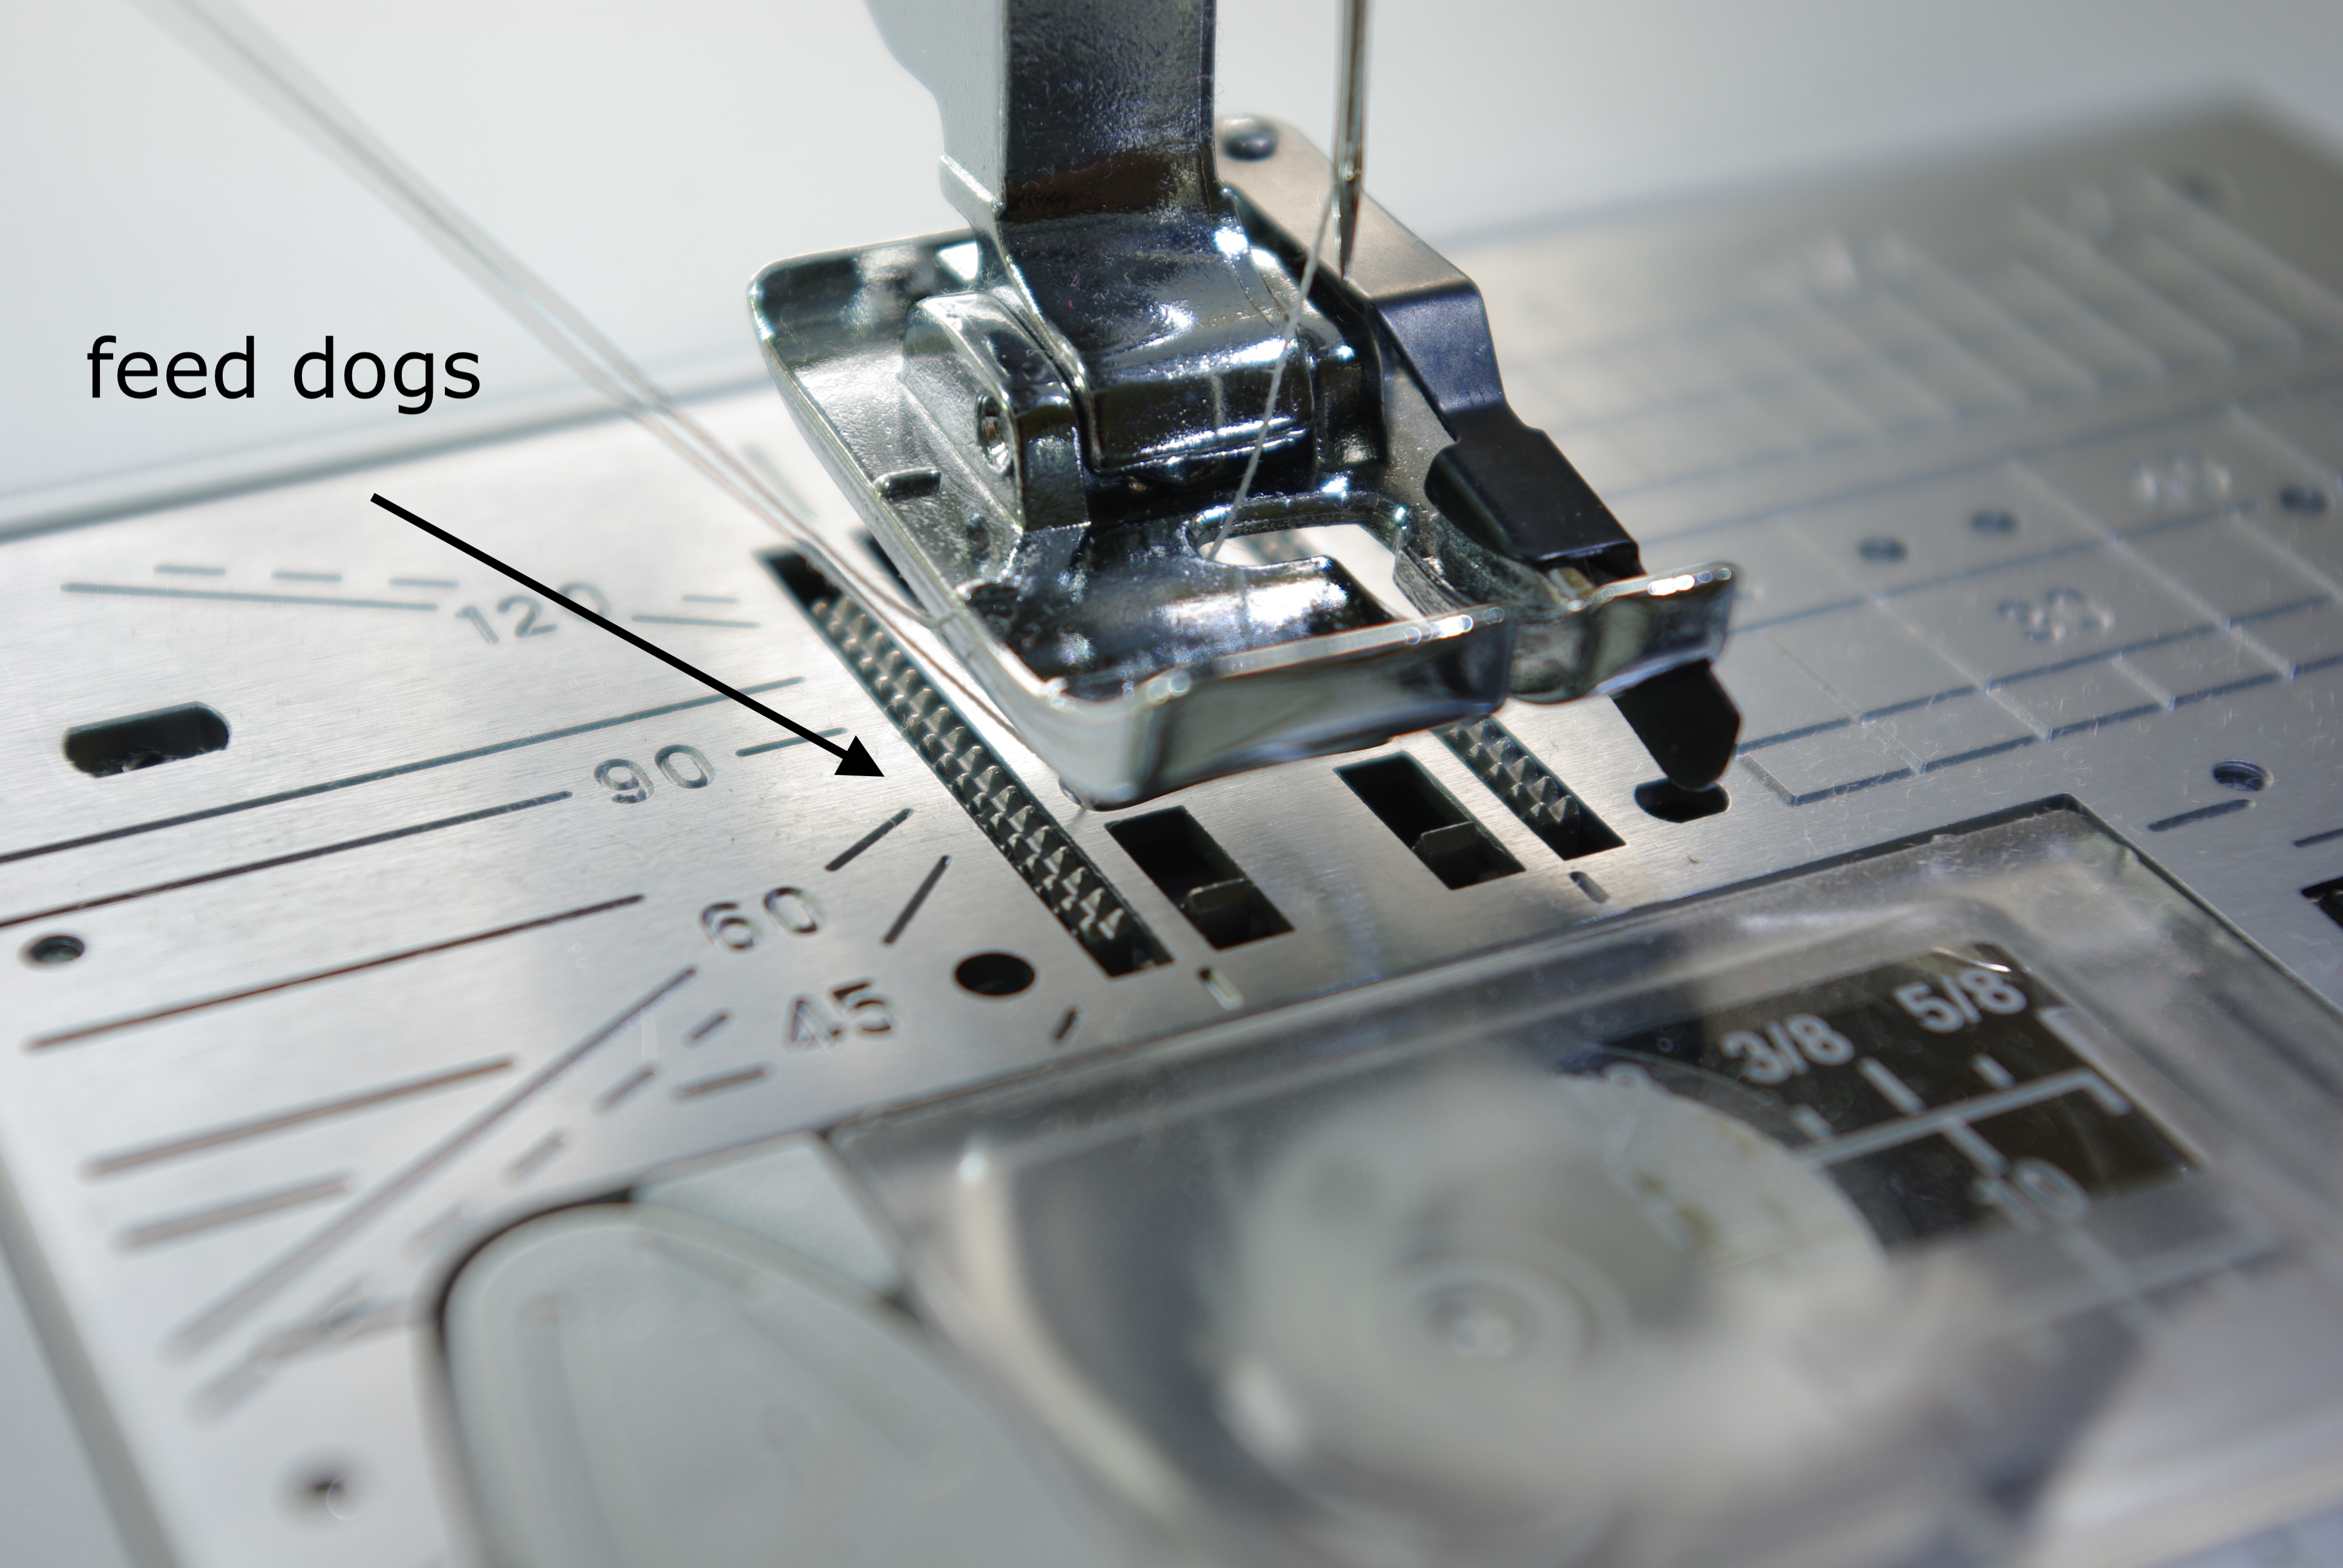
2. Feed dogs – The feed dogs are the metal teeth located in the slots in a sewing machine’s needle plate. Feed dogs are comprised of metal bars, crosscut with diagonal teeth that move back and forth; they grip fabric and pull it through the machine and away from the needle.
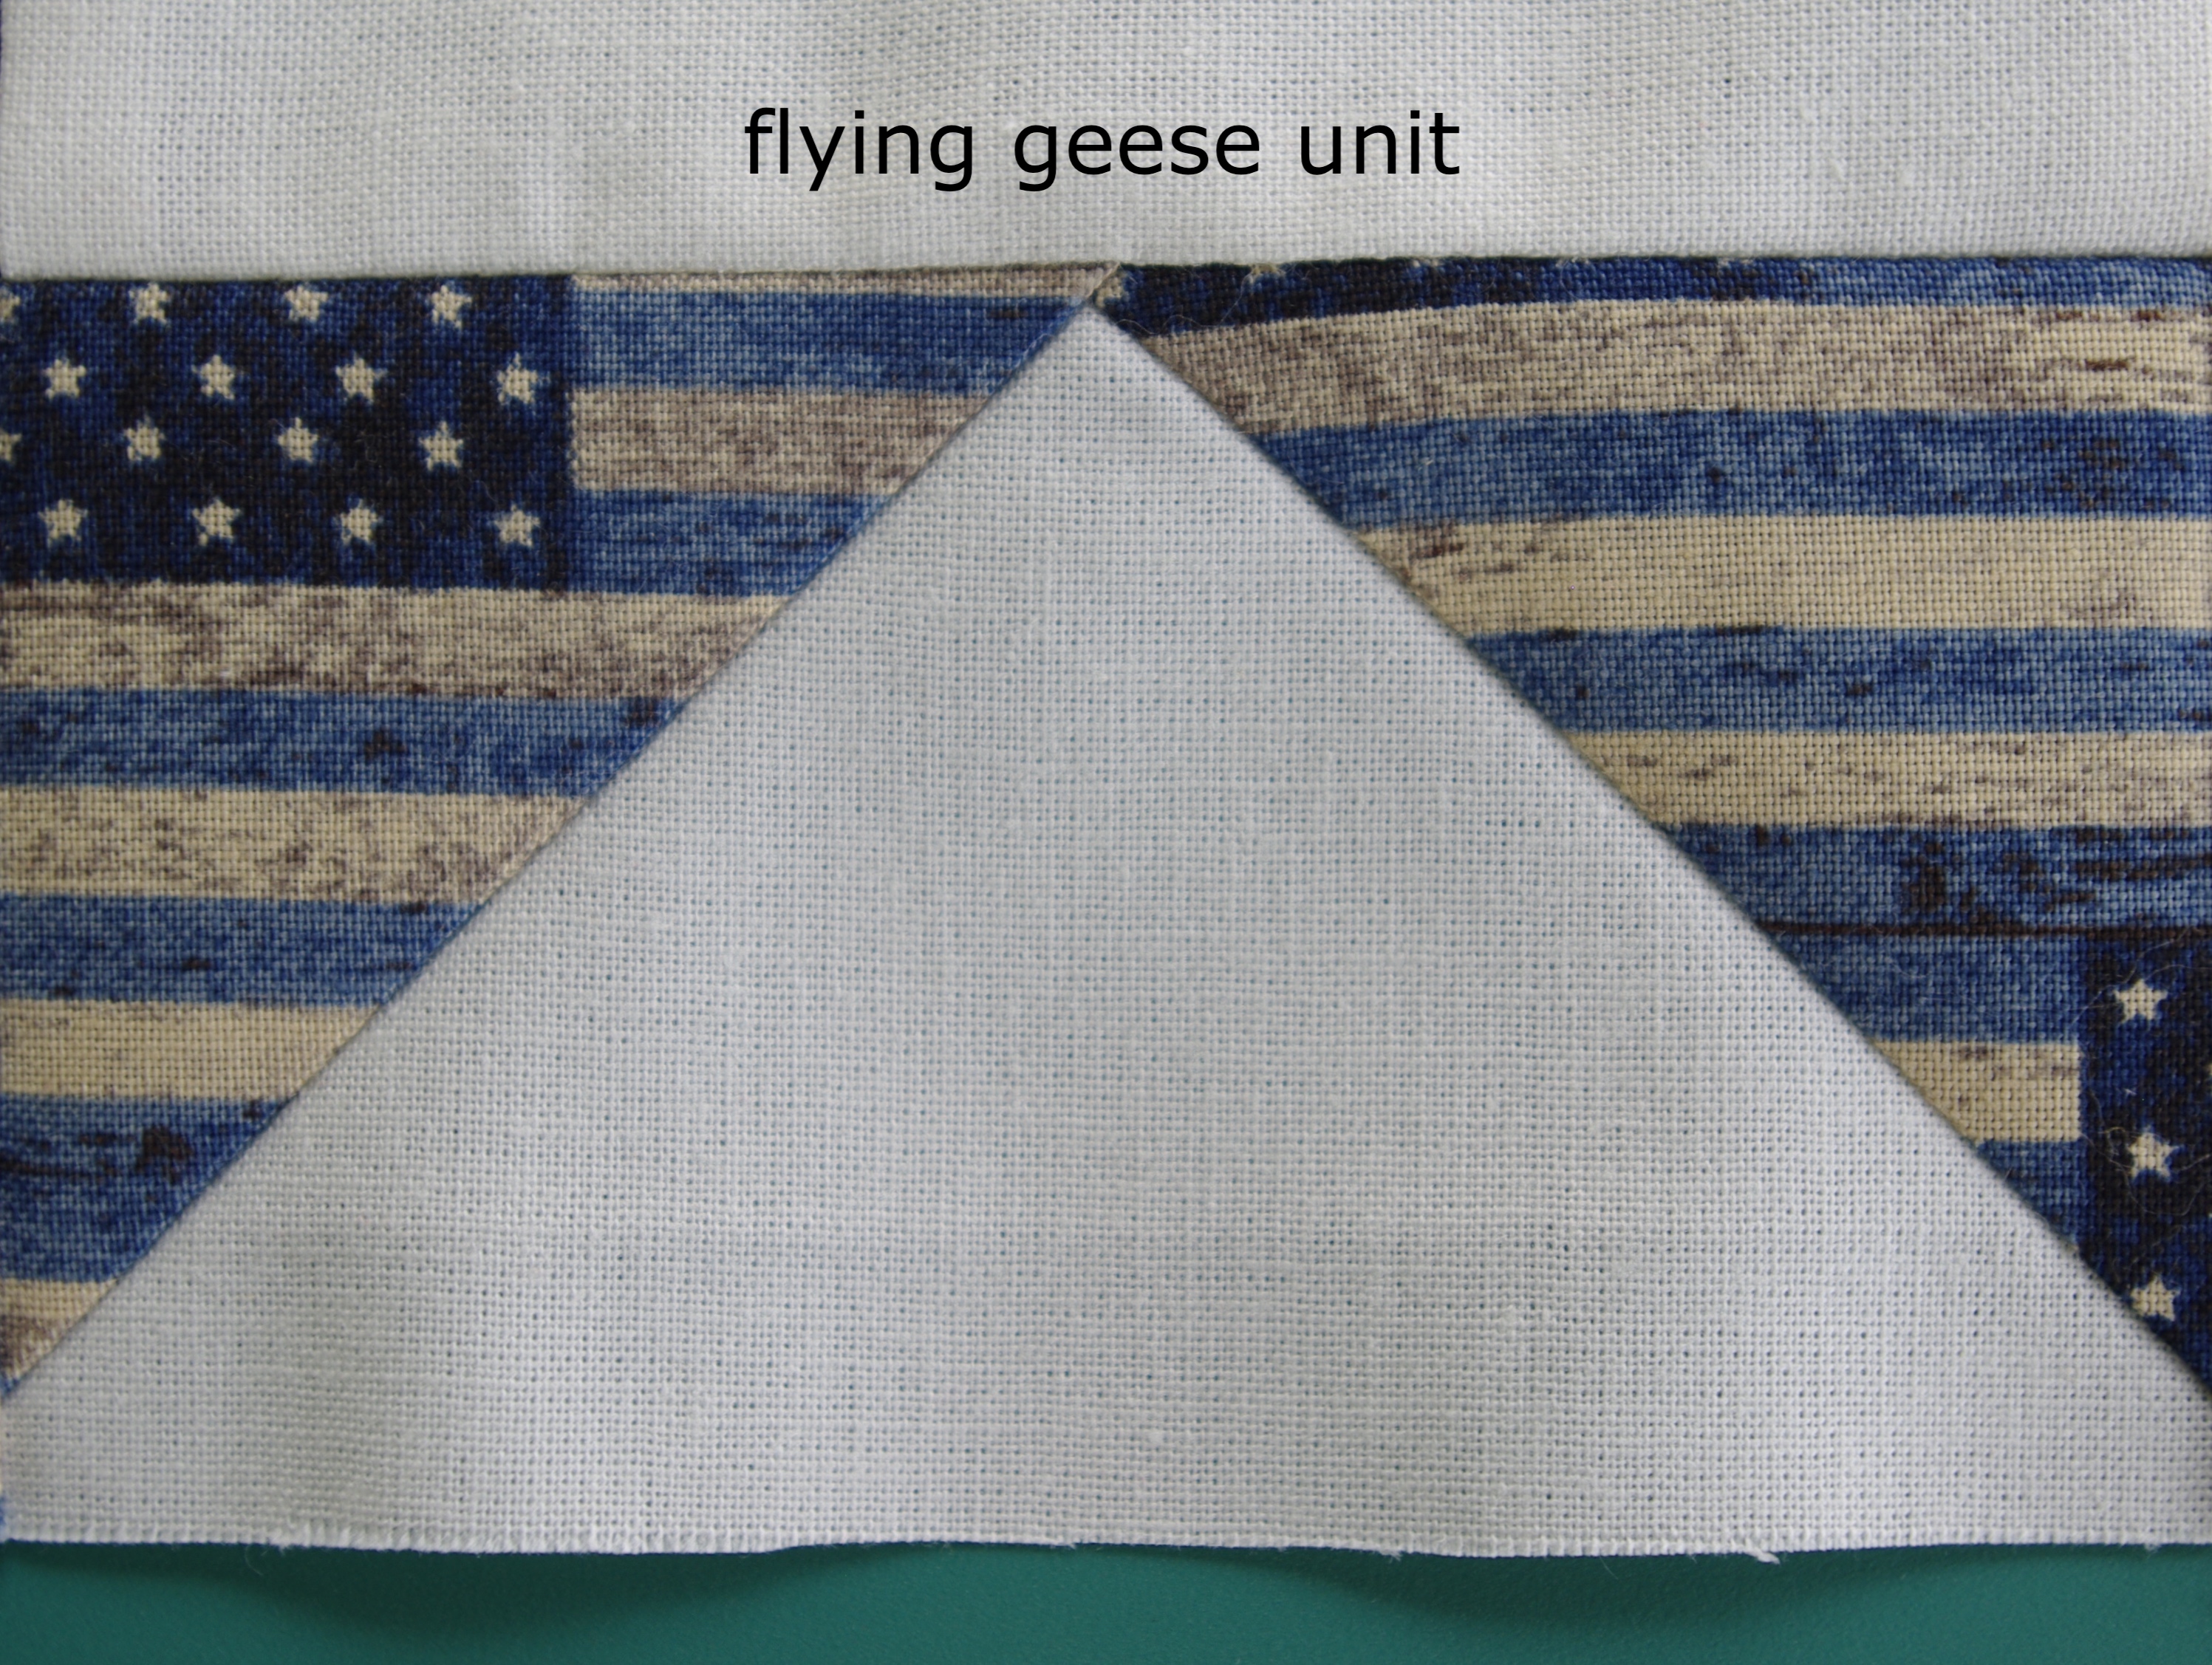
3. Flying geese – Flying geese is a traditional quilt block pattern created by sewing a triangle at each end of a rectangular piece of fabric, forming a peak in the middle. Finished flying geese blocks resemble geese flying in formation, hence the name.
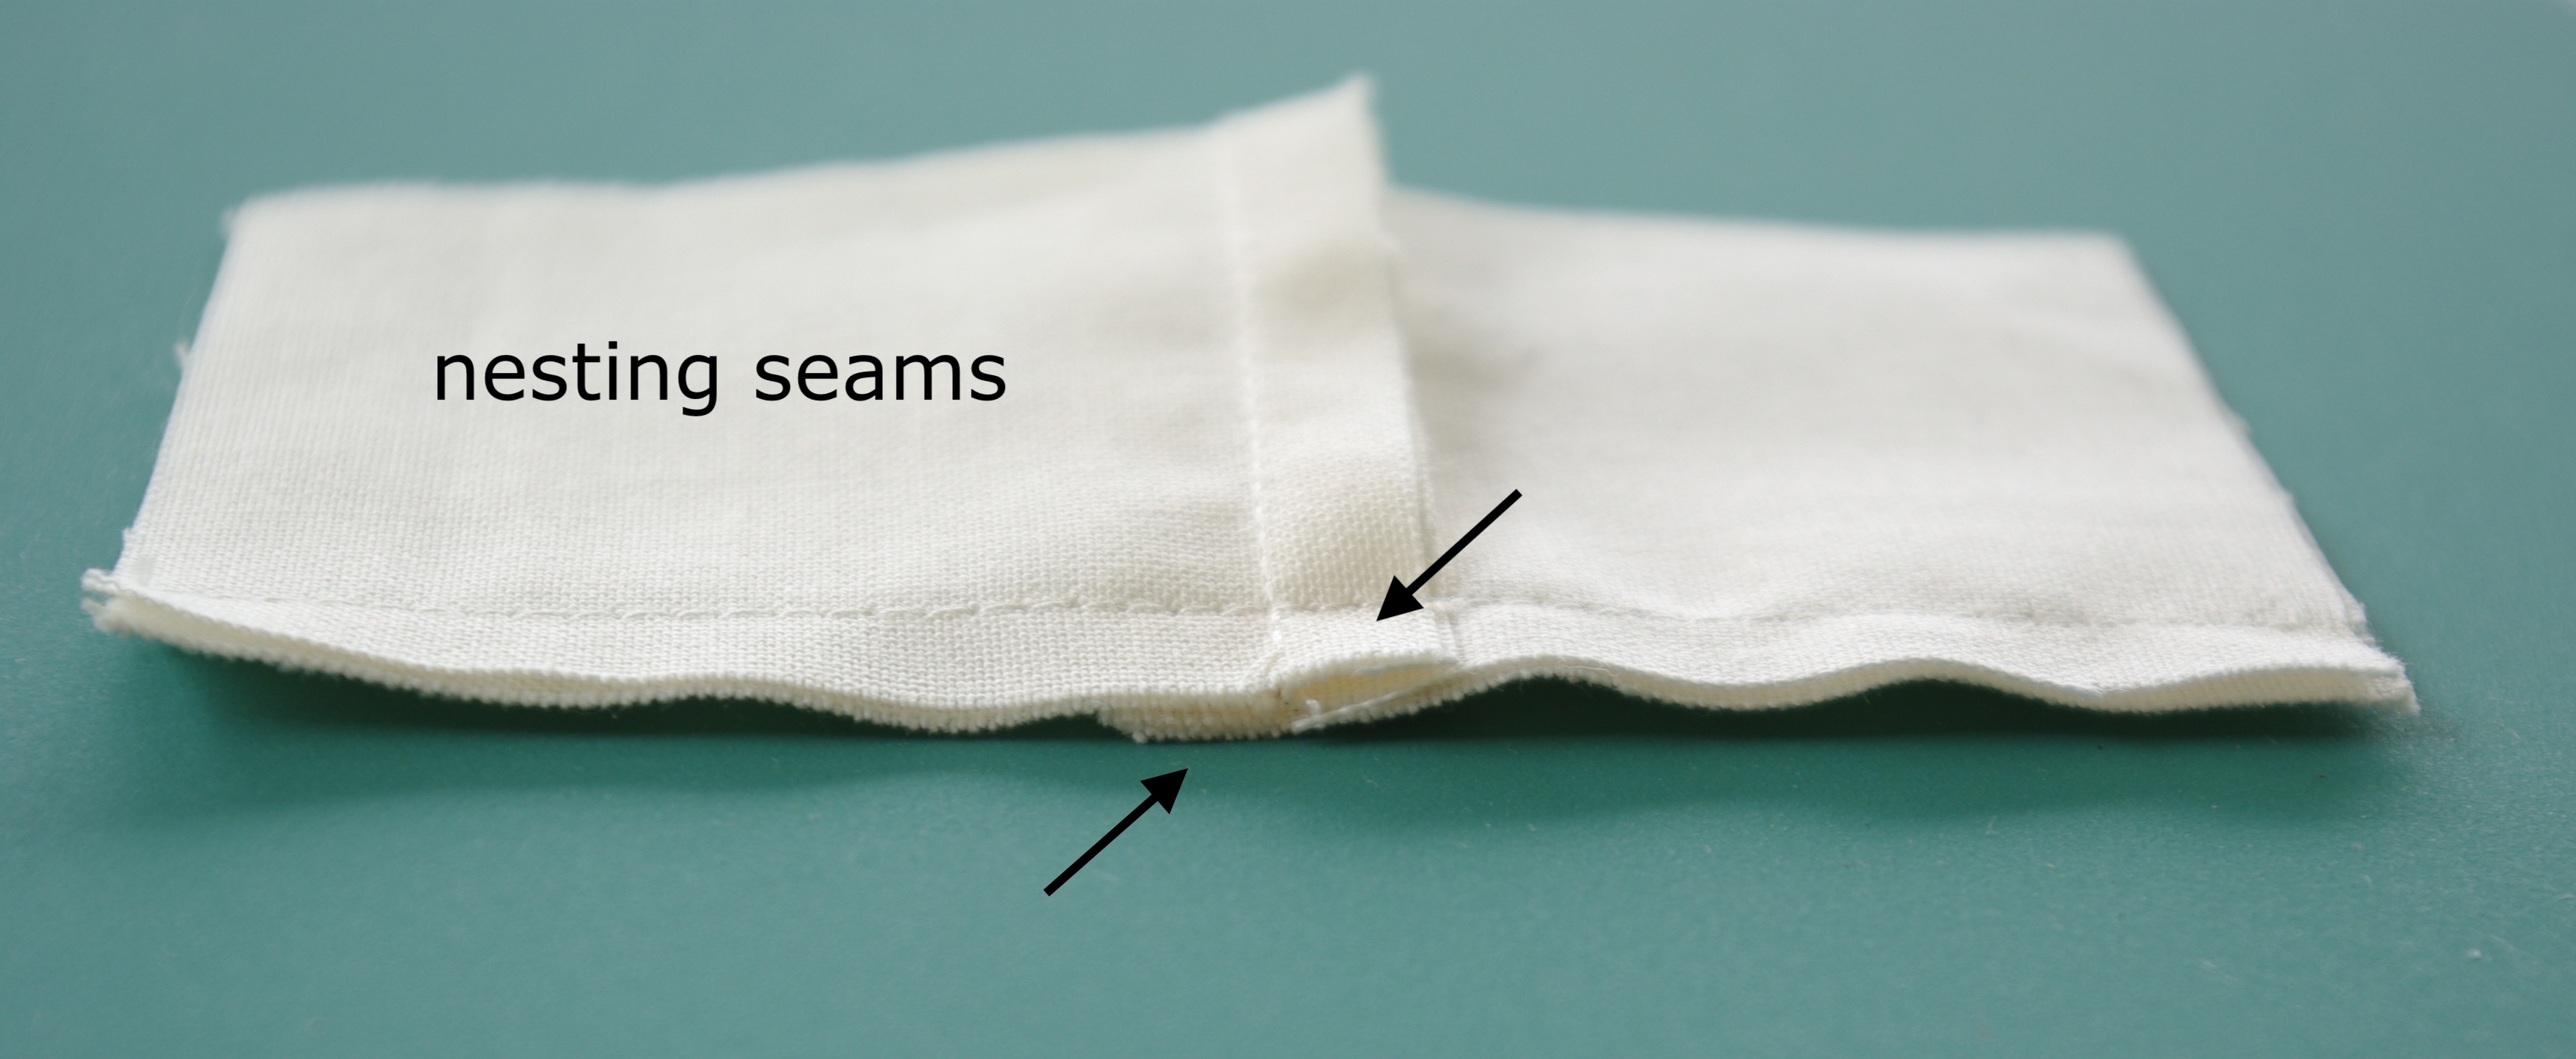
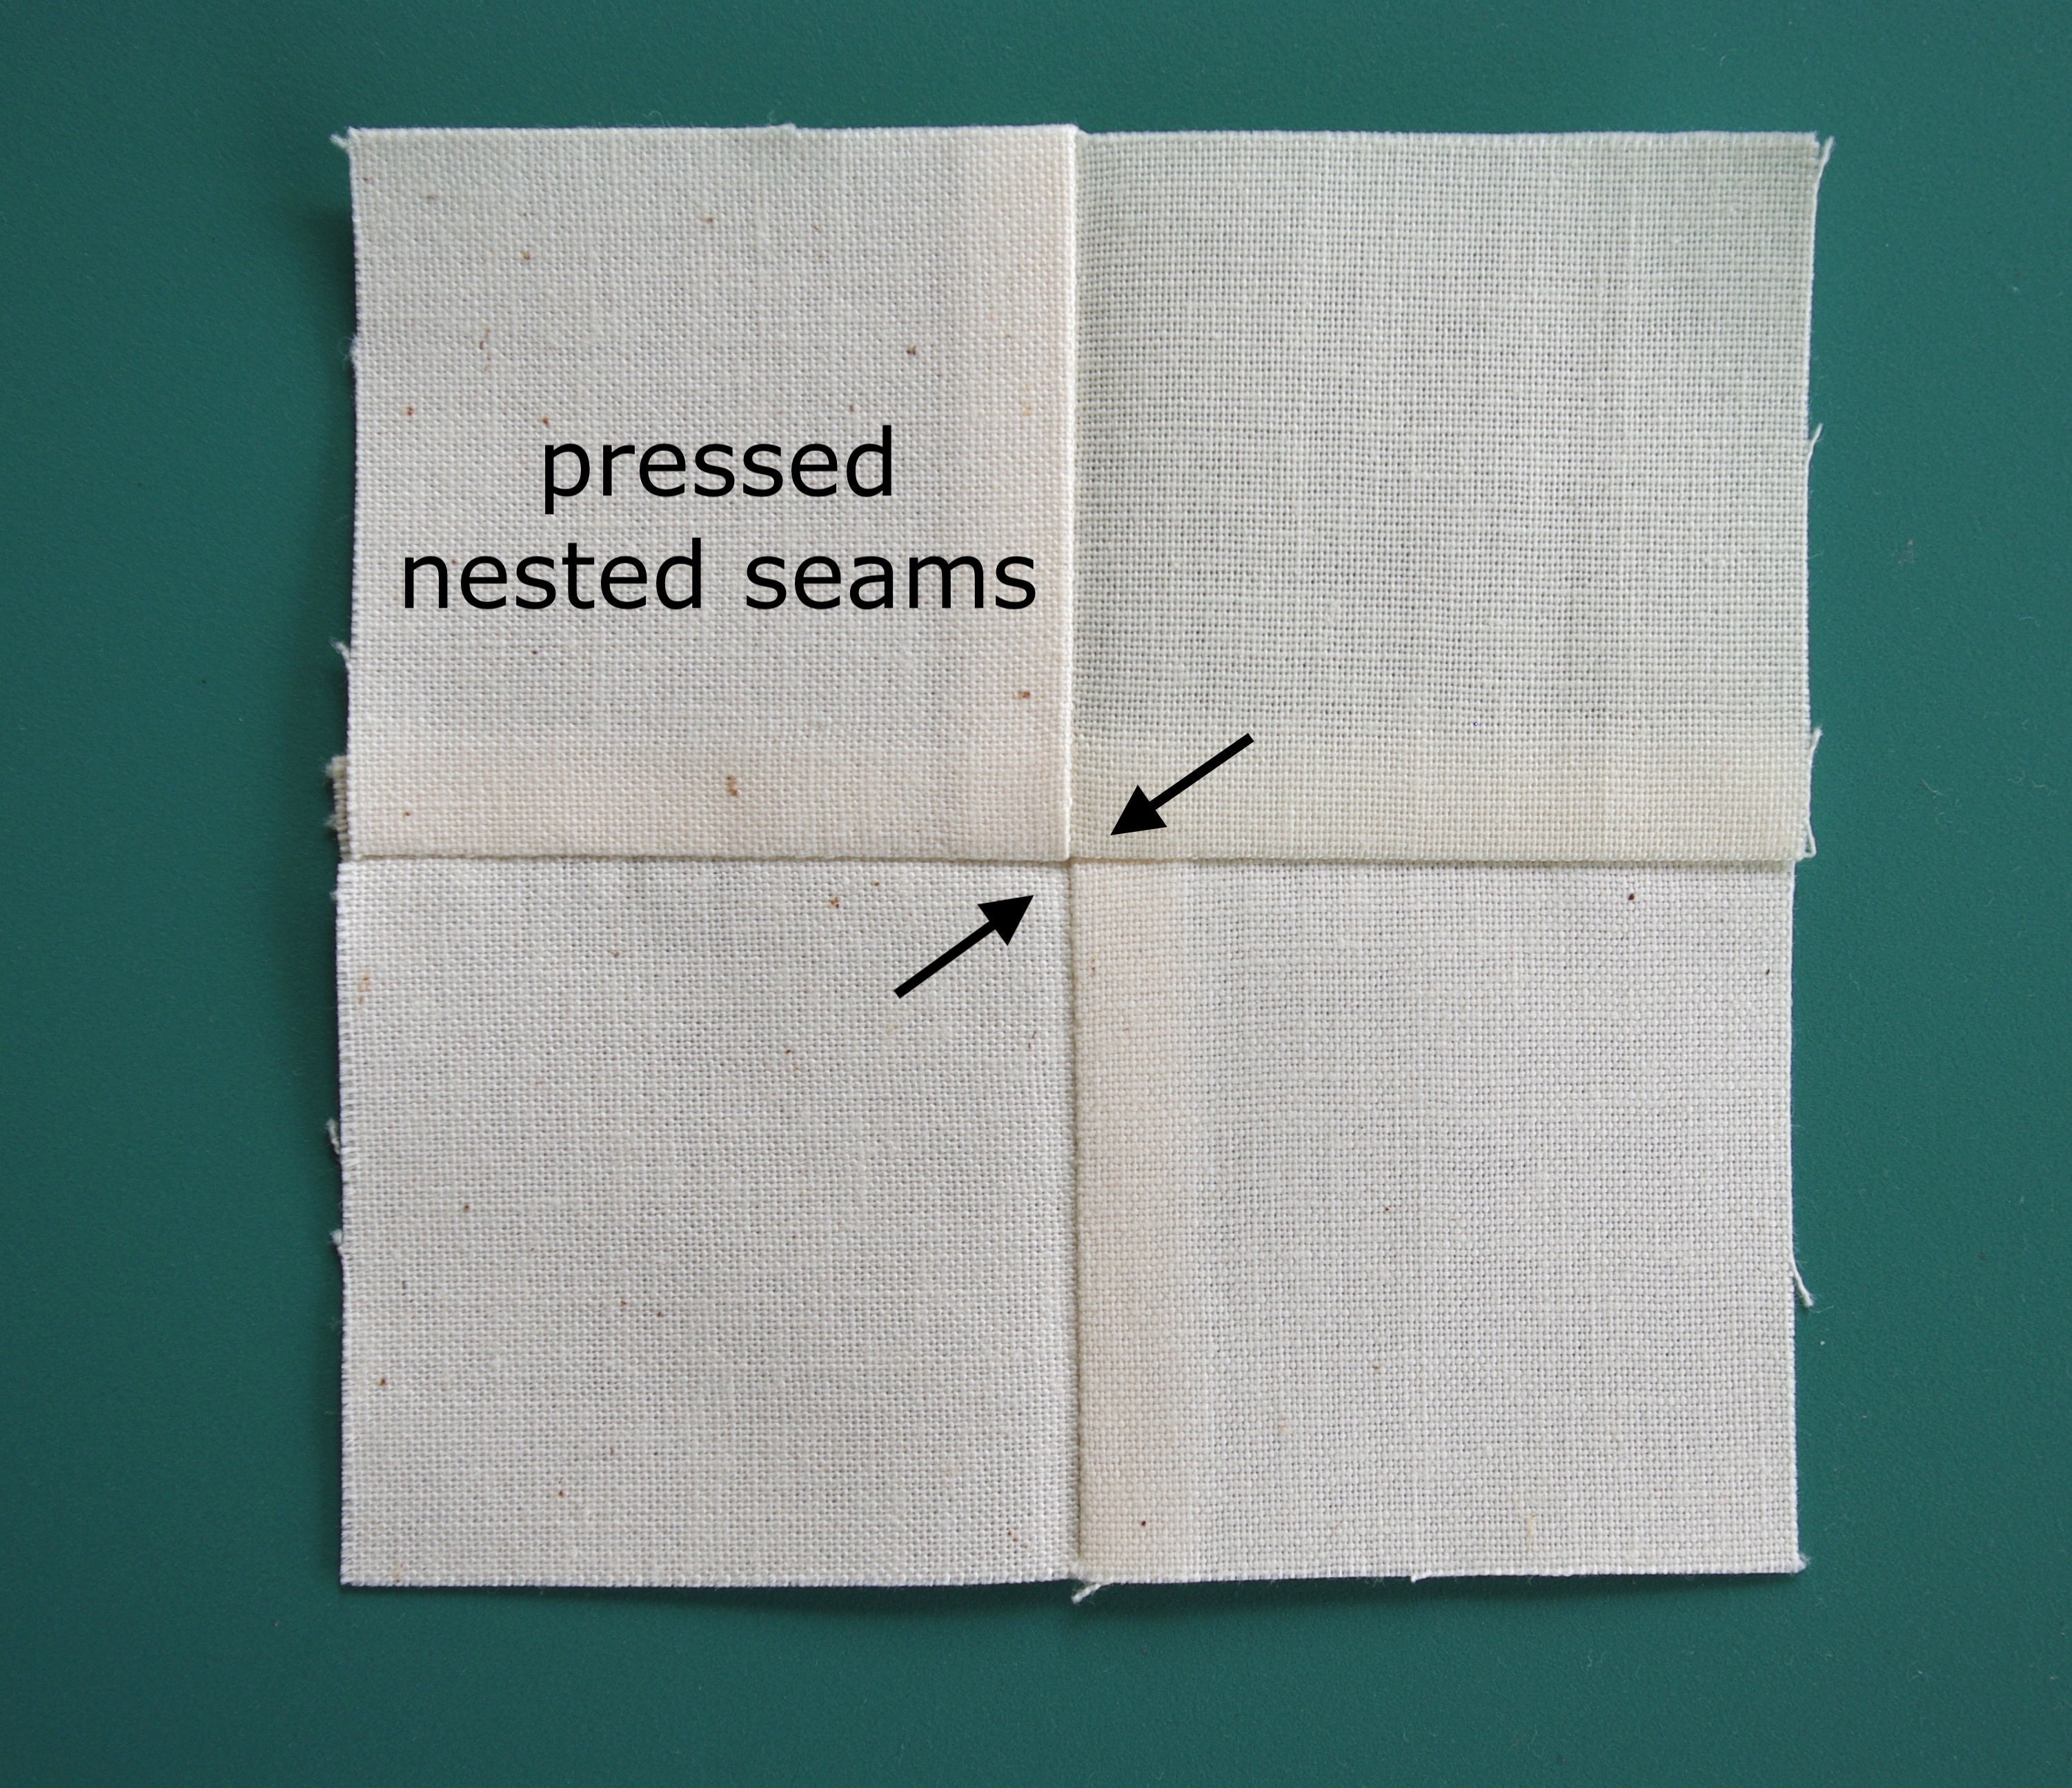
4. Nesting seams – Seams that line up precisely at an intersection of a block or quilt are known as nesting seams. To achieve nesting, press seams in opposite directions to reduce the bulk created by the seam allowance.
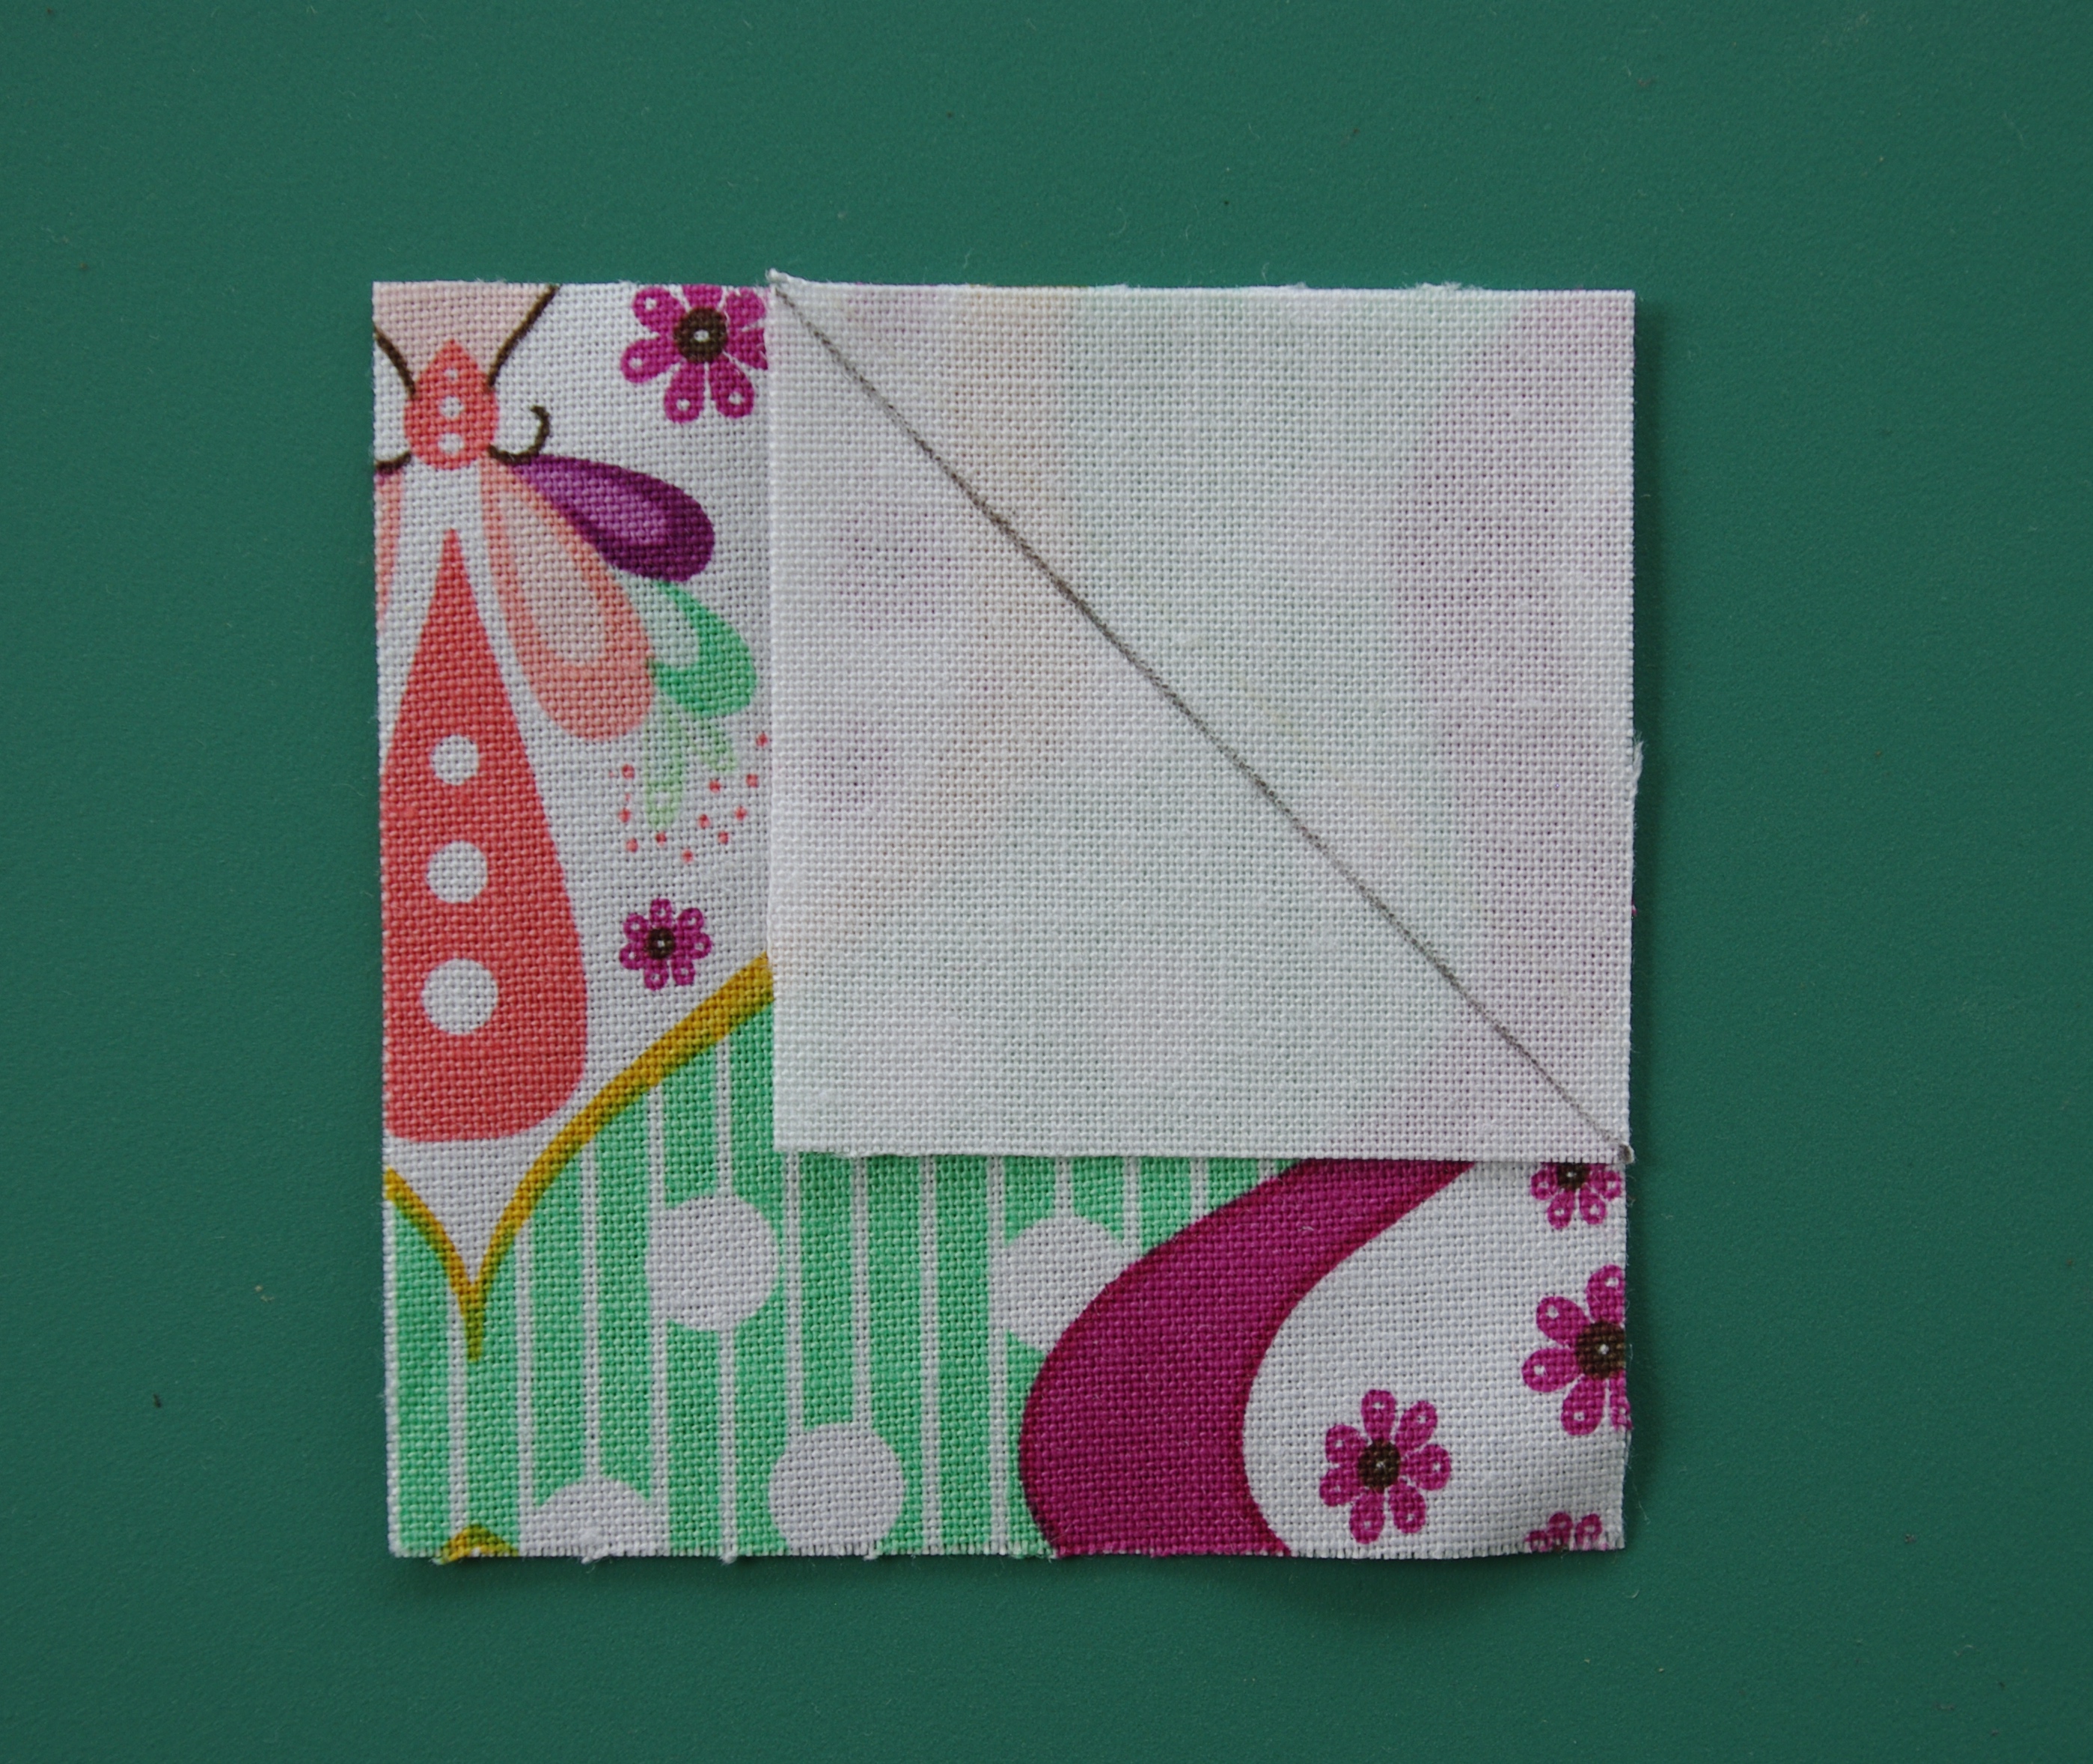
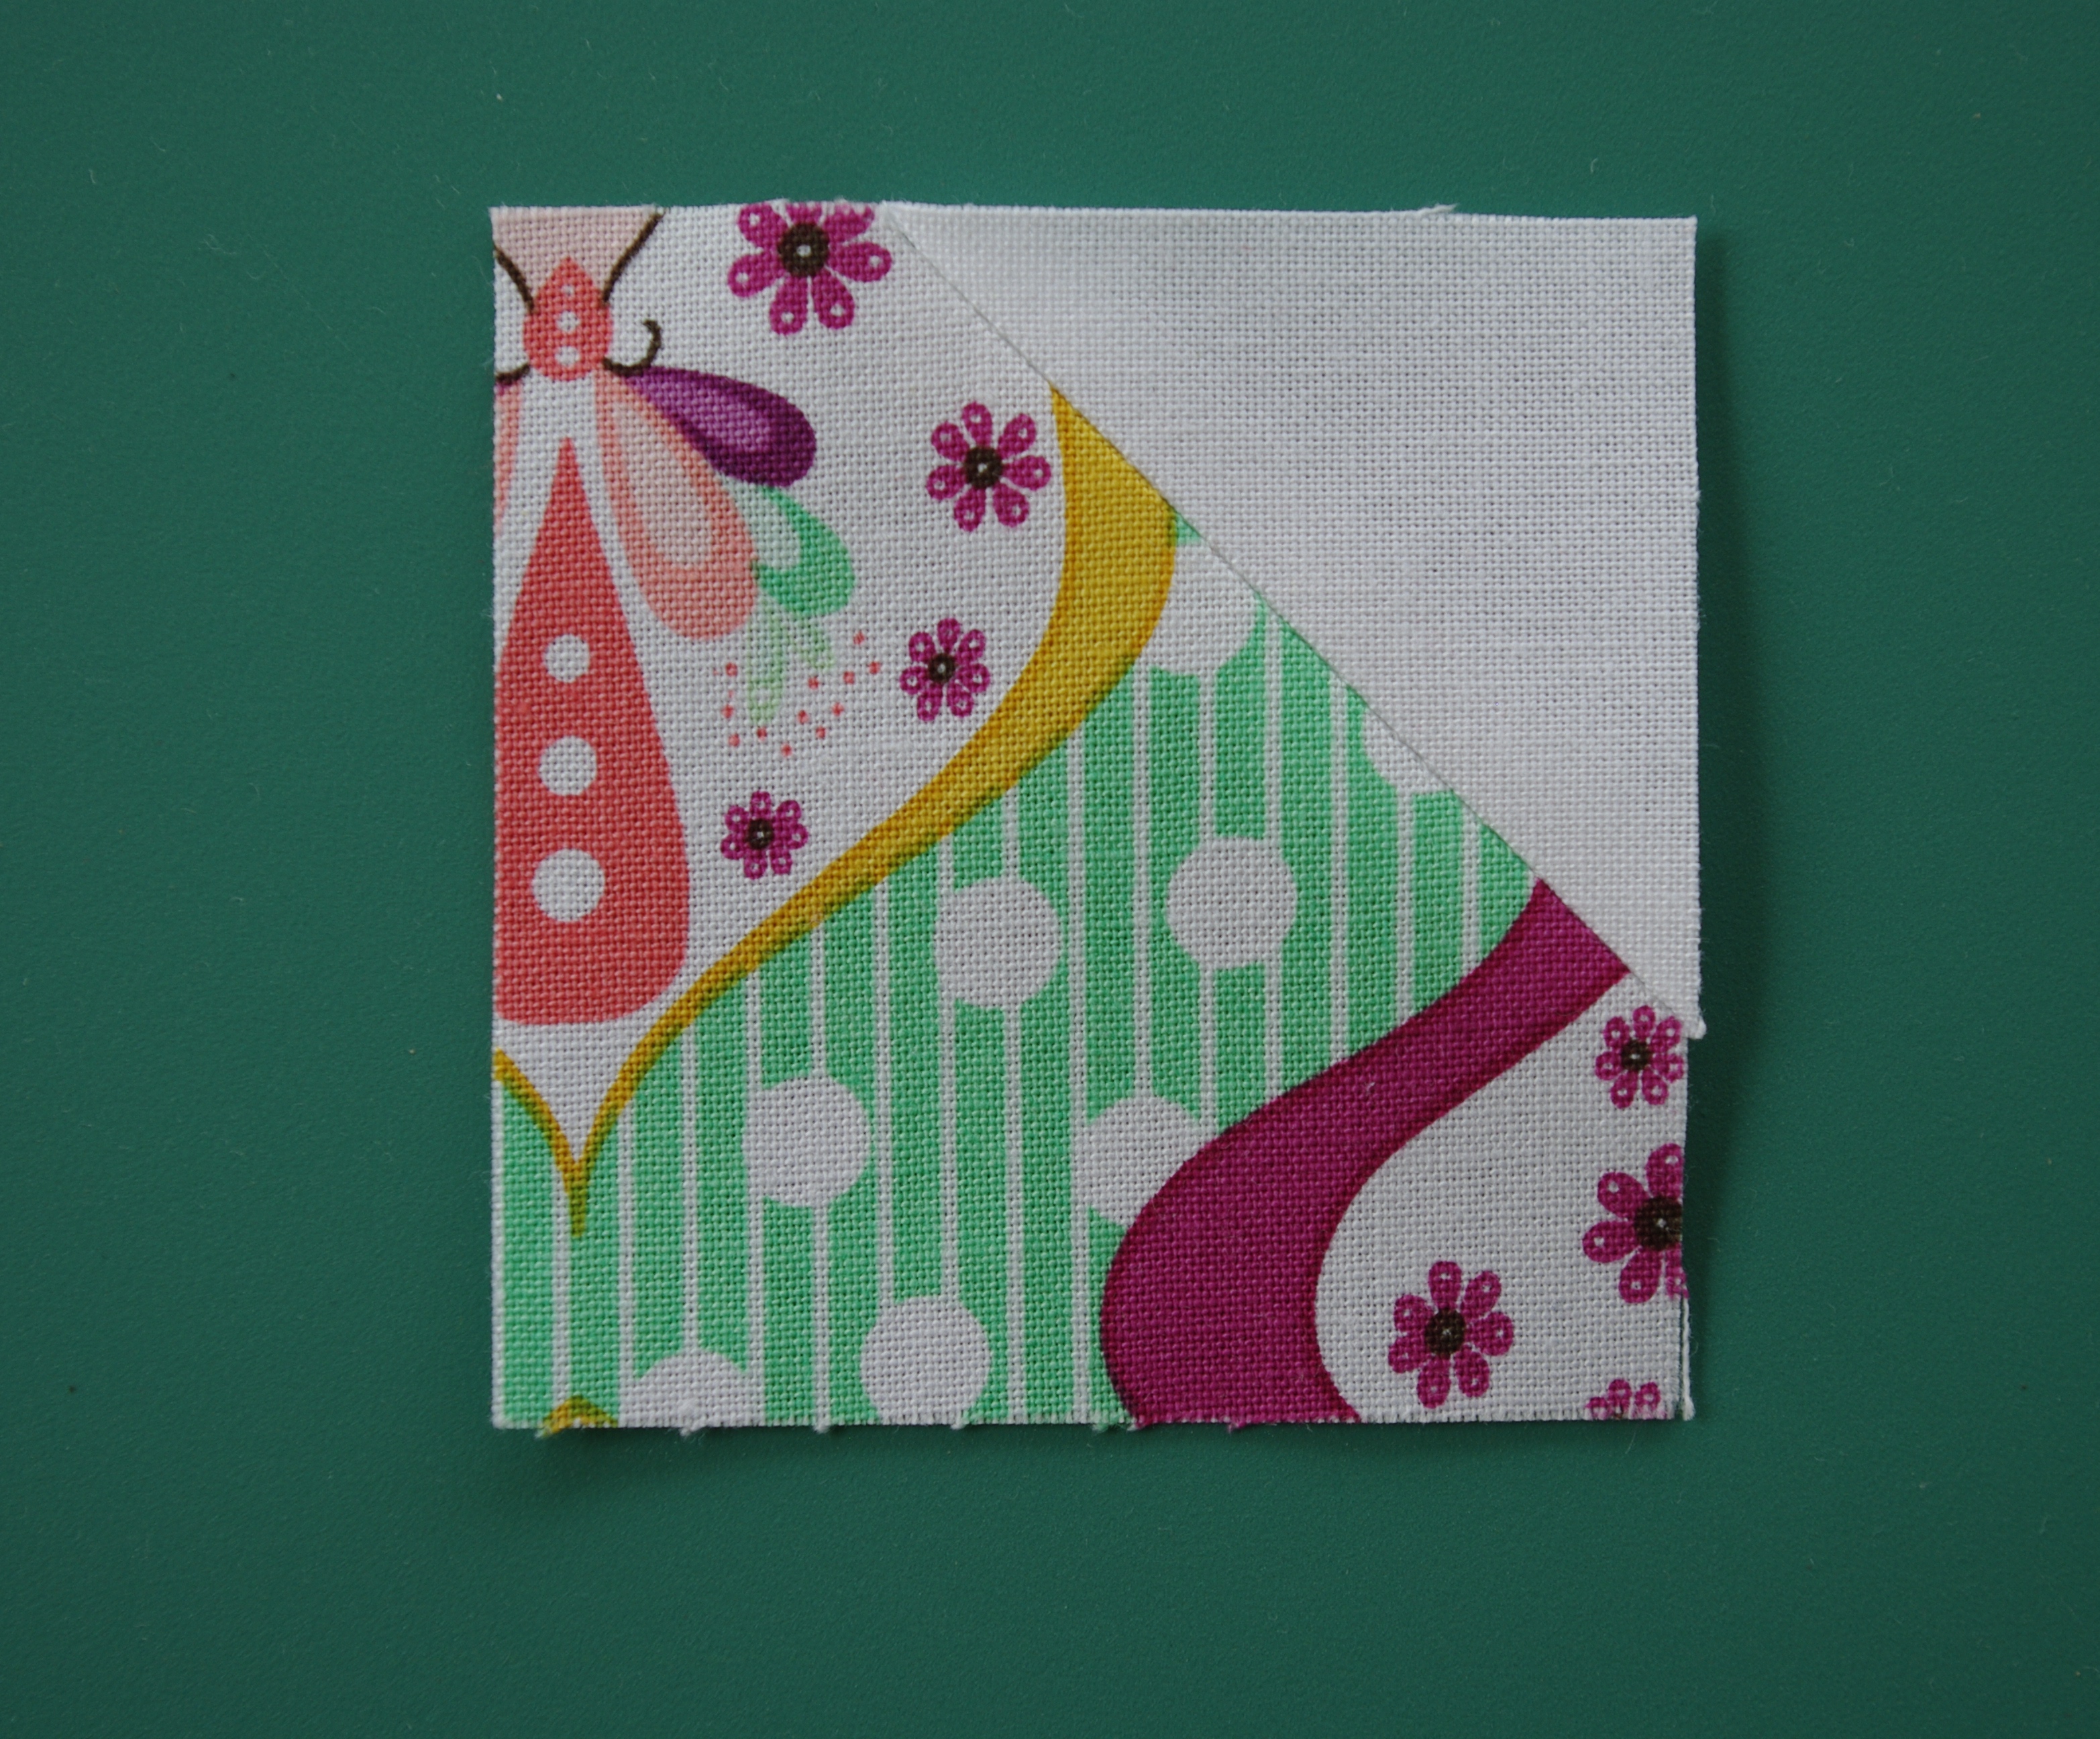
5. Snowball – The snowball technique is used when a quilter chooses to give a square a rounded effect (like a snowball). To achieve this result, the quilter draws a diagonal line on a background fabric square (white or light colored), sews on the line, cuts away the corner and presses back the triangle. This process can also be done in reverse, using a central white square and a color triangle in the corner.
Preparation to snowball a corner
Snowballed corner
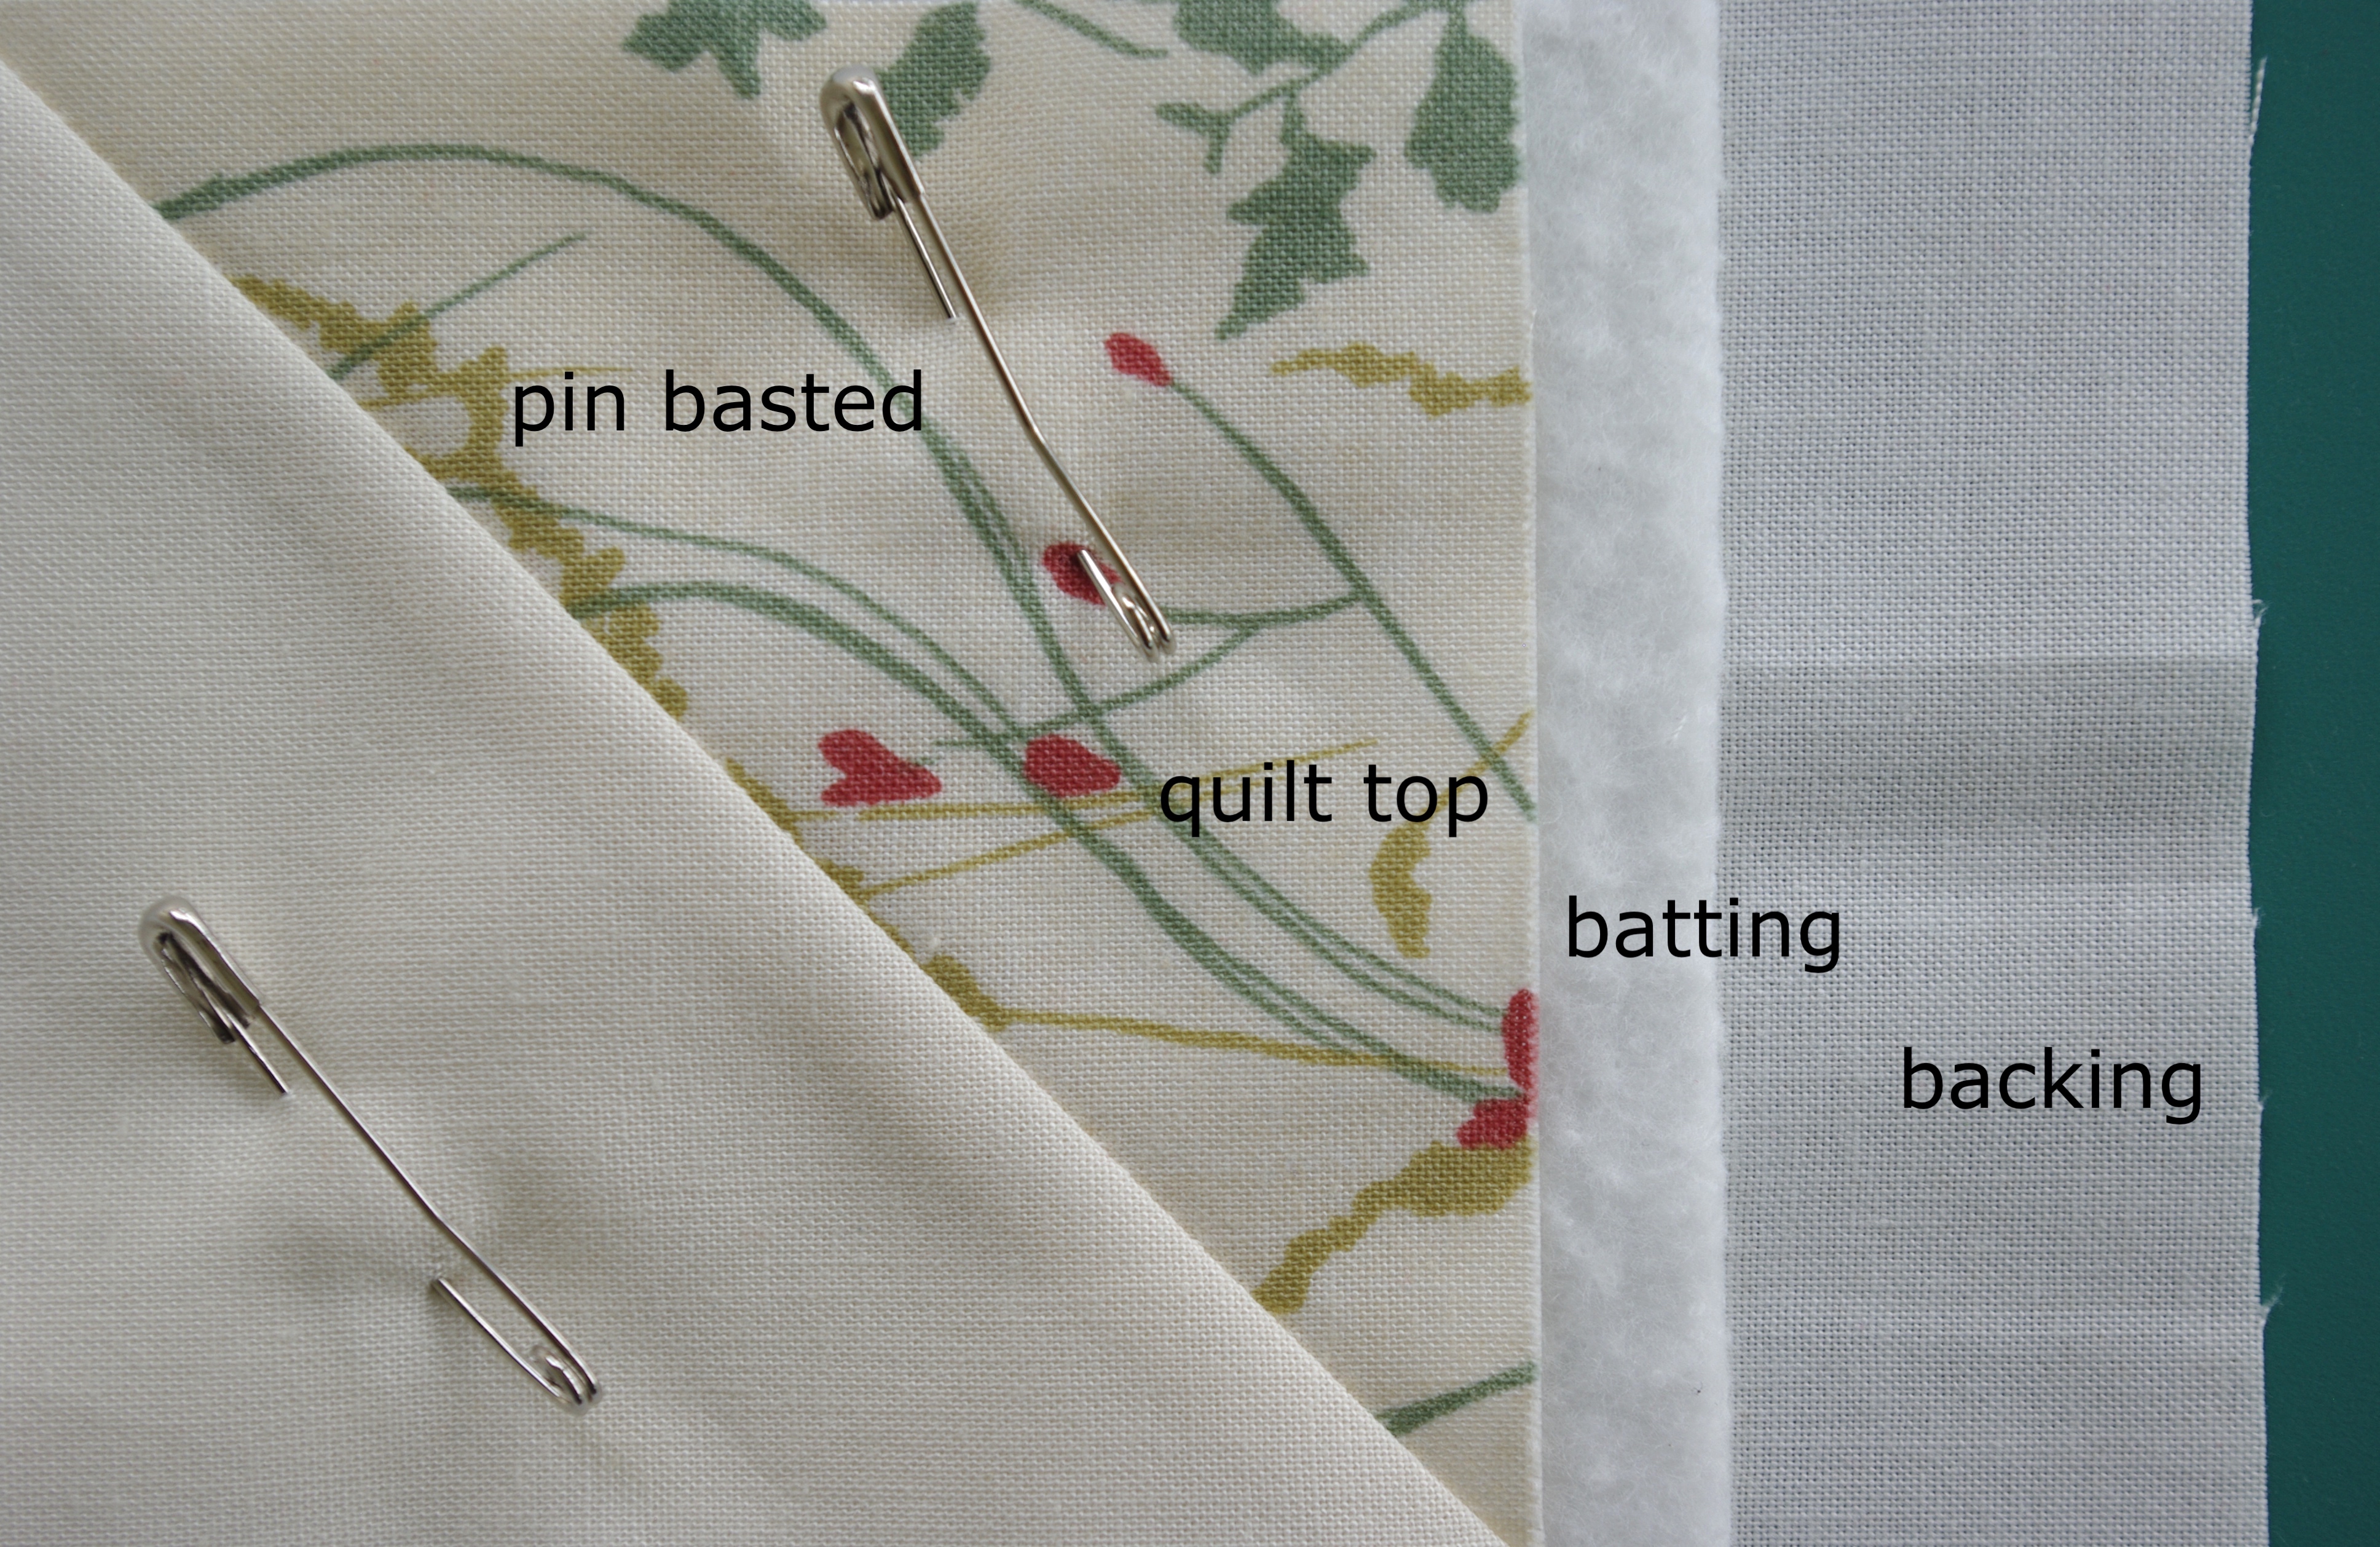
6. Quilt sandwich or sandwiching – Sandwiching is assembling the quilt top, batting and backing, then securing the layers together by basting with either quilting pins or glue–readying it for quilting. The batting and quilt backing are always cut a few inches larger than the quilt top to allow for fabric shifting while quilting.
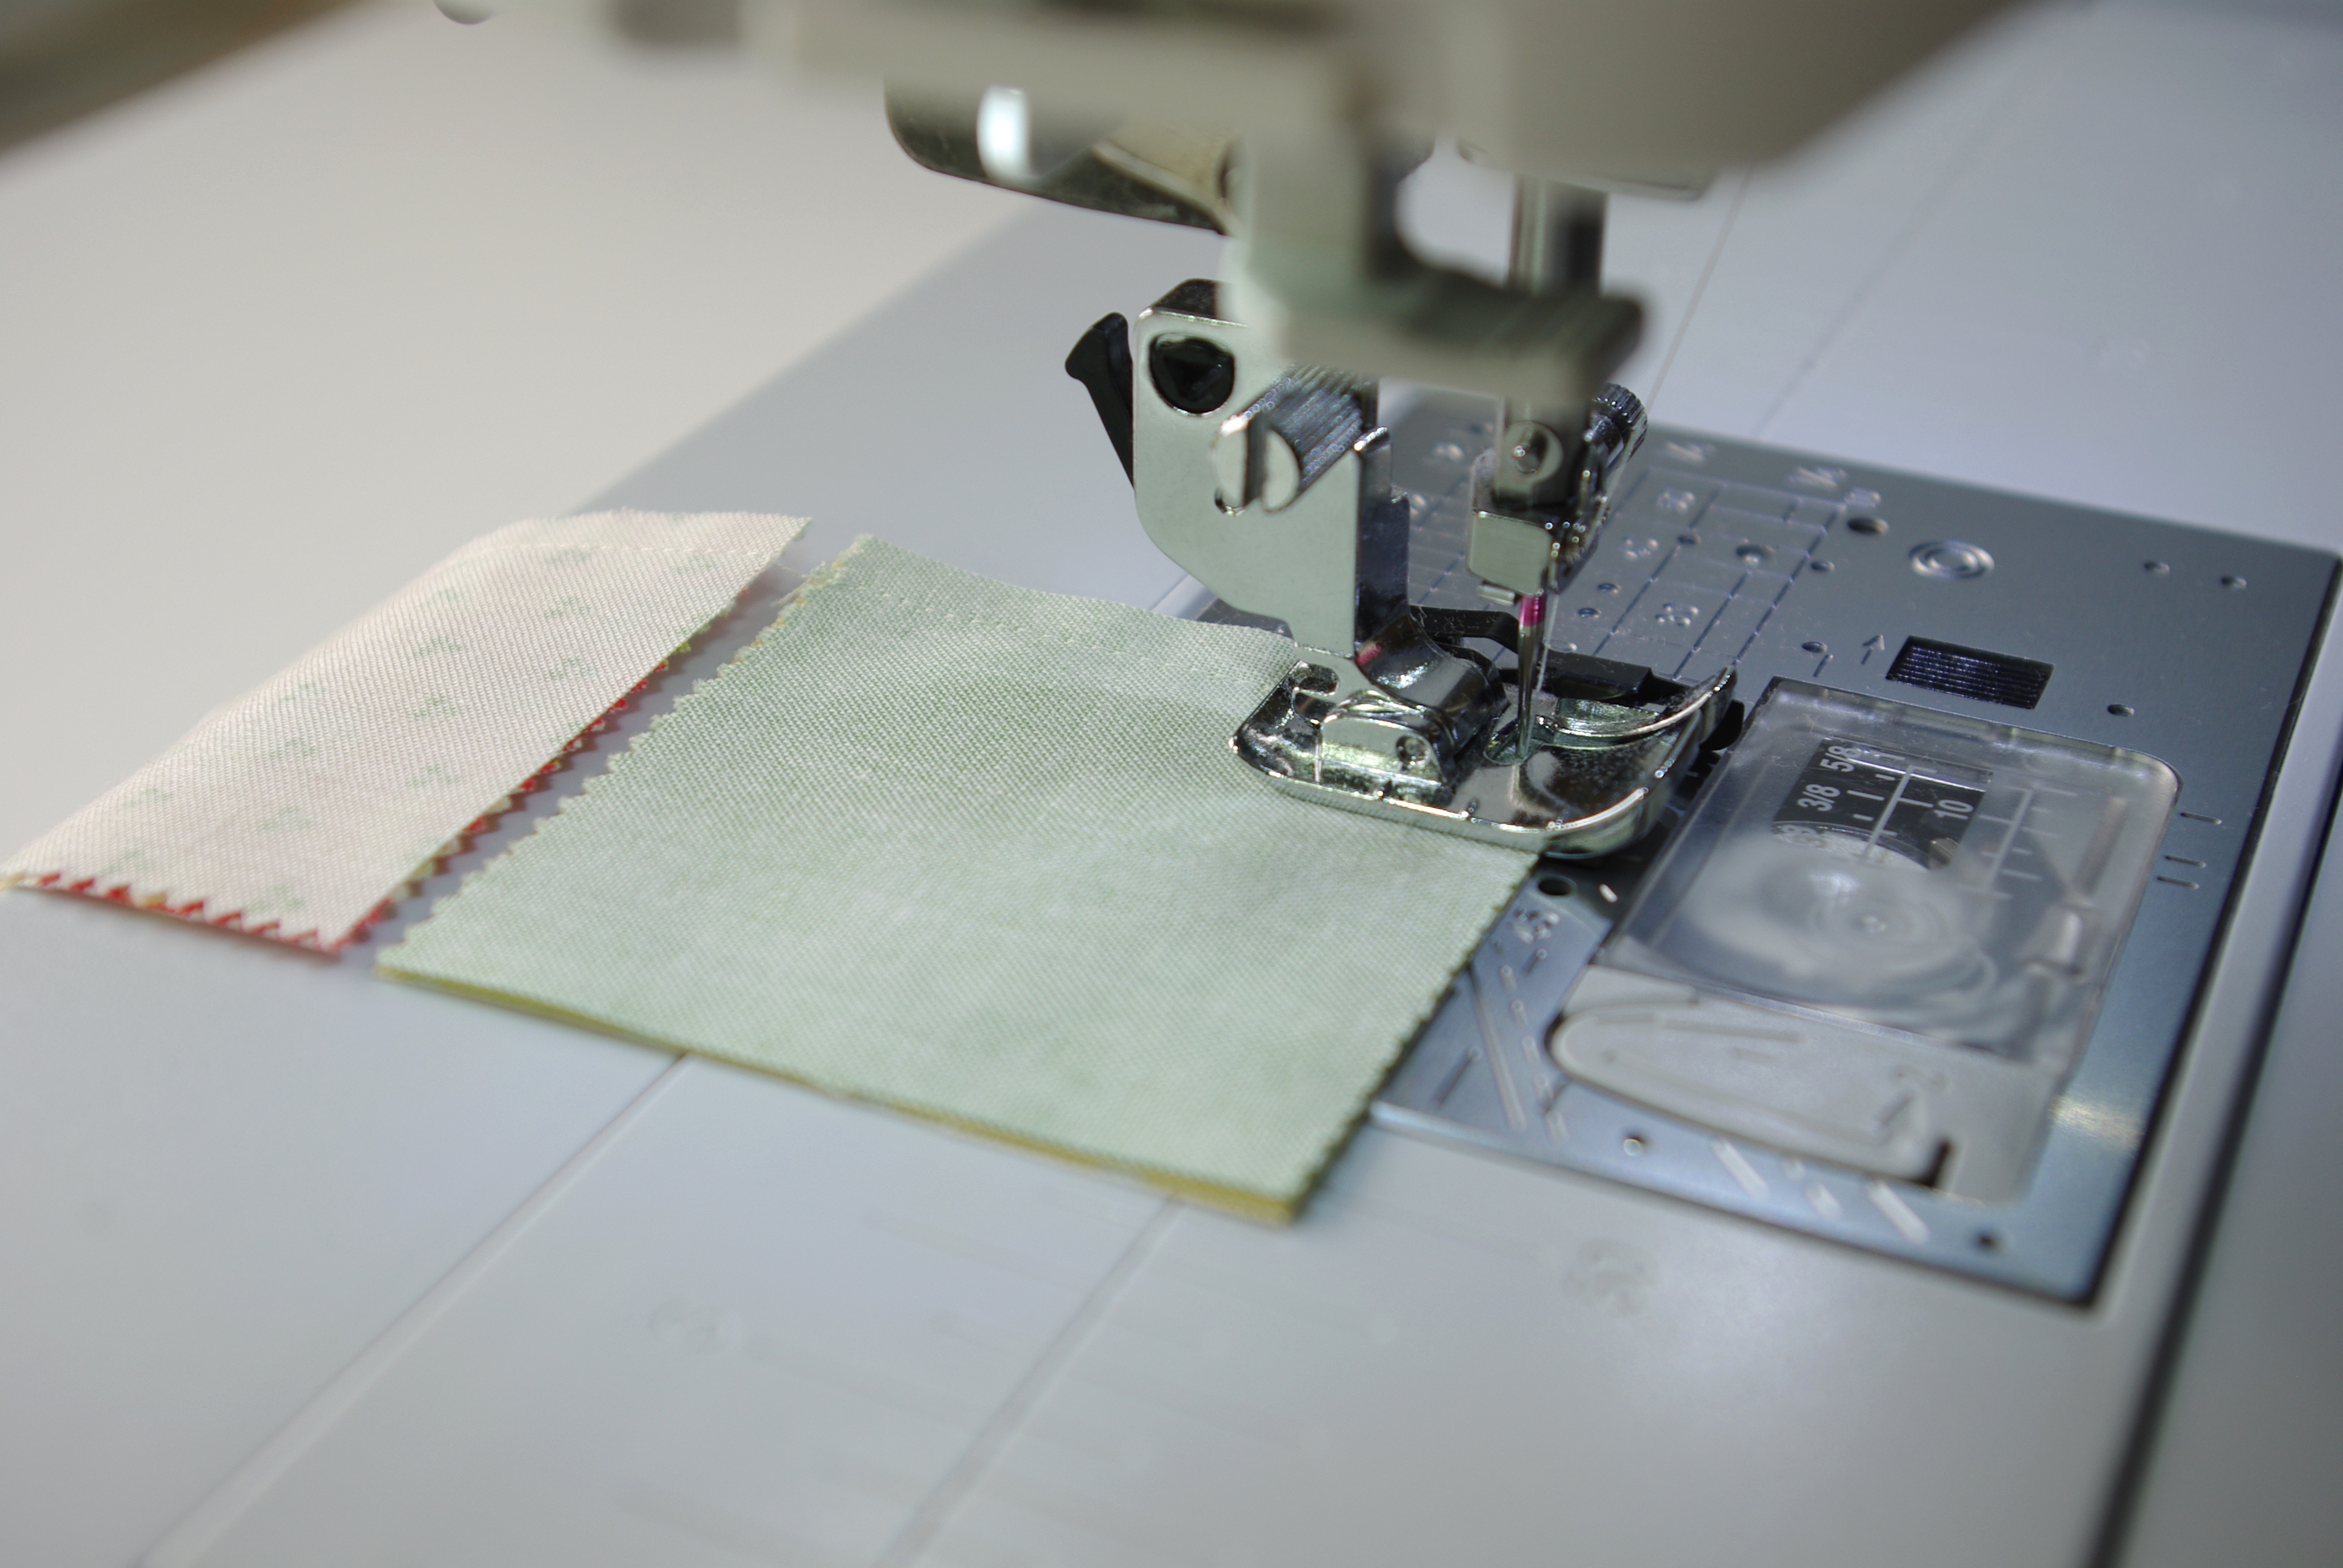
7. Chain piecing – Chain piecing is sewing together squares in one continuous length of thread instead of sewing piece by piece. This method saves time and is popular among quilters. Once multiple squares have been sewn in a strand, the thread is easily cut to separate individual pieces.
chain piecing
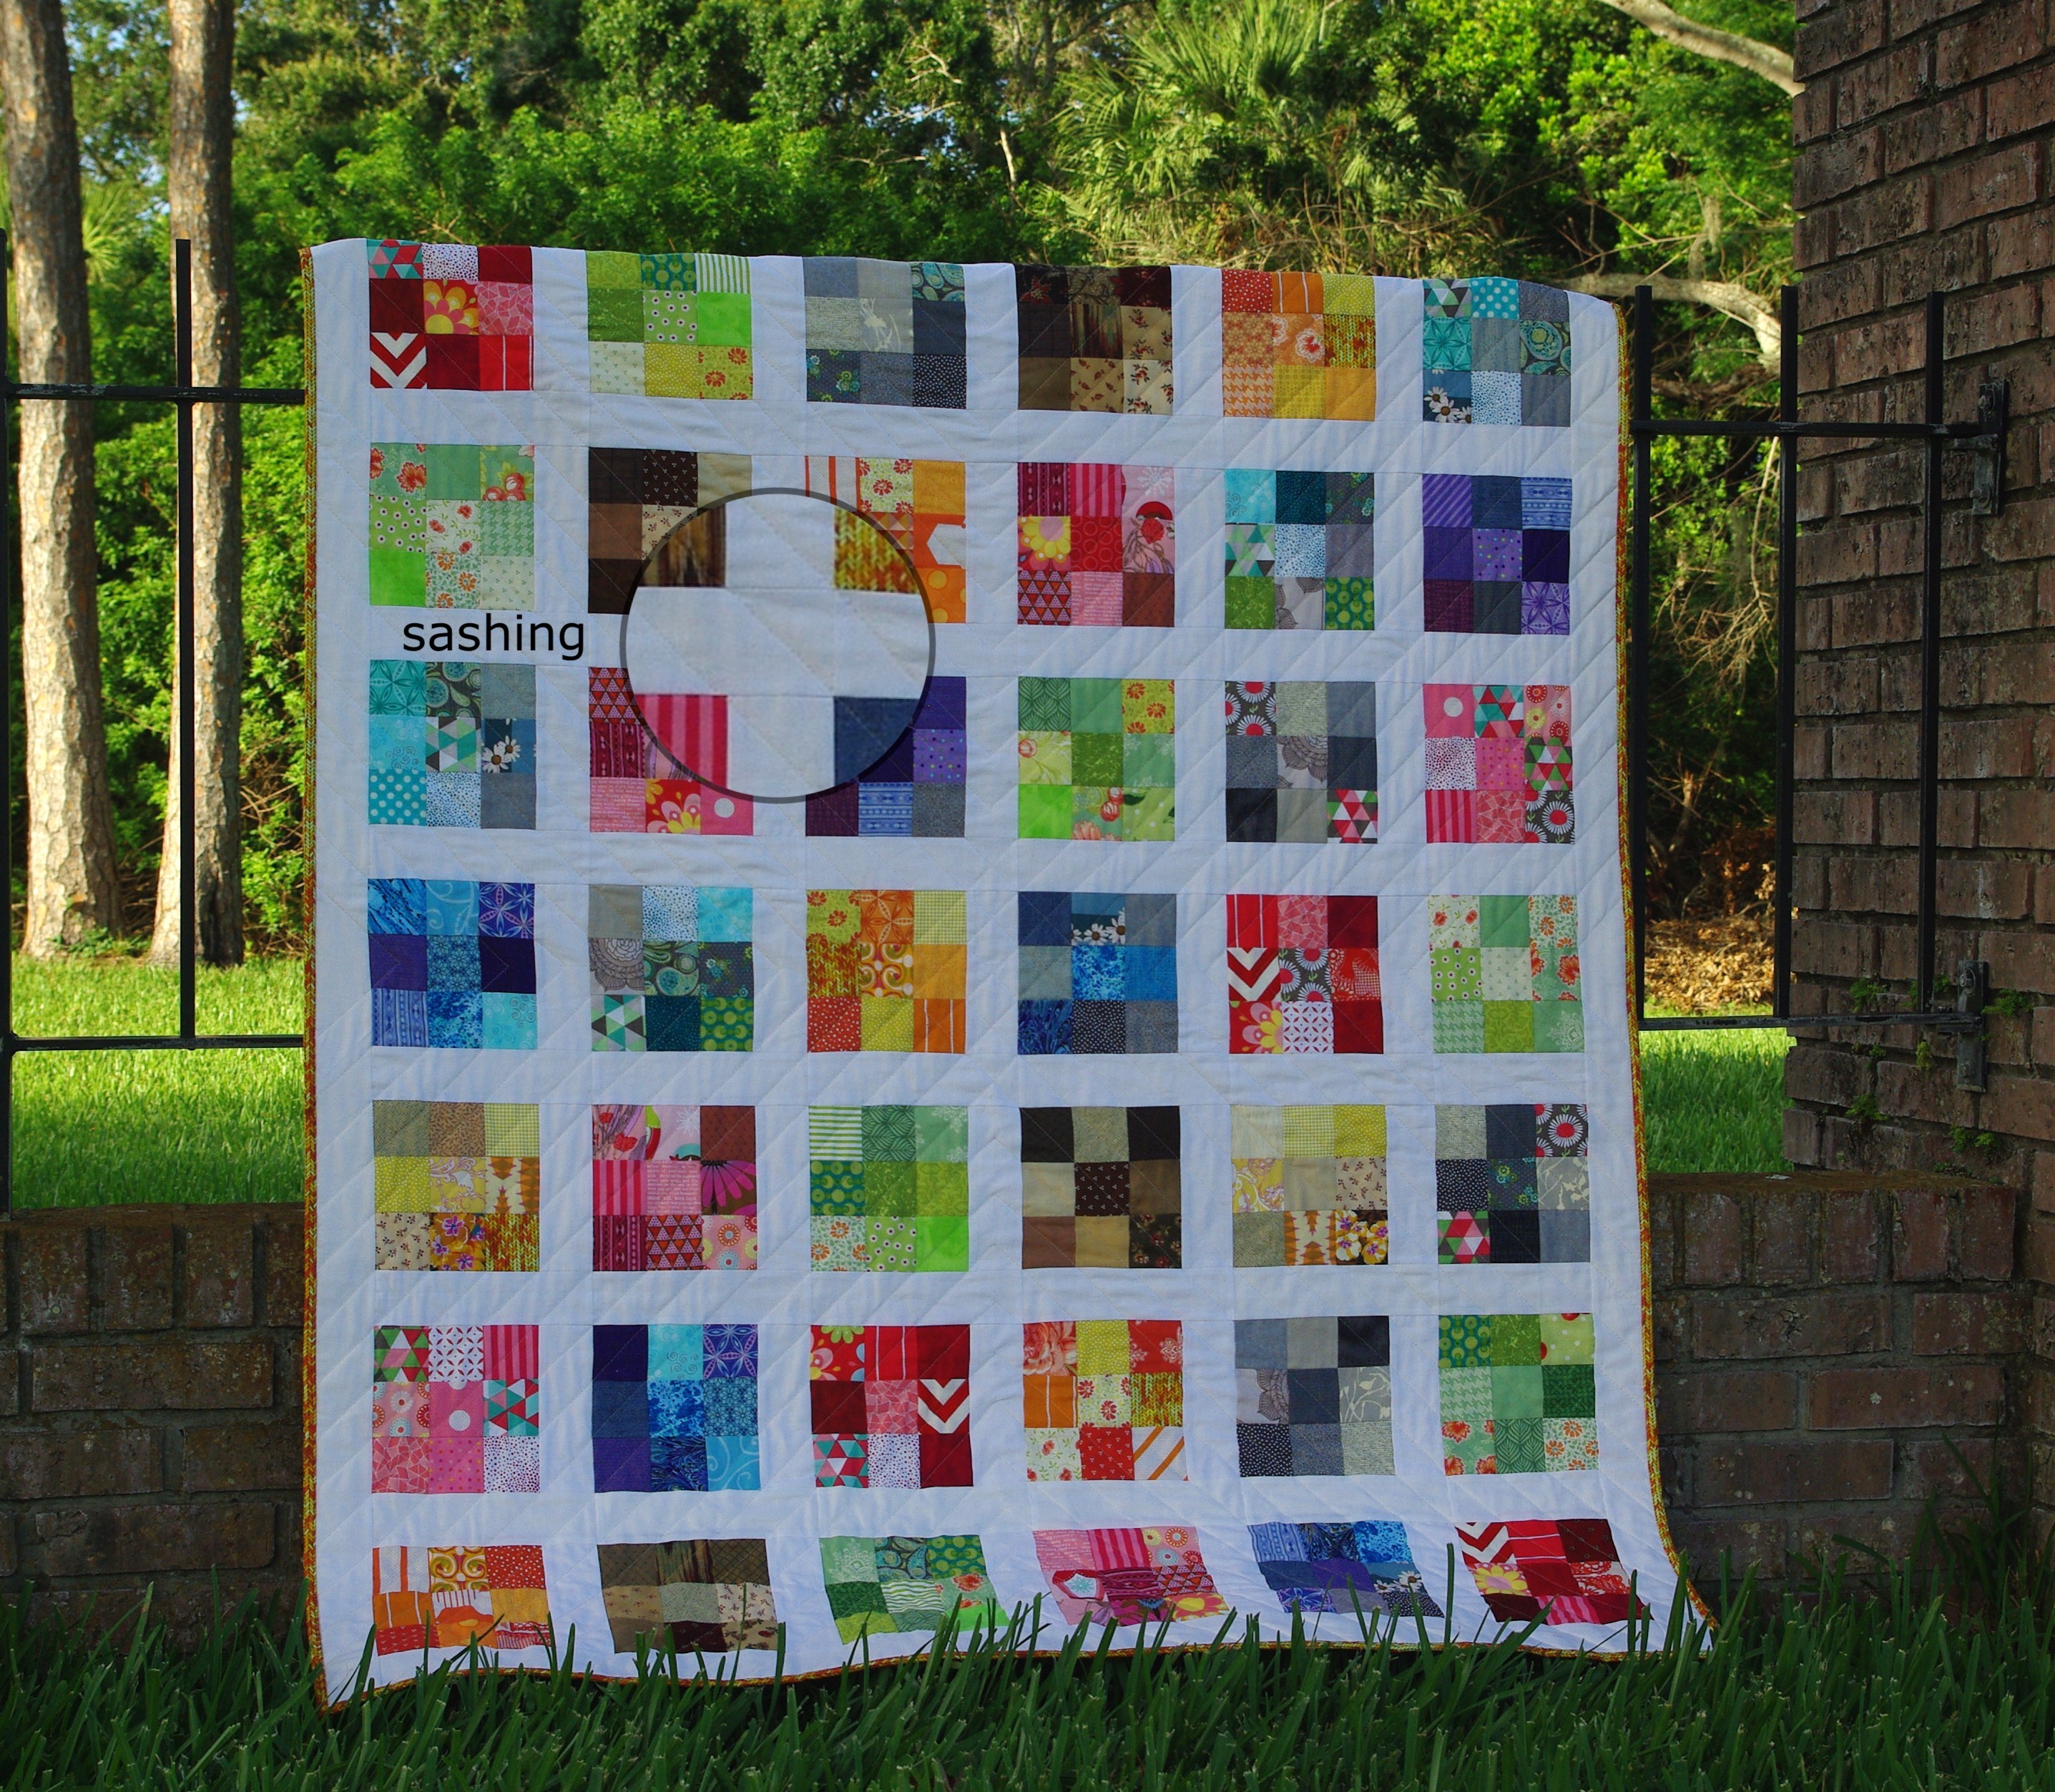
8. Sashing – Sashing is a strip of fabric sewn between blocks on a quilt top. It gives a windowpane effect and shows off blocks individually. Most often lighter-colored fabric is used for sashing to make the other colors pop. As a variation, sashing can be used to contrast quilt block colors.
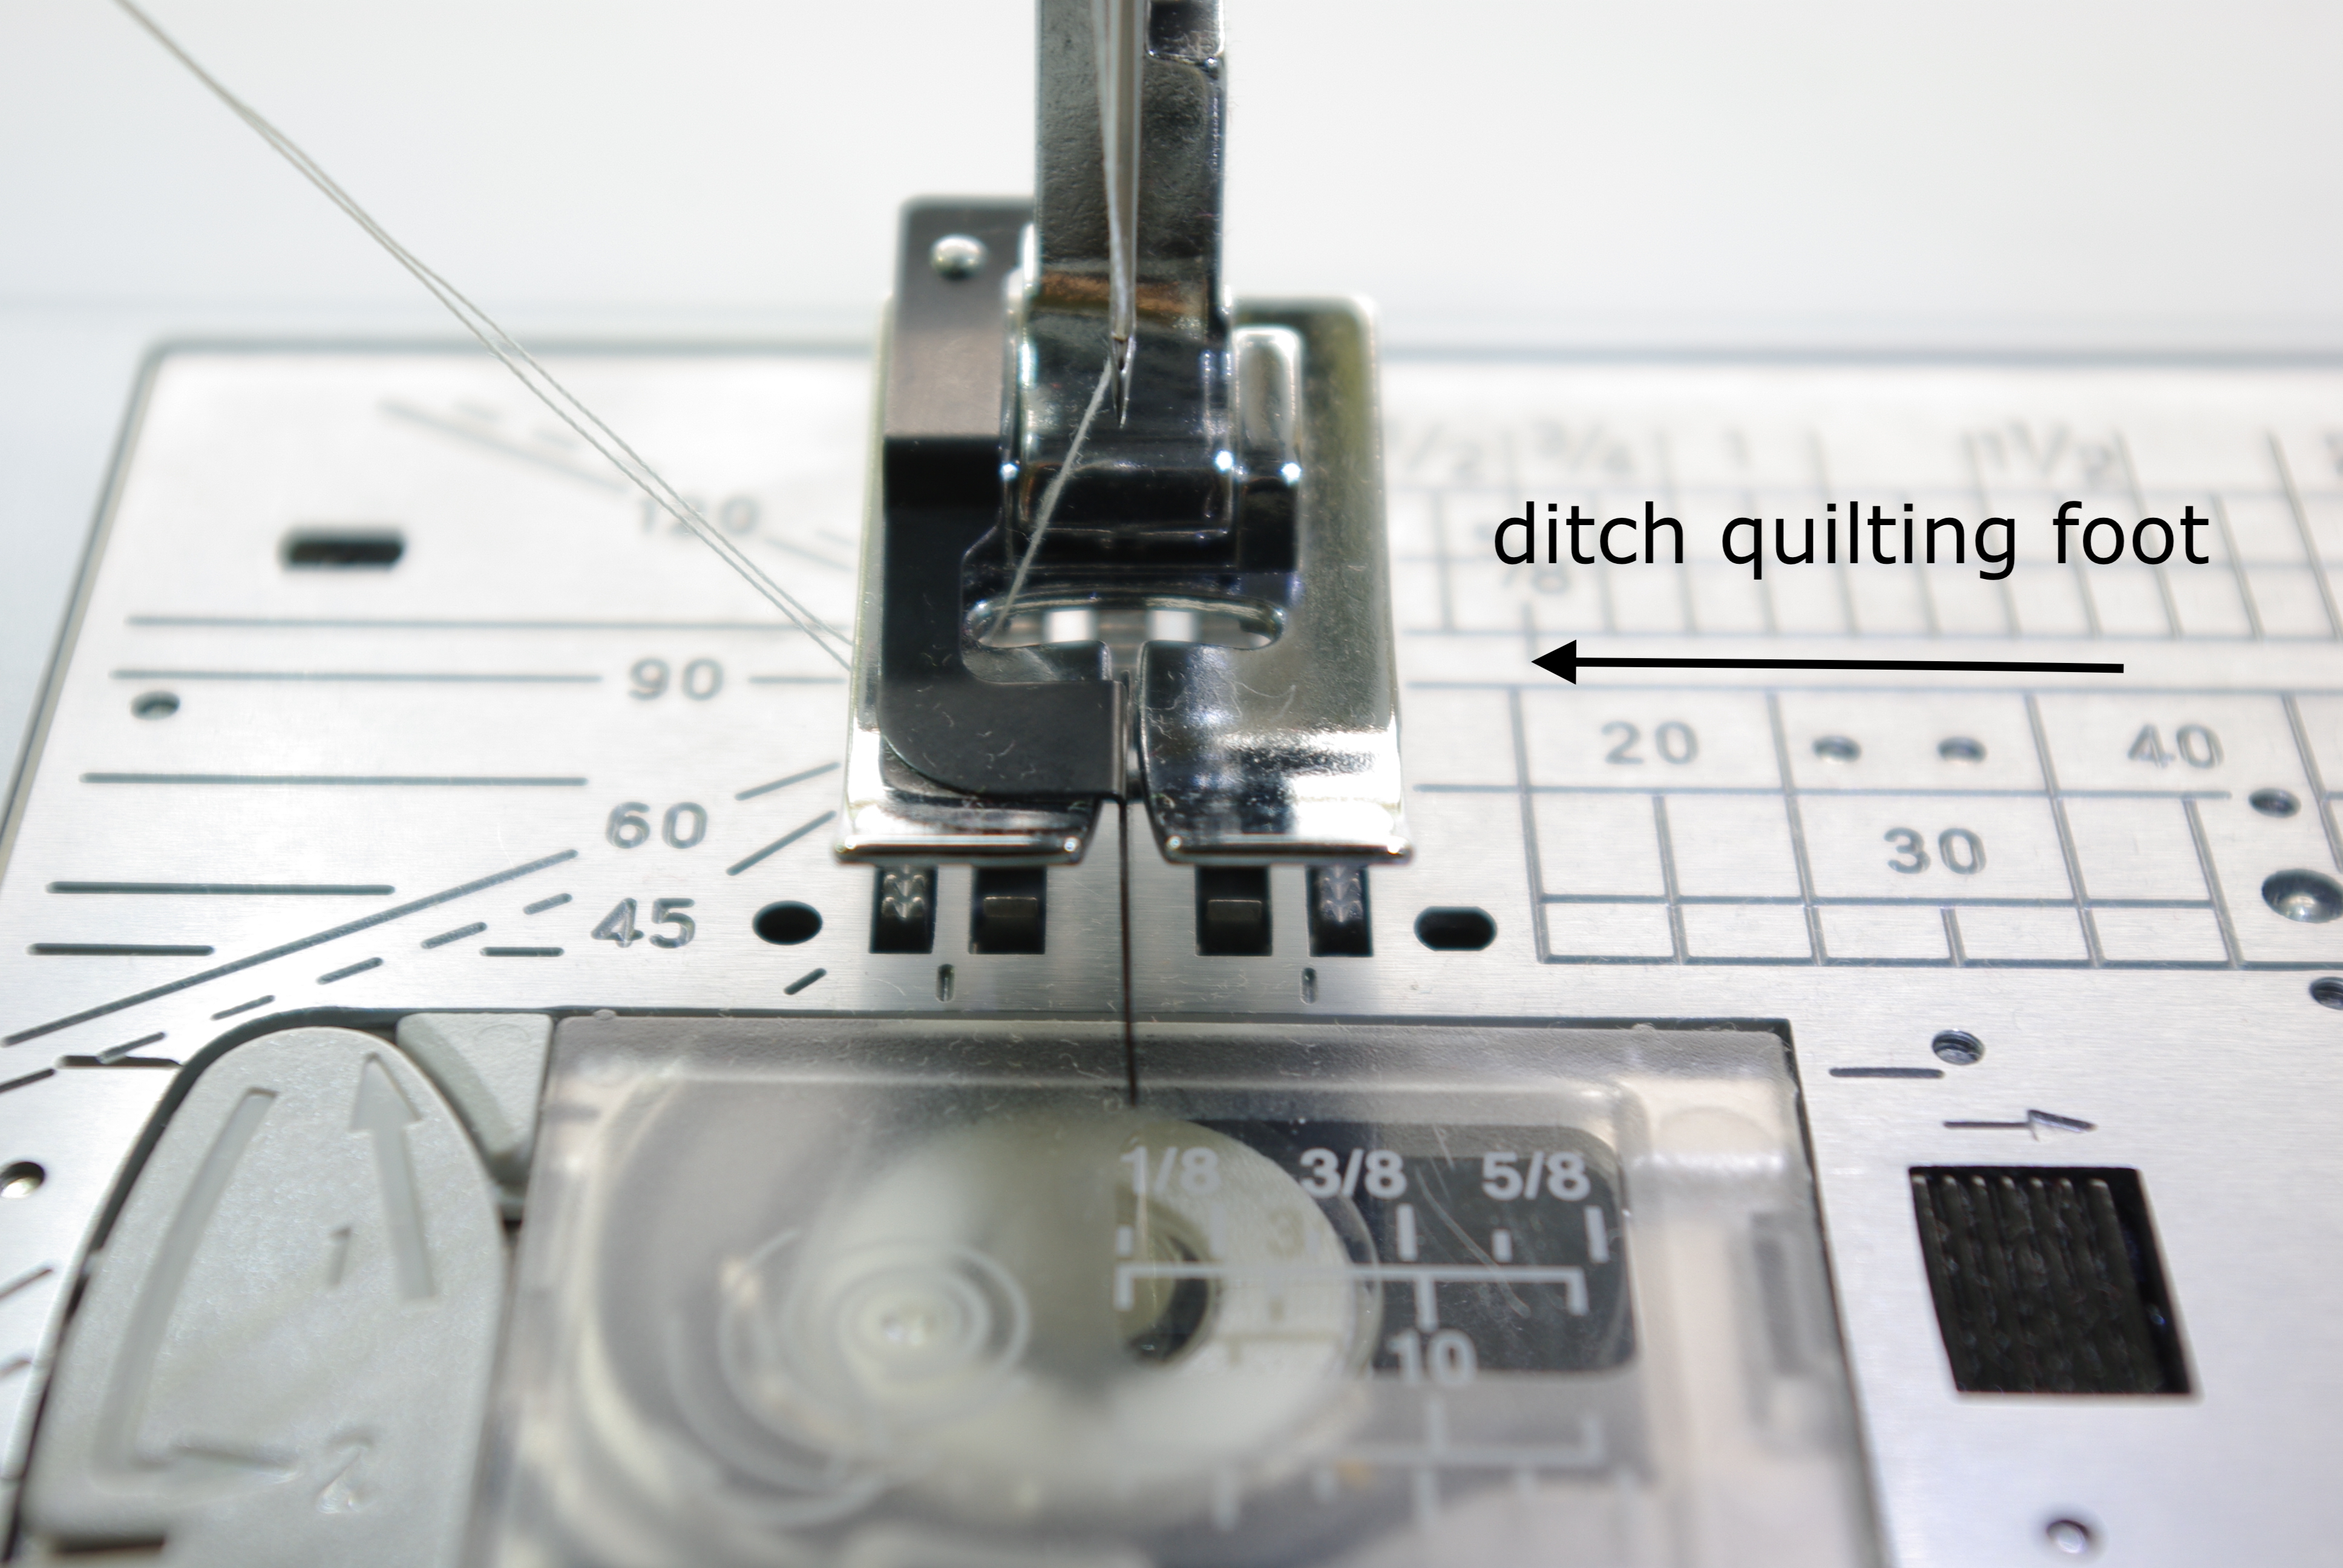
9. Stitch in the ditch – Stitching in the ditch is a technique where the quilting stitches on the quilt top are minimized by quilting ‘in’ the seams that were created when the quilt blocks were pieced together. Using a specialized foot helps makes this process neater with more accurate results.
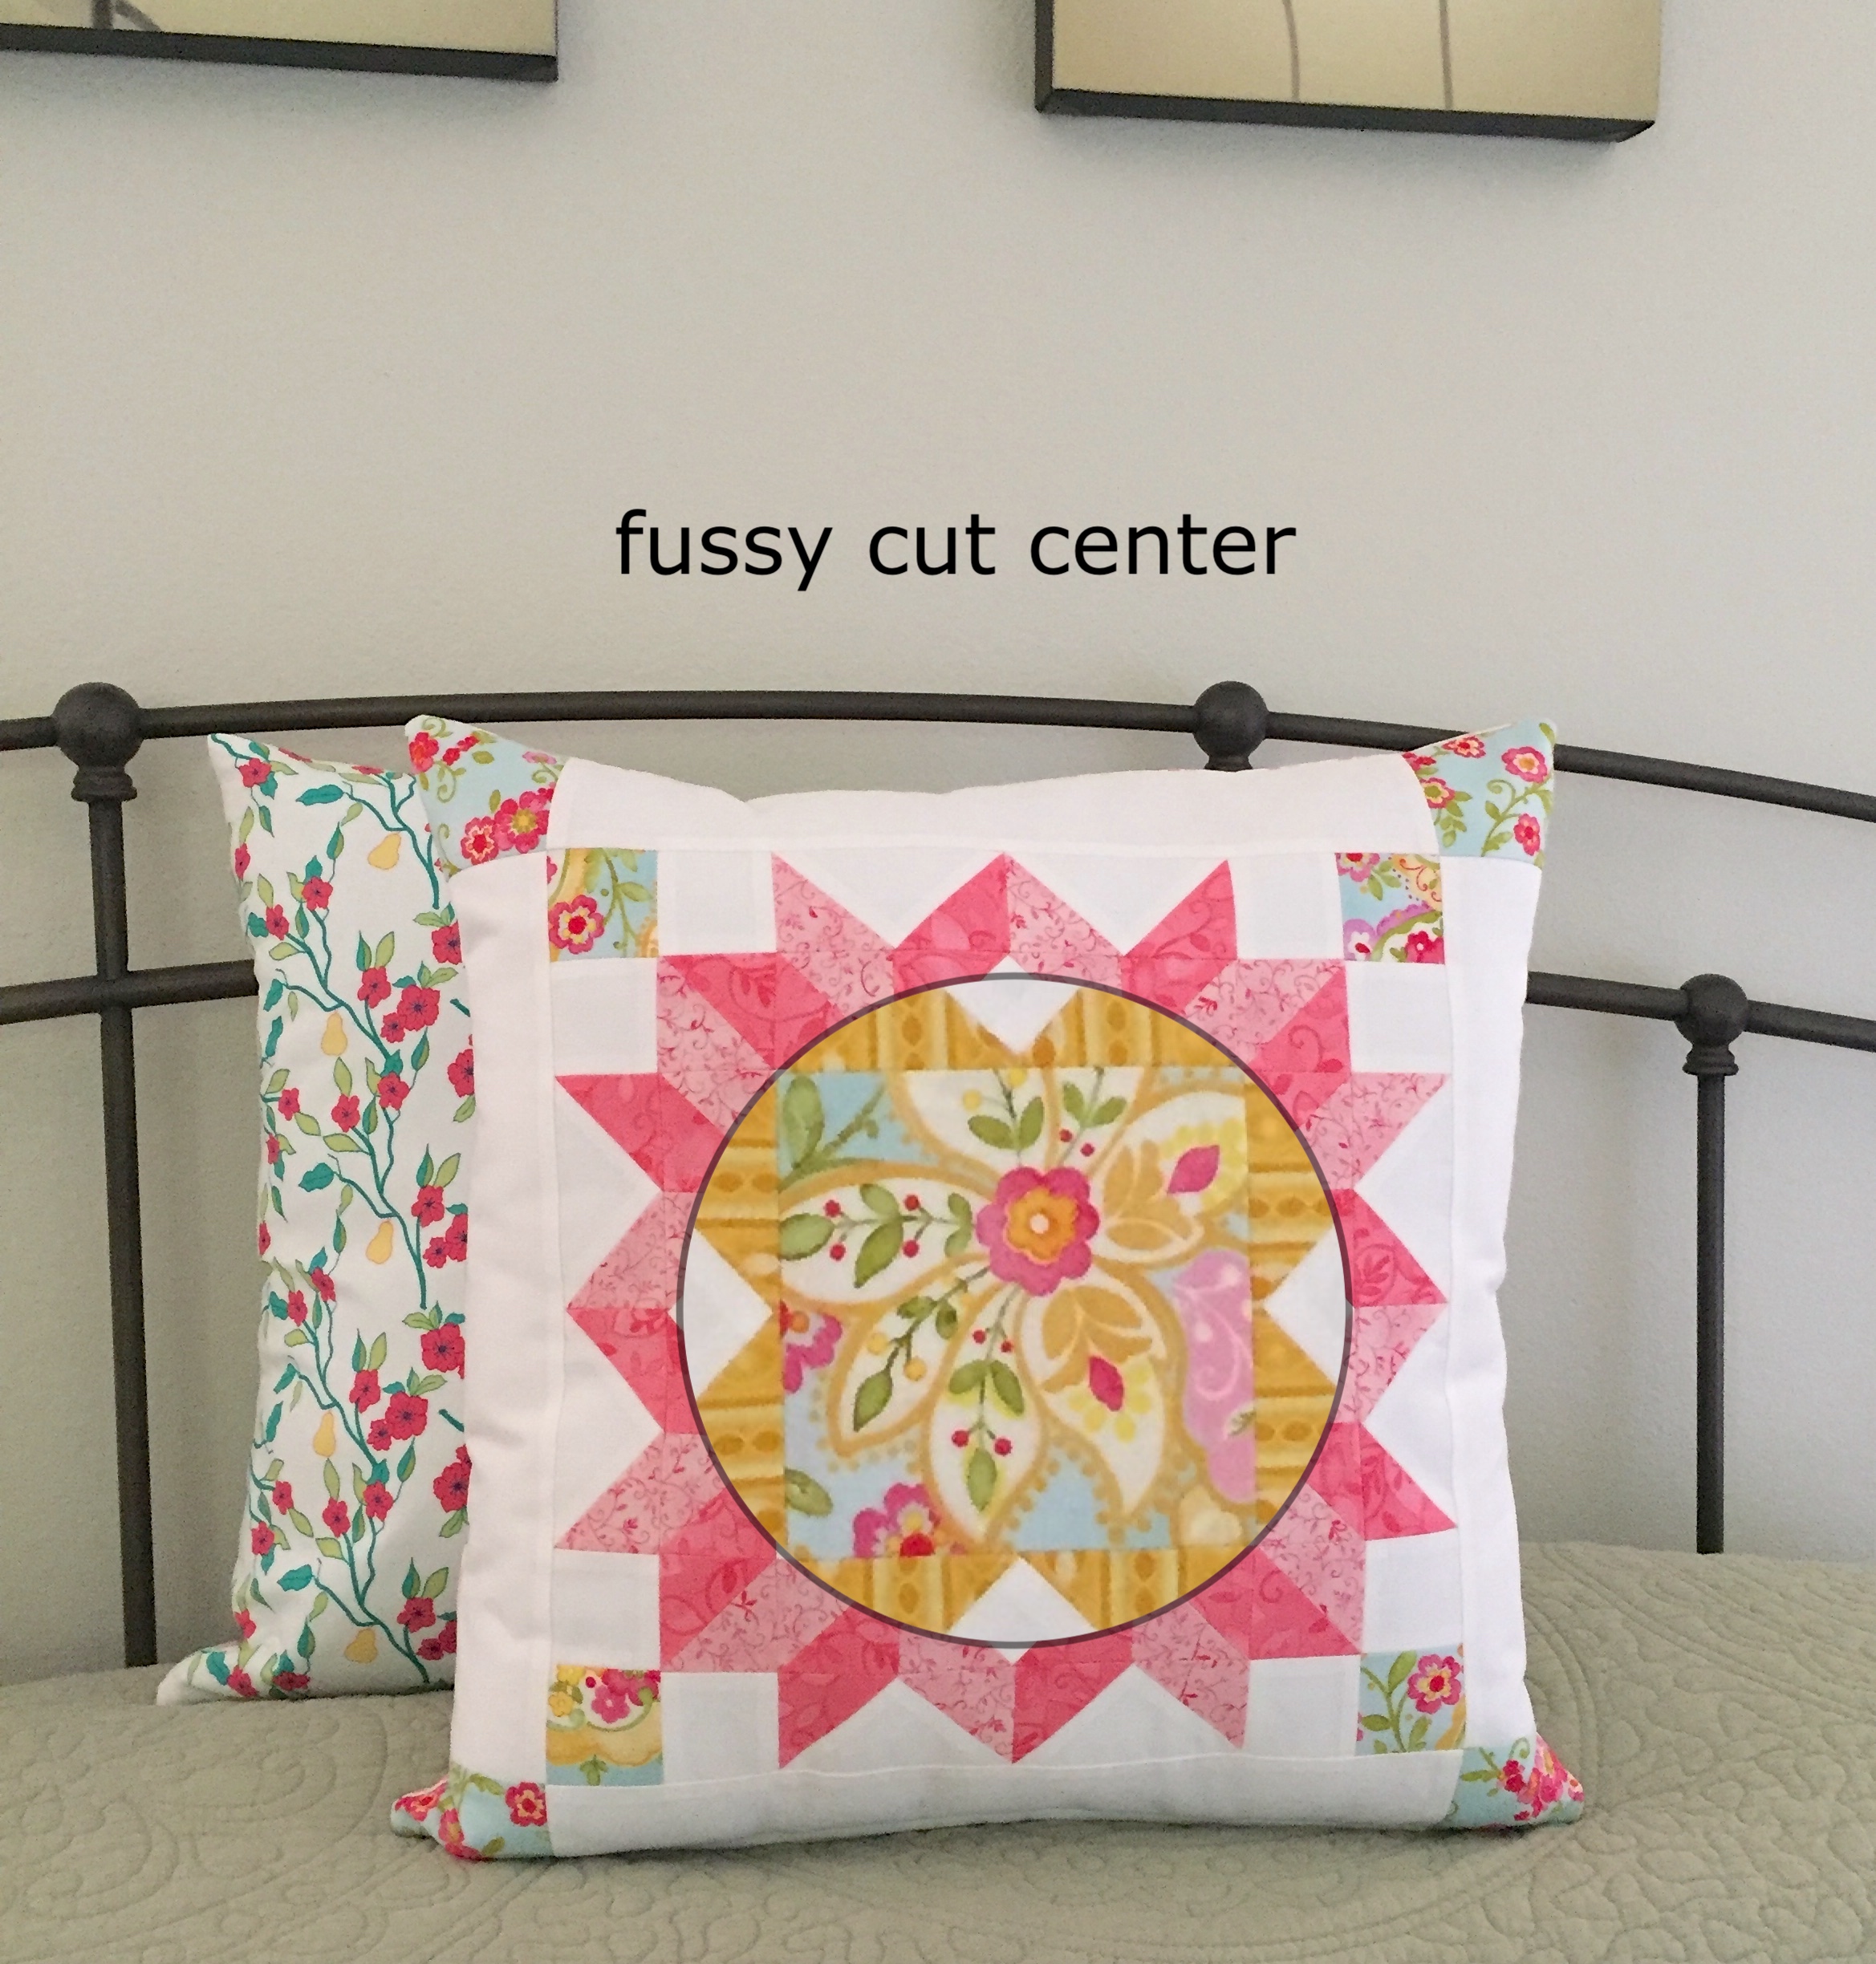
10. Fussy cut – A fussy cut is used when a quilter wants to showcase a specific section or element of a fabric pattern, e.g. a flower, an animal, etc. A fussy cut should always include a seam allowance.
I hope this blog post helped clarify some quilting terminology confusion.
I plan to continue my Quilting 101 series with my next post delving into the variety of precut fabric.
The month of May always brings out patriotism here in the US, with Memorial Day kicking off the summer season then Flag Day and the Fourth of July not too far behind. Right now I have two quilts in the making, a Christmas gift and a new pattern of mine, and I could use a break from larger projects so I set out to find something patriotic that I could finish quickly using left over fabrics.
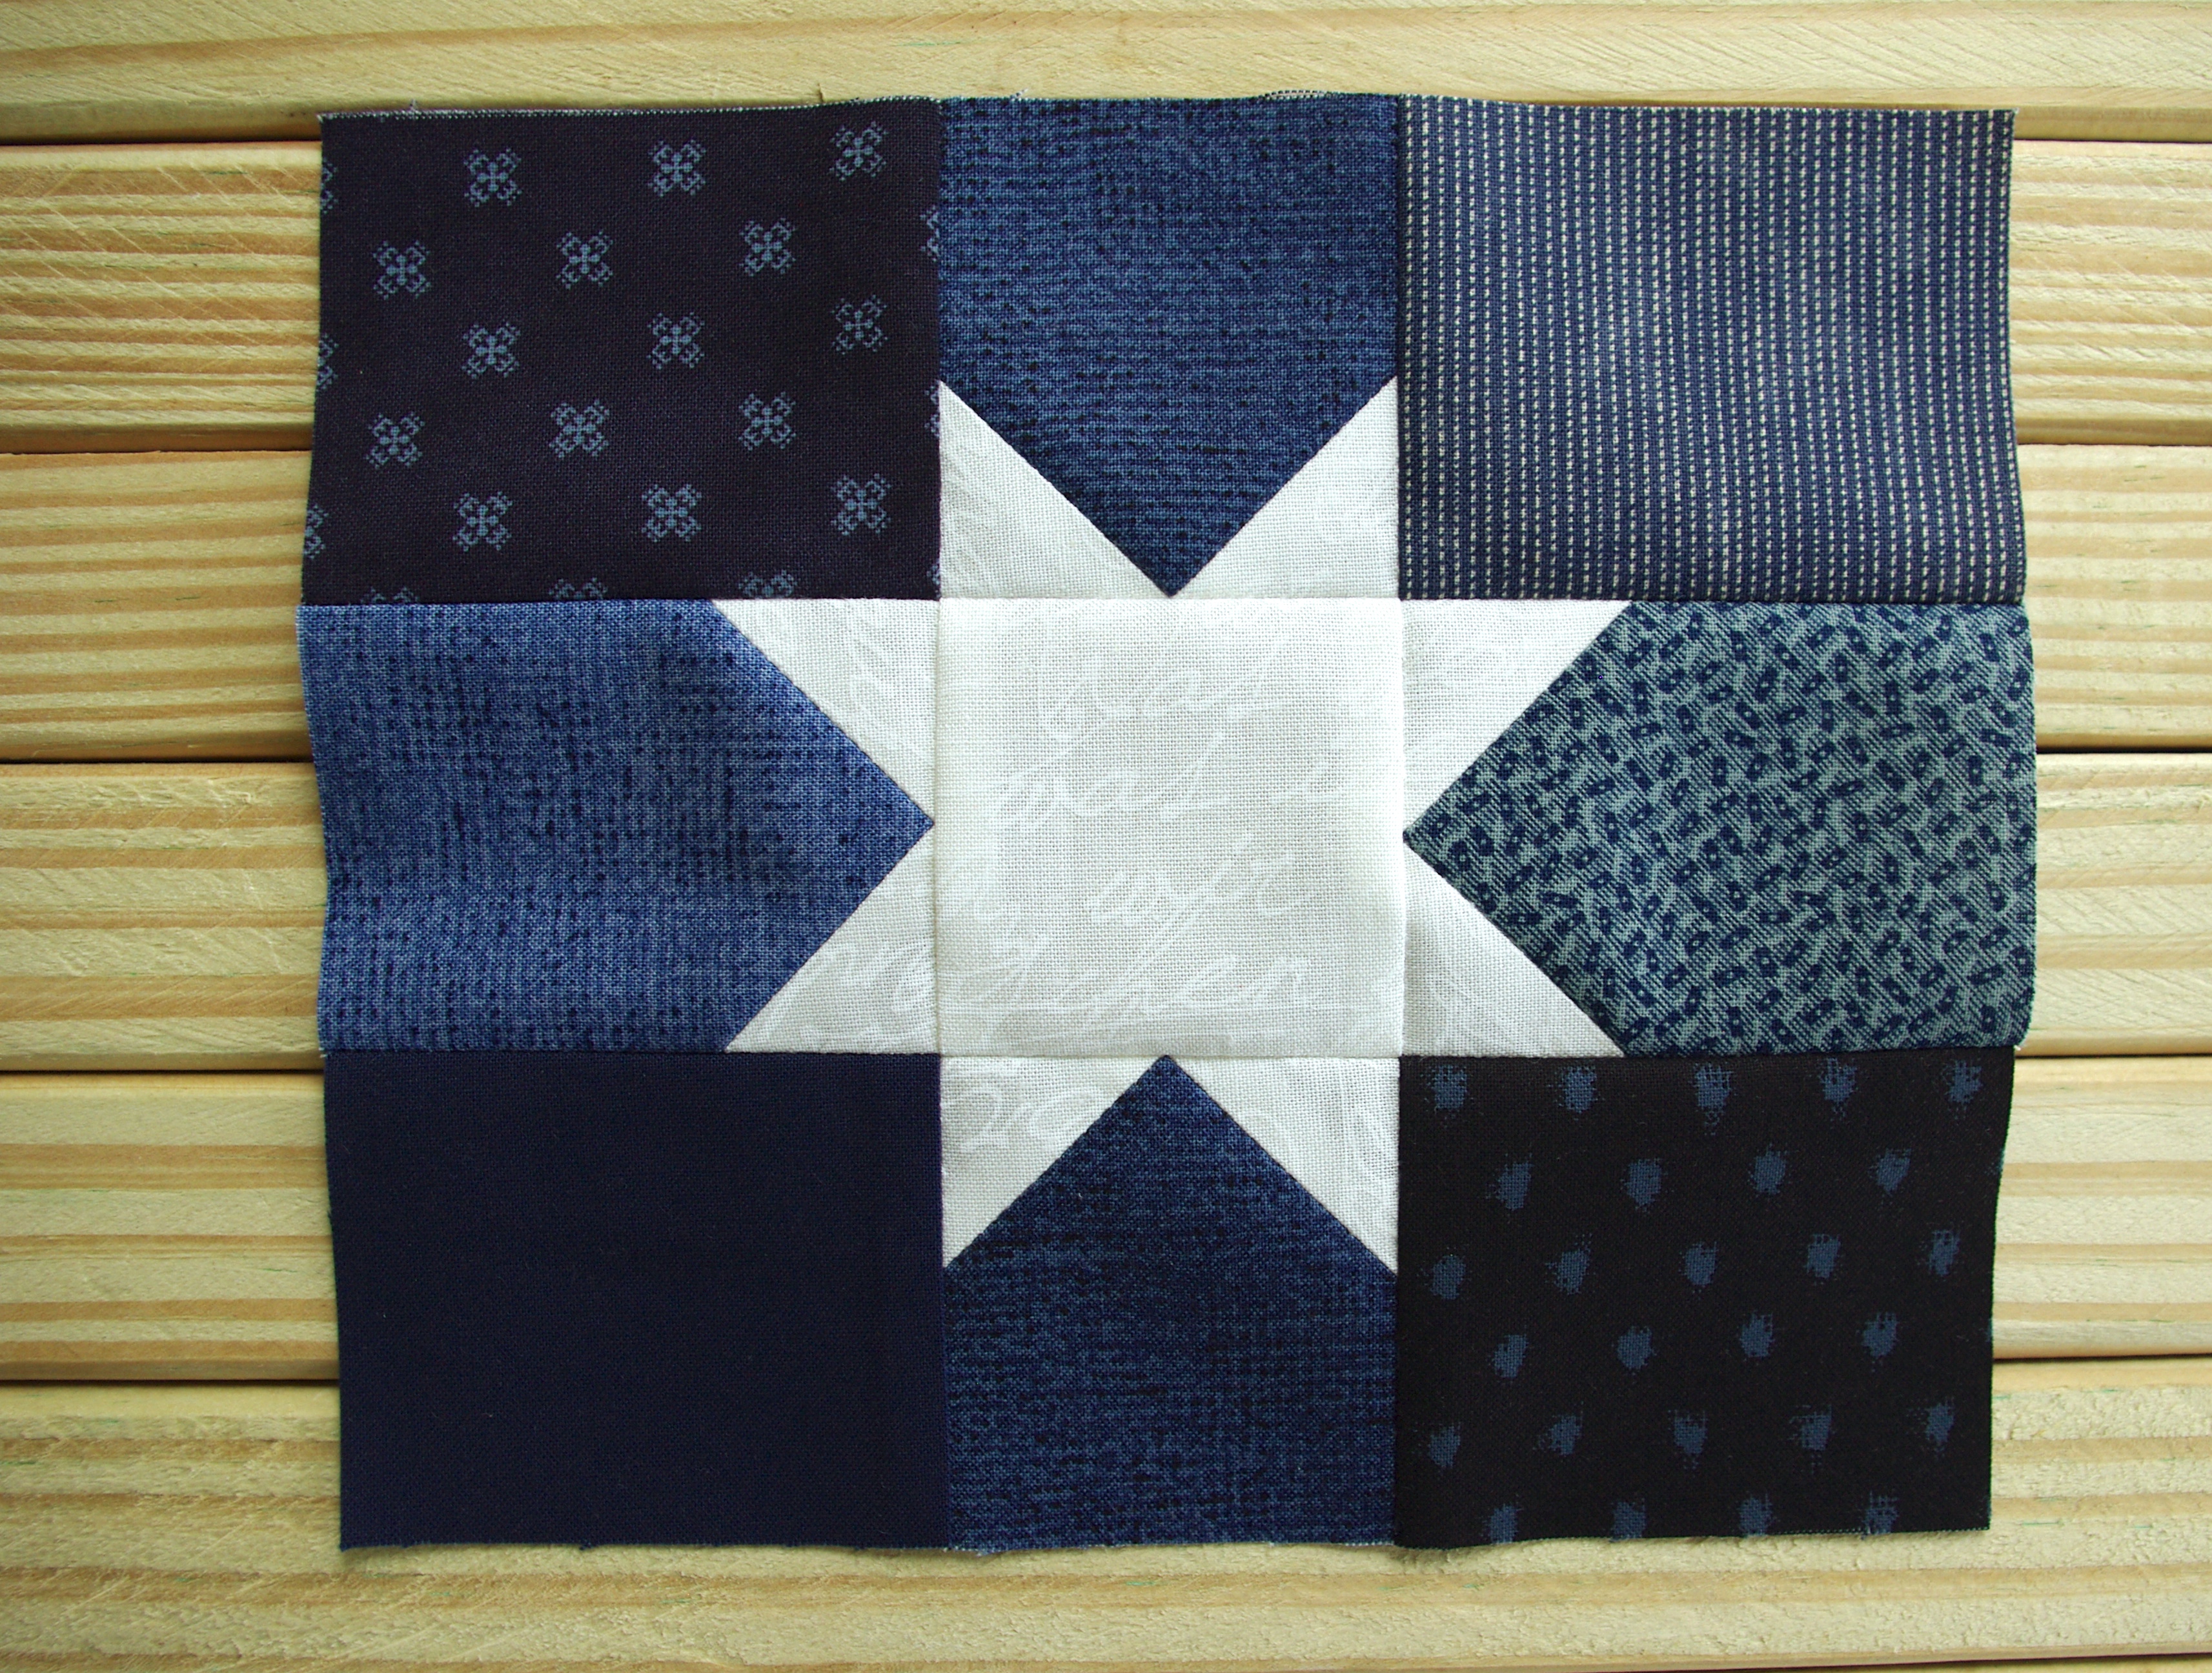
I usually don’t sew with blue (I don’t know why, I just don’t seem to choose it) but since I made my Americana Stars & Four Patches quilt last year, I had enough blue fabric for something small. Same with red, I don’t use it a lot, but I had some on hand from previous projects plus I got a small fat quarter bundle freebie with some lovely reds included. 🙂
After quite a bit of searching, I decided on a free flag tutorial from Cluck Cluck Sew. While she made a lovely pillow, I wanted something for my sewing room door so I added a light blue border and made mine a mini quilt.
For the star and stripes, I used a white low volume fabric with handwriting that reminded me of old-fashioned handwritten letters and historic signatures; I thought it was fitting for a flag. It’s kind of difficult to see it unless it’s close up…
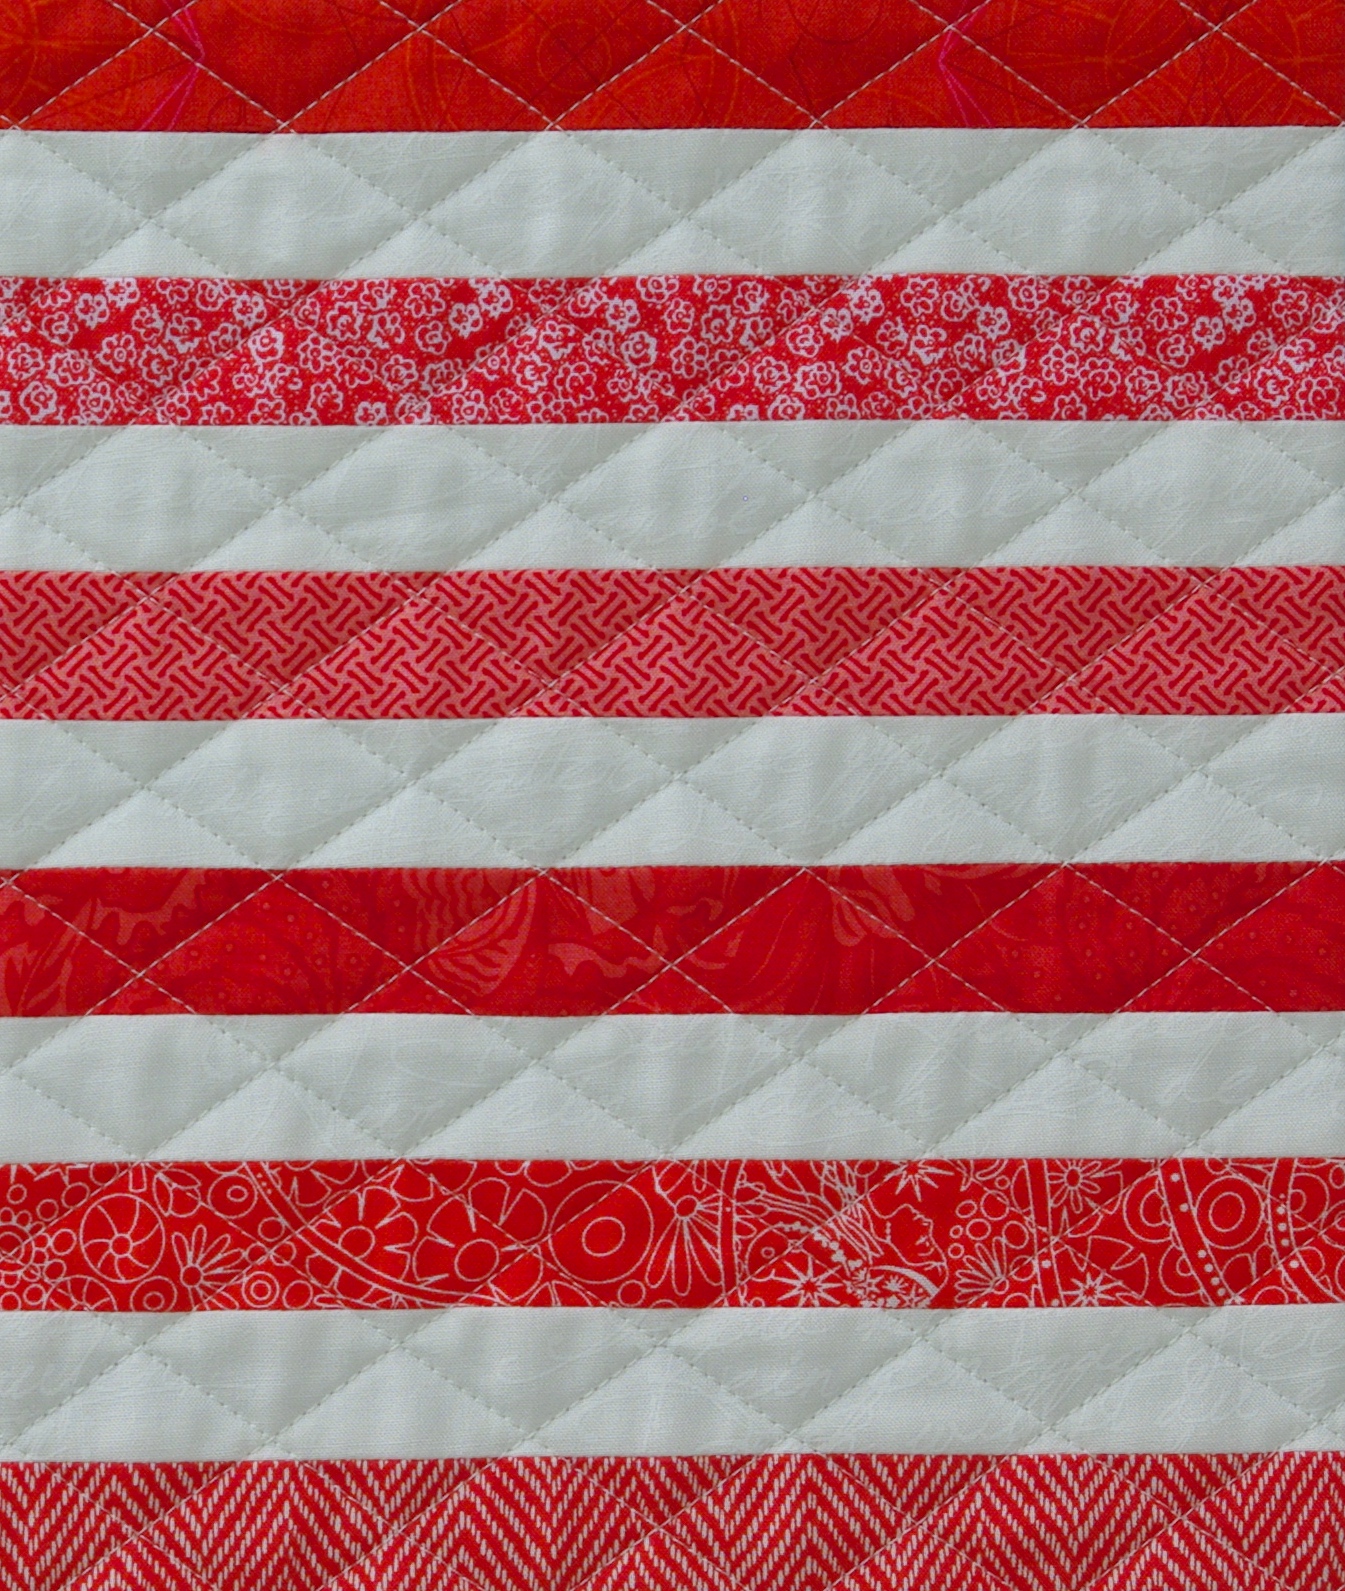
Before I began quilting, I did some ‘thread painting’—my quilting tip that consists of laying out thread on a project to help decide on a quilting pattern. To read more about it, click here. I do tend to gravitate toward crosshatch quilting, especially on rectangular blocks because the end results are diamonds, and I love the look! So yes, I went with crosshatch quilting, yet again.
thread painting
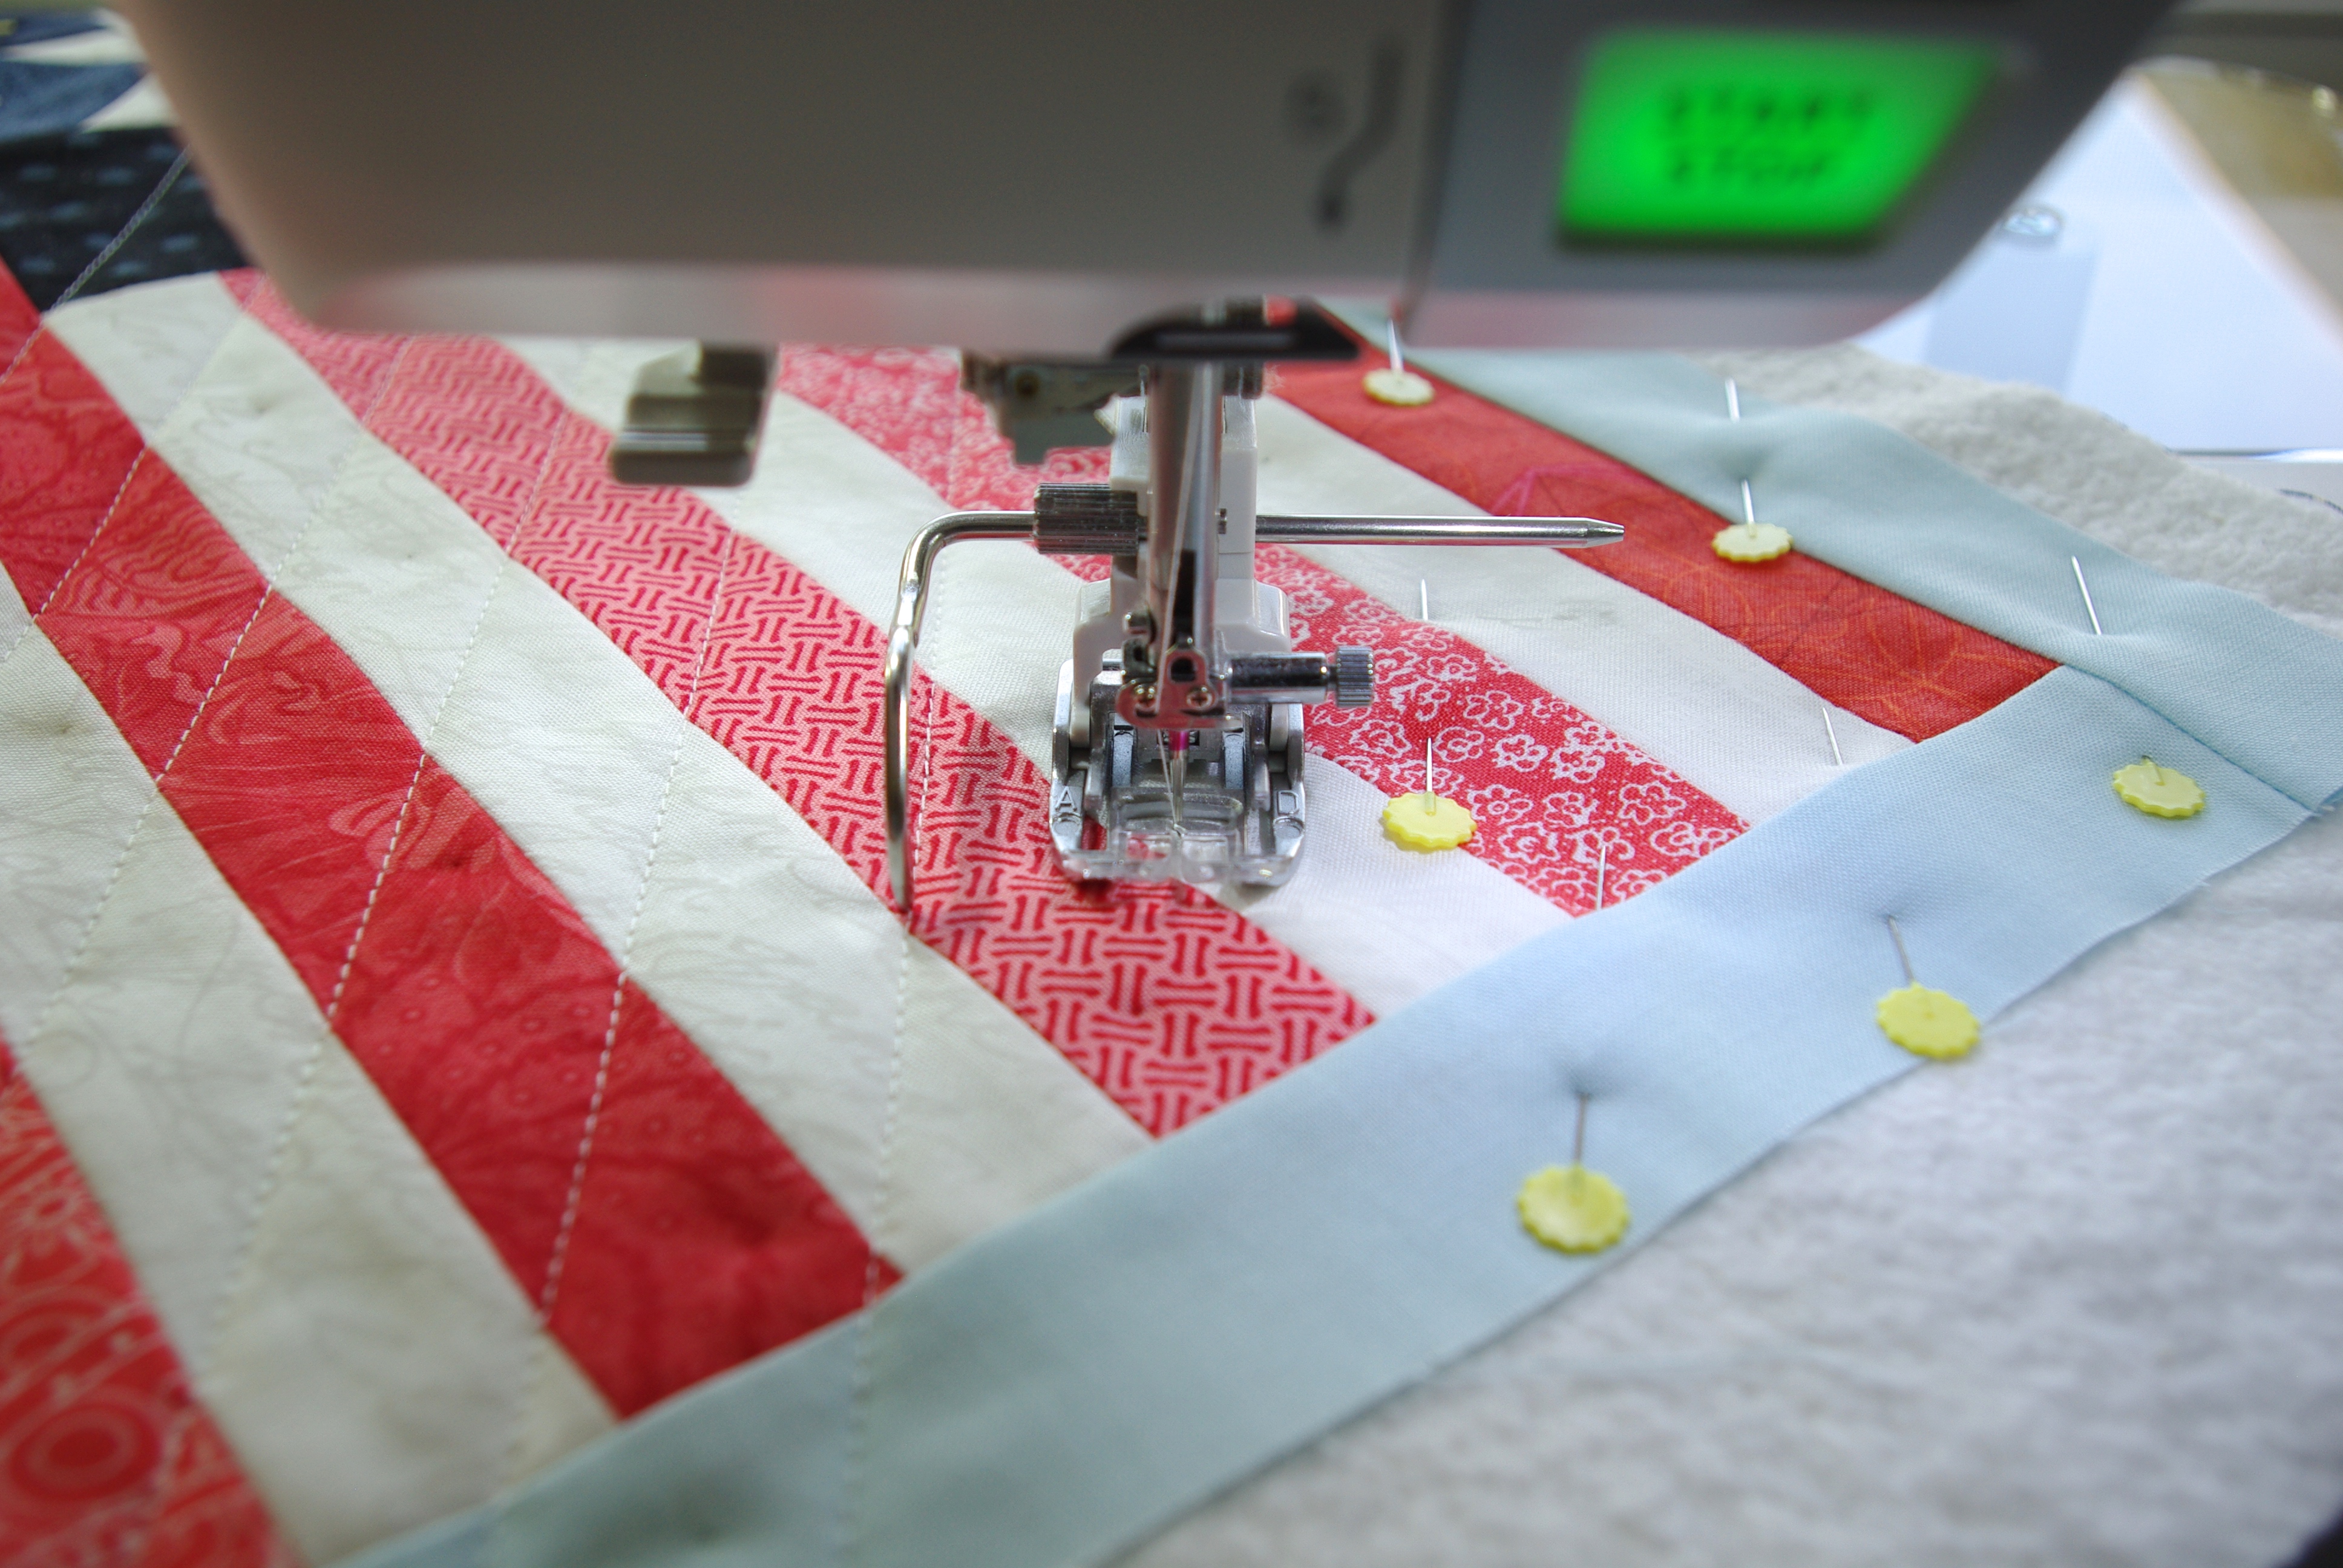
When basting a mini quilt, I always use my flower straight pins instead of actual quilting pins. Reasons being: they’re easier to put in and take out, they’re nice and sharp and long, and they seem flatter than other pins.
I used my guide for quilting accuracy and it gave me very precise results!
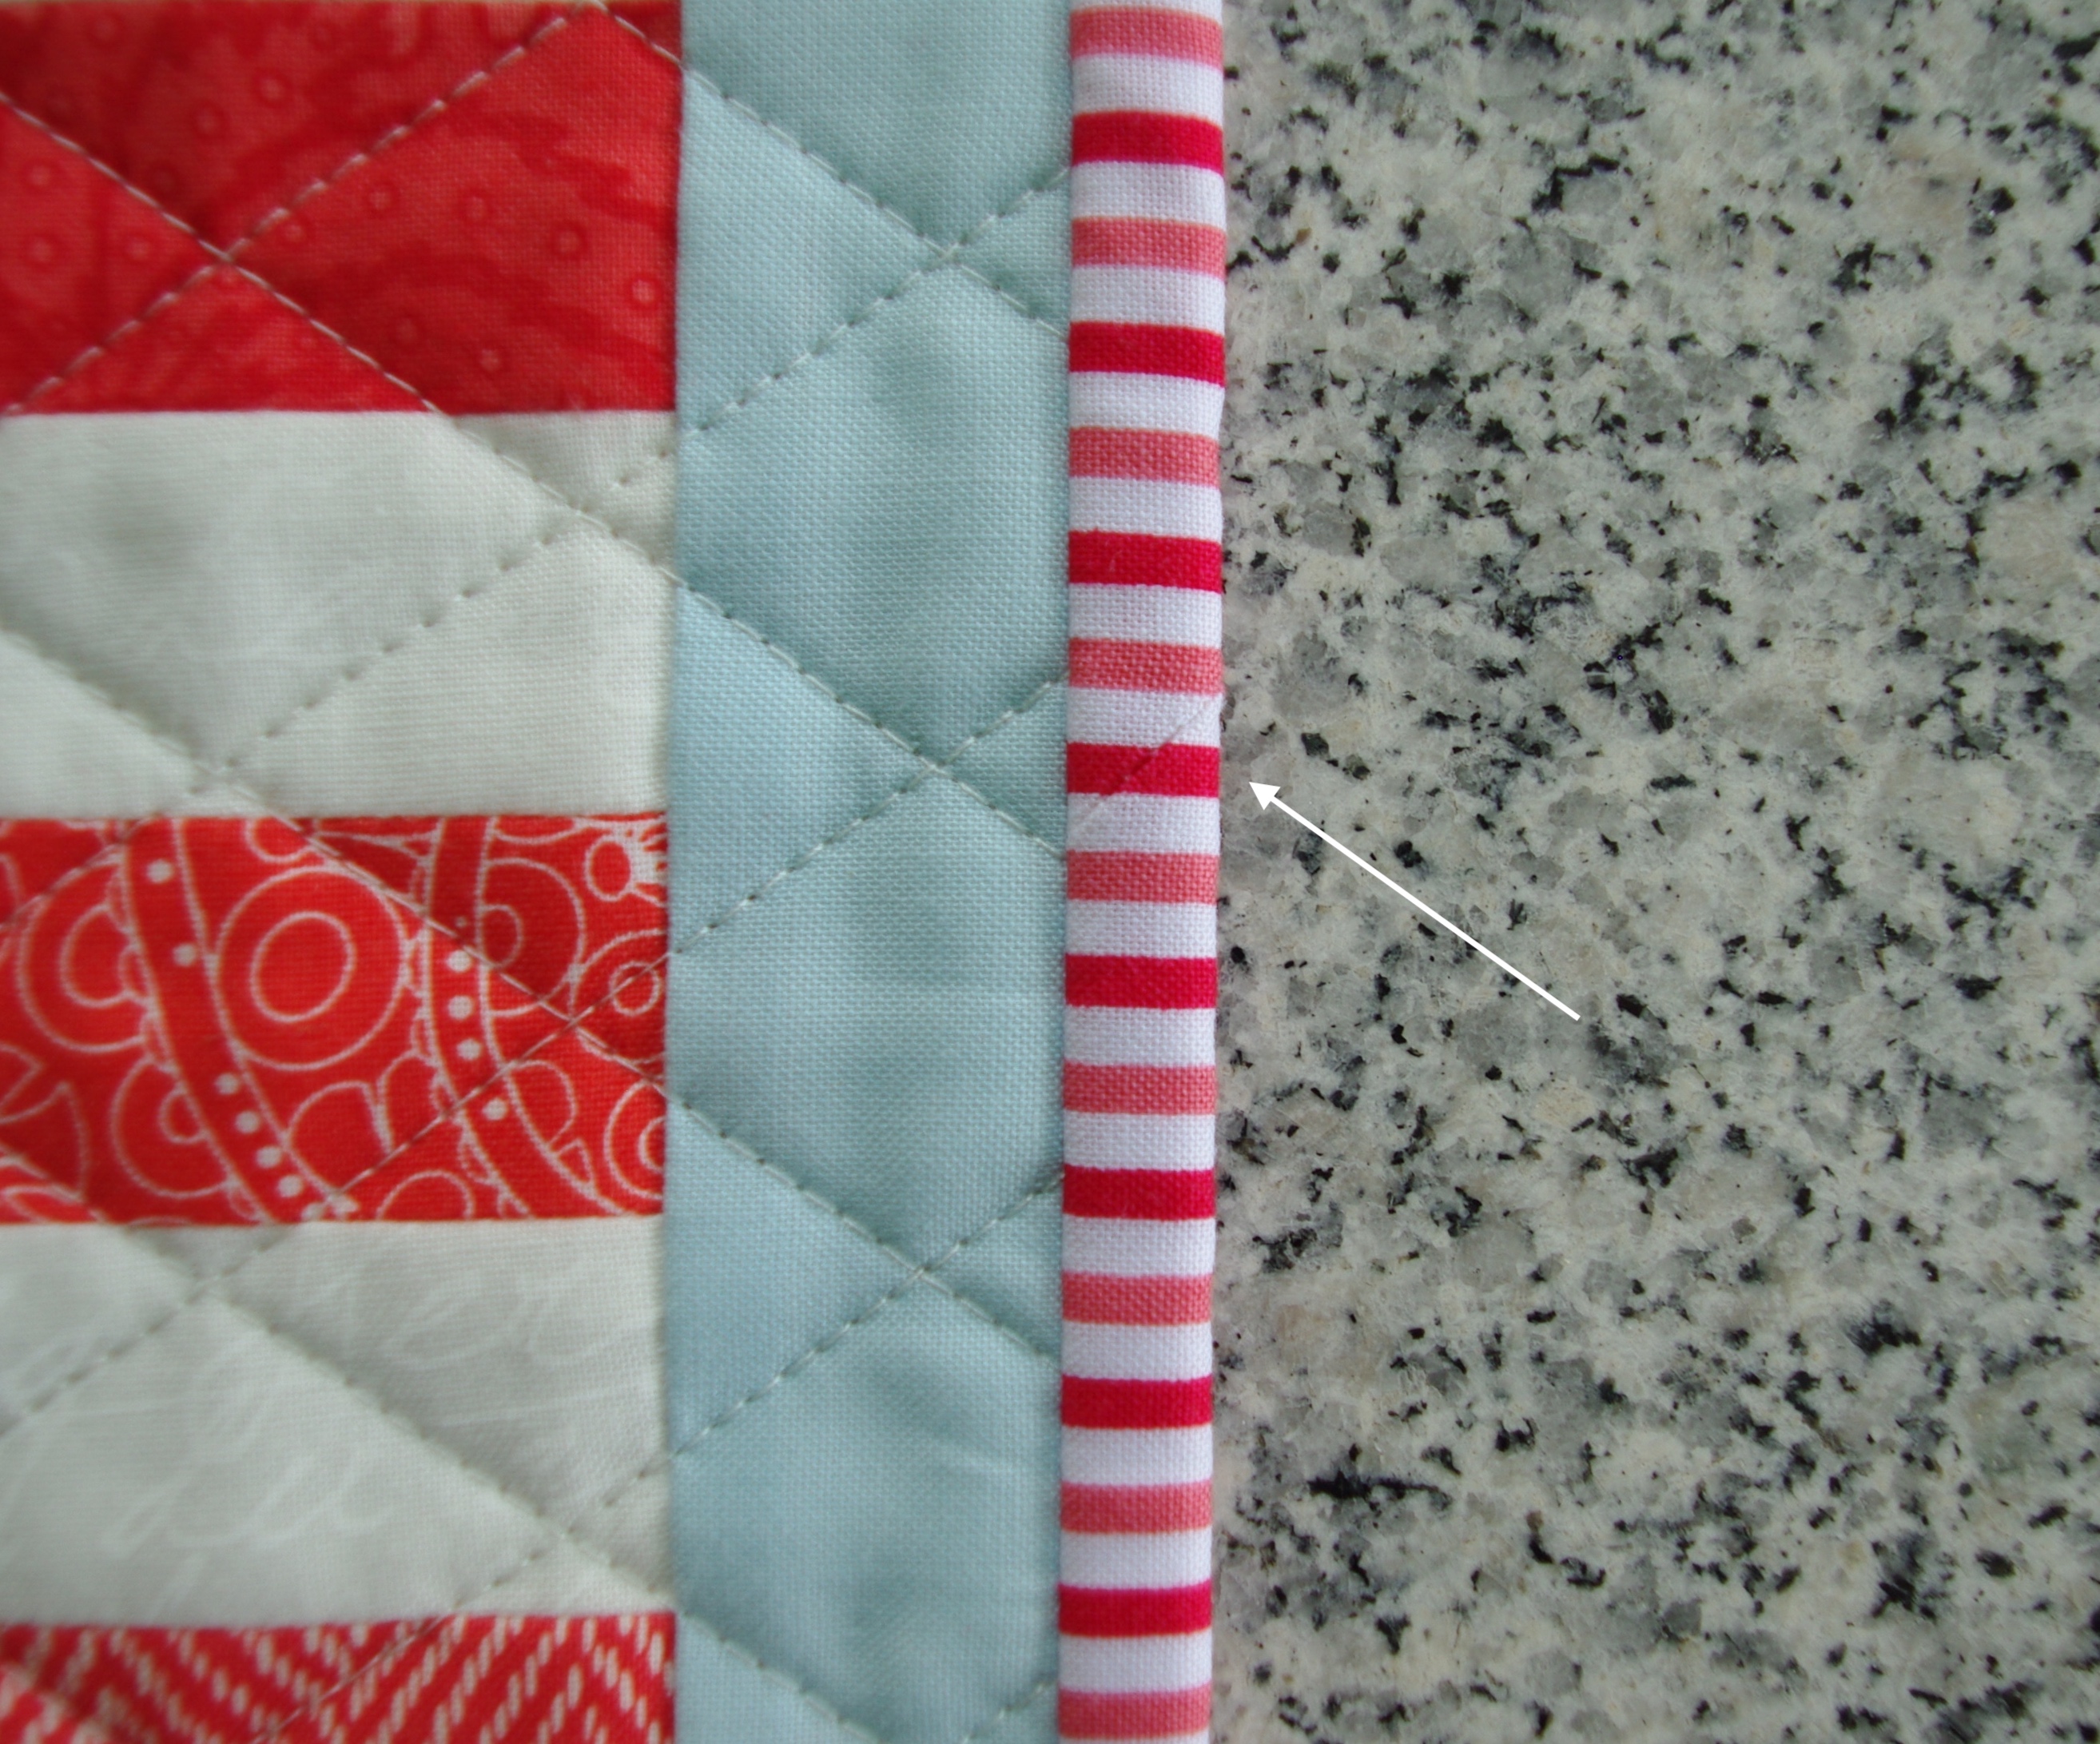
I was happy to have had enough red and white striped fabric for this project, left over from a Christmas tree skirt. And of course, striped binding is always a favorite.
And speaking of binding…how lucky was I to get this tiny stripe to align when I finished off my binding? Absolutely pure luck! Doubt that ever happens again. 🙂
For the back, I had this very appropriate fabric from my Stars & Four Patches quilt. As far as backing goes, it’s easy to match up prints, especially on a small project. I have more information on this topic on my Matching Fabric Patterns blog post.
And…here’s the finished project!
I love everything about this mini—it’s cute, a great size for my sewing room door and I can get it out to enjoy several times a year. Lastly, it was a small but significant scrap buster!
I finally did it—I made a quilt for my mom. After making several for other family members, non-relatives and donating a couple, I felt it was about time. (I think she might have been waiting for one for quite some time, too).
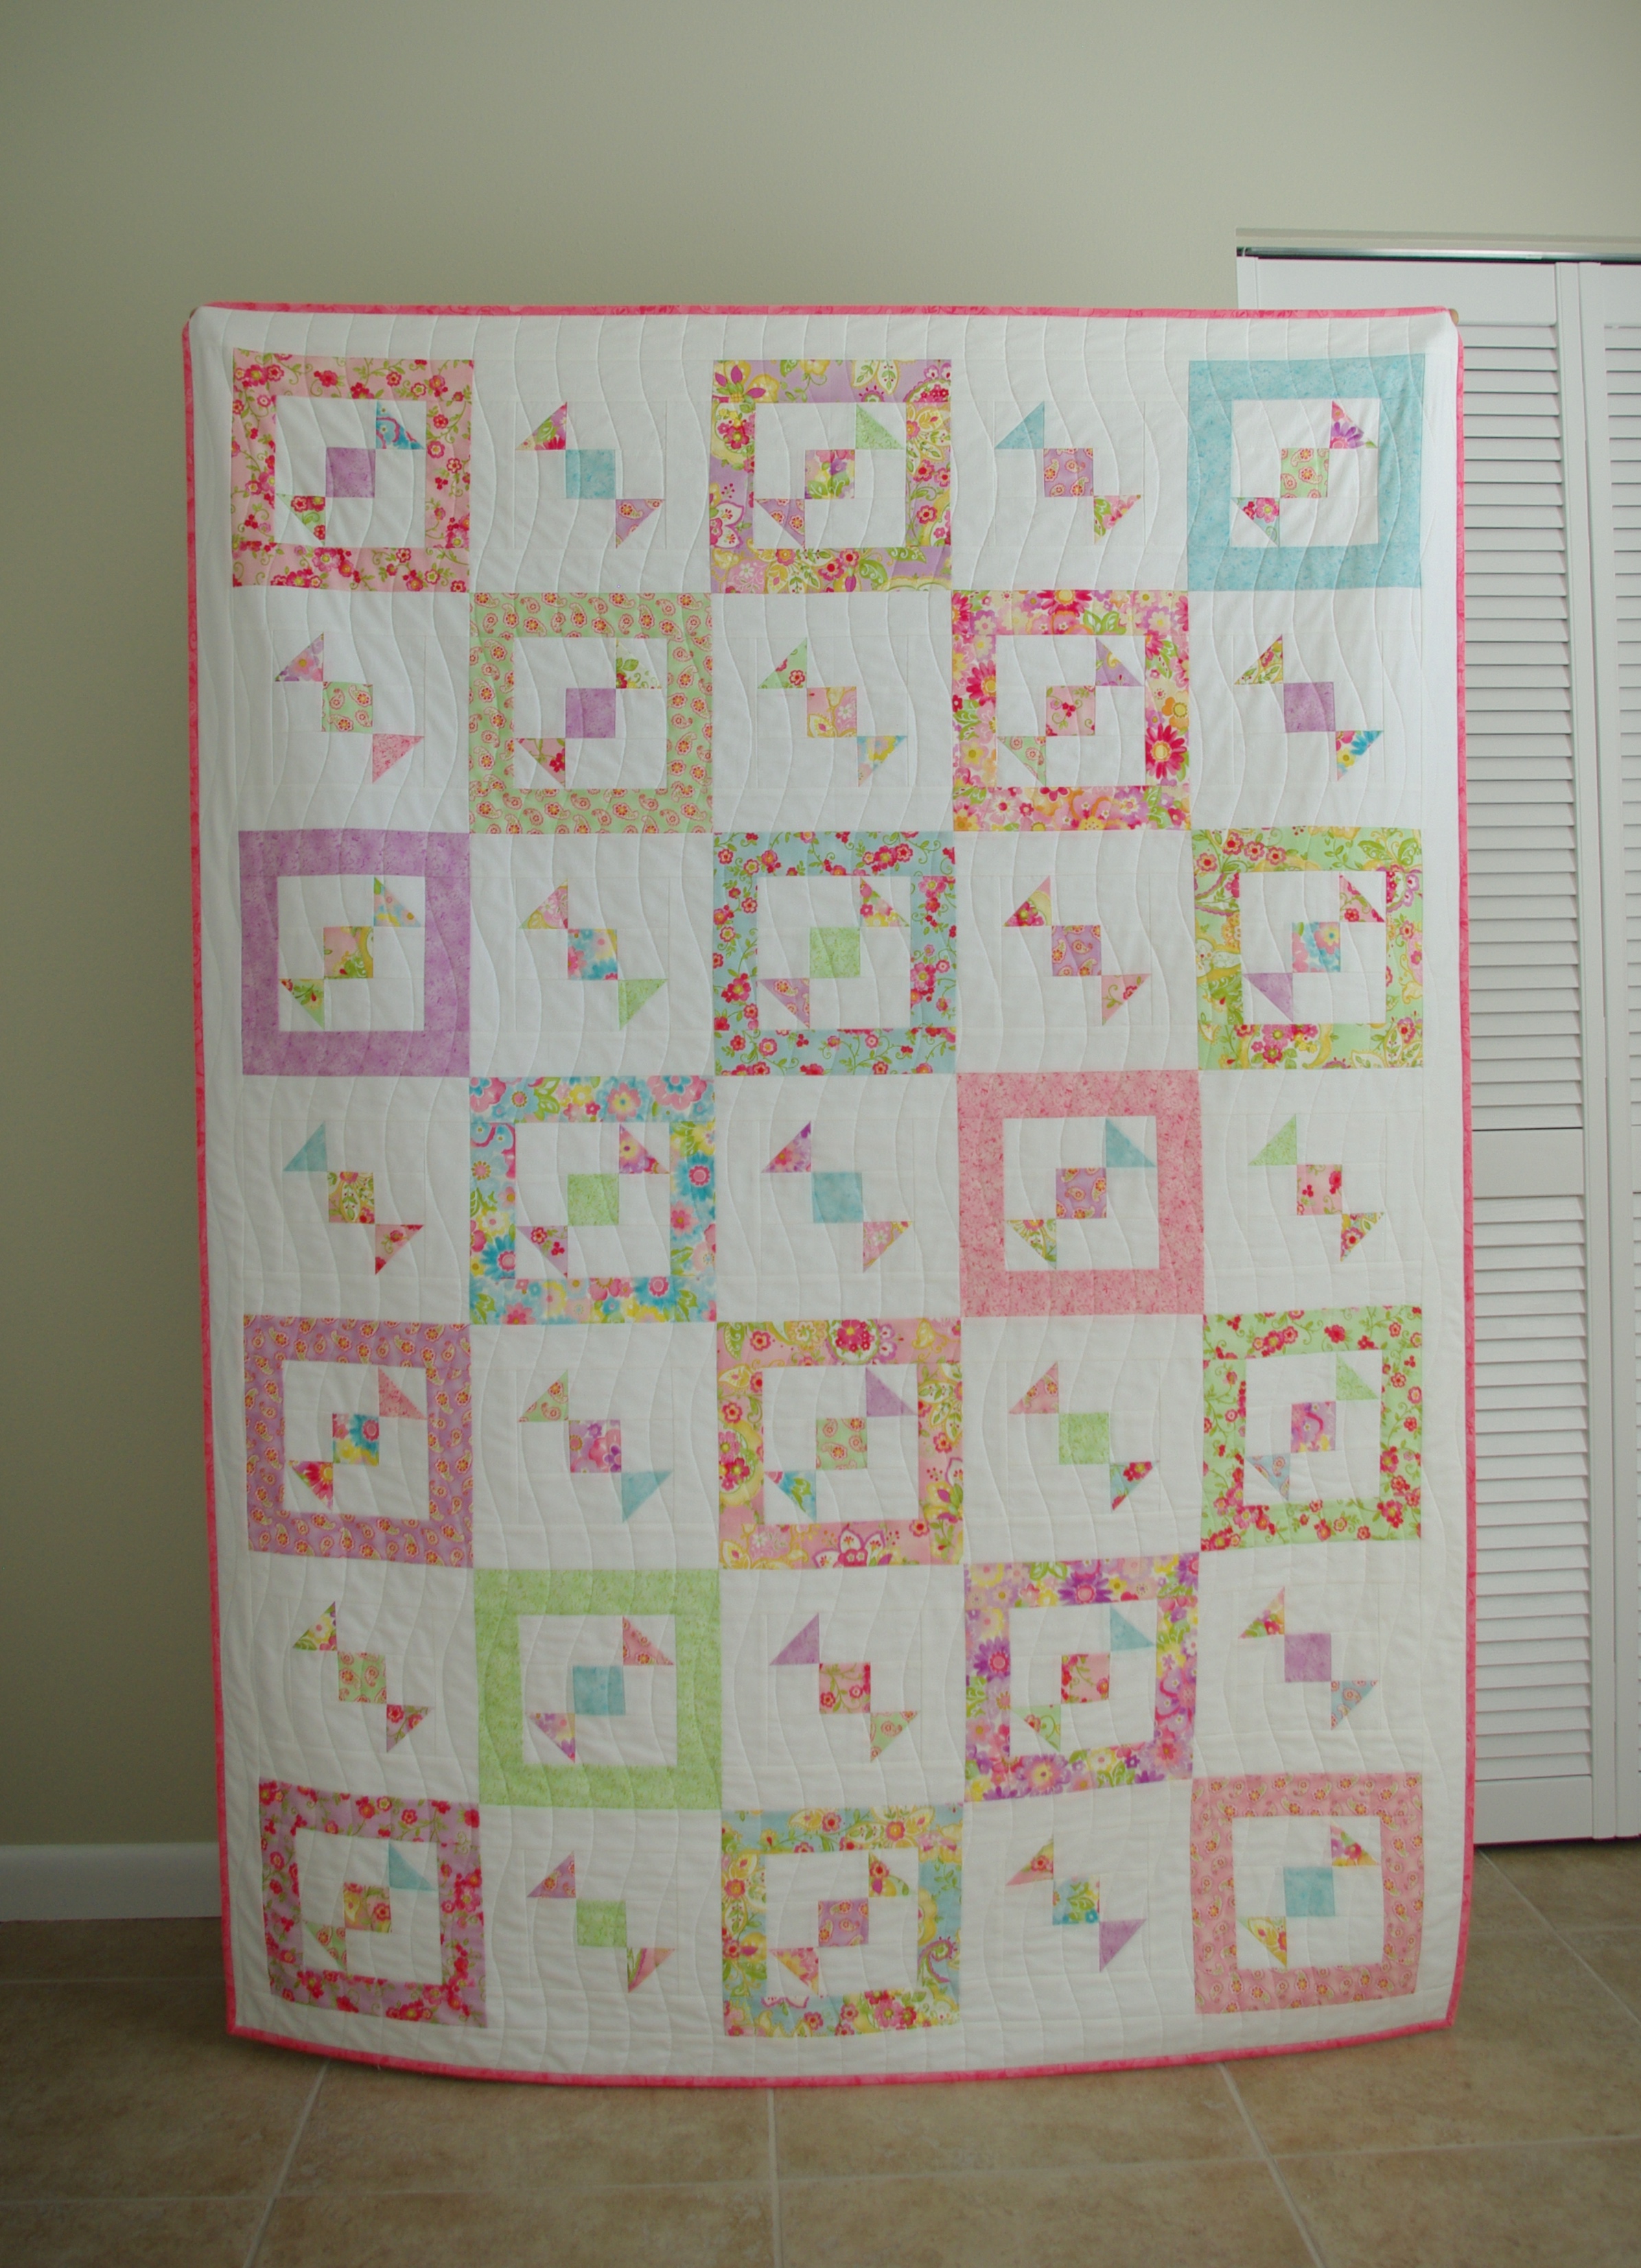
When asked what she wanted, I got a few easy requests: the quilt be made from my own pattern, Boxed Candy Toss Quilt that I use pastel-colored fabrics; and that I do my own quilting, design included. Done, done and done.
At first I thought I’d work on it with no time frame, then I resolved to have it done by Christmas. Since I started early enough, I decided to document the process and share some of the tips and techniques I used when making it.
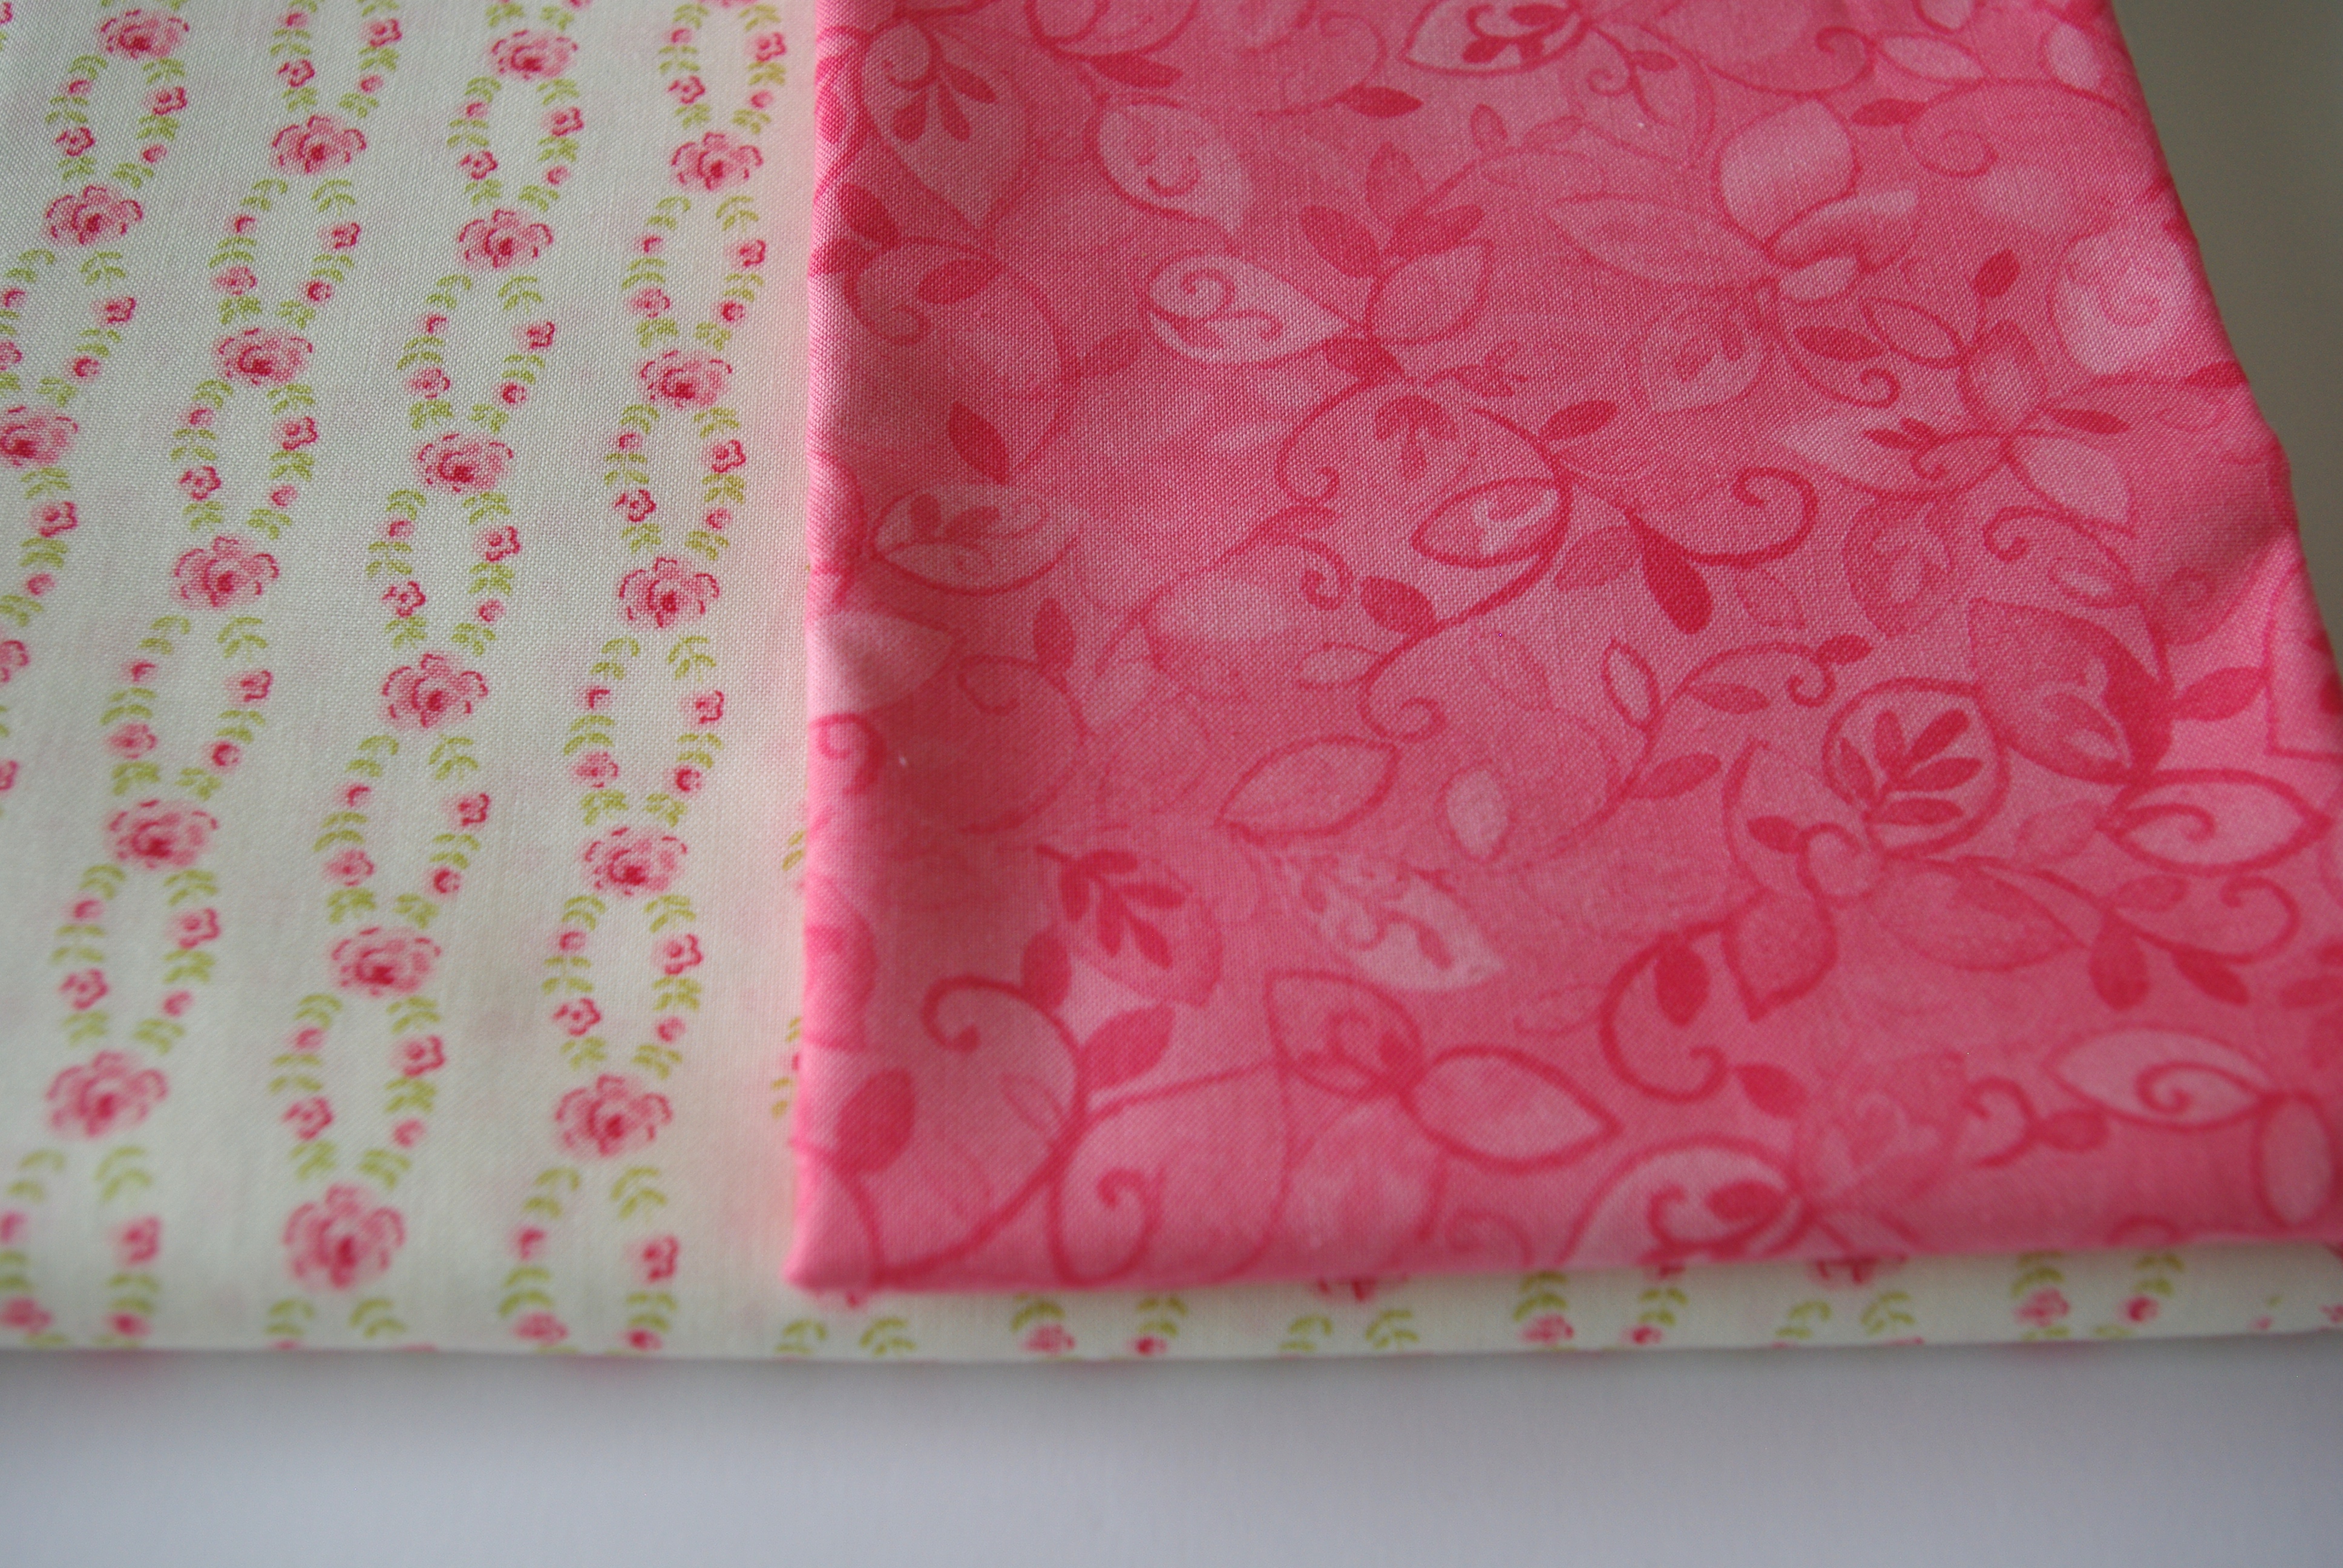
First, the fabric. The quilt top fabric collection is Colette by Chez Moi for Moda (an older collection that I had to have, luckily found on Etsy). The background fabric is Kona Cotton Snow.
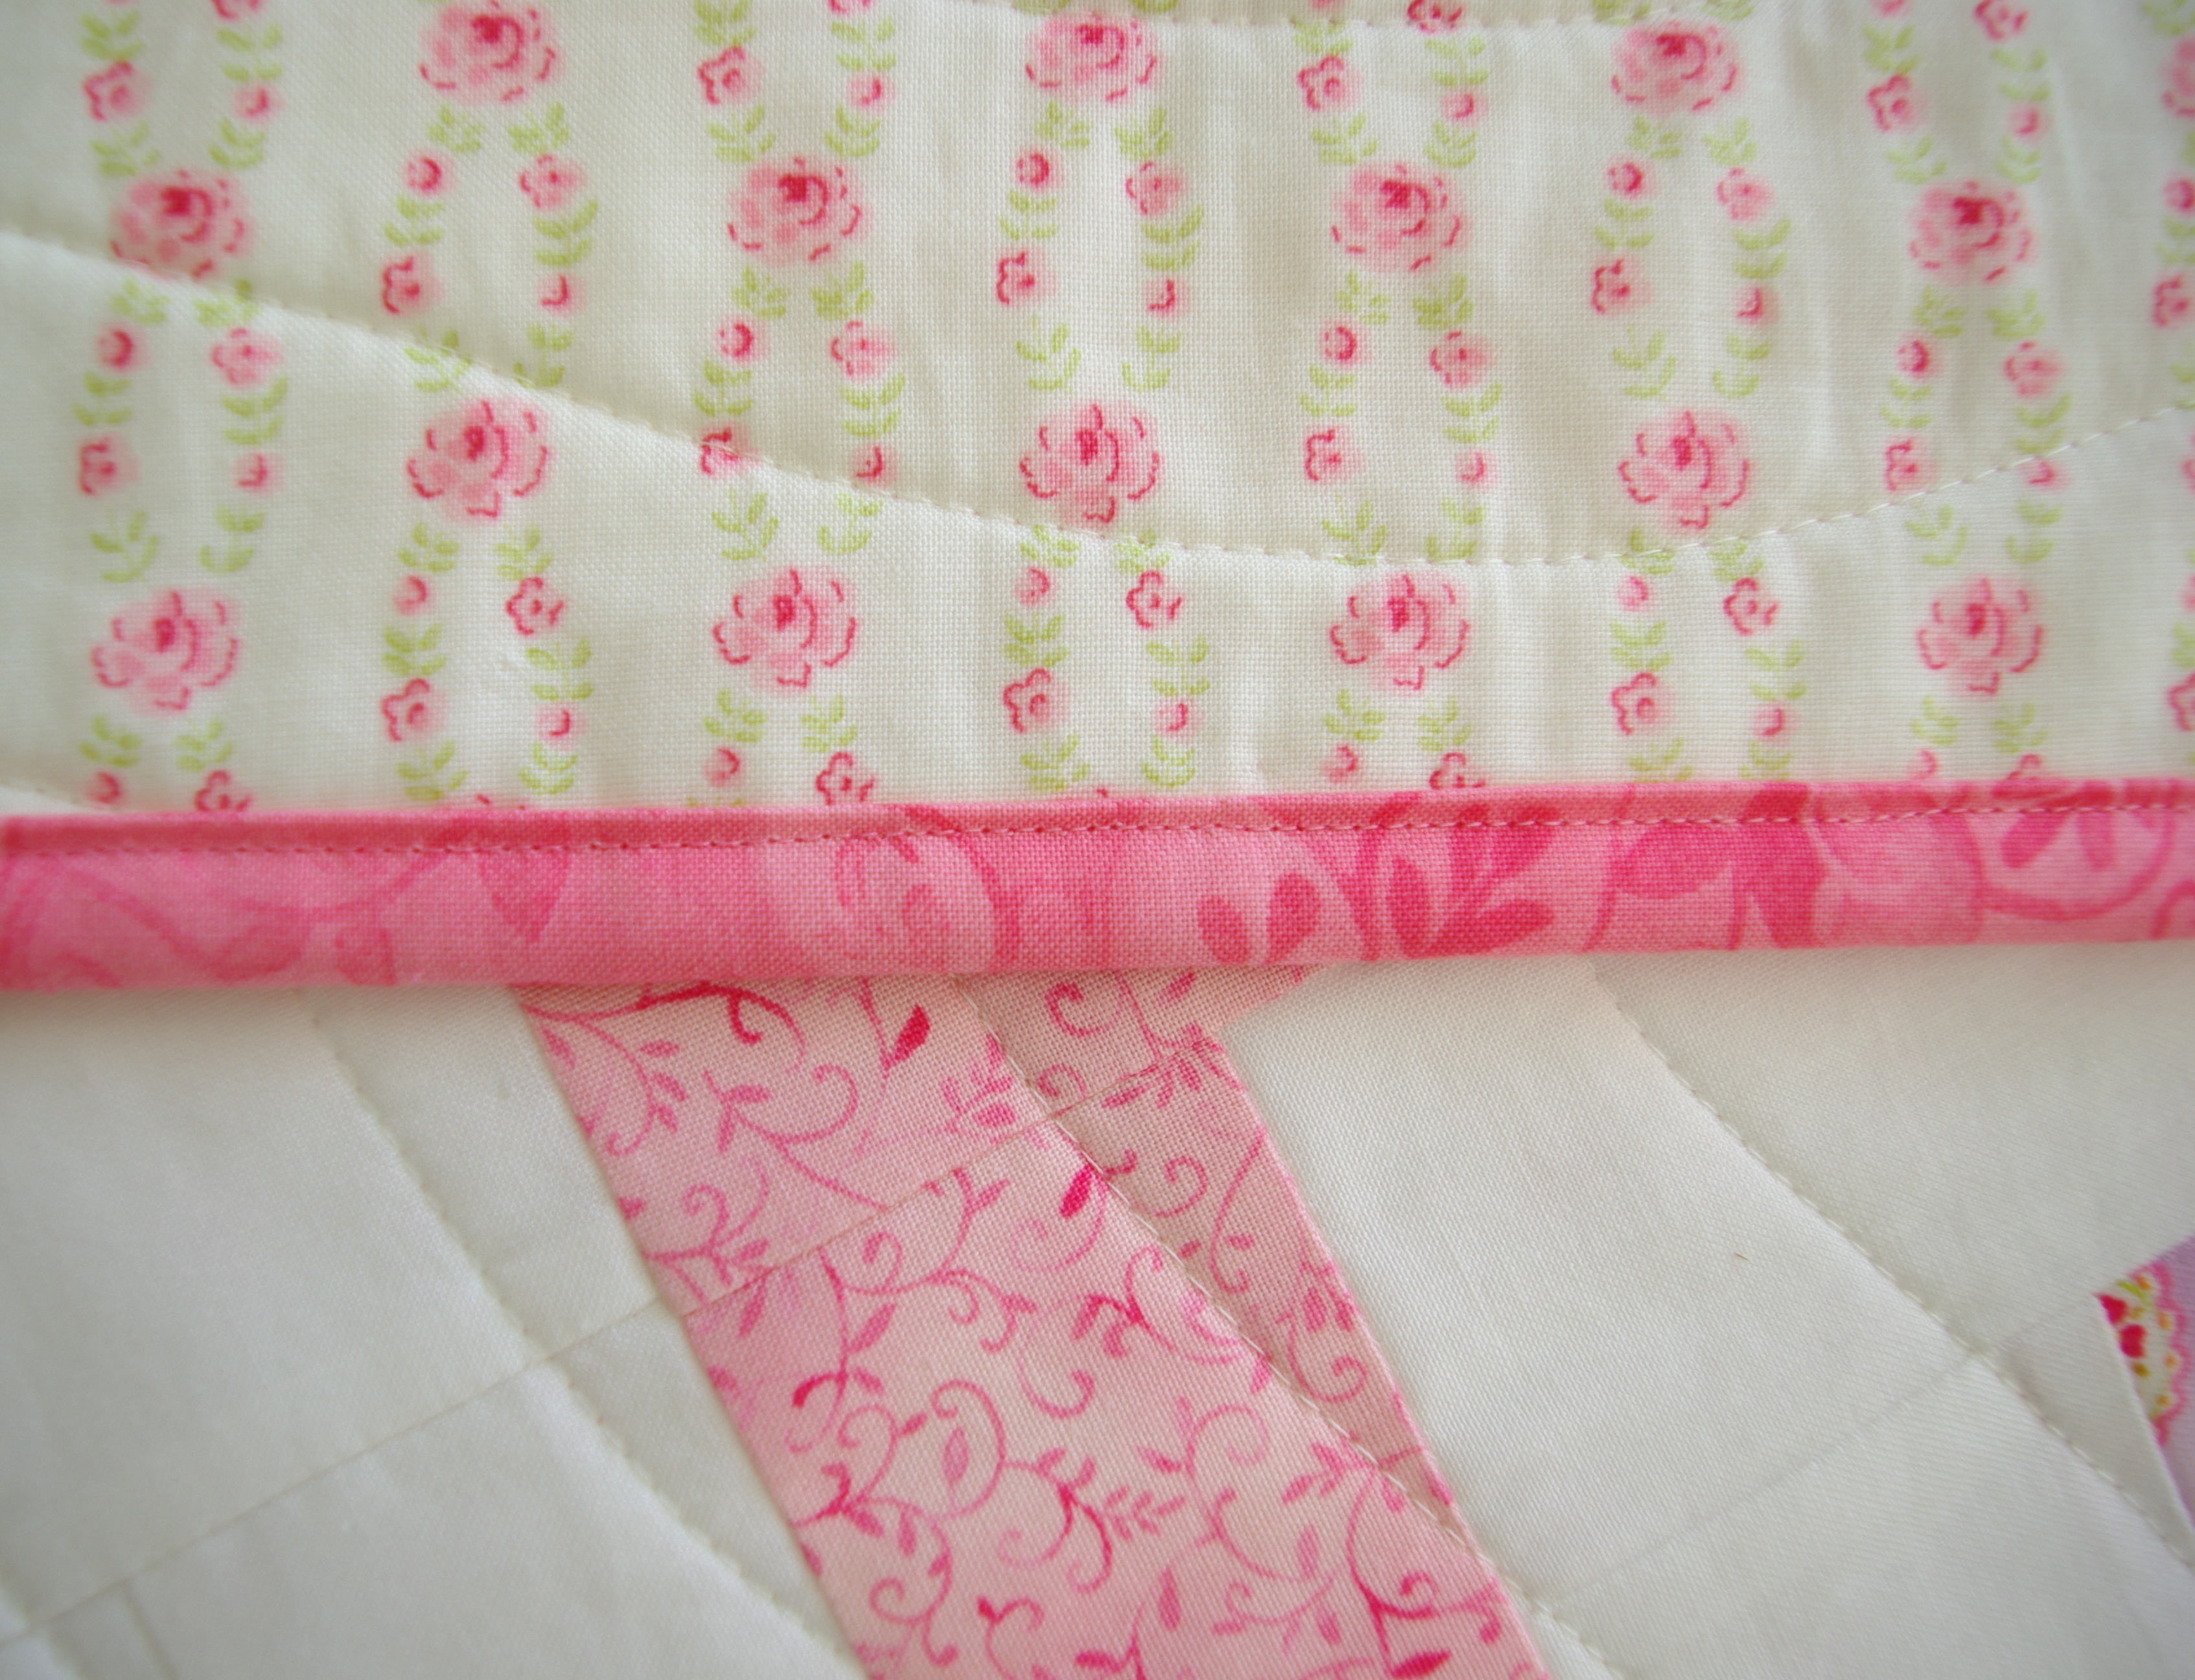
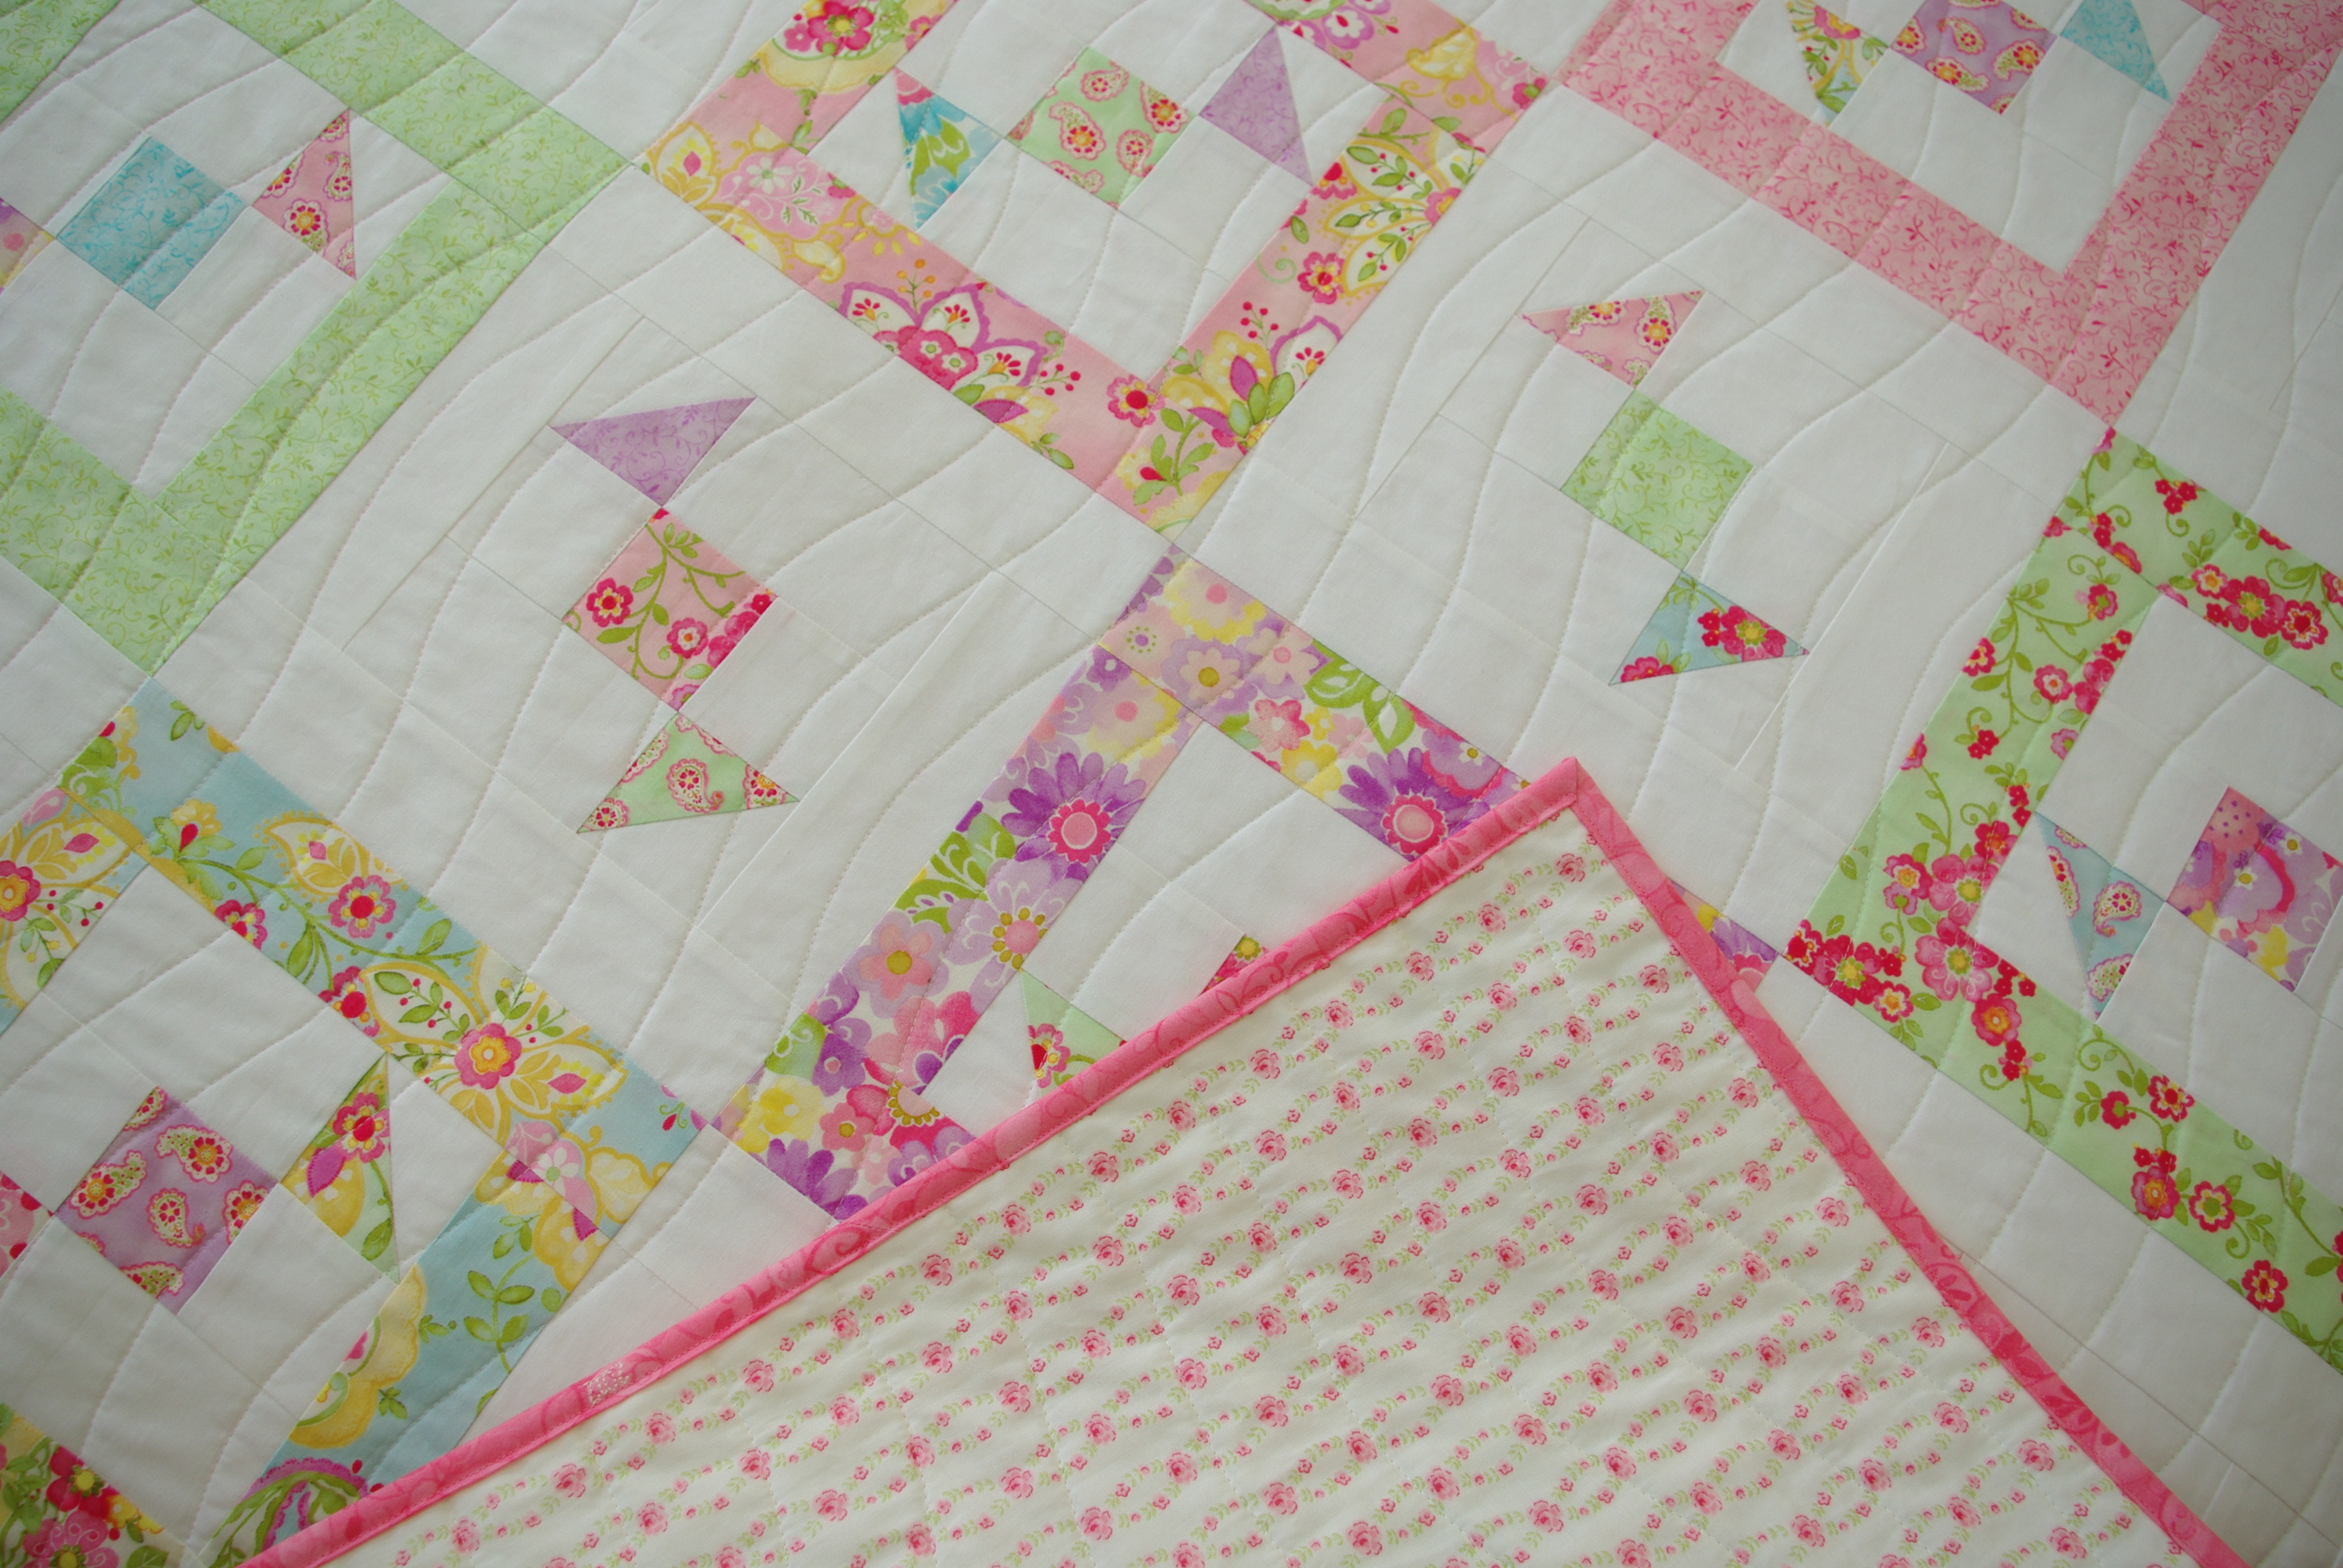
The backing (left) is Fleur by Brenda Riddle Designs for Moda and the binding is also Chez Moi from the Nanette collection. I used Aurifil 50wt 2026 for piecing and quilting.
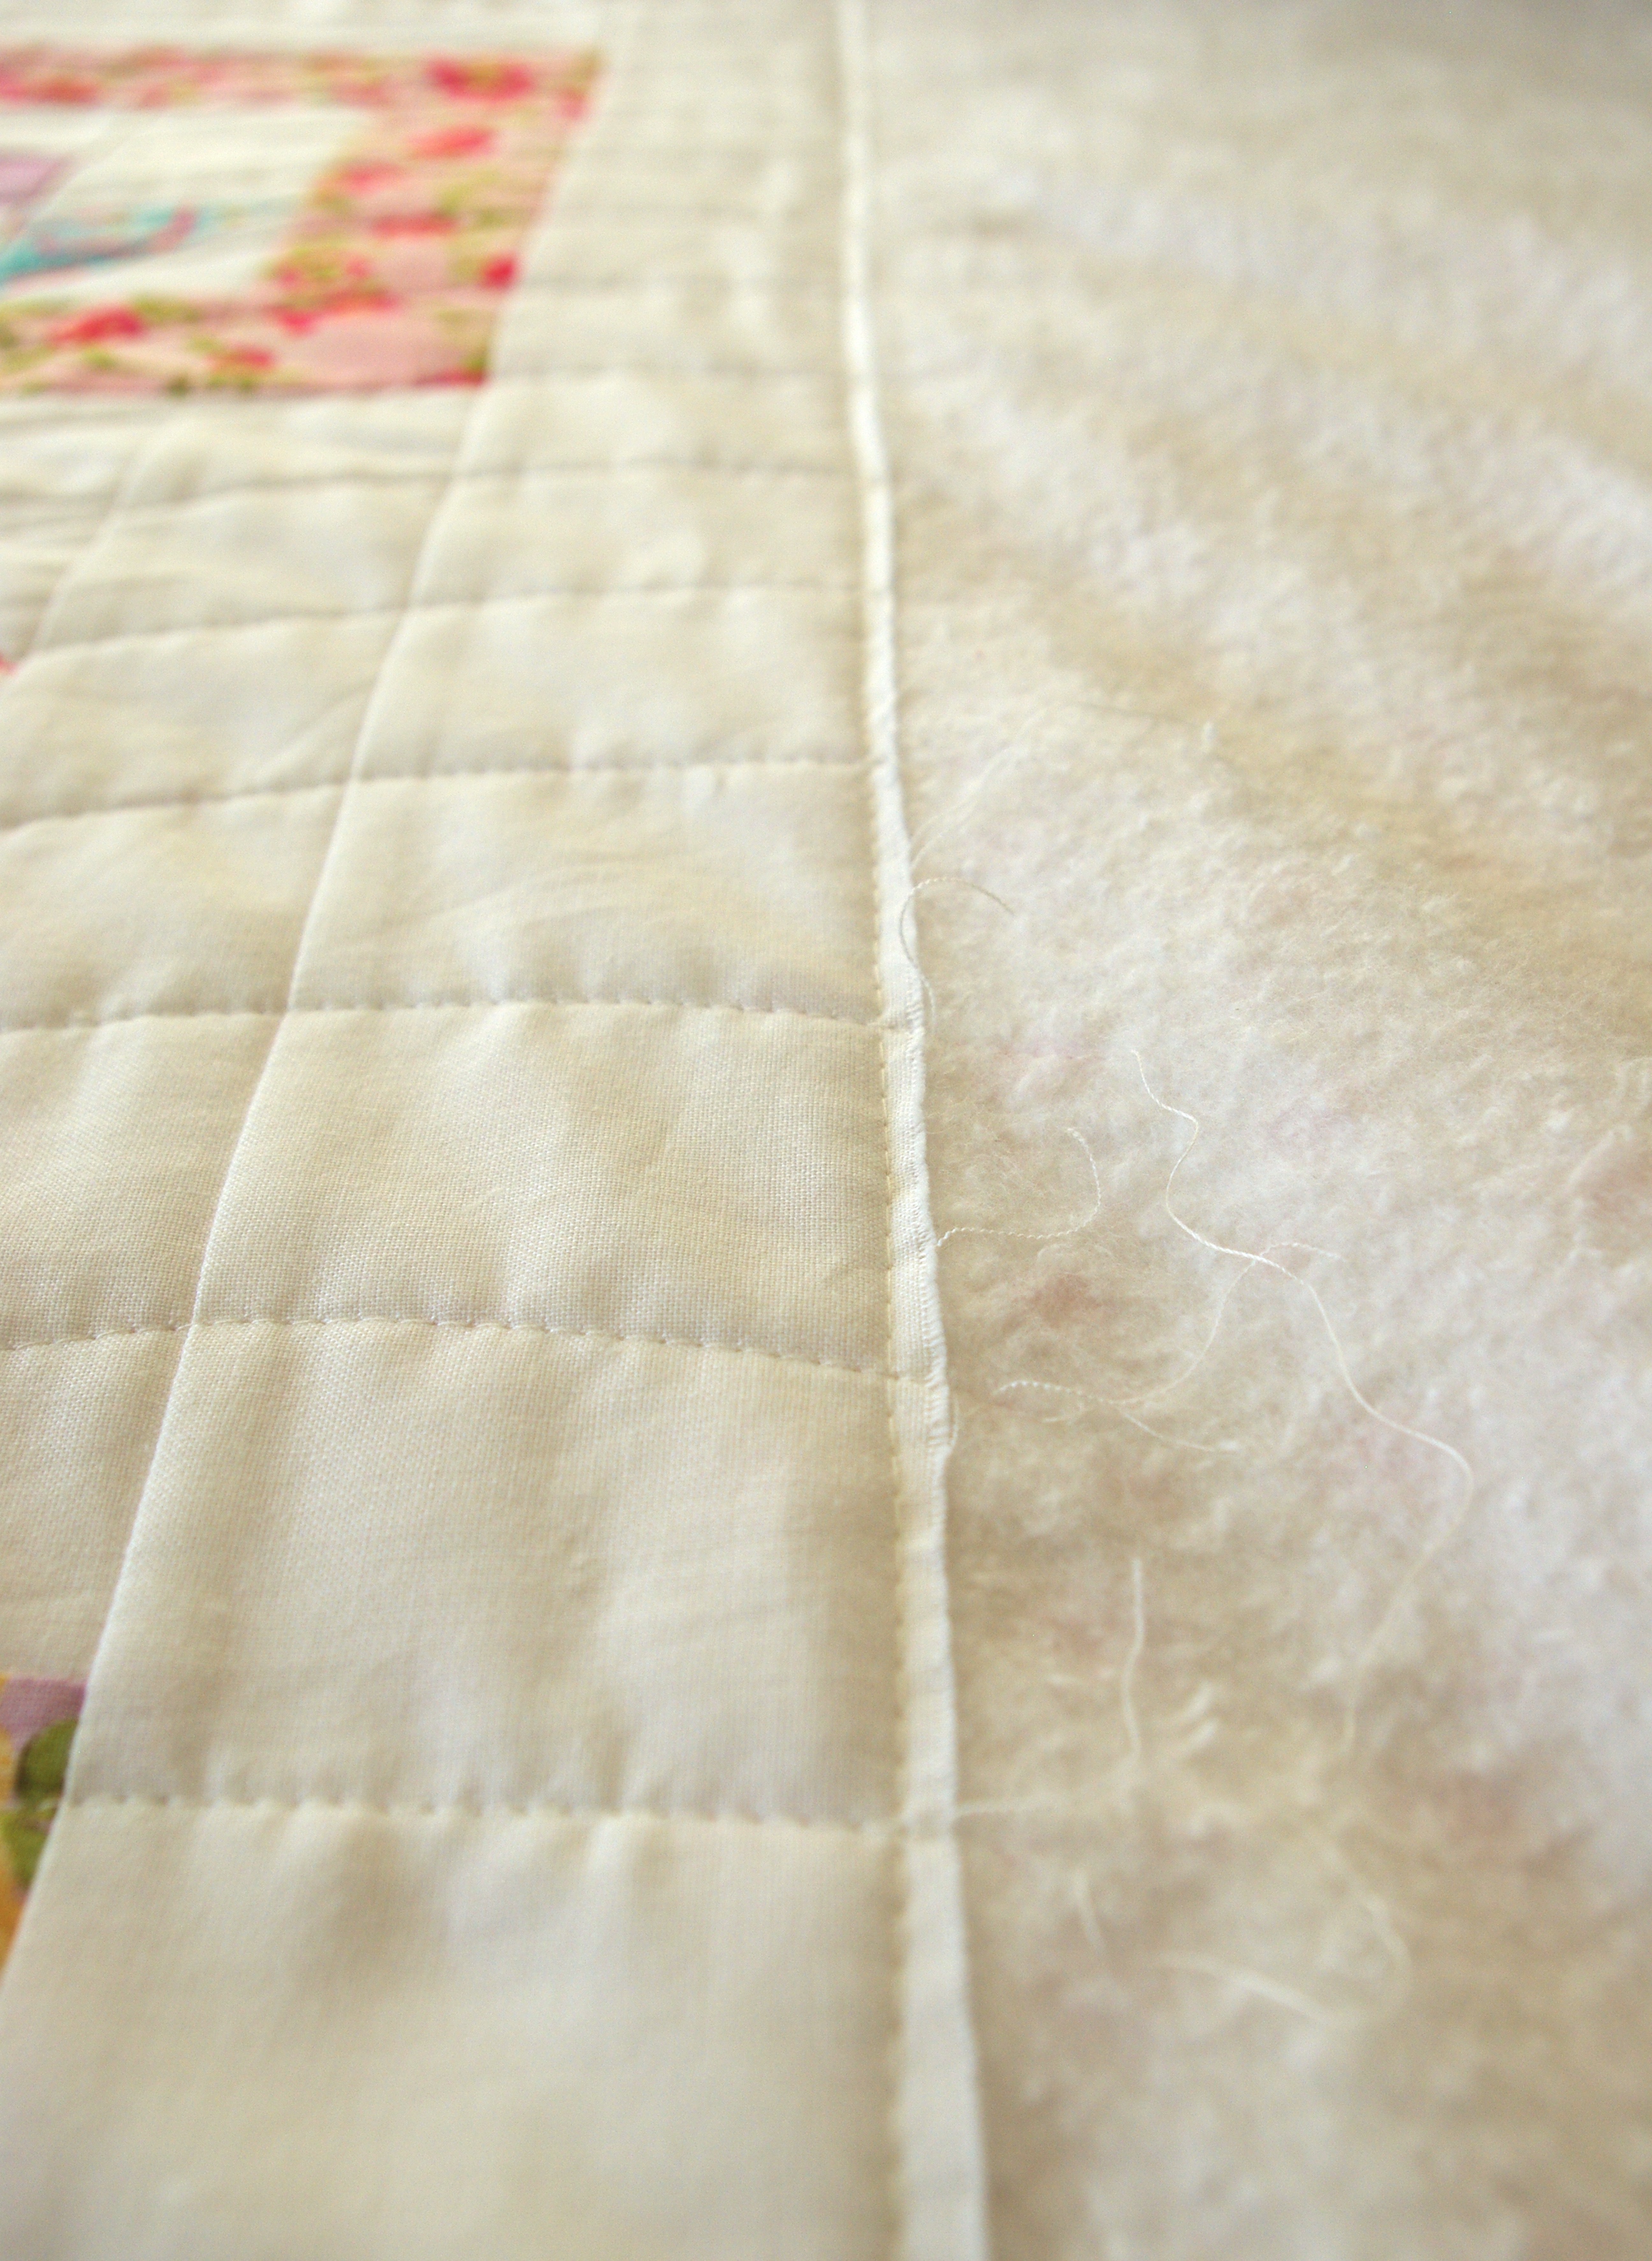
I have to admit it was a bit weird following my own tutorial, but soon the blocks were done and my quilt top was finished and sandwiched. Before I began quilting, I sewed a basting stitch along the top edge, approximately 1/8″ down, to help to keep everything from shifting and pulling. This is the first time I ever did this and I highly recommend it; it worked great.
I often think it would be interesting to know how much time we actually spend making a quilt, especially if we do the quilting ourselves. I spent several hours quilting this one, mainly because I used a hera marker for marking the lines (I had to go over them a few times) and the rounded quilting design is more of a challenge than just a straight line—but still fun!
For the wavy lines, I created a quilting template by drawing the design I wanted then tested it to make sure I’d be able to maneuver it through my machine with fluidity. Once I determined it was manageable, I transferred the pattern onto poster board. Something sturdier would have been better, but it worked out OK.
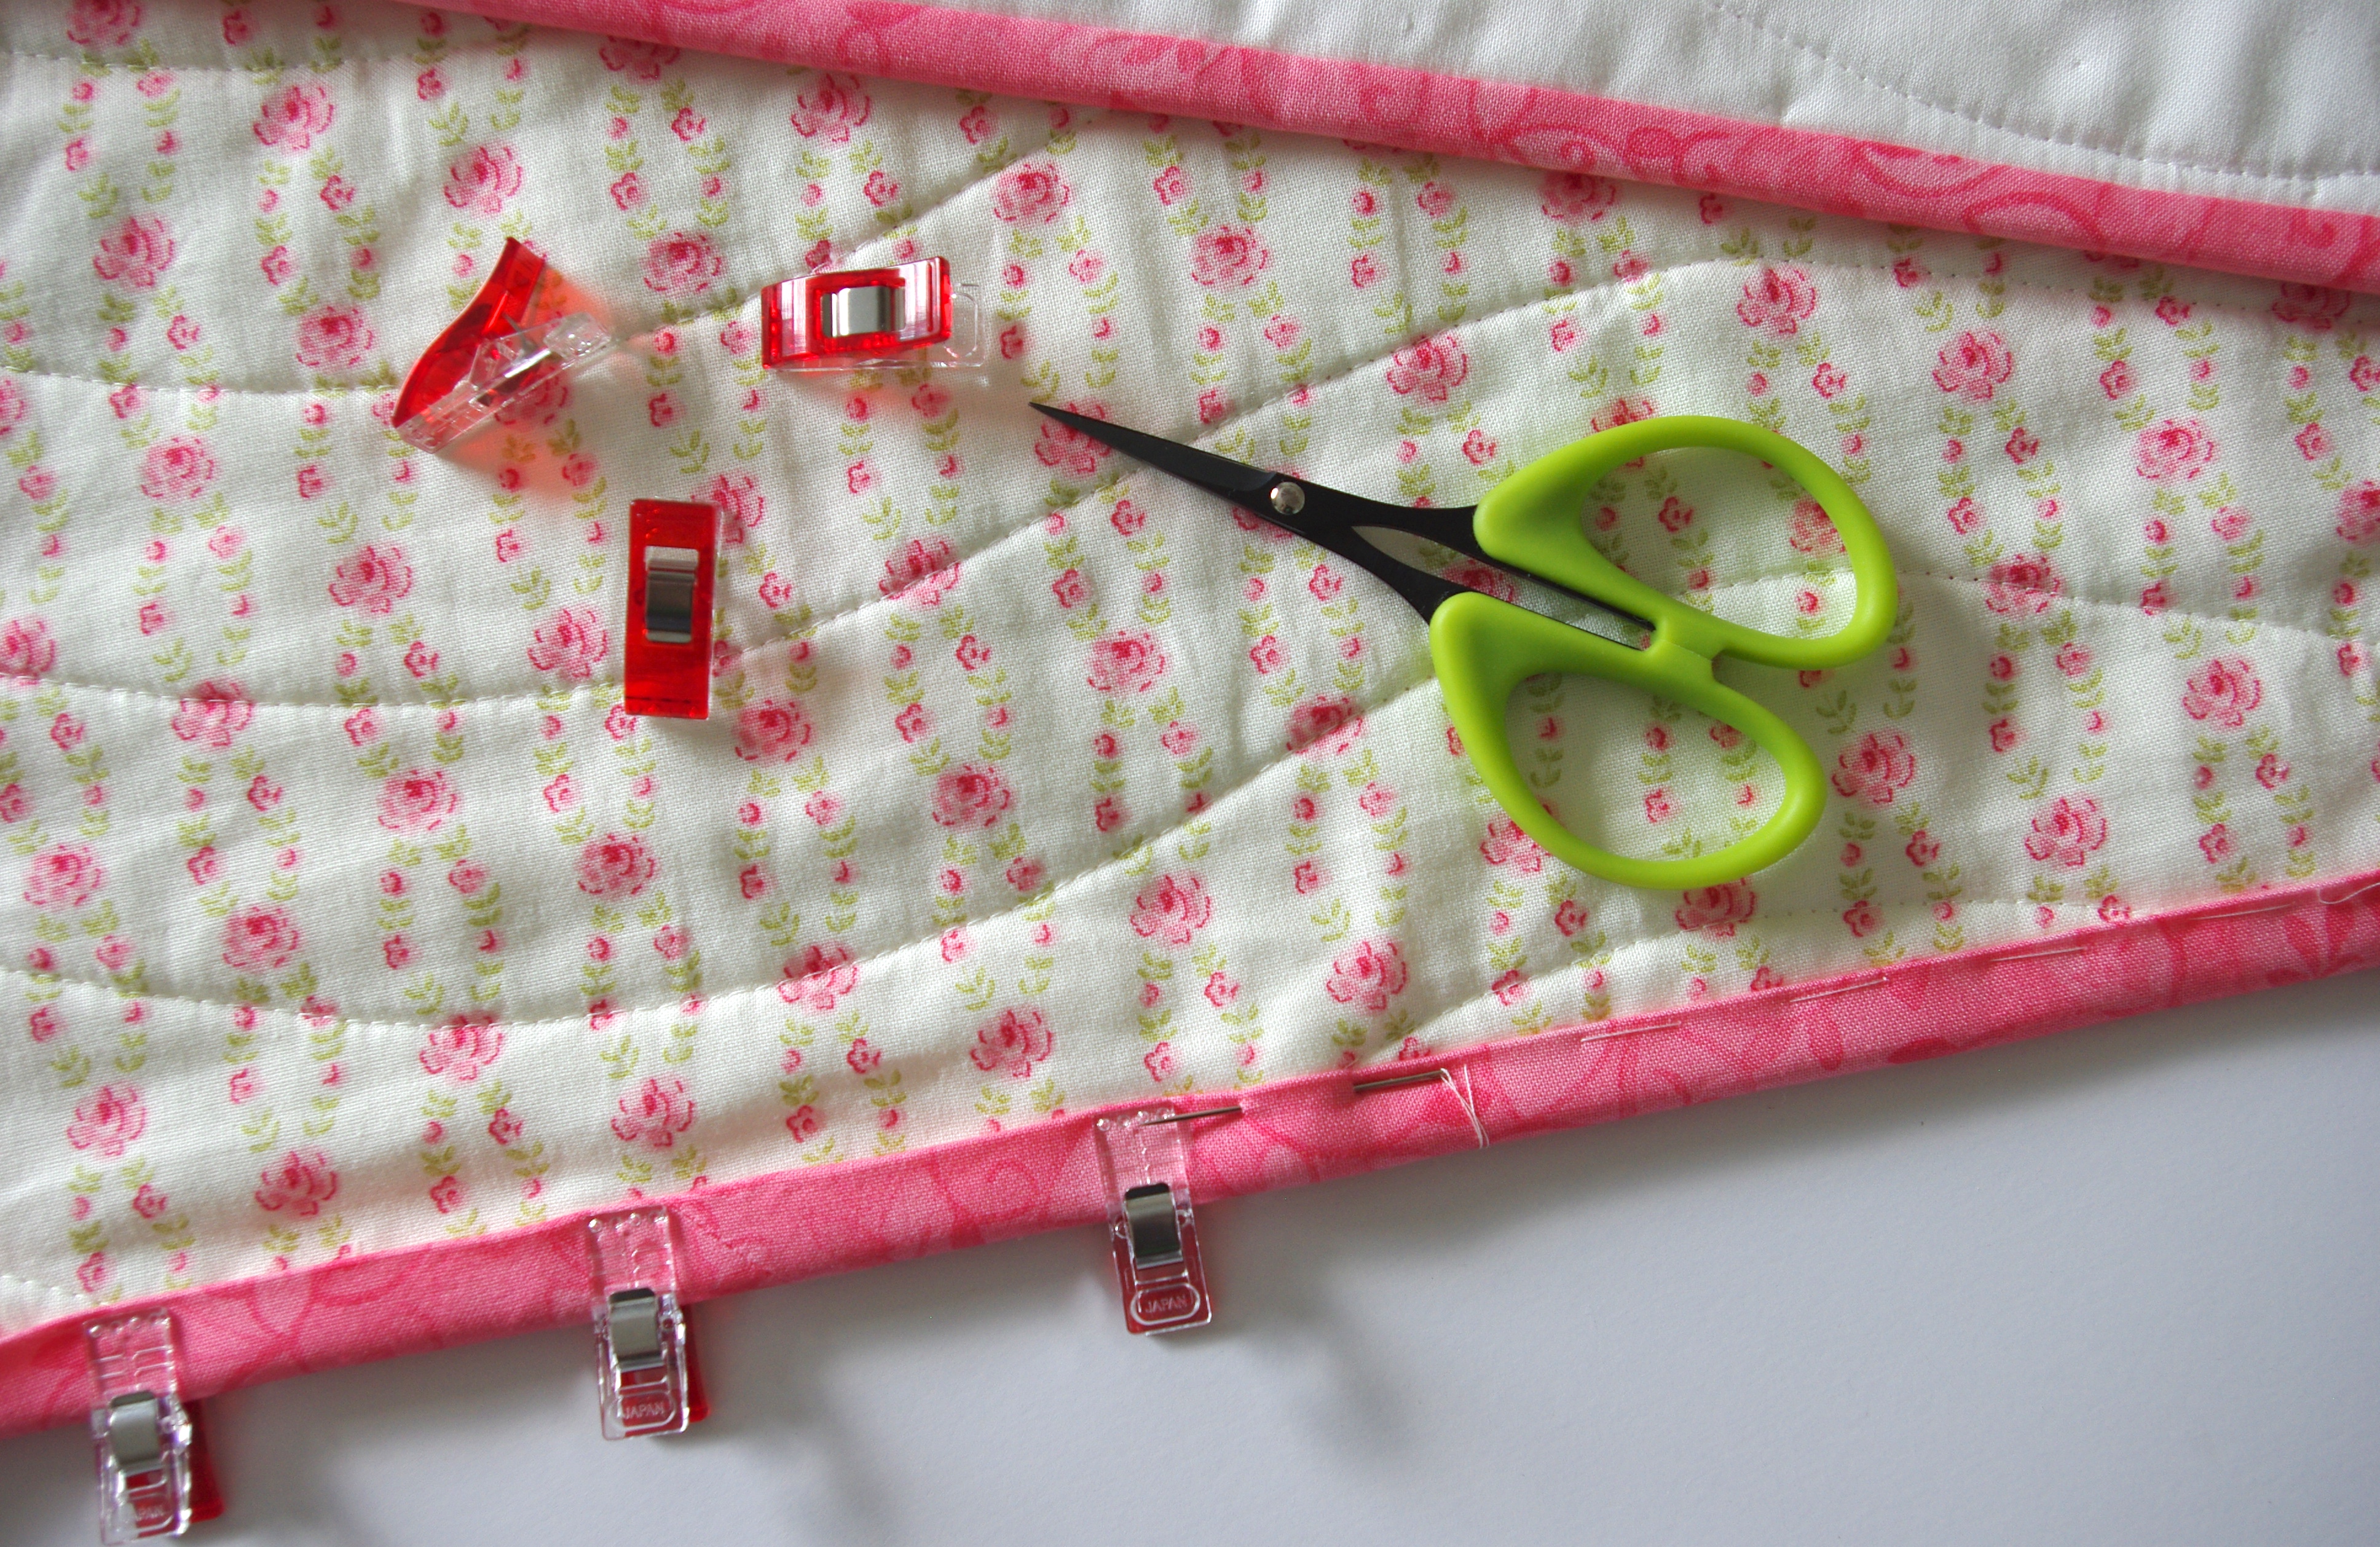
I always make my binding 2 ½” wide and sew it on using my ¼” foot. Once attached, I secure it with wonder clips and run a basting stitch by hand before sewing it down. In the past, I’ve tried removing the clips while machine sewing, but I ended up with crooked binding on the back. The basting stitch keeps everything secure when sewing, especially if machine sewing the binding. Sure, it’s another step but it’s well worth the extra time and effort.
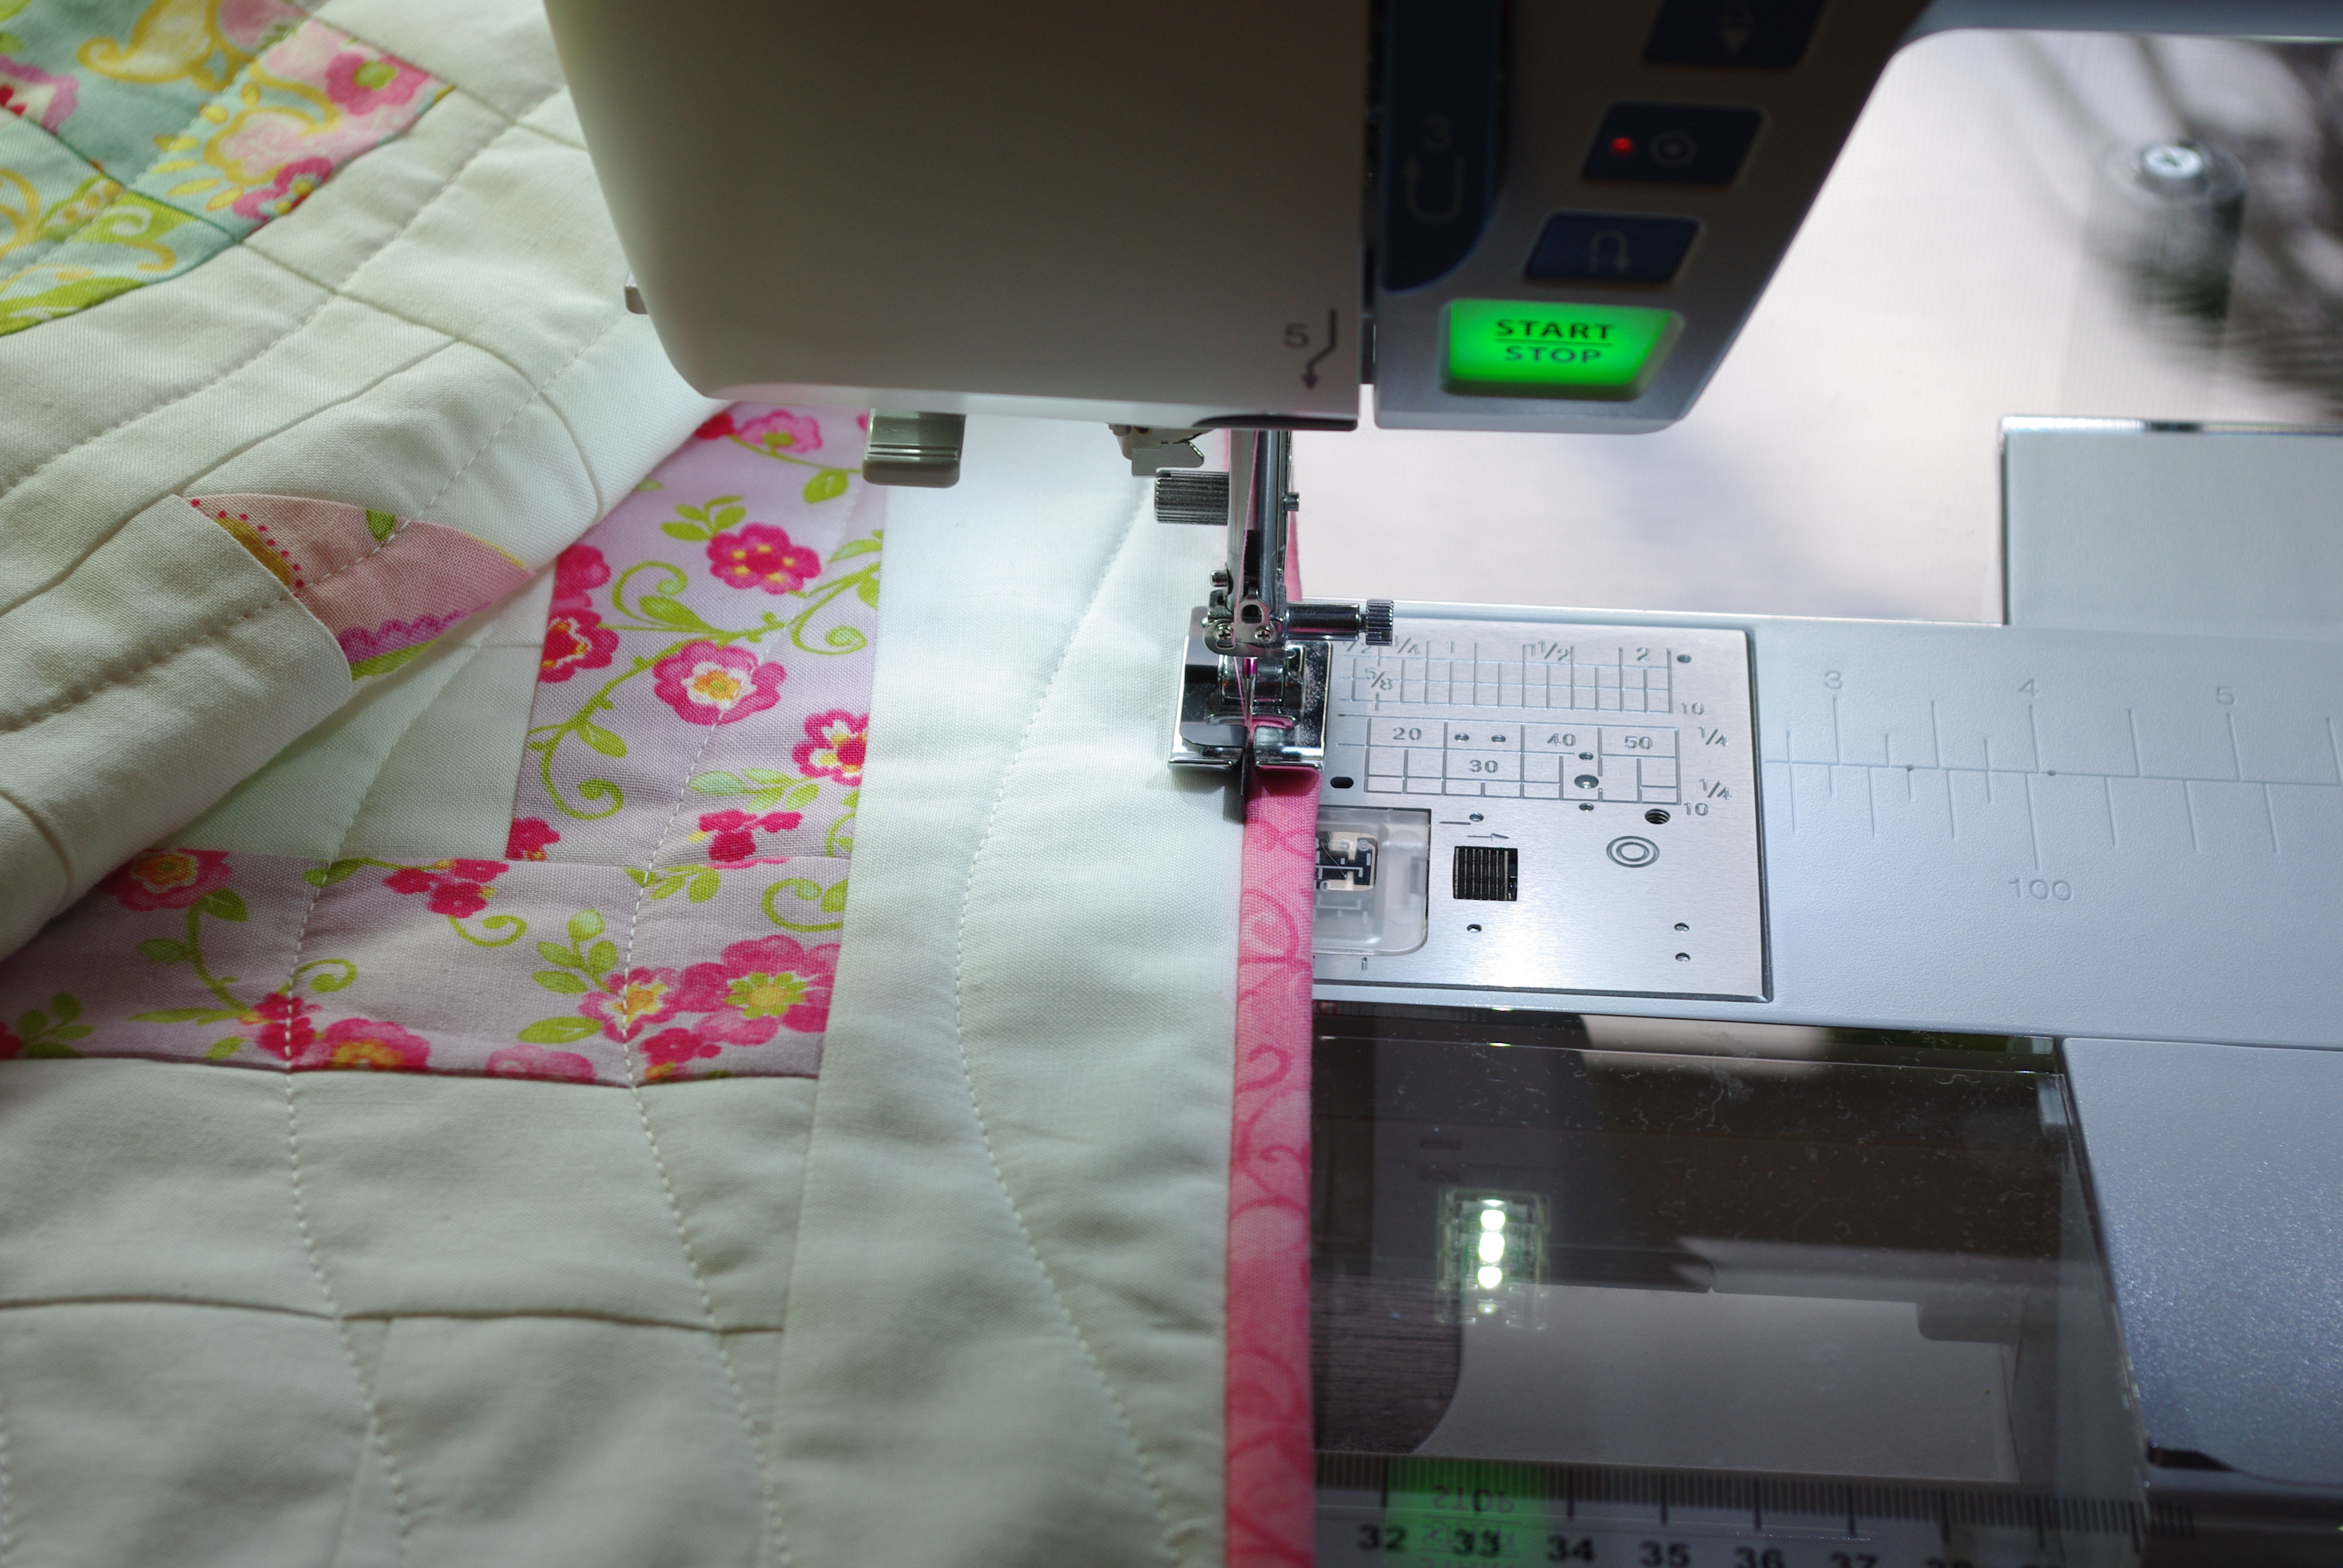
I chose to machine bind this quilt using my stitch-in-the-ditch foot (as I always do when machine binding). In this case, I put my needle setting on 7mm instead of ¼” when I attached the binding to the front.
I only use the 7mm setting if there is a border or if cutting off points on blocks is not an issue (as 7mm is a bit wider than ¼”). And here’s why I chose to do this…
the stitching on the back ends up nice and close to the binding edge. That extra width makes quite a bit of difference!
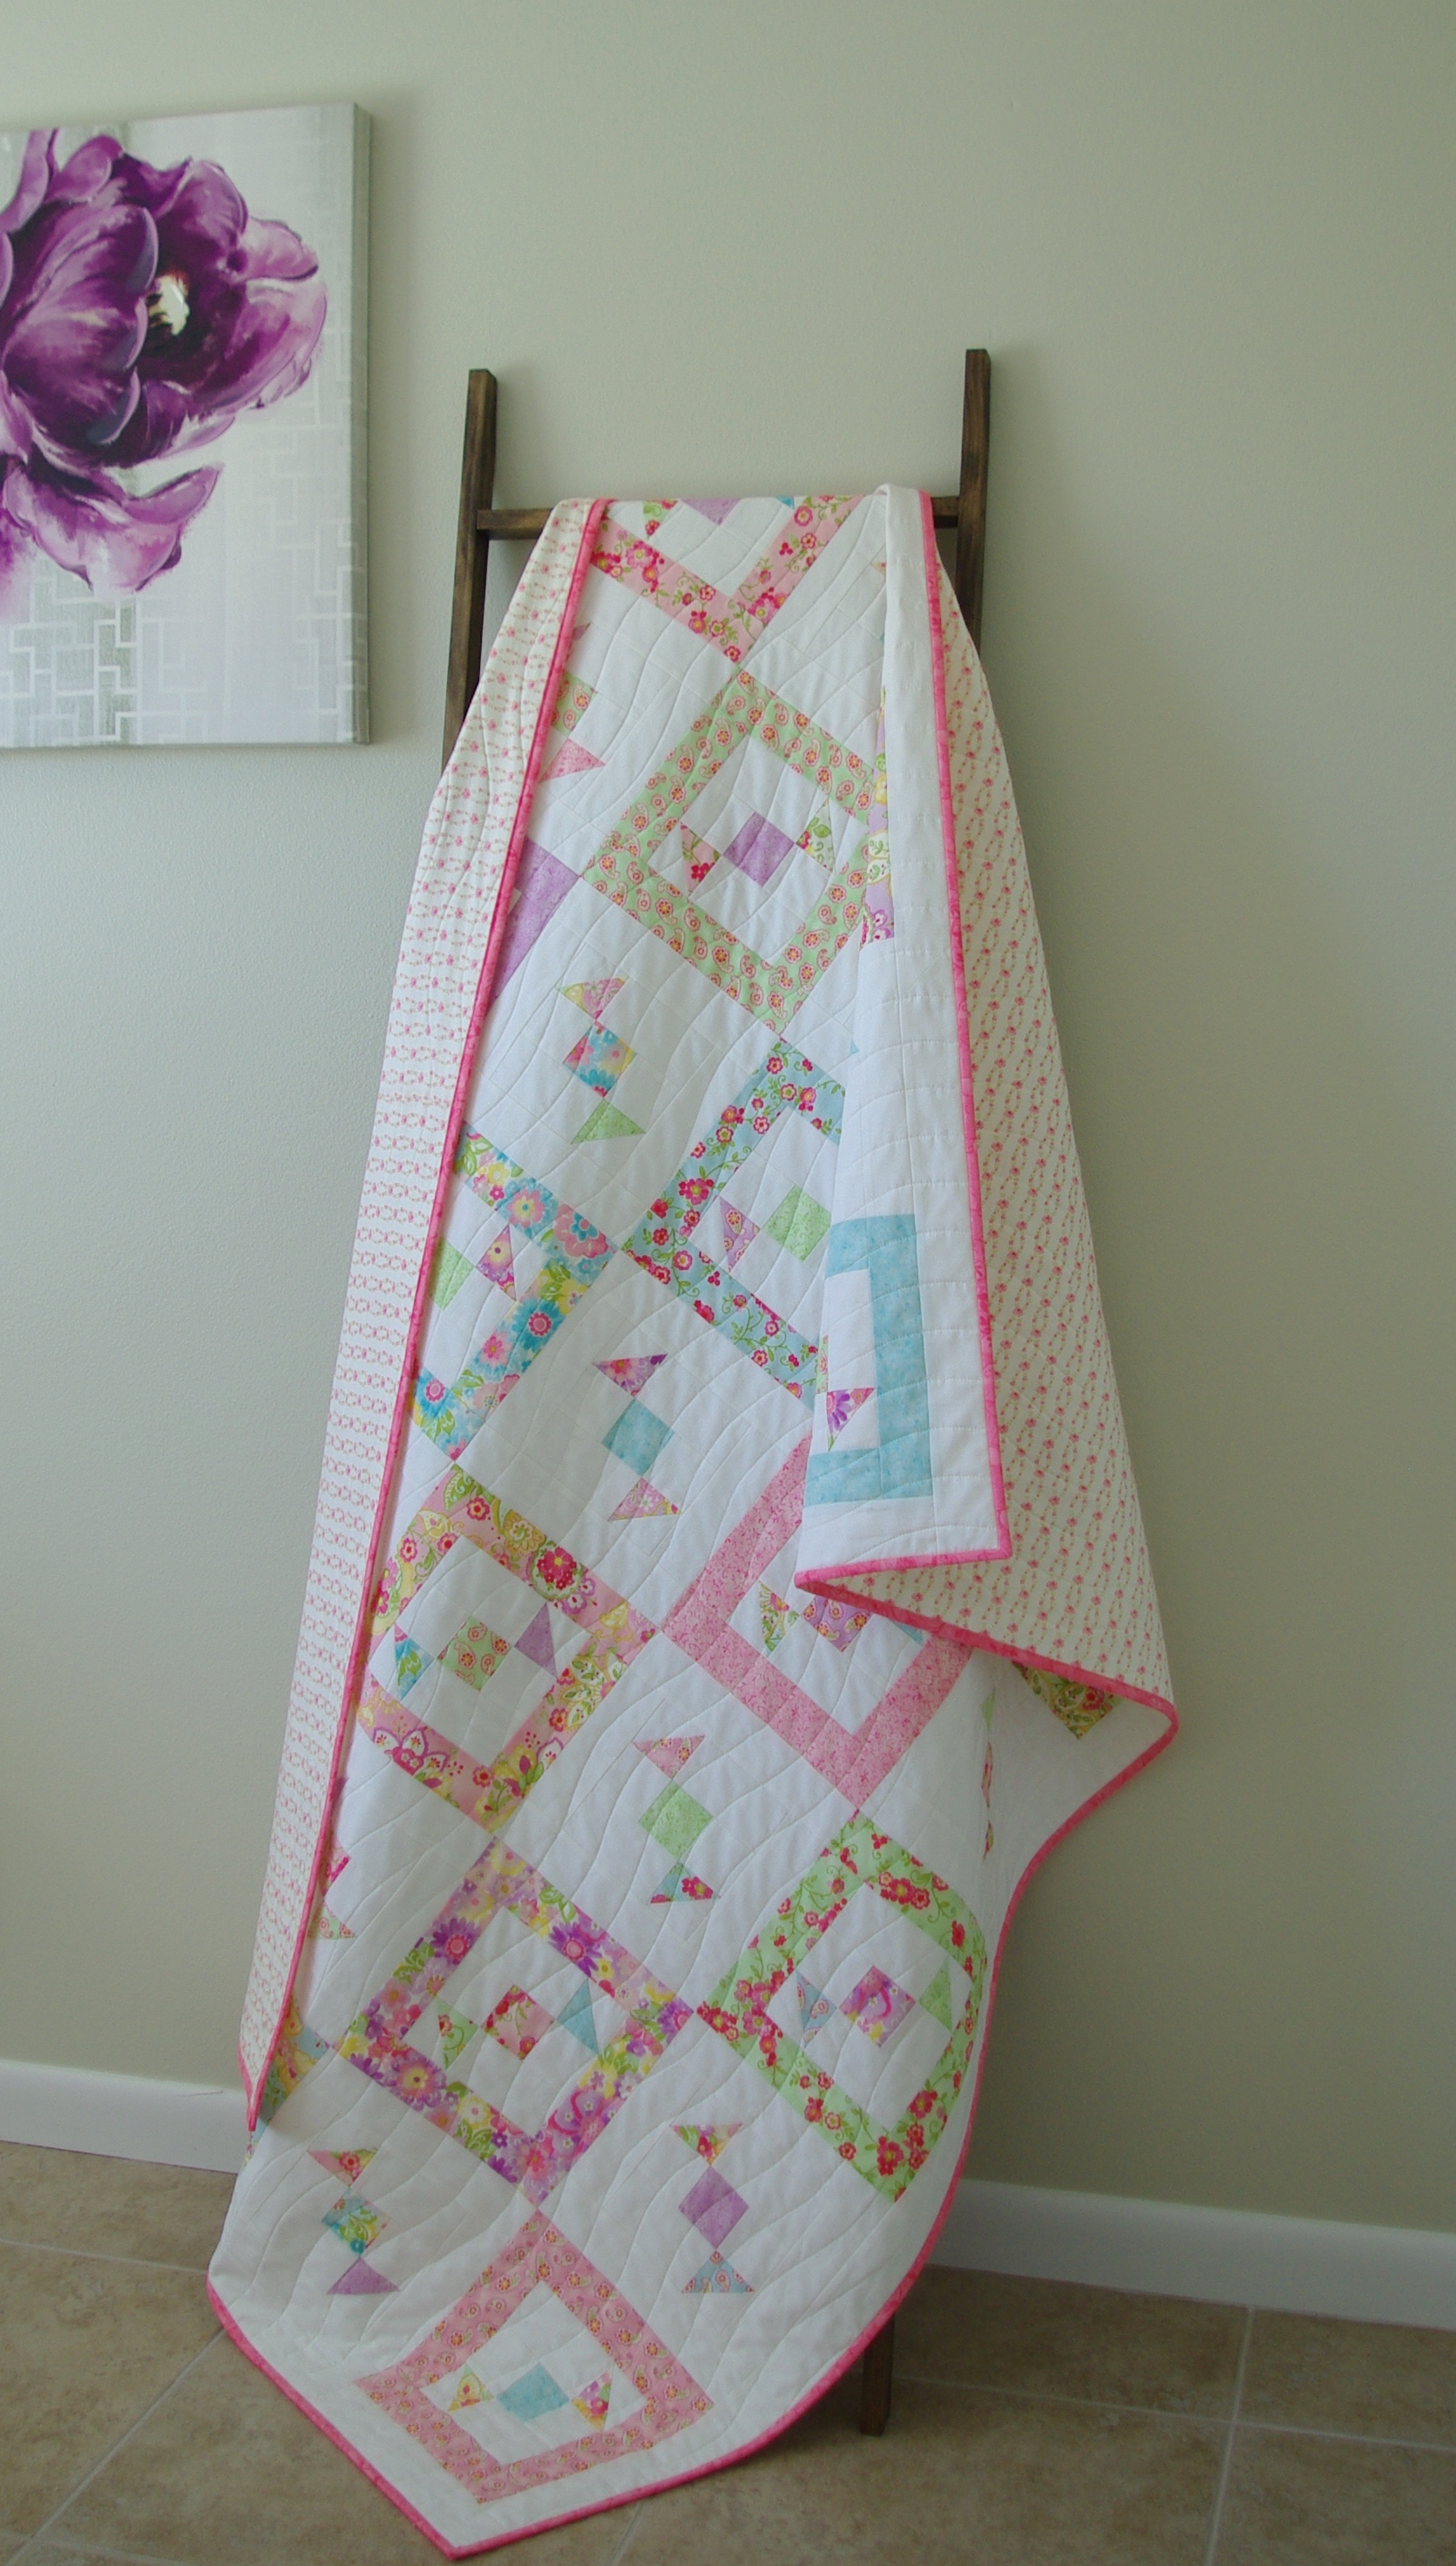
At last, the finished quilt!
I hope you’ll try out some of these methods if you haven’t used them in the past. Feel free to leave me comment if you do try something; I’d like to know how it works for you.