Christmas, home decor, quilting, sewing, Uncategorized

Microwave Bowl Cozies

Once spring arrived and I’d completed my 8th quilt for the year, it was time to make something else. Not that long ago microwave cozies were really popular and I was seeing them everywhere, so I figured now was a good time to try them out. I’m always in favor of making practical things people can actually use, and stashing down is always a plus.

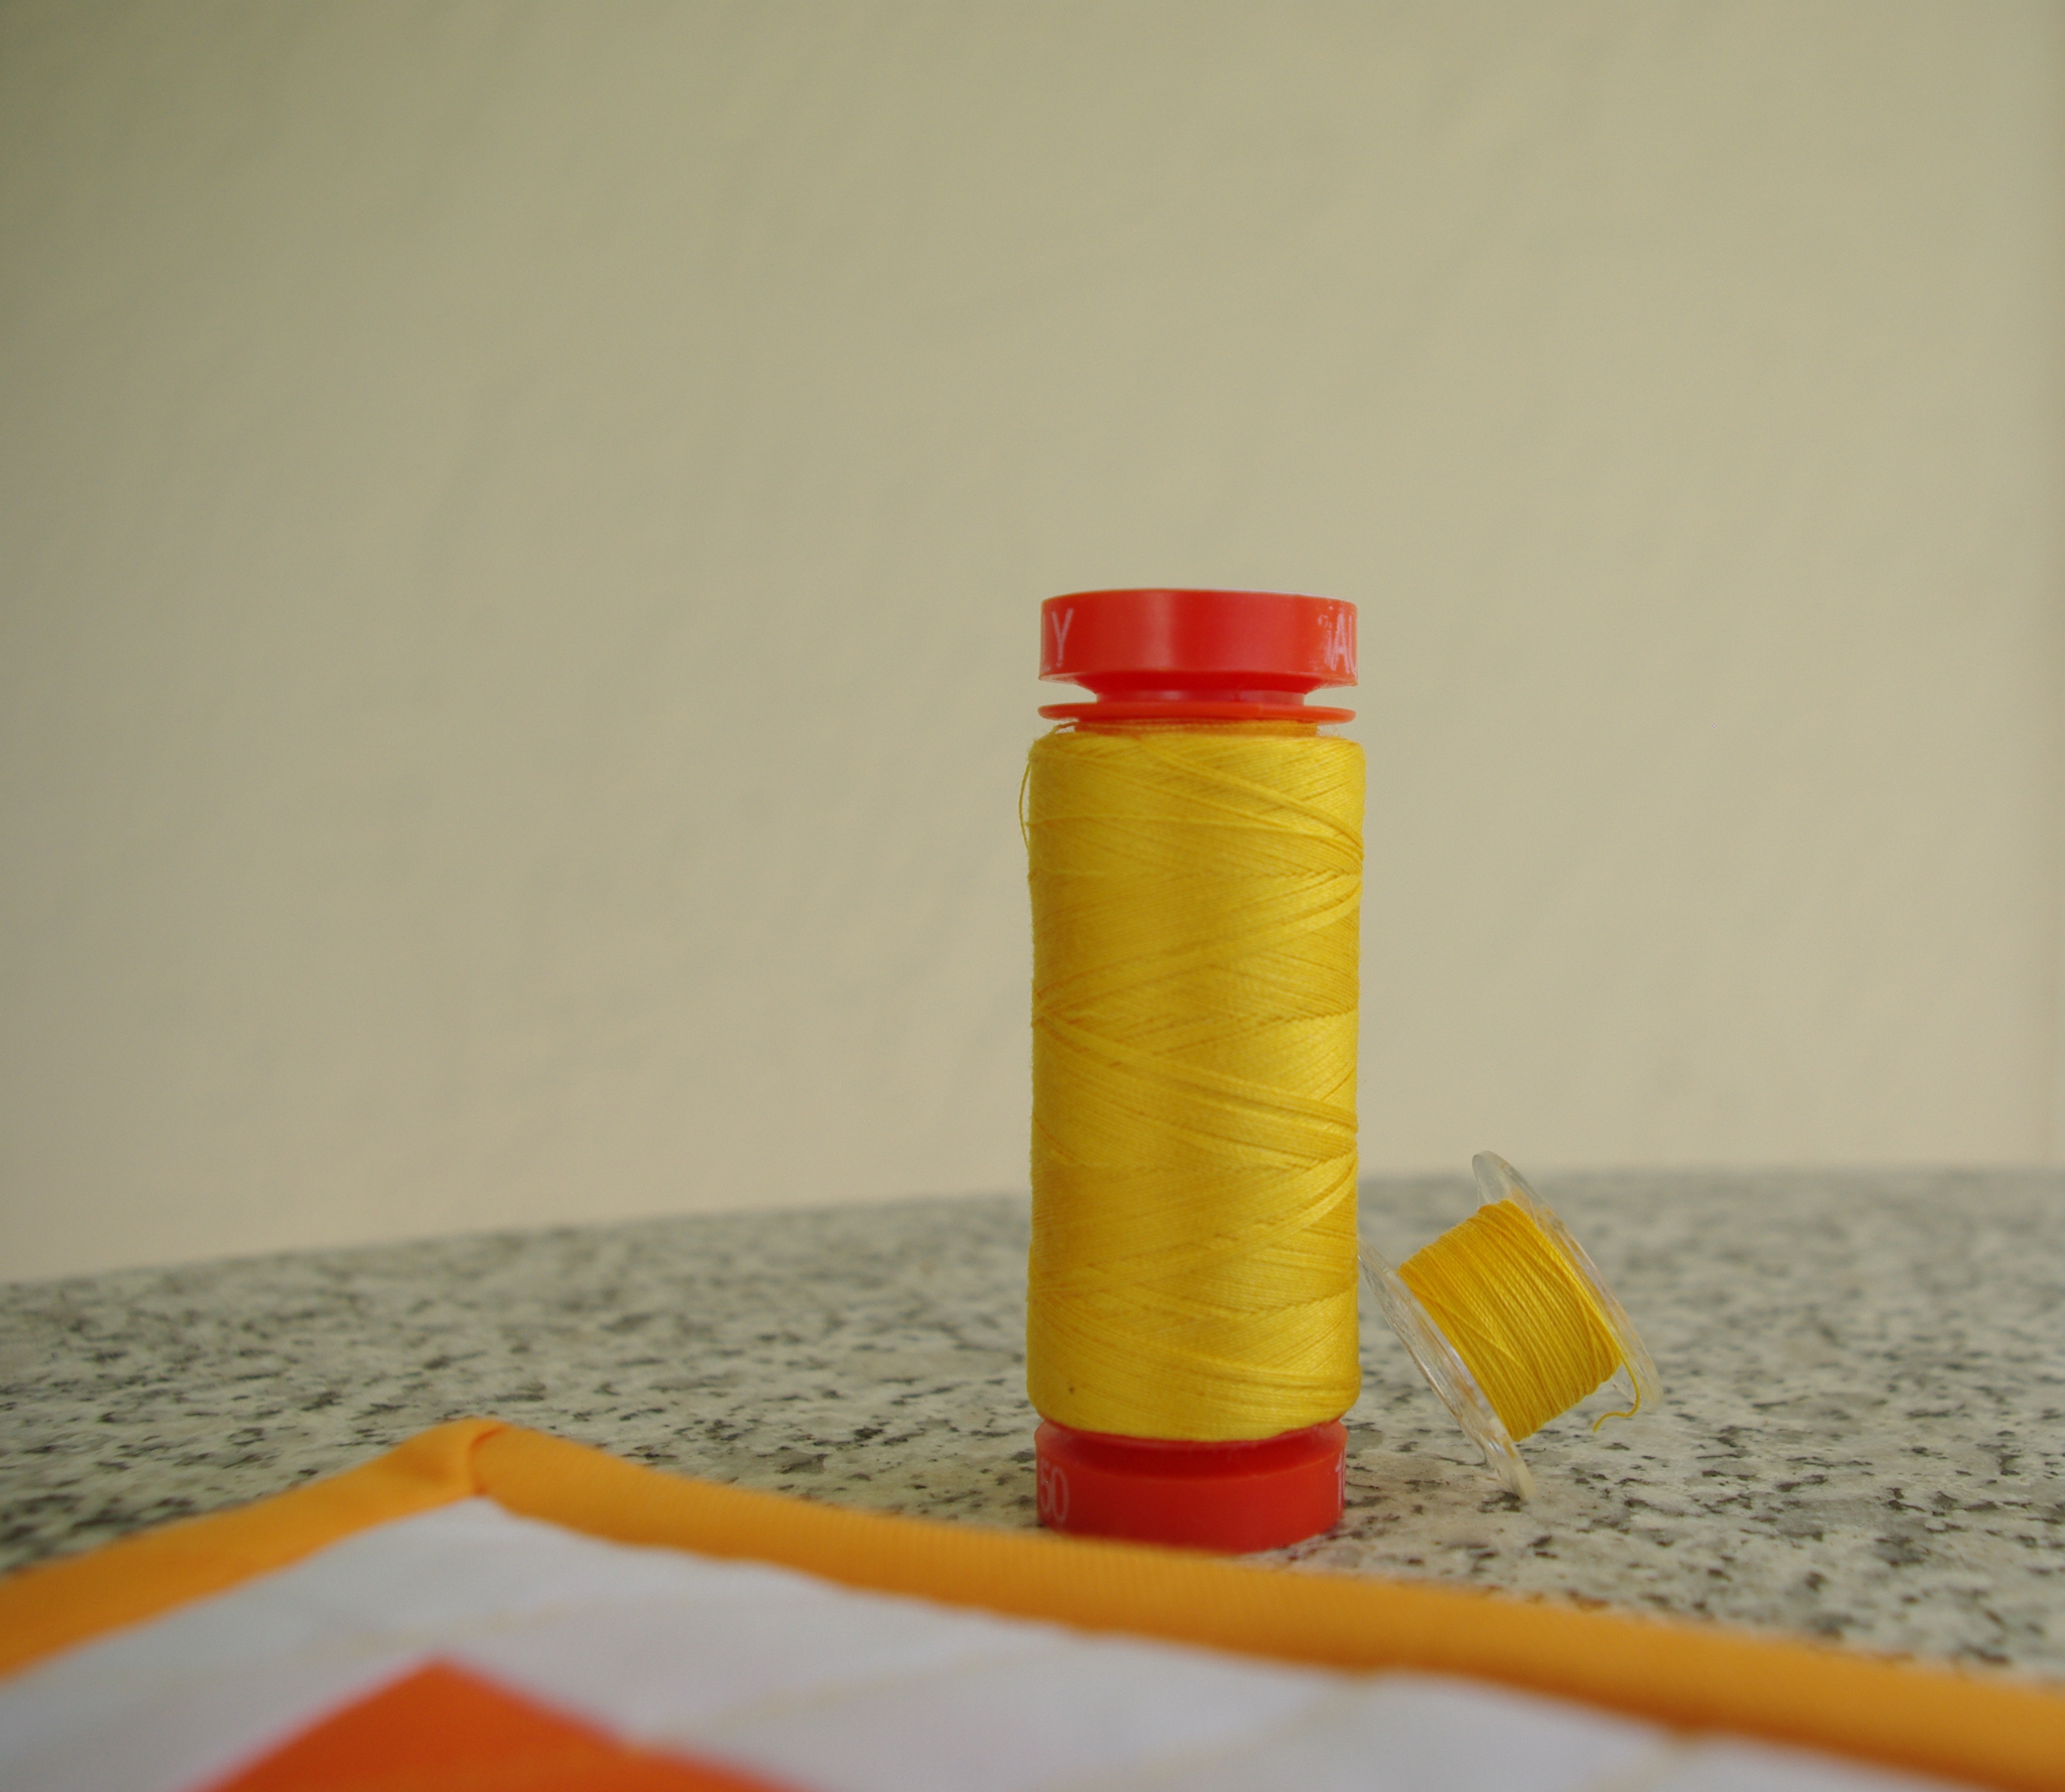
There are plenty of tutorials available on how to make these and they’re pretty much all the same. I followed a YouTube video by The Sewing Room. To make one bowl cozy you need 10″ squares for everything—the inside and outside fabric and the cotton batting in between.

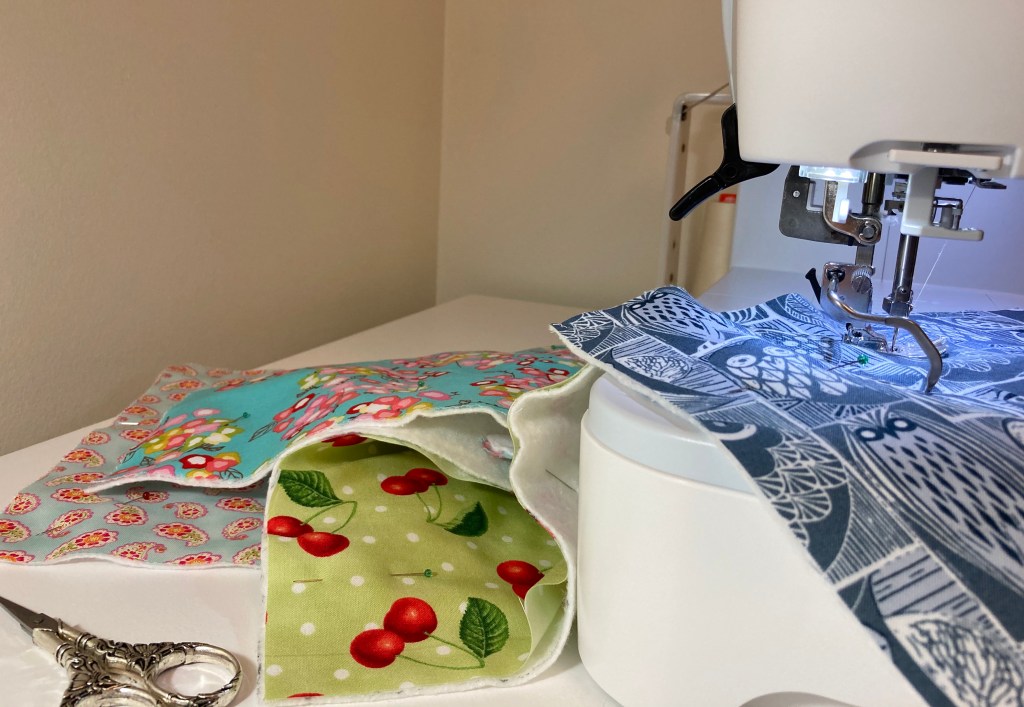
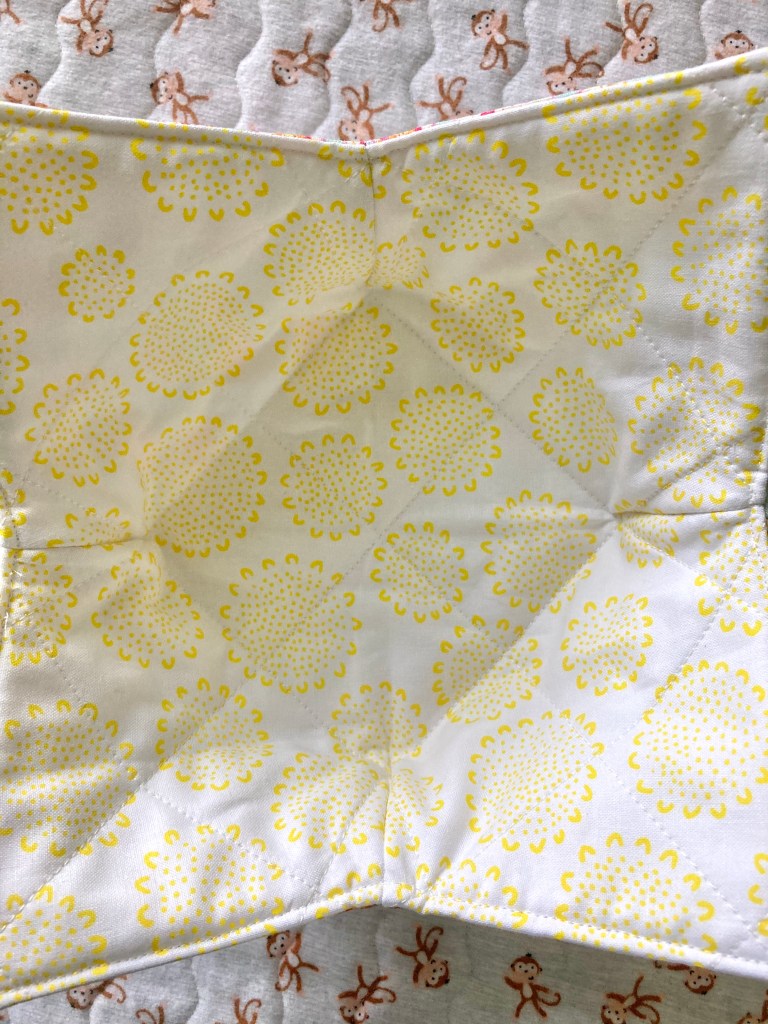
The process is pretty basic: you quilt the squares, sandwich the pieces, sew them together adding darts, turn it inside out and top stitch. After making five, I discovered a few tips and compiled them for those of you who decide to make your own.

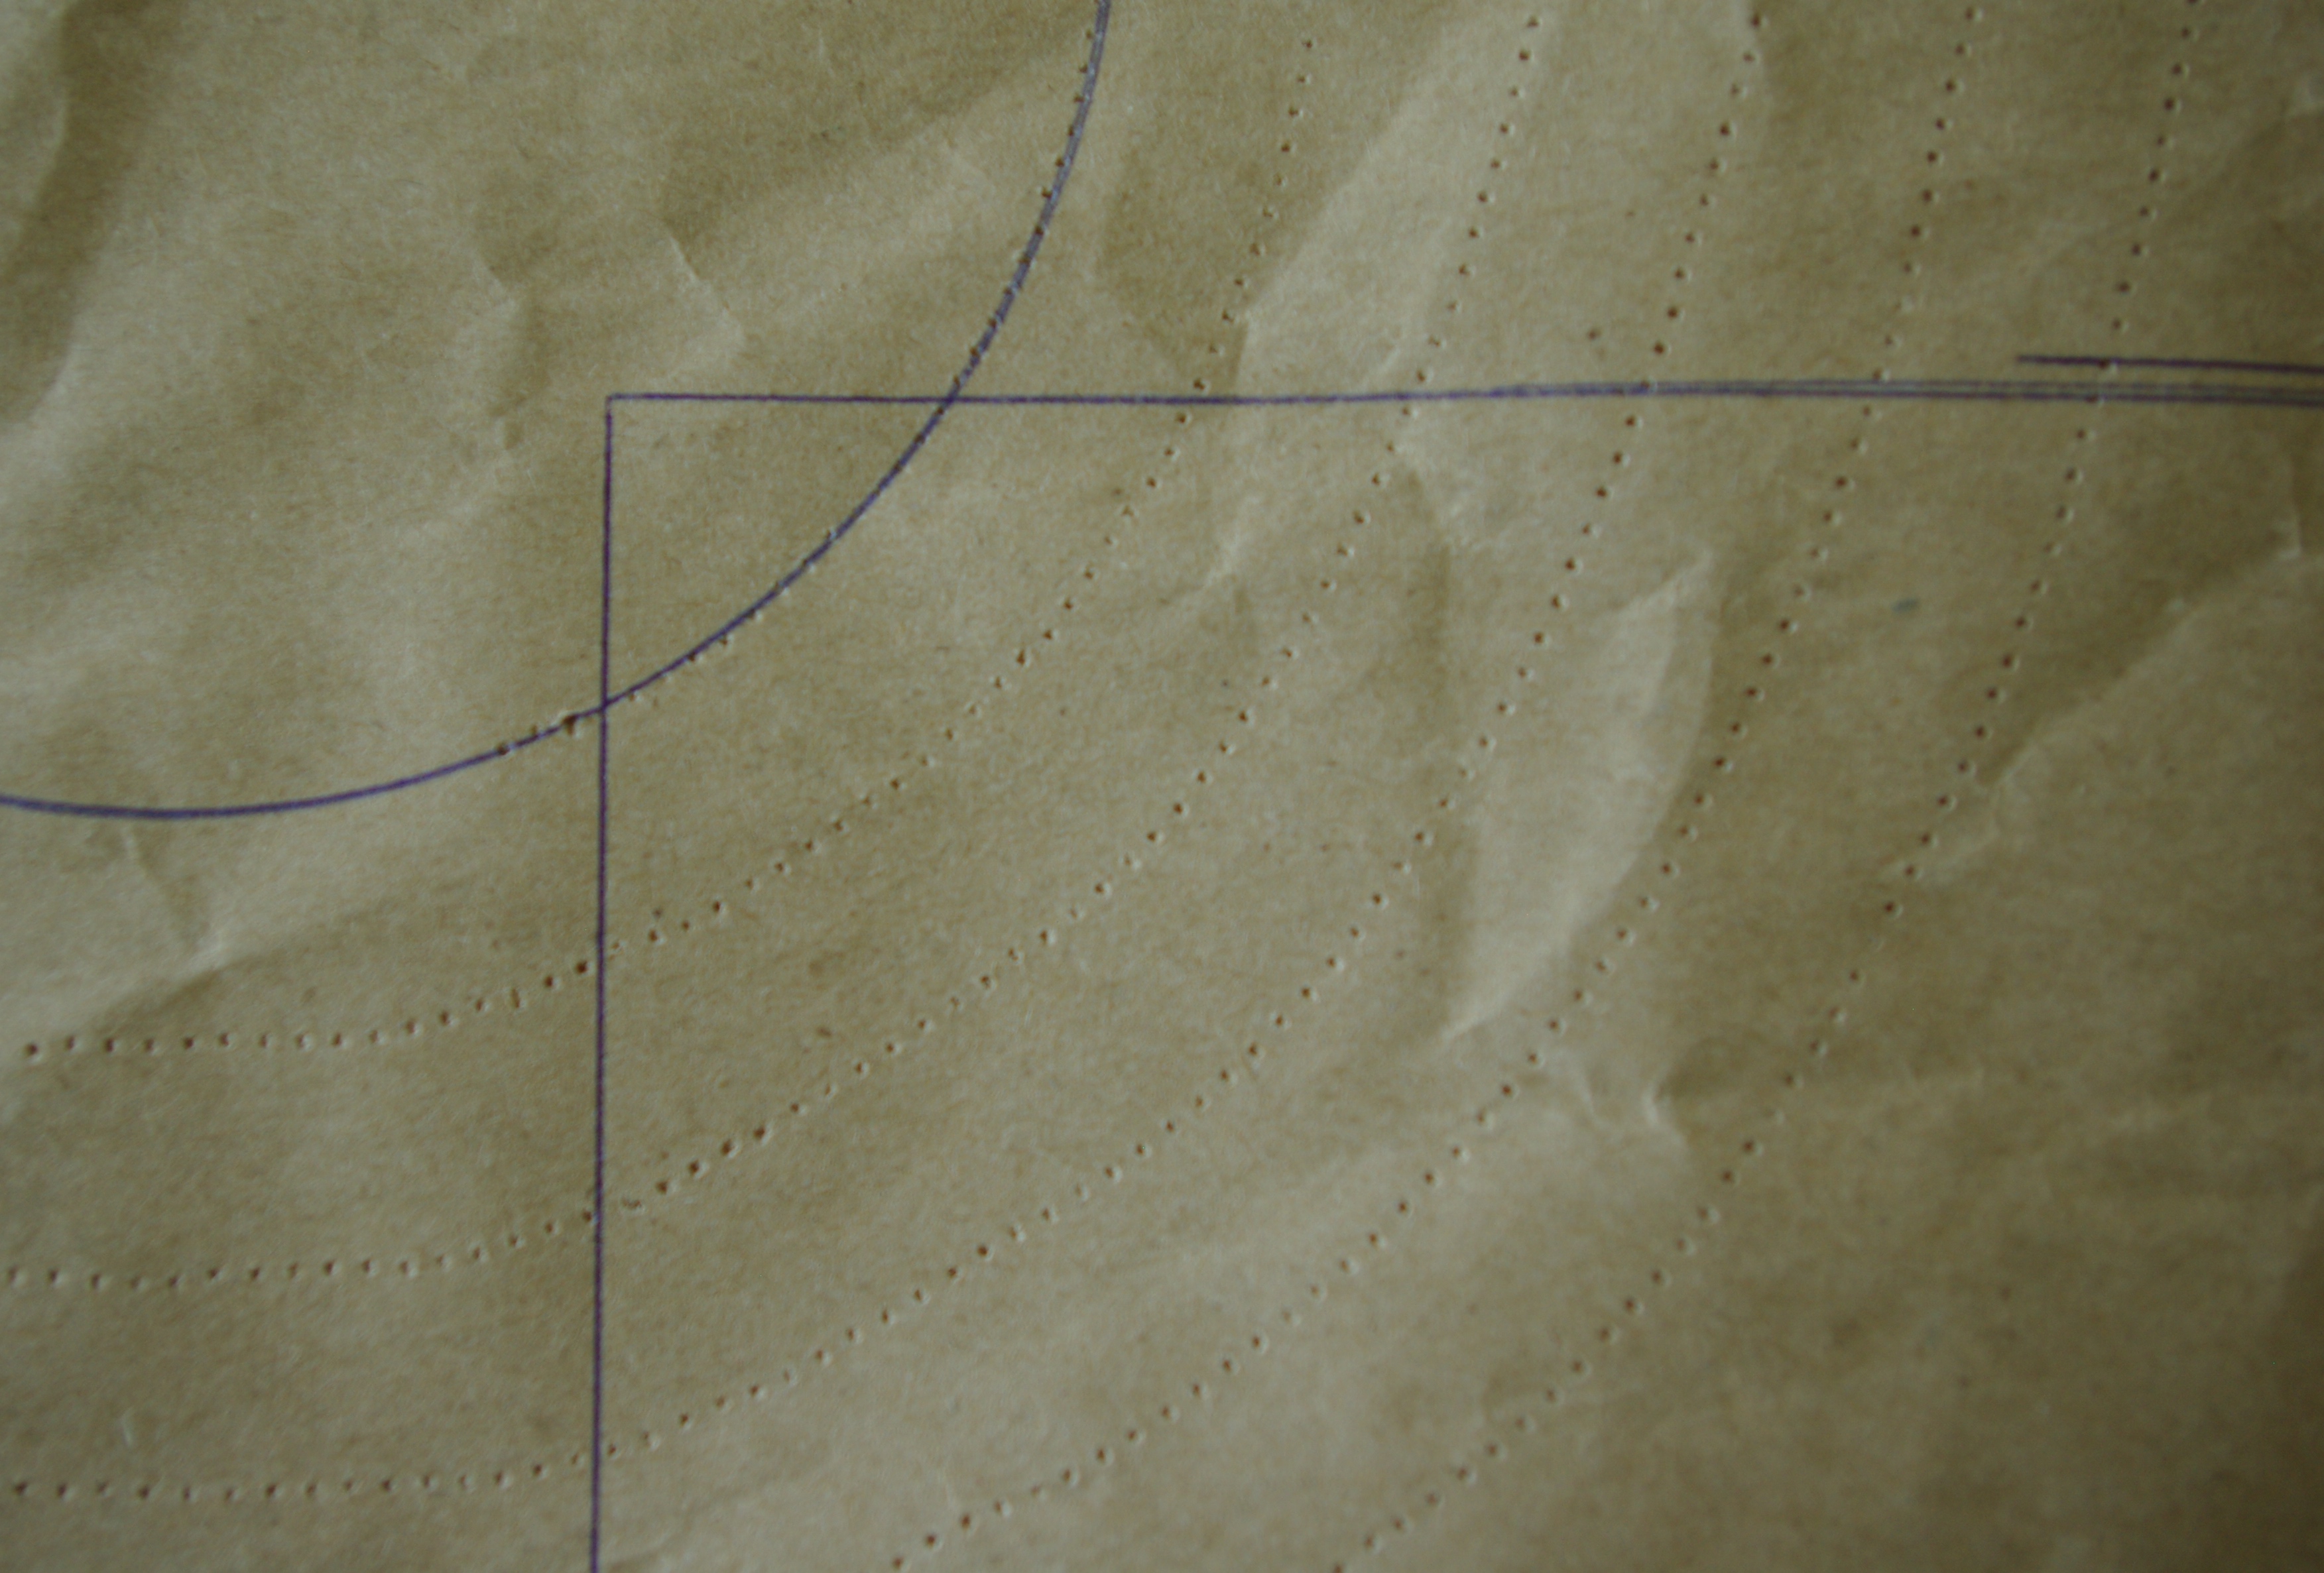
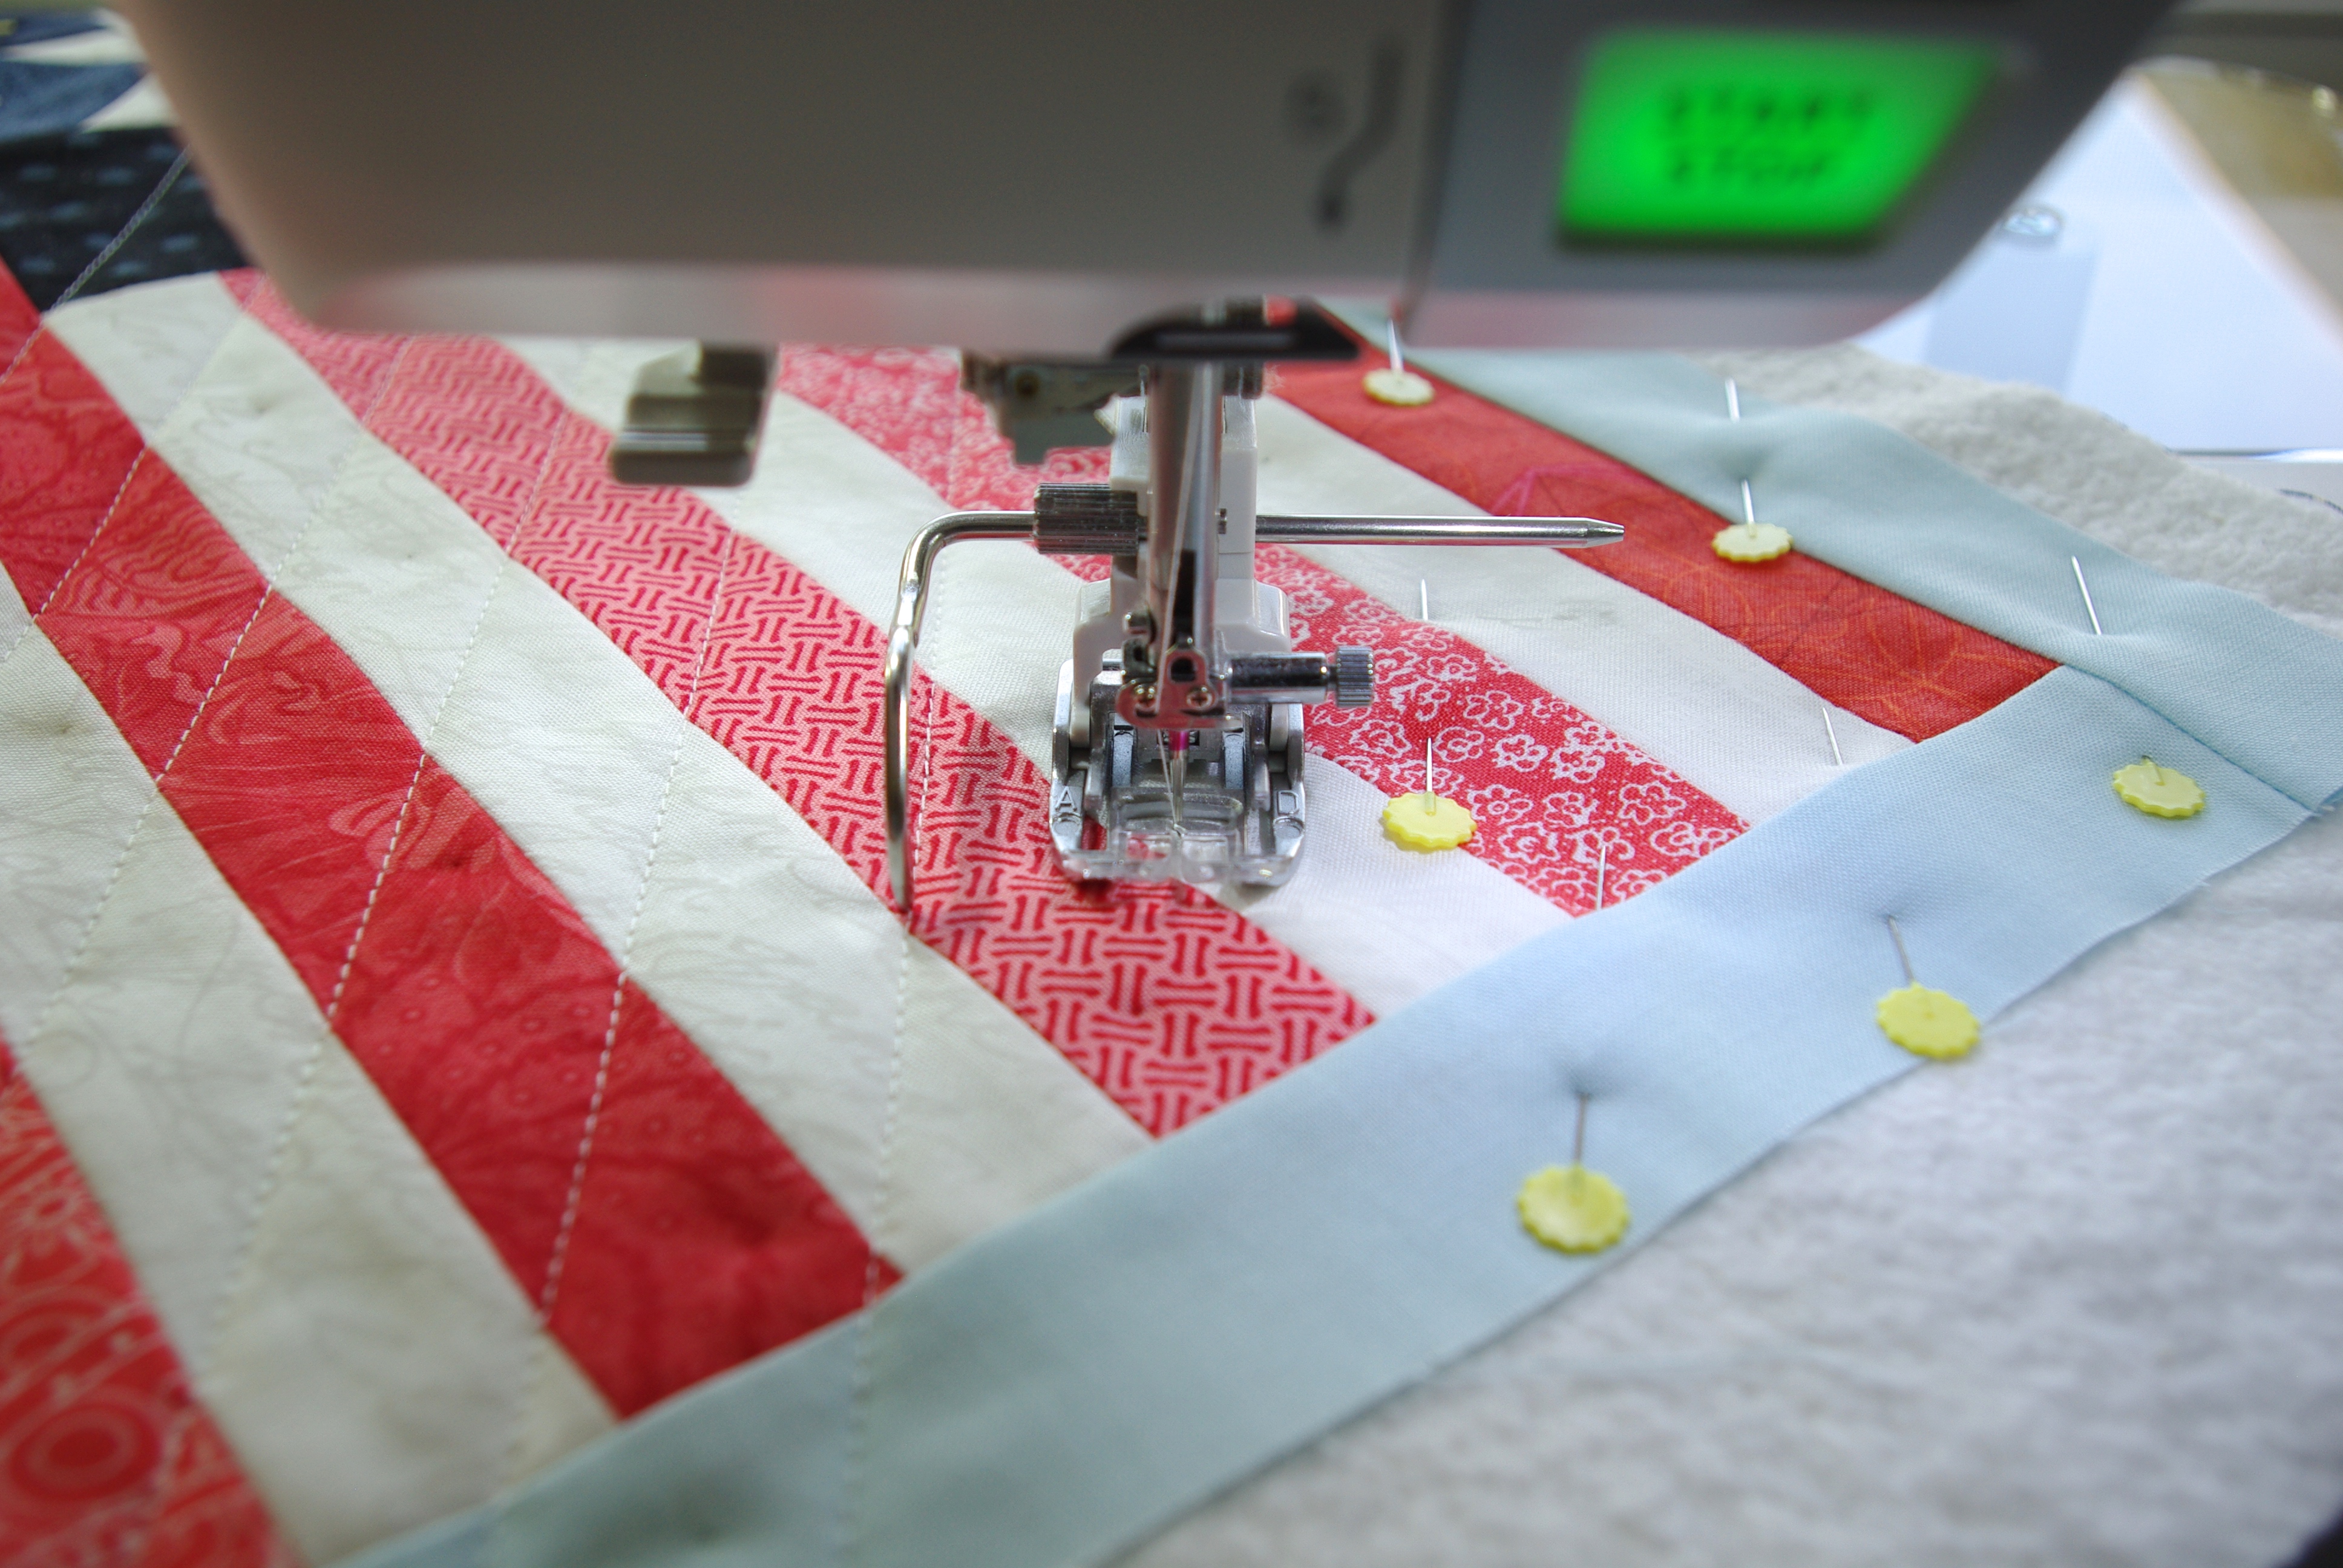
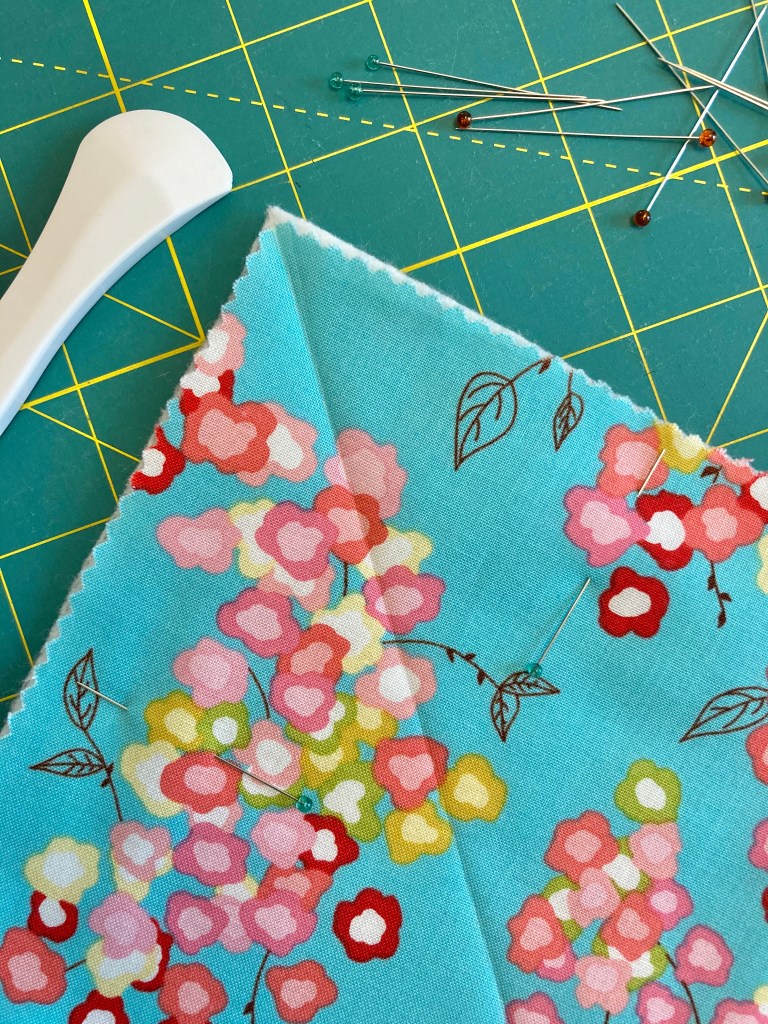
Instructions have you quilt an X from corner to corner. For accuracy, I marked my lines with a hera marker. I chain quilted the X on all five to save some time. Is chain quilting actually a thing? Carrying on…I used my walking foot guide for the rest of the quilting. Don’t forget to pin!

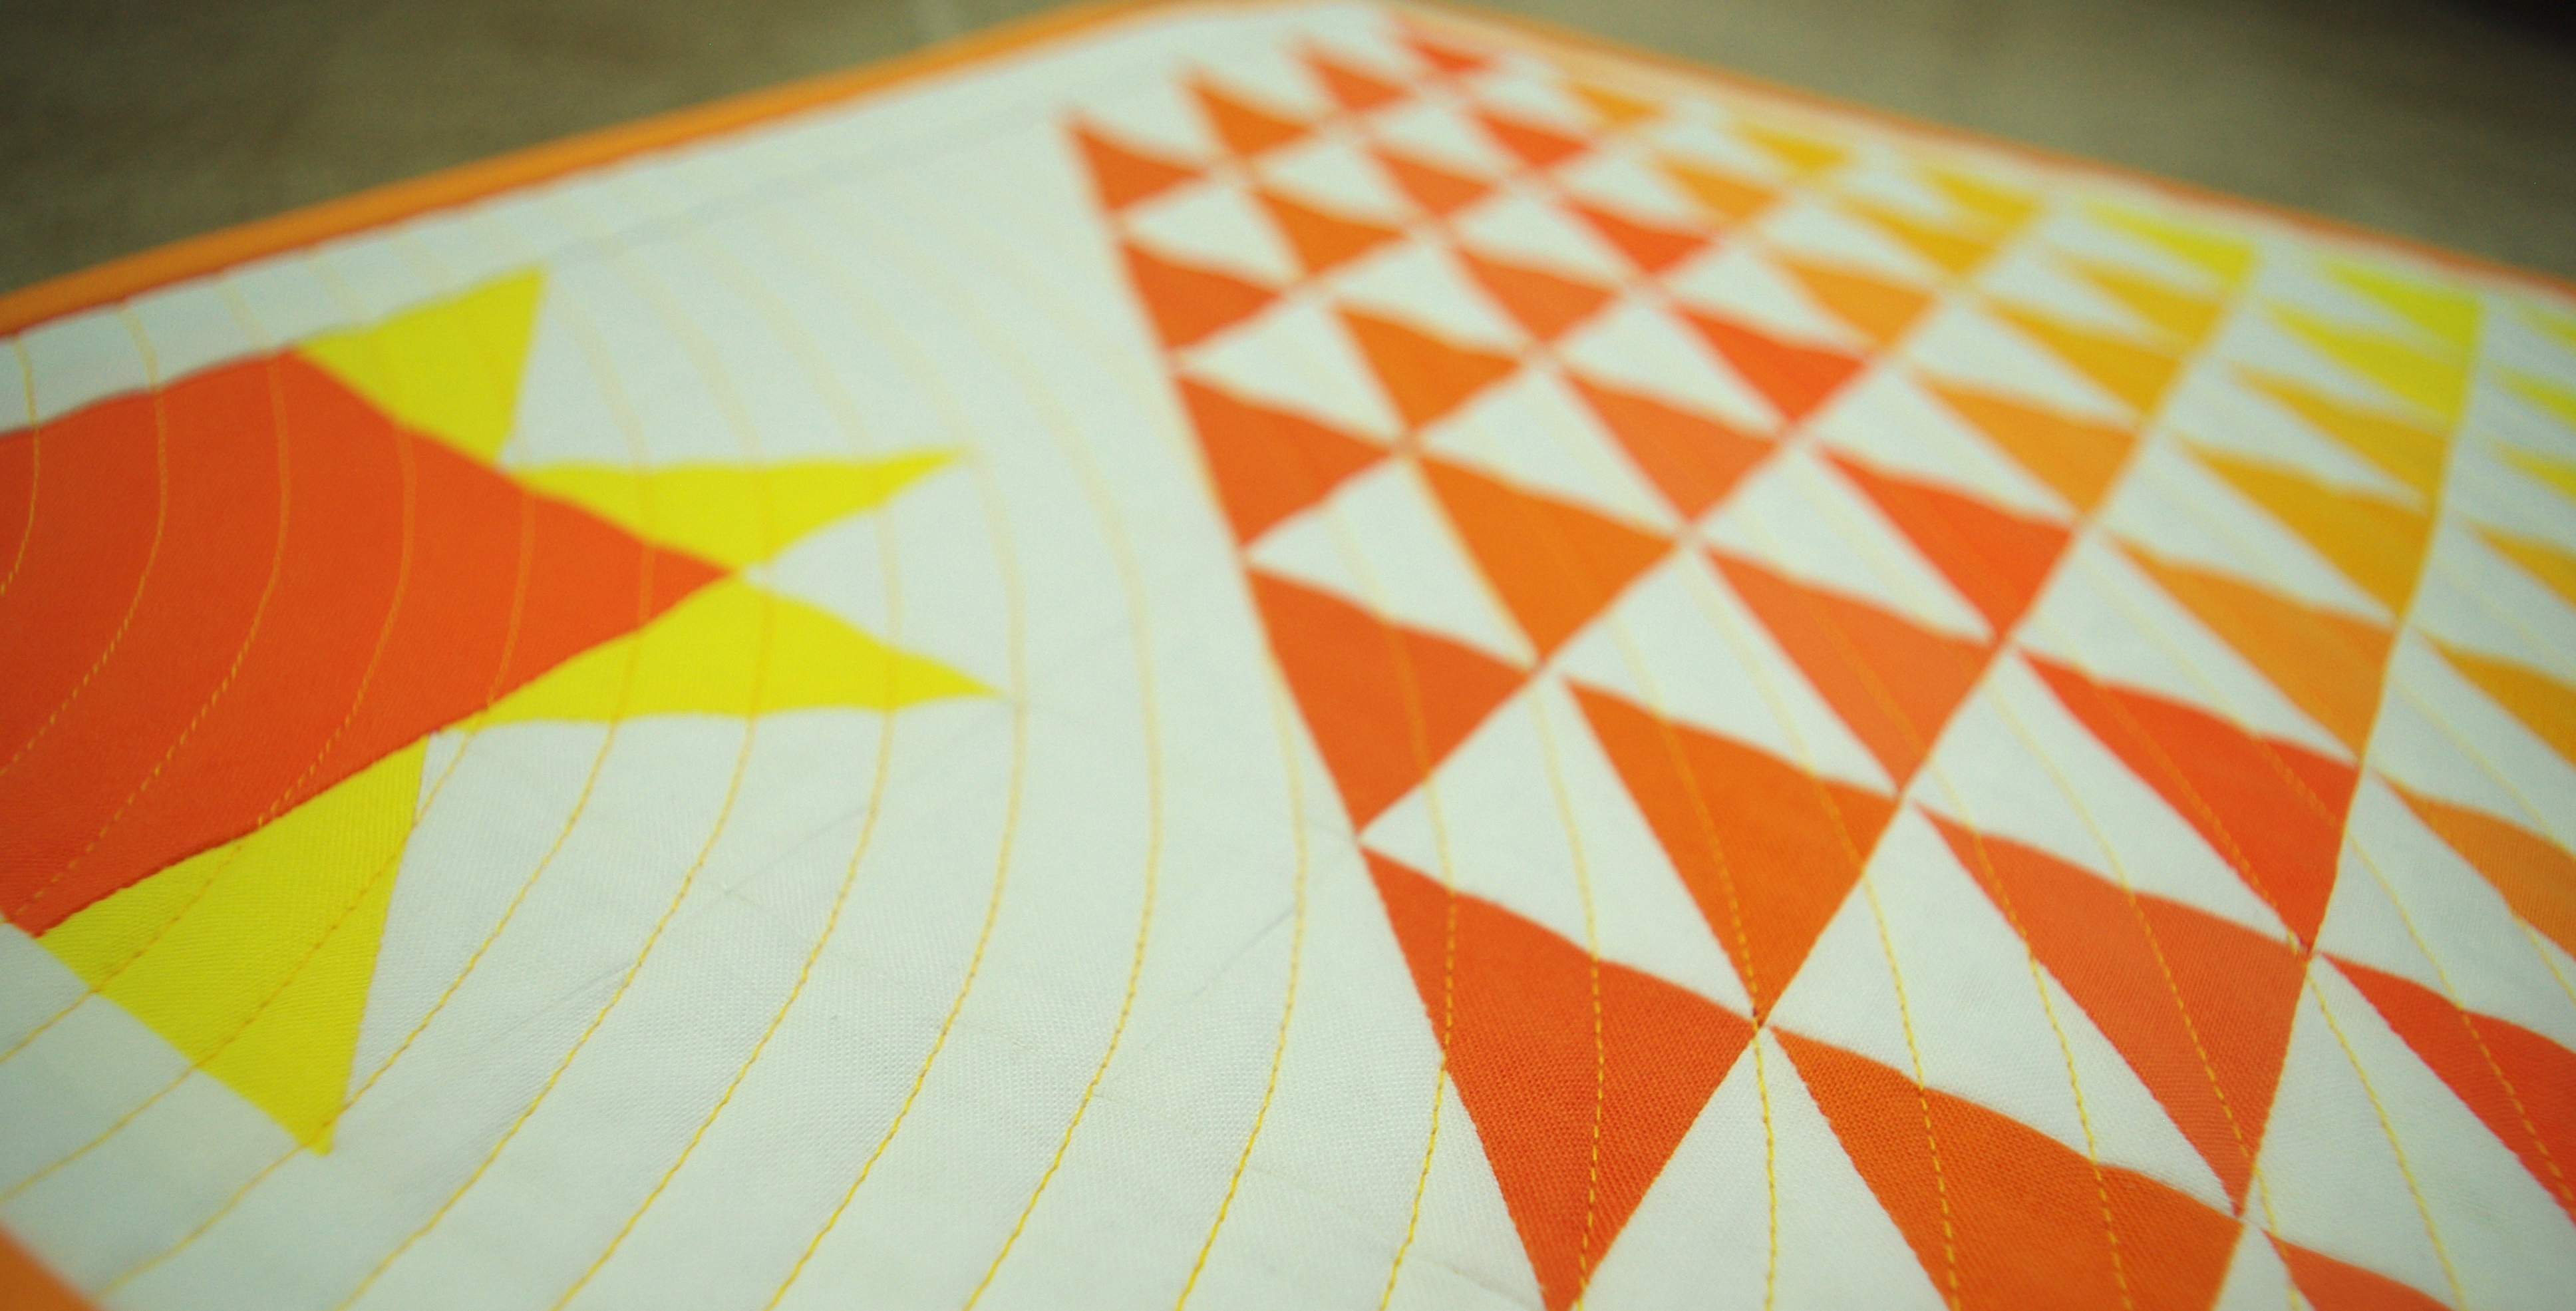
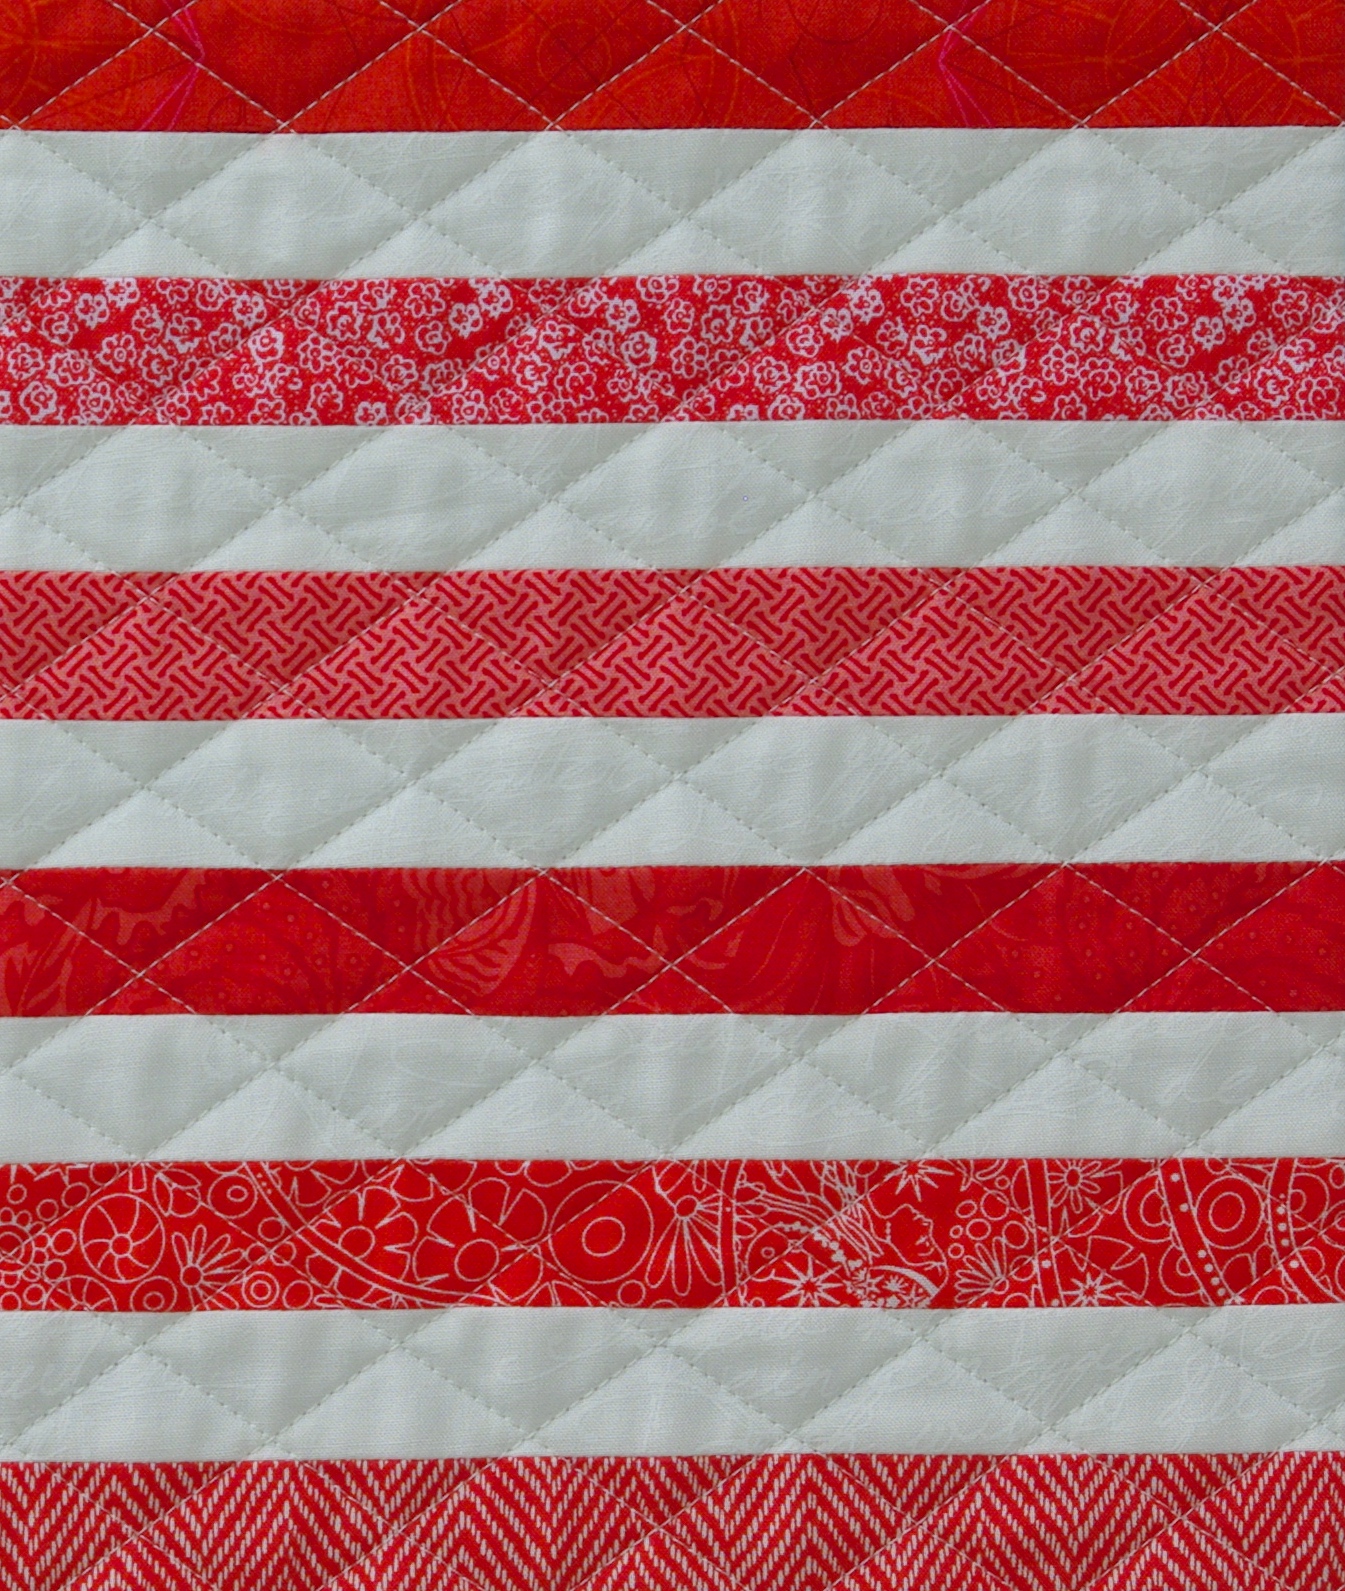
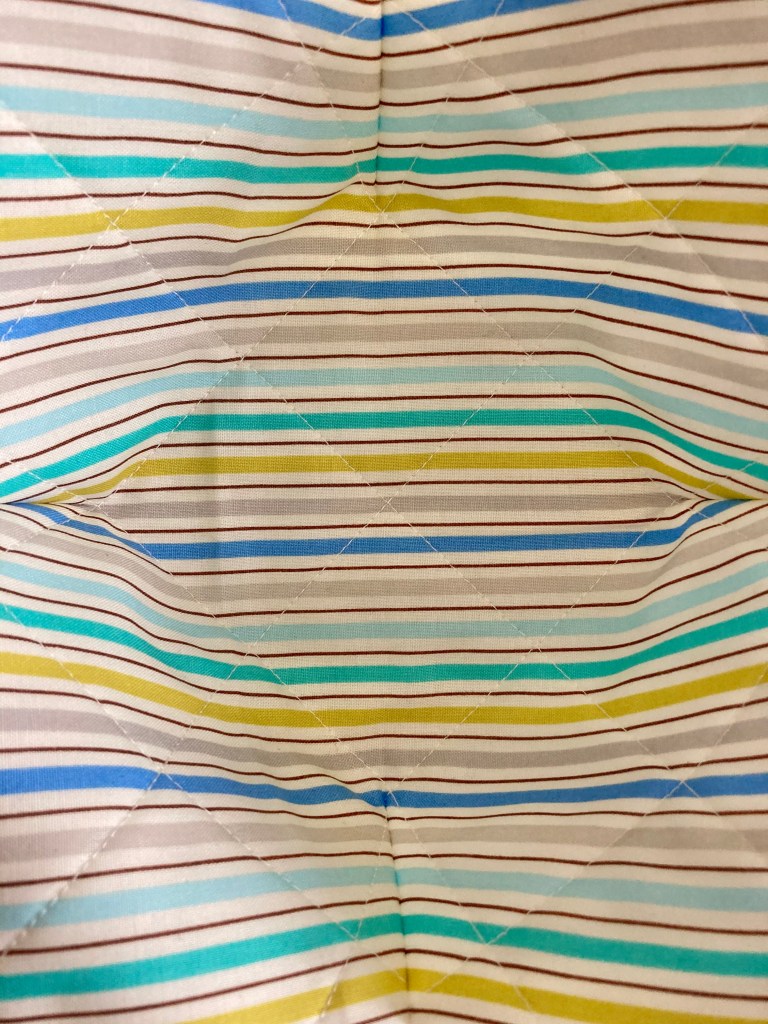
I quilted mine 2″ apart, a bit closer than in the video.

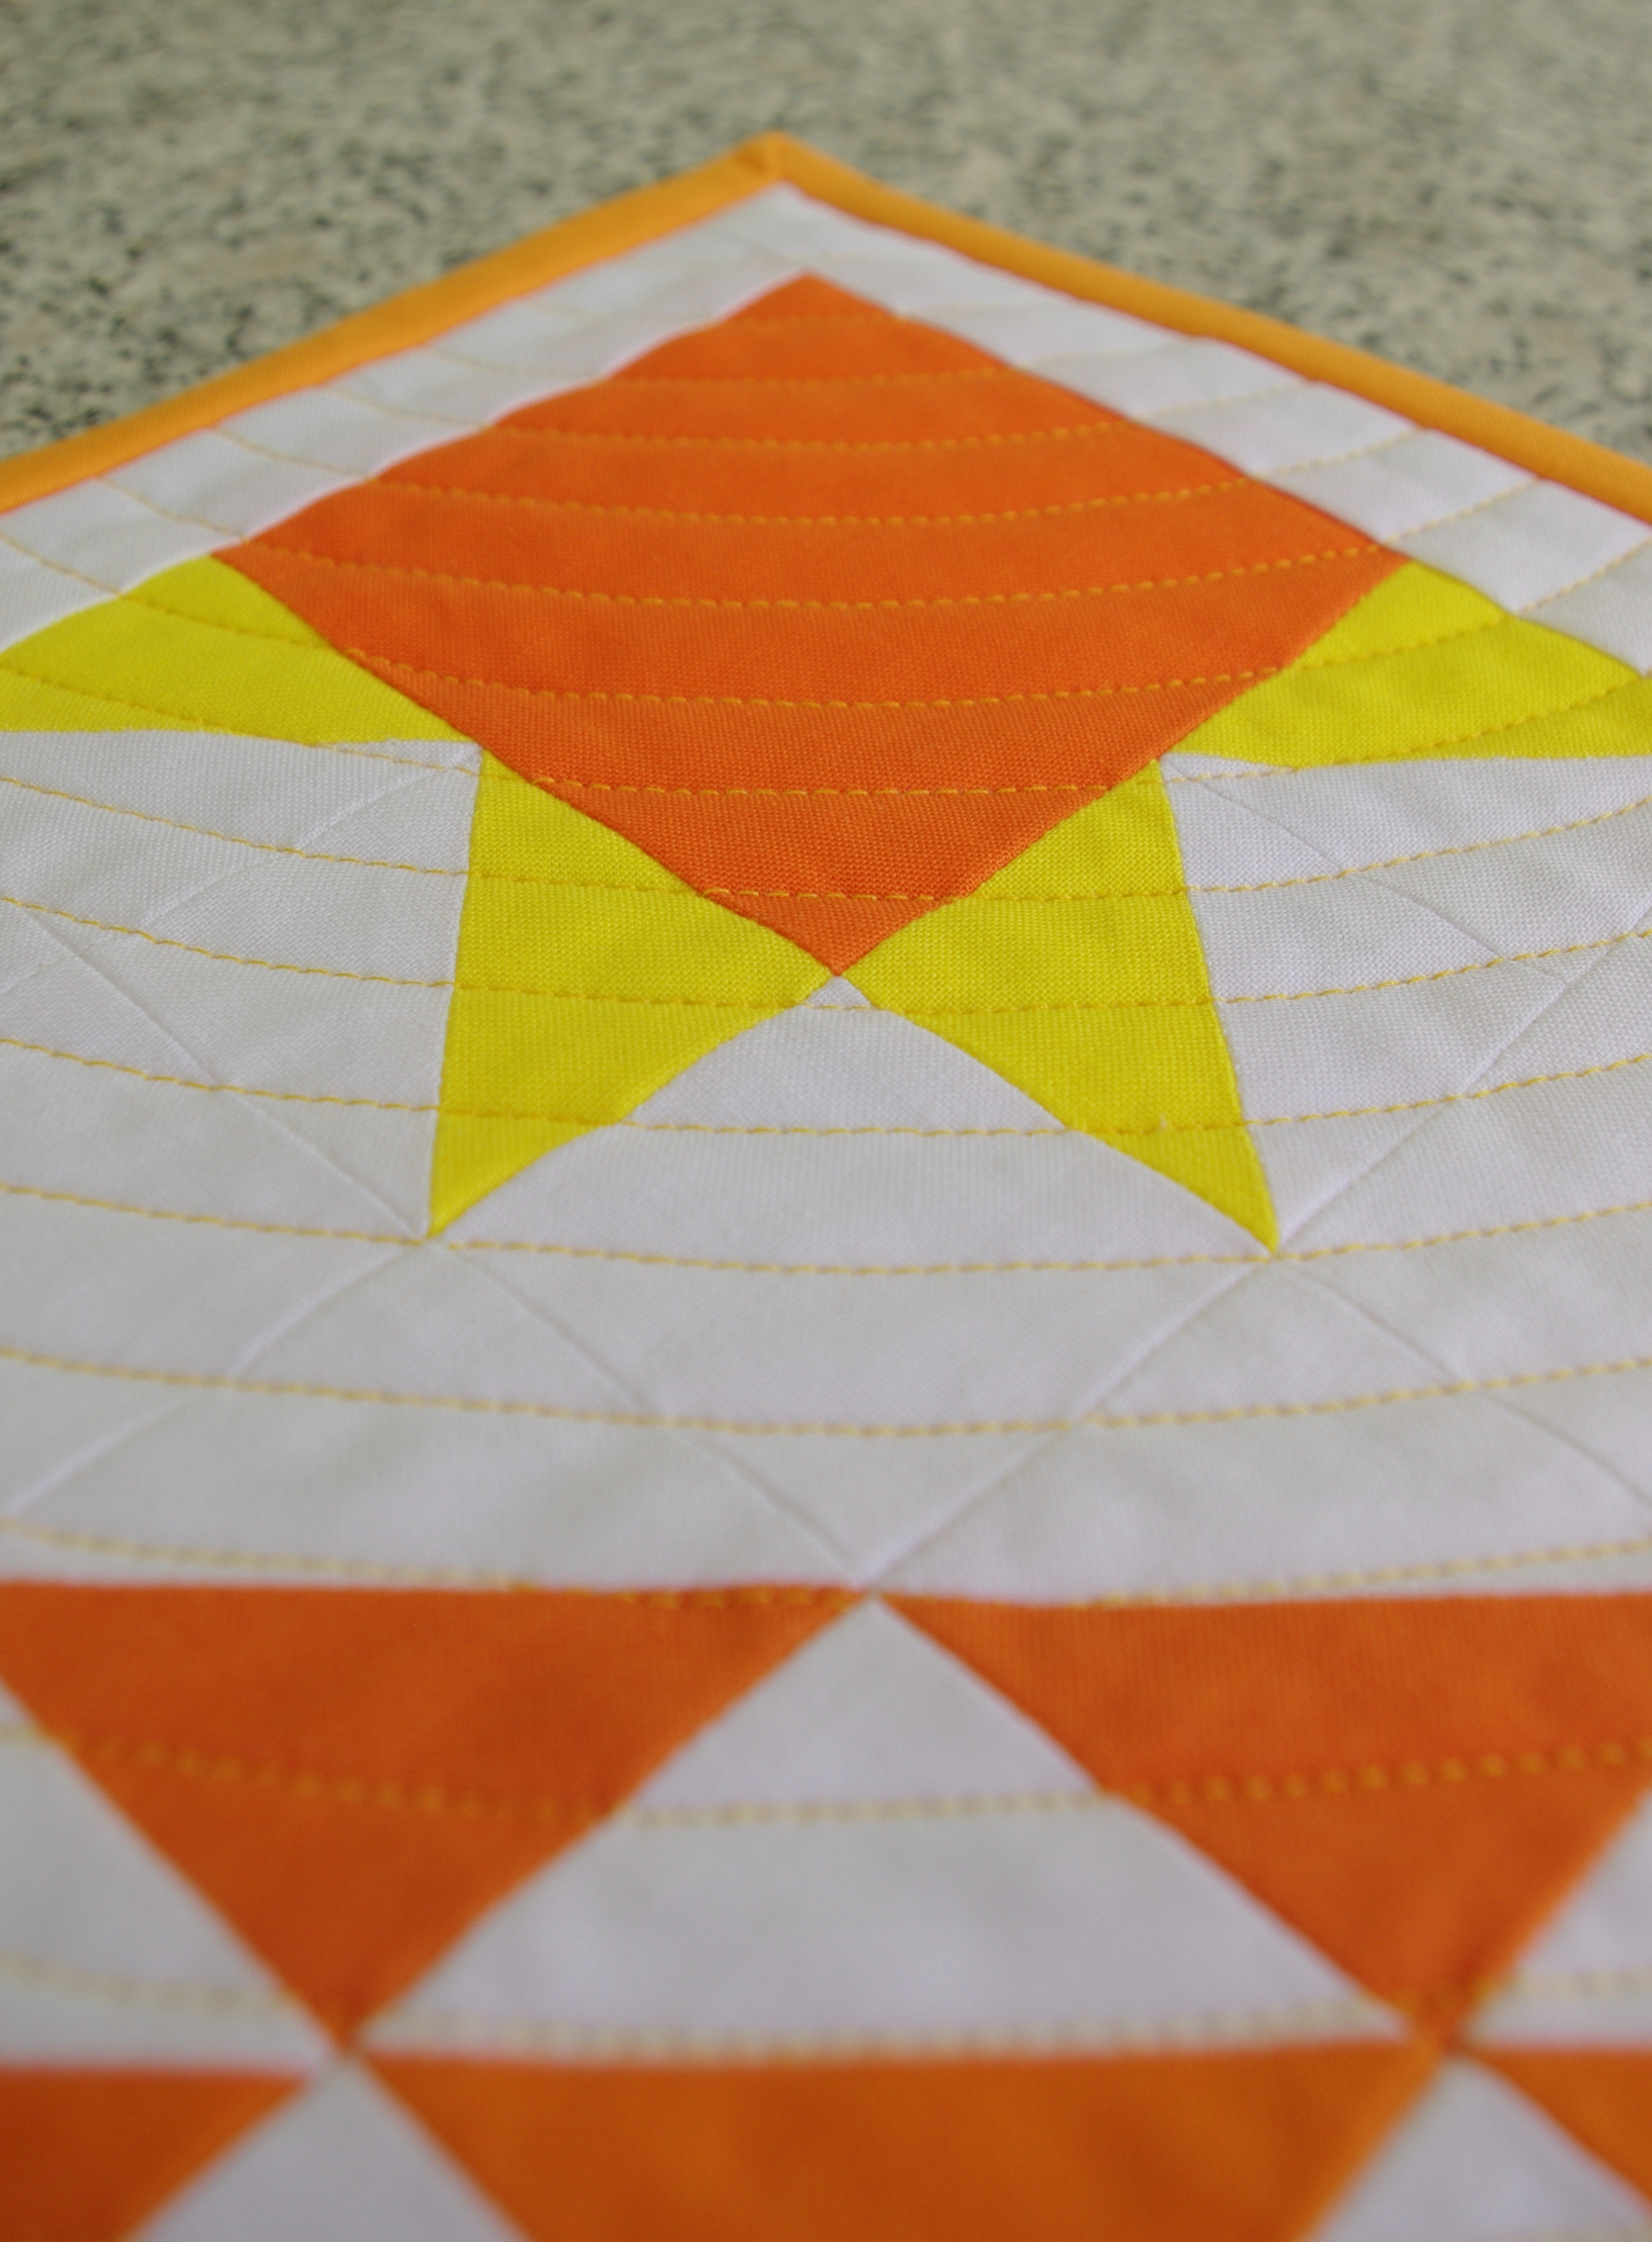
By doing so, the quilting helped shape the bottom of the cozies. I didn’t expect that but it turned out nicely.

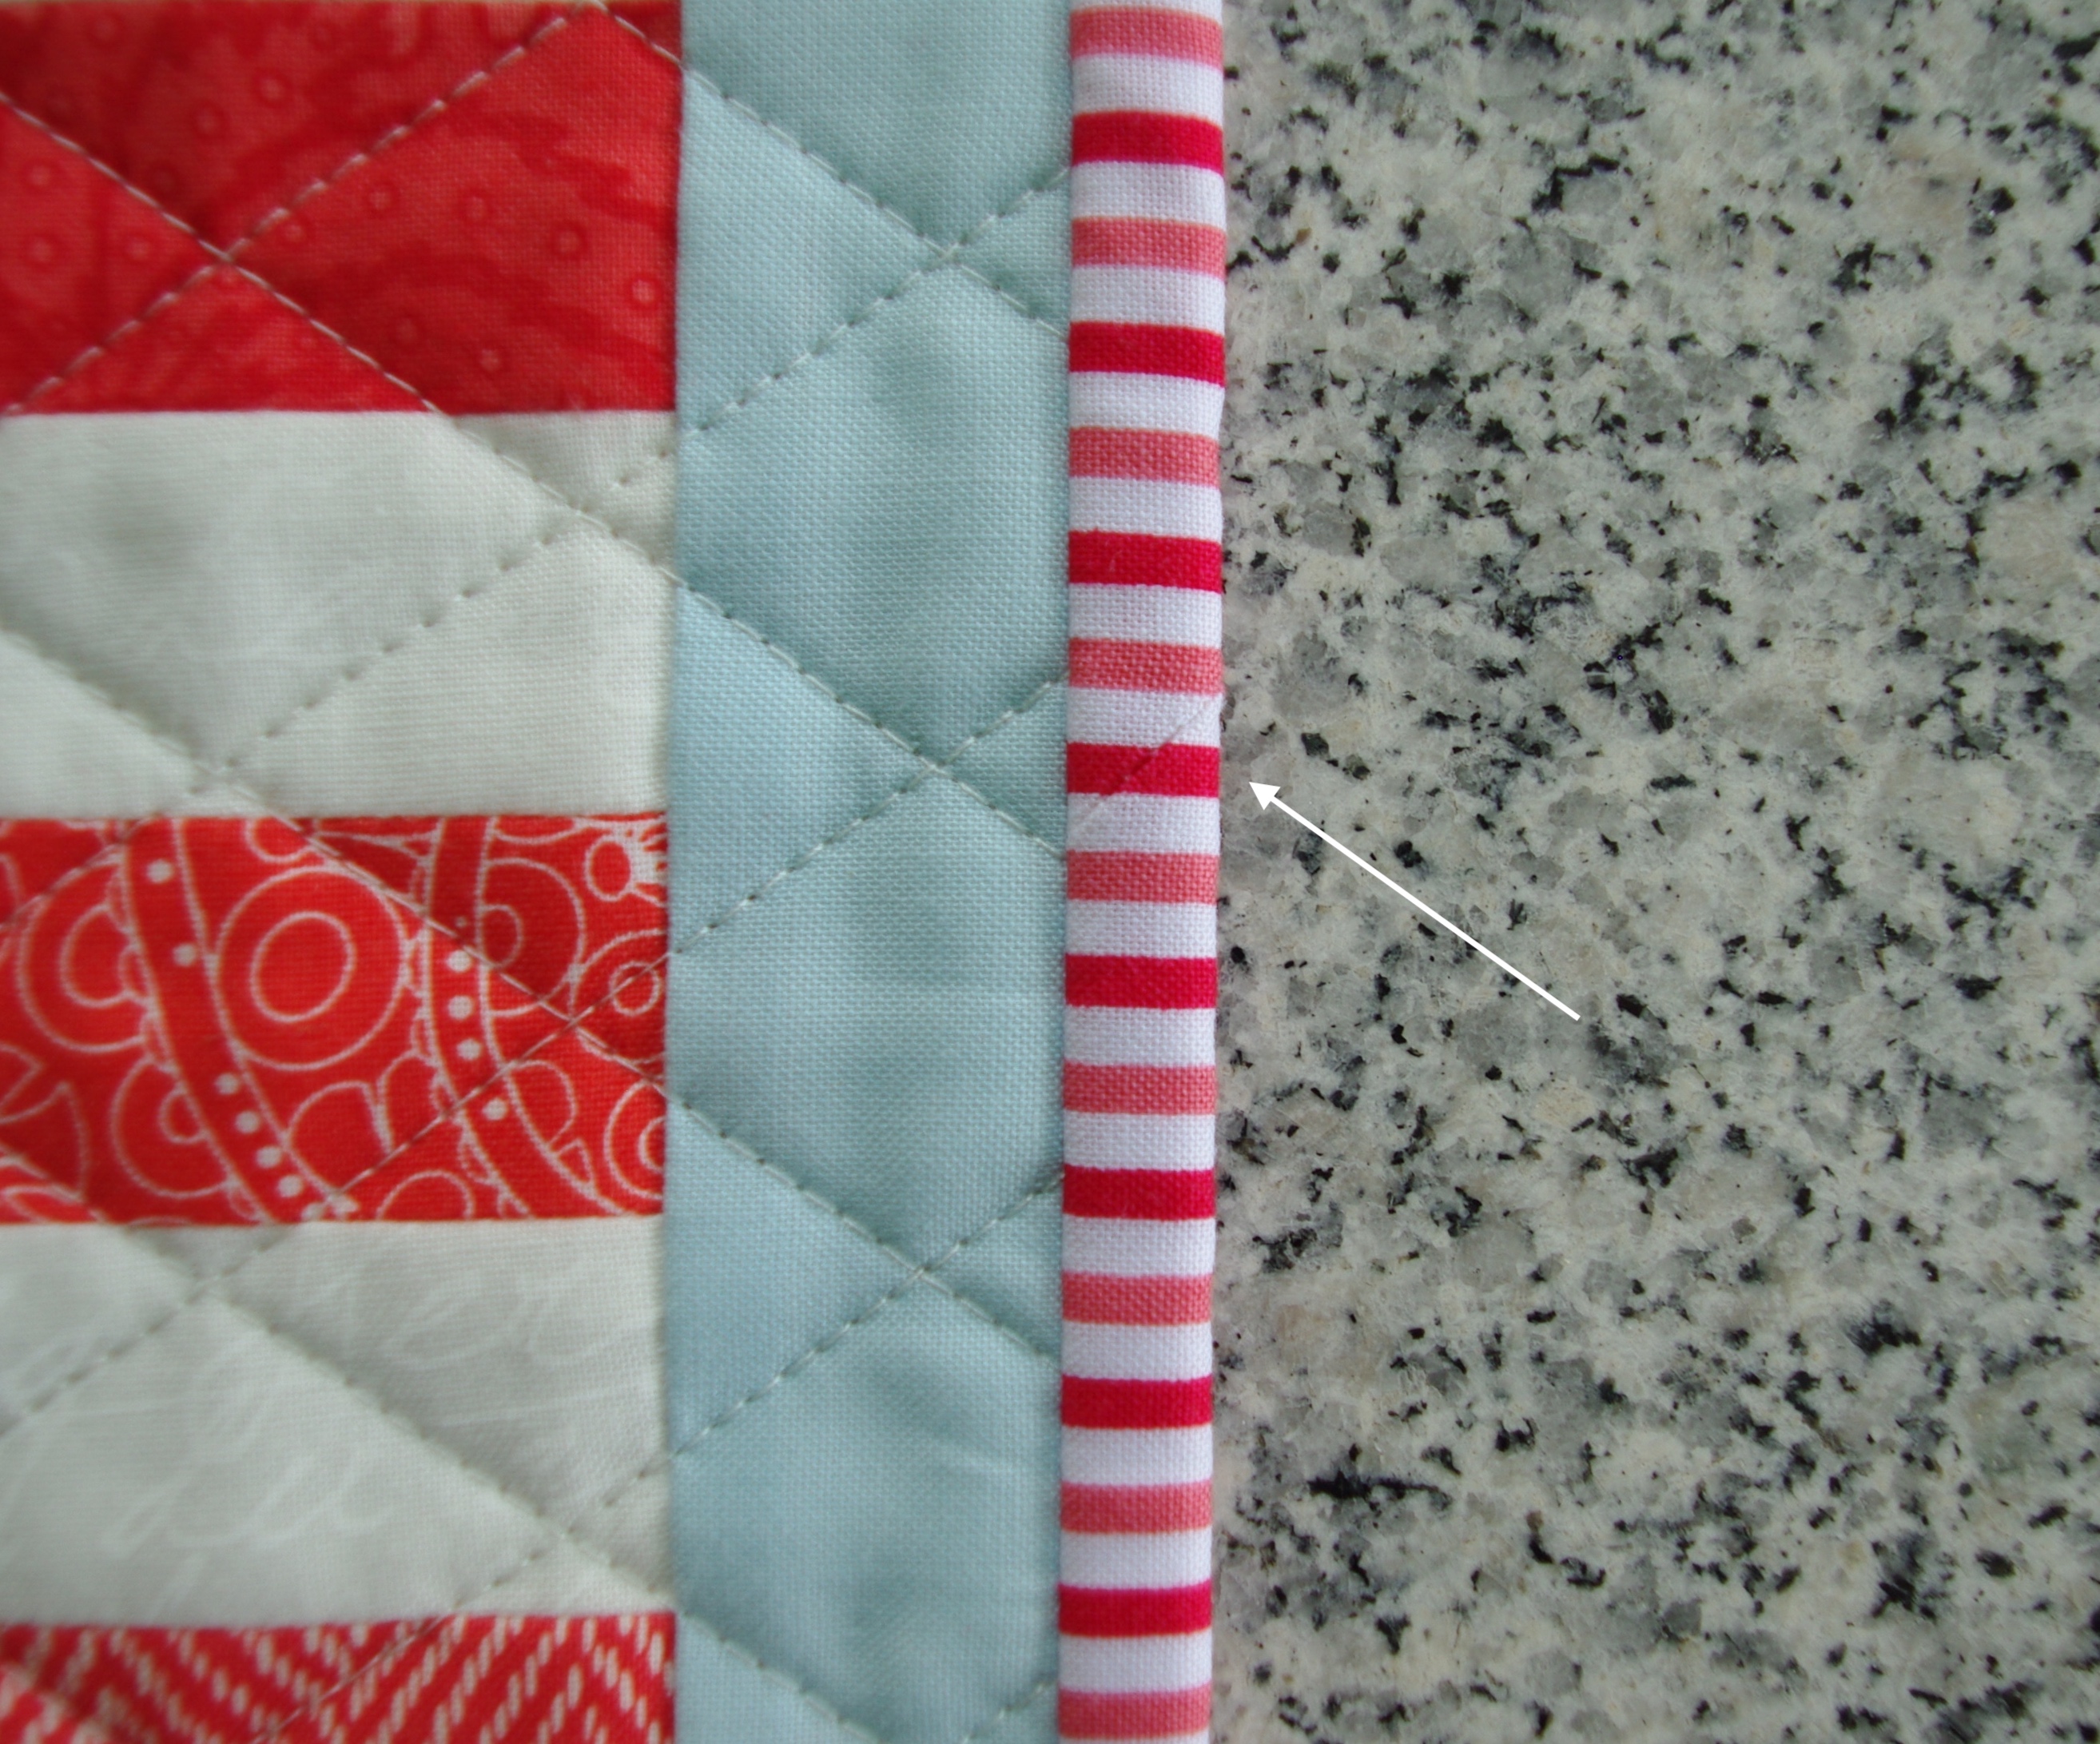
And I certainly didn’t expect the lines on my fabric to line up either! 🙂

Since you’re going through two layers of fabric and batting, take it nice and slow when top stitching.

I spent a few hours making all five of these. I kept one for myself and gave the rest to my family.

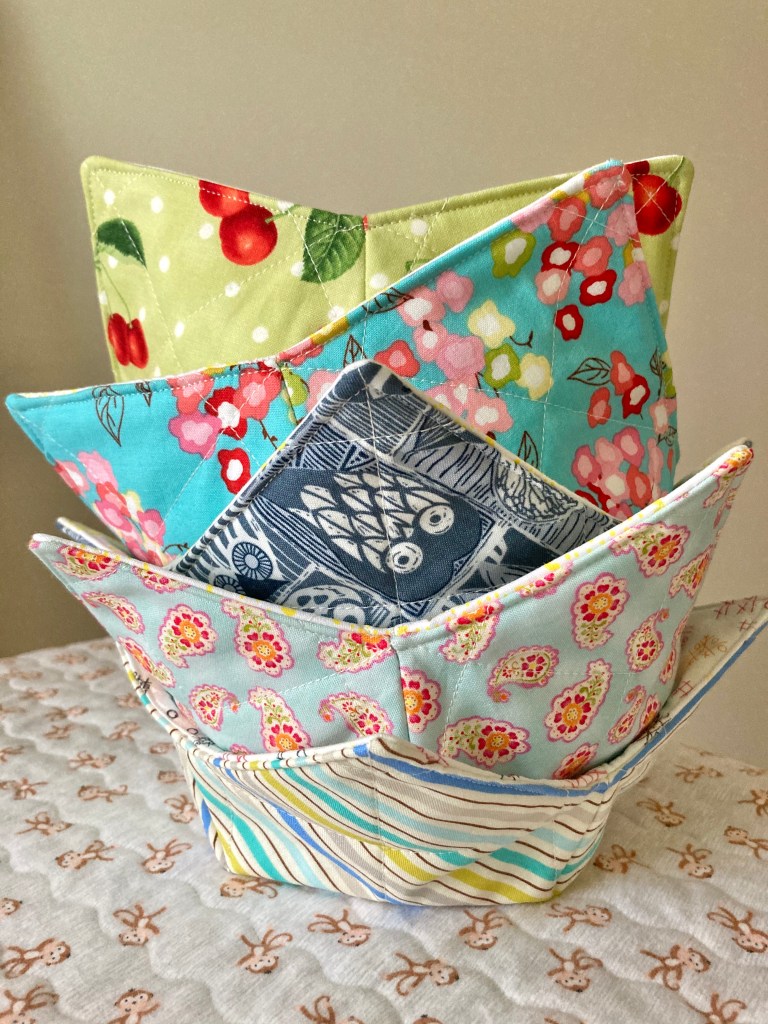
Because I didn’t have 100% cotton batting, we don’t use ours in the microwave, but we do use them to keep food warm. They work great and all the bowl sizes we tried fit just fine.

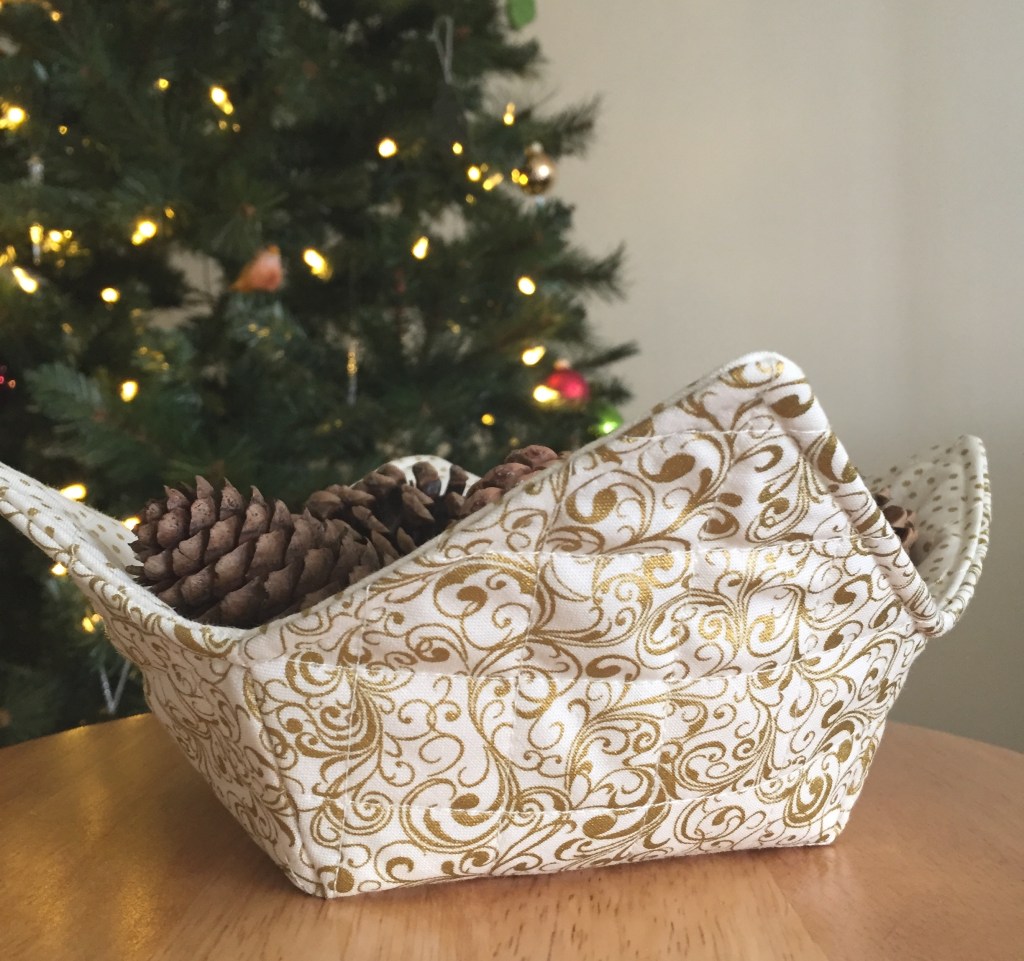
You can also make them for decoration. I made this one for displaying pine cones around Christmas. The beautiful metallic fabric and 1″ quilted lines give a festive holiday feel.

If you’re on your umpteenth quilt for the year and need a change of pace, you can quickly make a few bowl cozies to mix it up.

home decor, mini quilts, modern quilts, quilting, Uncategorized

Radiant Mini Quilt Published in Quiltmaker

To kick off the summer season, I have a newly published mini quilt pattern that gives off a summery vibe. It’s entitled Radiant because, well, the sun just radiates!

IMGP7651.JPG

I sketched this idea a while back but didn’t get a chance to write the pattern and make it until early spring last year. Right after finishing it, Modern Patchwork put out a call for ‘small’ projects. The timing was perfect so I submitted it for publication consideration. After being accepted, Modern Patchwork was no longer going to be published (sadly) so my mini was moved to the July/August issue of Quiltmaker.

I received my magazine copies yesterday and I have to say I love their layout, it definitely says summer to me! I’m very happy with it. 🙂

As seen in July/August issue of Quiltmaker

There were two things that inspired this design: 1. the sheer heat of the sun 2. fabric. I had purchased a Kona Cotton Citrus Bundle with something else in mind, but it ended being up exactly what I needed for this pattern. I wanted to create an ombre effect using solids ranging from dark to light giving the feeling of warmth radiating from the sun, and it worked. I think any combination of reds, oranges and yellows would do just as well.

IMGP7450
Kona Cotton Citrus Burst

I wanted to quilt circles from the sun outward, but before starting I tested my idea. On paper, I drew a circle (from a coaster) in the corner where the sun was on the quilt. I knew that the further out I’d have to sew, the larger the circles would get, and I had to make sure they’d stay round. It looked like it was going to work so I continued on.

IMGP7608

Testing showed I needed to start my lines off the quilt edge onto the excess batting area so I would have enough lead into the quilt top in order to keep my circles round. It was a bit of extra quilting but it was necessary to get the results I wanted. I used the edge of my walking foot for distancing apart lines, that way I didn’t have to make any markings.

IMGP7607.JPG

For quilting, I used Aurifil 2135, giving a nice warm finish.

IMGP8111
IMGP8097
IMGP8100

This little mini is a quick and easy make; consisting of mostly half square triangles. It measures 15″ W x 12″ H, and it would be a nice bright addition to anyone’s space! It’s also a great skill builder for a beginner quilter.

If you don’t subscribe to Quiltmaker, get your copy today and give it a try! If you like oranges and yellows you’re all set…or if you’re feeling adventurous try it out in your favorite color palette.

IMGP8147

So now that summer’s here, enjoy it!

fall decor, halloween, mini quilts, quilting, quilts, tutorials, Uncategorized

Pumpkin & Stars Mini Quilt Tutorial

It’s not too late to make a Halloween themed project! This one came to be because I wanted to combine a cute pumpkin with colorful friendship stars (making it the third project this year where I’ve incorporated these stars)…anyway, my latest mini quilt, Pumpkin & Stars, goes together relatively quick and will definitely show off your festive spirit! The pumpkin in this project is pretty basic, made with scrappy strips; I’m sure you’ve seen it used in several other projects. For mine, all I did was make the easy strippy pumpkin and add stars all the way around, in the traditional black and orange Halloween colors.

IMGP8955.JPG

After finishing, I thought another variation could be to give it a general autumnal look, leaning away from Halloween by replacing the black with gold, green, tan or taupe…any fall-like colors would work well. It also finishes to a toss pillow size.

This was a really fun project, I recommend it! If you’d like to give it a try, here’s what to do:

PUMPKIN & STARS MINI QUILT

MATERIALS
Variety of 2″ strips of orange and black fabric
(1) 1 ½” x 1 ½” square of brown fabric
(1) 1 ½” x 3″ rectangle of green fabric
(1) Fat quarter for background
(1) Fat quarter for backing
(1) Fat quarter for binding
20″ x 20″ quilt batting

GENERAL GUIDELINES
RST = Right Sides Together
HST = Half Square Triangle
WOF = Width Of Fabric
Use ¼” seam allowance throughout.
Press seams open unless otherwise indicated.

To make PUMPKIN:
Cut print fabric:
(1) 1 ½” x 1 ½” brown square
(1) 1 ½” x 3″ green rectangle
(6) 1 ½” x 5 ½” orange strips

Cut background fabric:
(6) 1 ½” x 1 ½” squares
(1) 1 ½” x 3″ rectangle
(2) 1 ½” x 6 ½” rectangles
(2) 1 ½” x 8 ½” rectangles

RST, sew (6) orange strips together lengthwise. Press.

Place (1) background square on each corner of the strip unit. Sew on diagonal line. Trim ¼” from sewn line. Press toward corner. Finished unit illustrated below.

Screen Shot 2018-10-24 at 8.56.35 PM.png

RST, place (2) background squares on the green strip so that the diagonal lines start on the lower left and end on the upper right. Sew on diagonal lines. Trim ¼” from sewn lines. Press toward corners. Finished unit illustrated below.

Screen Shot 2018-10-24 at 7.57.46 PM

To make STEM/LEAF UNIT:

Place the 1 ½” x 3″ background strip on the left, the brown square in the middle and the green leaf unit on the right. Sew the background strip onto the left edge of the brown square and the leaf unit onto the right edge. Press.

Sew the stem/leaf unit to the top of the pumpkin strip set. Press.

Your finished pumpkin block will look like this:

Screen Shot 2018-10-24 at 9.16.06 PM

To attach BORDERS:
Sew (1) 1 ½” x 6 ½” background strip to each edge of the pumpkin block. Press toward the border strips.

Sew (1) 1 ½” x 8 ½” background strip to the top and bottom edge of the pumpkin block. Press.

Unfinished size: 8 ½” x 8 ½”

To make FRIENDSHIP STAR:

Cut print fabric:
(1) 1 ½” x 1 ½” square
(2) 2″ x 2″ squares

Cut background fabric:
(4) 1 ½” x 1 ½” squares
(2) 2″ x 2″ squares

To make HSTs:
Draw a diagonal line on the wrong side of (2) background 2″ x 2″ squares. Place a marked square on a 2″ x 2″ print square. Sew ¼” from the drawn line on both sides. Cut on the drawn line, press open. Trim HSTs to 1 ½” square. One sewn unit makes 2 HSTs.

Place 1 ½” HSTs and 1 ½” background squares in order as shown below. Sew into rows. Press. Sew rows together, as illustrated.

Screen Shot 2018-10-24 at 7.54.00 PM

Make (4) orange friendship stars and (4) black friendship stars.

Unfinished block size: 3 ½” x 3 ½”

To make the SIDES:
Cut background fabric:
(4) 3″ x 3 ½” squares

RST, sew (1) 3″ x 3 ½” square to the top and bottom edge of a black friendship star, as illustrated below. Make 2.

Screen Shot 2018-10-24 at 10.20.08 PM

To attach SIDES:
Fold the pumpkin unit in half lengthwise and place a mark in the center along both edges. Repeat for both friendship star side unit inside edges. Match up a pumpkin center/side unit mark and pin on a side unit, RST. Sew. Press sides toward the pumpkin unit border. Repeat for opposite side. Trim if necessary.

To make TOP/BOTTOM ROWS:
Cut background fabric:
(4) 3″ x 3 ½” squares**

**NOTE: The background fabric cut at 3″ in width may vary due to differences in ¼” seam allowances. For example, mine needed to be a bit less than 3″ wide—more like 2 ⅞”—as my seam allowances always measure slightly larger than ¼”. You may have to adjust accordingly.

RST, sew (1) 3″ x 3 ½” square to each side edge of (1) black friendship star. Sew (1) orange friendship star to each edge of the black friendship star/background square unit. Make 2.

Screen Shot 2018-10-24 at 10.40.18 PM

To attach TOP/BOTTOM ROWS:

Use the same method as ‘To attach SIDES’ above.

To make BINDING:
Cut (4) 2 ½” x WOF from fat quarter. Sew strips end-to-end, press in half. Attach binding using preferred method.

Lastly, sandwich backing sized 20″ x 20″, batting and quilt top, baste. Quilt as desired.

IMGP8956.JPG

Finished size: 14 ½” x 14 ½”, although mine measured 14 ¼” square!

I quilted mine with fun, wavy lines using Aurifil thread 2000, and I love it.

IMGP8958.JPG

I always make my mini quilts with sewn in corners on the back so I can hang them on my sewing room door, but I think this one would look great on a table, too. And I definitely will be quilting those wavy lines on an upcoming quilt…

I hope you enjoy making this project and Happy Halloween!

baby quilts, mini quilts, quilting, Uncategorized

With Love Mini Quilt

Isn’t it funny how quilters automatically go into the ‘I’ve got to make something’ mode when they hear someone is having a baby? That’s exactly what happened to me over the summer when I learned my hair stylist was expecting. I had only one appointment before she’d be taking time off, so that limited me making her something small. I knew some sort of wall hanging was in order, so I searched and searched online, but to no avail. Since I couldn’t find what I wanted, I created my own.

I didn’t know what her decorating would include, colors or otherwise, so I designed something cute, but plain and simple and baby-themed enough that it would go with any decor. Interestingly enough, I wrote the pattern when I was working on my granny square quilt, so it was definitely granny square inspired.

With Love Mini Quilt pattern is available for purchase as a PDF download. It’s easy-to-follow with step-by-step illustrations, and it’s a quick project to make. The design is comprised of two small granny squares (just the centers), a two-piece heart and a snowballed O. It’s also beginner-friendly and lends itself for versatility in fabric choices.

For mine, I used Dear Stella mini dots in pastels and Kona Cotton Solid White for the background. I quilted it in a 1 ¼” crosshatch using Aurifil thread 2021.

IMGP8618.JPG

And since I’ve been enjoying the look of scrappy binding lately, I chose it for this project as well. The finished mini is 14 ½” square so it could also be made into a pillow as a fun alternative.

IMGP8717.jpg

And of course, when giving any handmade gift—add your label!

IMGP8625.JPG

My hair stylist was happy with this little mini, and I was happy to have created it and to have made one for her. If you’ve know anyone that’s expecting, it makes a wonderful gift. And if you do make one, I’d love to see your version! Share on Instagram #withloveminiquilt.

diy, tutorials, Uncategorized

DIY Quilt Ladder Tutorial

Don’t you just love those beautiful leaning ladders for displaying quilts? I know I do, but I didn’t want to pay upwards of $200 for one. I knew my husband and I could do a DIY for a LOT less, and we did, we made ours for under $20!

Here’s what we had to buy:
(4) ¾″ × 1 ½″ × 6′ Select Pine boards = $3.83 each
Total cost of $15.32 (+ tax)

1 box (of 25) 1 ½″ construction wood screws
Total cost of $2.17 (+ tax)

We purchased the boards and wood screws at Home Depot. Any big box hardware store should carry all other supplies and tools.

I should note that that was our price was less than $20 because we had the additional necessary items on hand: paint brush/foam brush, wood stain, polycrylic protective finish, paint, primer, a variety of sandpaper and the tools. If you don’t have these items, it will cost more, but nowhere near what a retailer is asking.

I was so happy with the first one, I asked my husband to help out again and we made a second one. I finished them differently; the first one I stained and the second one I painted white. That way, I can move them around the house and always have a fresh, new look.

This was a fun project for both of us. It was really rewarding to make something for our home that not only is attractive, but useful, too. I also found that working with wood was relaxing and rather enjoyable. 🙂

The time spent on each ladder varied. Estimated time on construction was about 2 ½ hours and it took about 3 – 3 ½ hours to sand, stain and apply polyurethane. It was much more time consuming to paint. I applied one coat of primer and four coats of paint, which took several hours, but was worth it. I love both results.

IMGP8215.jpg

Finished ladder measures 6′ H × 19″ W × 1 ½″ D.

If you’d like to make your own, click here for my downloadable PDF DIY Quilt Ladder Tutorial. The tutorial is easy-to-follow with step-by-step instructions and plenty of photos.

Here’s to creating and saving a ton of money at the same time!

mini quilts, tutorials, Uncategorized

Corner Hanging Pocket Tutorial

Hanging mini quilts is a must-do, right? Whether you’re a quilter who hangs minis all over your walls or one like me who hangs one at a time—having an effective method of displaying them is essential no matter how many or how few. This corner technique is so fast and easy, in no time your minis will be ready to show off!

Required materials include two squares of fabric and a round dowel rod. I usually use 3/8″ width (oak) as it’s sturdy and doesn’t tend to bend or warp. It’s not necessary to go any larger than 3/8″ with most mini quilts. I’ve also used a 1/4″ dowel rod on a very small mini and through my experience, it held up well.

IMGP8091.JPG

Dowel rods can be purchased at any big box home improvement store for under $2 each (36″ length/oak). There are a variety of sizes and types of wood so you can choose what best suits your needs.

Let’s get started. Once your mini quilt is quilted and trimmed (but before binding), cut two 3″ x 3″ squares from your backing fabric (or from scraps). Press squares in half diagonally.

IMGP7611.JPG

On the back of the quilt, pin one pressed square onto each top corner.

IMGP7617

Attach binding, sewing carefully around the pins, making sure to keep the all the edges flat.

IMGP7619.JPG

Finish sewing on the binding using your preferred method.

IMGP7643.JPG

And it’s finished!

Measure from one end of the binding to the other, cut the dowel rod to measurement. Sand off any rough edges.

IMGP8089.JPG

Insert and hang!

IMG_5476

Got a lot of mini quilts? Need a few tips on storing them? Click here!

mini quilts, quilts, Uncategorized

Patriotic Flag Mini Quilt

The month of May always brings out patriotism here in the US, with Memorial Day kicking off the summer season then Flag Day and the Fourth of July not too far behind. Right now I have two quilts in the making, a Christmas gift and a new pattern of mine, and I could use a break from larger projects so I set out to find something patriotic that I could finish quickly using left over fabrics.

I usually don’t sew with blue (I don’t know why, I just don’t seem to choose it) but since I made my Americana Stars & Four Patches quilt last year, I had enough blue fabric for something small. Same with red, I don’t use it a lot, but I had some on hand from previous projects plus I got a small fat quarter bundle freebie with some lovely reds included.  🙂

IMGP7940.JPG

After quite a bit of searching, I decided on a free flag tutorial from Cluck Cluck Sew. While she made a lovely pillow, I wanted something for my sewing room door so I added a light blue border and made mine a mini quilt.

IMG_7293.jpg

For the star and stripes, I used a white low volume fabric with handwriting that reminded me of old-fashioned handwritten letters and historic signatures; I thought it was fitting for a flag. It’s kind of difficult to see it unless it’s close up…

IMGP7937IMGP7939

Before I began quilting, I did some ‘thread painting’—my quilting tip that consists of laying out thread on a project to help decide on a quilting pattern. To read more about it, click here. I do tend to gravitate toward crosshatch quilting, especially on rectangular blocks because the end results are diamonds, and I love the look! So yes, I went with crosshatch quilting, yet again.

IMGP7954.jpg
thread painting

When basting a mini quilt, I always use my flower straight pins instead of actual quilting pins. Reasons being: they’re easier to put in and take out, they’re nice and sharp and long, and they seem flatter than other pins.

IMGP7979

I used my guide for quilting accuracy and it gave me very precise results!

IMGP7988.JPG

I was happy to have had enough red and white striped fabric for this project, left over from a Christmas tree skirt. And of course, striped binding is always a favorite.

IMGP8008.JPG

And speaking of binding…how lucky was I to get this tiny stripe to align when I finished off my binding? Absolutely pure luck! Doubt that ever happens again.  🙂

IMGP8022.jpg

For the back, I had this very appropriate fabric from my Stars & Four Patches quilt. As far as backing goes, it’s easy to match up prints, especially on a small project. I have more information on this topic on my Matching Fabric Patterns blog post.

IMGP8019.jpg

And…here’s the finished project!

IMGP7982.JPG

I love everything about this mini—it’s cute, a great size for my sewing room door and I can get it out to enjoy several times a year. Lastly, it was a small but significant scrap buster!

IMGP8000

Happy Memorial Day

quilting, Uncategorized

Pillowpalooza!

Since I’ve made a lot of pillows lately, I thought it would be a good time to show my work on a blog post. I’ve also included a couple of others I made a few years ago.

Starting with my oldest projects first…the next two sets of pillows date back to when I dug out my Kenmore sewing machine in 2012 and started sewing (then consequently, quilting) as a hobby. These two are some of the the first ones I ever made, and they’re still a favorite.

IMGP7557.JPG

If you read my ‘About’ section, you may recall I was given a store-bought comforter quilt with lovely Laura Ashley fabrics that consisted of a variety of colors and textures, which I slowly and surely took apart, and yes, with a seam ripper.

I made an ensemble from the backing. I followed a tutorial for a foam seat, and I got really adventurous and made bias binding!

Out of all that fabric, those four pillows and the seat cushion is all I have left, and I still have yards and yards of that funky ribbon! The panels in the quilt were about 12″ square, pretty large for a quilt but pretty small for pillows.

This one was made with repurposed half square triangles I had used in a Moda Bake Shop project submission. They were perfectly fine and there was no sense in them sitting in a drawer, so I reused them.

IMGP7318
front
IMGP7321
reversible back

I made it ‘reversible’ so it looks good no matter what side is facing out. I did the same thing with a few others. Sometimes I turn them around just for new look.

The next one is a Dutch Rose block pattern I found in McCall’s online library of 150+ quilt block patterns. All free and a great resource! Here’s the link: The Quilting Company.

IMGP7051.JPG

Personally, I think this is the prettiest block I’ve ever made. I left it on my design wall for a month just so I could look at it. 🙂

And here it is in pillow form on my bed. Still love it.

:.,bcxz .jpg

The front consists of a mix of Moda fabrics; the yellow is Benartex from a bright collection called Transformation by Sarah Vedeler Designs.  As always, I used Kona Cotton for my background, this is Kona Cotton Snow. I put a lovely Art Gallery fabric by Amy Sinibaldi on the back. Such soft and gorgeous colors!

IMG_7167.jpg

The next two are pillow covers I made for my mom, also with printed fabric on the back. I used mostly leftover fabric from the quilt I made for her this past Christmas. Hope she likes them!

IMG_7082

IMGP7420

Overall, these zippered pillow covers are fairly easy to make and the quilt block possibilities are endless. If you’d like to create some for yourself, here’s the link to my Zippered Quilt Block Pillow Cover Tutorial.

I’m sure you noticed that none of these quilt block pillows are quilted. I opted not to quilt them because I love the look of fresh, crisp fronts. Sure, quilting is an option, I just wanted to mix things up a bit.

That pretty much wraps up my current pillow collection. I’m in the process of making a queen size Hunter’s Star quilt for my daughter and I plan to make a few throw pillows to go along it. Oh, and of course I have other ideas in the works, so eventually there’ll be a Pillowpalooza II!