
From time to time I like to write about sewing tools I use to make quilting easier, especially ones that help me make better quilts. I have 5 valuable items to showcase, and if you don’t already use them I recommend giving them a try.
STARCH
When my Sweet Stripes quilt pattern was out to testers last November, a tester asked me if the pattern should mention using starch. When I replied, ‘I don’t use starch, only when making minis,’ she was pretty surprised; its use must be more popular than I thought. Fast forward to my upcoming pattern where small squares will be stitched and flipped with seams pressed open—that actually need starched for best results—I’ll definitely recommend using it this time!
My starch preference is Flatter by Soak. I’m not one for scented products, but I’d just finished a bottle of unscented that smelled anyway so I chose pineapple this time. A 8.4 ounce bottle costs around $12 on Amazon putting it on the expensive side, but for a top-notch product it’s worth paying a bit more (my last bottle lasted one year). It’s great stuff; it doesn’t leave your fabric crunchy nor does it leave residue on your iron.

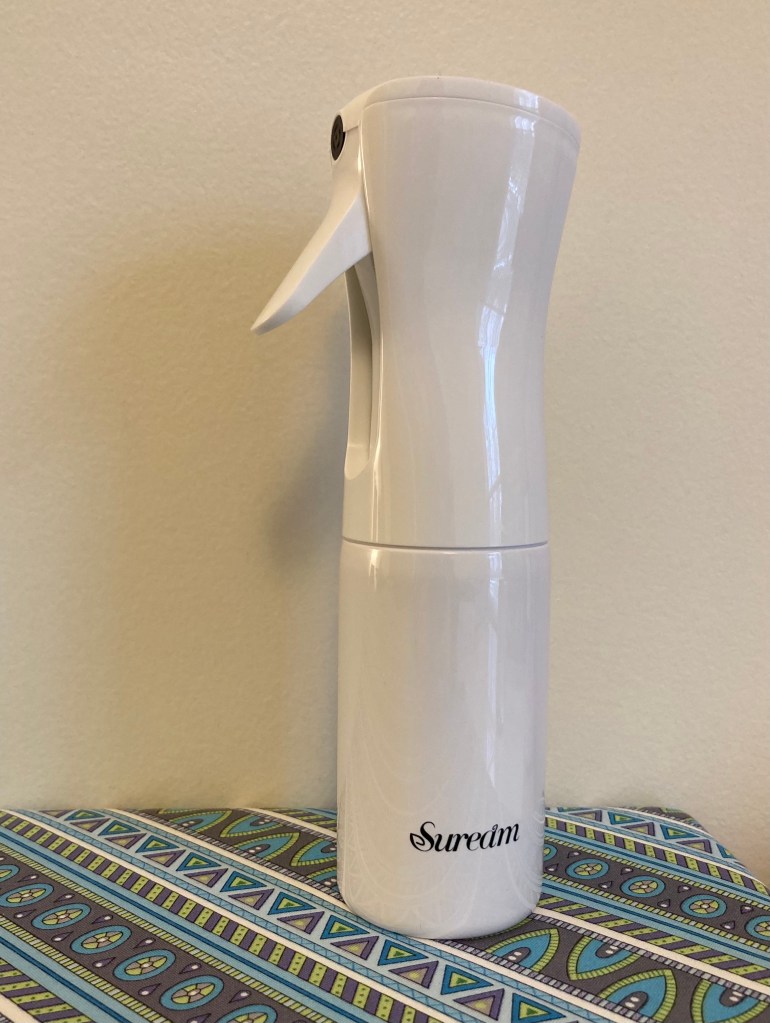
SPRAY MIST BOTTLE
Since every iron leaks eventually (even my costly Rowenta Focus started leaking after a year or so) I’ve quit putting water in them. While I really love using steam and I miss it, I’ve gotten used to going without. As an alternative, I use a water spray bottle when pressing. I’d seen this funky sprayer in a quilt shop over the summer but ended up purchasing one online a few months later. It’s a fine mist spray bottle and it is excellent. It holds 5.4 ounces of water and costs around $7 on Amazon. The pump sprays a really fine mist and if you hold the nozzle down it’s works like an aerosol. I love the clean look of white so it’s not unsightly on my pressing table.
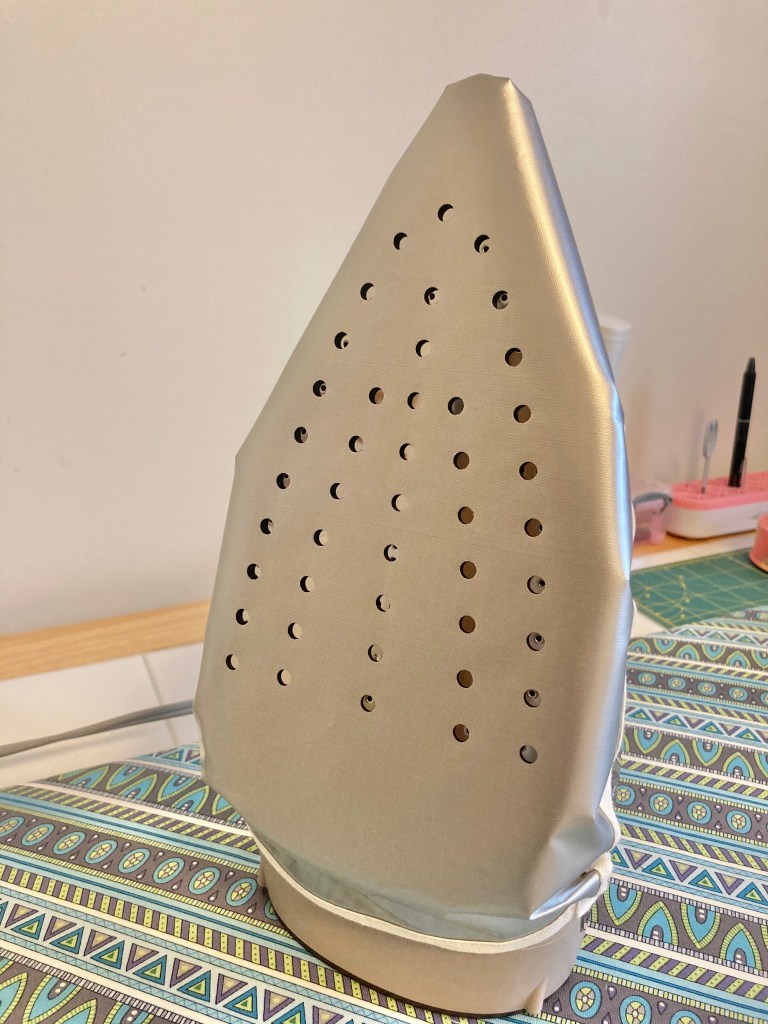
IRON SHOE
This is kind of an odd item, but it comes in really handy. I first saw one at the Fat Quarter Shop as a flash sale item and thought I’d give it a whirl, thinking it might help avoid the constant mess of getting interfacing adhesive stuck to my iron. It costs around $15 and is ‘made of fiberglass and is a non-stick surface that will save your fabric from scorching, shine and burns.’ It’s great when using interfacing and when pressing seams of pieced batting—nothing sticks! It’s easy to use; just tie it on your iron (fits any size).

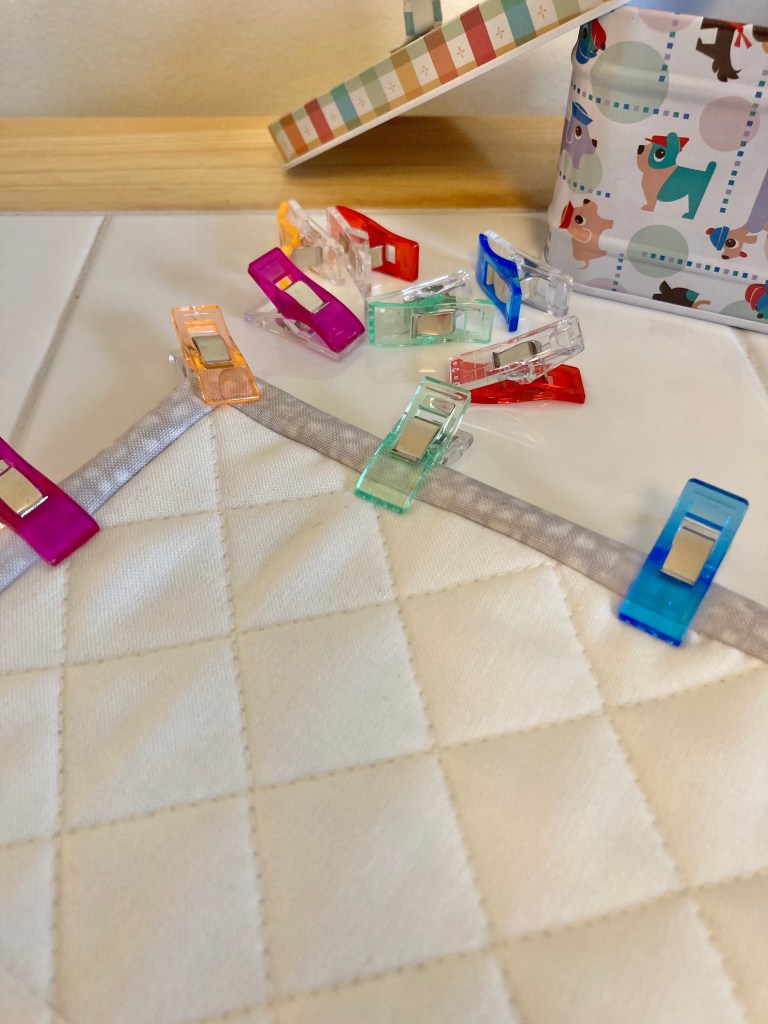
QUILTING CLIPS
My sister bought me this cute little tin of 100 assorted colored clips (including 10 large sized). I’m not calling them ‘Wonder Clips’ because they’re not actually Clover brand as ‘Clover’ isn’t stamped on. I have a couple hundred Clover clips and by comparison, they’re pretty much the same. They’re the same size, they look alike and they perform the same. These might even grip a bit tighter. I’m guessing they’re less expensive than name brand, and I was told they were purchased on Amazon. I use them constantly and love the fun colors.

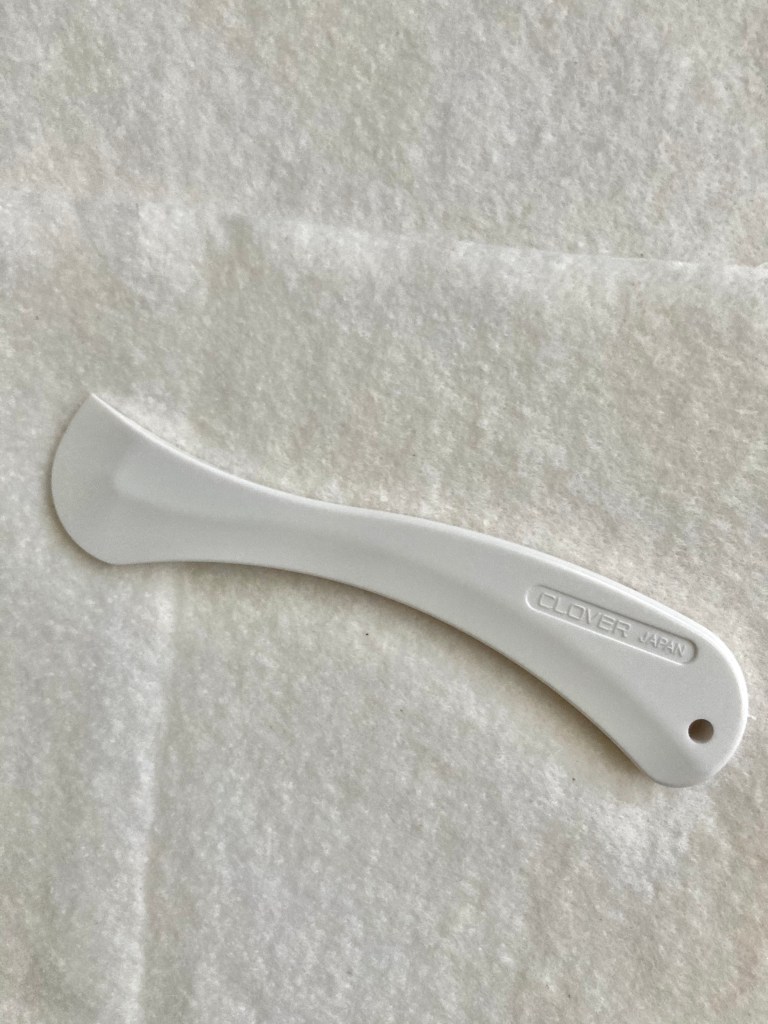
HERA MARKER
If you quilt your own quilts, using a hera marker is a safe and effective way to mark your quilt tops. If you’ve never used one before, they’re really easy to use. Just line up your ruler where you’re going to sew and mark a pressed line, just like you would using a pen or pencil. Since you have to see the line to sew, you’ll have to run the marker along the side of the ruler a couple of times to get a good indentation. In the end, the indentation is just a crease that’ll go away. This Clover hera marker can be purchased at JoAnn, online, or at your LQS, costing around $6. It’s a great tool and for such a low price, it’s well worth it. The sharper edge can eventually wear down, but it’ll take quite a while. I just replaced mine after about 4 years of use, and that was mainly because I had broken off the tip.
I hope this post is a useful guide if you’re looking for items to make quilting easier and more efficient…and to making more beautiful quilts!
Note: I am not endorsed by any product I have mentioned in this post; they are items I like, use, and wanted to share information on.
