
Most of the time I have only one quilt in the works as I’m better focused and organized when I stick to a single project. But that’s most of the time. 😉 There are occasions when I work a few projects at a time, mainly if I know a specific quilt is going to be a long process. My most recent example is my scrappy on point nine patch quilt.
For Christmas 2018 and 2019 I’d given my kids queen size quilts, so 2020 was the year to make one for myself. I decided on a scrappy nine patch so I could use a big share of the 2 1/2″ squares I always seem to be accumulating. And to give it a bit more style, I decided to make it on point using various white tone on tone background fabrics instead of plain white.
To get started, I determined the size I wanted then designed the layout in EQ8. Using 2 1/2″ squares resulted in relatively small blocks (6″ square finished) so the pattern required a lot more blocks than I’d imagined…a total of 242! Of those, 132 nine patch were needed and 110 white squares. Additional background squares were required for the blocks around the edge that were cut larger and in half. I also added a 2 1/2″ border.

The next step was choosing colors. Because 11 color blocks were needed in each row, I figured I’d need 11 different colors for a balanced look. The colors I used were: coral, pink, orange, green, gray, mint green, teal, yellow, neutral, aqua and red. I averaged 12 blocks per color, but I had more of some colors than others. For example, I had a lot more yellow and pink than mint green and gray.
Here’s a look at my stash before I started.

It doesn’t look like I had much, but I got most of what I needed from what was already cut. How many squares did I need? 660! A lot. This was a really fun step, but it was kind of perpetual…as an example…I would be one square short of orange, so I’d have to cut a strip from a fat quarter for it then I’d end up with more orange in my box. That said, the next picture doesn’t look like I made much of a dent, but I really did.

Once I chose enough colors for a fair amount of blocks, it was time to get sewing.

While I had a several white tone on tone fabrics cut into 2 1/2″ squares, I had larger pieces I needed to cut as I went long. EQ determined the quilt needed about 9 yards of background fabric altogether. Again, a lot! I knew I didn’t have enough on hand, so towards the end I’d pick up or order random fat quarters, 1/2 yard and 1 yard cuts to keep a wide variety of fabrics throughout the quilt.

In mid-November, all my nine patch blocks were finished. I barely had room to lay them out, but I managed alright. Next, I labeled rows accordingly then tackled the task of sewing this huge beauty together.

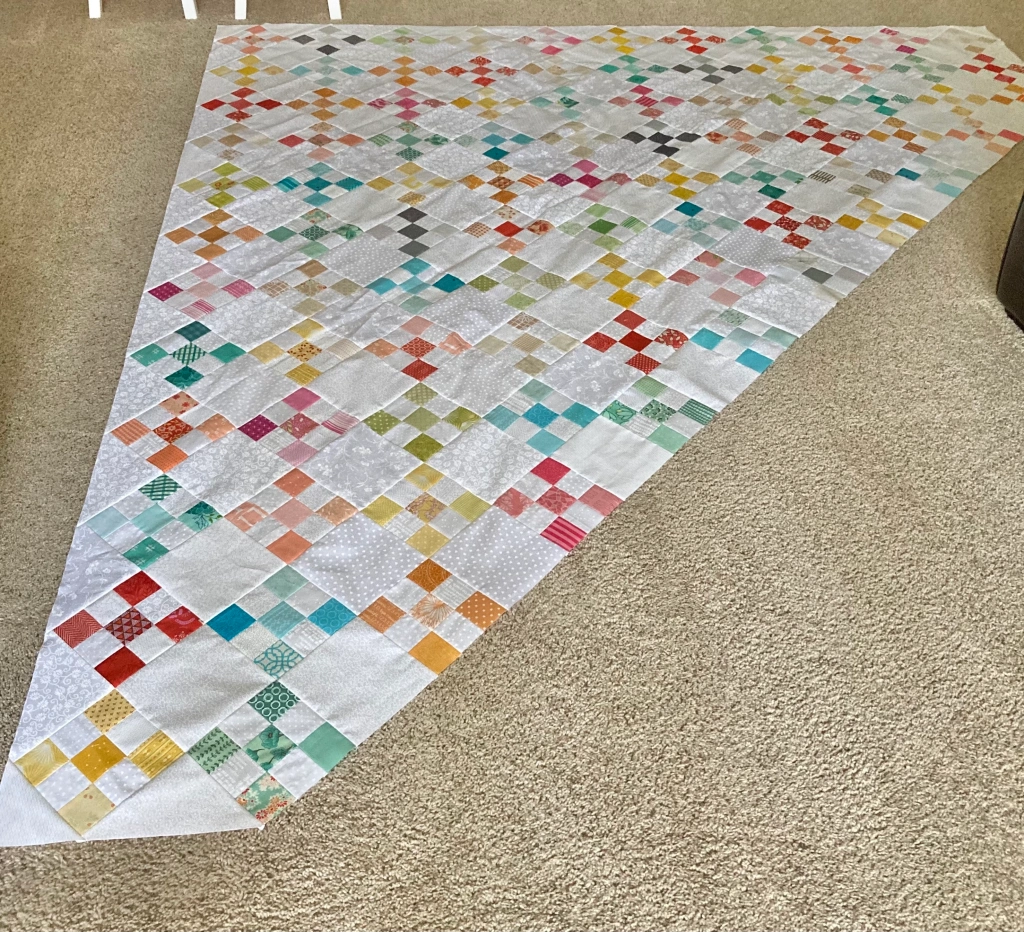
Here’s a look at the quilt top, pressed and ready for longarming.

Because of the scrappiness, I’ve no way of knowing how many different fabrics went into this, but I’m sure there’s Moda, Art Gallery, Andover, Kona Solids, Bella Solids, Michael Miller, Windham, Dear Stella, Kimberbell, Northcott and Riley Blake fabrics.

EQ calculated the finished size of this quilt approximately 97″ x 106″. Mine always come up a bit short, so my finished top measured 96″ x 104 1/2″. Since I’d wrestled with roughly 9 yards of fabric when piecing the backs of my kid’s quilts, I wanted to avoid that this time so I purchased Windham Fabrics Multi-colored Dots by Whistler Studio in 108″ wide. I think this fun fabric corresponds nicely with the colors on the front. And I’d never purchased wide backing fabric before, so this was a first.

For binding, I used what I had on hand. I have only one quilt top that I never finished (but made binding for) so I used that along with other binding I made for another project but changed my mind on. Might as well go scrappy with the binding too, right?

So finally, here’s my finished quilt!

For quilting, I chose a baptist fan motif with 1 3/8″ wide sweeps. I think the round design compliments the angular composition of the layout.

And that polka dot backing is just right…

From start to finish, there was a huge amount of time involved in making this quilt. I started in March 2020 and finished early July 2021. Even though I had it ready for longarming in January, like so many things the pandemic caused me to put the quilting on hold. I was finally able to drop it off in May and it was quilted in June, making it my latest finish.

Even though this project seemed to take forever, it was worth waiting for.
If you’d like to make your own version, download the PDF queen size layout.

Absolutely simplistically beautiful! I just love scrappy quilts.
LikeLike
Thank you for the compliment Amy! I love scrappy quilts too, they’re definitely my favorite.
LikeLike
I love a scrappy Irish chain! I did mine in color waves…so much fun! Like you I found myself cutting a strip to get the colors I wanted.
LikeLike
Yes! It definitely was one of the funnest quilts I ever made. I’m glad you had fun making yours too. 🙂
LikeLike
How do I get the pattern for the 9 Free Nine-Patch quilting pattern?
Pamela Mayne 1marykay@msn.com
LikeLike
Hi Pamela,
I don’t have this written as a pattern, I have a chart that can be downloaded for free (under my FREE DOWNLOADS tab).
LikeLike
Deb I love the Scrappy Nine patch but I can’t find the Chart u referenced in the Free Downloads where might I find it?
LikeLike
Hi Mari,
Thank you for the compliment on my quilt! Look at the teal bar over the blog post…you’ll see free downloads. Click that & it’s the top one.
LikeLike
love the colors and how you coordinated each nine-patch! How big did you cut the white squares in between the nine-patches?
LikeLike
Hi Elaine,
Thank you for complimenting my quilt! The in between squares were cut the same as the unfinished 9 patches; 6 1/2″ square.
LikeLike
So pretty… love 9 patches.
LikeLike
Thank you Karen. Nine patches are the best!
LikeLike