mini quilts, quilting, tutorials

Scrappy Heart Block Tutorial

In the spirit of upcoming Valentine’s Day, I wanted to make a scrappy heart out of fabric I had on hand; then I took it one step further and decided it would be fun to make a tutorial.

Overall, this block is perfect for the beginner quilter because it’s super easy and quick, but that doesn’t mean an experienced can’t quilter can have fun making it! It makes a great gift or a nice mini for yourself…I hope you give it a try.

To get started, choose your fabric. The pattern requires 2 ½” and 3″ squares for the heart section, also for the heart background, so strips, squares or scraps will work. I chose ten different prints as to have plenty of variety.

Materials needed: Equivalent of one fat quarter of color/print fabric in at least 3” strips or scraps for heart; one fat quarter of background fabric. General sewing/quilting materials such as a ruler, cutting mat, rotary cutter, thread, scissors, pins, iron, sewing machine.

I used fabric left over from a quilt I made myself a few years ago, Riley Blake Designs Just Dreamy 2 by My Mind’s Eye. To this day I absolutely love that quilt because the fabrics are so cute and happy, also making them perfect for this project. And the colors are great for Valentine’s Day! For the background fabric, I chose Kona Cotton White .

IMGP6885.jpg
Riley Blake Designs Just Dreamy 2 by My Mind’s Eye

Here are some general guidelines:

  • Use 1/4″ seam allowance throughout
  • Press seams open (not borders)
  • RST = Right Sides Together

Once you’ve chosen your fabric, it’s time to cut.

From printed fabric, cut:

20 – 2 ½” squares

5 – 3″ squares

From background fabric, cut:

5 – 3″ squares

2 – 2 ½” squares

2 – 2 ½” x 4 ½” rectangles

2 – 2 ½” x 12 ½” rectangles (borders)

2 – 2 ½” x 16 ½” rectangles (borders)

Next step, draw a diagonal line on the back of all five 3″ background squares in preparation for making half square triangles (HSTs).

To make HSTs: Place a 3″ background square on a printed 3″ square, RST. Sew ¼” on both sides of the drawn line. Make five.

IMGP6916

Cut on the drawn line. Press. One sewn unit will give you two HSTs, you’ll have ten total. Trim to 2 ½” square. For superior accuracy, I used my Bloc-Loc ruler; however, a regular quilter’s ruler will work fine.

IMGP6934

Time to choose your layout. I spread out my colors fairly evenly, but anything goes!

IMGP6945.JPG

Tip: It’s a good idea to take a photo of your block once the layout is decided; it’s a helpful reference tool when sewing the block together.

To make rows, sew squares together keeping in layout order. I usually press seams in opposite directions per row for nesting purposes, but because the squares are rather small, open pressed seams will help reduce bulk. The block will lay flatter having done so.

Keeping your rows in correct order, sew together in pairs, and then sew pairs together. I used a pin at every seam so they’ll line up nicely.

IMGP6959.JPG

Results from all that pinning!

IMGP6962
IMGP6969

With your block sewn and pressed (measuring 12 ½” square), the next and final step is attaching the borders. Pin one  2 ½” x 12 ½” rectangle to each side of the heart. Sew*, press toward border.

*Tip: When sewing on borders, place them on the underneath side of the block (feed dogs side) to avoid sewing pressed seams in the wrong direction. Also, if your border is a bit longer (as mine was), the feed dogs will help ease in the extra length.

Attach one 2 ½” x 16 ½” rectangle to both the top and bottom of the heart block. Press toward border.

And done!

IMGP7004.jpg

Block measures 16 ½” square.

I haven’t decided what I am going to do with mine, there are so many options! I could make it into a pillow, a quilted mini or add others to it and make it into a quilt. Also, be sure to trim all the threads off the back before doing anything; it’s a terrible task but makes all the difference.

Tip: Since I used 5″ squares, I had leftover pieces from cutting the 3″ squares. To reduce waste, I cut them into 1 ½” squares so I could use them in future projects.

Happy Valentine’s Day

Note: I am not endorsed by any products I have mentioned or photographed in this post; they are just items I like, use and wanted to share information on.

mini quilts, quilting, Uncategorized

Mini Mania

Doesn’t everyone pretty much love mini quilts? I’m a big fan because they’re cute, they’re not a huge commitment, they go together fast and they’re fun! I enjoy whipping one up in between bigger projects when I feel I need a break.  While I’m not one to hang them all over my sewing room walls, I do like to decorate my door with one at a time; as seasons and holidays change, I change my door decor. Since I’m ready to put up a Valentine’s Day mini, I thought it would be a good time to post ones I’ve made. I’ve given some away but I still have a small collection, and of course I intend to add more.

First up are my circus minis. I released the patterns for these nearly two years ago (my first patterns). They measure roughly a foot square each and for sure would brighten up anyone’s room!

IMGP5426
Circus Lion Mini

IMGP5506
Circus Elephant Mini

IMGP5376 copy
Circus Tent Mini

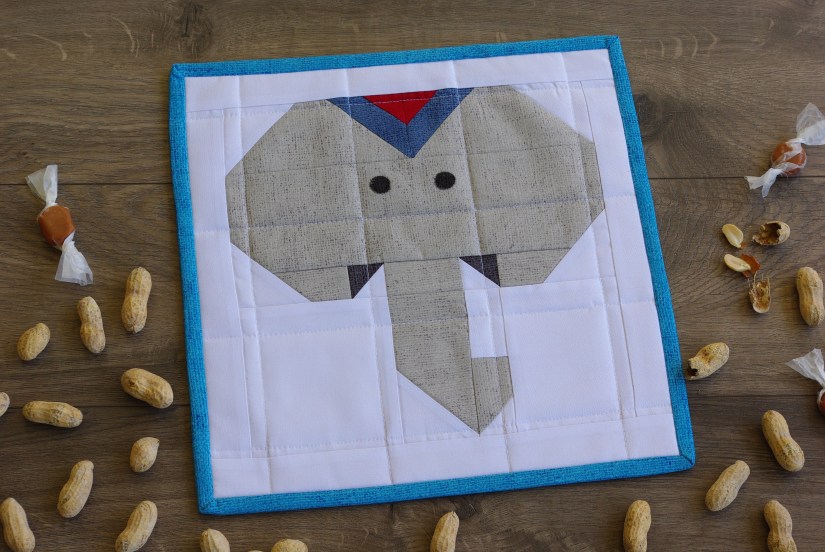
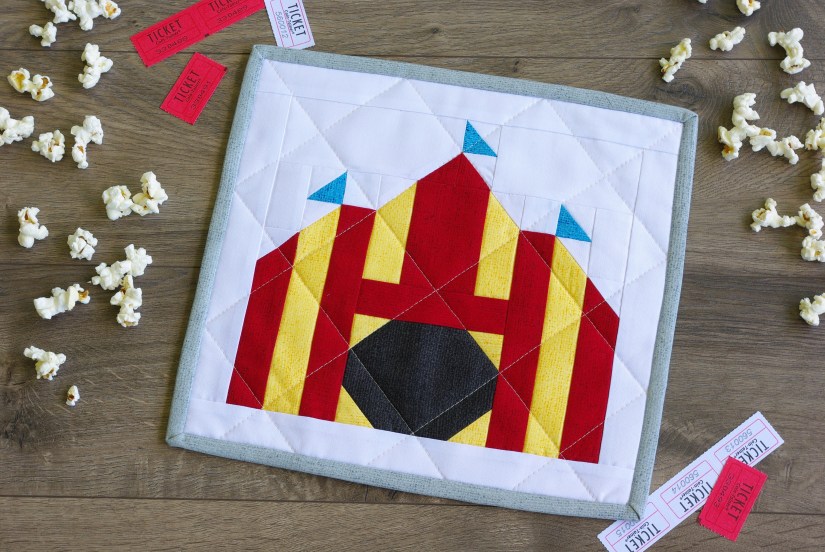
I blogged about these in my last entry (more information if you scroll to my last post). I made them as gifts, using a Moda Concrete mini charm pack for each.

I also mentioned this mini in my last entry; I kept it for myself because I absolutely love this Riley Blake collection, Floriography.

IMG_6121

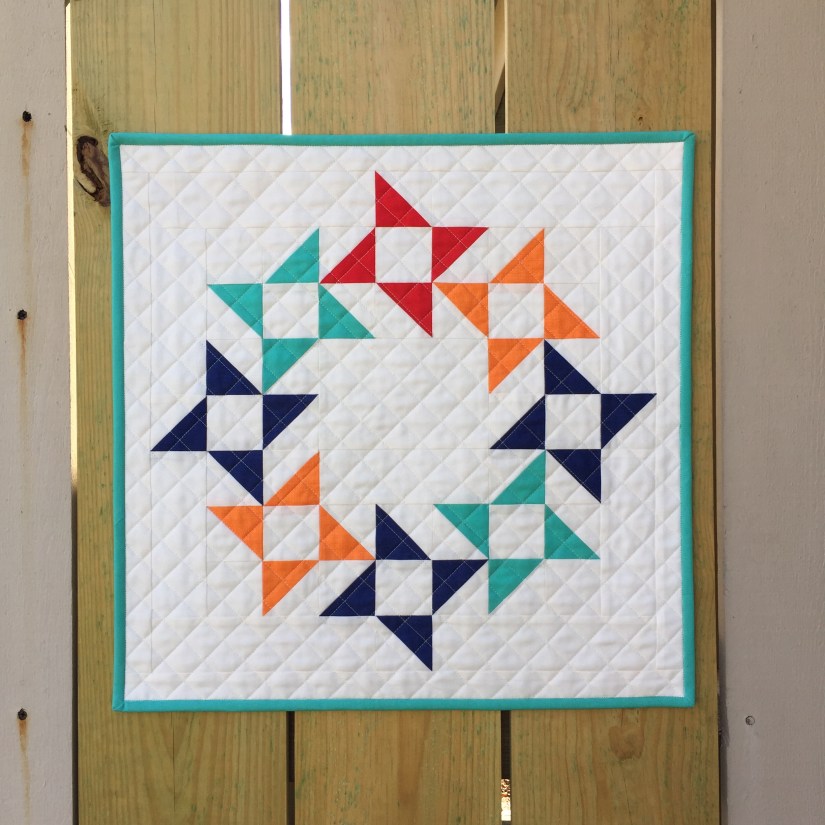
I found this free pattern on Instagram and had to make one for myself. It’s available from The Family Hearth, found here: Full Bloom Mini Quilt Pattern. I used my absolute favorite, Art Gallery Fabrics, Etno by Pat Bravo—that’s why I couldn’t part with it!

IMG_4755
Full Bloom Mini Quilt

These butterfly minis were given to my mom as a gift. I made them out of scraps and free motion quilted them, which actually came out pretty decent since it’s not a strong suit of mine! The pattern is by Lella Boutique.

IMG_3134.jpg
Social Butterfly Mini Quilt

I mentioned these last time too…

My latest finish is this Friendship Star Mini Quilt, found on Pinterest. I couldn’t get the free pattern to download so I made it by looking at the photo. I am going to donate it to my local guild for the quilt show boutique, hopefully it’ll sell, but since I really like the way it came out I wouldn’t mind keeping it for myself…

IMG_6543

That’s it so far. I’m always looking for something cute and fun so if you’ve got any suggestions, please send them my way!