Finally, another quilt finish! While this is only my second quilt for the year, I do have a couple of new patterns in the works that I’m excited to share fairly soon.
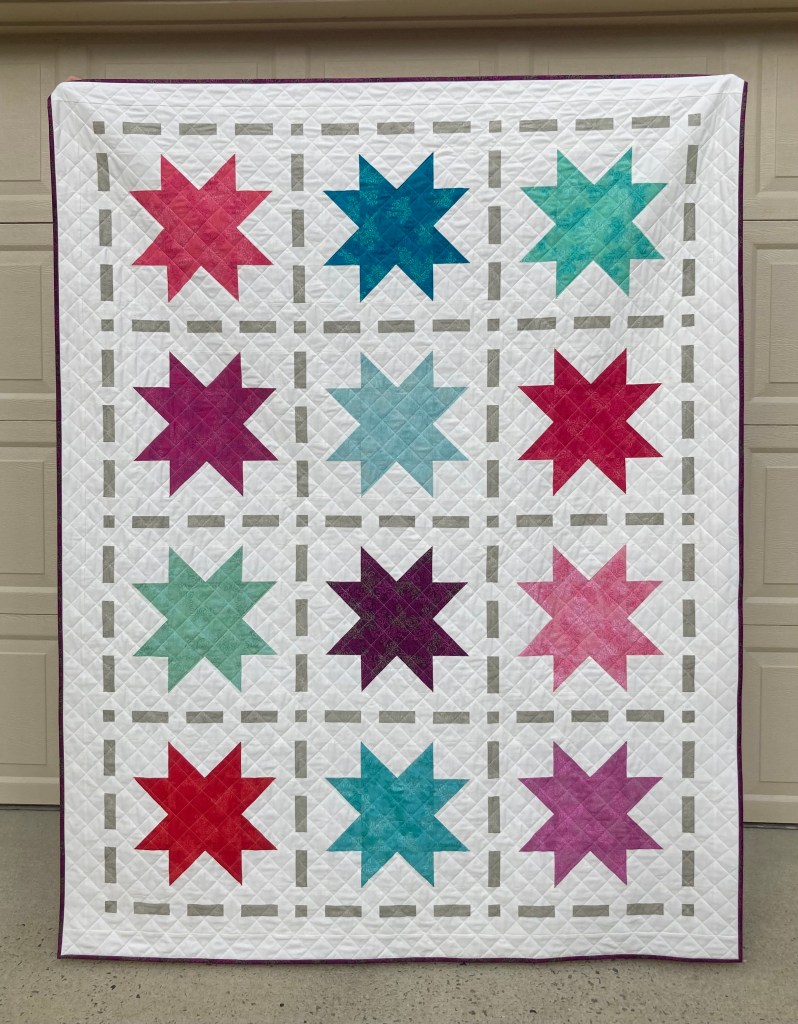
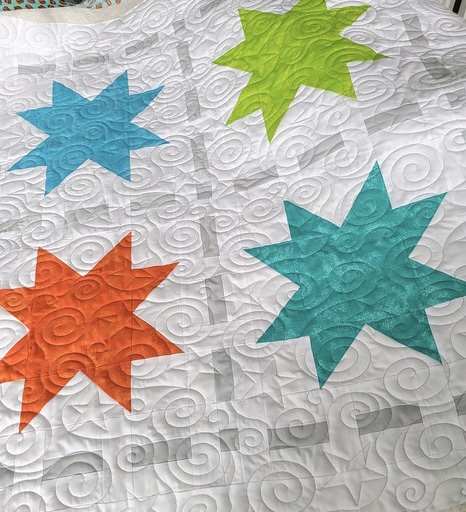
Yesterday I finished a baby version of my Stitches & Stars pattern. I decided to make this to help use up some extra fabric, mostly solids. I also had on hand a variety of colorful bindings from other makes. I attached them all together and came up with a myriad of colors. It’s definitely a fun look and certainly adds some brights, too.
For this baby version, I used soft-colored solids for the stars. The sashing, the “stitches”, are made using a tone-on-tone print by Art Gallery Fabrics. I feel accenting with gray is always a good choice. 😉
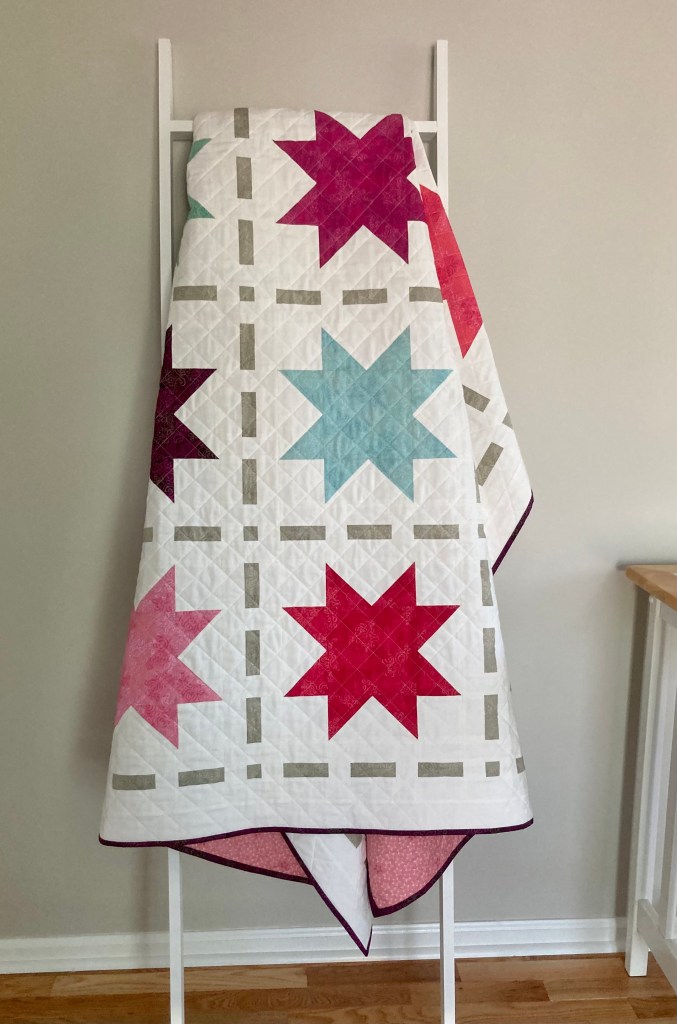
Since it’s for baby, I thought I’d soften the whole look by using an off-white solid on both the front and back. And to add some extra flair, I sewed together the cut-aways and made a fun stripe on the back.
For the quilting, I ran a vertical serpentine stitch every 1 1/2″ which gives it that lovely, crinkly-quilty look.
I released Stitches & Stars in 2022. It’s a really fun pattern to make, and if you’re one who loves star quilts it would be a perfect pattern for you.
I have decided to put this for sale on my Etsy shop hoping a cute baby will receive it soon!
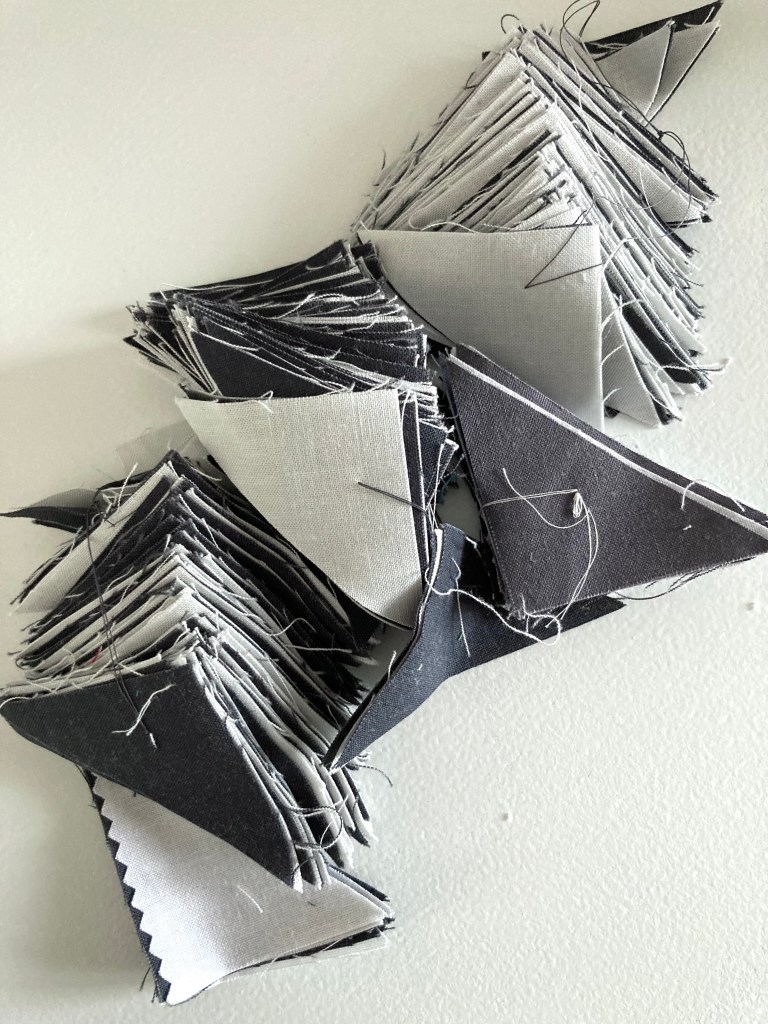
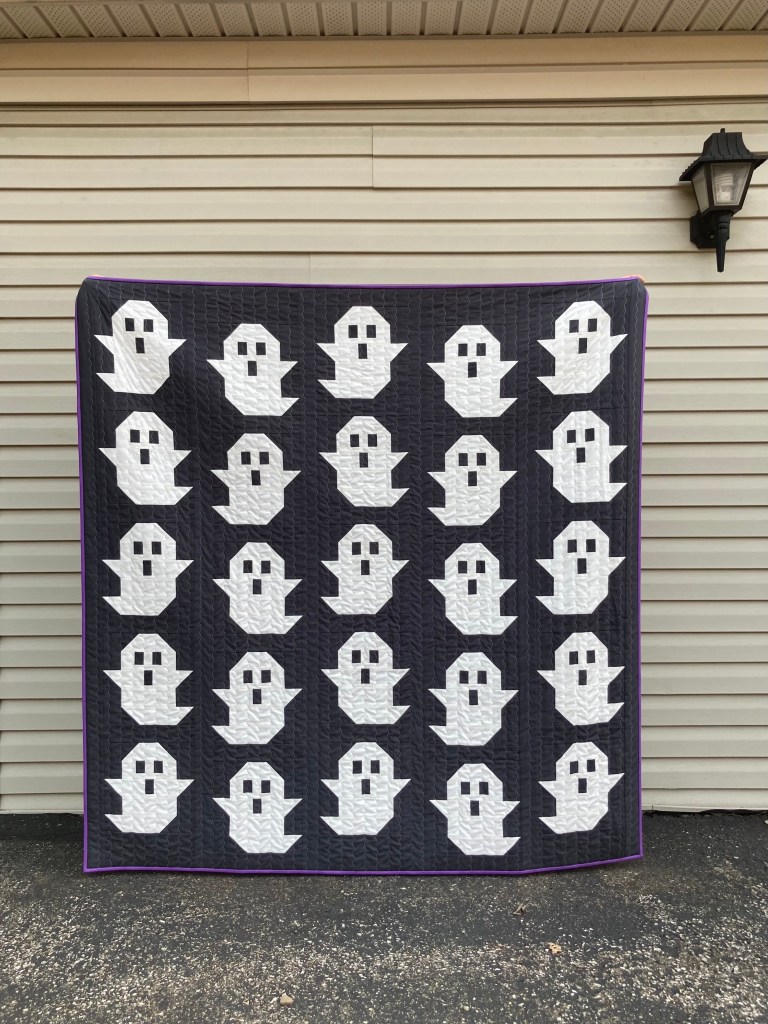
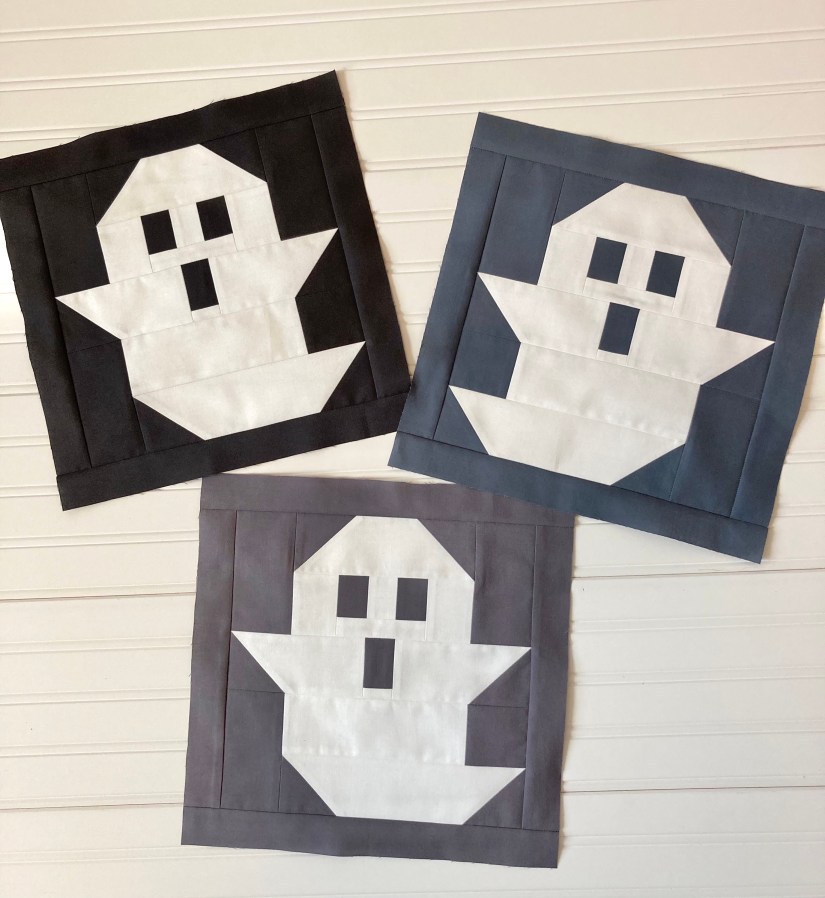
A couple of years ago I made The Ghost Quilt that resulted in dozens of cut-away corners. Not being one to waste and certainly being one who’s always looking for something to make with such things, I held on to them.
Knowing I wouldn’t get to this project anytime soon, I had to find a way to keep the corners together. I stacked bundles about 3 inches high then hand-sewed through them making a loop.
I put them in a bag, and then they sat for over a year and a half. One day in the middle of winter I went through my fabric looking for inspiration. My sewing room closet doesn’t allow for a lot of storage so upon finding the bundles I decided it was time to make something.
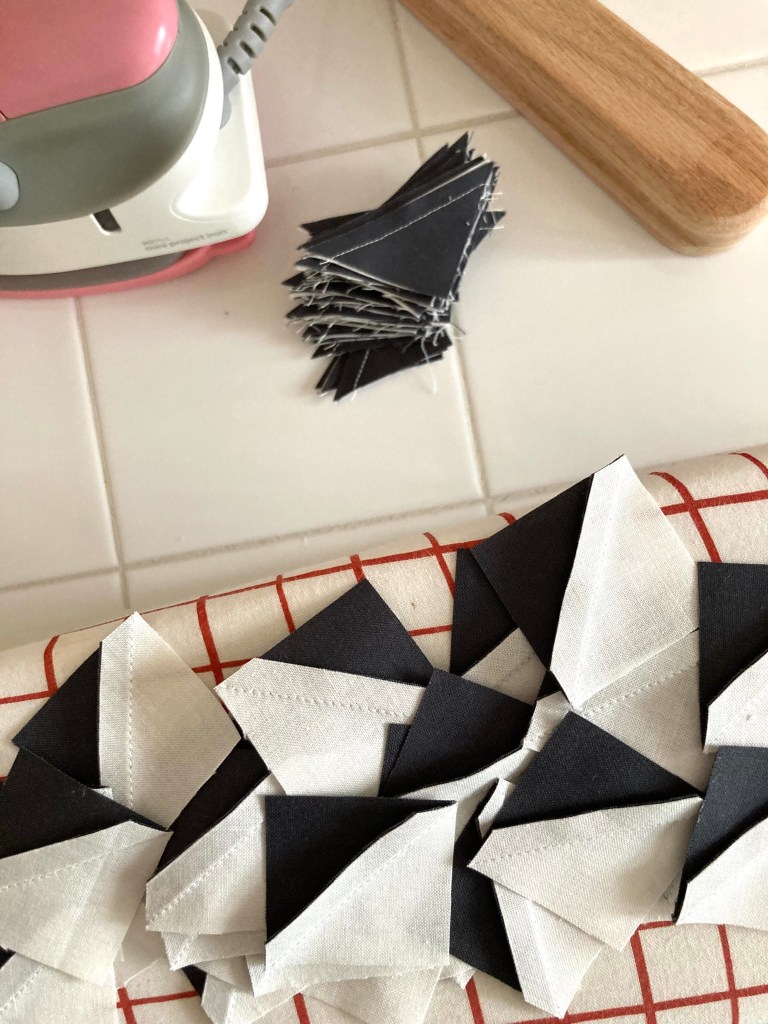
The first thing to do was make half square triangles. After chain piecing the pairs, pressing and trimming (a couple of days worth of work) there were over 160 HST!
A sane quilter wouldn’t have taken this project on for several reasons. First of all, the cut-aways were very small. Once sewn and squared, the HST measured 1 5/8″. Meaning once sewn into something they’d finished at 1 1/8″. That’s crazy small. But there I was.
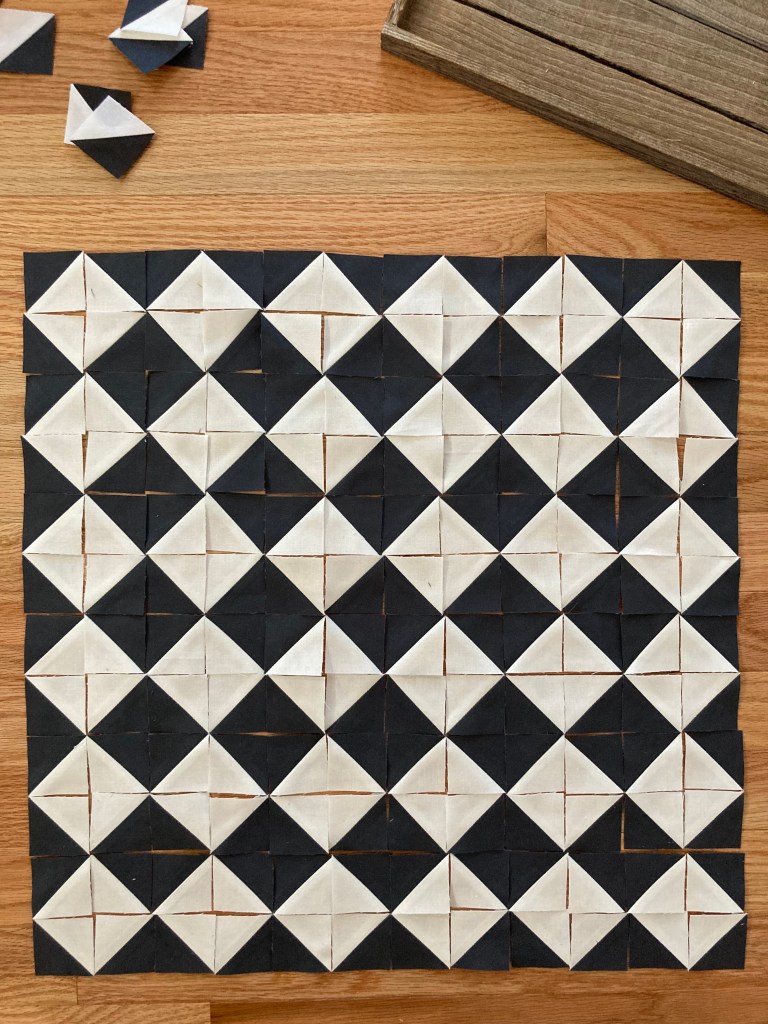
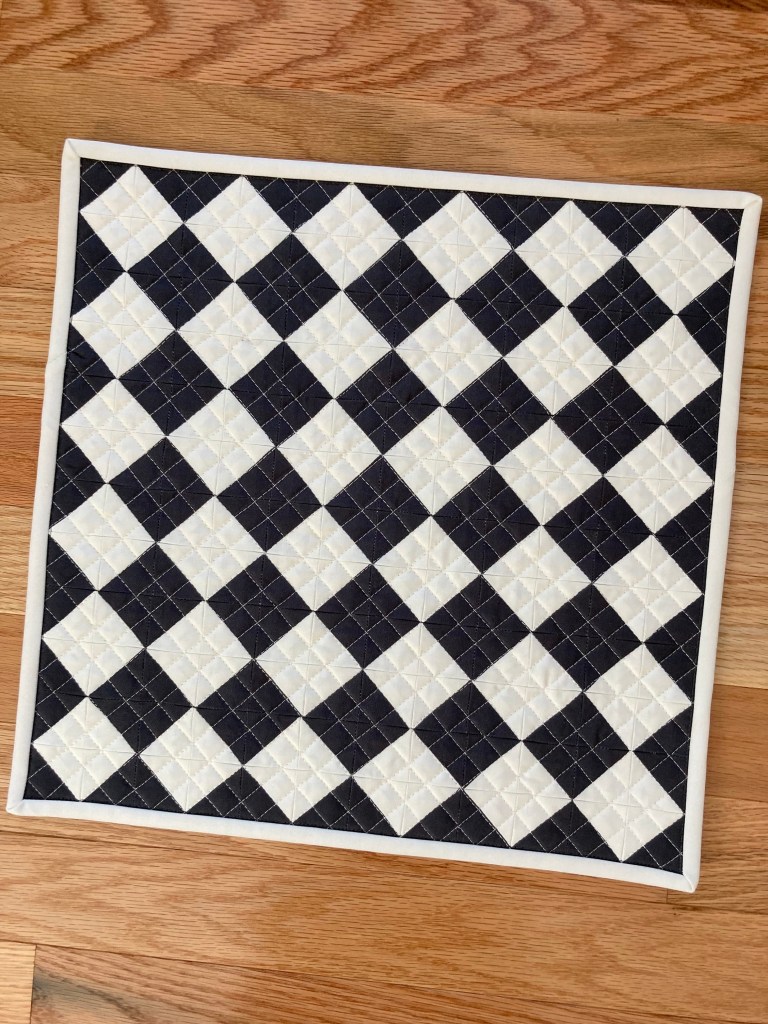
Out of all the design options, I’d settled on checkerboard. I’ve got to admit, once sewn, I didn’t really like it. Once quilted, I still didn’t like it. But it’s a gift and I hoped the recipient would.
Here’s a few photos of the process…
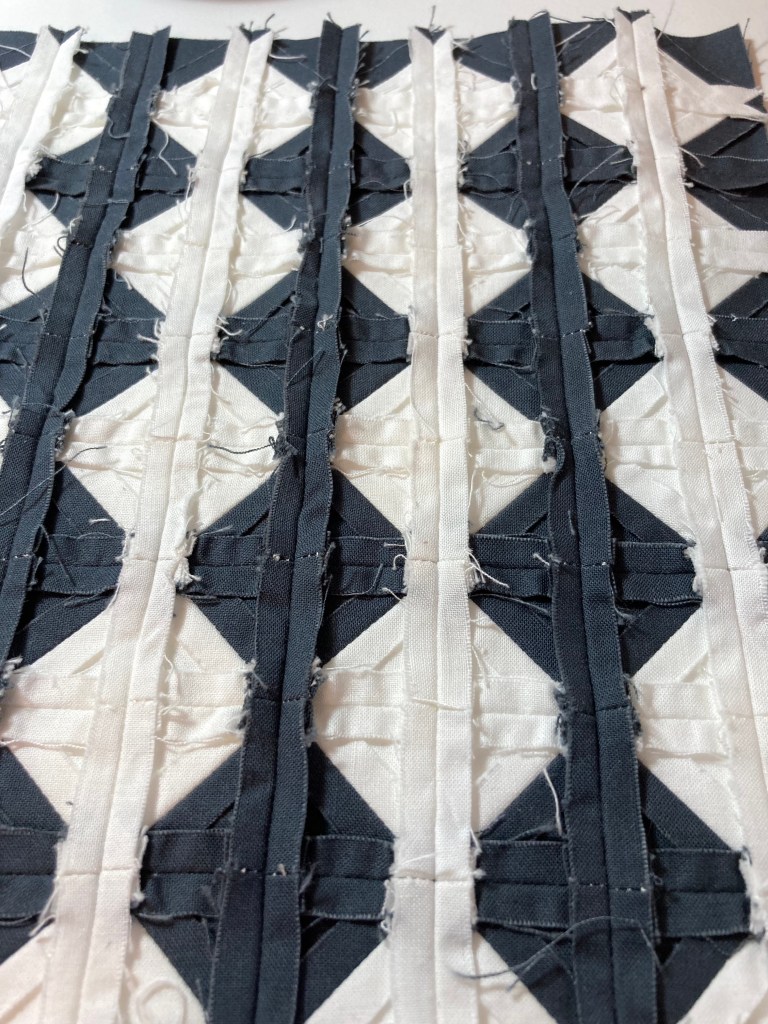
As you can see, there were a lot of threads to cut AND I used quite a bit of starch due to the bulk.
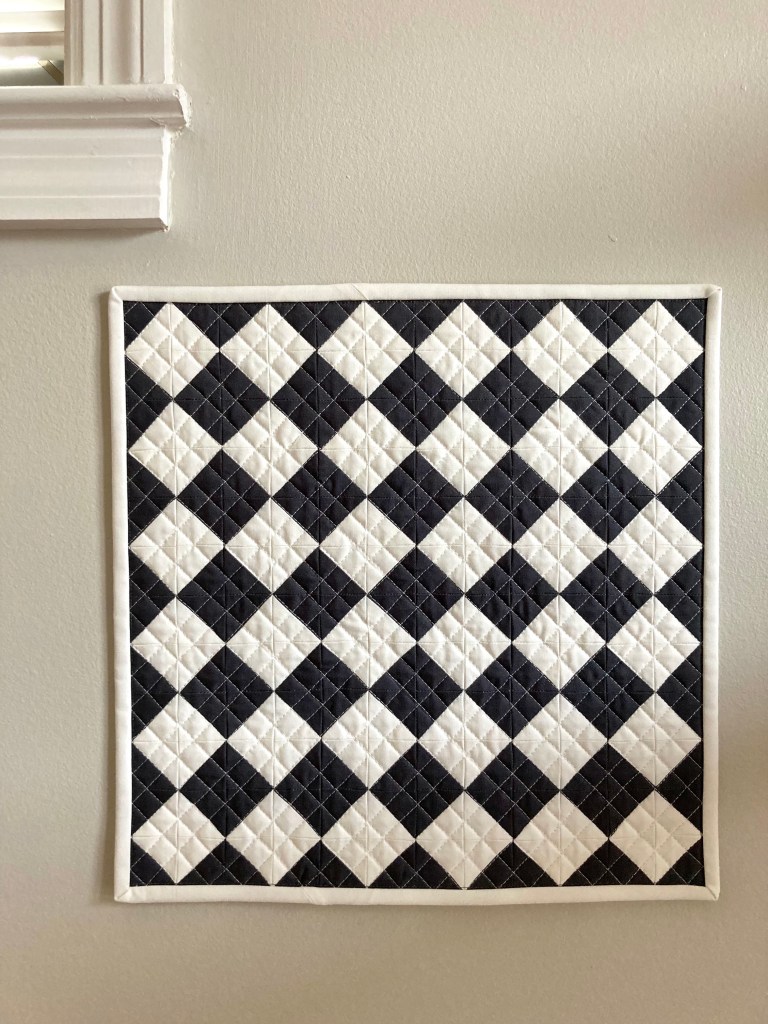
Here’s the finished mini.
After putting it away for a few weeks then getting it out to photograph, I did end up liking it. I think the white binding is just right, too.
Overall, this was a challenge I felt I needed. I also found it interesting how at one point I was ready to toss it but decided not to, and in the end was glad I didn’t. 🙂
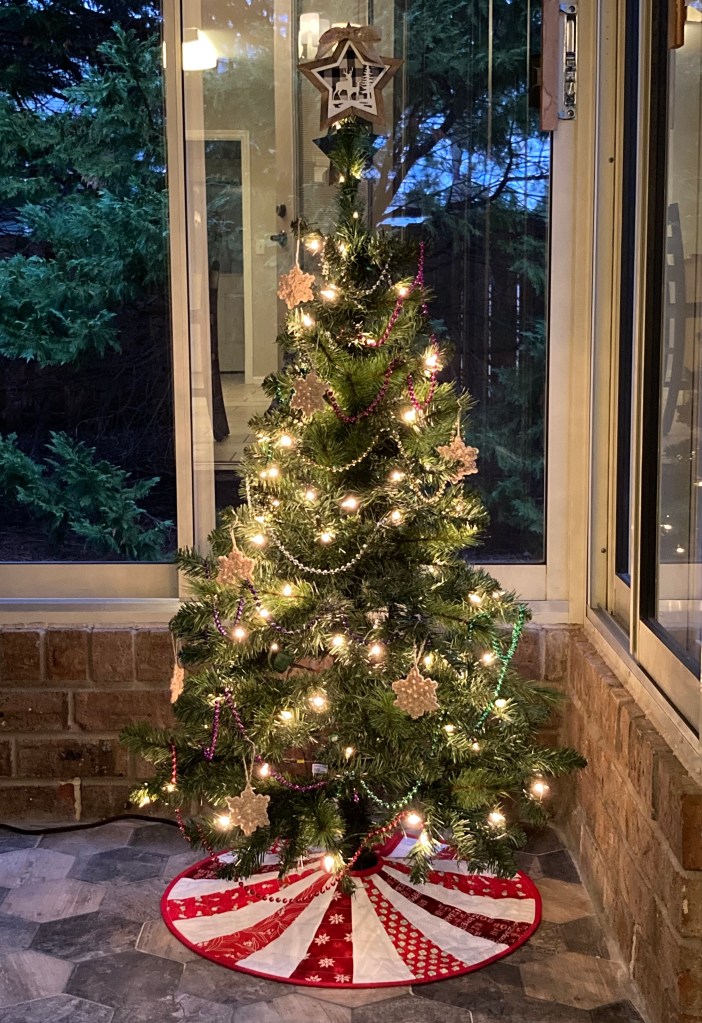
This Christmas season I bought a little 4’ pre-lit artificial tree to brighten up my sunroom. At first, I wasn’t going to do much but light it, then I decided to add a few decorations but keep it simple.
First, I hung a variety of colored bead strands then added crocheted snowflakes my daughter made me a while back. Wanting a rustic look, I found a lightweight star ornament with a deer scene that’s perfect for my ‘in the pines’ setting. My husband easily made a wire spring, drilled it into the bottom and voilà—a star topper is born! 🙂
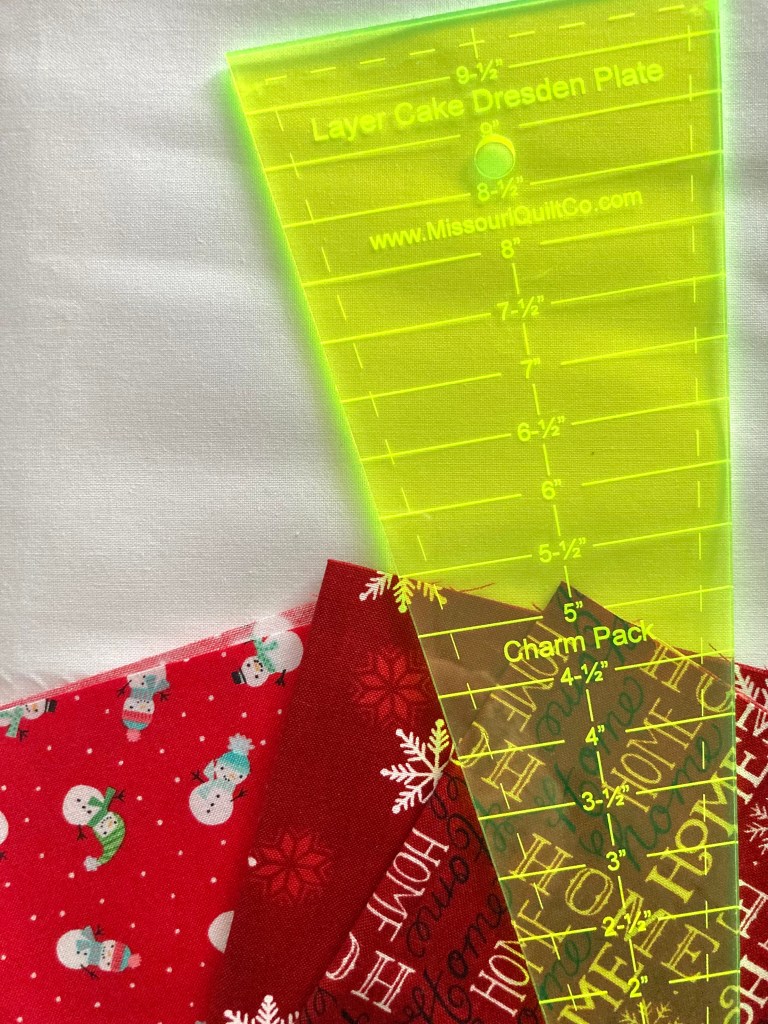
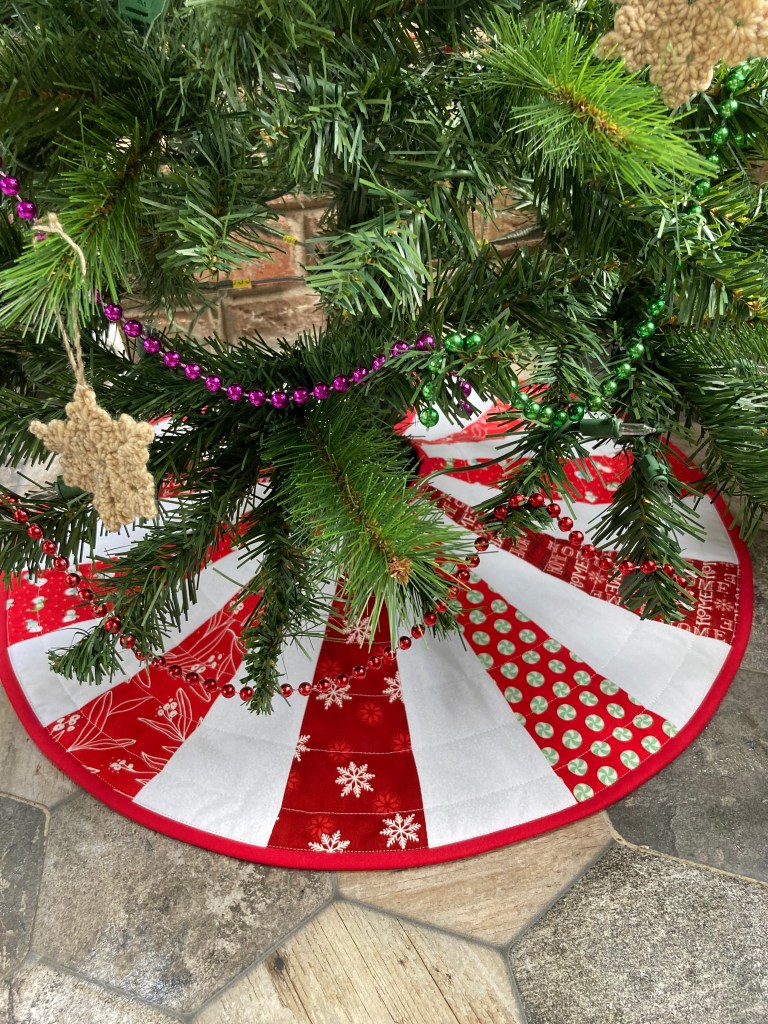
Once I’d gotten to this point, I knew a tree skirt would be in order. Years ago, I purchased a 10” Dresden ruler for making mini tree skirts I gave as gifts, so already having that was great. I also had leftovers from five holiday fat quarters from last year’s stockings. It ended up I was able to get two Desden cuts from each—exactly what was needed.
I used a tonal white-on-white flower print (leftover from my Scrappy On Point Four Patch quilt) for contrast fabric, and luckily had enough Kona Red solid to make the bias binding. I was ready to go!
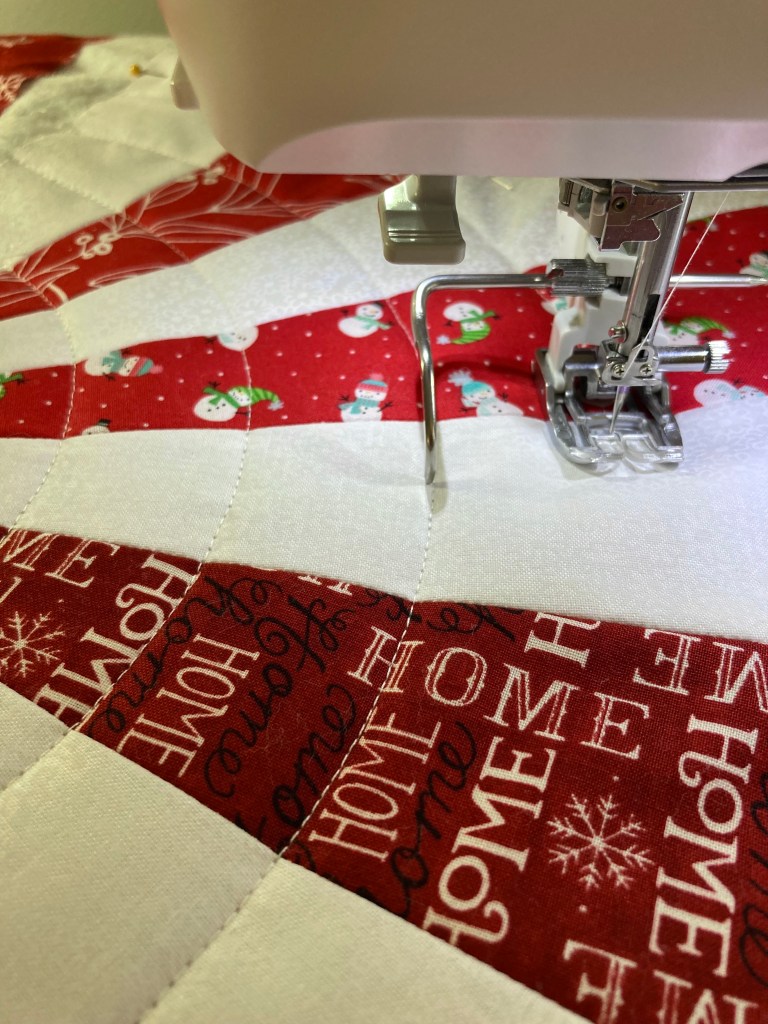
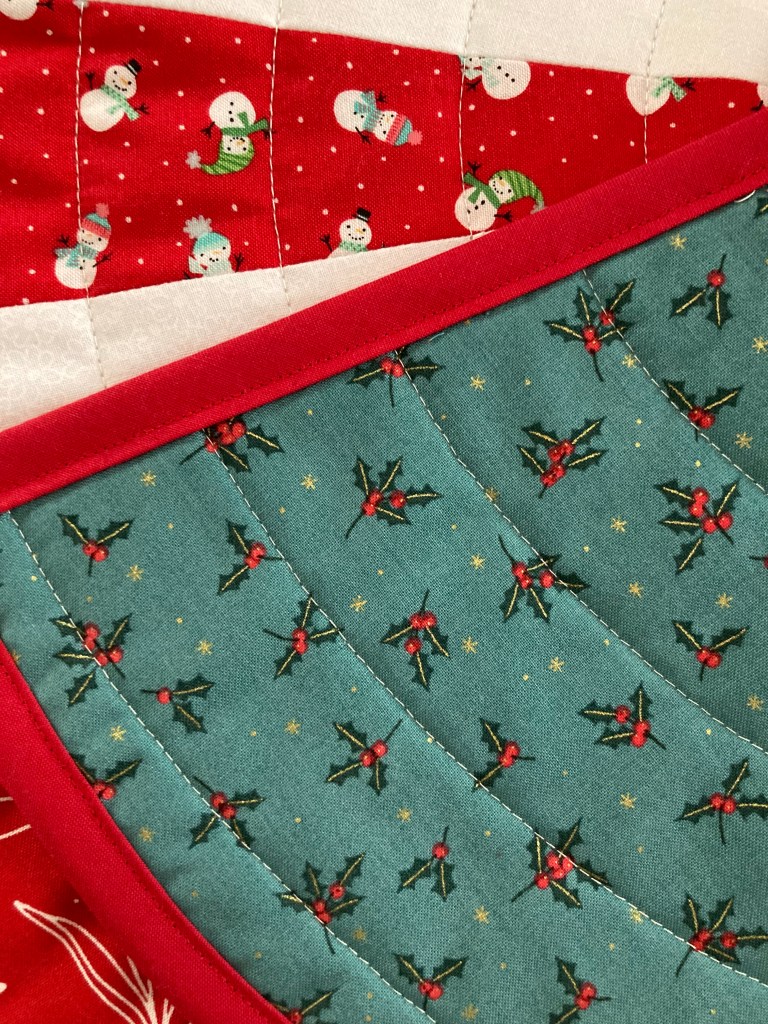
Sewing the Dresden pieces together goes really fast. I think it took me more time to press the fabric and cut them. 😉 I used a metallic holly berry print with a green background for the backing, also a leftover.
Figuring how to quilt it was a bit more of a challenge. On the others, I quilted a tree in each section but that required a lot of hiding thread ends that I didn’t want to do. I thought of going around circle after circle, but was afraid it would look like a spider web…so I let that idea rest for a few days.
Nothing else came to mind so I decided to give circles a try after all. To start, I quilted about ½” down from the center. I set up my walking foot guide to 1 ½” and continued from top to bottom.
The quilting ended up looking nice, and I don’t think it looks anything like a spider web. 😉
Next was attaching the binding. Since I lack experience with sewing circles, I knew my sewing skills would be put to the test, but overall it was a good turnout!
I now have a scrappy mini tree skirt and this little tree is decked out for the holidays!
If you’ve got a small tree, I suggest giving this project a try. It’s fast and easy. Also, these little tree skirts make great gifts, too.
With the fall season approaching, I’d decided to create an autumnal tablescape for my sofa table. Since June I’d been thrifting, something I’d never done much of before, looking for pretty and elegant items to coordinate with things I already had.
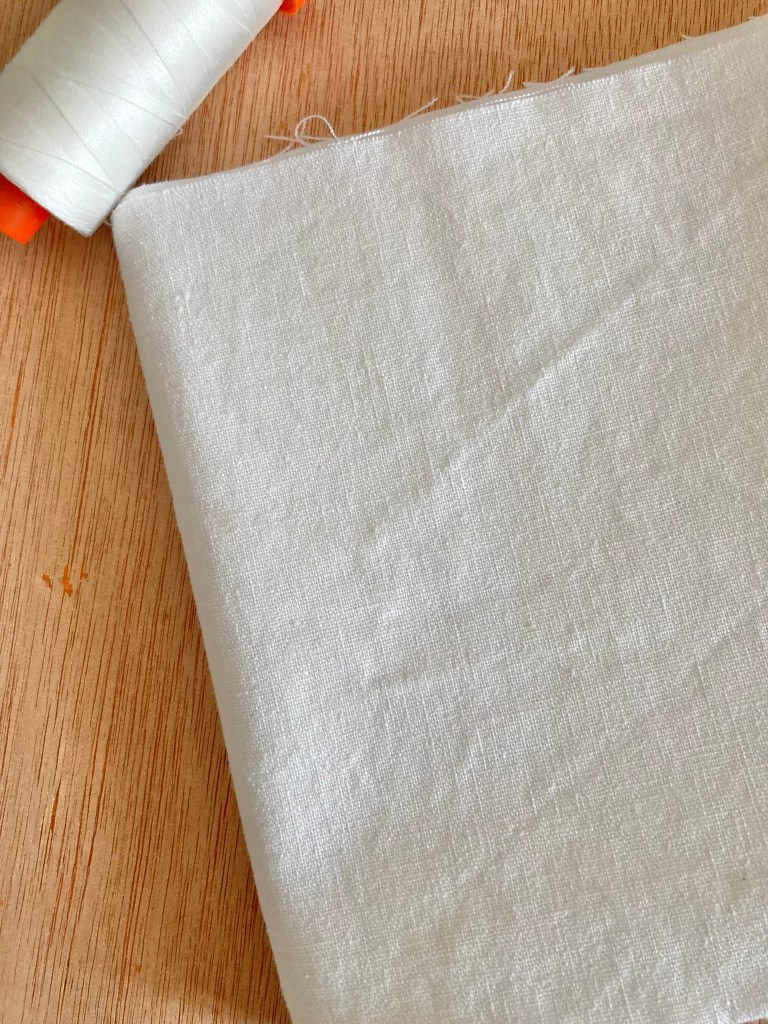
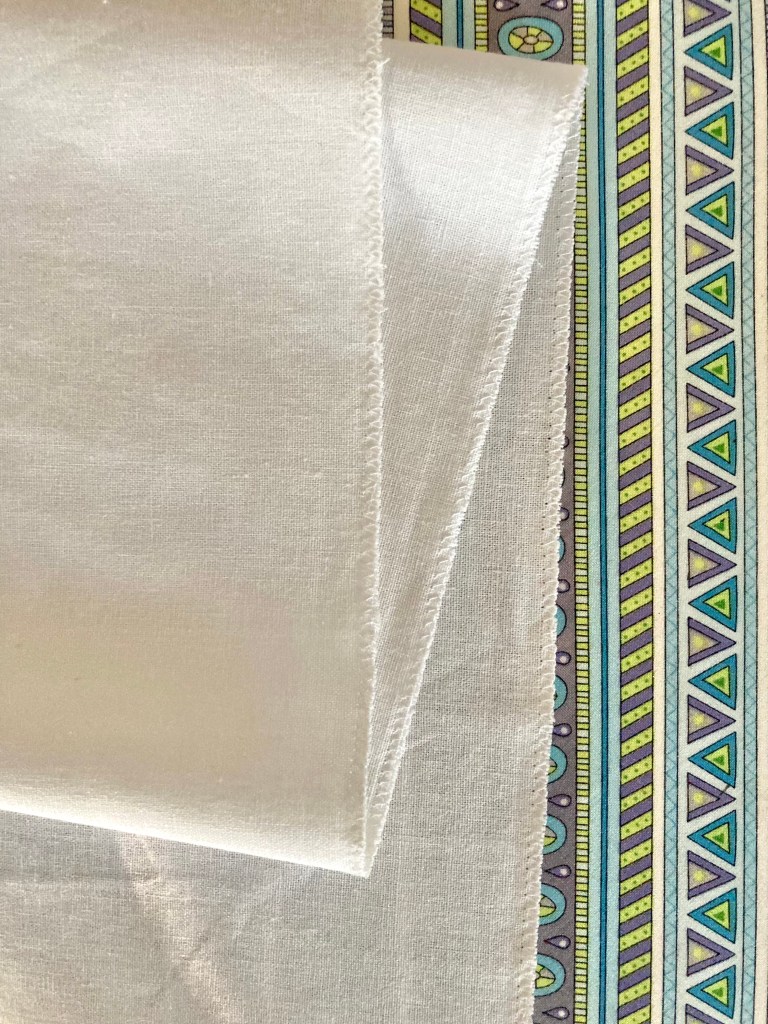
What I didn’t have was a table runner. My first thought was ‘What could I make using what I have?’, then remembering I’d stashed a narrow piece of white Essex Linen leftover from making napkins. Perfect!
While the piece was WOF, it wasn’t long enough to drape over the table ends, so I trimmed the fabric to 9 1/2″ wide by 34 1/2″ long giving nice coverage for my table that measures 11 1/2″by 38 1/2″.
I planned to hem and top-stitch, but after pinning one side it was apparent that it’d be too bulky so I left the edges flat and ran a zigzag stitch all the way around, giving it a bit of a rustic look.
Since the linen was white and not fall-like, I decided to tea dye it. This wasn’t something I’d ever tried before but it was so easy and rather fun! I quickly found a YouTube video with all the info I needed.
Because the runner is a bigger piece of fabric, I doubled the recipe for dyeing: 5-6 tea bags to 2 cups of boiling water (this doubled, using black tea). If you’ve never tea dyed before, just boil the water, add the tea and let it set for 15 min. Remove the tea bags and place your item in the bowl, making sure it’s covered. Allow it set for at least 15 minutes, or until the desired color is achieved. I soaked mine for 2 hours, occasionally turning the fabric. NOTE: Tea dyeing works with natural fibers only.
Once it’s the color you want, remove and rinse with cold water. I gently rolled mine in a towel to remove the excess water. After unrolling and smoothing it flat, I placed it in the sun until dry.
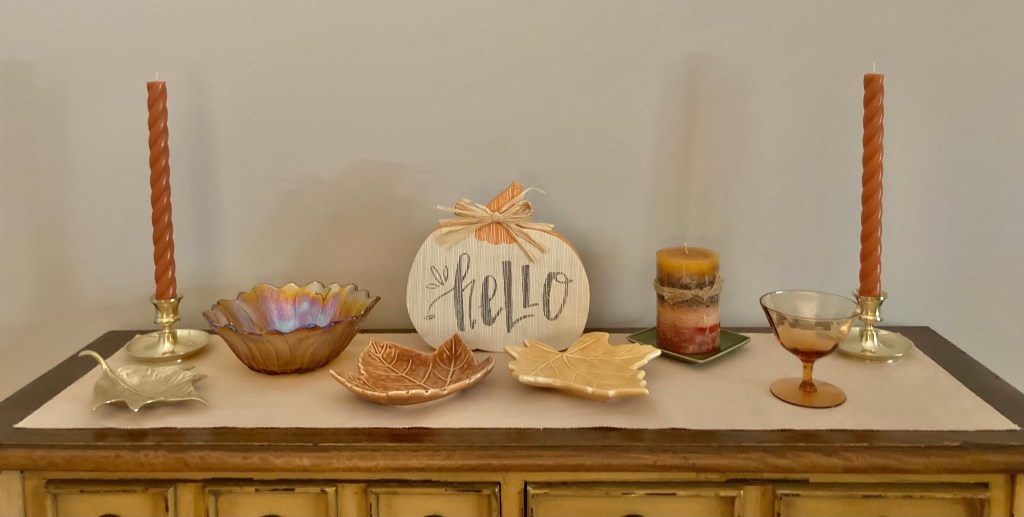
On the first day of autumn I set up everything and am really pleased. 🙂 It’s a lovely display for fall and will do nicely through Thanksgiving.
This is a great way to give your space some seasonal vibes, and if you’re a thrifter, it’s fun to go on the hunt for just the right things.
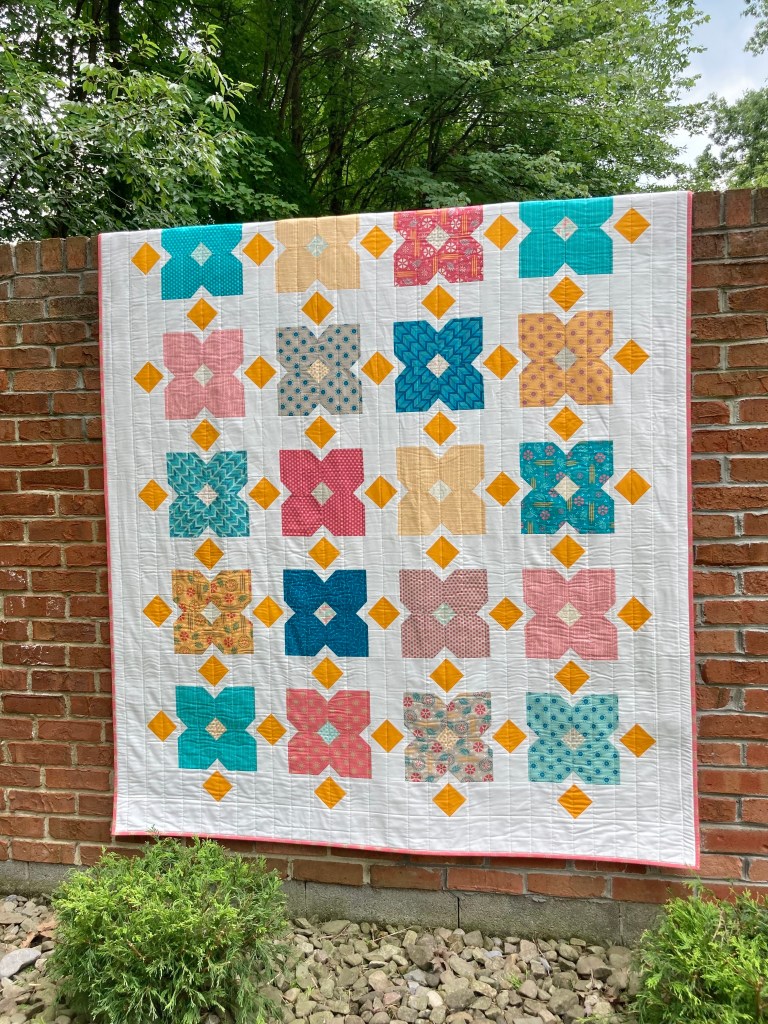
It’s nearly back to school and for a lot of quilters that means back to the sewing machine! Just in time to kick off sewing season, I have a fun and quick pattern for you – Stitches & Stars. It’s now available for purchase as a PDF download in my Etsy shop.
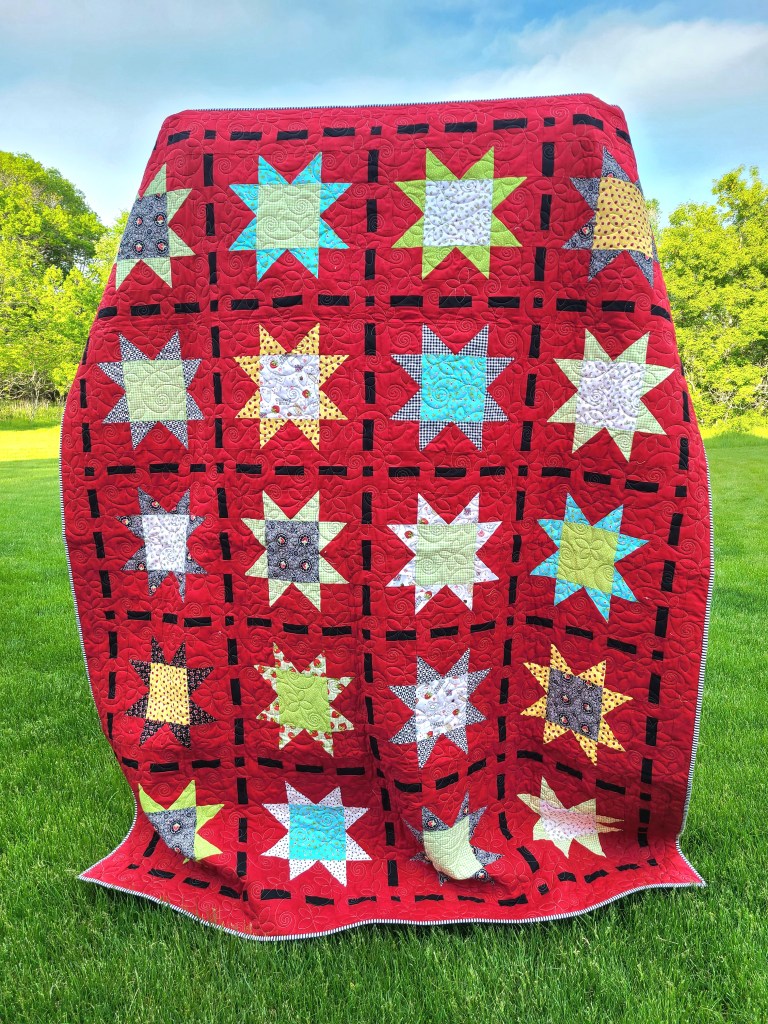
Everyone loves the sawtooth star, don’t they? In thinking so, I’d decided it was about time to design a pattern highlighting this famously loved block. To give it a new and innovative twist, I added stitches around the blocks to create a defining, unique look.
My quilt shown is throw size yet the pattern is also written for baby, twin and queen sizes. I made mine using beautiful Art Gallery Fabrics Nature Elements in jewel tones for the stars, and from the same collection in gray for the stitches. I used Bella Solids Bleached White PFD for the background.
It’s also designed for a quick-sew in mind…the stitches are larger pieces strip pieced and chained pieced then cut smaller. The stars are made with flying geese, using the 4 at a time method. It goes together fast!
Here’s a look at tester’s quilts…
There are so many color version opportunities with this one, why not give it a try?!?
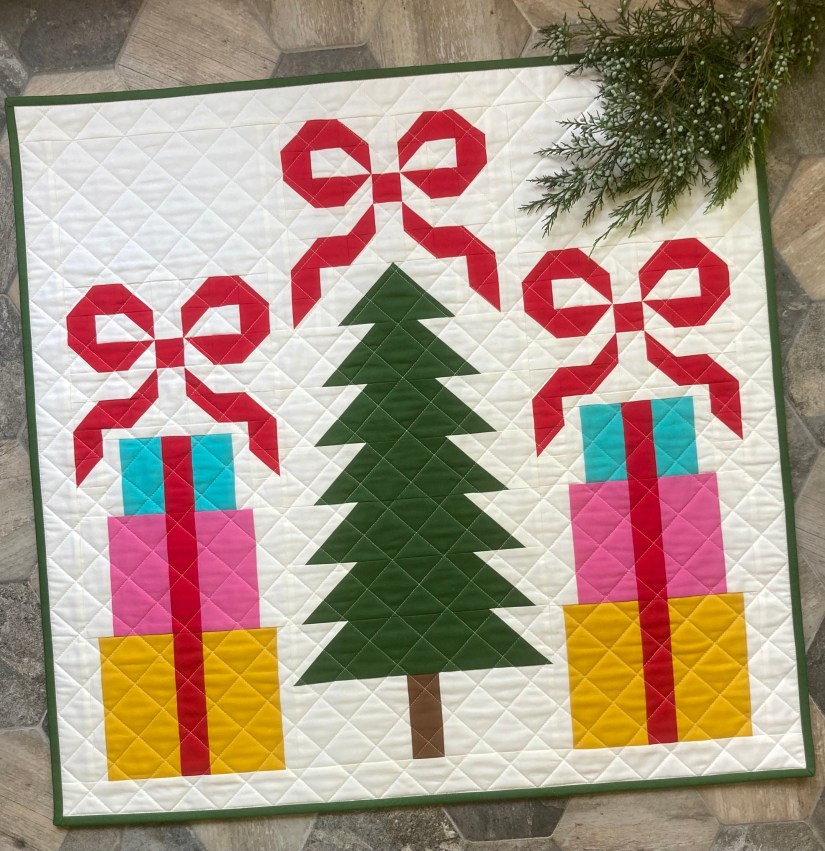
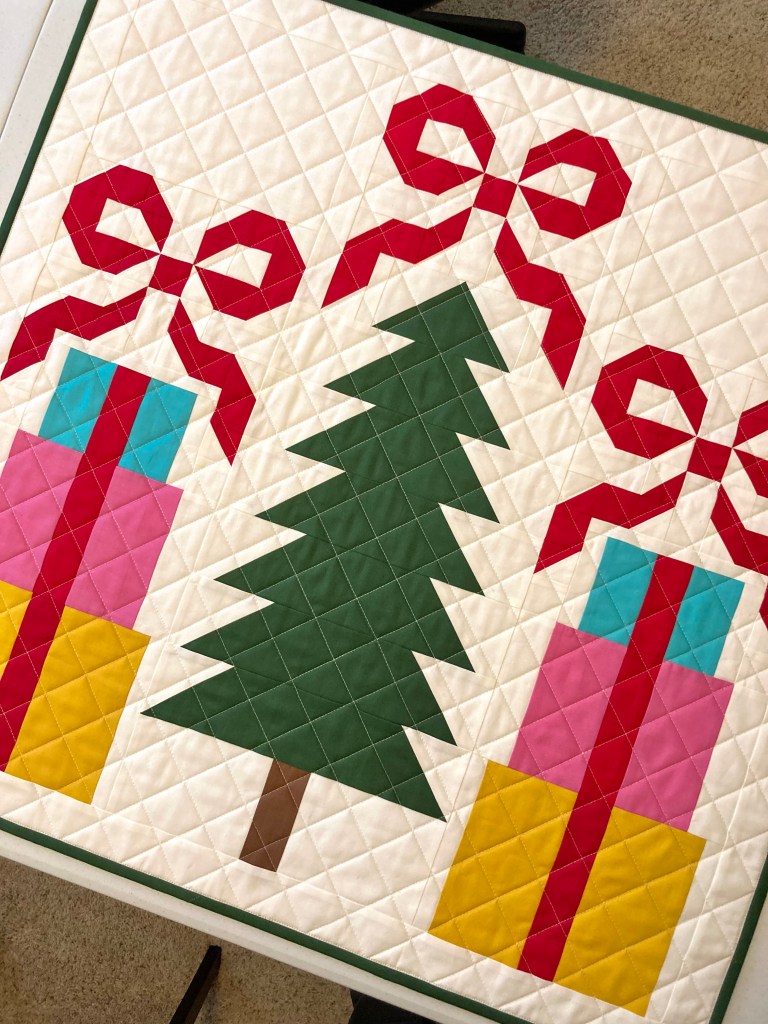
Just in time for Christmas in July, here’s my pattern for this upcoming holiday season, Christmastime! Now available for purchase as a PDF download in my Etsy shop.
Finishing at 31 ¼” x 30 ¼”, Christmastime sews up in no time. Just choose your favorite colors and create a festive quilt – great as either a wall hanging or a table topper. And here’s a fun fact, I designed the tree construction in a non-conventional way that’s oh-so-easy with fewer seams and a smoother finish!
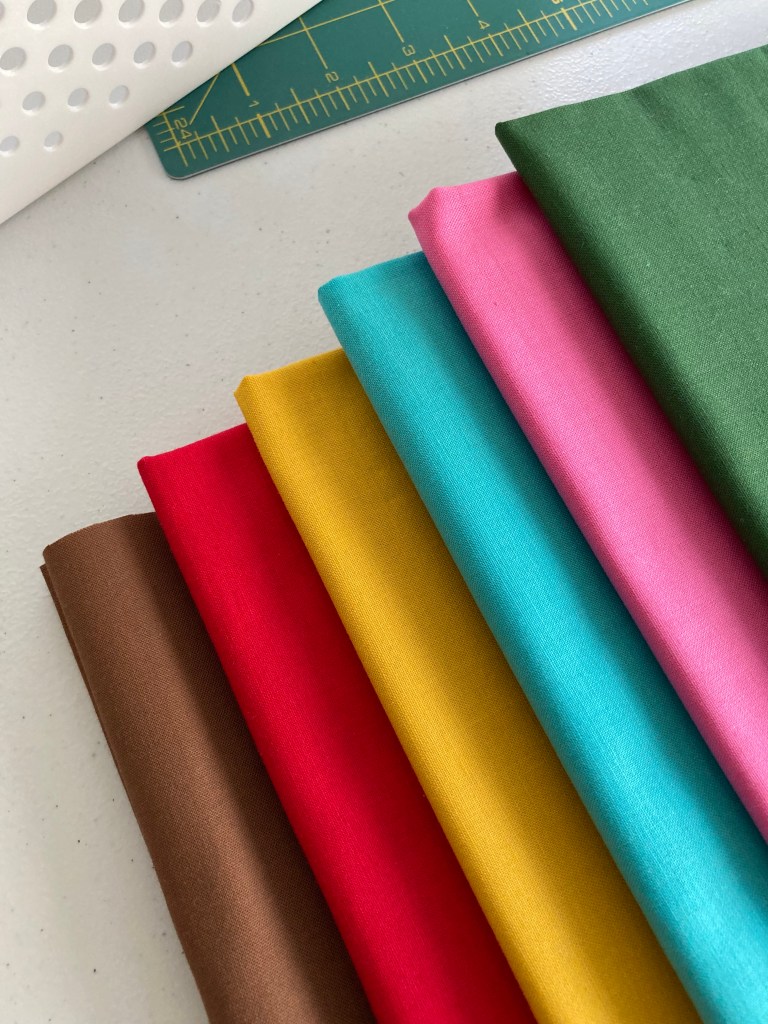
For my version of the quilt, I went bold with Kona Cotton solids which kind of gives it a Dr. Seuss look. 😉
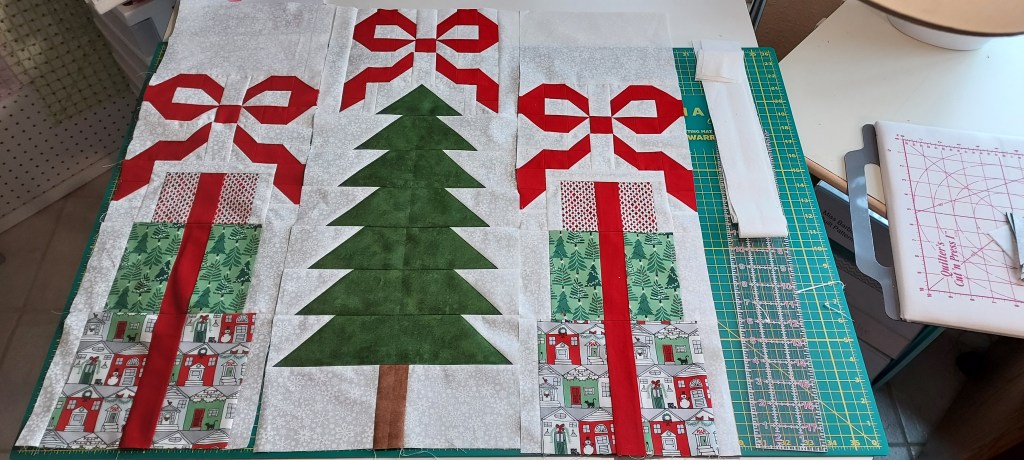
Here’s a look at two of my testers quilts…Barbara went full-on Christmas which is just beautiful!
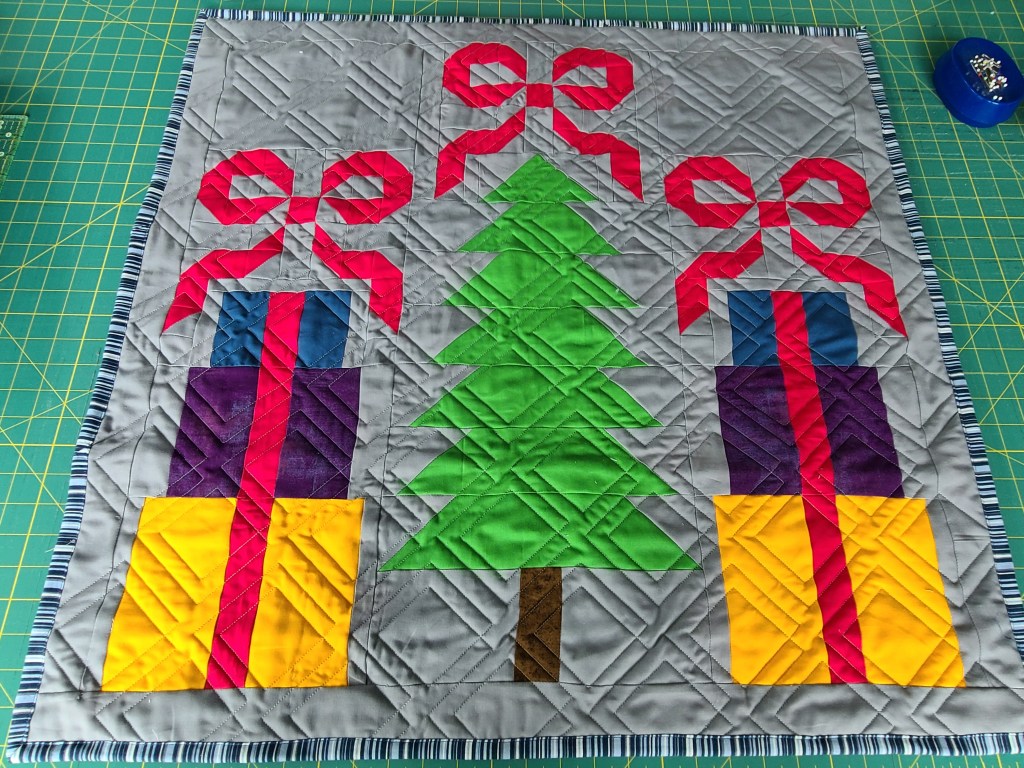
Janine chose solids and created a delightfully fun color scheme! And her choice of quilting is spot-on.
This is my first pattern of wall hanging or table topper size giving even more choices in my Etsy shop. If you’re looking for something fun to whip up that’s also whimsical AND original, give Christmastime a try!
After relocating and settling in, I’ve decided it’s time to clear out some of my mini quilts. Now most people would have thought to do this before moving, but, well…you know… 😉 Anyway, these minis are great for hanging on your wall or door -or- they make excellent table toppers. I have five on sale for 20% off on my Etsy shop for this week only! (More details are available on Etsy listing).
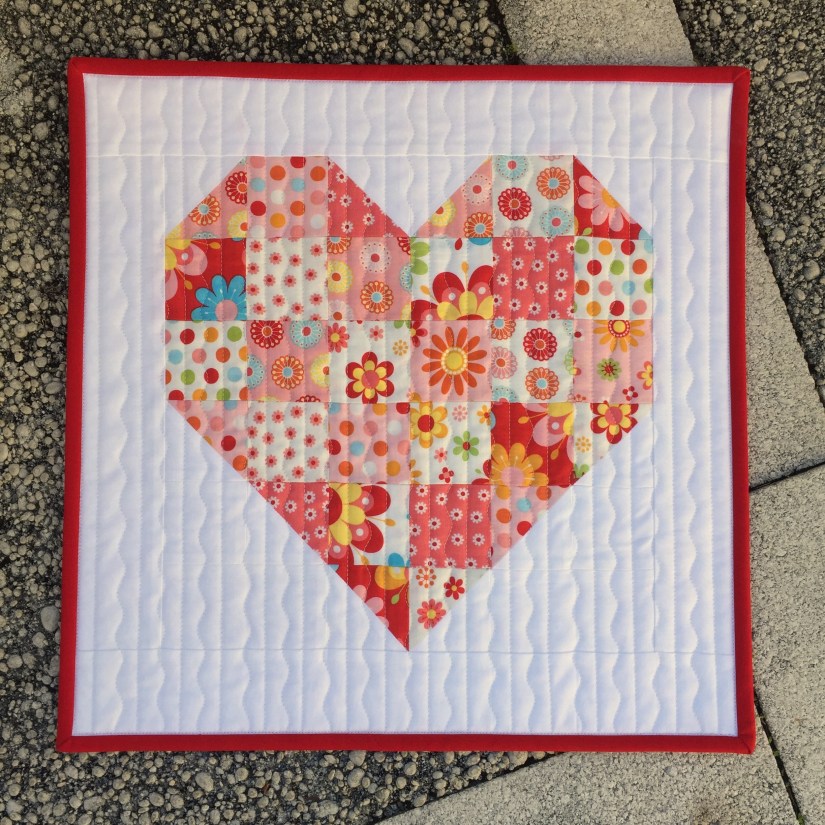
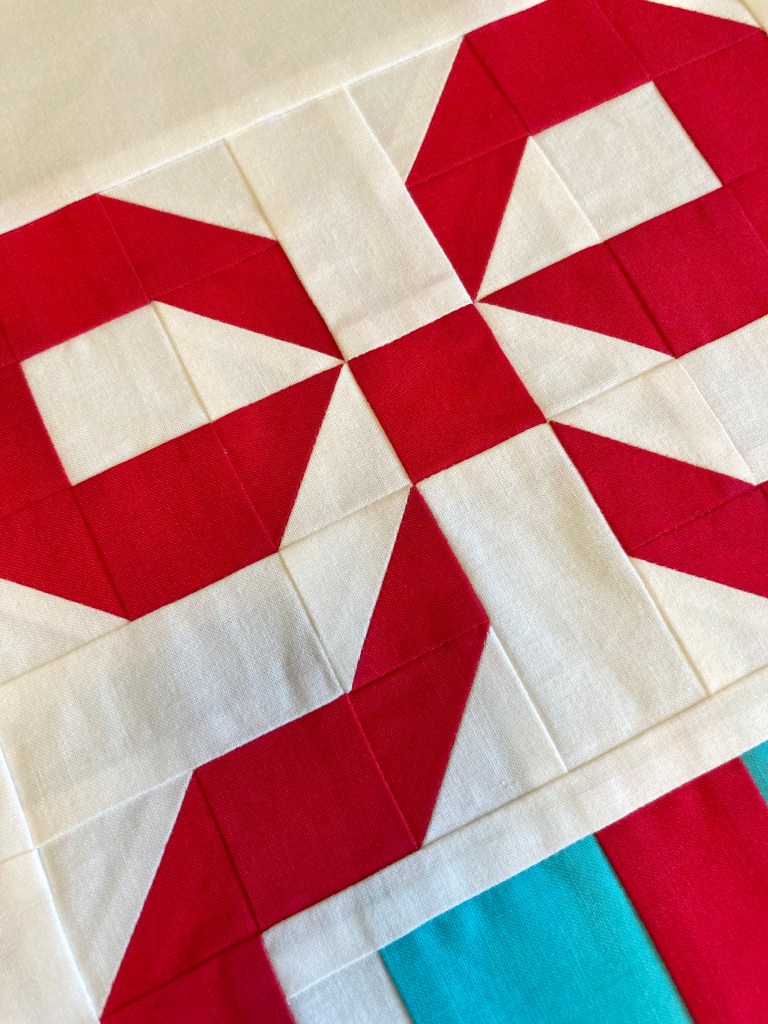
Here’s a run down of what’s available. Let’s start with my retro Flower Heart mini. I made this for my Scrappy Heart Mini tutorial a few years ago. It’s made with a fun, flowery collection from Riley Blake fabrics.
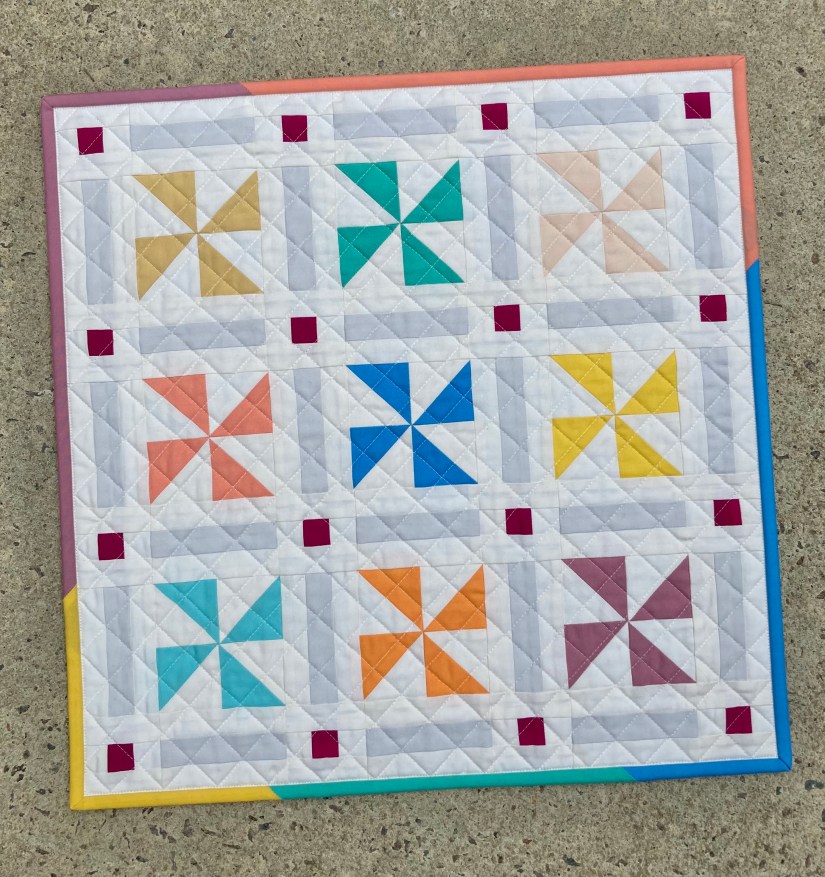
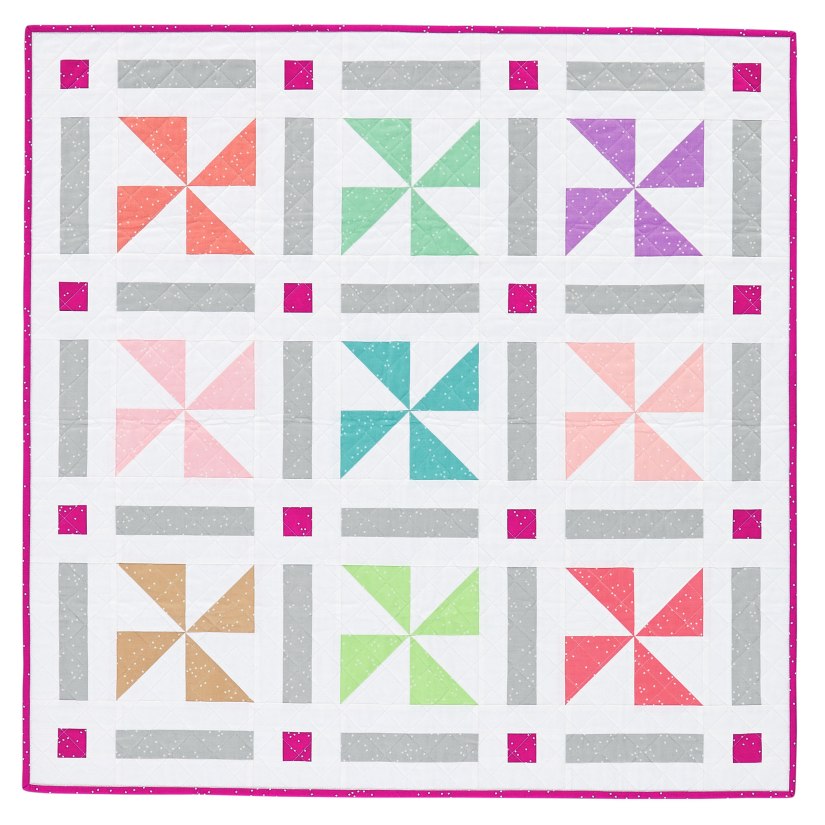
Next up is my Pinwheels Galoremini quilt. This mini is the one featured on the cover of my PDF pattern. Also, a baby size quilt version of this pattern was published in Quilts & more fall edition 2021. It’s a Monday Morning Designs pattern.
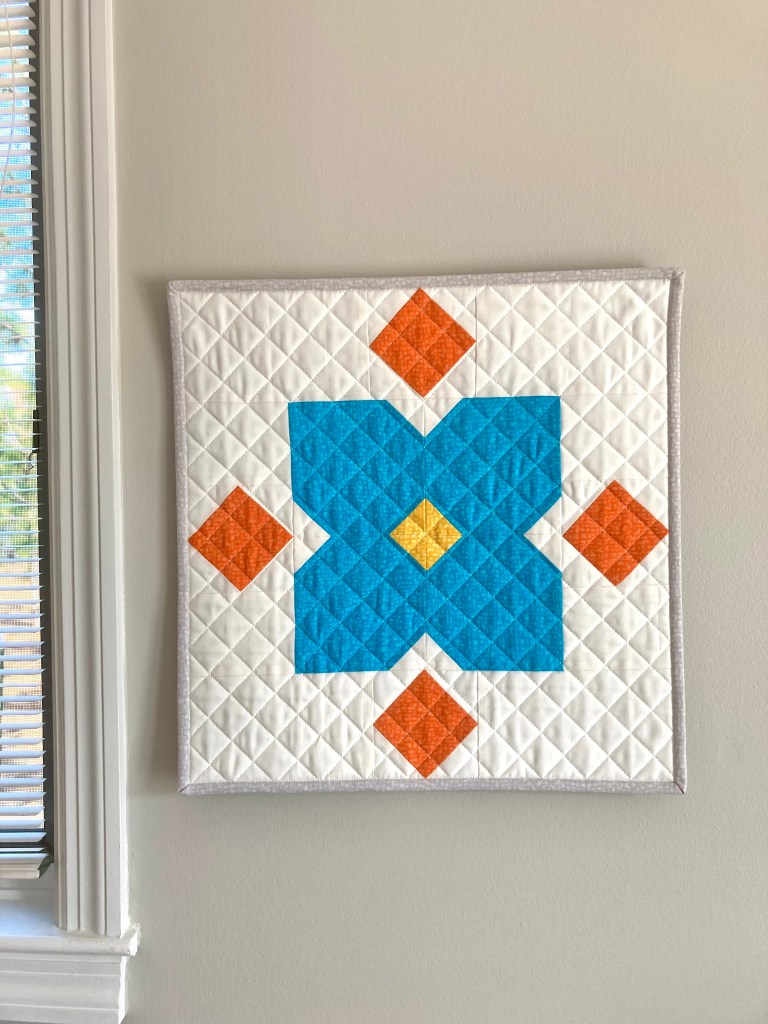
Another Monday Morning Design is my Floriography mini quilt. I embellished the block by adding a square-in-a-square border to help frame the center. This colorful mini is made with the Bedrock collection from Windham fabrics and boy does it pop!
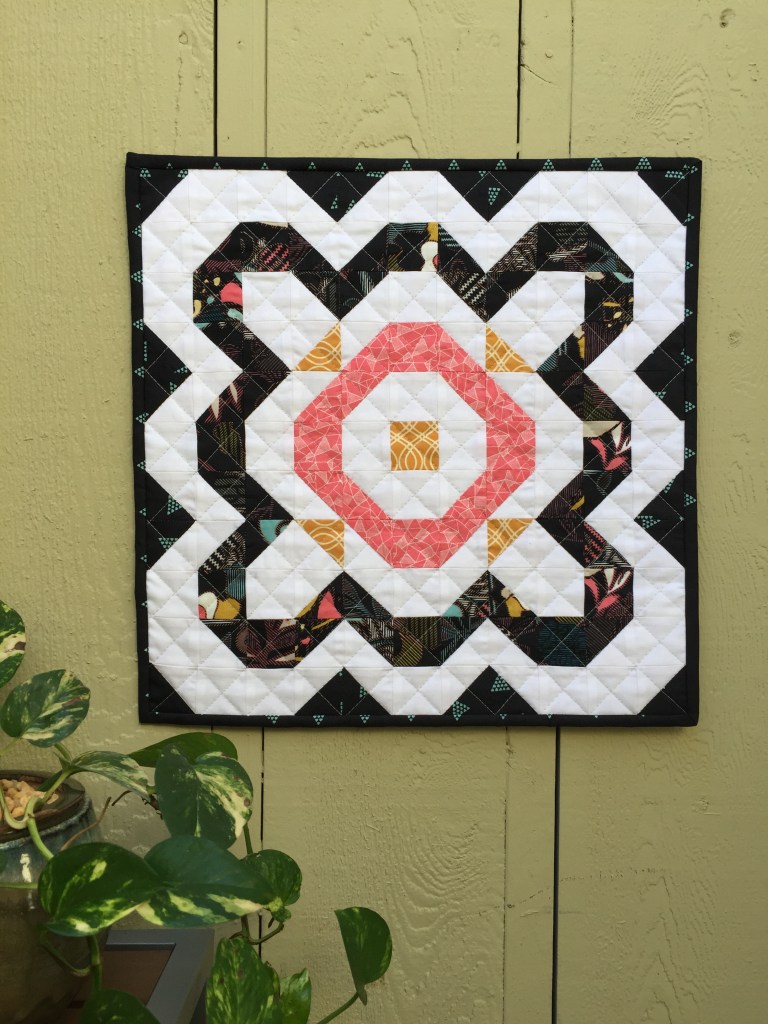
This bold black, white and pink Flower mini is from a pattern by the Family Hearth. I used delightful prints by Pat Bravo for Art Gallery Fabrics for a striking aesthetic.
Full Bloom Mini Quilt
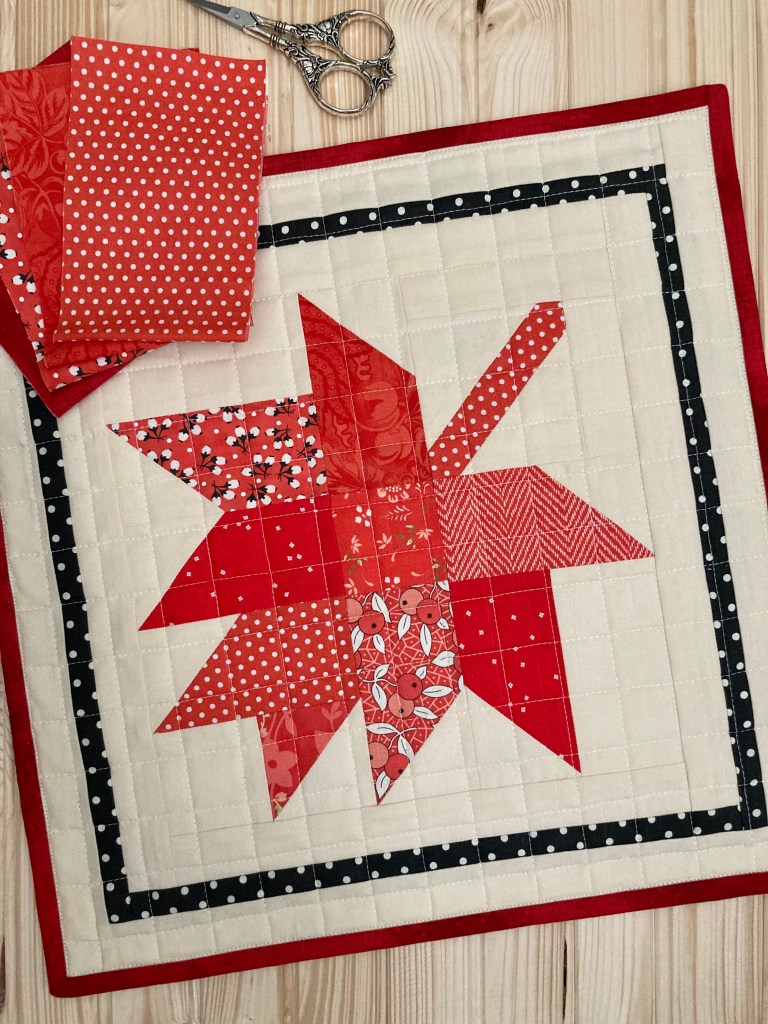
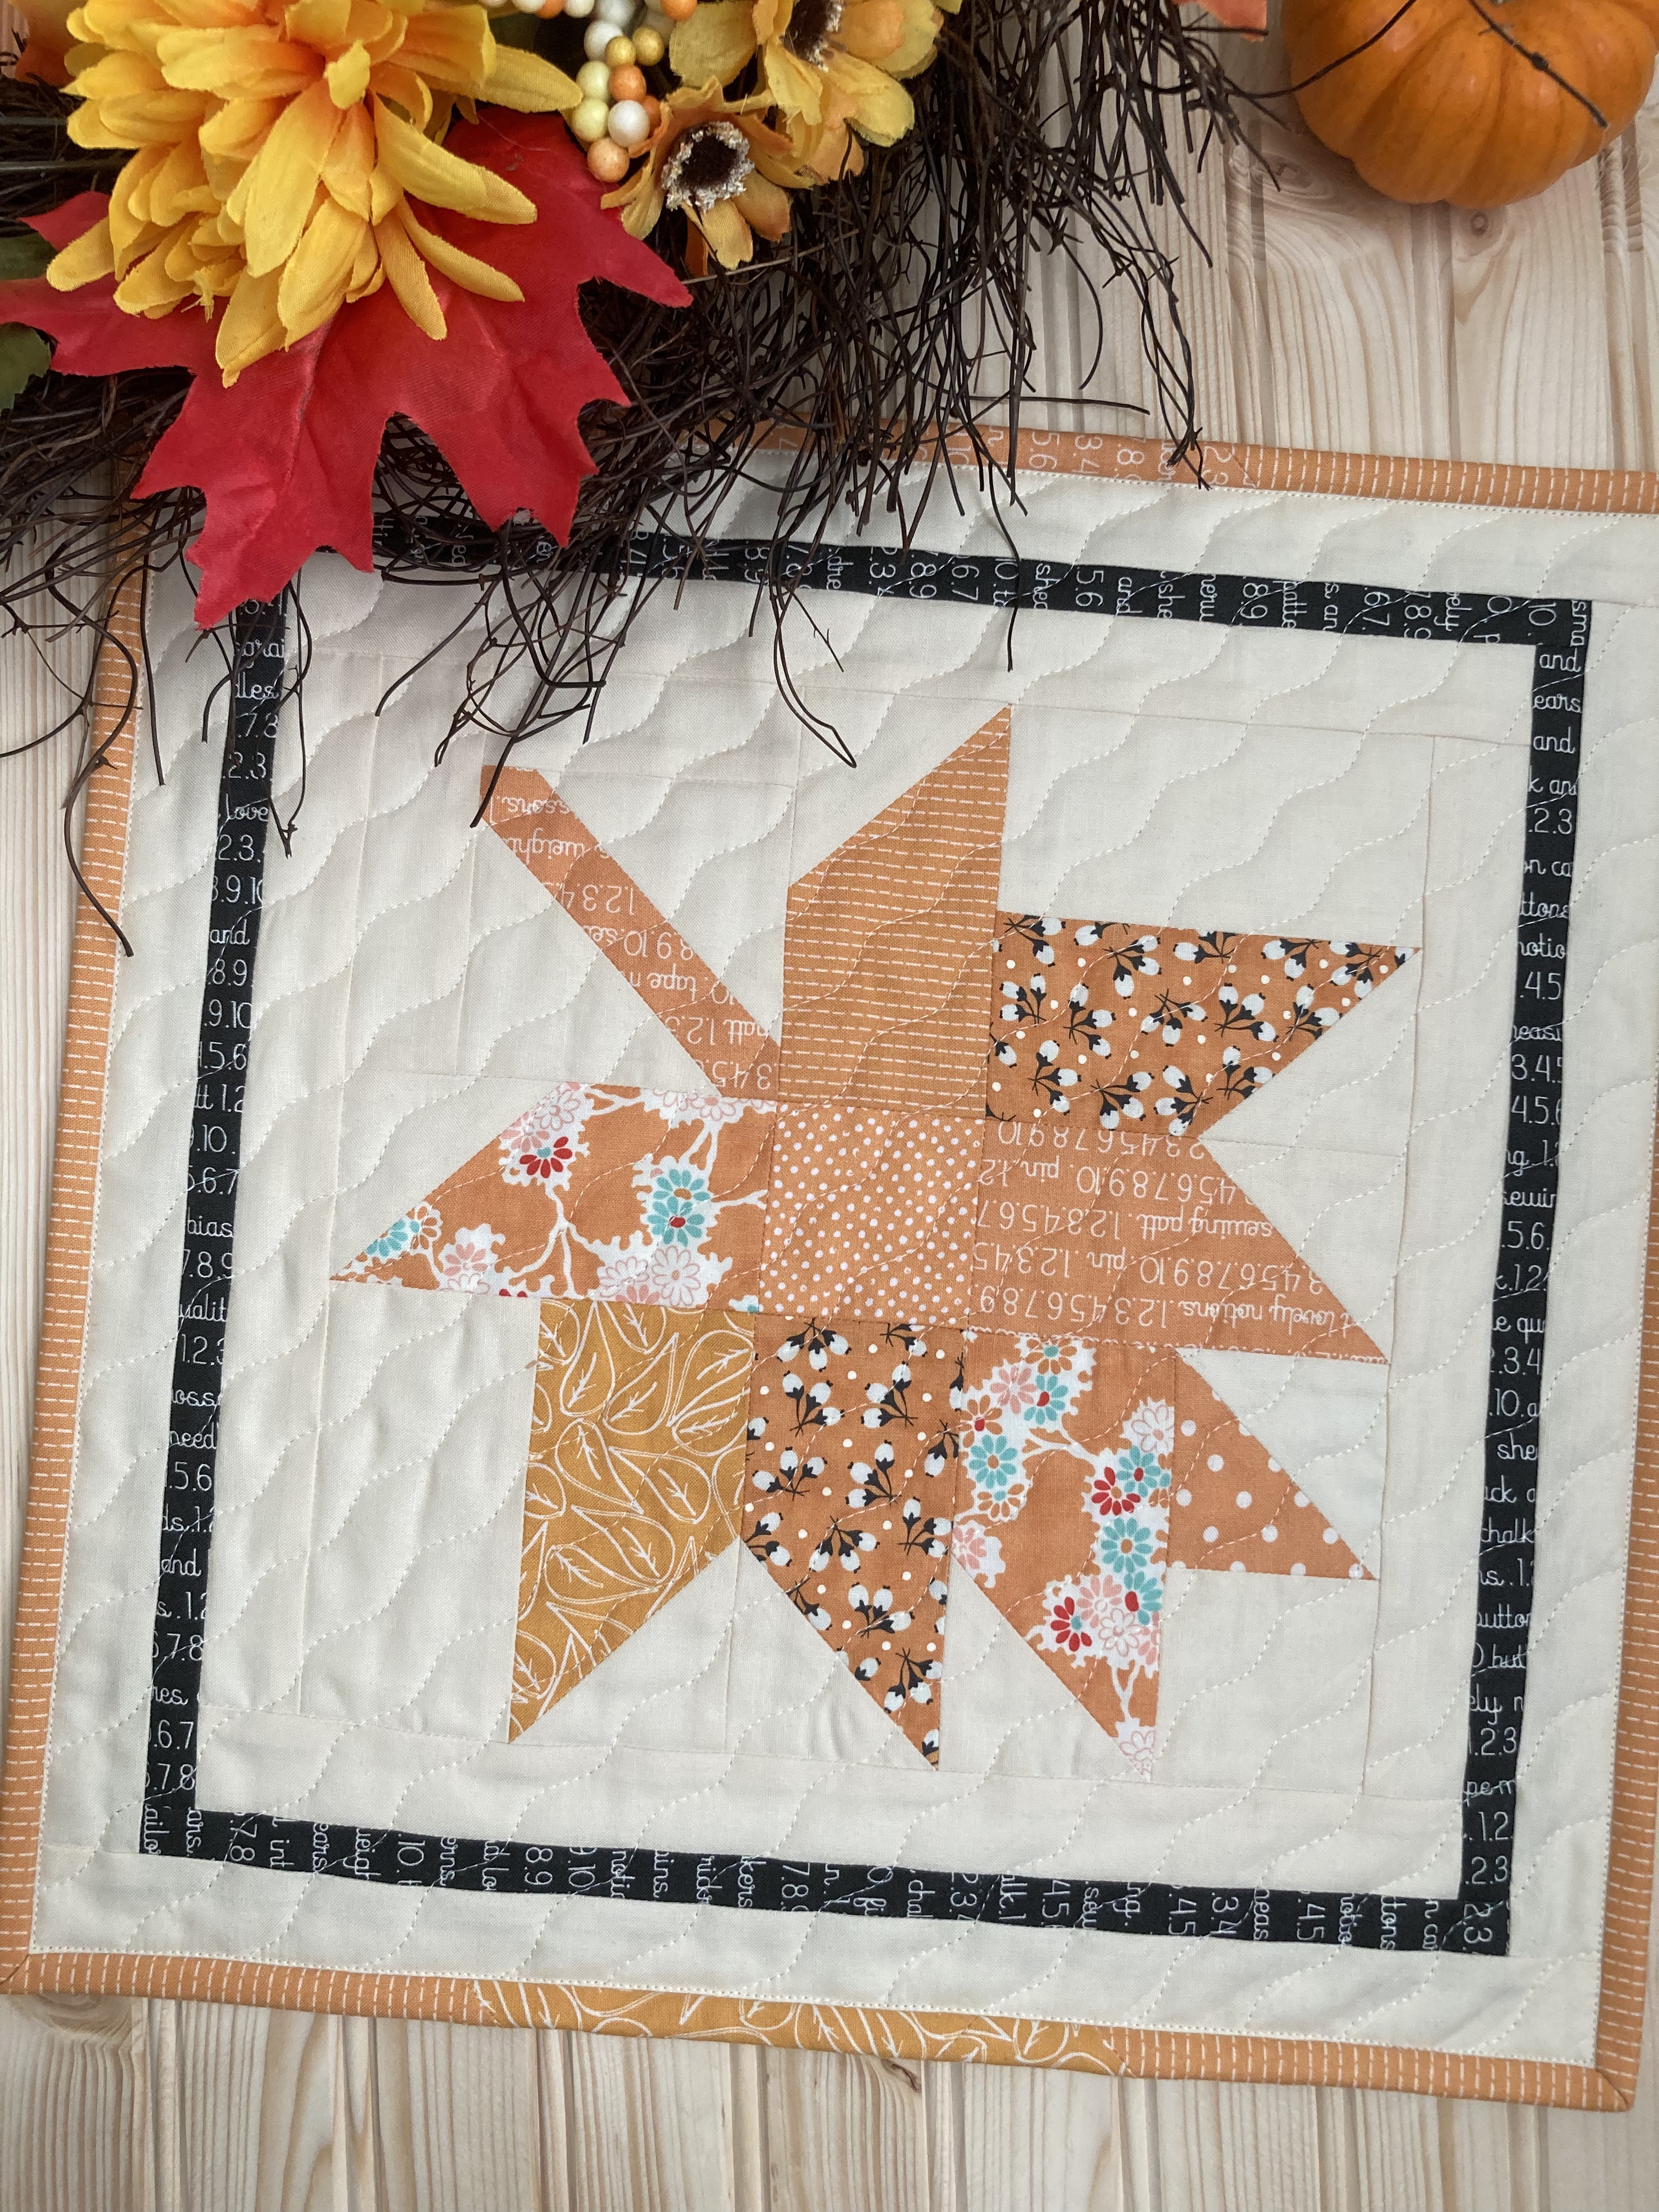
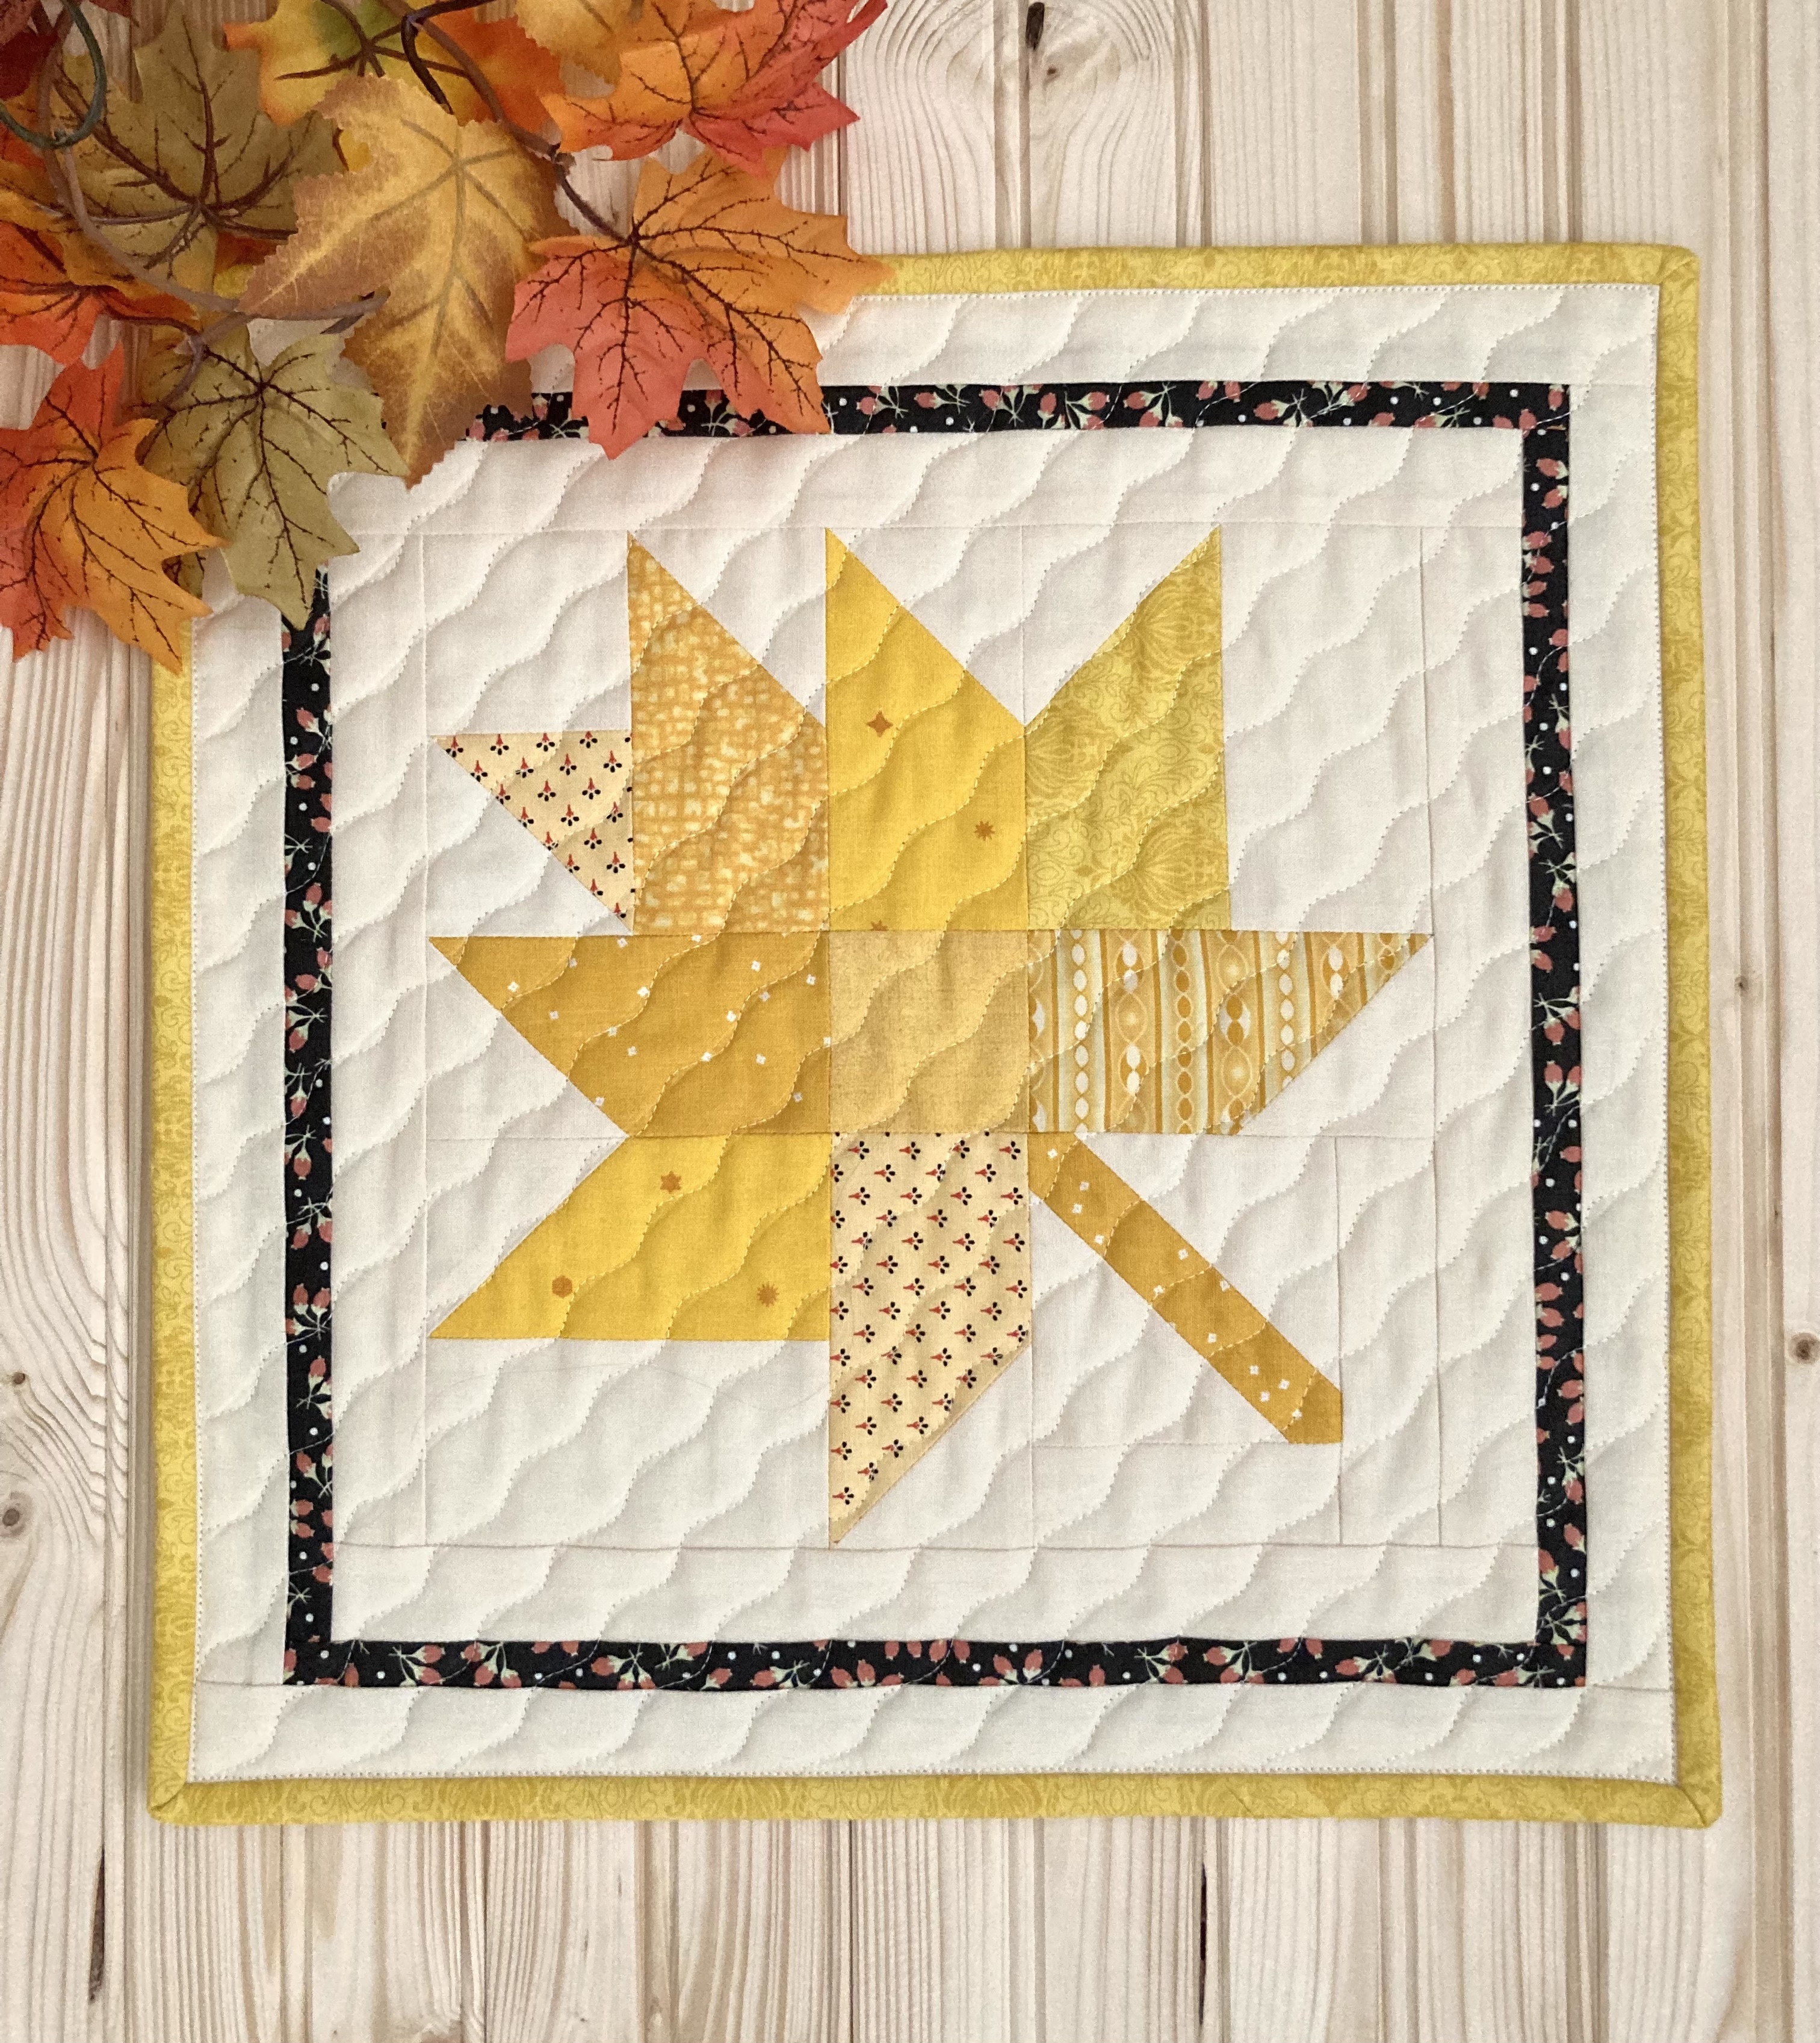
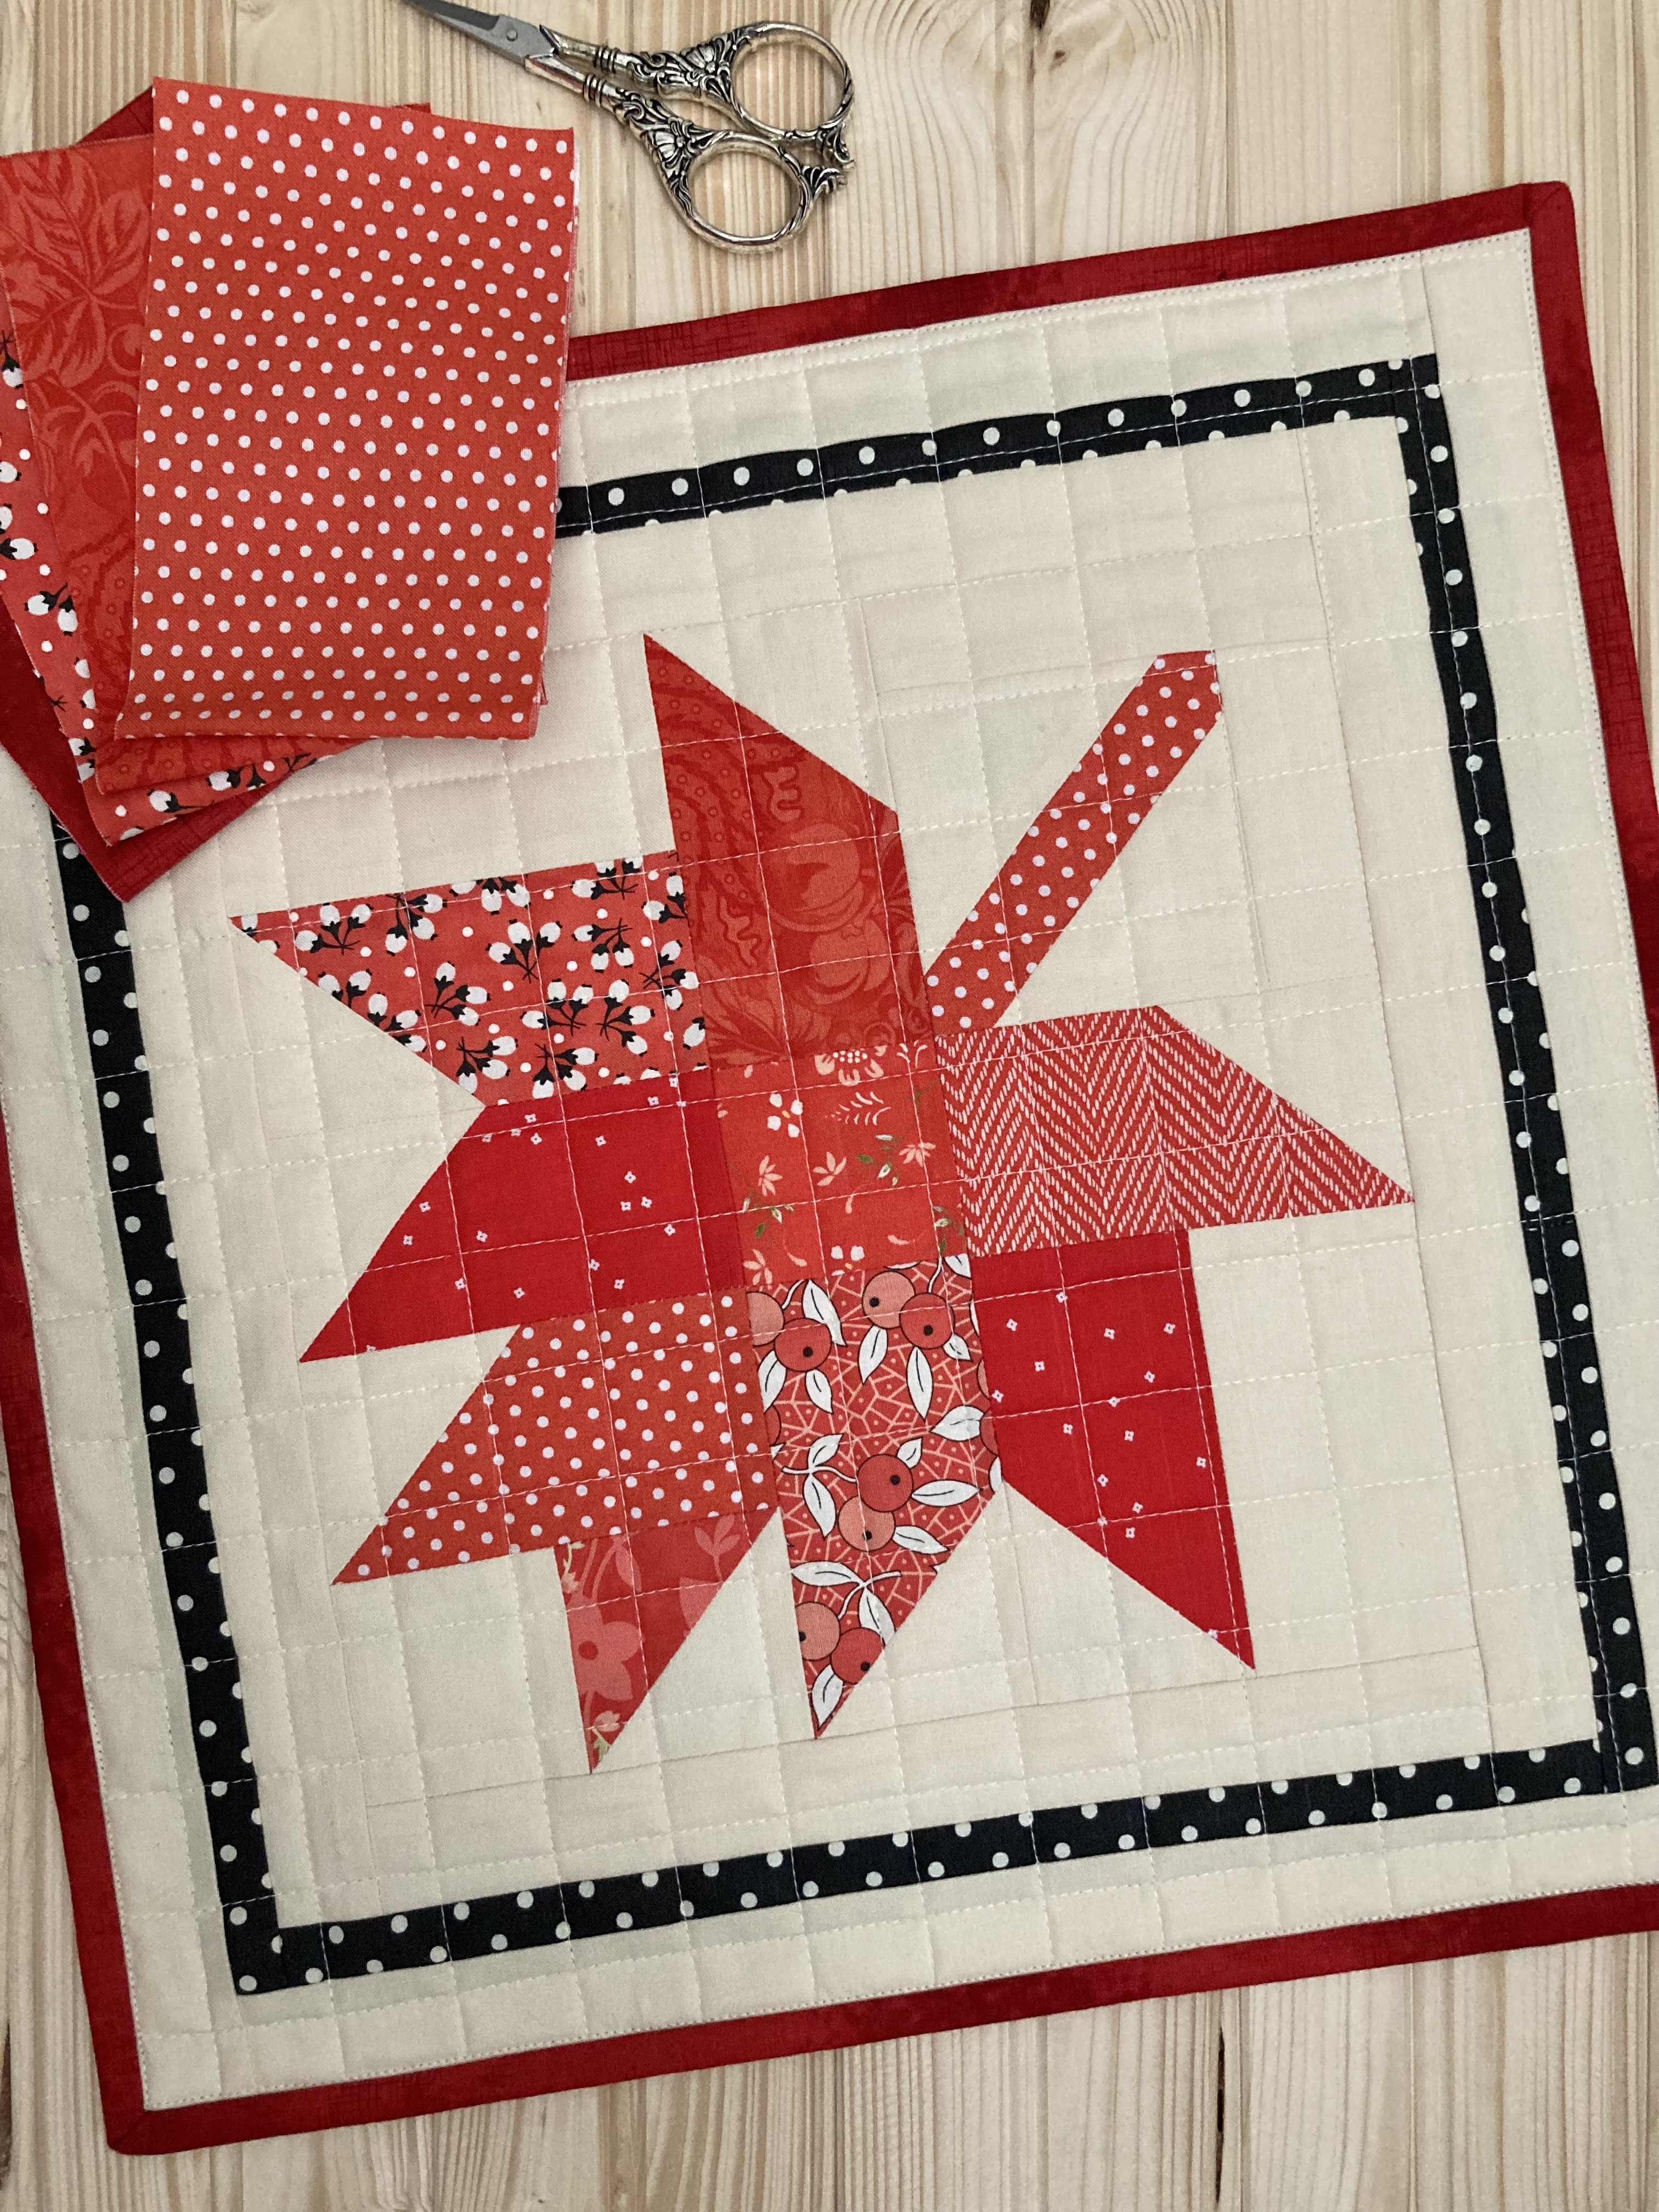
If you’re looking to bring autumnal colors indoors, this Maple leaf mini will do the trick! The pattern is by Cori Yoder. I used Moda fabrics throughout to give it a true-to-life fall vibe.
All five mini’s have corner pockets sewn onto the back to accommodate a dowel rod for easy hanging. All minis are handmade by me.
Choose a favorite for yourself, give one to a friend or loved one as they make great gifts!
When we quilters make a quilt we also create a lot scraps—it’s seems to be a never ending cycle. Other than making scrappy quilts, there’s always the question of what to do with scraps, especially if they’re not very wide. While scrolling Pinterest, I found the answer—a rag wreath.
Not only are they pretty, they’re easy and fun, and they use up a lot of scraps! What I especially like about this project is anything goes…from the wreath size to the color scheme. There are plenty of options, too. You can make it all one color, make one for a particular holiday or season or create a completely scrappy one using what’s on hand.
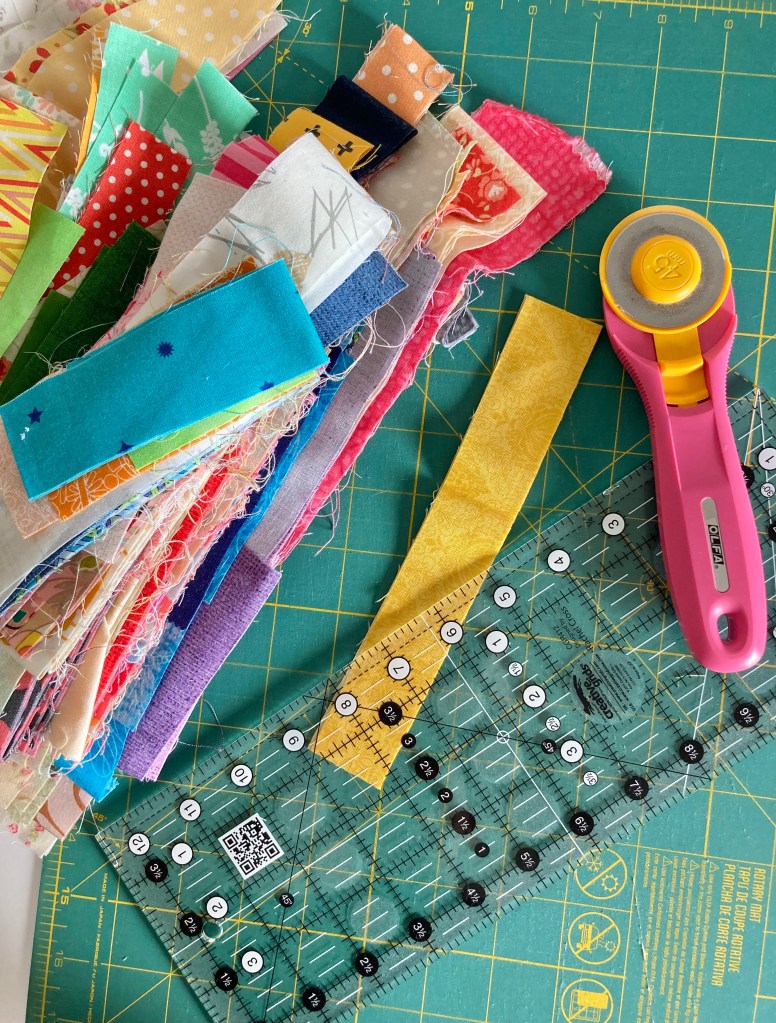
To get started, choose a wreath frame (one with 4 wires) and gather scraps.
Because I’d never made one before, I needed to know what else was involved so I watched a few YouTube videos. After that, I decided on the 12″ size because making an 18″ wreath would have required more strips than I had and I didn’t want to create even more scraps. 😉 Also, 12″ would be better suited for a 30″ interior door.
I purchased the frame at Michael’s for $3.99 + tax. Through videos I found others went to the dollar store and got theirs for a dollar!
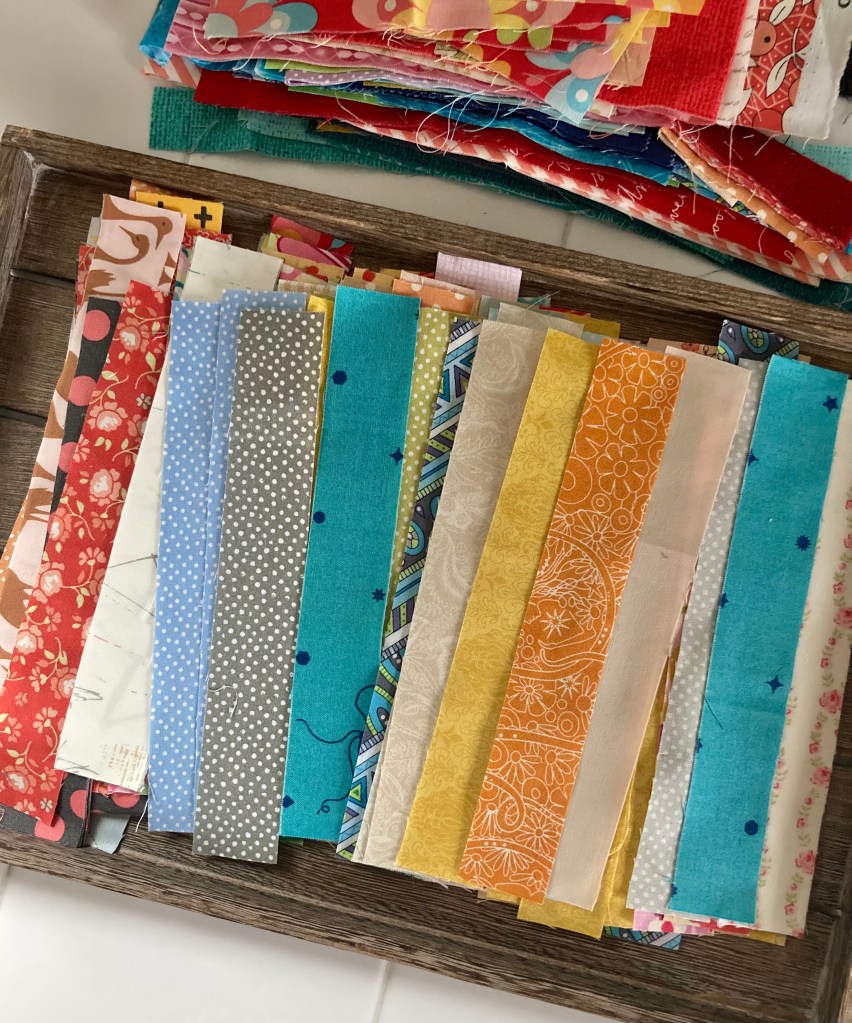
YouTube makers offered different suggestions on strip size. I opted for 1 1/4″ wide by 8″ long.
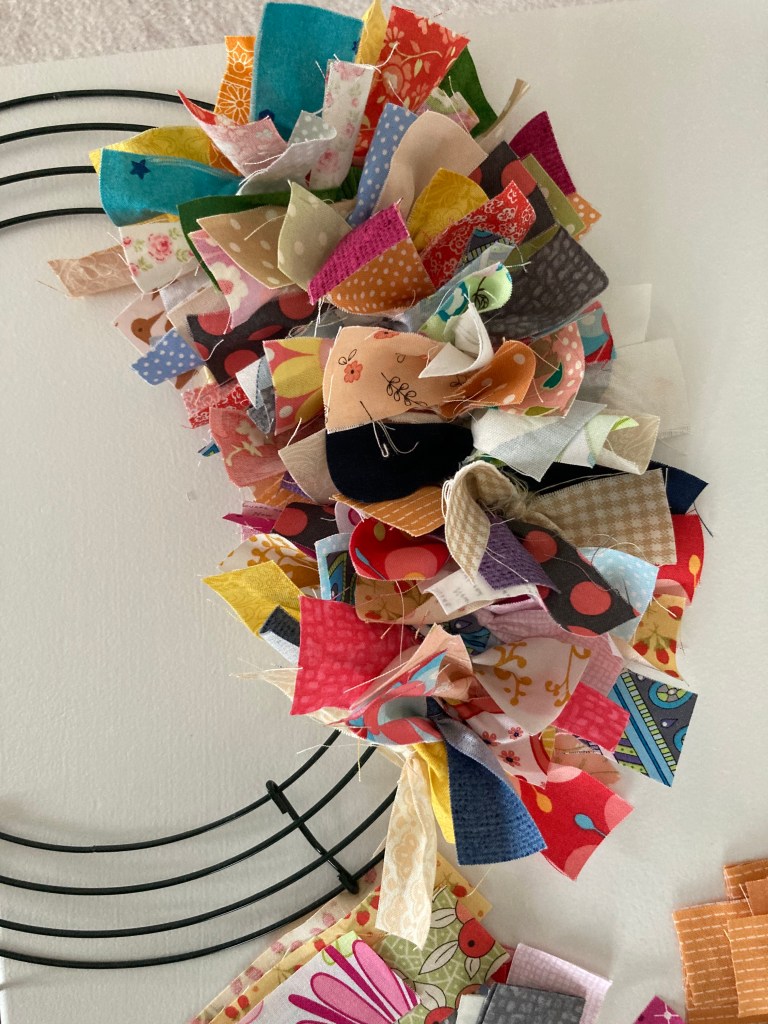
They also showed various methods of tying on the strips. I decided to go with the most popular way that’ll give the fullest wreath. Here’s how: tie one strip into a knot over two pieces of metal, tying on one side, then the opposite, then tying one in the middle. This process continues within each frame section.
Here’s what the back looks like.
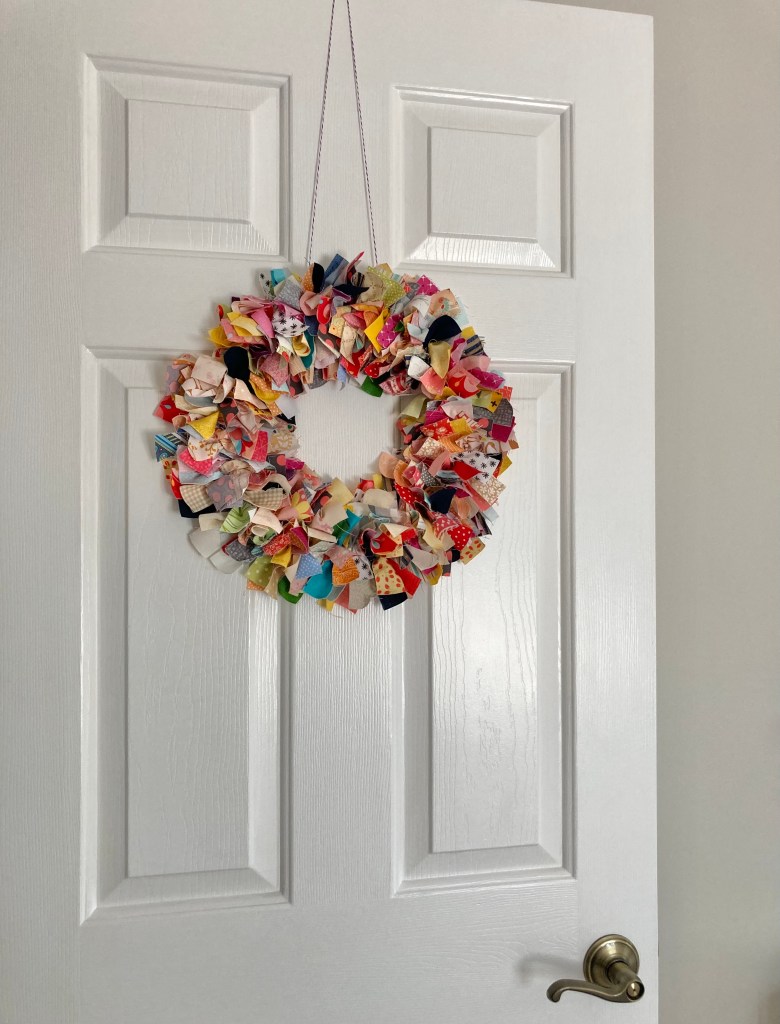
Mine has several different fabrics (from quilts made long ago) giving it plenty of color.
All in all, I’d say it took me the better part of a day to make this from start to finish. And how many strips did it take you ask? 190. That’s a lot of strips!
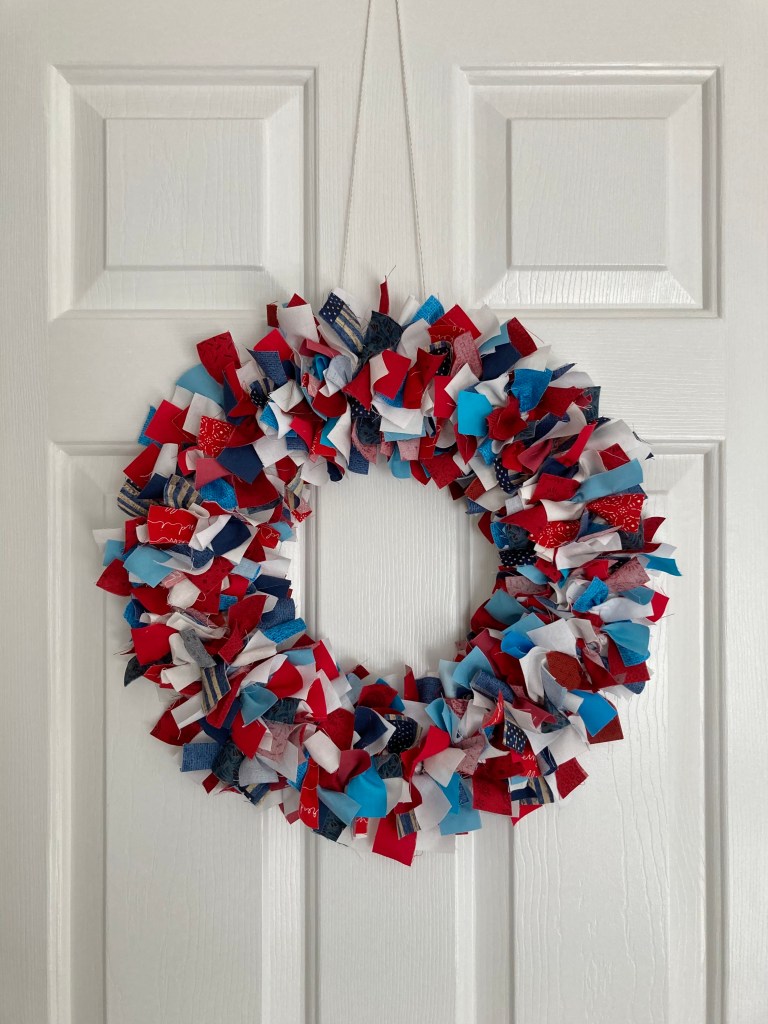
Since I enjoyed this project, I decided to make a larger one in red, white and blue for the summer holidays. This time I went to the Dollar Tree and purchased a 14″ frame for $1.25. 🙂
I cut my strips from left over fat quarters, 2 1/2″ strips and yardage. Because I was using only two colors that had prints, I opted for at least 6 different kinds from the red and blue fabrics. I used all solids for the white. I think it ended up with a nice variety without too much repeat. This wreath was a bit larger than the other; totaling 232 strips!
I enjoyed watching these wreaths come together, and it was a pretty relaxing project to do. It’d also be a good one to take on the go. If you’re ever in need of a fun, handmade gift, I think a recipient favorite-colored wreath would be an excellent choice.
Every year I like to take a look back at the projects I completed. While there were plenty of quilts and small projects, there was also a significant pause where I made absolutely nothing. Just needed a break I guess. 😉
I started the year off with a new pattern, Floriography. I designed it for a layer cake and tested it with one I’d had since 2015. The original pattern had square-in-a-square blocks in the sashing but once I made it I thought it might be too much fuss and if I thought so, other quilters would too. I still may offer it as Floriography II if there’s enough interest.
After completion, I ended up altering the pattern and offsetting the blocks so this is Floriography as it is today. The pattern is still layer cake friendly and is available for purchase in my Etsy shop. So far it’s been pretty popular and it’s so versatile with fabric cuts and colors, I used fat quarters!
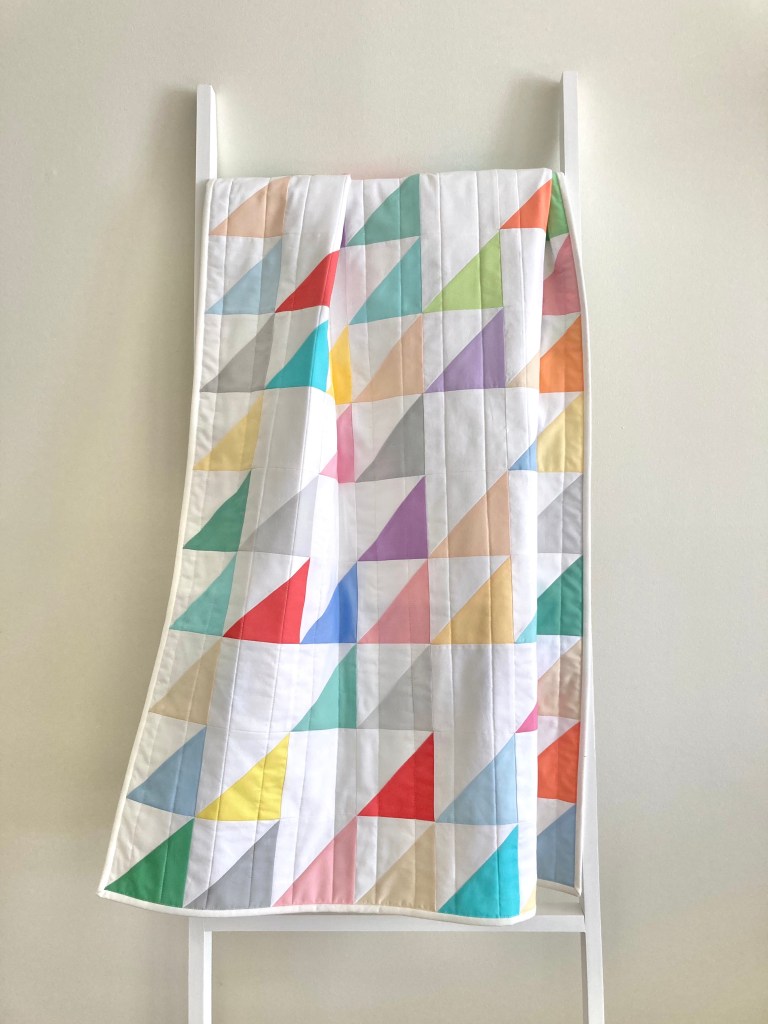
Next, I played around with my Triangle Twizzle pattern by making a baby quilt first. Doing so helped me get the design where I wanted it. I really liked this one, especially the lovely pastels.
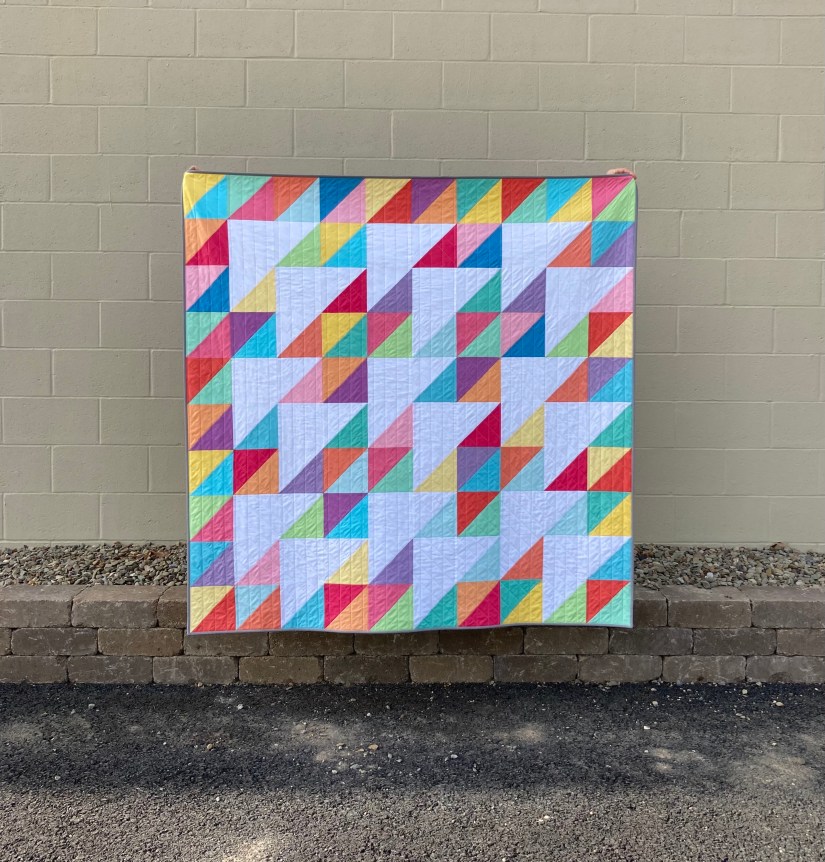
After tweaking the pattern, I ended up with my final version of Triangle Twizzle which is available in my Etsy shop with three size options: baby, small throw and large throw. It’s very easy and great for the beginner quilter.
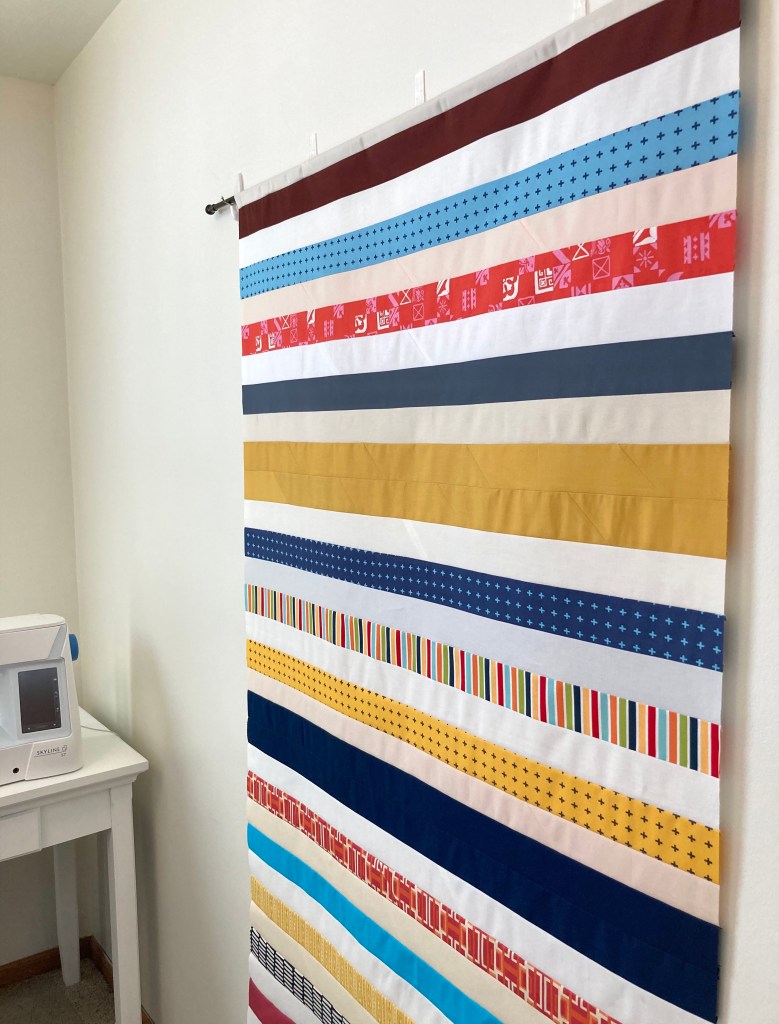
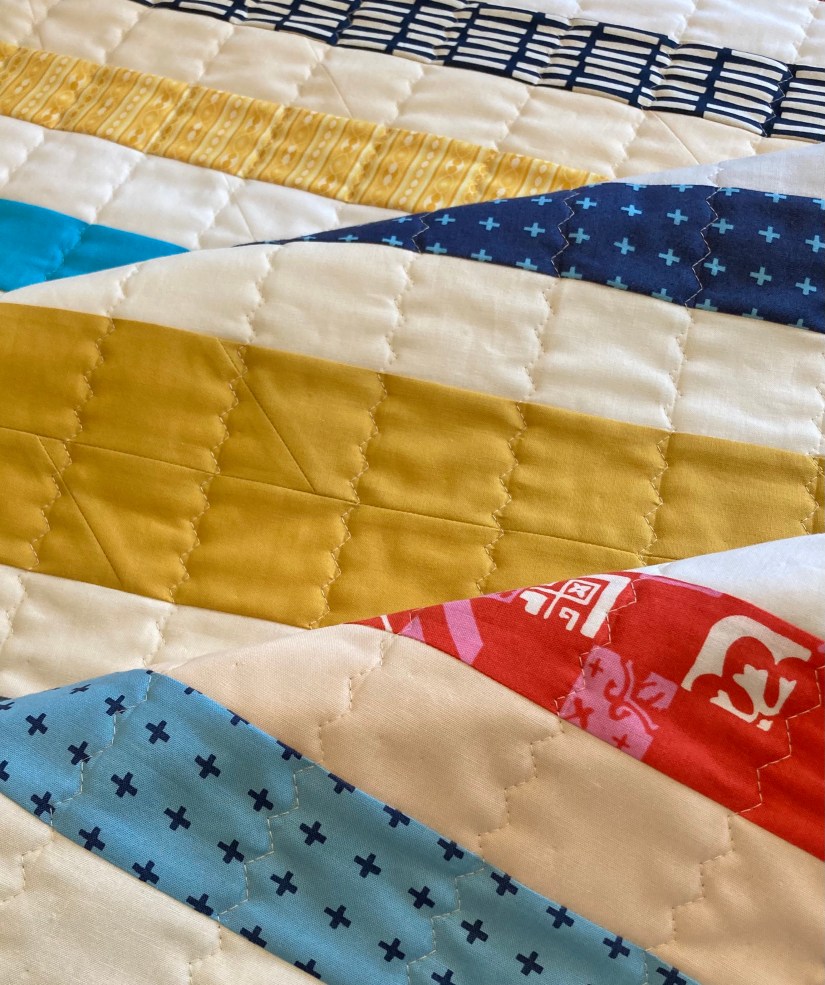
For this quick finish I used various 2 1/2″ strips for an outdoor quilt as per my daughter’s request. She wanted it just big enough to sit on or cover up with and nothing fancy. All I did was gather a bunch of strips and put them together for a super scrappy look. The backing was a mix of gray pieces in random sizes which didn’t matter since it would be used primarily on the ground.
For the quilting, I experimented with a short zigzag stitch and really liked the results.
By early March I finished my Playful Pastels baby quilt for the Fall 2021 issue of Quilts and more. This pattern will be available when I have my copyrights back, making it the end of February 2022. I’m excited to release this pattern, renamed Pinwheels Galore; it’ll be available in four sizes: baby, throw, twin and queen.
I made The Ghost Quilt by Pen + Paper Patterns and along with it I made a few minis. It was a fun one, but it was also a ‘one and done’ one!
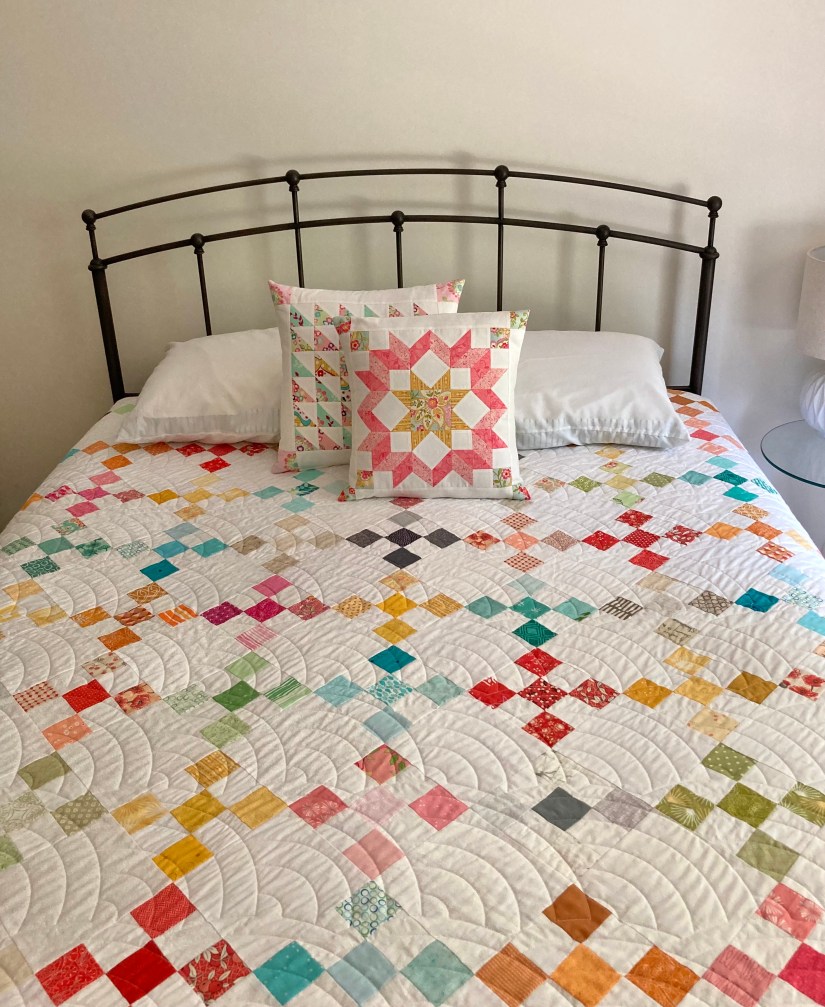
This was an ongoing quilt that I made using 2 1/2″ squares I cut as leftovers, although I did have to buy some yardage for the background. I absolutely love this quilt…except for the quilting…it just isn’t what I’d hoped for but it was a fun make and will someday be used on my queen size bed.
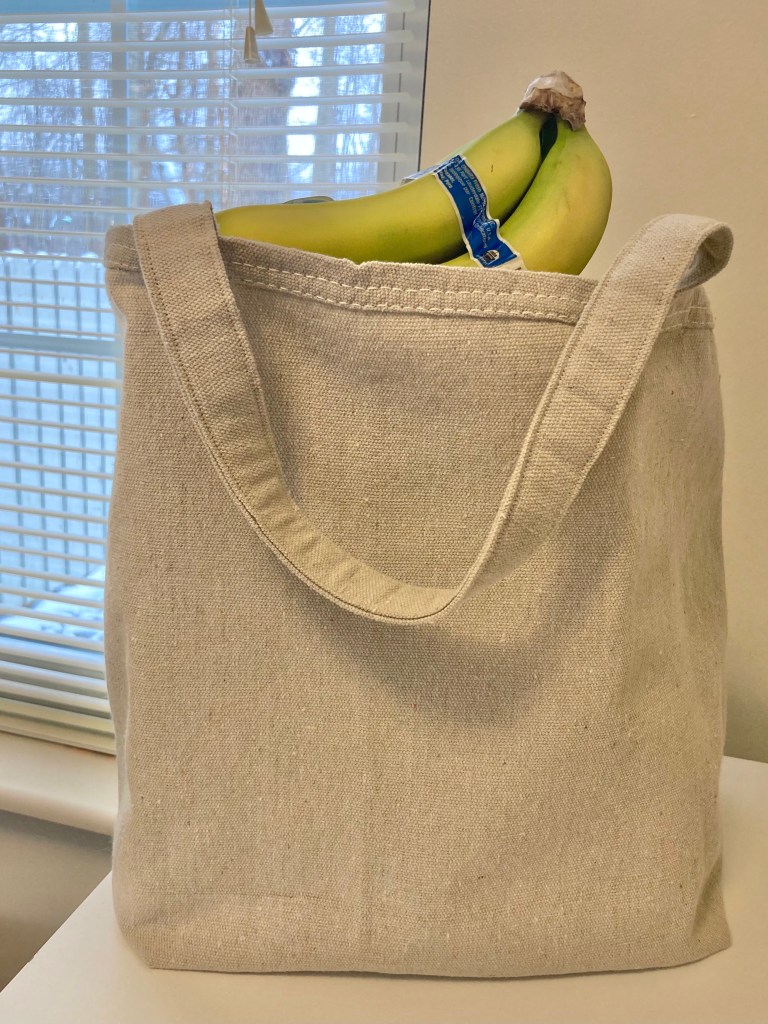
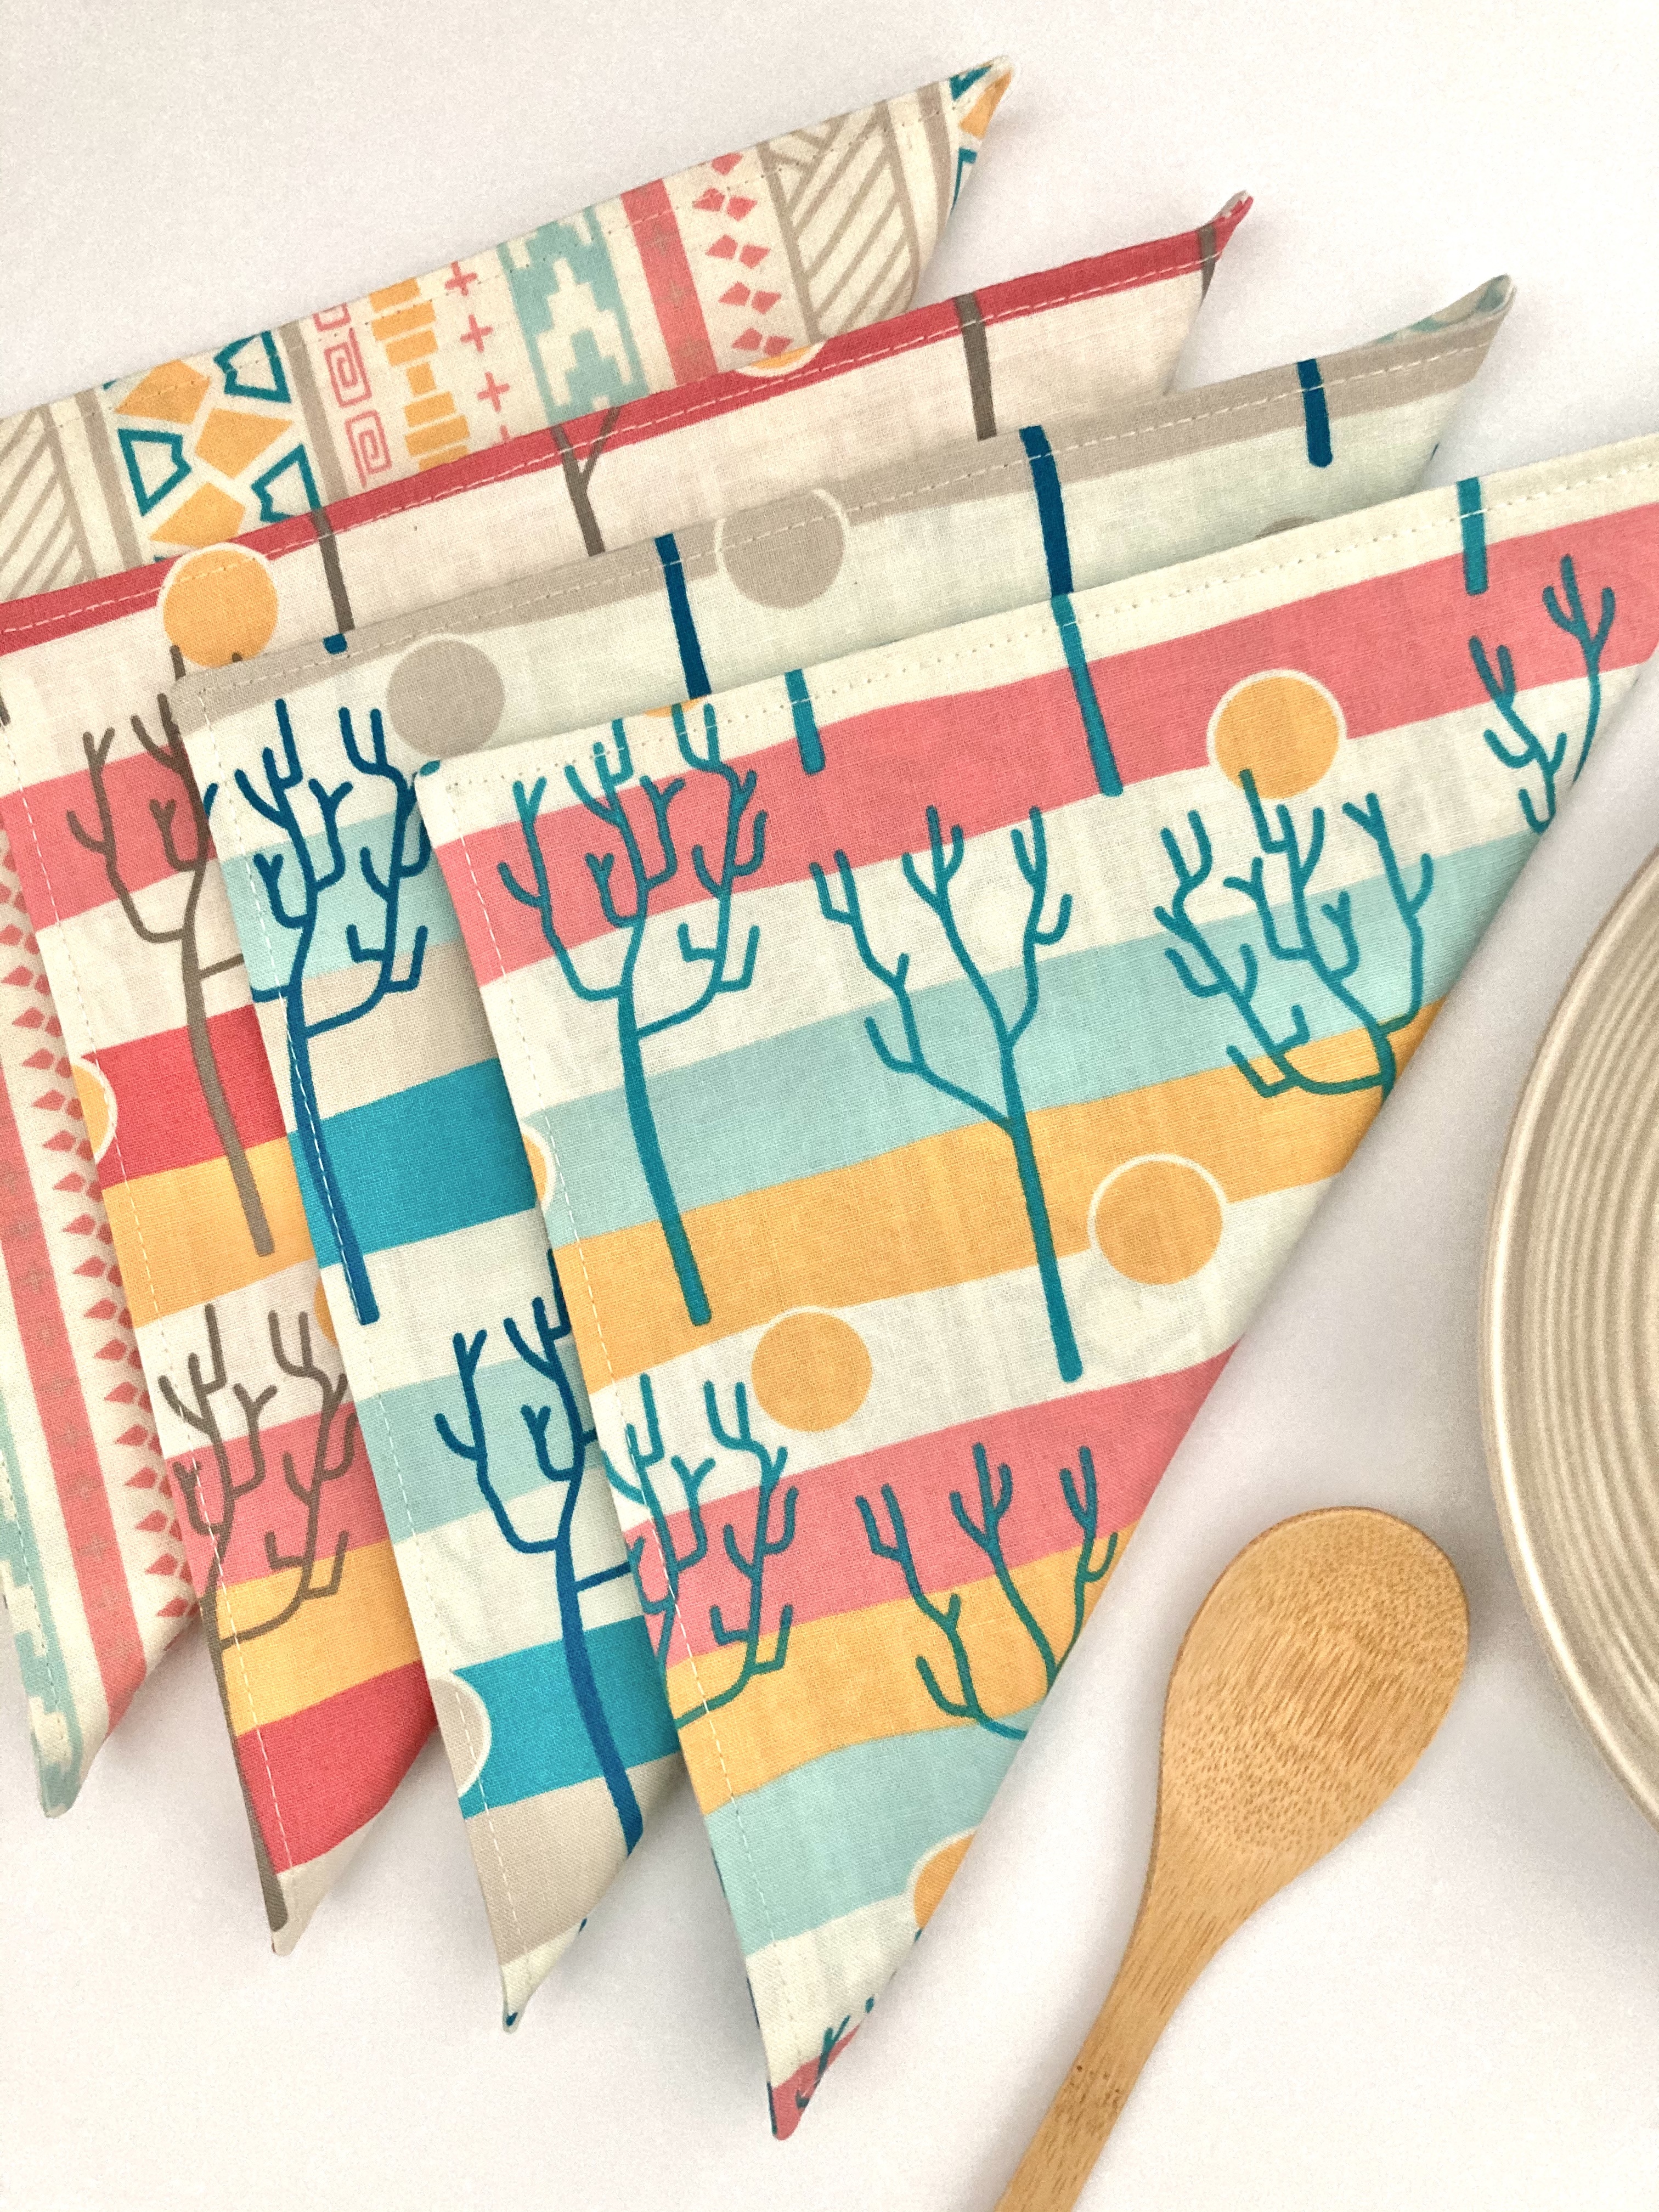
Other projects included reusable grocery bags, wine bottle bags, a pillowcase, fall leaf minis, Christmas stockings and table napkins. (A PDF wine bottle bag tutorial will be posted soon!)
I also have two other patterns nearing completion. Here’s a peek at one entitled Christmastime. It’s wall hanging size and will be available in July! The other quilt will be available in several sizes and features the ever-popular sawtooth star.
That wraps up last year and here’s looking forward to a quilty 2022! 🙂
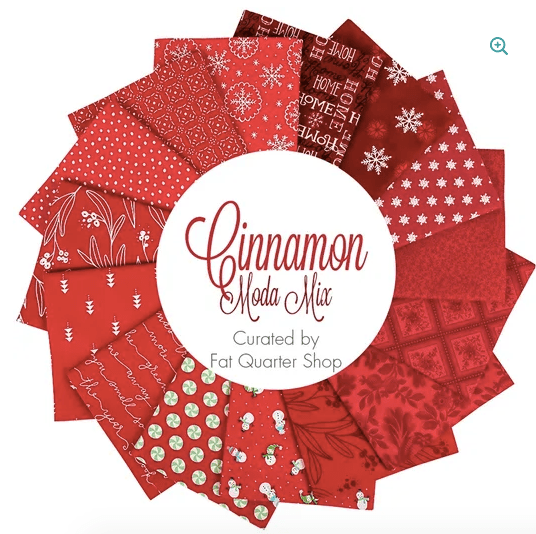
After making a Triangle Peaks Christmas quilt last winter, I had several whimsical fabrics left over from a Moda fat quarter bundle.
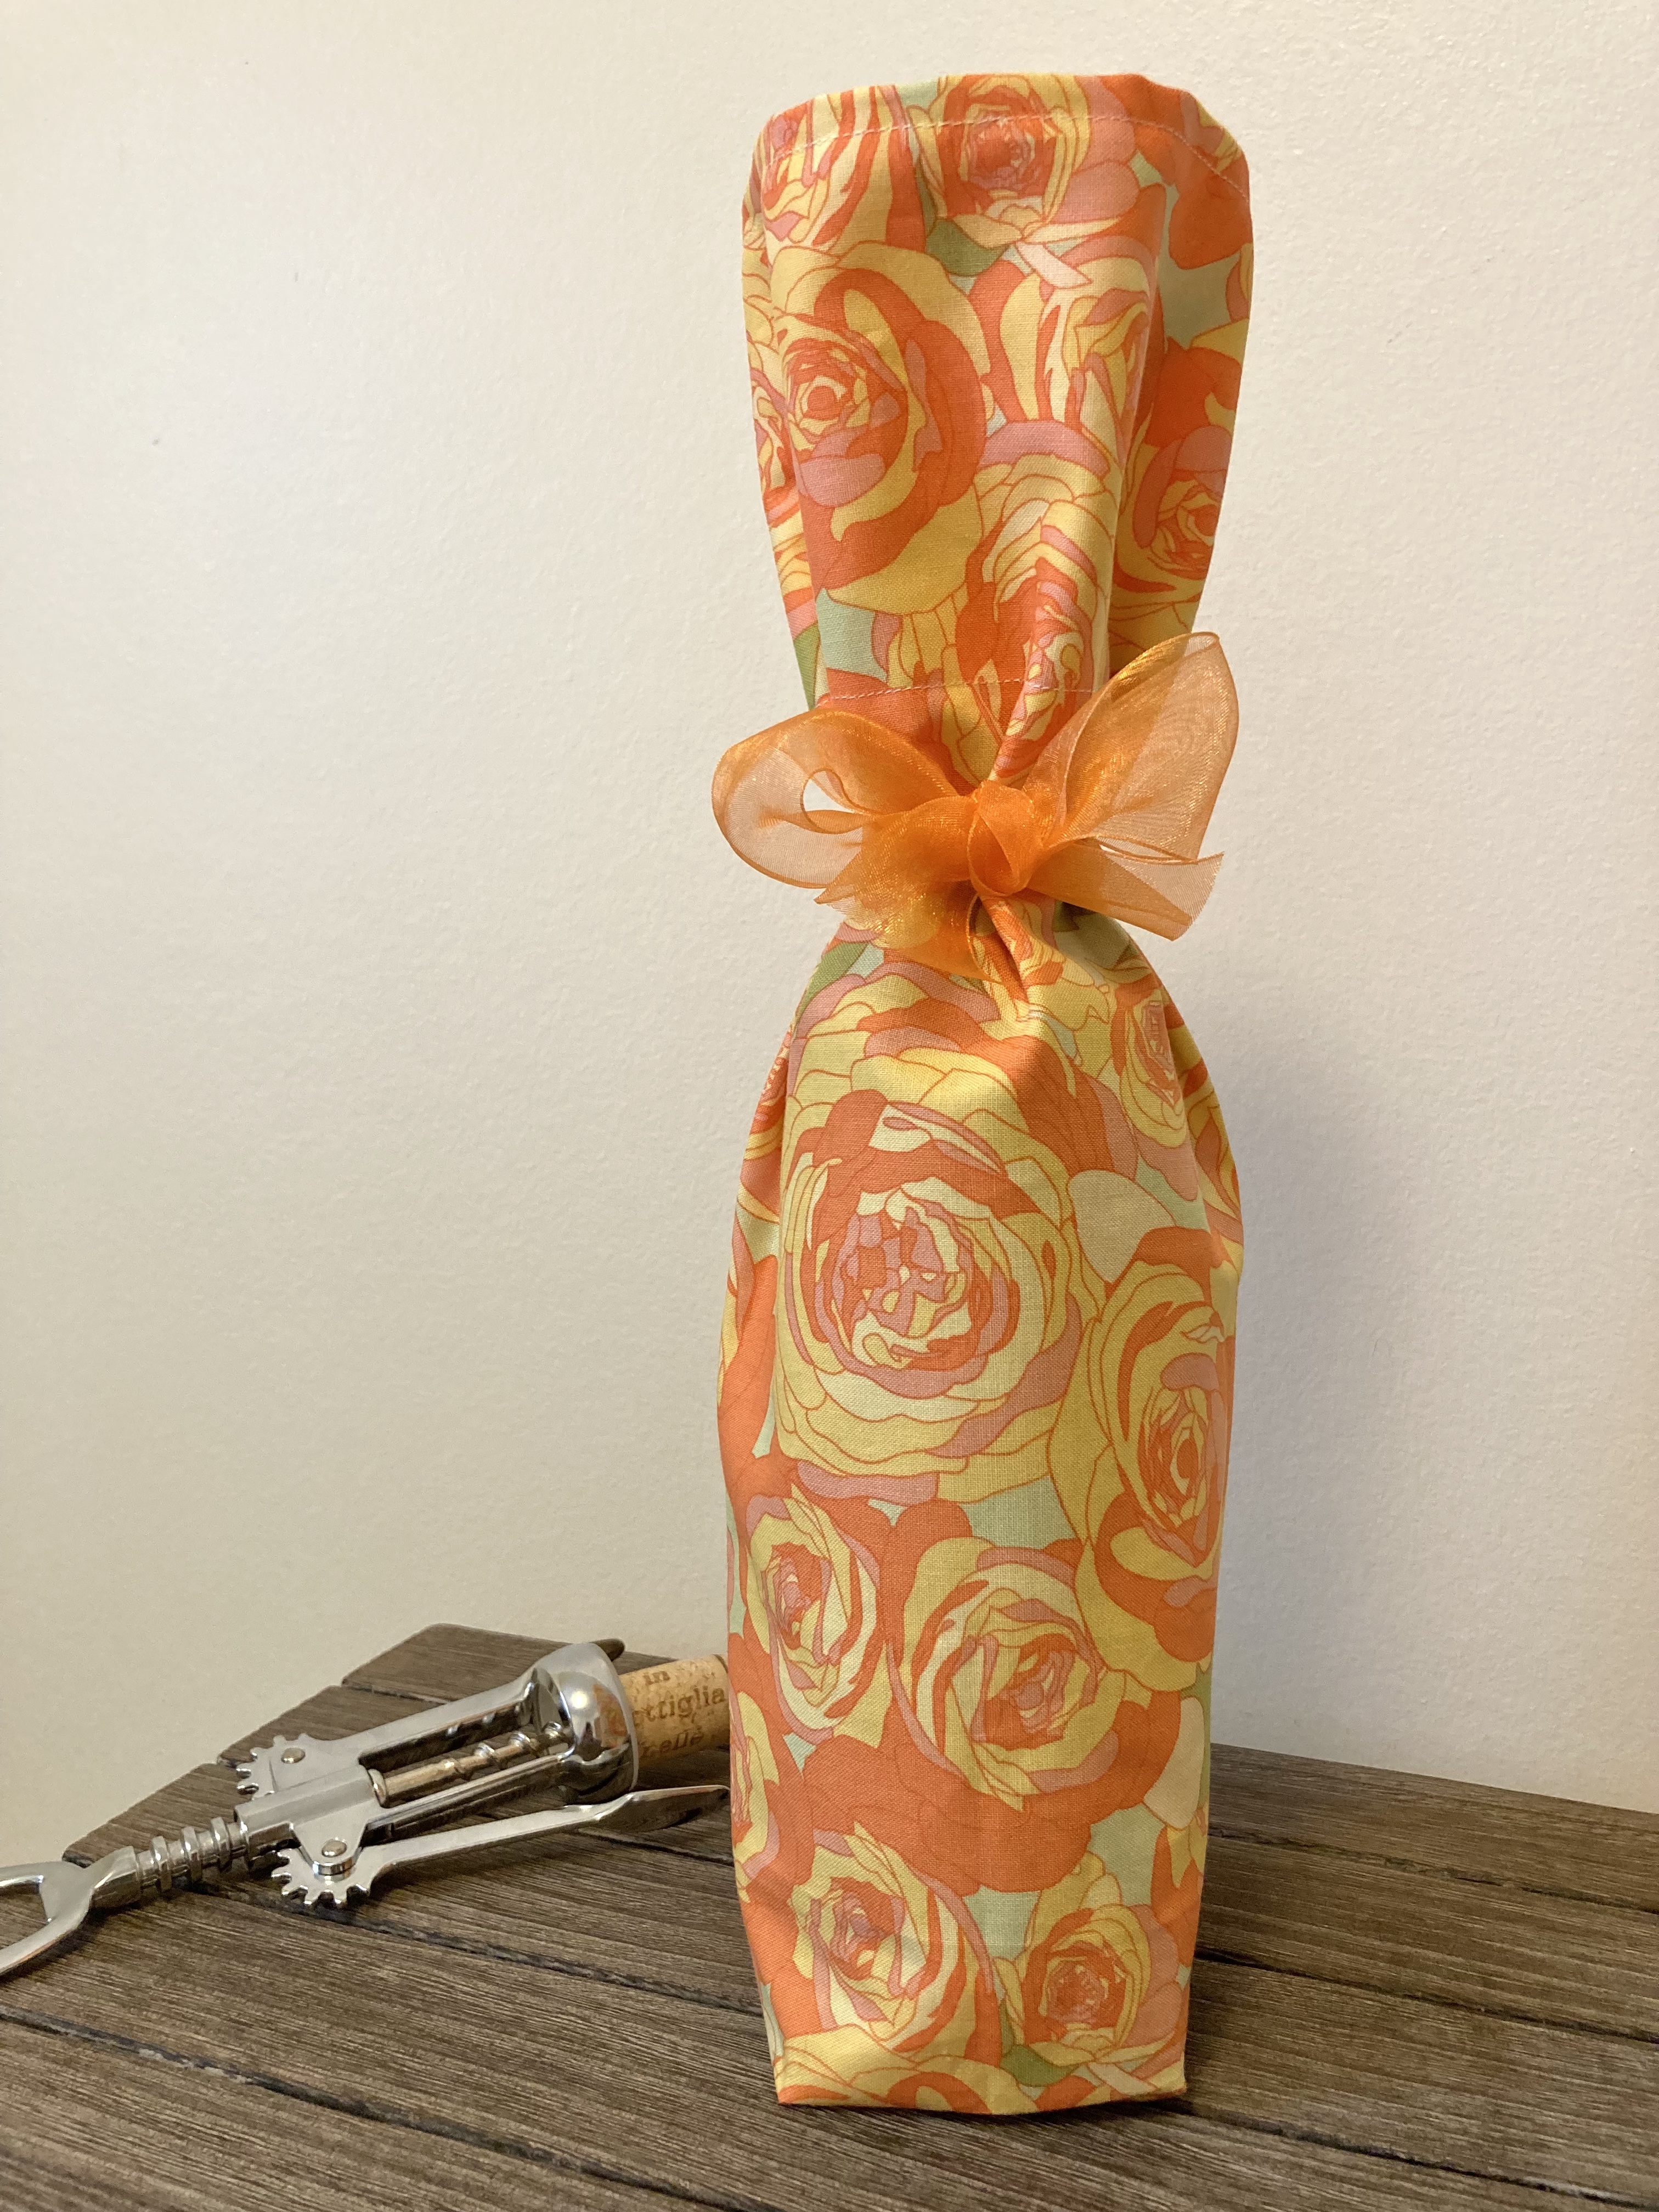
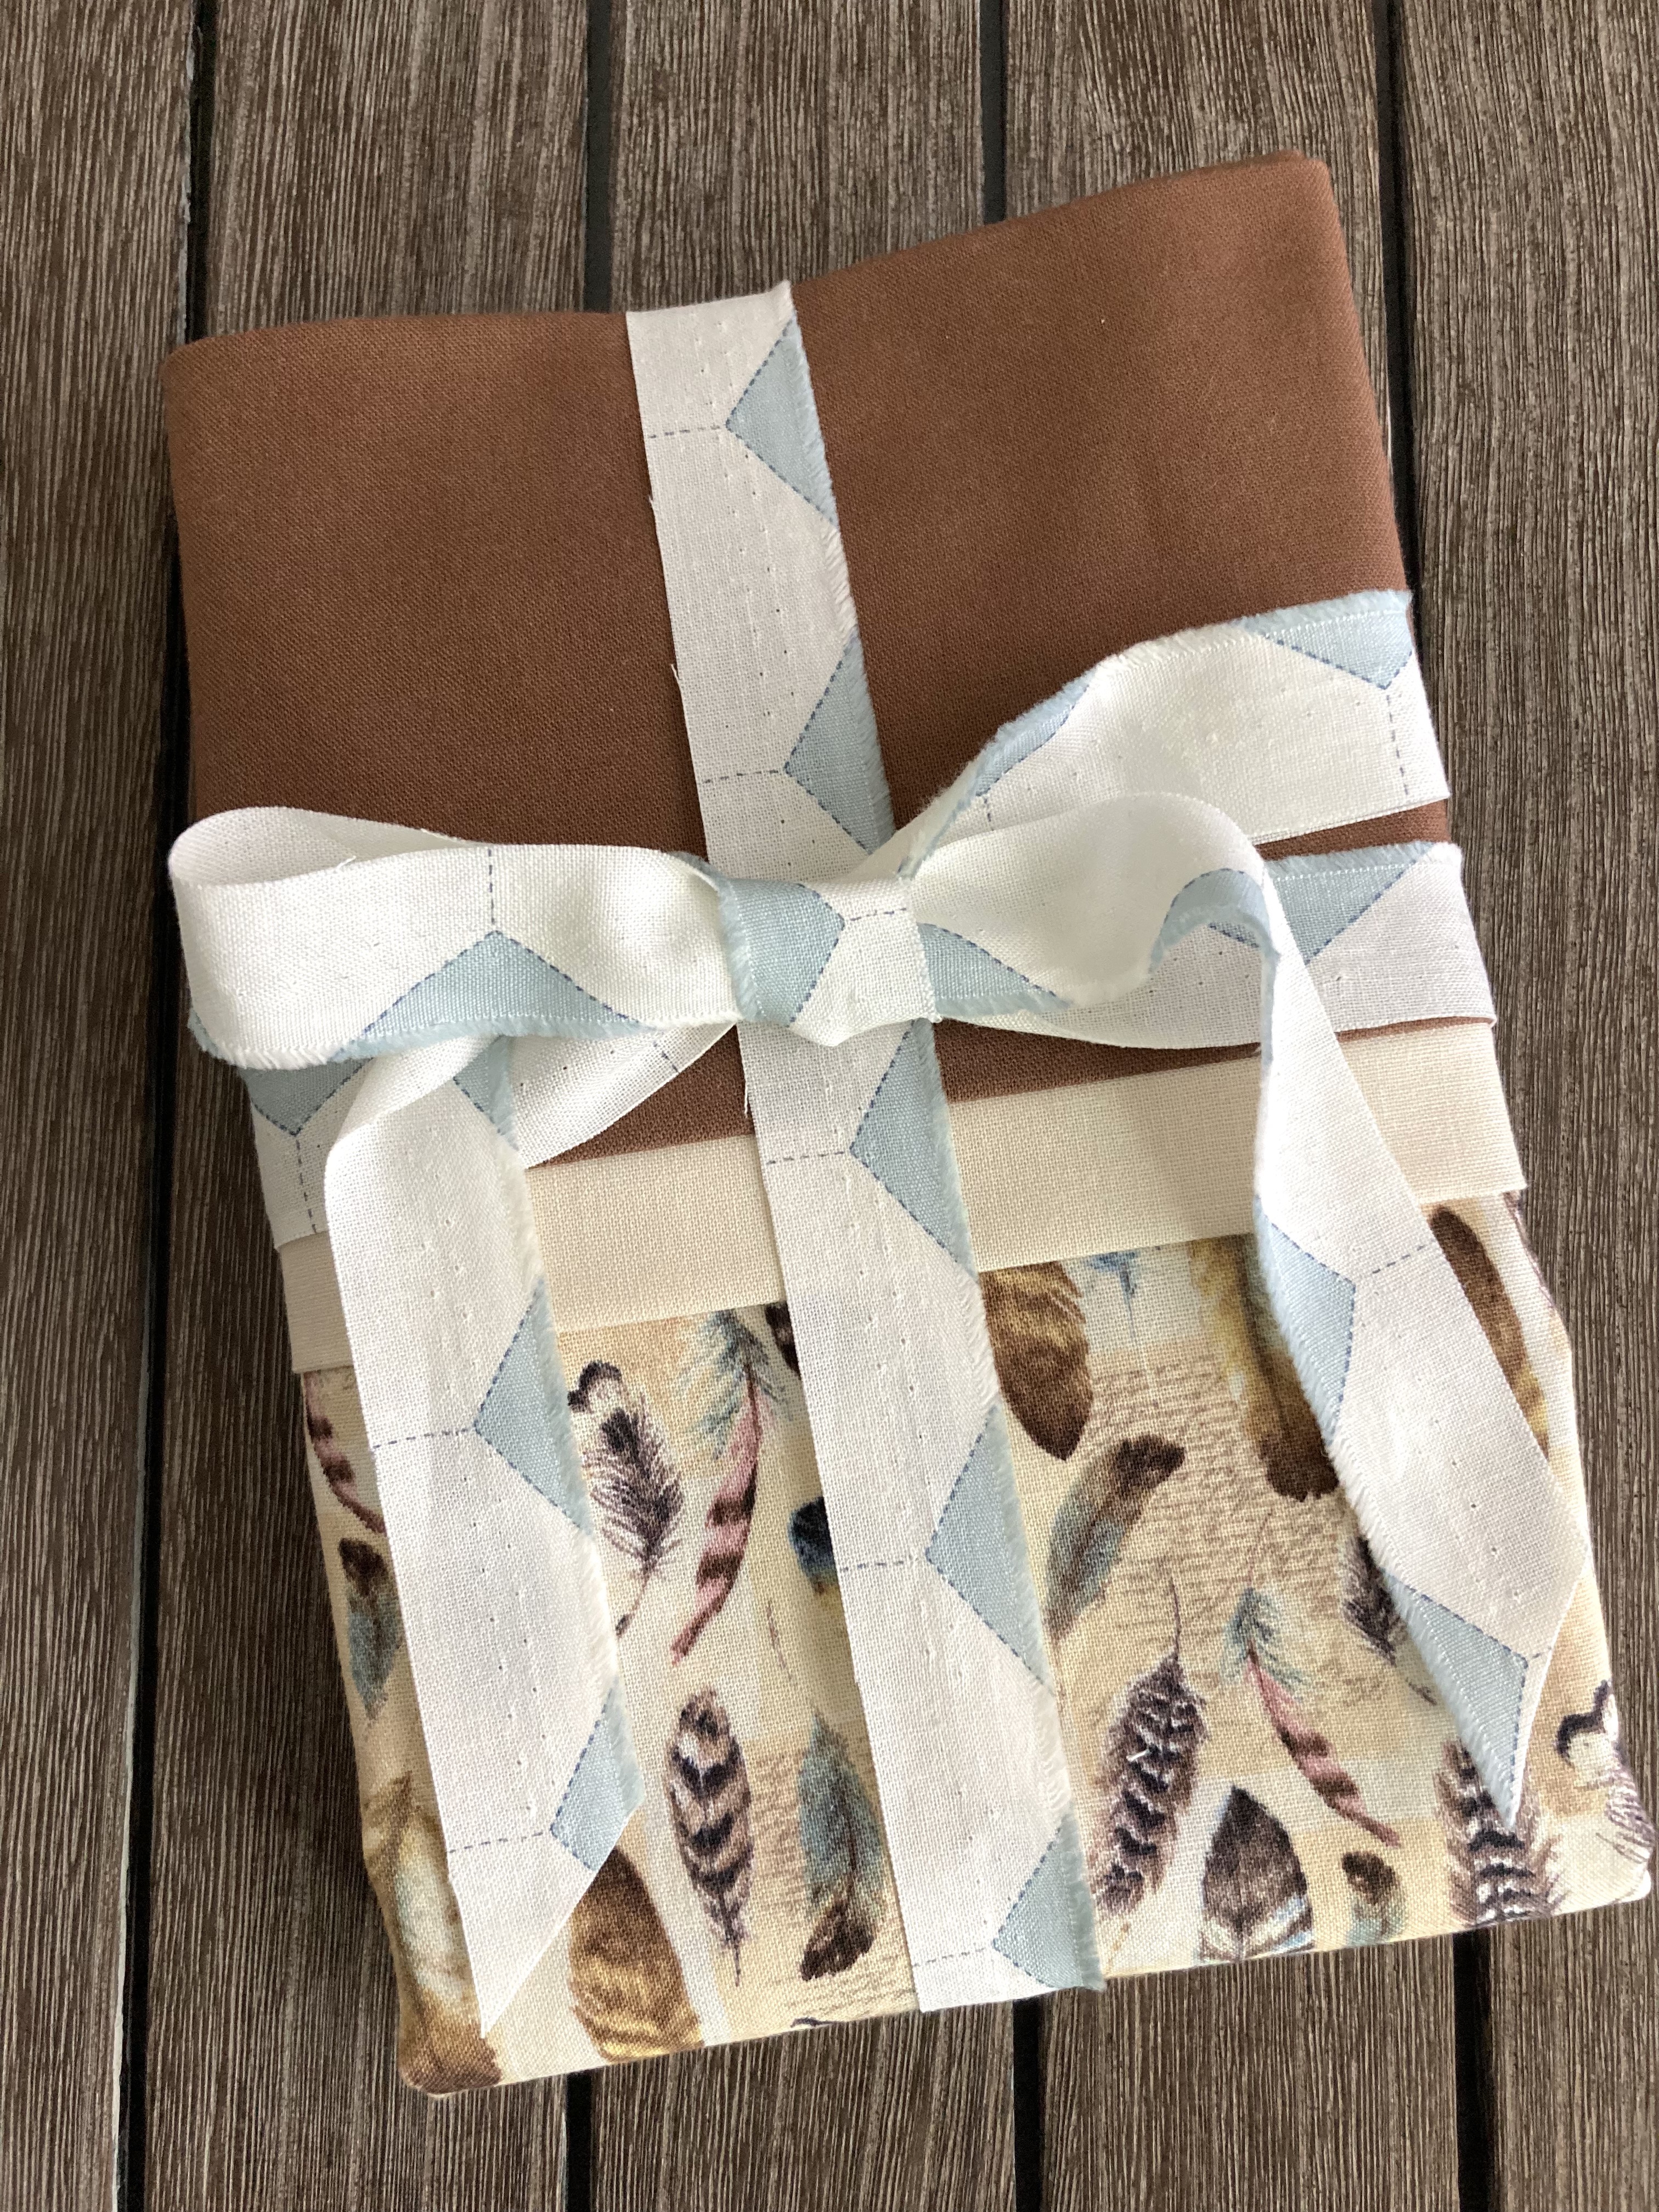
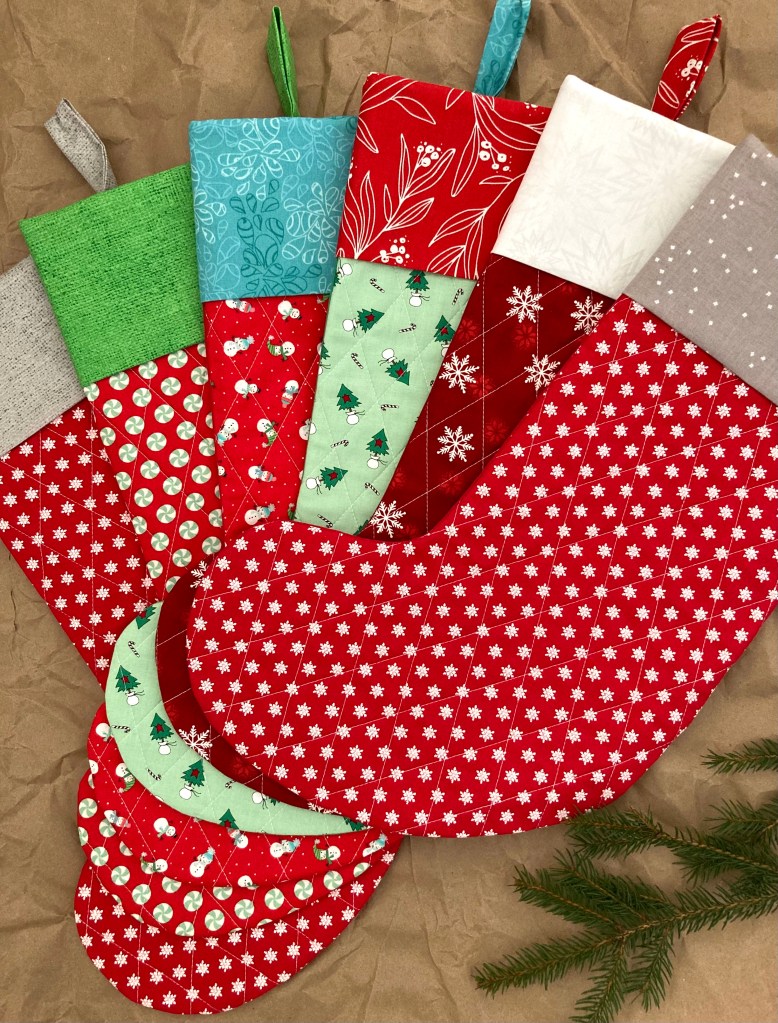
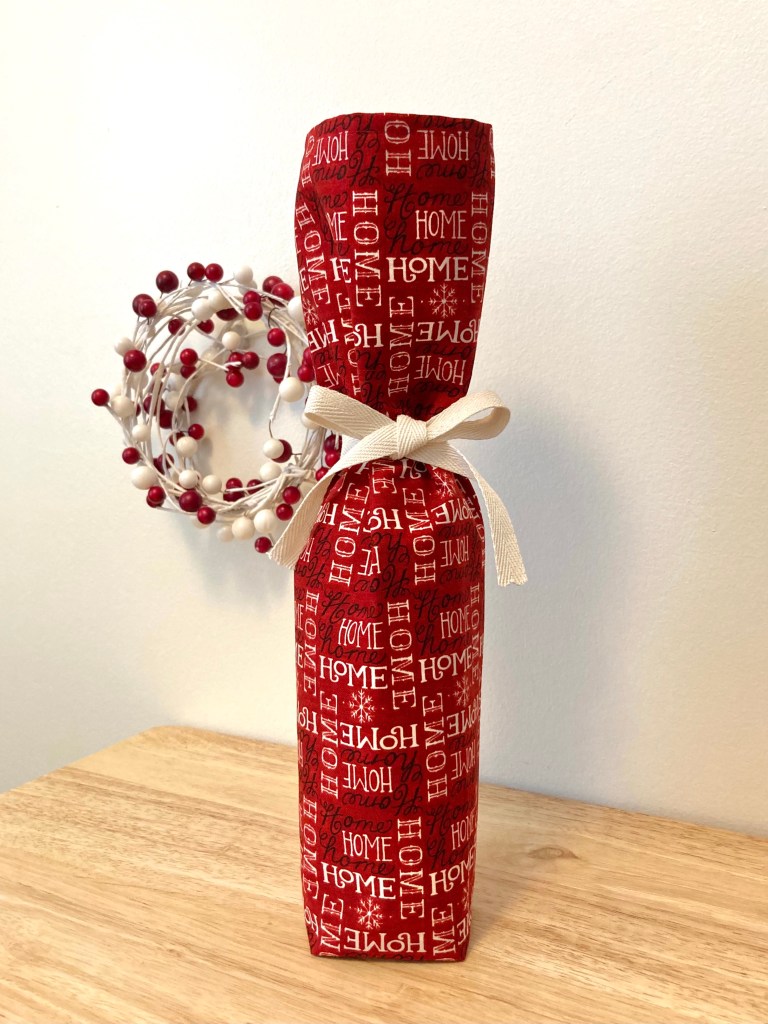
I figured the leftovers would be best showcased in smaller, festive projects instead of a quilt so I decided to make handmade stockings for my family and a wine bottle bag for a host/hostess gift for an upcoming holiday party.
As a side note, I’ve written a tutorial for making this wine bottle gift bag. It’s a really quick make and requires a small amount of materials. I’ll post the tutorial sometime soon!
To get started on the stockings, I did a bit of searching to find a tutorial that best suited my needs. I wanted to make them with a one-piece front and I wanted to quilt them. I found a pattern called ‘Stocking Up’ on the All People Quilt website that was exactly what I had in mind.
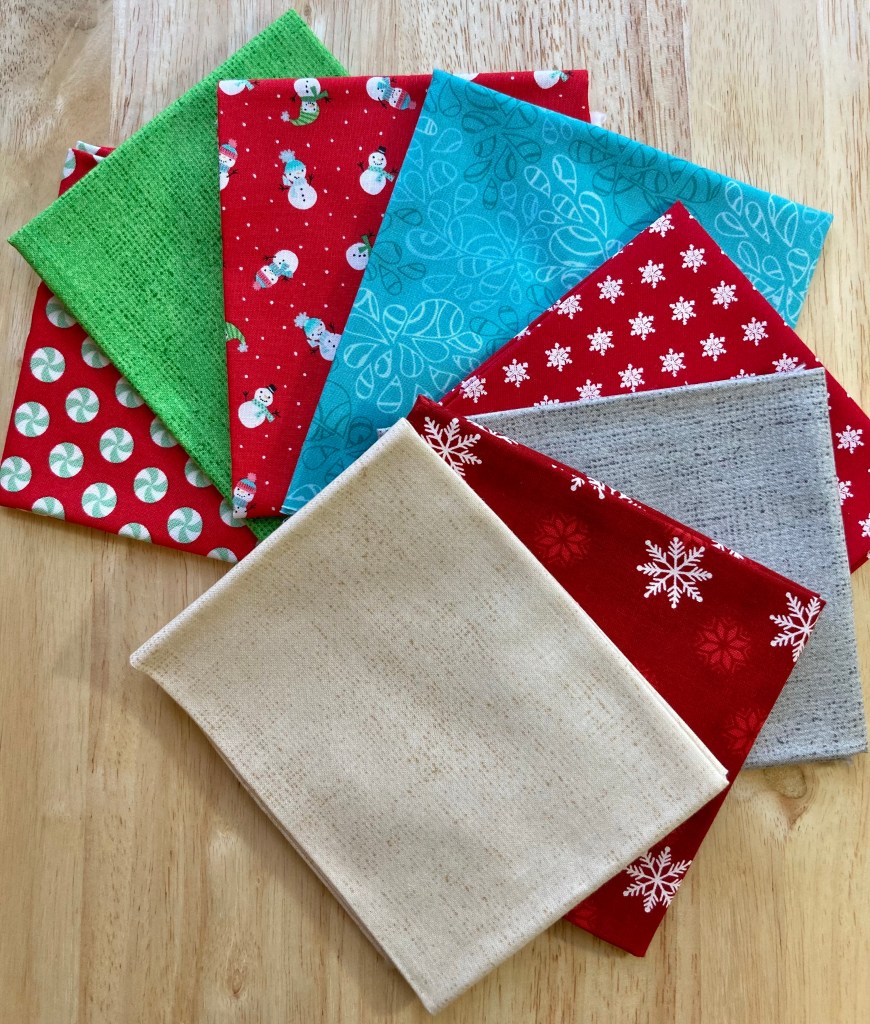
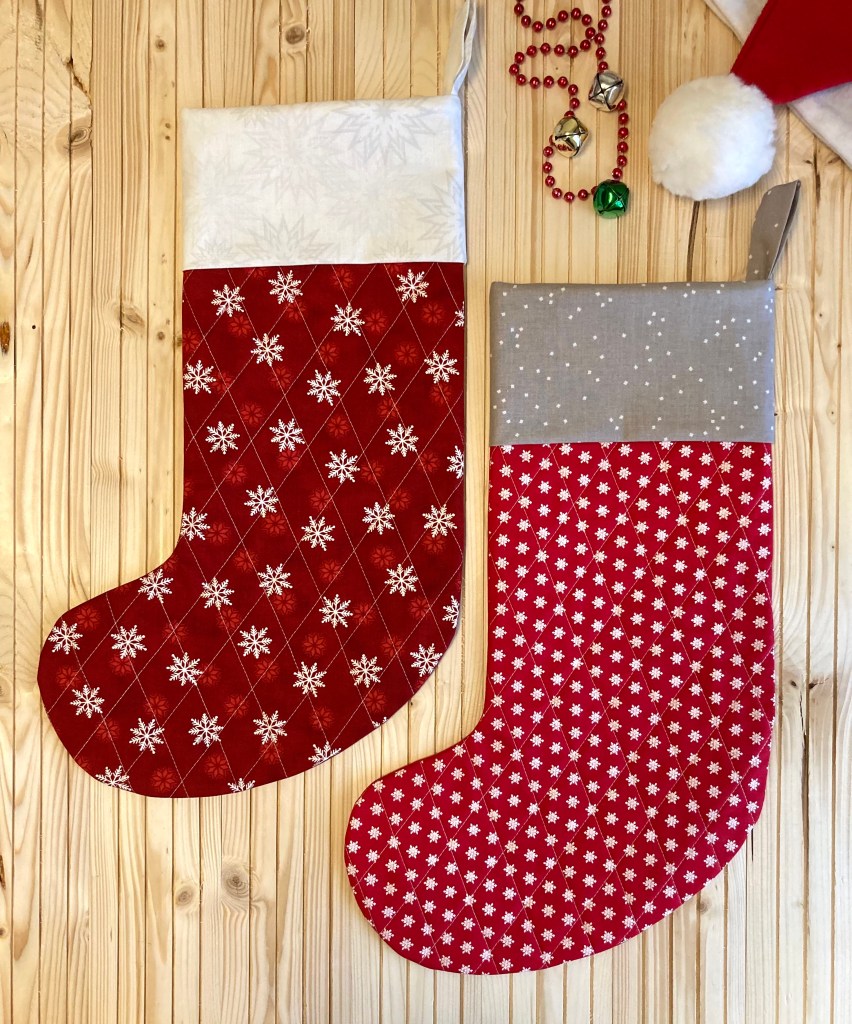
I was hopeful to get two fronts out of one fat quarter, but because all fat quarters are not cut equally, I was only able to get two out of one of them. Since I was making six stockings and one wine bottle bag, and I needed fabric for cuffs, I ended up going to my LQS for an additional fat quarter.
I don’t have much of a stash but I was able to put together nice combinations of stocking fronts and cuffs with what I had on hand (one fat quarter shown ended up getting swapped out).
Having used fat quarters instead of yardage, I opted to sew a solid matching color for the backs omitting both the lining and quilting.
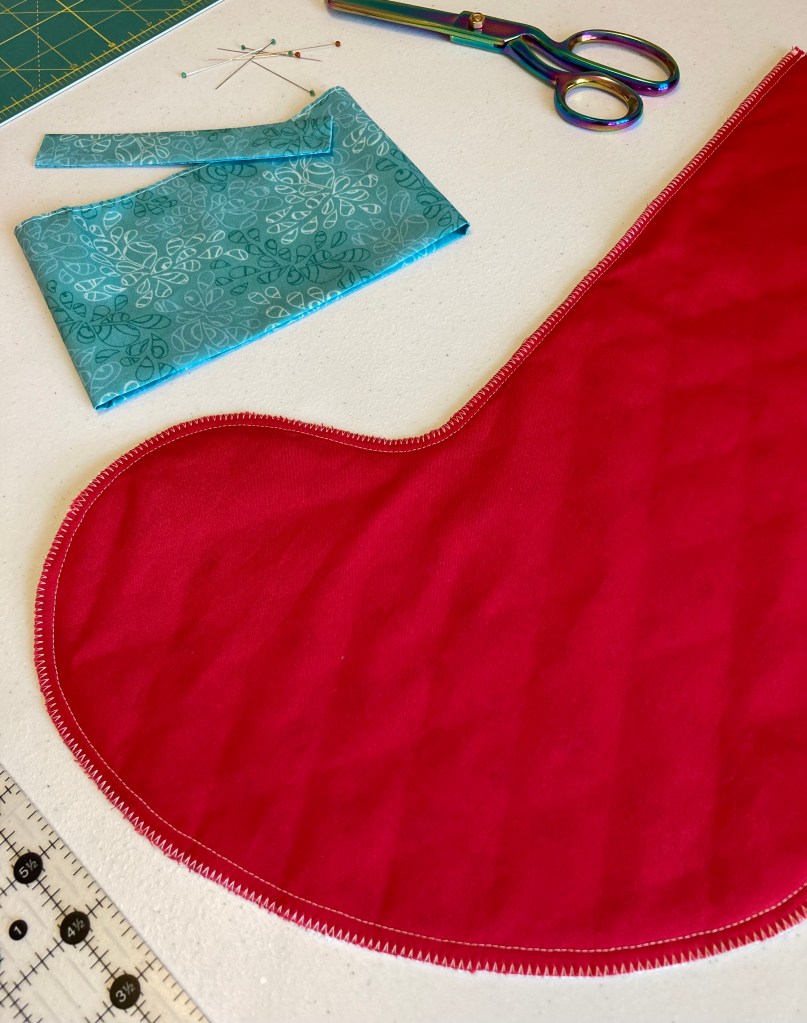
There were a few steps in the making process that threw me—I got confused trying to think inside out and backwards but I managed alright in the end. 😉
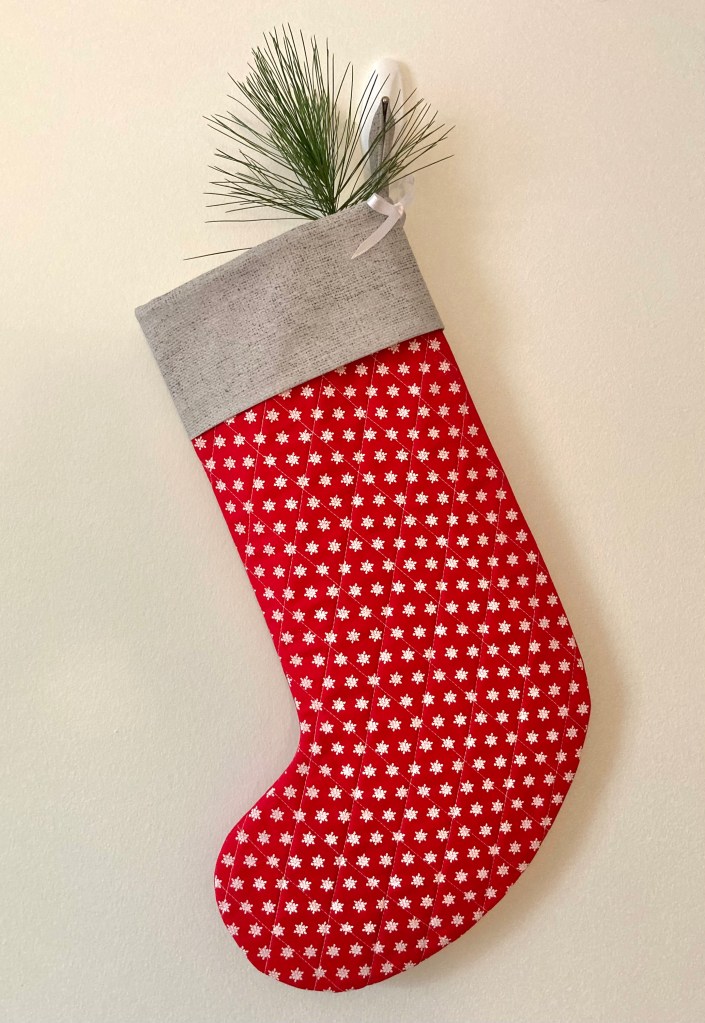
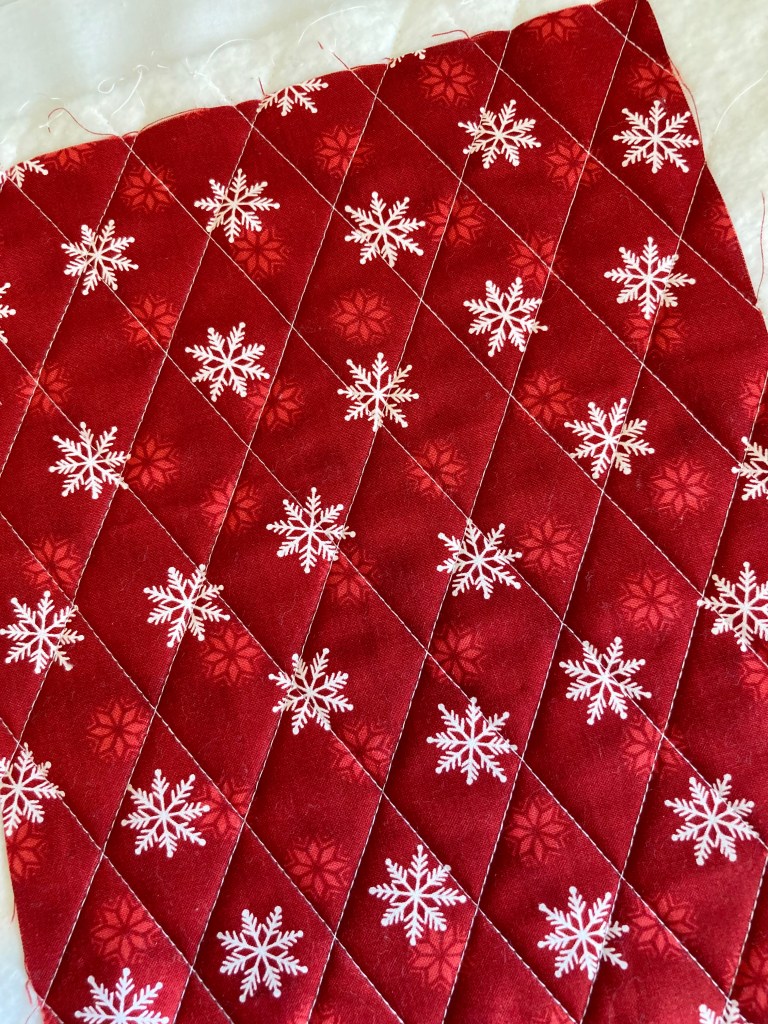
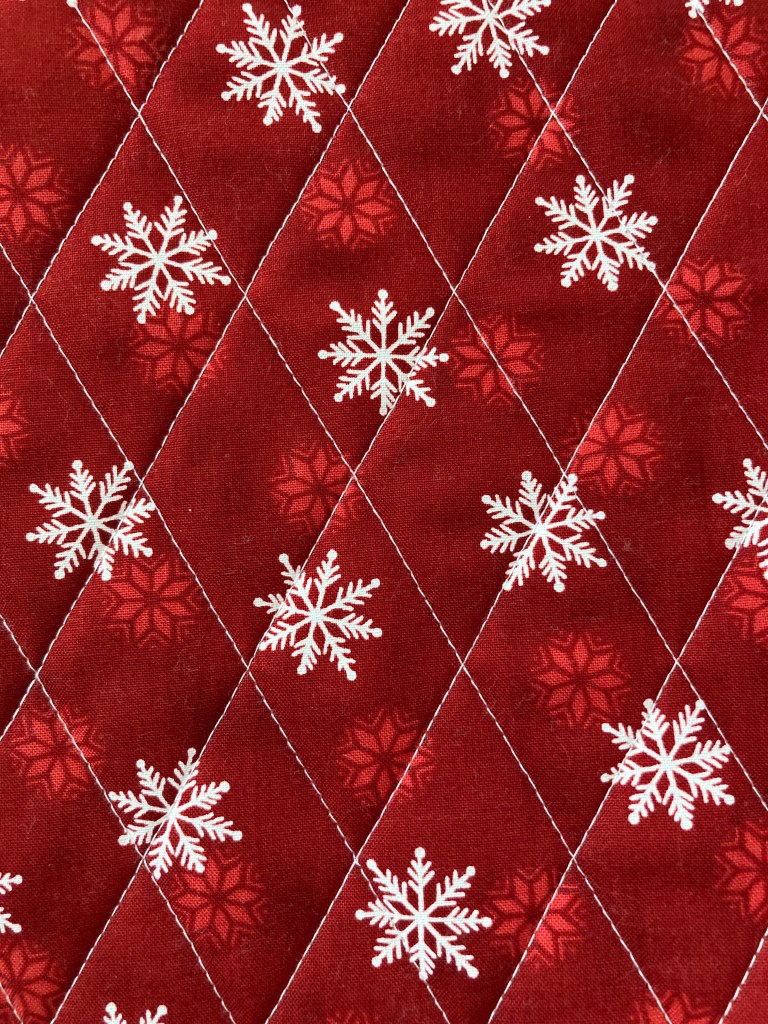
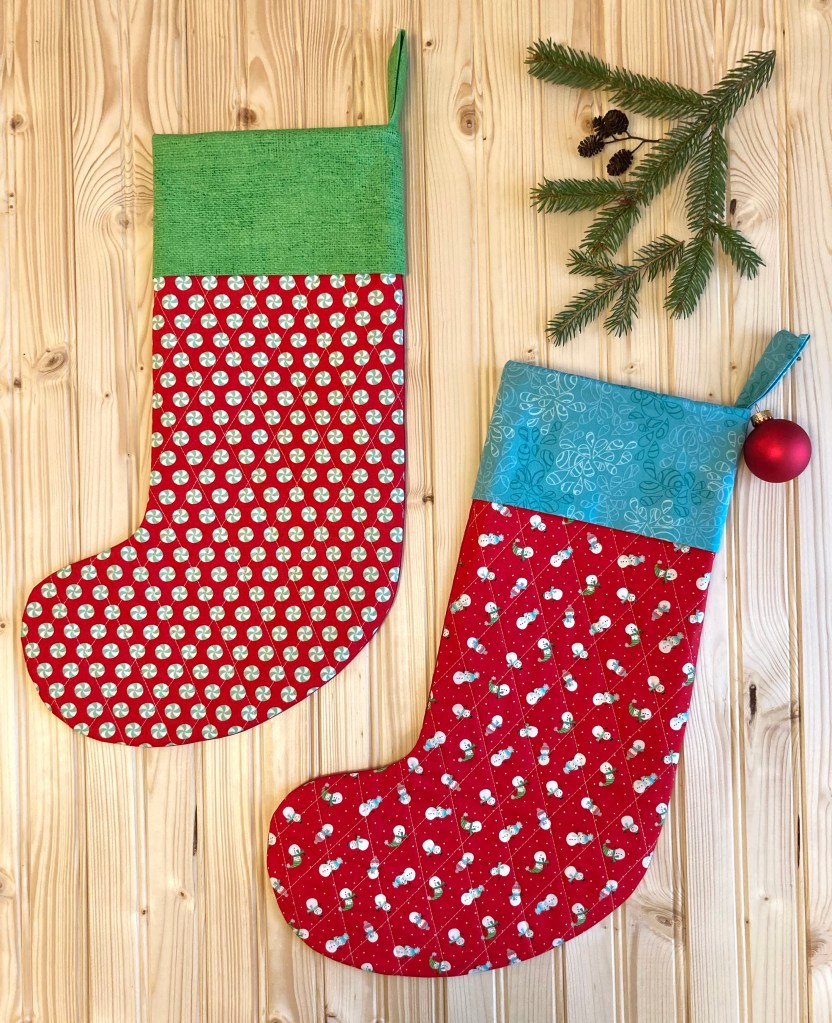
I chose to quilt all six the same. The front piece is a rectangle so I drew a diagonal line from corner to corner using a hera marker then quilted every 1 1/4″ with white thread.
I love the diamond pattern.
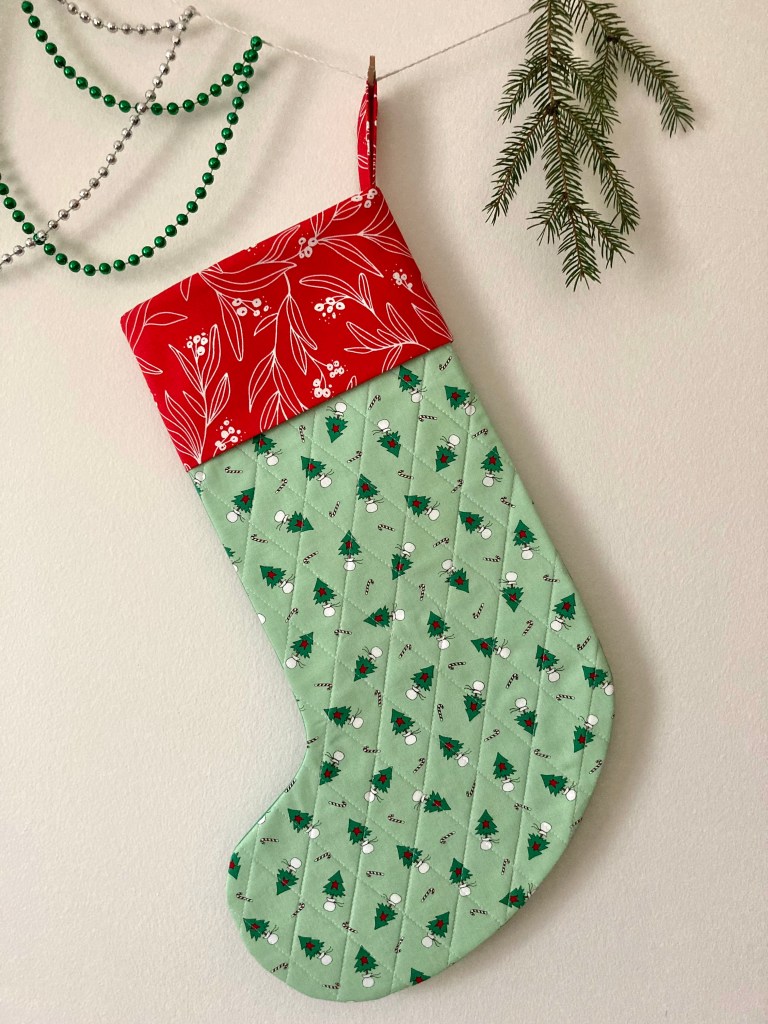
I also made my cuffs a 1/2″ longer than the pattern, just a personal preference.
I really like the variety of colors and fabrics, and overall this was a fun project to make this time of year. I’m very happy with them and I hope my recipients will be as well!