quilting, sewing, Uncategorized

Save that Selvage!

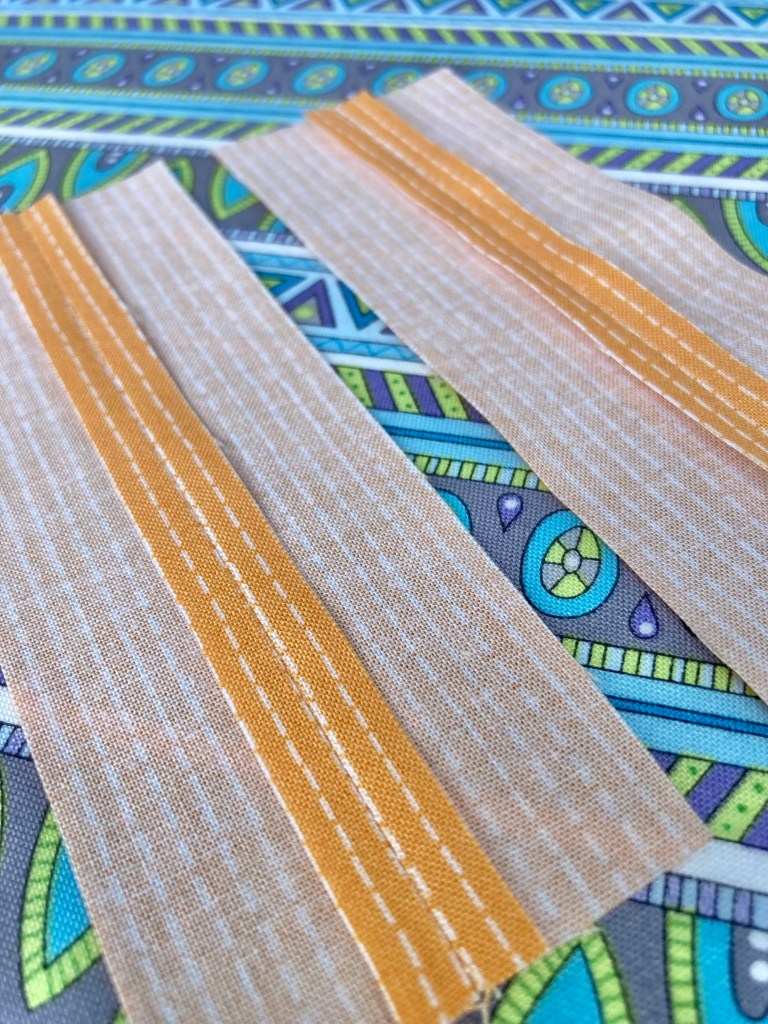
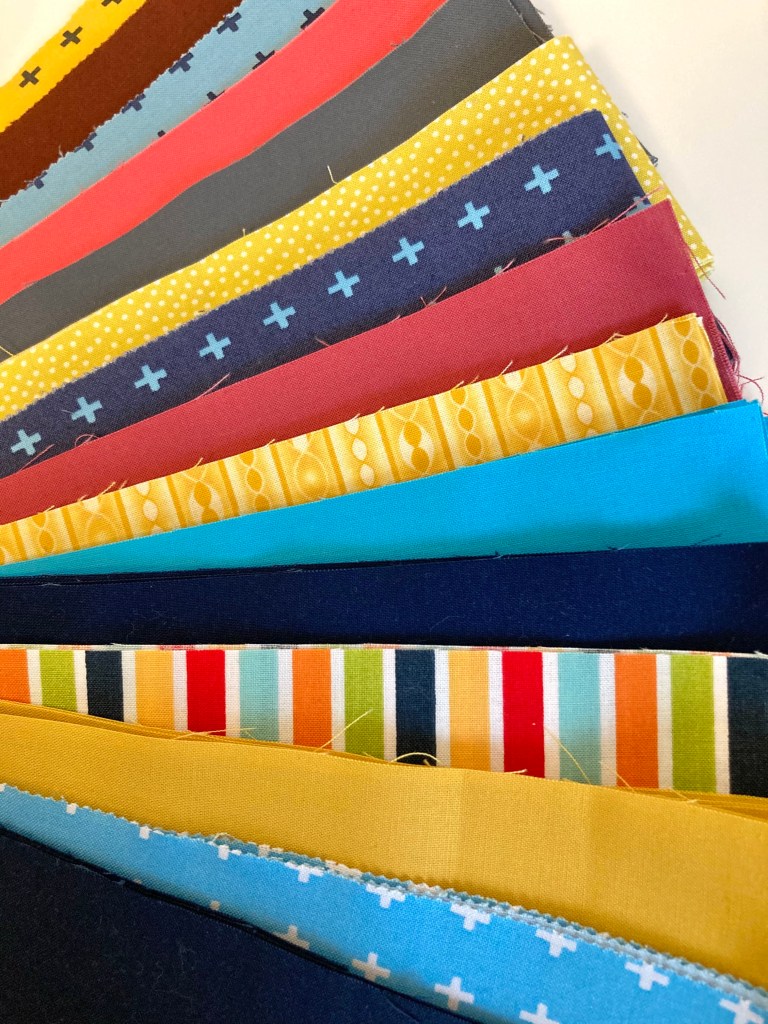
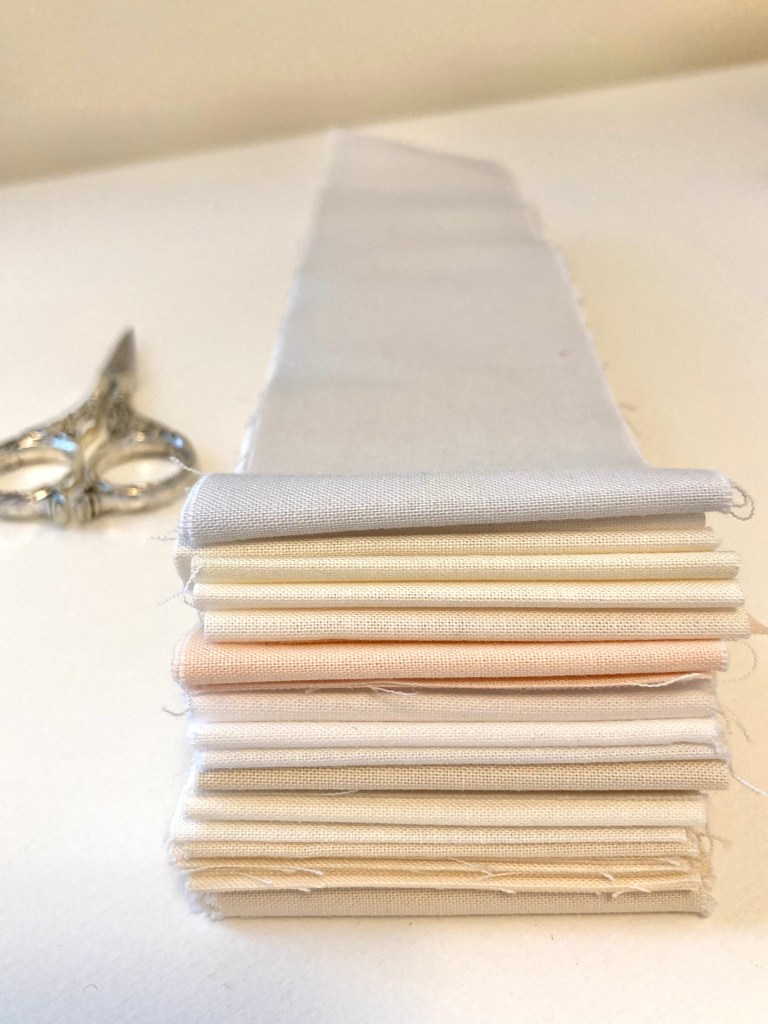
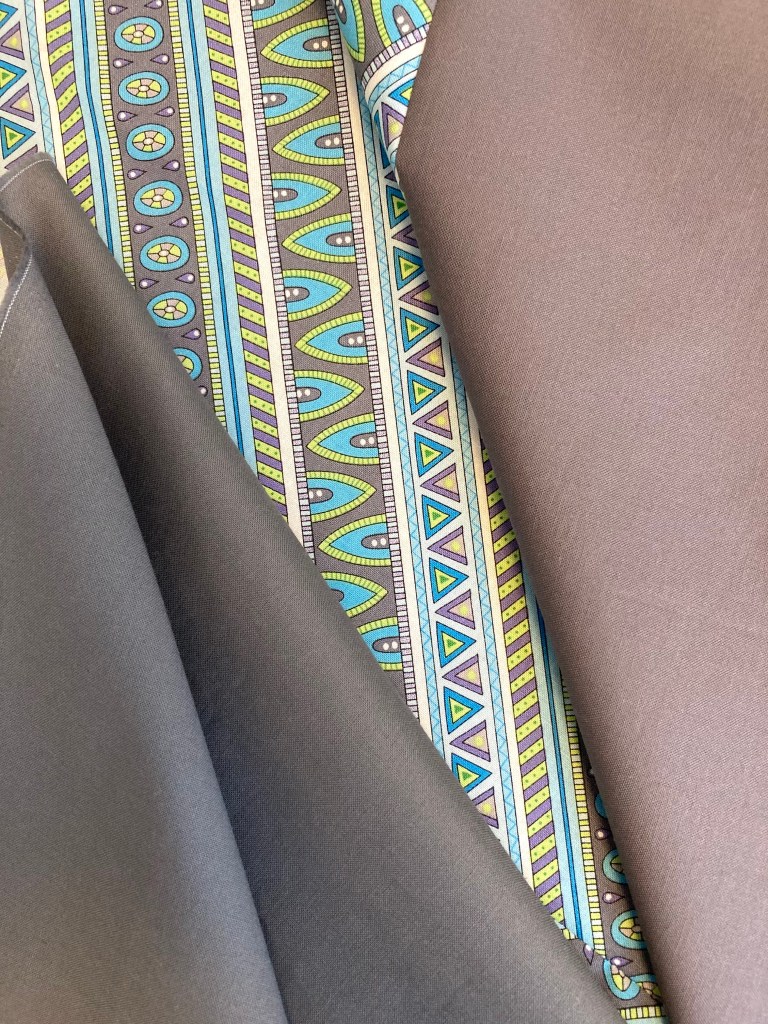
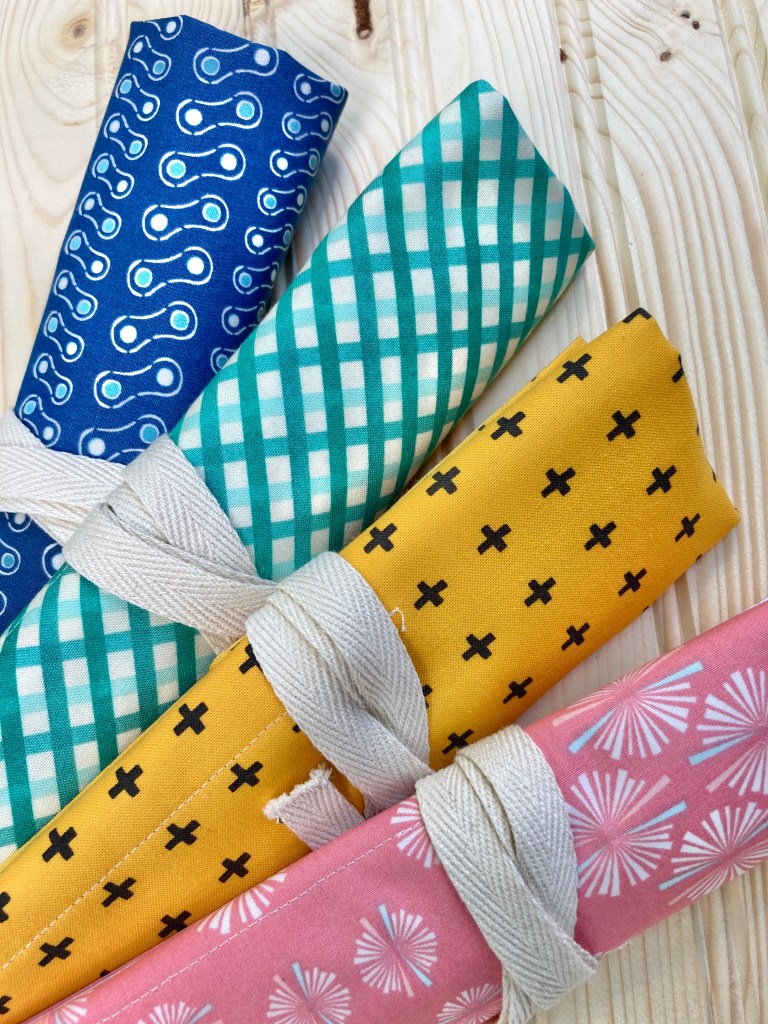
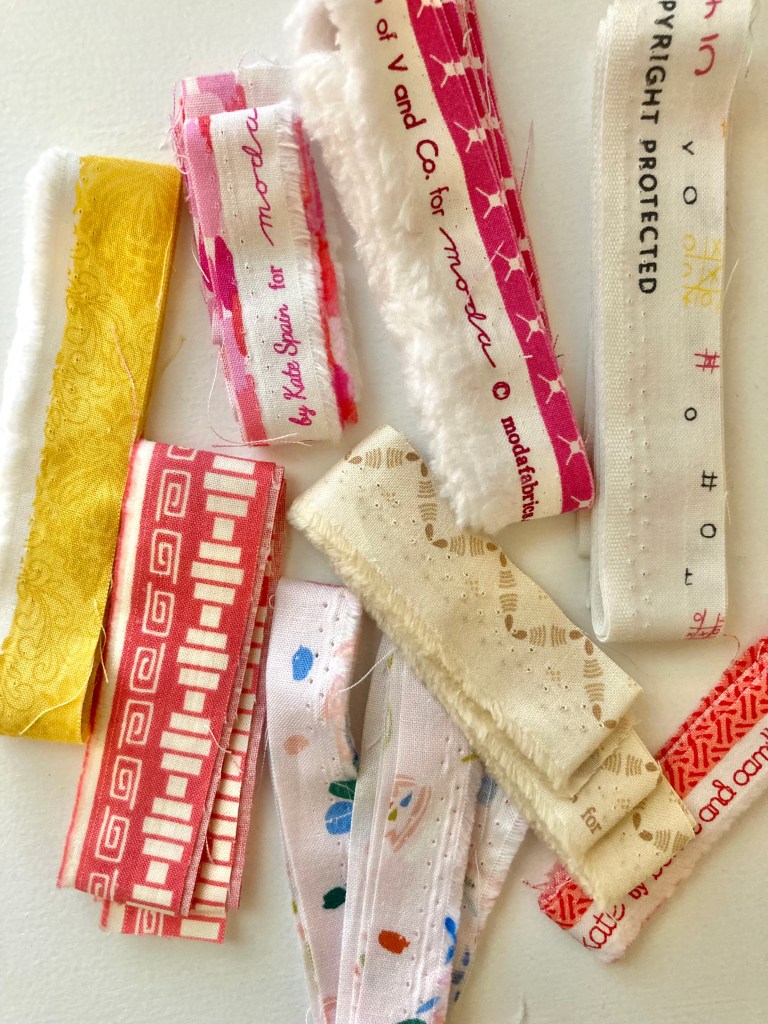
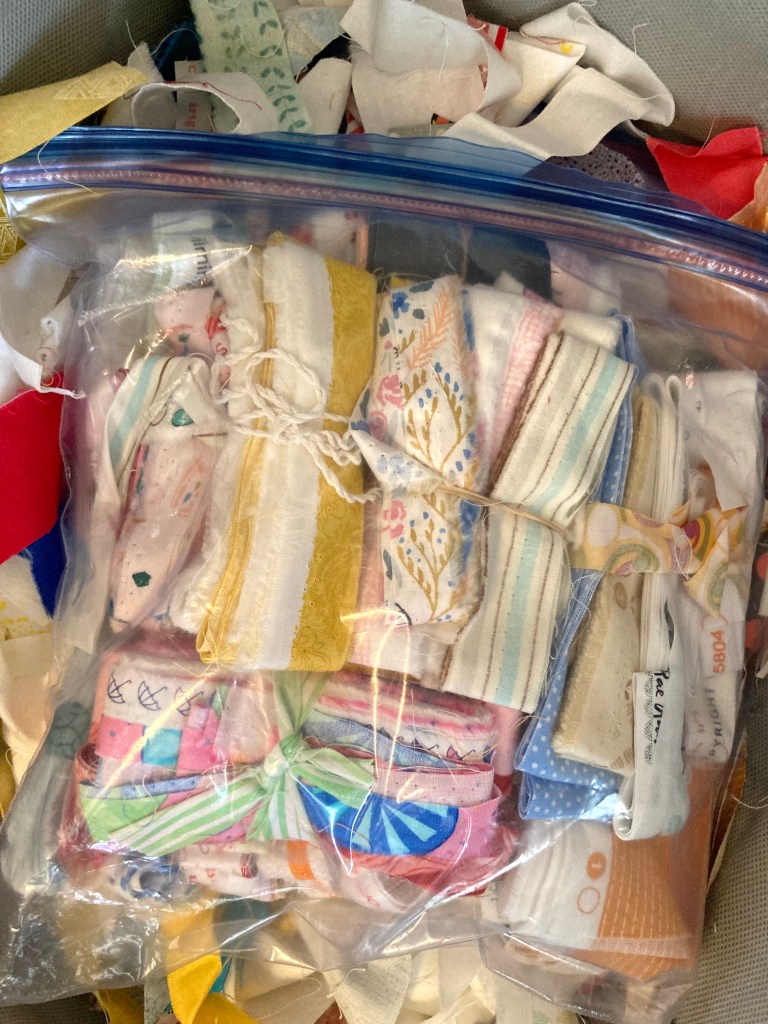
Ever since I started quilting I’ve been saving selvages. Even though I have plenty, I can’t seem to stop saving ones that have fun sayings and cute drawings printed on them.

Since I like to keep things to a minimum, I’ve found a great way to use some of those selvages—wrap them on gifts instead of ribbon—and this is the perfect time of year to do so.

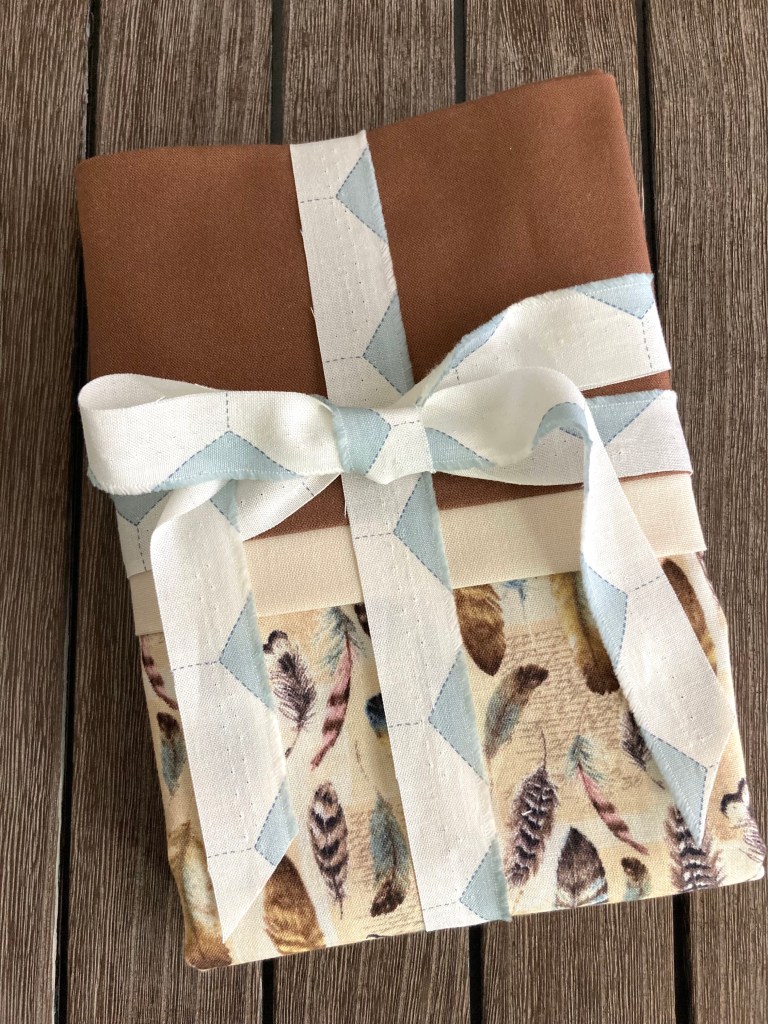
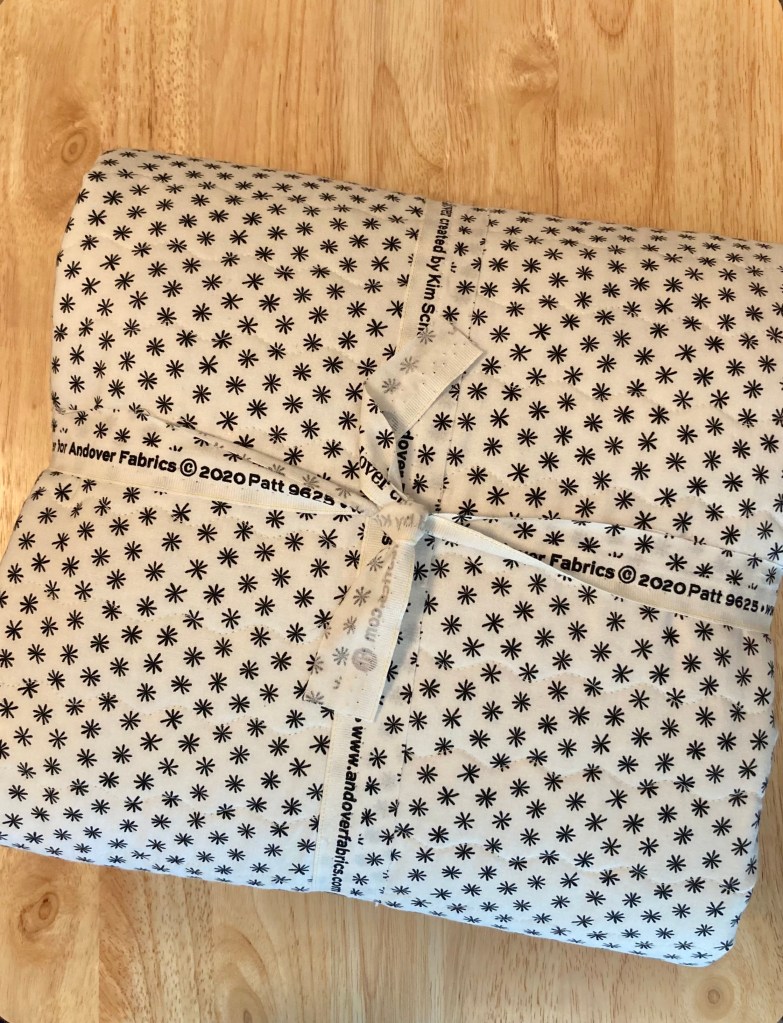
Each Christmas I like to give my family members something handmade, and because everyone has received at least two quilts from me, I’ve had to think of other things to make. For the last few every years I’ve gifted my husband a bird-themed pillow case wrapped with colorful selvage.

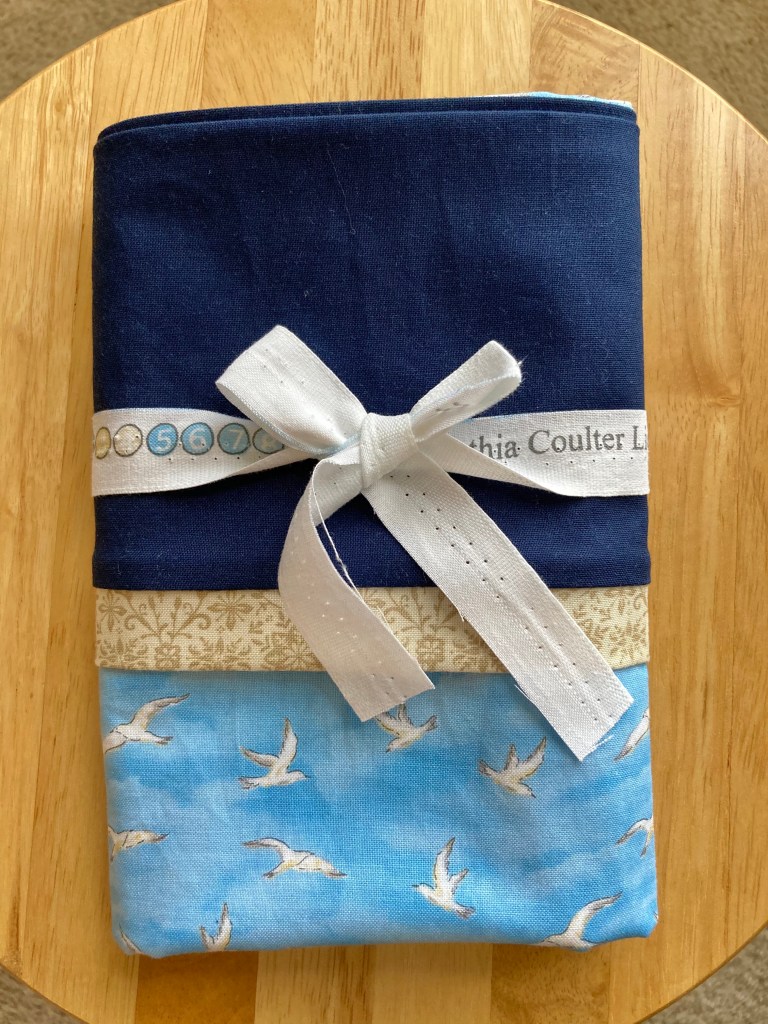
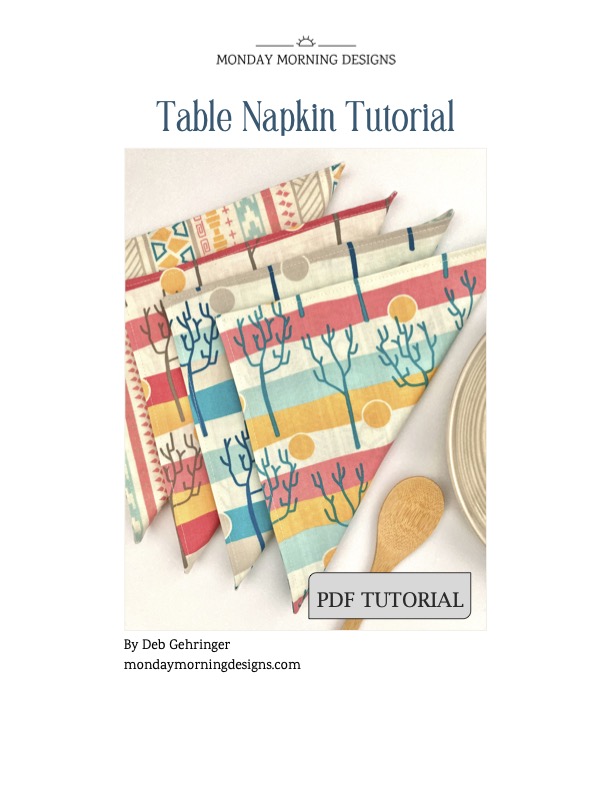
Other gifts I’ve dressed up by using selvage is table napkins made for my kids. When I completed this set I wrapped it with selvage and tied a pretty bow. I think it classes up the bundle and makes a nice presentation.

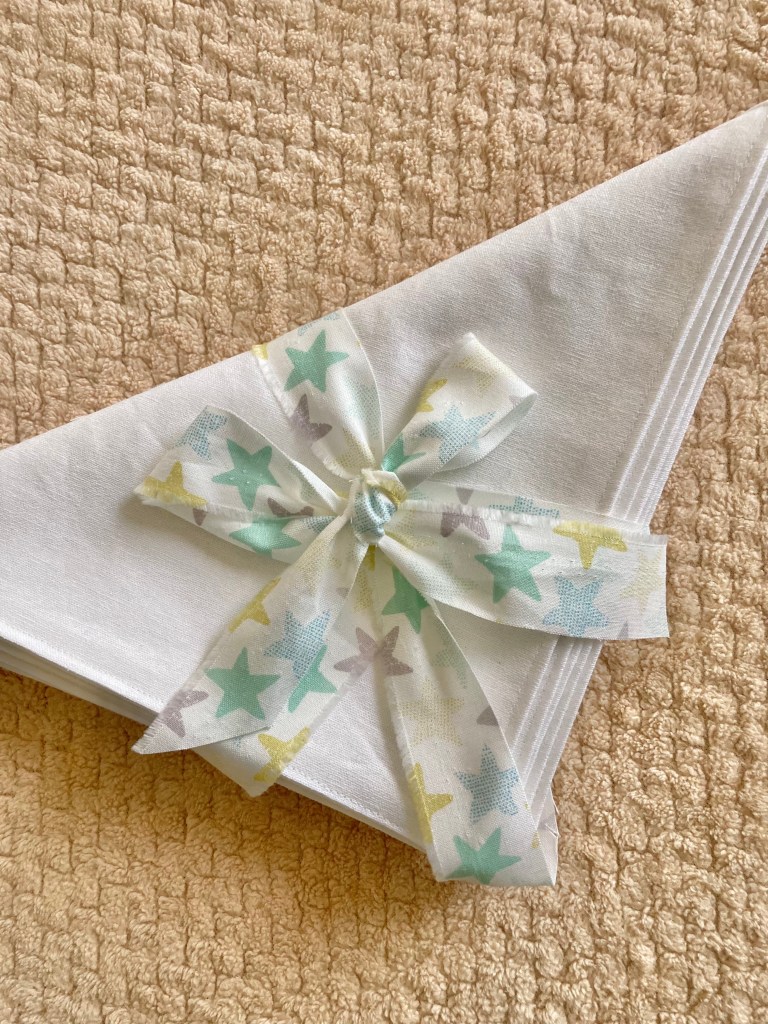
(If you’d like to make table napkins for yourself or as gifts, I have a PDF Table Napkin Tutorial available).

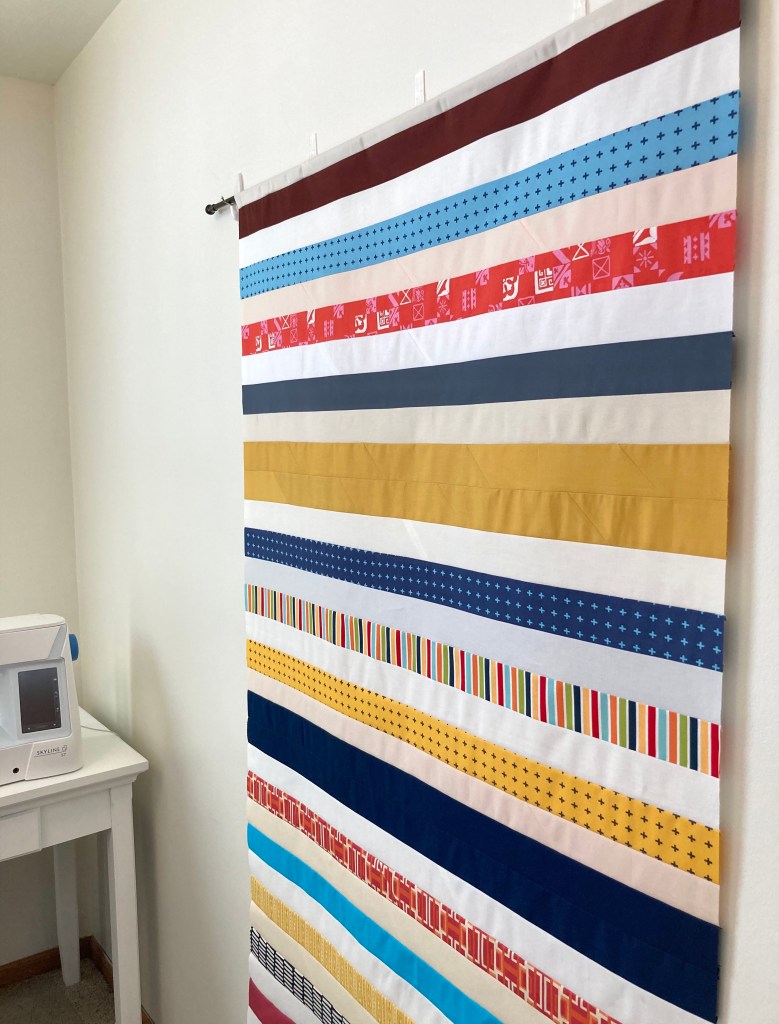
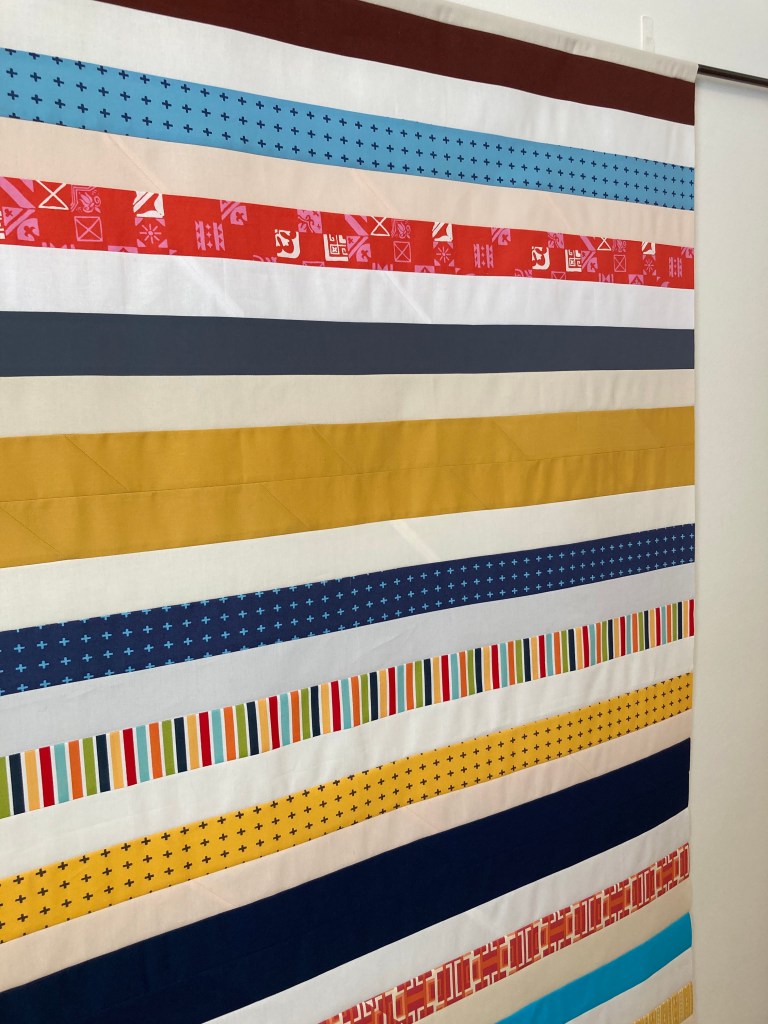
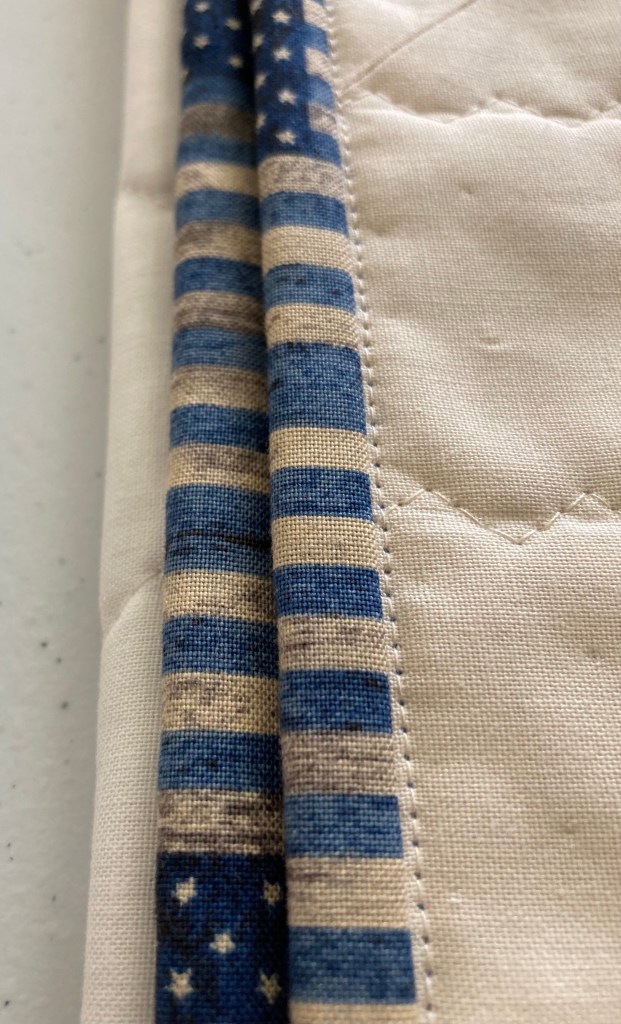
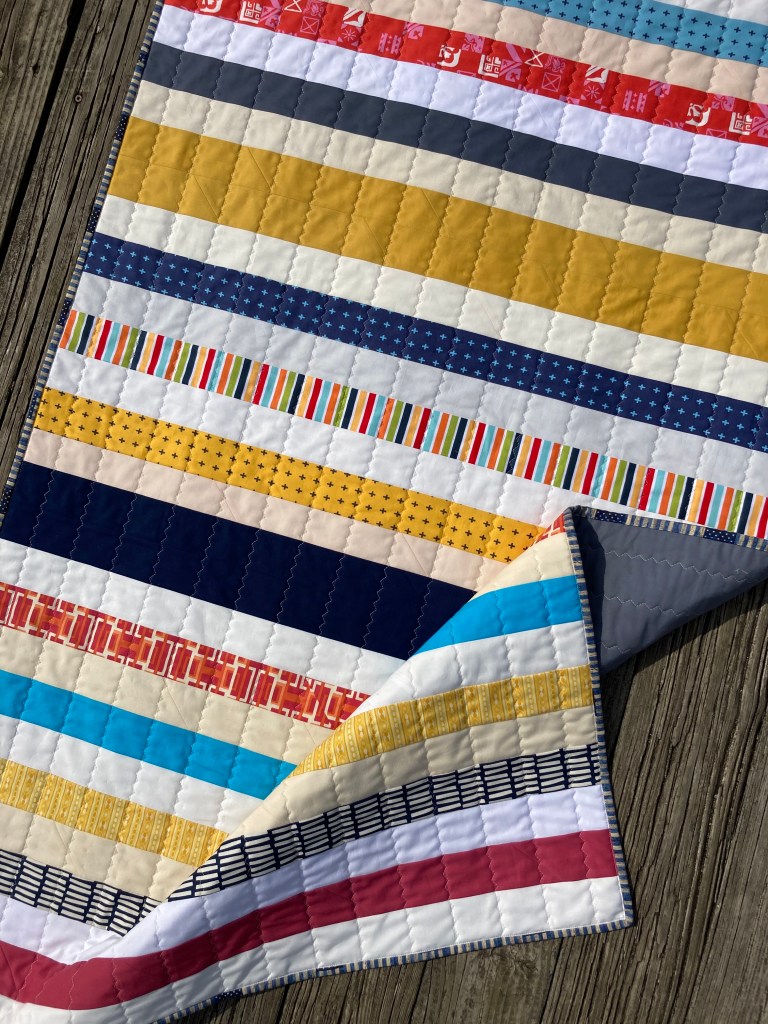
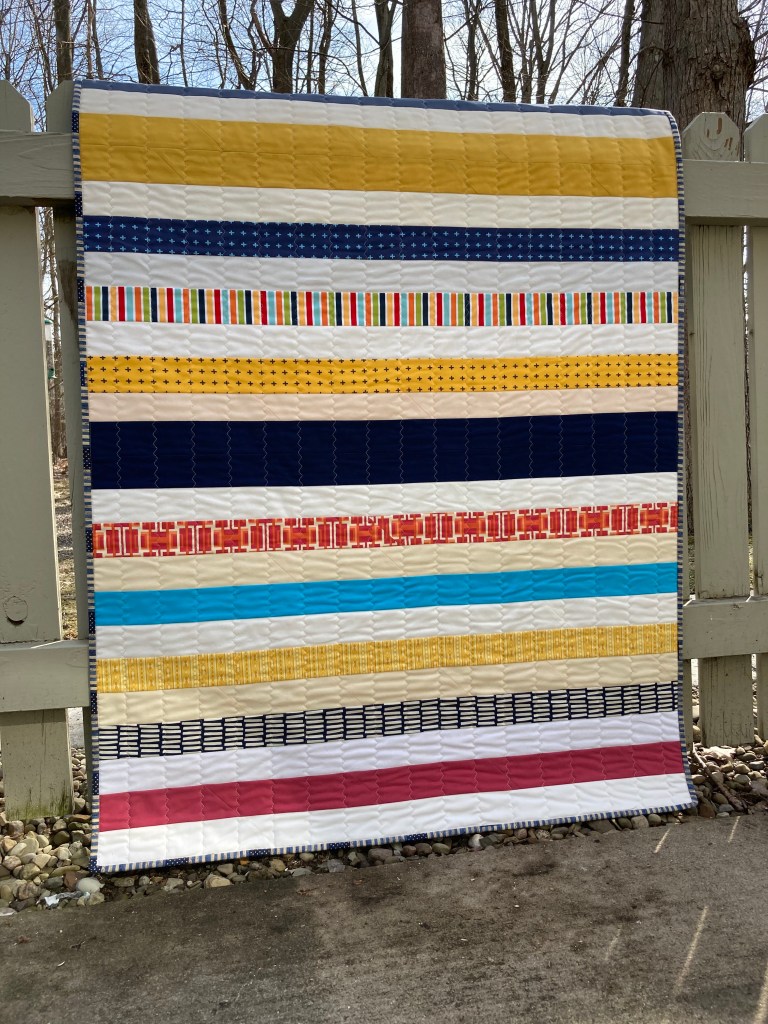
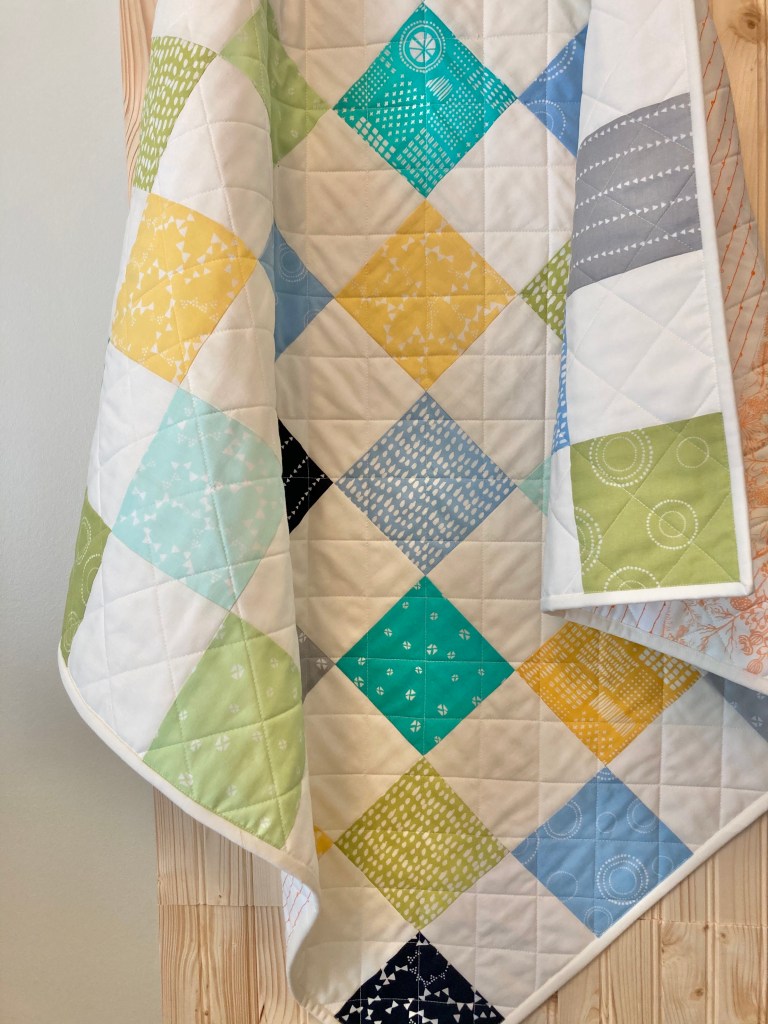
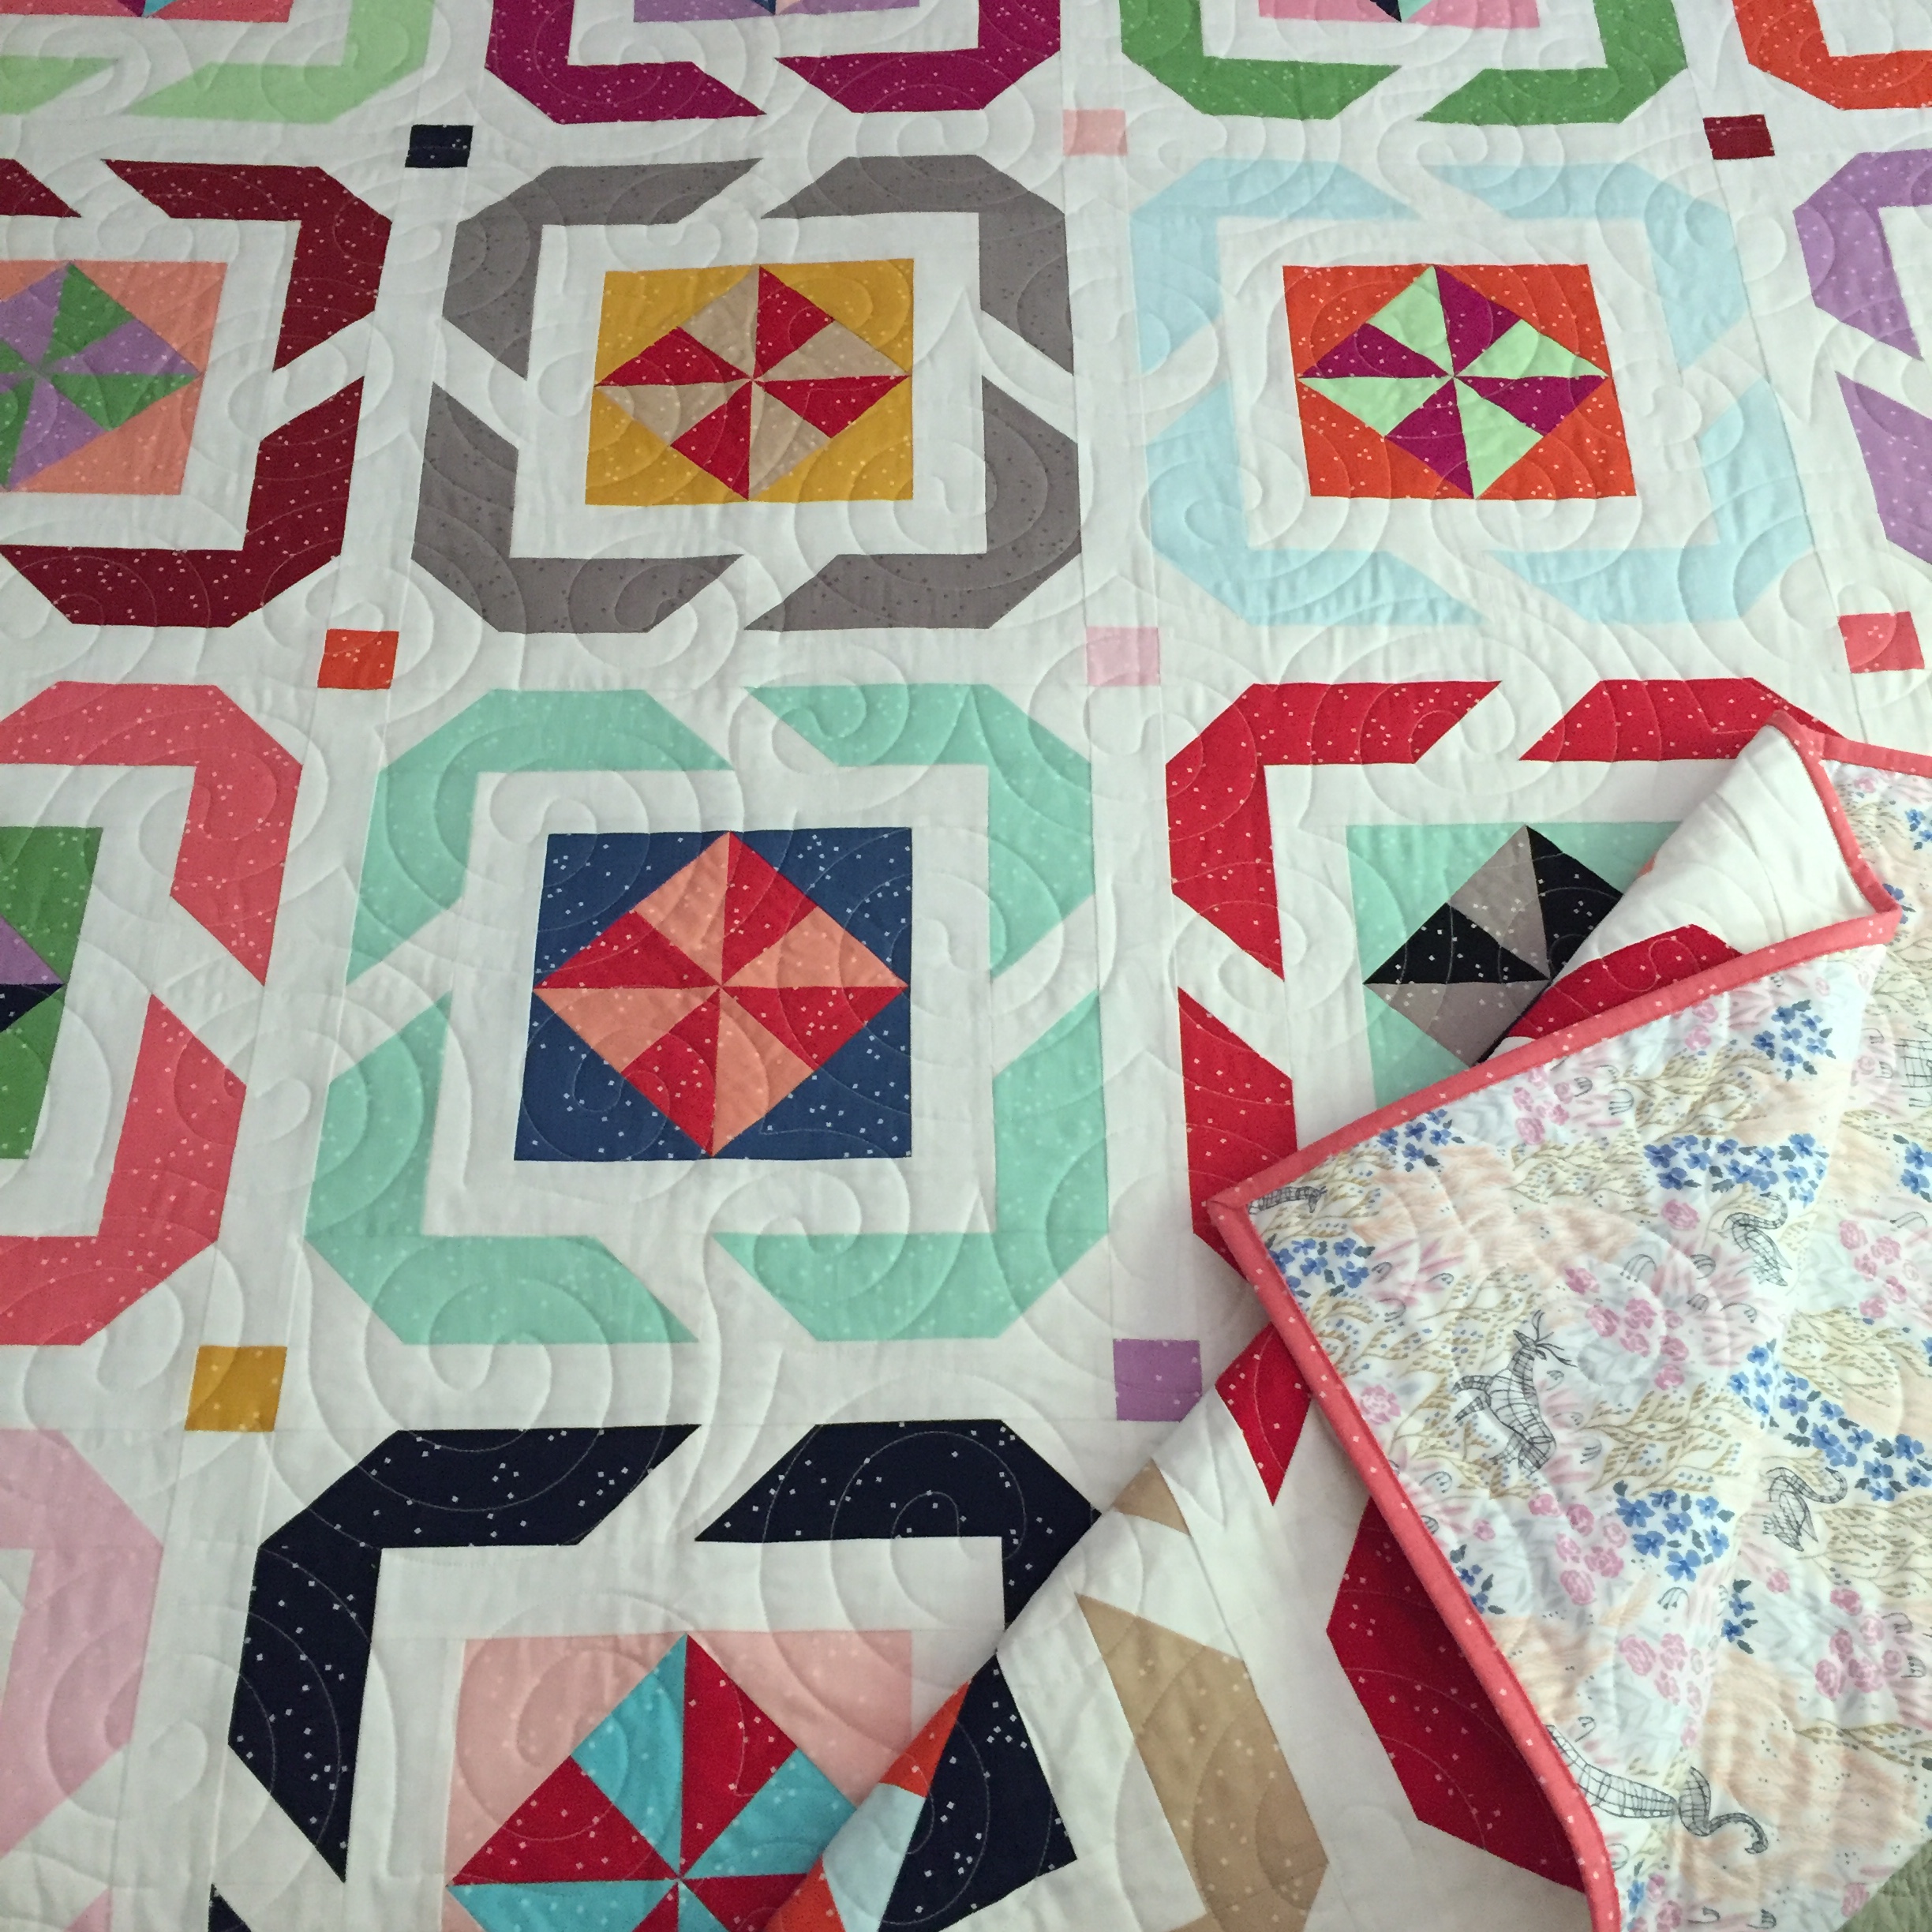
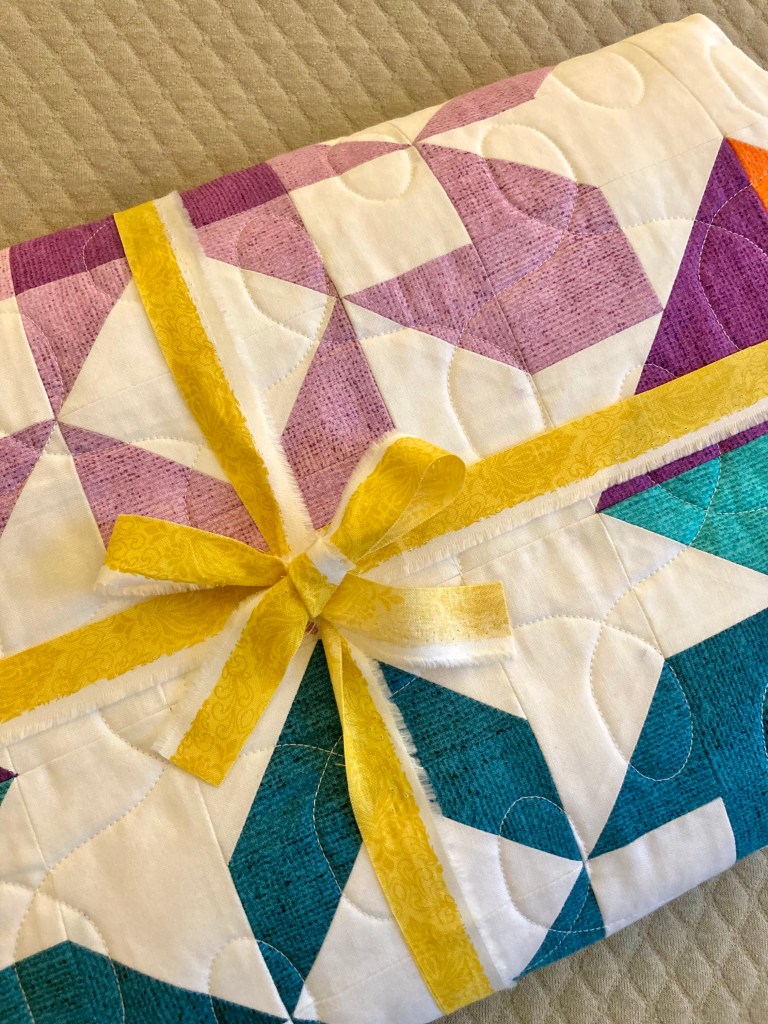
Of course another good way to use selvage is wrapping and gifting a quilt. When I gift a quilt I always find a selvage that compliments the fabrics. By doing this there’s nothing to buy and I’m ready to gift or ship without doing any shopping. Nothing like saving time and money!

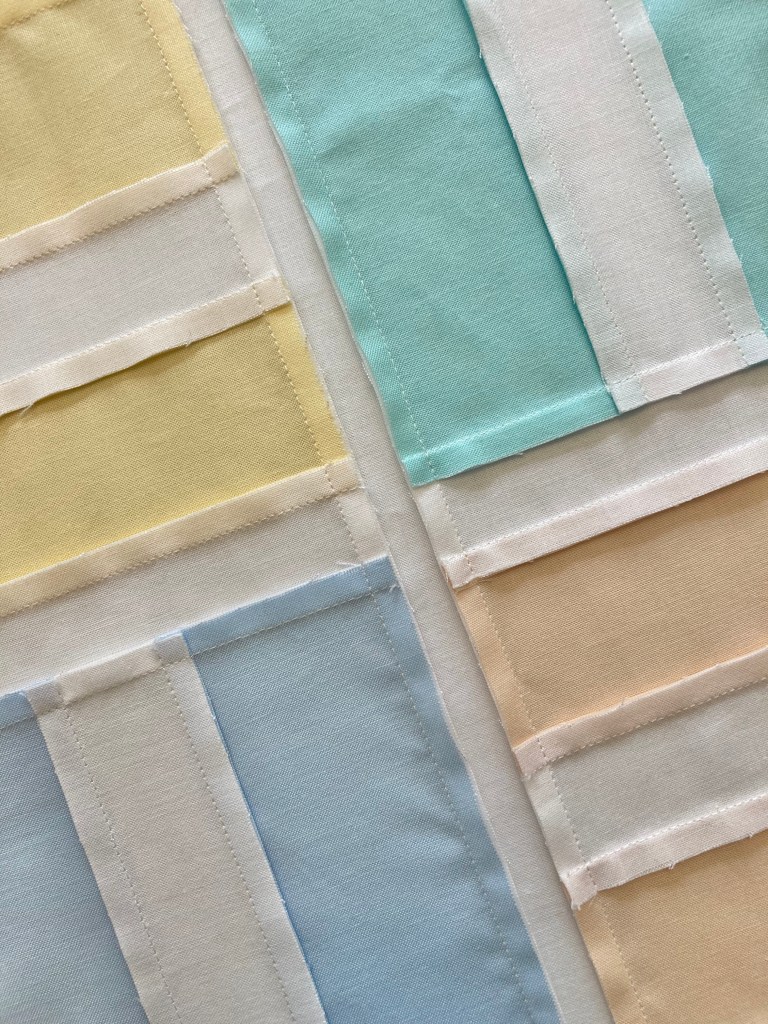
Another bonus to saving and using selvages is that they’re really easy to store. I just bundle a few together, place them in a large zip-lock bag and keep it in my scrap bin. It doesn’t matter that they’re creased and wrinkled, just press and trim when needed.

Not only does this put pretty selvages to good use (that may otherwise be tossed out), it’s convenient and environmentally friendly! 🙂

how to, PDF download, sewing, tutorials, Uncategorized

Table Napkin Tutorial

For most quilters, managing stash is an ongoing process—as long you keep sewing, you keep ending up with left over fabric, especially with precuts.

Early this spring I finished a quilt using a layer cake I’d had since 2015. (Wow!) When the quilt was complete, several 10″ squares were left. I knew I’d never use them in a quilt and I didn’t want to store them, but what could I do with a dozen precut squares?

After considering a few options, I decided to make reusable table napkins for everyday use. And because I like all things environmental, it was a fun and practical choice.

These napkins finish around 8 1/2″ square and they’re so easy to make. If you’ve got any 10″ squares lying around, download this detailed Table Napkin PDF tutorial and start stashing down!

Christmas, mini quilts, modern quilts, monday morning designs quilt pattern, patterns, quilting, Uncategorized

Holiday Sewing Projects

Even though summer has just left us, now’s the time to get started on our holiday sewing projects. It’s definitely not too early especially if you plan to make a quilt and would like to have it finished in plenty of time.

I’ve noticed a lot a quilt patterns out there are so close to being the same as one another, and well, it’s getting kind of old. In order to make what change I could, I decided to design something completely different, and what better subject is there than the holidays? So last year I set to work and came up with my Holiday Hemlocks throw quilt in two versions, Scrappy Holiday Hemlocks PDF pattern

and non-scrappy Holiday Hemlocks PDF pattern (both available in my Etsy shop). Additionally, I have a Holiday Hemlocks PAPER pattern available for those of you who prefer paper over digital, and shipping is FREE!

There’s no denying this quilt design is definitely different than any other holiday quilt, right? Well, that’s exactly what I was going for. But different doesn’t mean difficult. 😉

Here are a few things I’d like to note about these quilts…they’re traditionally pieced with no tricky blocks involved, and the patterns are suitable for anyone who has made only a couple of quilts! In fact, one of my testers was an absolute beginner and hers turned out great.

My patterns are always clearly written with step-by-step instructions, there are also plenty of detailed, colorful diagrams throughout.

Don’t have time to make an entire quilt? Try this festive little mini instead—Wee Three Trees.

This pattern is by far the best seller in my Etsy shop. I made the one photographed here for myself, but I’ve made several of them for gifts, too. Wee Three Trees is a relatively quick make, you could easily whip one up in a weekend.

If you like both designs AND want to save some money, I offer Wee Three Trees and Holiday Hemlocks Pattern Bundle for a lesser price than buying them separately. The same goes for the Wee Three Trees and Scrappy Holiday Hemlocks Pattern Bundle. No matter what you choose, I’ve got you covered.

Lastly, if you don’t shop on Etsy and would like an alternative, all my patterns can be found at: https://payhip.com/MondayMorningDesigns.

I hope you find your next holiday project here. 🙂 Happy sewing!

Uncategorized

A Quilt and an Honor Flight

Last week I received an inquiry from a customer regarding the purchase of my Stars and Four Patches quilt listed in my Etsy shop.

A woman from Wisconsin was interested in gifting this quilt to someone before they were scheduled to take an Honor Flight at the end of the month. She needed it in a few days to have it in time; could I send it ASAP?

Ends up, of course I could (and did) but what, after all, is an Honor Flight?

One quick internet search turned up this: The mission of Honor Flight is to transport America’s veterans to Washington, D.C. to visit the memorials dedicated to honoring those who have served and sacrificed for our country. ​

This service shows an unmeasureable expression of respect for veterans, I can only imagine how important taking this trip would be for them.

As for myself, I have to admit I was really touched…I felt it was an honor for me knowing a quilt I made was chosen to be given to someone special to help signify a momentous life event. I never thought a quilt would have that sort of impact.

Even though I’ll never meet the buyer or the recipient, and I’ll probably never know what war this veteran fought in, I do feel like I was a part of this celebration in a quiet way.

As for the gifted quilt, I made it in 2017 with every intention of keeping it but time passed and I had to pare down on my quilts. I thought this one in particular could be enjoyed by someone else so I decided to part with it. I’m glad for those decisions because more than likely this red, white and blue quilt has more of a profound meaning to the new owner. And what an intersting story I now have to tell about a patriotic quilt I once made…

By now the Honor Flight has come and gone; hopefully it went well. This occasion has reminded me of the thanks we owe our veterans for their invaluable service.

For more information on Honor Flights, visit honorflight.org

quilting, sewing, Uncategorized

Quilting with a Tailor’s Clapper

It wasn’t until recently that I learned what a tailor’s clapper is, let alone find out it’s a great tool for quilting. Who knew?

If you’re not familiar with this funny little thing, here’s some general information. A tailor’s clapper is an elongated, rounded piece of hardwood (average size: approximately 9″ long x 2″ wide) with a routered groove down each side. Some are straight and some are a bit wider on one end, but no matter the design they can be used in either direction.

What’s the purpose of a tailor’s clapper and how is using one beneficial to quilting? This handy tool helps to achieve wonderfully flat, crisp seams which is exactly what quilters want! And in the end the results will give you a beautifully flat quilt top. 🙂

After reading quilters rave about them and doing a bit of research myself, I thought I’d give one a try. I decided to purchase this one from Amazon. I like that it’s made in the USA and it had a lot of good reviews. This one offers 2 sizes, I chose the standard size.

How does a tailor’s clapper work? Well, they’re pretty basic and very easy to use; here’s how. Once you press your seam with a hot, steamy iron, remove the iron and immediately place the clapper on the seam then hold it down for a few seconds. The clapper will trap the heat and steam leaving an amazingly flat seam.

Here’s a look at fabric I sewed and tested with and without the clapper. It’s easy to tell which one I used the clapper on and which one I didn’t…it really works!

I’m definitely seeing a better outcome in my quilting now that I use a tailor’s clapper when pressing, and I most definitely recommend using one. And what I find so interesting is that this simple garment-making tool that originated in England well over 100 years ago is still useful in today’s complex world!

Note: I am not endorsed by the product mentioned in this post; it is just an item I like, use, and wanted to share information on.

sewing, tutorials, Uncategorized

Making Reusable Canvas Grocery Bags

The winter months are a great time to catch up on projects you’ve been planning but have been putting off for a while. In my case it was making reusable grocery bags out of canvas.

To get started, I didn’t want to spend a lot of money, and high quality canvas wasn’t really necessary so I purchased a durable canvas drop cloth (for around $9) which saved me at least half. The weave was comparable to fabric off the bolt, so it was a win-win.

For instructions, I followed this excellent tutorial https://www.themakeyourownzone.com/how-to-make-a-reusable-grocery-bag/. Since the tutorial was geared for using plastic materials, I made a few changes along the way…

Because I was using cotton, I was able to press seams with an iron and I used my hot ruler for accuracy.

I also had the issue of fraying, so once the seams were sewn and the body portion of the bag was assembled, I ran a zigzag stitch along all the raw edges. A serger would work nicely if you’ve got one.

Notice the nice hem along the top? When cutting, I planned to have the factory sewn edge up top for a professional look. It was also a more substantial edge for attaching the handle and it added extra durability.

Overall, the tutorial allowed me to achieve the same results just with different materials. If you decide to make your own reusable bags, I should point out a few things regarding plastic vs. canvas.

First of all, the canvas bags won’t stand up like plastic! But they’ll definitely last longer and they can be laundered which is a definite plus.

With both types, you’ll want to be sure to add something to the bottom for support. I used fitted cardboard to give the bags a more defining shape and added strength.

My husband does the grocery shopping (he actually likes to) 🙂 and he loves these bags. And of course, if it’s green and eliminates plastic waste I’m all about it!

From start to finish, these bags (I made 3) took just a few hours and they’re a really easy make.

modern quilts, quilting, quilts, Uncategorized

A Striped Picnic Quilt

A few weeks ago my daughter requested a quilt specifically for outdoor use. Even though she has a few others I’ve made her, she doesn’t want to use them outside so of course I agreed to make another one. 🙂 We both decided that a scrappy, use-whatever-I-have quilt about the size of an extra large beach towel would work just fine; an approximate size of 36″ x 60″.

Since ‘beach towel’ was mentioned in our conversation, I got to thinking along those lines and decided to go with a strippy theme by using WOF 2 1/2″ strips leftover from other projects. Having recently reorganized all my fabric, I had a good idea of what was what in my stash, so I pulled a variety of print strips that would coordinate, along with all the solid 2 1/2″ strips I had.

To start, I trimmed the print strips to 37 – 38″ so I wouldn’t have to be overly concerned about lining up edges perfectly when sewing, and it would also allow for some wiggle room when trimming the top to its final size. Some of the solids were 2 1/4″ strips and needed pieced to get to the required length. But since this was an improvised project, I figured anything goes!

My layout consisted of alternating light and dark colored stripes, varying the placement of prints and solids. I had enough strips of solid navy blue and gold to make one 4 1/2″ wide strip of each. To add a bit of interest to the design, I placed one wide strip about 1/3 of the way down and the second wide strip about 1/4 of a way down from that.

I pressed all my seams to the dark fabrics, and trimmed the top to 36 1/2″ wide once all the strips were sewn. The length ended up at 60 1/2″.

Here’s the finished quilt top…

For the backing, we decided dark colors would be best since the quilt will be used on the ground. I pieced together various gray fabrics along with a colorful blue/gray diagonal print.

Did you ever have a quilt that you considered an ‘I always wanted to do that’ quilt? This was one for me. I’ve always wanted to make a strippy quilt, improvise a quilt, and quilt using a zigzag stitch. I figured this was the perfect time to do them all.

For the quilting, I set my machine on the zigzag setting with three stitches per zig. Or zag? 🙂 I tested out a few different sizes before I began, deciding on a rather petite stitch that was fun to sew. As always, I pin basted and used a hera marker for marking lines (every 2″). I really like how it turned out.

To finish, I used a blue and tan flag print for the binding, mainly because I wanted to use the last of this fabric and I thought the stripes would show up nicely. Plus, everyone loves striped binding, right?

Here’s the finished quilt! And I’m happy to say I bought nothing to make this one. I even pieced the batting and used thread that I’d had for a few years now.

If you want to make a small, striped quilt for indoor use or out, here’s a layout of the one I made. Overall, there are twenty-seven (approximately) 2 1/2″ strips and two 4 1/2″ strips. This is just a guideline, you certainly can add or take away as needed.

finished size 36″ x 60″

Now it’s time to send it off for the new owner to enjoy!

Uncategorized

Trim those Threads!

If you happen to follow me on Instagram, you may have seen a post or two with me griping about cutting threads off the back of quilt tops. I’ve probably even mentioned it on blog posts too, as it’s the absolute worst step in the quilting process, I think anyway!

Not only is this step tedious, it’s really time consuming. On some quilt tops, I’ve literally spent 8-10 hours trimming threads. That’s a lot of hours! But I look at it this way, if I’ve spent a ton of money, time and energy making a quilt, I might as well do it right. Plus I want my quilts to be as best as they can be.

My longarmer told me about quilters who skip this step, and why they shouldn’t. One main reason is that if a light background fabric is used, all those threads on the back will show against it, especially the darker colored ones. Also, uncut threads will most definitely ruin the smoothness of the front. Whatever is left uncut on the back is sure to make a lumpy and bulky front, and that’s not a good look.

Secondly, longarm quilters don’t like getting tops full of uncut threads because it’s going to make their job look messy, even if they’re a great longarmer. I guess it’s kind of quilting etiquette. 😉

Here’s a look at a quilt top back I’ve recently finished trimming, before and after. What a difference!

All that trimming made for a nice, fresh front. It was definitely worth the effort.

And here’s the finished quilt. Even though I used pastel solids, threads left uncut would have certainly shown through on the white fabric. (Pattern is Sweet Stripes. This baby quilt is currently for sale in my Etsy shop)

So the next time there are threads to be cut, I’ll do the lousy task and try to tone down my complaining…I guess it’s not all that bad once I get started…plus my quilt top AND longarmer will thank me. 🙂

Uncategorized

5 Quilting Essentials

From time to time I like to write about sewing tools I use to make quilting easier, especially ones that help me make better quilts. I have 5 valuable items to showcase, and if you don’t already use them I recommend giving them a try.

STARCH

When my Sweet Stripes quilt pattern was out to testers last November, a tester asked me if the pattern should mention using starch. When I replied, ‘I don’t use starch, only when making minis,’ she was pretty surprised; its use must be more popular than I thought. Fast forward to my upcoming pattern where small squares will be stitched and flipped with seams pressed open—that actually need starched for best results—I’ll definitely recommend using it this time!

My starch preference is Flatter by Soak. I’m not one for scented products, but I’d just finished a bottle of unscented that smelled anyway so I chose pineapple this time. A 8.4 ounce bottle costs around $12 on Amazon putting it on the expensive side, but for a top-notch product it’s worth paying a bit more (my last bottle lasted one year). It’s great stuff; it doesn’t leave your fabric crunchy nor does it leave residue on your iron.

SPRAY MIST BOTTLE

Since every iron leaks eventually (even my costly Rowenta Focus started leaking after a year or so) I’ve quit putting water in them. While I really love using steam and I miss it, I’ve gotten used to going without. As an alternative, I use a water spray bottle when pressing. I’d seen this funky sprayer in a quilt shop over the summer but ended up purchasing one online a few months later. It’s a fine mist spray bottle and it is excellent. It holds 5.4 ounces of water and costs around $7 on Amazon. The pump sprays a really fine mist and if you hold the nozzle down it’s works like an aerosol. I love the clean look of white so it’s not unsightly on my pressing table.

IRON SHOE

This is kind of an odd item, but it comes in really handy. I first saw one at the Fat Quarter Shop as a flash sale item and thought I’d give it a whirl, thinking it might help avoid the constant mess of getting interfacing adhesive stuck to my iron. It costs around $15 and is ‘made of fiberglass and is a non-stick surface that will save your fabric from scorching, shine and burns.’ It’s great when using interfacing and when pressing seams of pieced batting—nothing sticks! It’s easy to use; just tie it on your iron (fits any size).

QUILTING CLIPS

My sister bought me this cute little tin of 100 assorted colored clips (including 10 large sized). I’m not calling them ‘Wonder Clips’ because they’re not actually Clover brand as ‘Clover’ isn’t stamped on. I have a couple hundred Clover clips and by comparison, they’re pretty much the same. They’re the same size, they look alike and they perform the same. These might even grip a bit tighter. I’m guessing they’re less expensive than name brand, and I was told they were purchased on Amazon. I use them constantly and love the fun colors.

HERA MARKER

If you quilt your own quilts, using a hera marker is a safe and effective way to mark your quilt tops. If you’ve never used one before, they’re really easy to use. Just line up your ruler where you’re going to sew and mark a pressed line, just like you would using a pen or pencil. Since you have to see the line to sew, you’ll have to run the marker along the side of the ruler a couple of times to get a good indentation. In the end, the indentation is just a crease that’ll go away. This Clover hera marker can be purchased at JoAnn, online, or at your LQS, costing around $6. It’s a great tool and for such a low price, it’s well worth it. The sharper edge can eventually wear down, but it’ll take quite a while. I just replaced mine after about 4 years of use, and that was mainly because I had broken off the tip.

I hope this post is a useful guide if you’re looking for items to make quilting easier and more efficient…and to making more beautiful quilts!

Note: I am not endorsed by any product I have mentioned in this post; they are items I like, use, and wanted to share information on.

baby quilts, color gallery, monday morning designs quilt pattern, quilting, quilts, sewing, tutorials, Uncategorized

2020 Project Recap

It seems that staying in more than usual made for a productive year. In 2019 I’d completed 11 quilts and thought that was a lot, but in 2020 I surpassed that and made 14! Of the 14, I gave 4 as gifts and I have a few on hand should a gift-giving occasion arise.

Other than having a queen sized quilt ready for longarming, I’d quilted the other 13 myself. That’s quite a bit as I typically have one or two done professionally every year. My goal for 2020 was to use what I had on hand, so I didn’t purchase fabric to make several of these quilts.

Here’s a look at the past year: These two quilts were gifted along with two others that I can’t show—one is to be published in the Quilts & More fall edition, and the other is a pattern currently in the works. The photo below I now offer as an easy tutorial for a beginner, Checkered Baby Quilt.

This is the only two-colored quilt I’ve ever made, for me red and white were the obvious choice. 😉 It’s a free Moda pattern called Illusions.

This Scrappy Four Patch Charm is the second quilt I’d made from this free pattern from Robert Kaufman. I just love this design and I wouldn’t be surprised if I make yet another one. For this, I literally took every 5″ square I had, cut a few more and threw it together. It was so fun and it used a lot of what I had on hand.

Both patterns, Westerly Winds and Radiant, were released last year.

My Holiday Hemlock quilt was a challenge and a joy to design, not to mention how fun it is to watch it come together. While working on this, I decided on a second, scrappy version for all the scrap lovers out there!

Sweet Stripes is the last of my pattern releases for the year. This cheerful pattern is designed with the beginner quilter in mind. It’s fat quarter friendly and there are 7 different sizes with two layouts versions to choose from. It’s quick AND easy!

I made this baby size Sweet Stripes quilt but I have no baby to give it to, so it’s currently for sale in my Etsy shop. 🙂

The last quilt finish of the year is my Christmassy Triangle Peaks. I had to make this red and green version for my annual holiday quilt. Even though I finished it mid-December, I’m already planning for this year!

I was surprised that I made only one mini; a section of my Holiday Hemlocks. I put together a center tree and star along with a shorter ribbon and it made a lovely wall hanging. It’s a great way to display part of the quilt if you don’t have time to make a whole one.

I also added another page to my website, color gallery. It showcases several photos with color tiles to help with your color inspiration. Thankfully my family members allowed me use their beautiful images for this project. I think it’s an excellent resource.

Other projects include pillows for my mom, a pillow case for my bird-loving husband, utensil wraps, colorful rope bowls and microwave bowl cozies.

I also added several tips, tutorials, charts and plenty of other quilty posts to my website. And lastly, I updated my logo and I love it.

Coming soon in 2021…a tutorial for the utensil wrap, a new quilt pattern and more tips and sewing inspiration. I’m looking forward to a great year of creating!