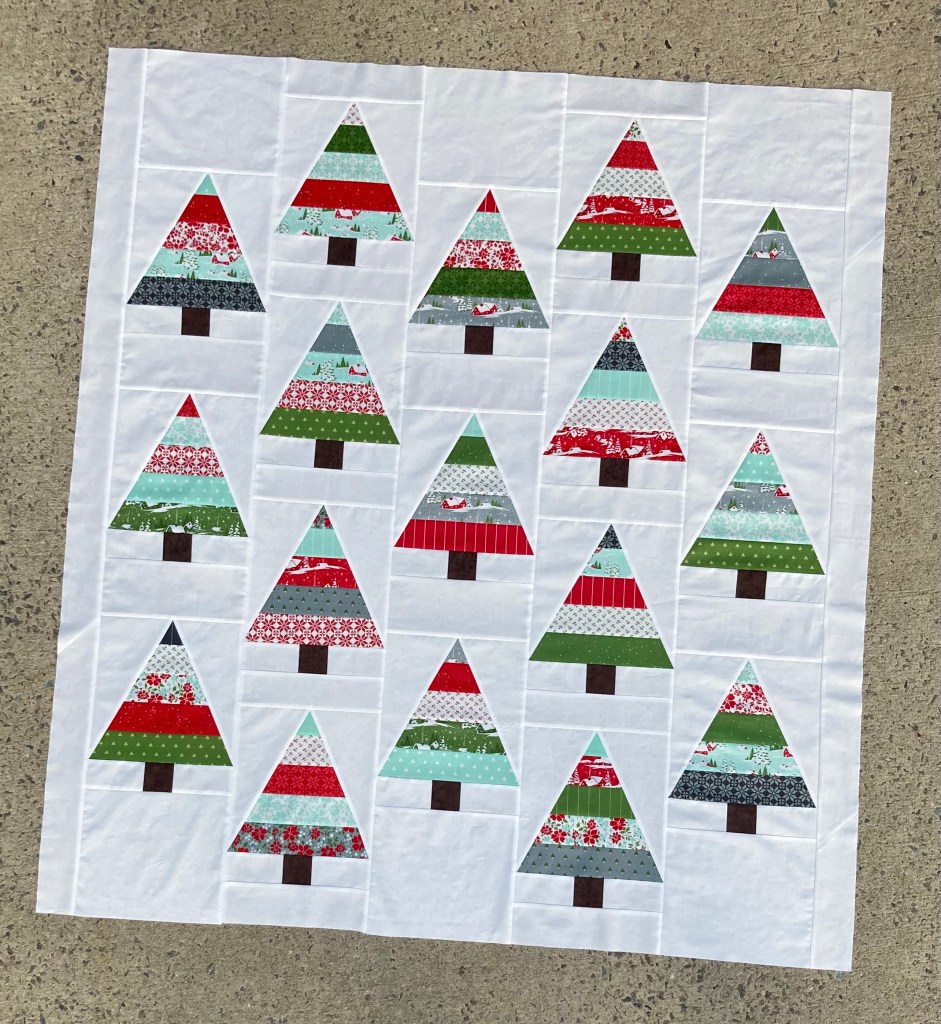
To end this year’s quilt pattern releases, I’d like to introduce my Winter Woodlands PDF pattern, now available for purchase in my Etsy shop.
Winter Woodlands is a nod to my best selling pattern, Wee Three Trees mini quilt. For quite a while I’d been thinking about making the mini into a larger version and here it is! Just think of it as Wee Three Trees grown up. 😉
For my quilt, I used Moda’s jelly roll Merry Little Christmas by Bonnie and Camille.
This collection is so festive and is a perfect choice for this quilt. I love the traditional red and green and that teal is also included.
Since the pattern is written for a throw size quilt (finishes 55″ x 60 ½”) you can make it all from a jelly roll, including the binding!
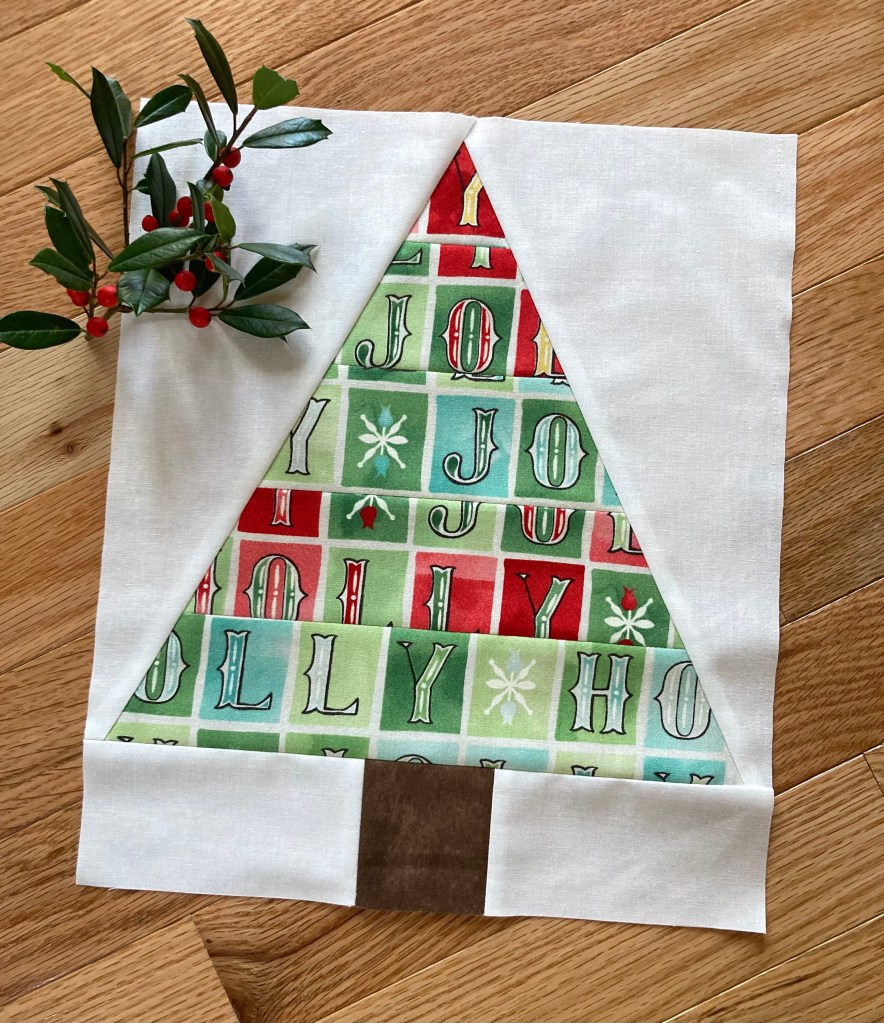
Winter Woodlands block made from Moda’s Evergreen Collection
I know I say it a lot, but my testers all agreed this is a quick make! It’s geared toward confident quilters; yet if you’re a quilter looking to build your quilting skills, give it a whirl.
It’s the perfect time with the holiday season upon us, so I hope you’ll get your copy and add a festive quilt to your home for this coming winter.
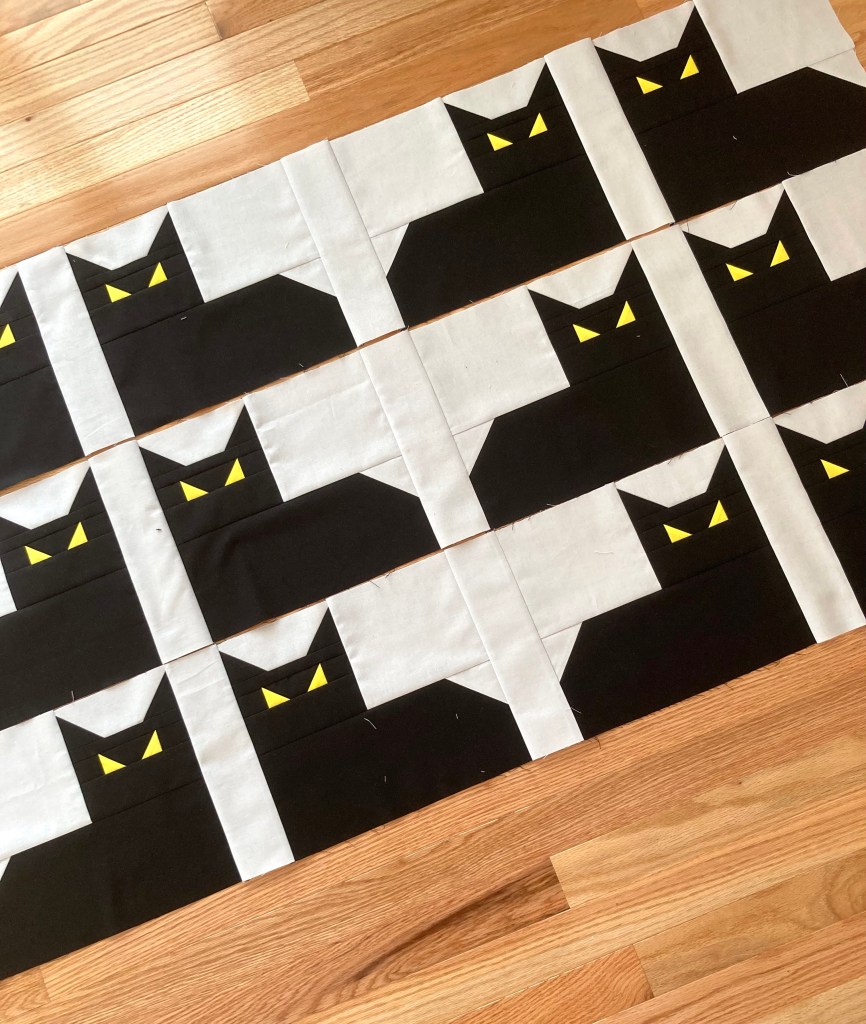
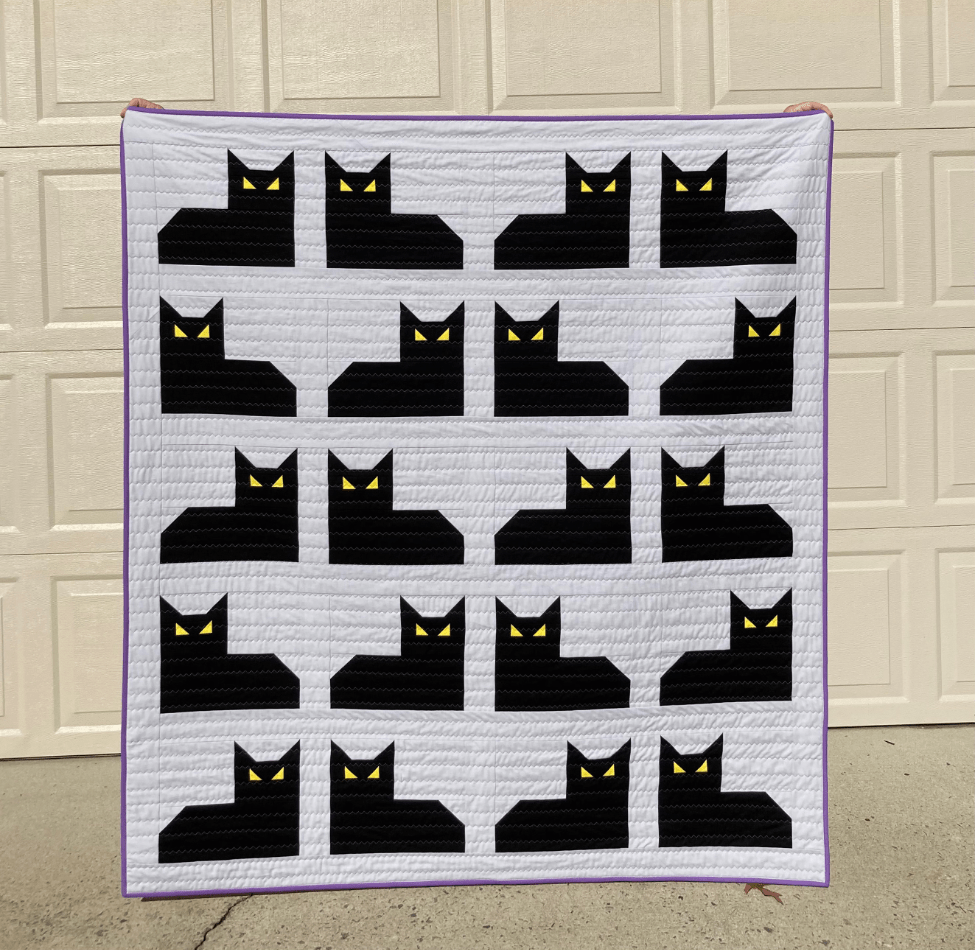
My last entry was about the release of my latest pattern, Spooky Kittens. Since this quilt has gotten quite a bit of interest, I decided to post a write-up with photos for a more in-depth look at my process.
I’d like to start by mentioning that not only is this pattern beginner friendly, it sews together fast and instructions include 2 fabric choices, either fat quarters or yardage. And also for beginners, there are no half square triangles which can sometimes be a challenge!
To make my quilt, I used yardage since I had most of the solids I wanted to use on hand.
Kona Cottons from L to R – Morning Glory, Black, Citrus, Quicksilver
Once my colors were chosen, it was time to get started. In a nutshell, this pattern consists of making two mirrored kitten blocks, adding sashing then putting it all together. All testers agreed—it’s a quick make.
And here’s why…throughout the pattern there are several places where you can chain piece: when assembling the kitten heads and again when attaching sashing strips. It’s no secret that chain piecing is an excellent time-saver. 😉
You can also chain piece when attaching kitten heads to background pieces, as I did here…
And again when sewing the kittens blocks together making finishing blocks a breeze.
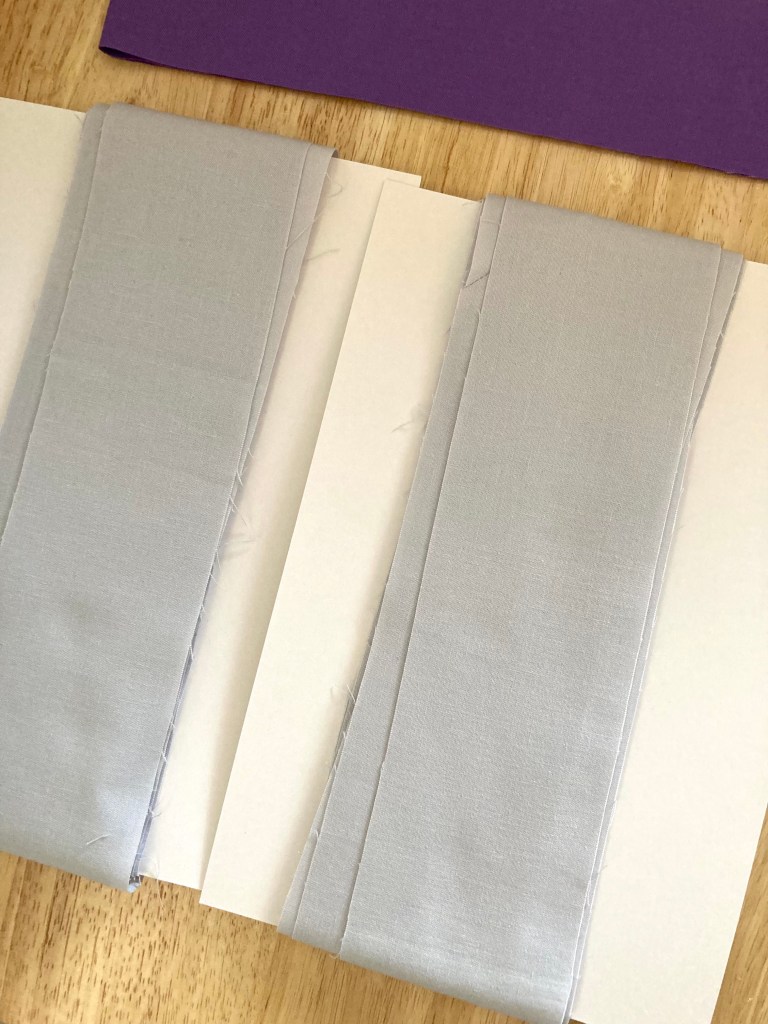
Once the blocks were sewn and my layout was complete, it was time to sew the blocks and vertical sashing strips into rows. At this point, everything was coming together as I envisioned so I was pretty happy about that. 🙂
With rows completed, the last thing to do was attach the sashing. Here’s a tip for handling the sashing strips; once they’re sewn into long strips, wrap them around something sturdy so they will unfold nicely when you’re attaching them to rows.
I used comic book cardboard backing boards for wrapping and it worked great. (I happen to have a whole pack for wrapping and storing my solid fabrics). If you don’t have any on hand, cardboard or anything sturdy will work just fine.
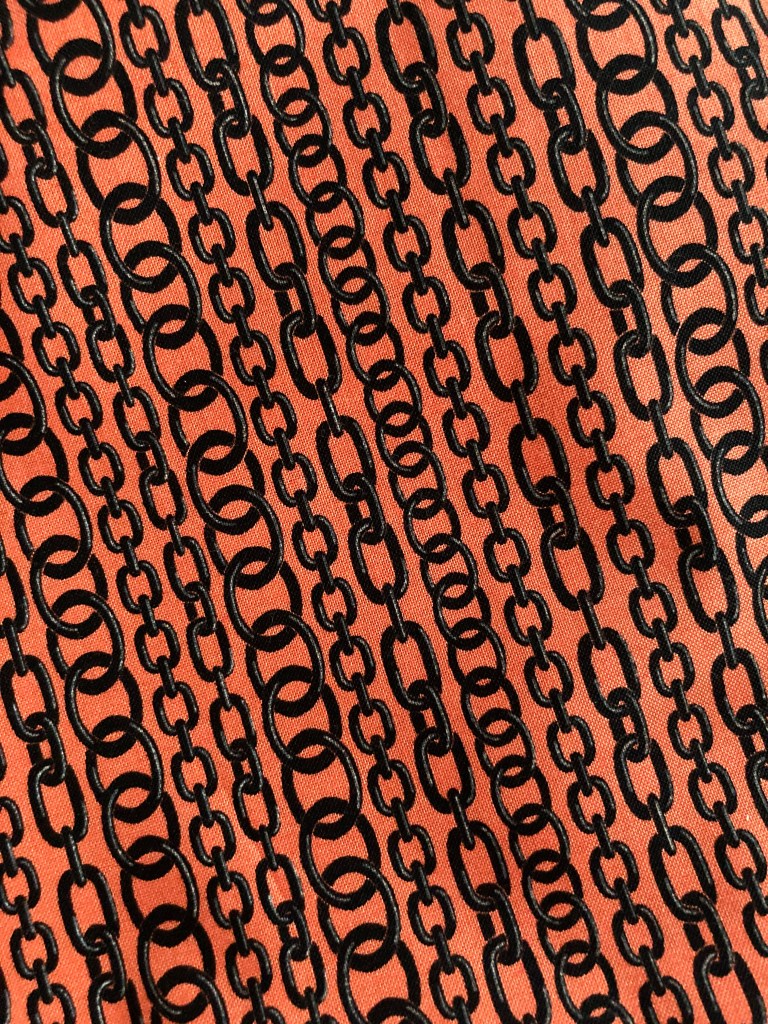
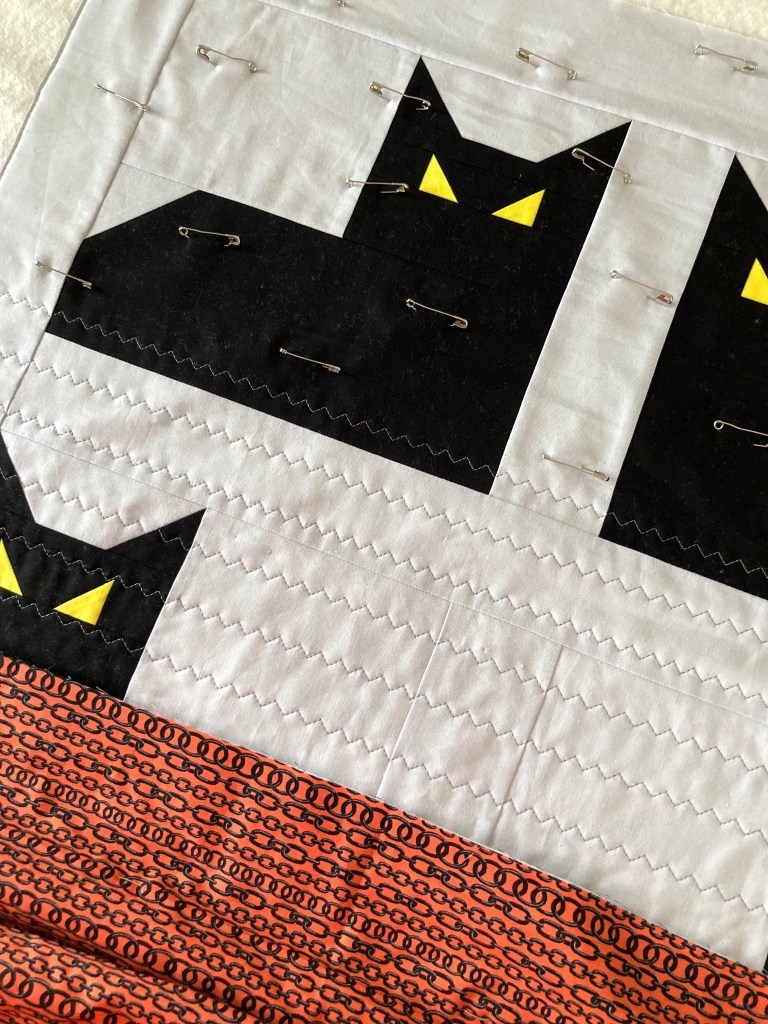
Once my quilt top was complete, I had to pause a while waiting for a fabric order. I wanted something Halloween themed for the backing and I found the perfect fabric. It’s from Free Spirit’s line Spell Bound and it features black chains on a festive orange background. It was the perfect compliment to the quilt front.
With my quilt top complete, my backing fabric cut, sewn and pressed, it was time to sandwich and pin baste my quilt. Not a favorite part of the process but I managed to get through it easily enough. 😉
After basting, I needed to decide on a quilting pattern. Since the kittens are shorter blocks, I thought the quilting would showcase best by running horizontally. And because the kittens are a bit ‘spooky’, I decided the quilting should give that sort of vibe, too. That said, I chose a three-stitch zigzag with the lines spaced 1 1/4″ apart.
I used medium gray Aurifil thread (2605), and was pleased with the results.
Since the binding is the finishing touch—I consider it ‘framing in’ the quilt, kind of like choosing the right frame for a piece of art—I wanted something to set it off.
I also wanted to use a common Halloween color so I went with purple.
One last thing…I had my test block leftover so I decided to make it into a mini quilt. For this, I used the serpentine quilting motif sewn with a lighter gray thread. I also used Kiwi Kona cotton for the binding. It’ll make a great wall hanging in a small area.
There you have it, easy and quick! And a great quilt to add to your Halloween decor. I hope you enjoy this fun Halloween quilt and you try one out for yourself.
It’s nearly back to school and that means back to the sewing machine! With Halloween just a mere 78 days away, you’ll have more than enough time to whip up my latest quilt pattern, Spooky Kittens. It’s now available for purchase in my Etsy shop.
To all the Halloween lovers out there, this quilt’s for you. Spooky Kittens has a lot to offer…first of all, it’s beginner friendly. The pattern is written for throw size; it consists of just two mirrored blocks, sashing, and presto, it’s done!
Another bonus is that the pattern comes with two fabric options—yardage or fat quarters.
I made mine using yardage. For the back, I went with a really fun print with black chains on an orange background. With all the seasonal fabrics out there, you’ll surely find something to make yours unique!
I’d love to see your version of this fun and easy quilt! With either fabric option you choose it’s sure to be a Halloween favorite. 🙂
Finally, another quilt finish! While this is only my second quilt for the year, I do have a couple of new patterns in the works that I’m excited to share fairly soon.
Yesterday I finished a baby version of my Stitches & Stars pattern. I decided to make this to help use up some extra fabric, mostly solids. I also had on hand a variety of colorful bindings from other makes. I attached them all together and came up with a myriad of colors. It’s definitely a fun look and certainly adds some brights, too.
For this baby version, I used soft-colored solids for the stars. The sashing, the “stitches”, are made using a tone-on-tone print by Art Gallery Fabrics. I feel accenting with gray is always a good choice. 😉
Since it’s for baby, I thought I’d soften the whole look by using an off-white solid on both the front and back. And to add some extra flair, I sewed together the cut-aways and made a fun stripe on the back.
For the quilting, I ran a vertical serpentine stitch every 1 1/2″ which gives it that lovely, crinkly-quilty look.
I released Stitches & Stars in 2022. It’s a really fun pattern to make, and if you’re one who loves star quilts it would be a perfect pattern for you.
I have decided to put this for sale on my Etsy shop hoping a cute baby will receive it soon!
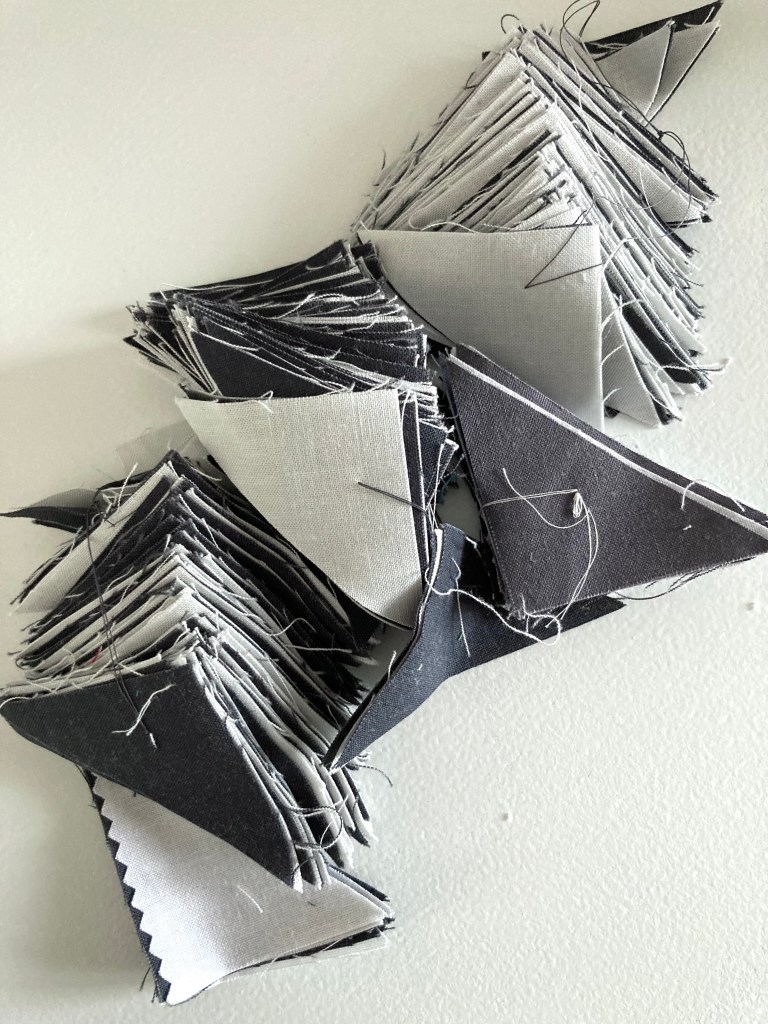
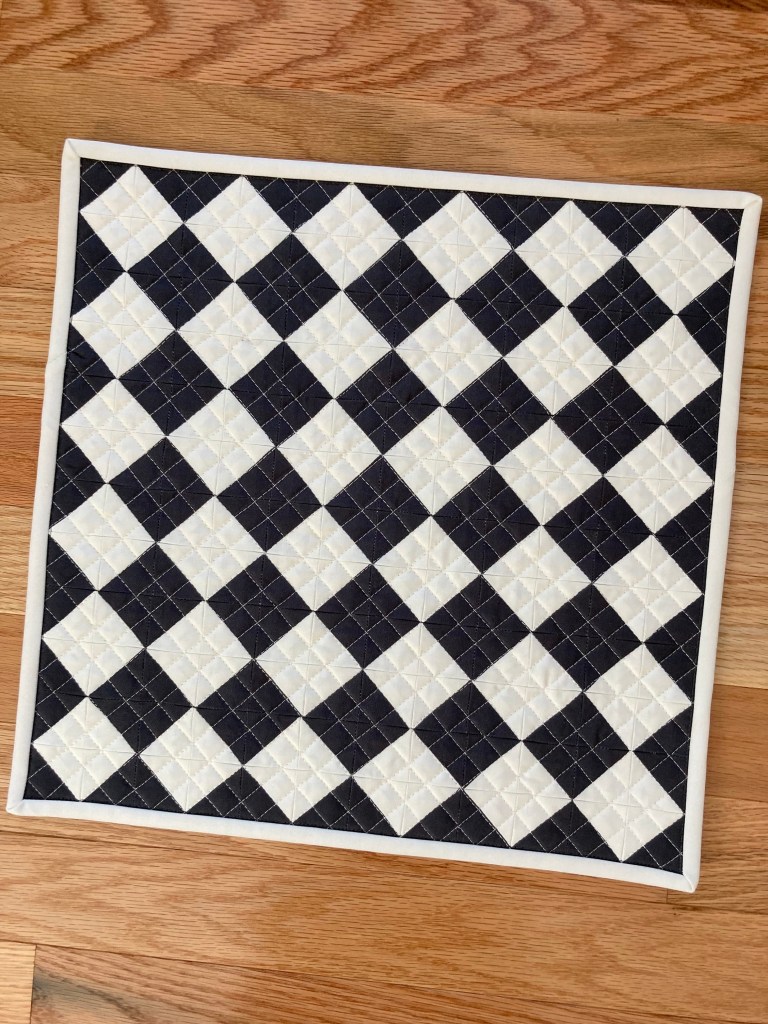
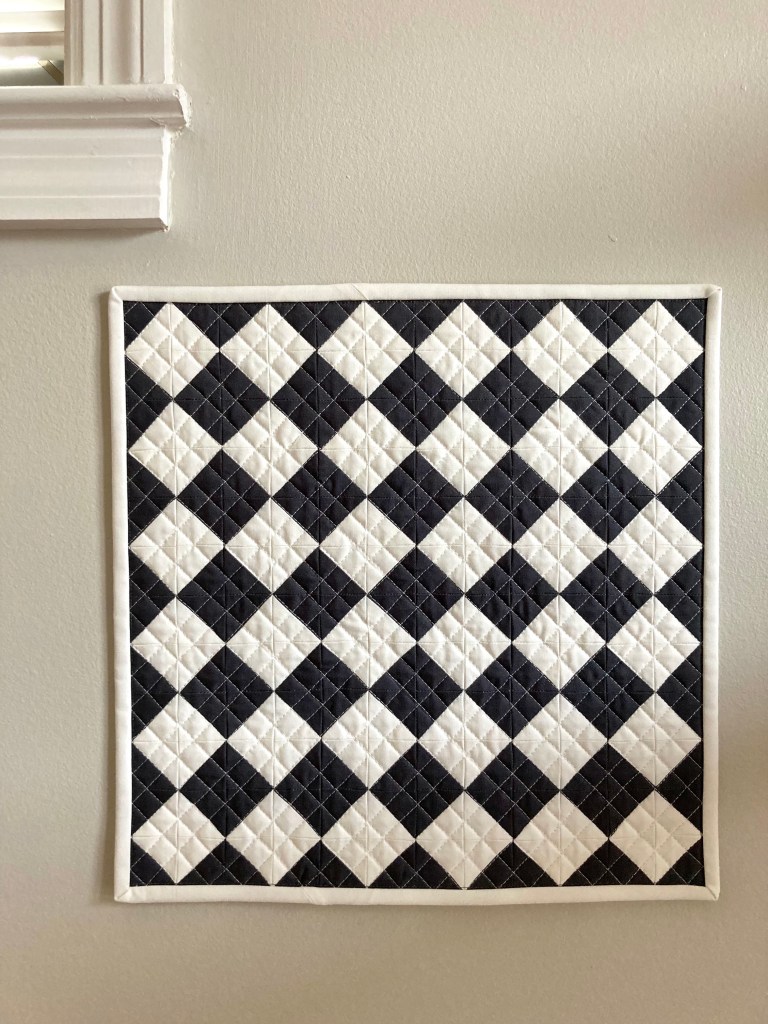
A couple of years ago I made The Ghost Quilt that resulted in dozens of cut-away corners. Not being one to waste and certainly being one who’s always looking for something to make with such things, I held on to them.
Knowing I wouldn’t get to this project anytime soon, I had to find a way to keep the corners together. I stacked bundles about 3 inches high then hand-sewed through them making a loop.
I put them in a bag, and then they sat for over a year and a half. One day in the middle of winter I went through my fabric looking for inspiration. My sewing room closet doesn’t allow for a lot of storage so upon finding the bundles I decided it was time to make something.
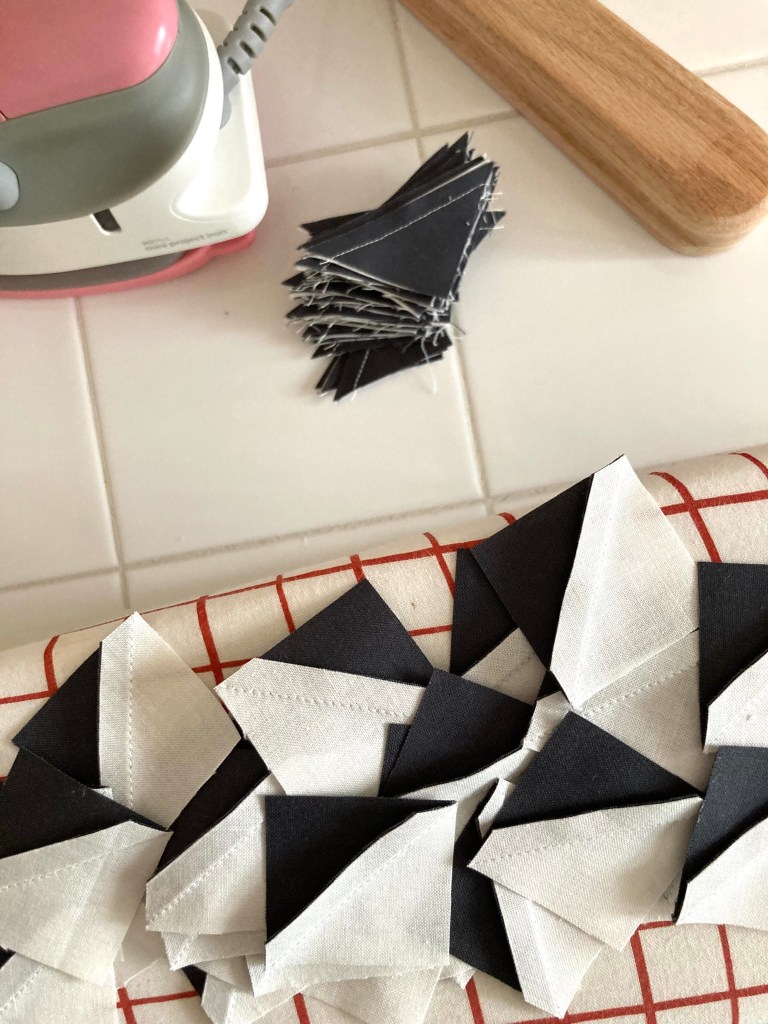
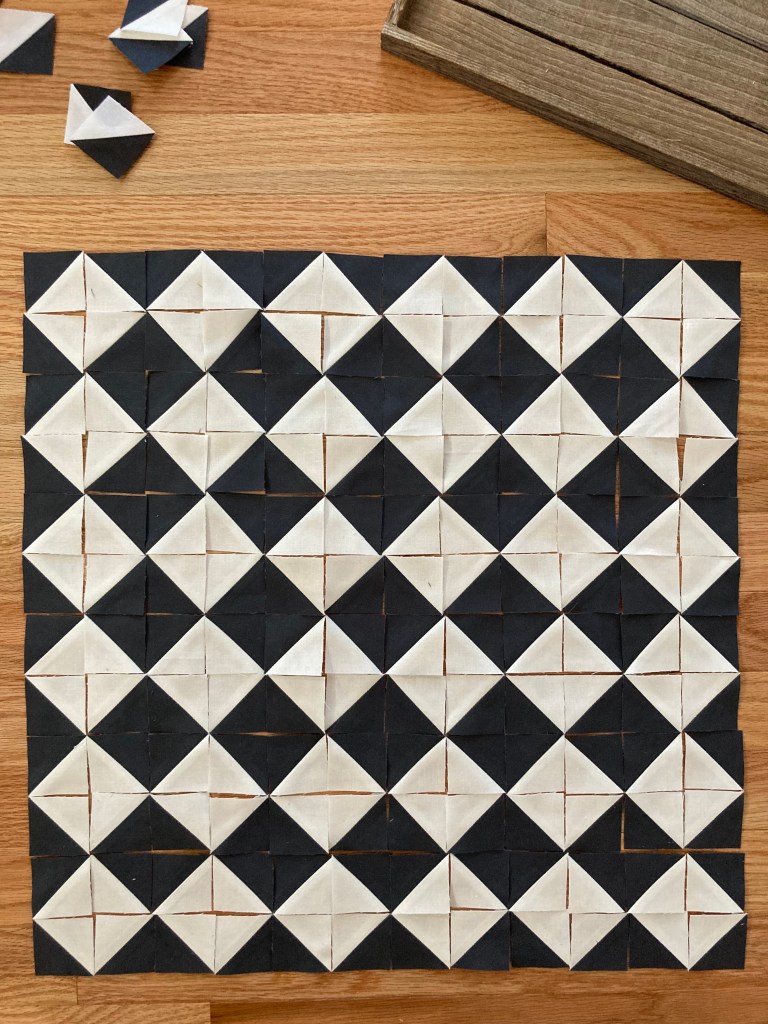
The first thing to do was make half square triangles. After chain piecing the pairs, pressing and trimming (a couple of days worth of work) there were over 160 HST!
A sane quilter wouldn’t have taken this project on for several reasons. First of all, the cut-aways were very small. Once sewn and squared, the HST measured 1 5/8″. Meaning once sewn into something they’d finished at 1 1/8″. That’s crazy small. But there I was.
Out of all the design options, I’d settled on checkerboard. I’ve got to admit, once sewn, I didn’t really like it. Once quilted, I still didn’t like it. But it’s a gift and I hoped the recipient would.
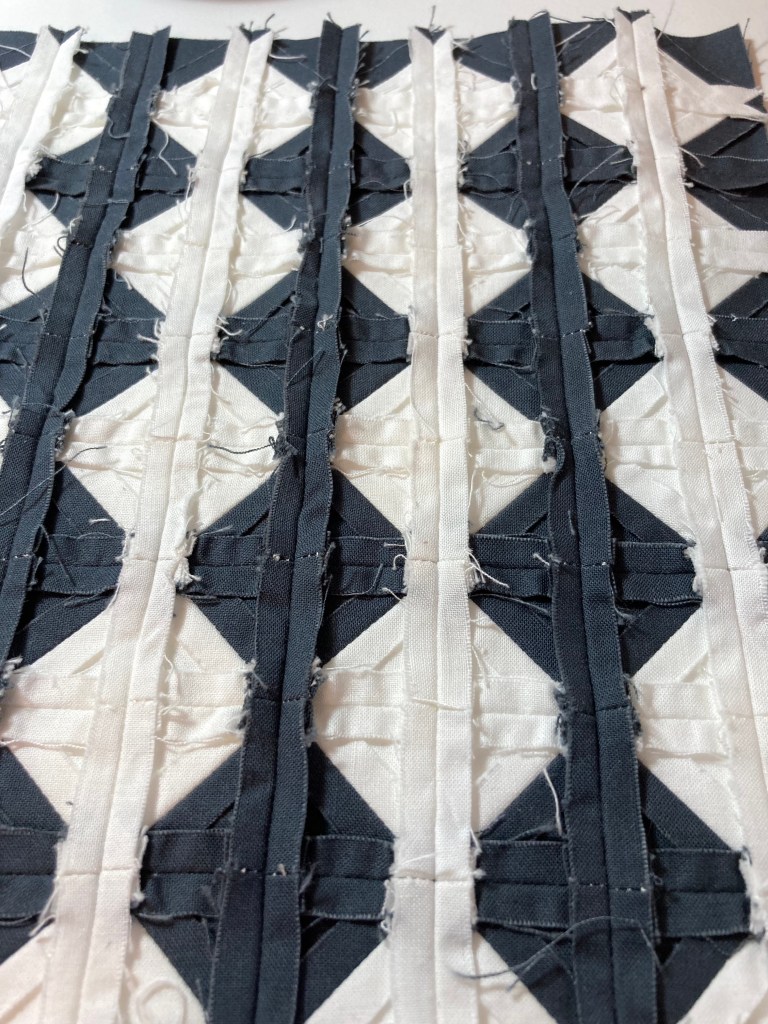
Here’s a few photos of the process…
As you can see, there were a lot of threads to cut AND I used quite a bit of starch due to the bulk.
Here’s the finished mini.
After putting it away for a few weeks then getting it out to photograph, I did end up liking it. I think the white binding is just right, too.
Overall, this was a challenge I felt I needed. I also found it interesting how at one point I was ready to toss it but decided not to, and in the end was glad I didn’t. 🙂
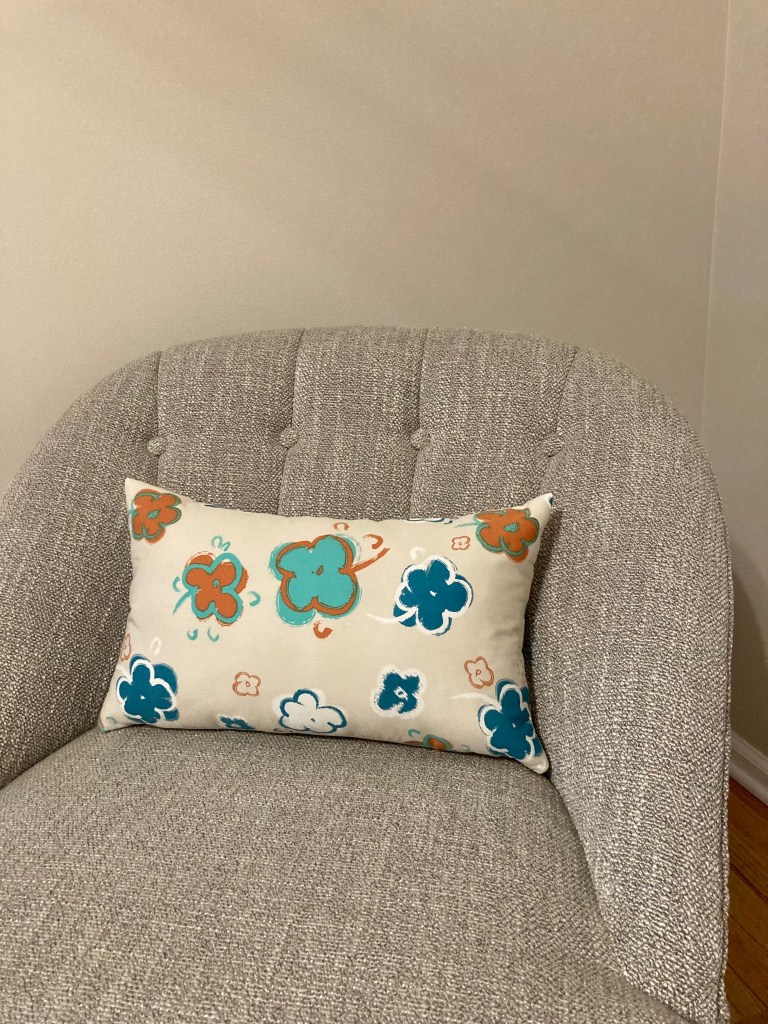
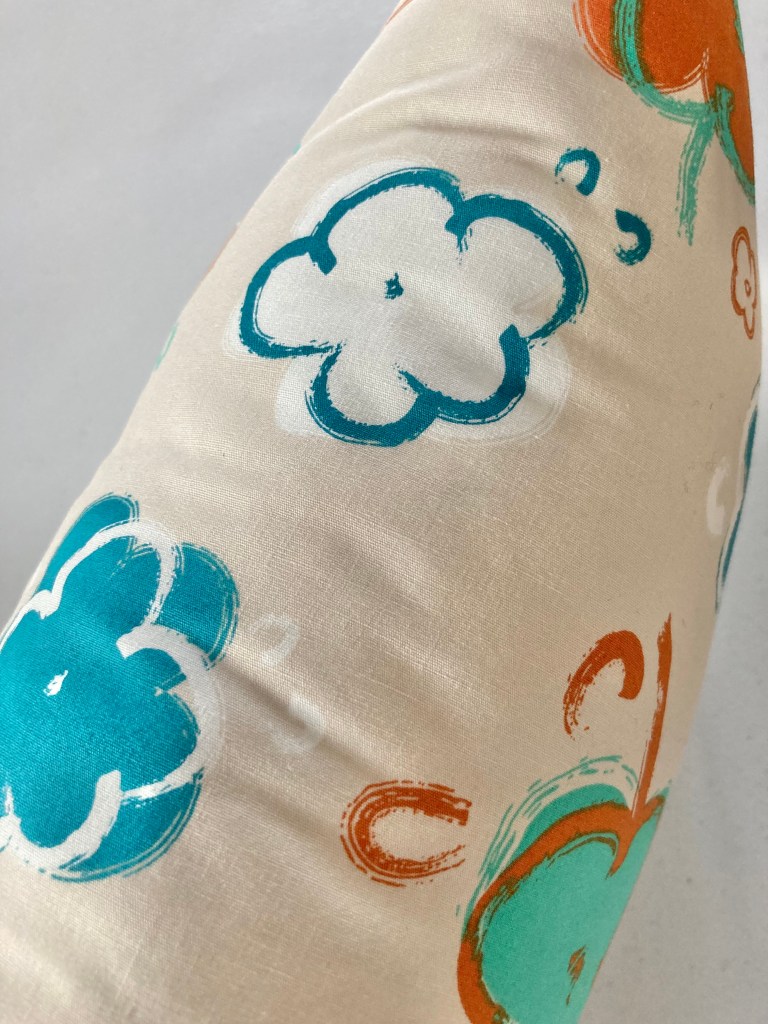
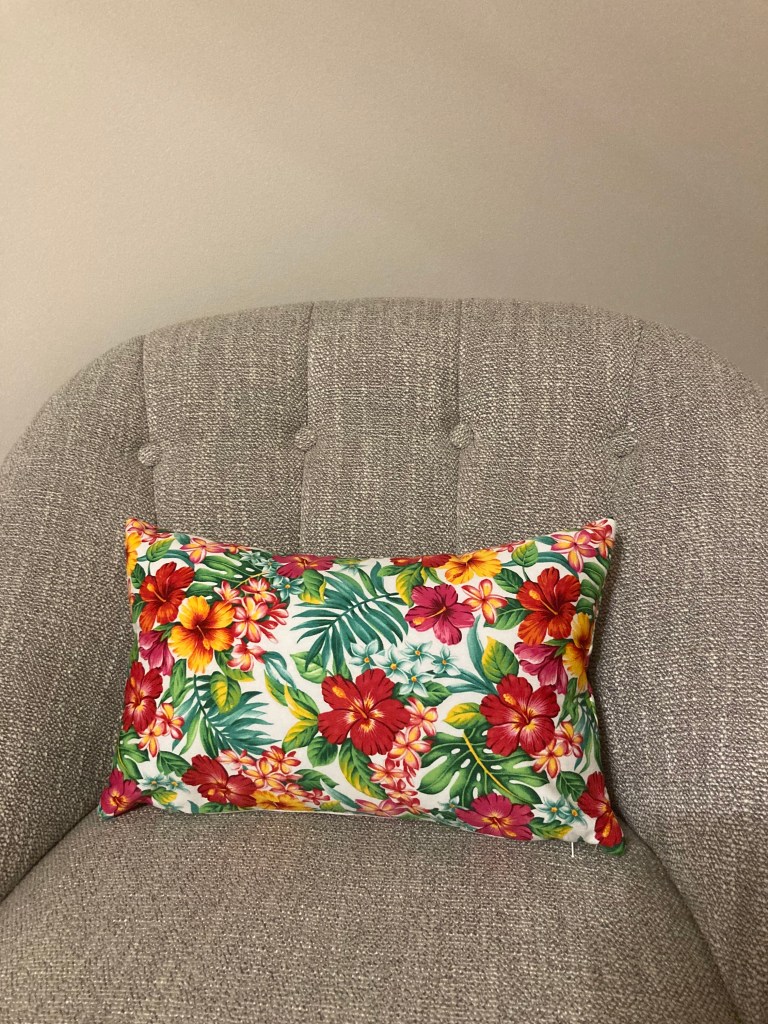
Recently I purchased a small chair and side table for a reading nook in my dining room (that I don’t want to use as a dining room). To add color to the corner, and because every chair needs a pillow, I decided to make my own. As a side note: purchased lumbar pillows cost a ridiculous minimum of around $45 and were too big.
Because my chair is on the small side, the pillow could be made from a fat quarter. Lucky! Right away I knew exactly what FQ I’d use—a whimsical flower print from the Etno collection by Pat Bravo for Art Gallery Fabrics. It’s an older line that I love and was glad to finally use.
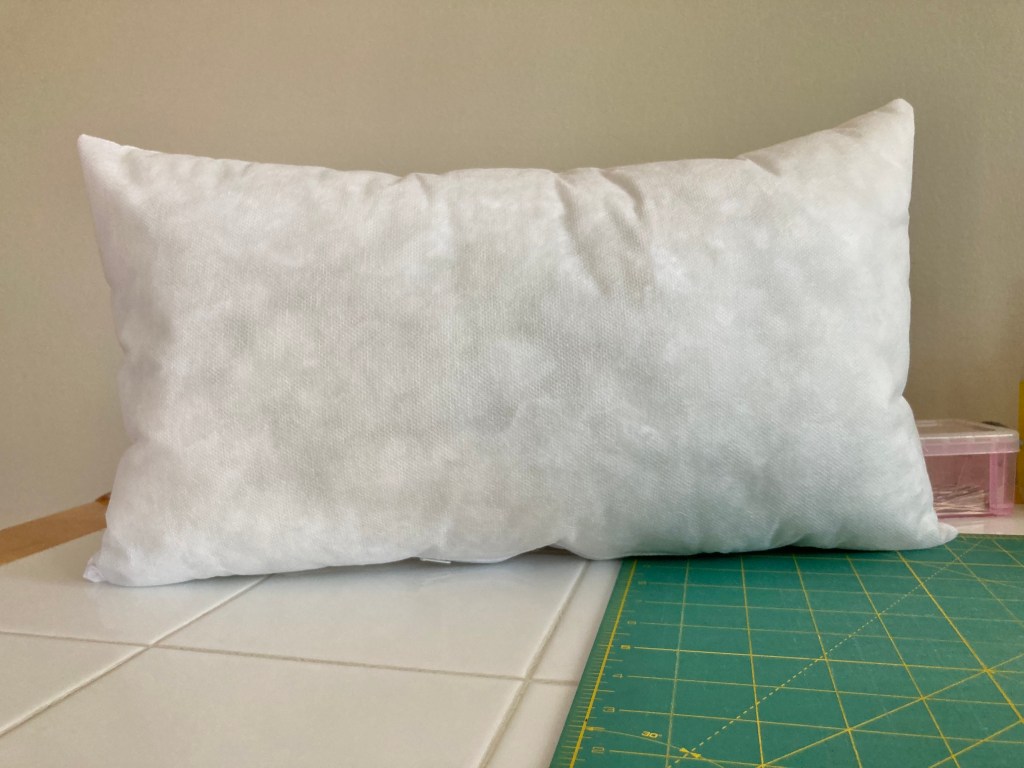
Also, I happened to have 2 new pillow forms on hand. They were 18” x 18” so I removed all the stuffing and resized them to 11” x 18”, then restuffed them.
I revisited my Zippered Quilt Pillow Block Cover Tutorial for a refresher on the zipper sewing technique and other necessary steps, and in no time I had a cute little pillow! It really dresses up the space and gives it a personal touch.
Another nice feature about this pillow size is no seam; the FQ sewed into a tube, giving the pillow a clean finish on top.
Not only is it a custom-made pillow, the total cost to make it is approximately $14 and about 1 hour and ½ of my time. A lot better than $45 AND made exactly how I wanted. 🙂
Since I liked that pillow so much and it was fun to make, I made another. I used the other pillow form and repeated the same steps. For this one I used a Hawaiian themed FQ my son gave me from his trip to Maui. It’s so bright and fun! I love it.
I’m really happy with these results, and I can change the pillows out when I want a new look. I’m now thinking about making some seasonal ones, too.
It’s time to look back on 2022 and revisit completed projects, and in all there weren’t that many!
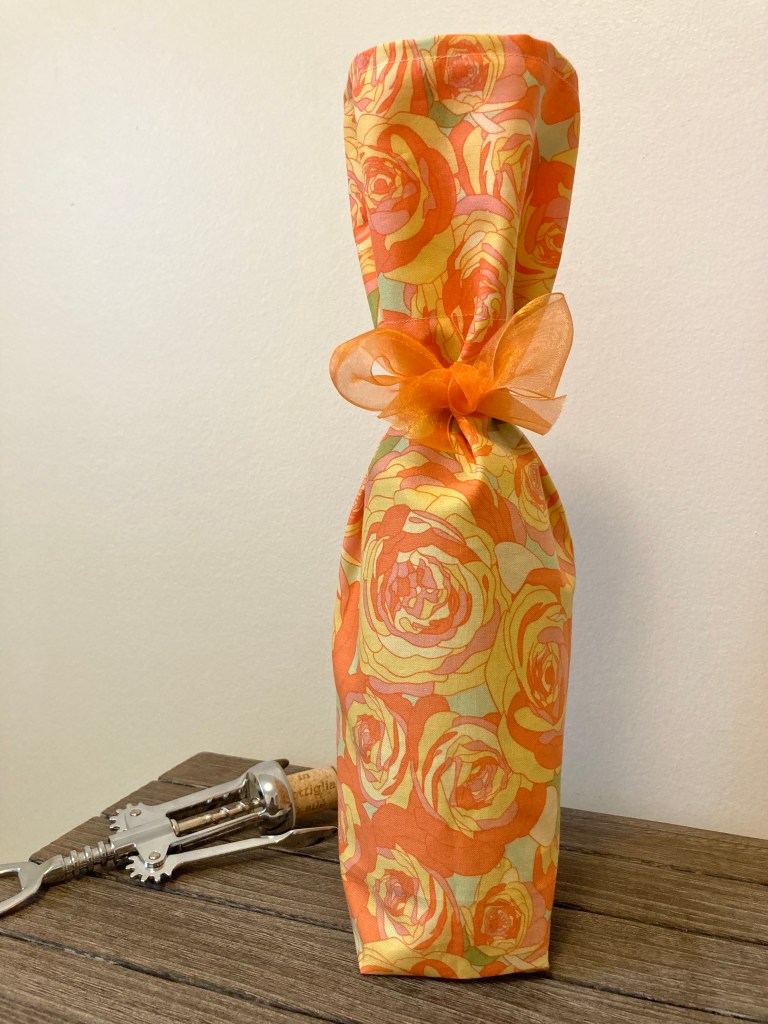
My first finished project was a wine bottle bag as a hostess gift; it definitely makes a lovely presentation when gifting a bottle of wine. It’s a really quick project that only requires a fat quarter and a ribbon! Download the free PDF tutorial here.
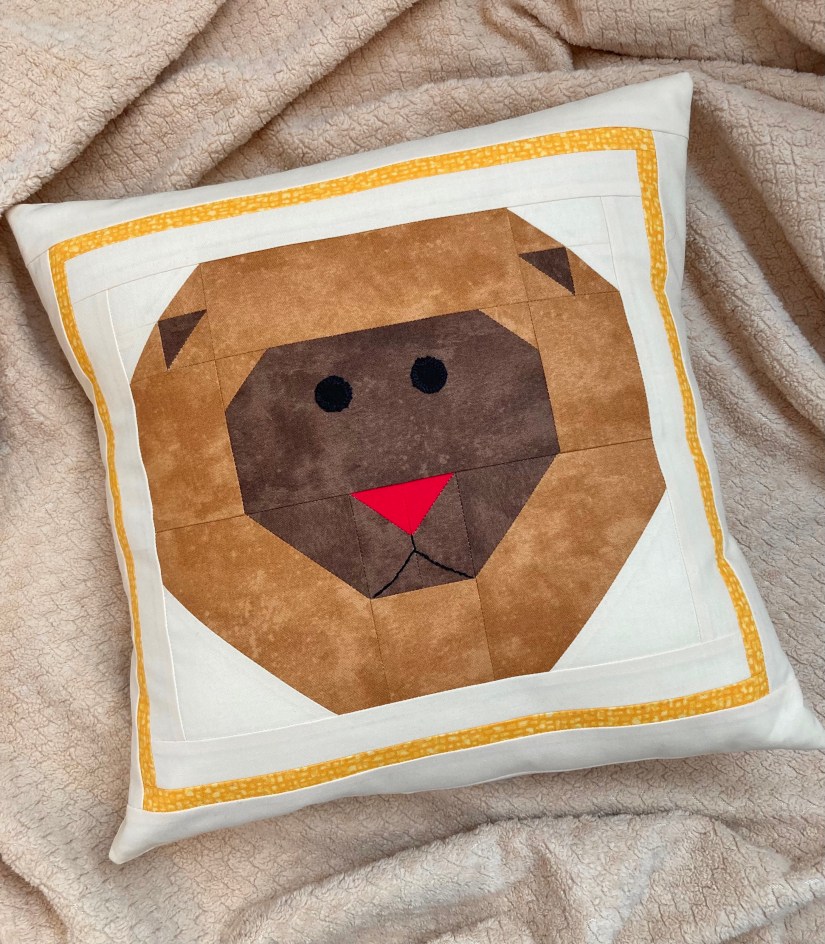
Next up is a pillow cover of a cute little lion. This is an easy project that can be completed in just an afternoon. The cover fits a 16″ pillow form. Lazy Lion pillow cover pattern is available for purchase in my Etsy shop.
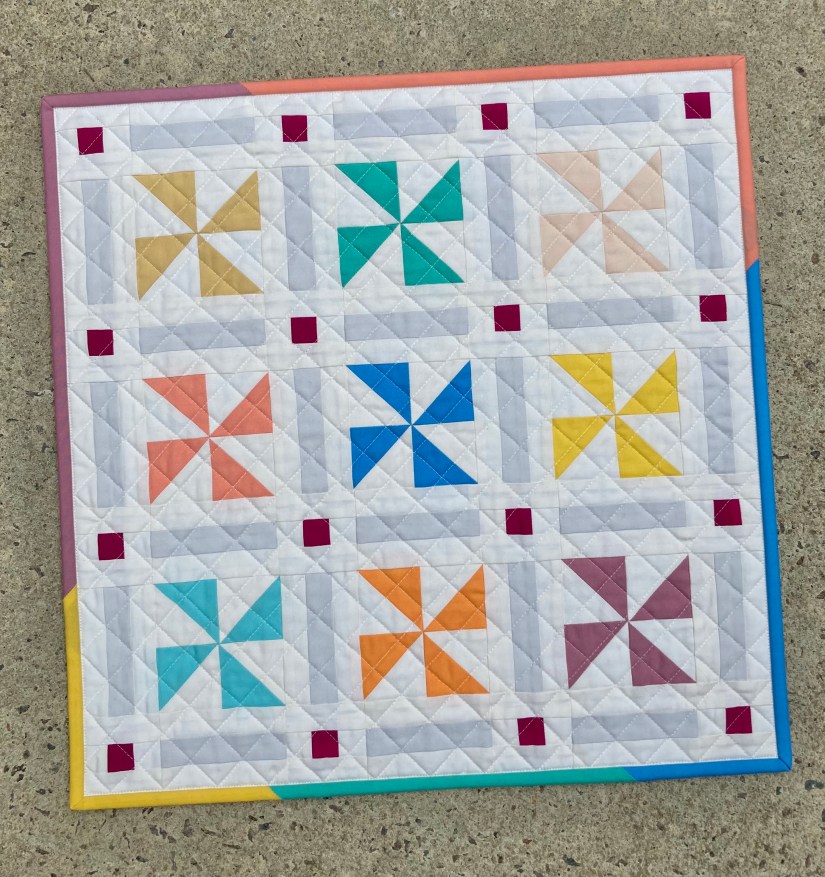
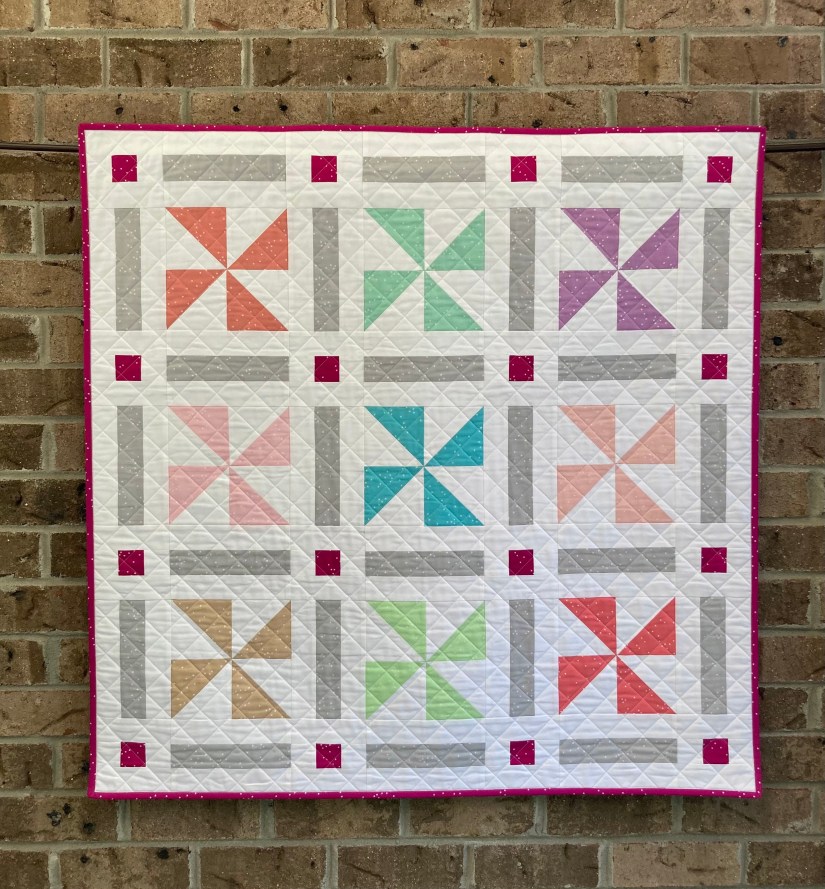
My first 2022 quilt pattern releases were Pinwheels Galore Mini quilt and Pinwheels Galore quilt which is available in several sizes. Both patterns can be found in my Etsy shop.
Pinwheels Galore Mini QuiltPinwheels Galore Baby Quilt
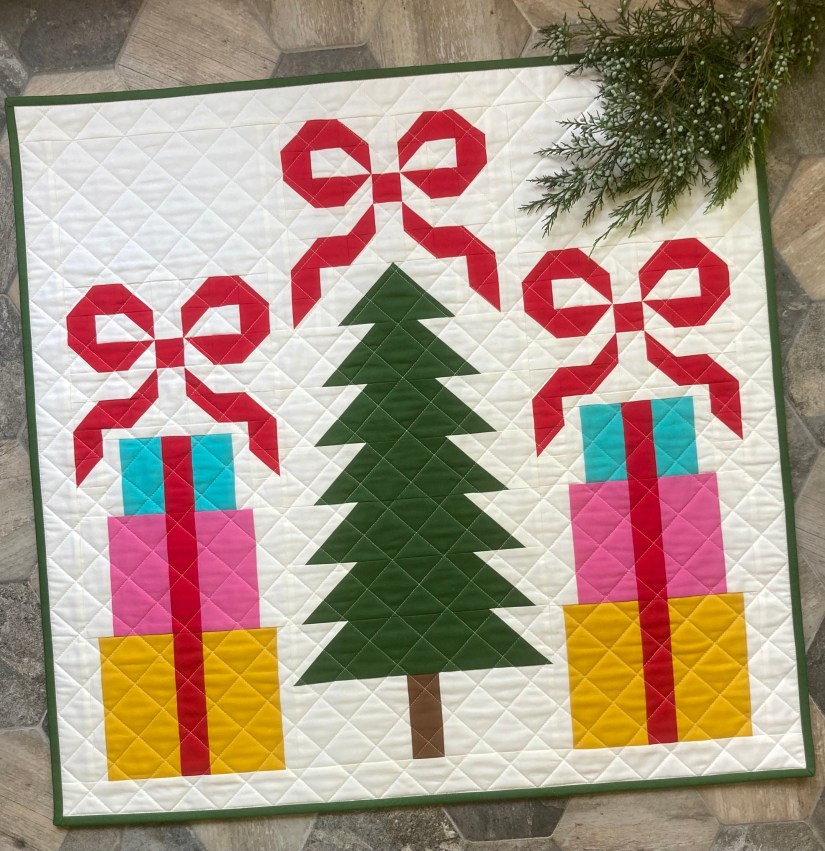
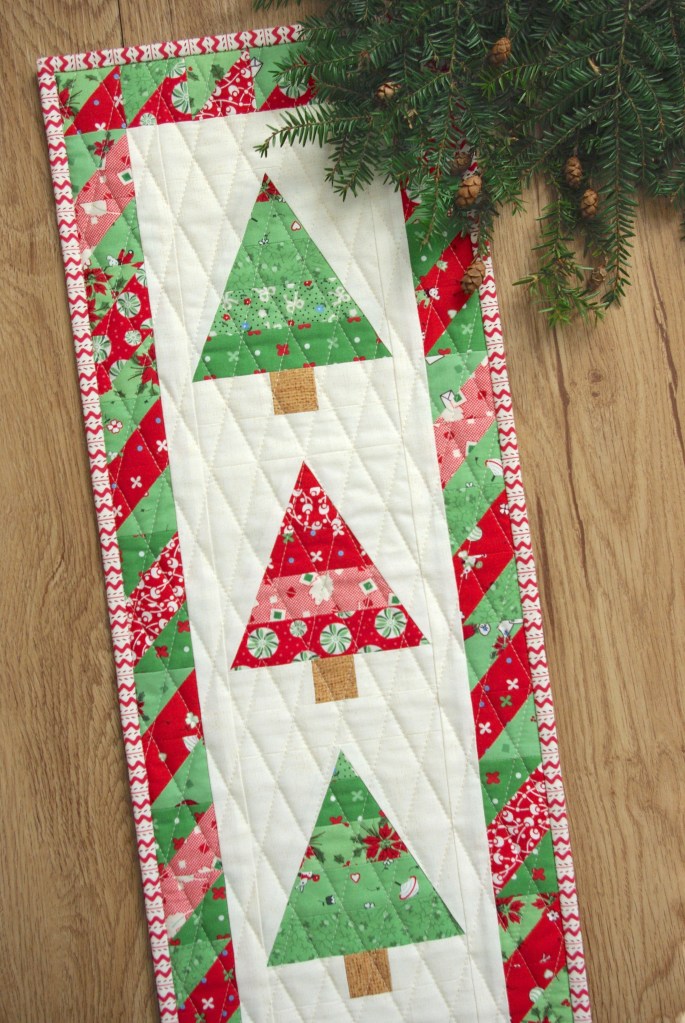
To celebrate Christmas in July, I released a fun and whimsical pattern called Christmastime. It’s a table topper or wall hanging, and it’s definitely a fun one to watch come together. And, the tree is constructed with no half square triangles!
If we want to talk favorites, I’d have to say my Stitches & Stars is up there. I made mine using fat quarters from the Elements collection by Art Gallery Fabrics. I just love this line and I think this pattern is a great way to showcase the beautiful jewel tones. Stitches & Stars comes in four sizes and is a popular choice among quilters. 🙂
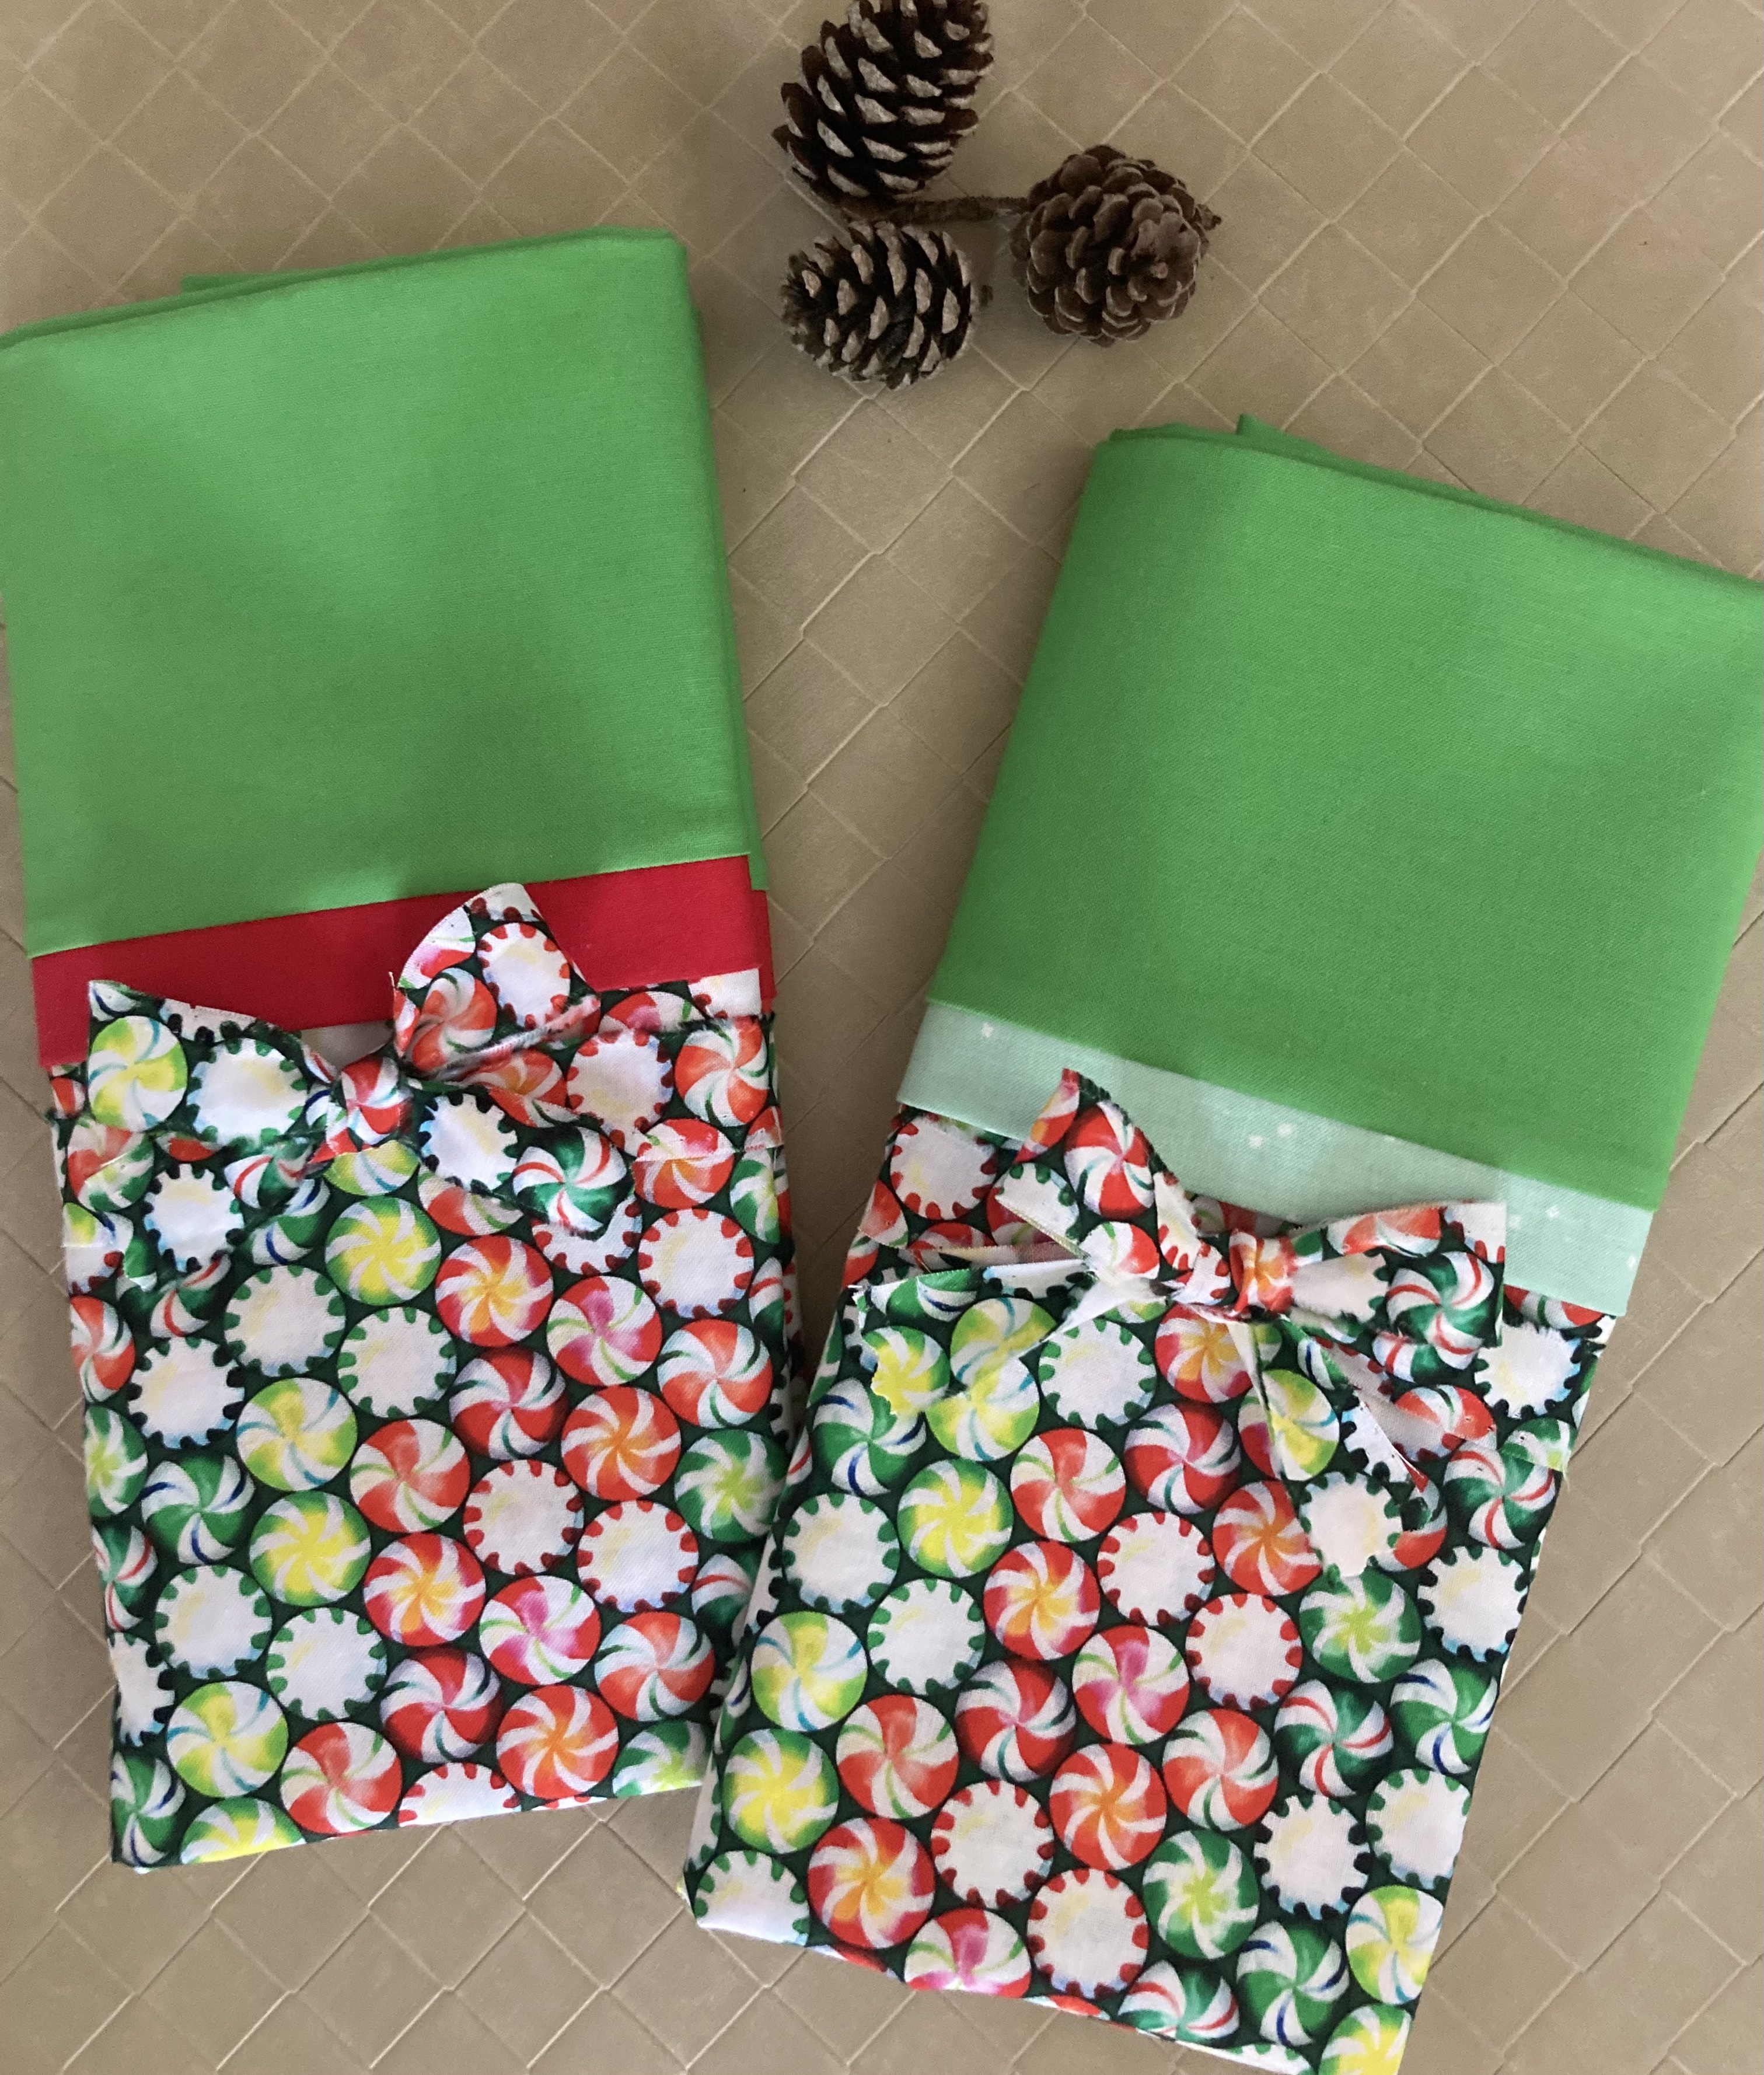
Making handmade gifts for Christmas has become something I do year after year. In 2022, I made pillowcases and a darling Easter mini quilt for family members.
Lastly, I made a mini tree skirt for a new tree addition in my sun room. It’s also a quick and simple project and can be made in no time.
That wraps up 2022 projects. I’ve got plenty planned for 2023 so be sure to stop back! 😉
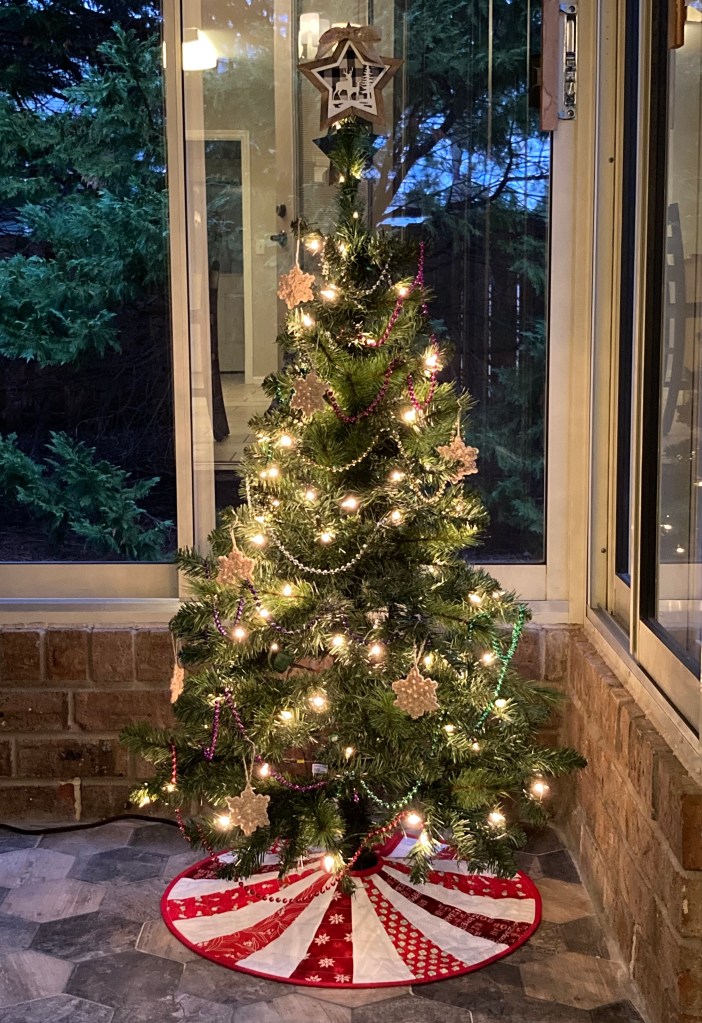
This Christmas season I bought a little 4’ pre-lit artificial tree to brighten up my sunroom. At first, I wasn’t going to do much but light it, then I decided to add a few decorations but keep it simple.
First, I hung a variety of colored bead strands then added crocheted snowflakes my daughter made me a while back. Wanting a rustic look, I found a lightweight star ornament with a deer scene that’s perfect for my ‘in the pines’ setting. My husband easily made a wire spring, drilled it into the bottom and voilà—a star topper is born! 🙂
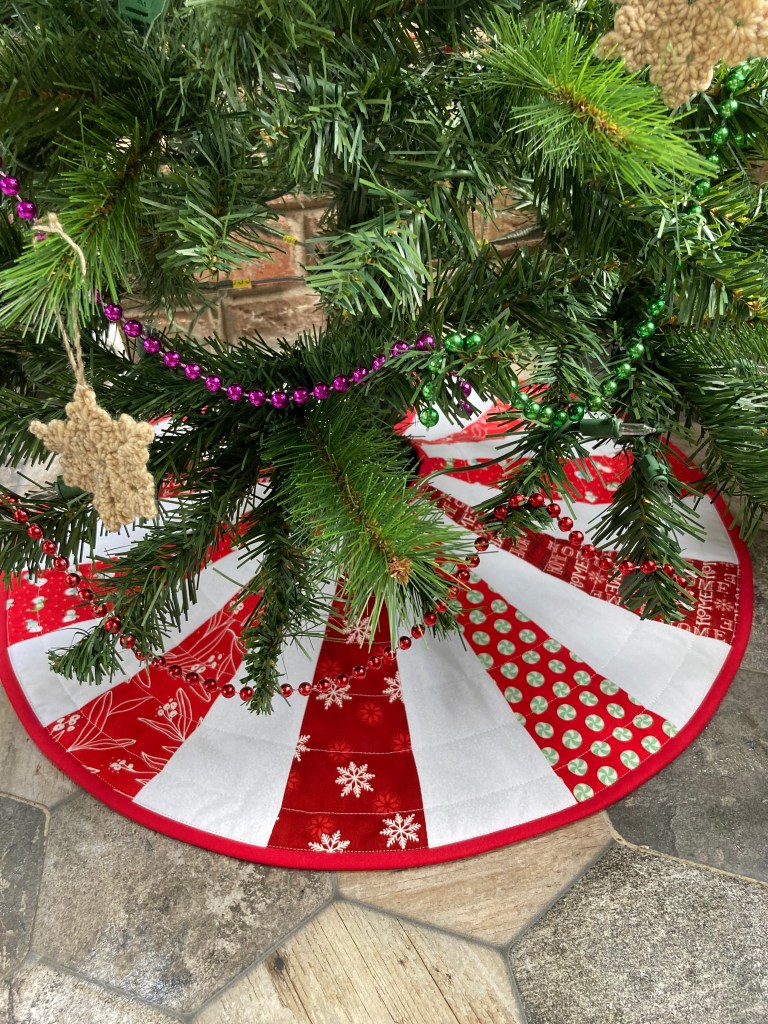
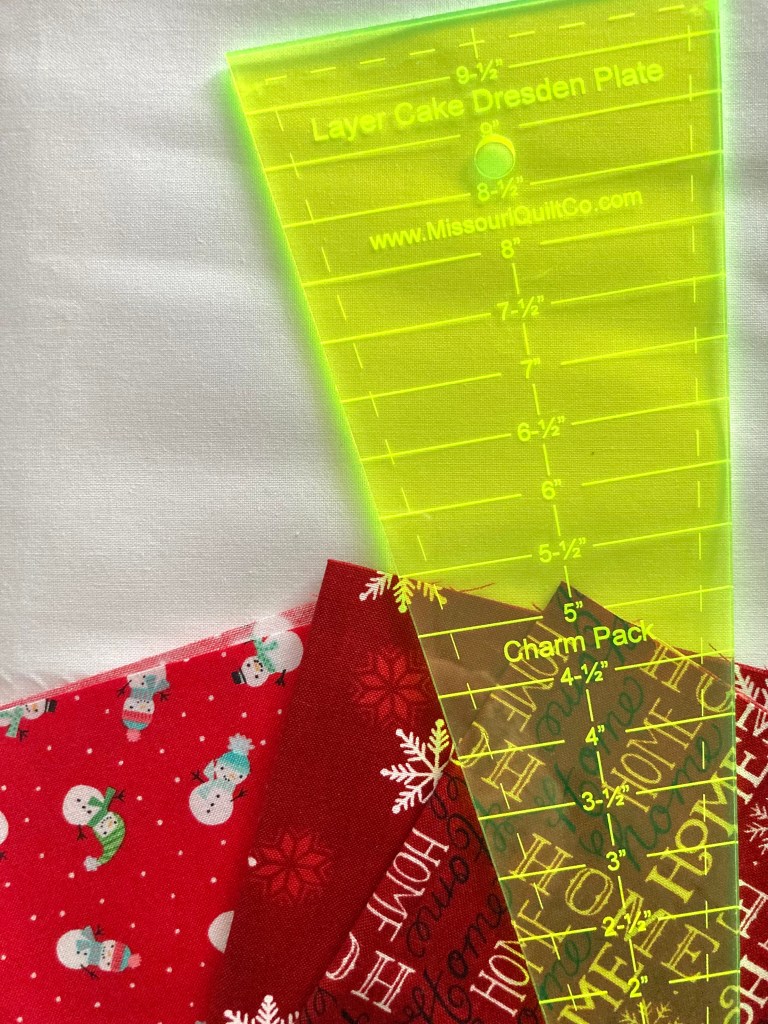
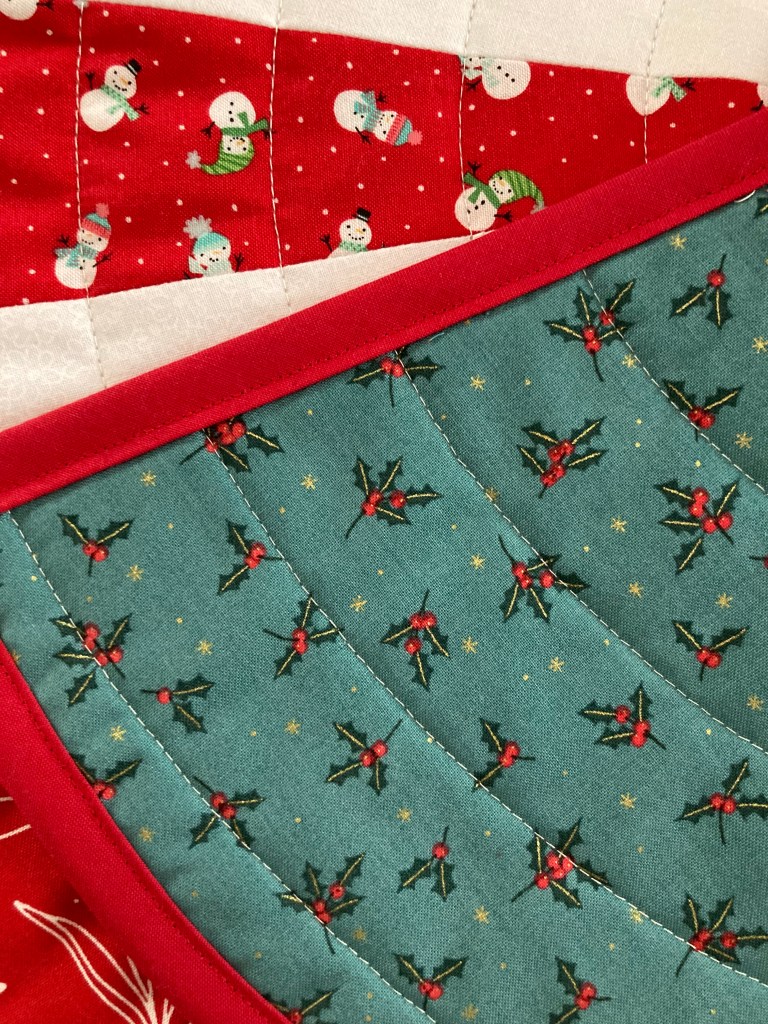
Once I’d gotten to this point, I knew a tree skirt would be in order. Years ago, I purchased a 10” Dresden ruler for making mini tree skirts I gave as gifts, so already having that was great. I also had leftovers from five holiday fat quarters from last year’s stockings. It ended up I was able to get two Desden cuts from each—exactly what was needed.
I used a tonal white-on-white flower print (leftover from my Scrappy On Point Four Patch quilt) for contrast fabric, and luckily had enough Kona Red solid to make the bias binding. I was ready to go!
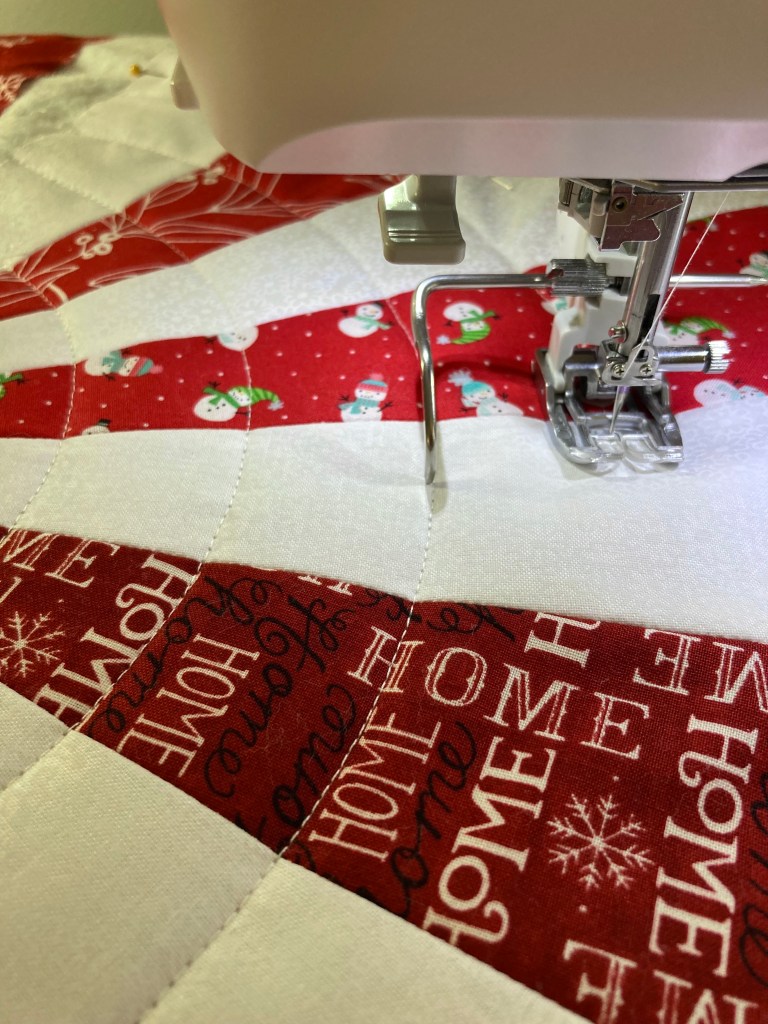
Sewing the Dresden pieces together goes really fast. I think it took me more time to press the fabric and cut them. 😉 I used a metallic holly berry print with a green background for the backing, also a leftover.
Figuring how to quilt it was a bit more of a challenge. On the others, I quilted a tree in each section but that required a lot of hiding thread ends that I didn’t want to do. I thought of going around circle after circle, but was afraid it would look like a spider web…so I let that idea rest for a few days.
Nothing else came to mind so I decided to give circles a try after all. To start, I quilted about ½” down from the center. I set up my walking foot guide to 1 ½” and continued from top to bottom.
The quilting ended up looking nice, and I don’t think it looks anything like a spider web. 😉
Next was attaching the binding. Since I lack experience with sewing circles, I knew my sewing skills would be put to the test, but overall it was a good turnout!
I now have a scrappy mini tree skirt and this little tree is decked out for the holidays!
If you’ve got a small tree, I suggest giving this project a try. It’s fast and easy. Also, these little tree skirts make great gifts, too.
Wee Three Trees is now available in kits! Shabby Fabrics has this little mini pattern bundled with festive fabric so that one-stop shopping makes it easy. Inside the kit you will find beautiful Moda fabric and a paper copy of the pattern. Kits are limited so be sure to order early! 🙂
Have your own fabric? No problem! You can purchase either a paper or PDF pattern in my Etsy shop.
Wee Three Trees is designed for the confident beginner, but of course it’s a fun make for anyone. Plus, it goes together fast making it a great weekend project. And now’s the time to start on that holiday sewing, right? 😉
Looking for a quick and easy-to-make gift with the holidays fast approaching? I’ve got a few suggestions that just might help.
If you have someone on your list that seems to have everything, a personalized handmade gift can be the one thing they’re missing. If you’re like me, you enjoy giving people something handcrafted verses something store bought.
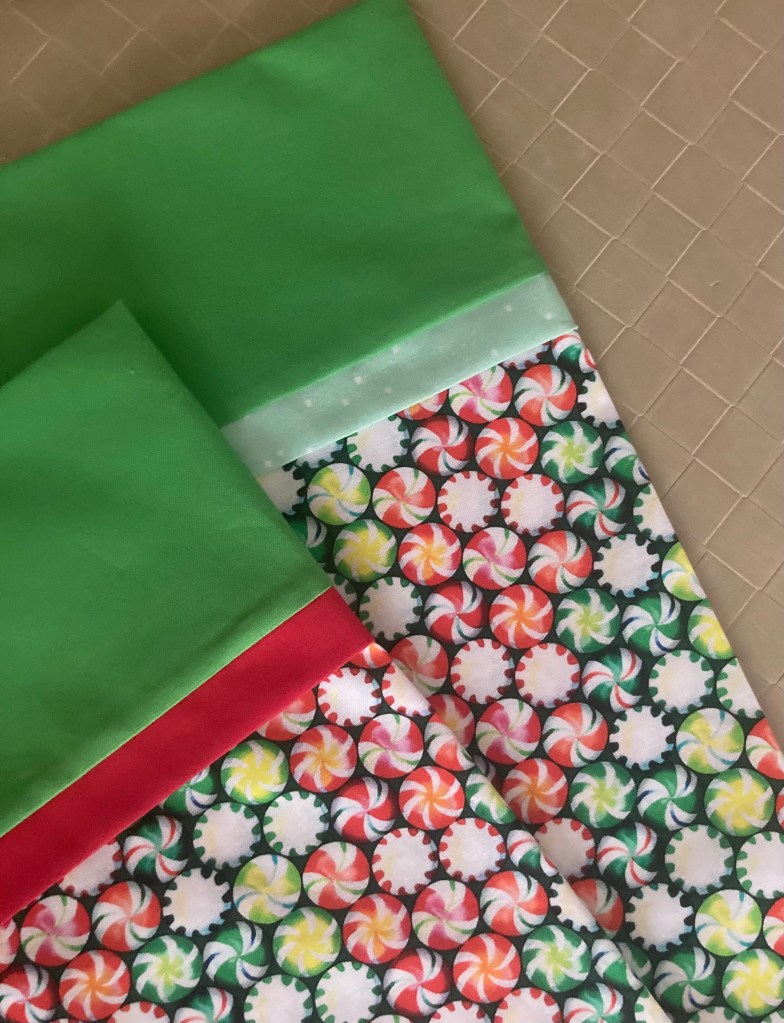
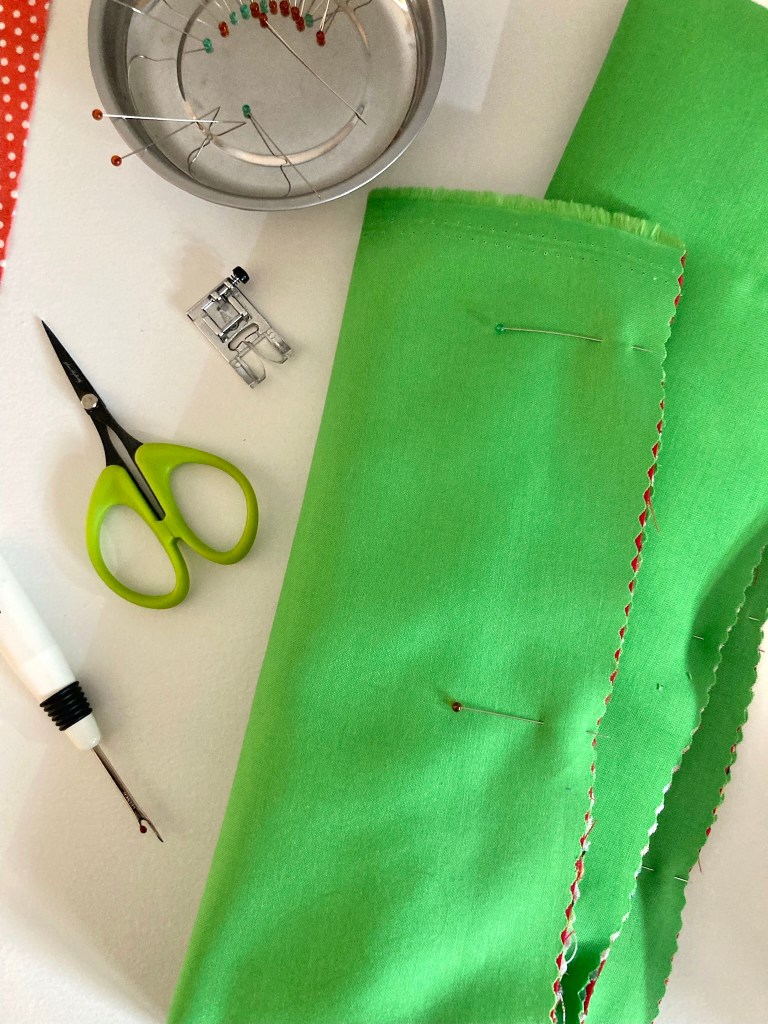
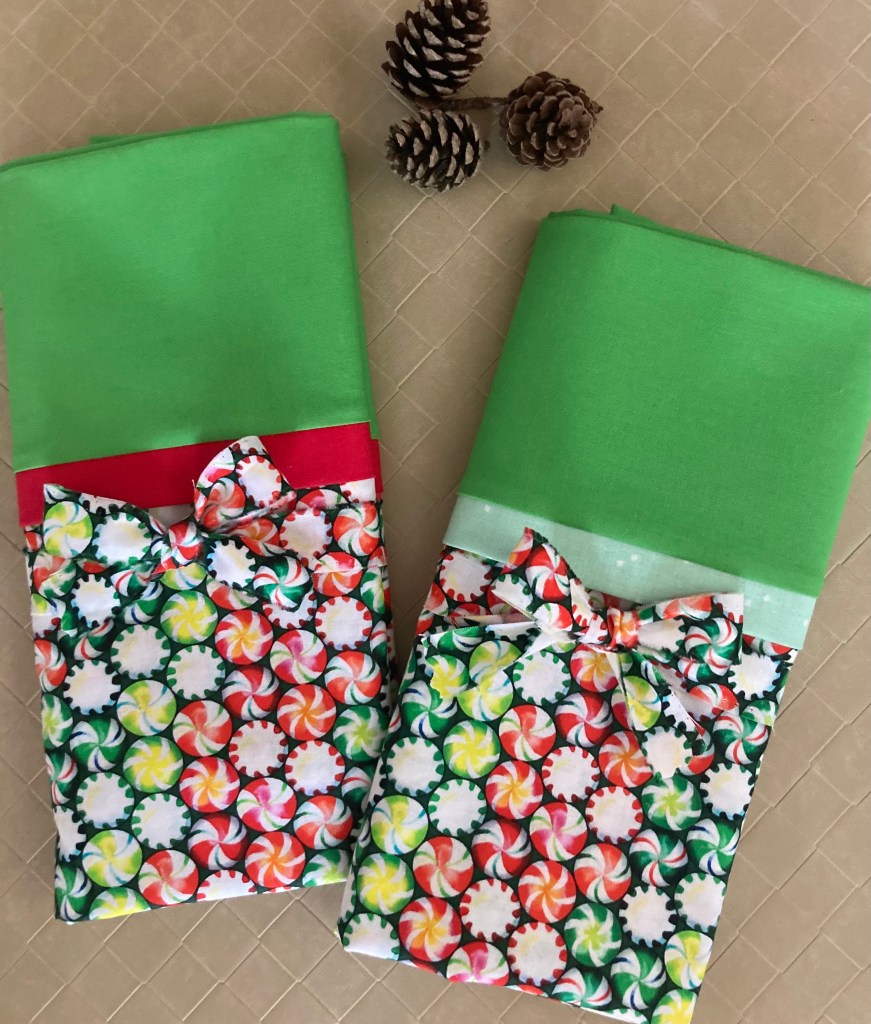
Since everyone in my family has at least two quilts from me, I occasionally move from the realm of quilting for gifts. One great idea is pillowcases. These can be really fun because you can make them personal by choosing fabric that reflects the recipient’s hobbies, interests or simply something they’d enjoy. My husband is a huge bird watcher so I made him a bird print pillowcase.
Since I’m all out of ideas for my son, I decided on pillowcases for him and his girlfriend. I chose a bright and whimsical fabric that’ll be perfect throughout the holiday season.
You’ve gotta love those French seams! If you’re not familiar with them, this is a great introduction.
When trimming the pillowcase fabric, use the cutaway selvage for tying it up before gifting. It makes a nice presentation if you use a pinking rotary cutter or pinking shears.
Here’s a future money saving tip—shop for fabric after the holidays. You can get last year’s prints for a lot less than new ones.
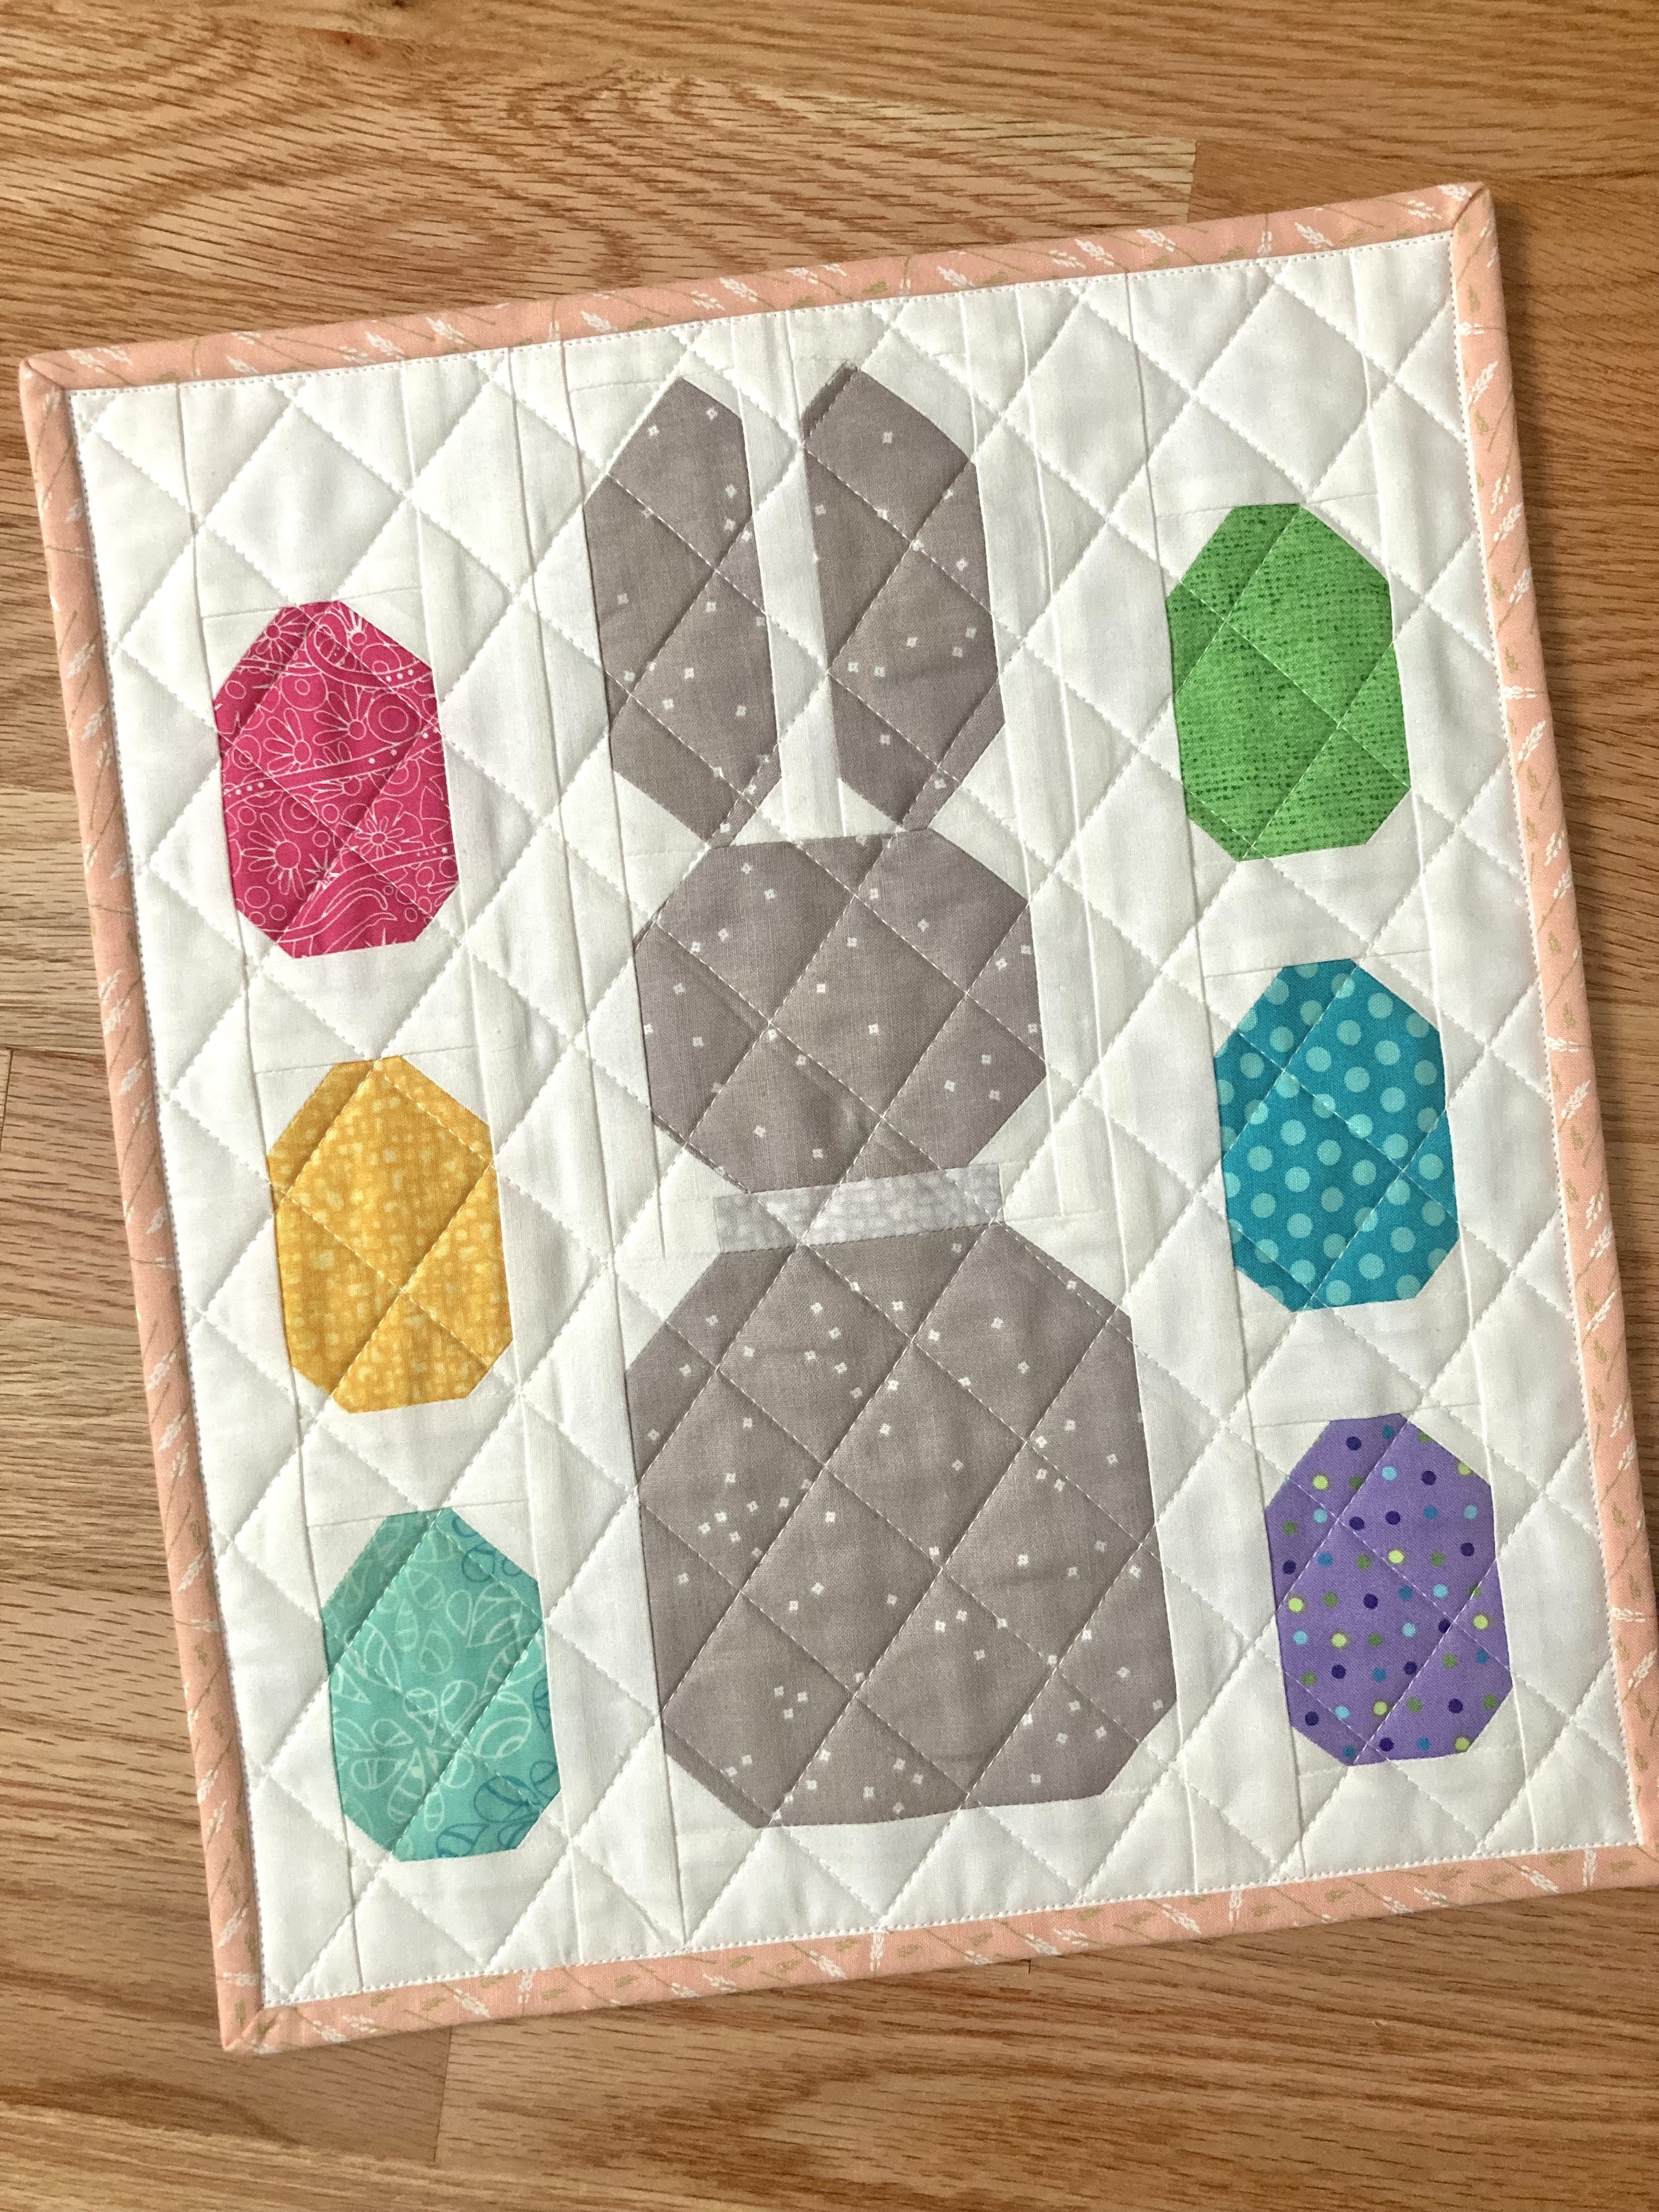
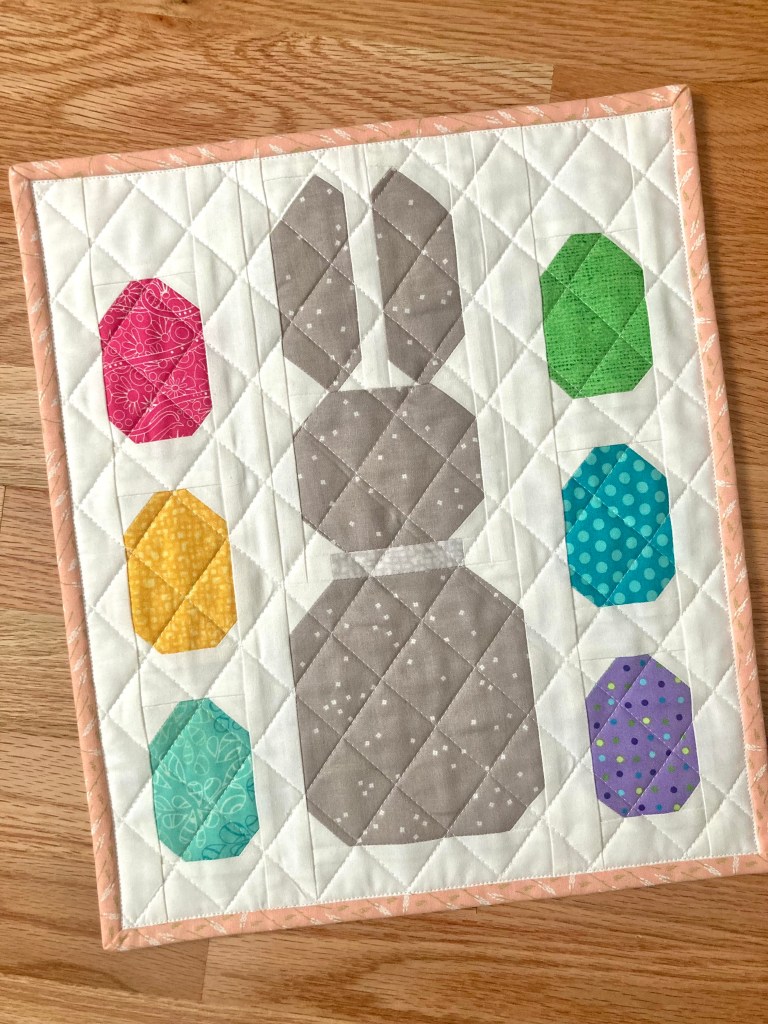
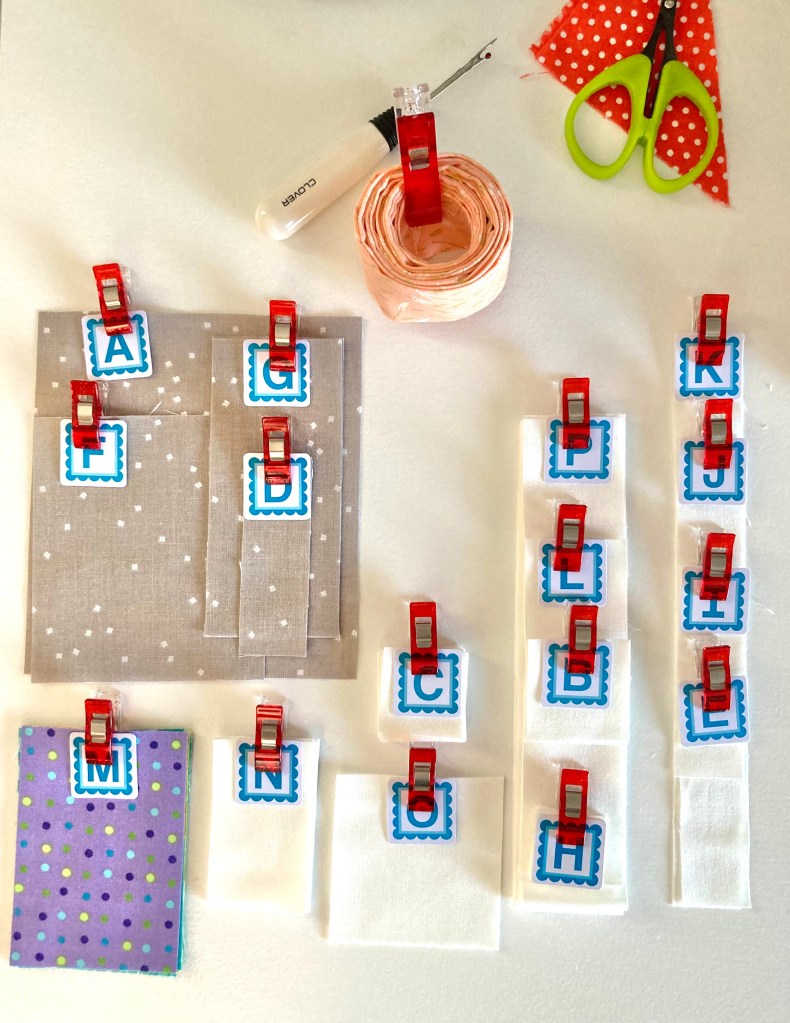
My daughter requested an Easter Bunny mini quilt from a free Bernina tutorial. It’s so cute and easy.
I think it took me more time to cut the fabric than to make it. 😉
So now I’m set and am already planning for next year…
I also have other small gift ideas under my TUTORIALS tab. Check it out and see if there’s anything you’d like to try!