quilting, Uncategorized

Inspired by Fabric

IMG_3362

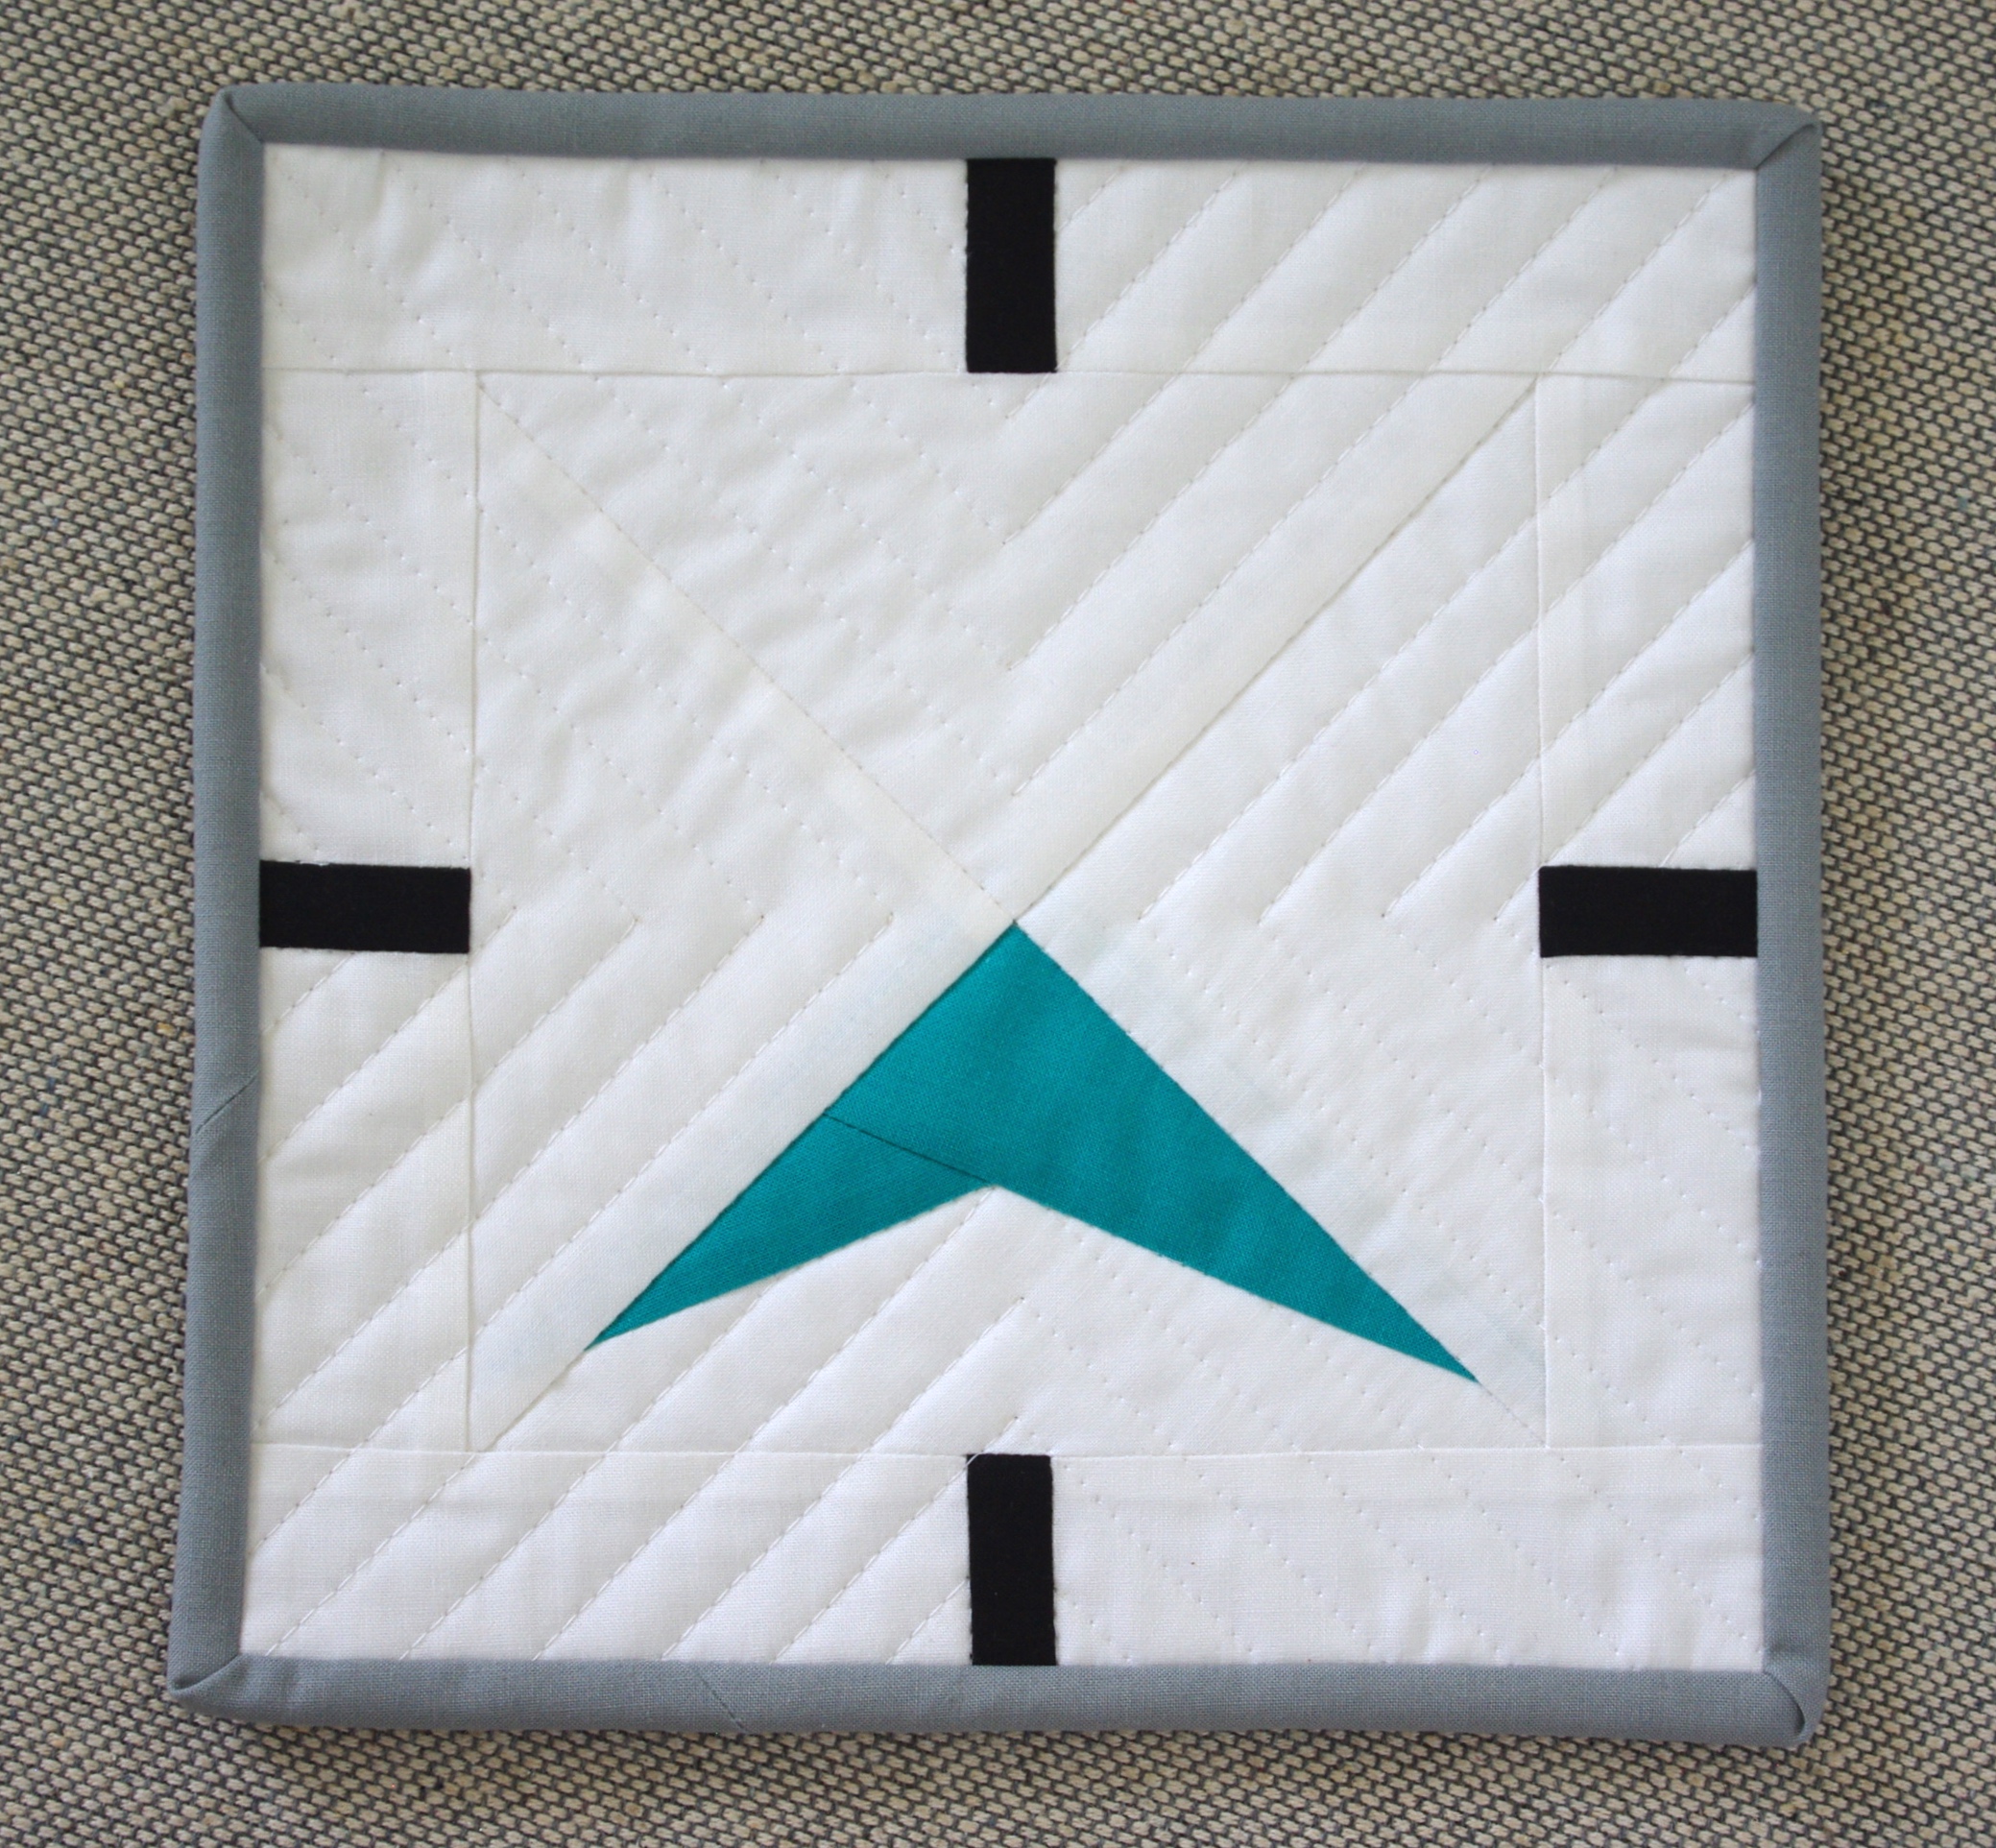
I was recently asked if fabric has ever inspired me and my immediate answer was ‘Yes!’ The best example I can give is my Dash into Spring Placemat.

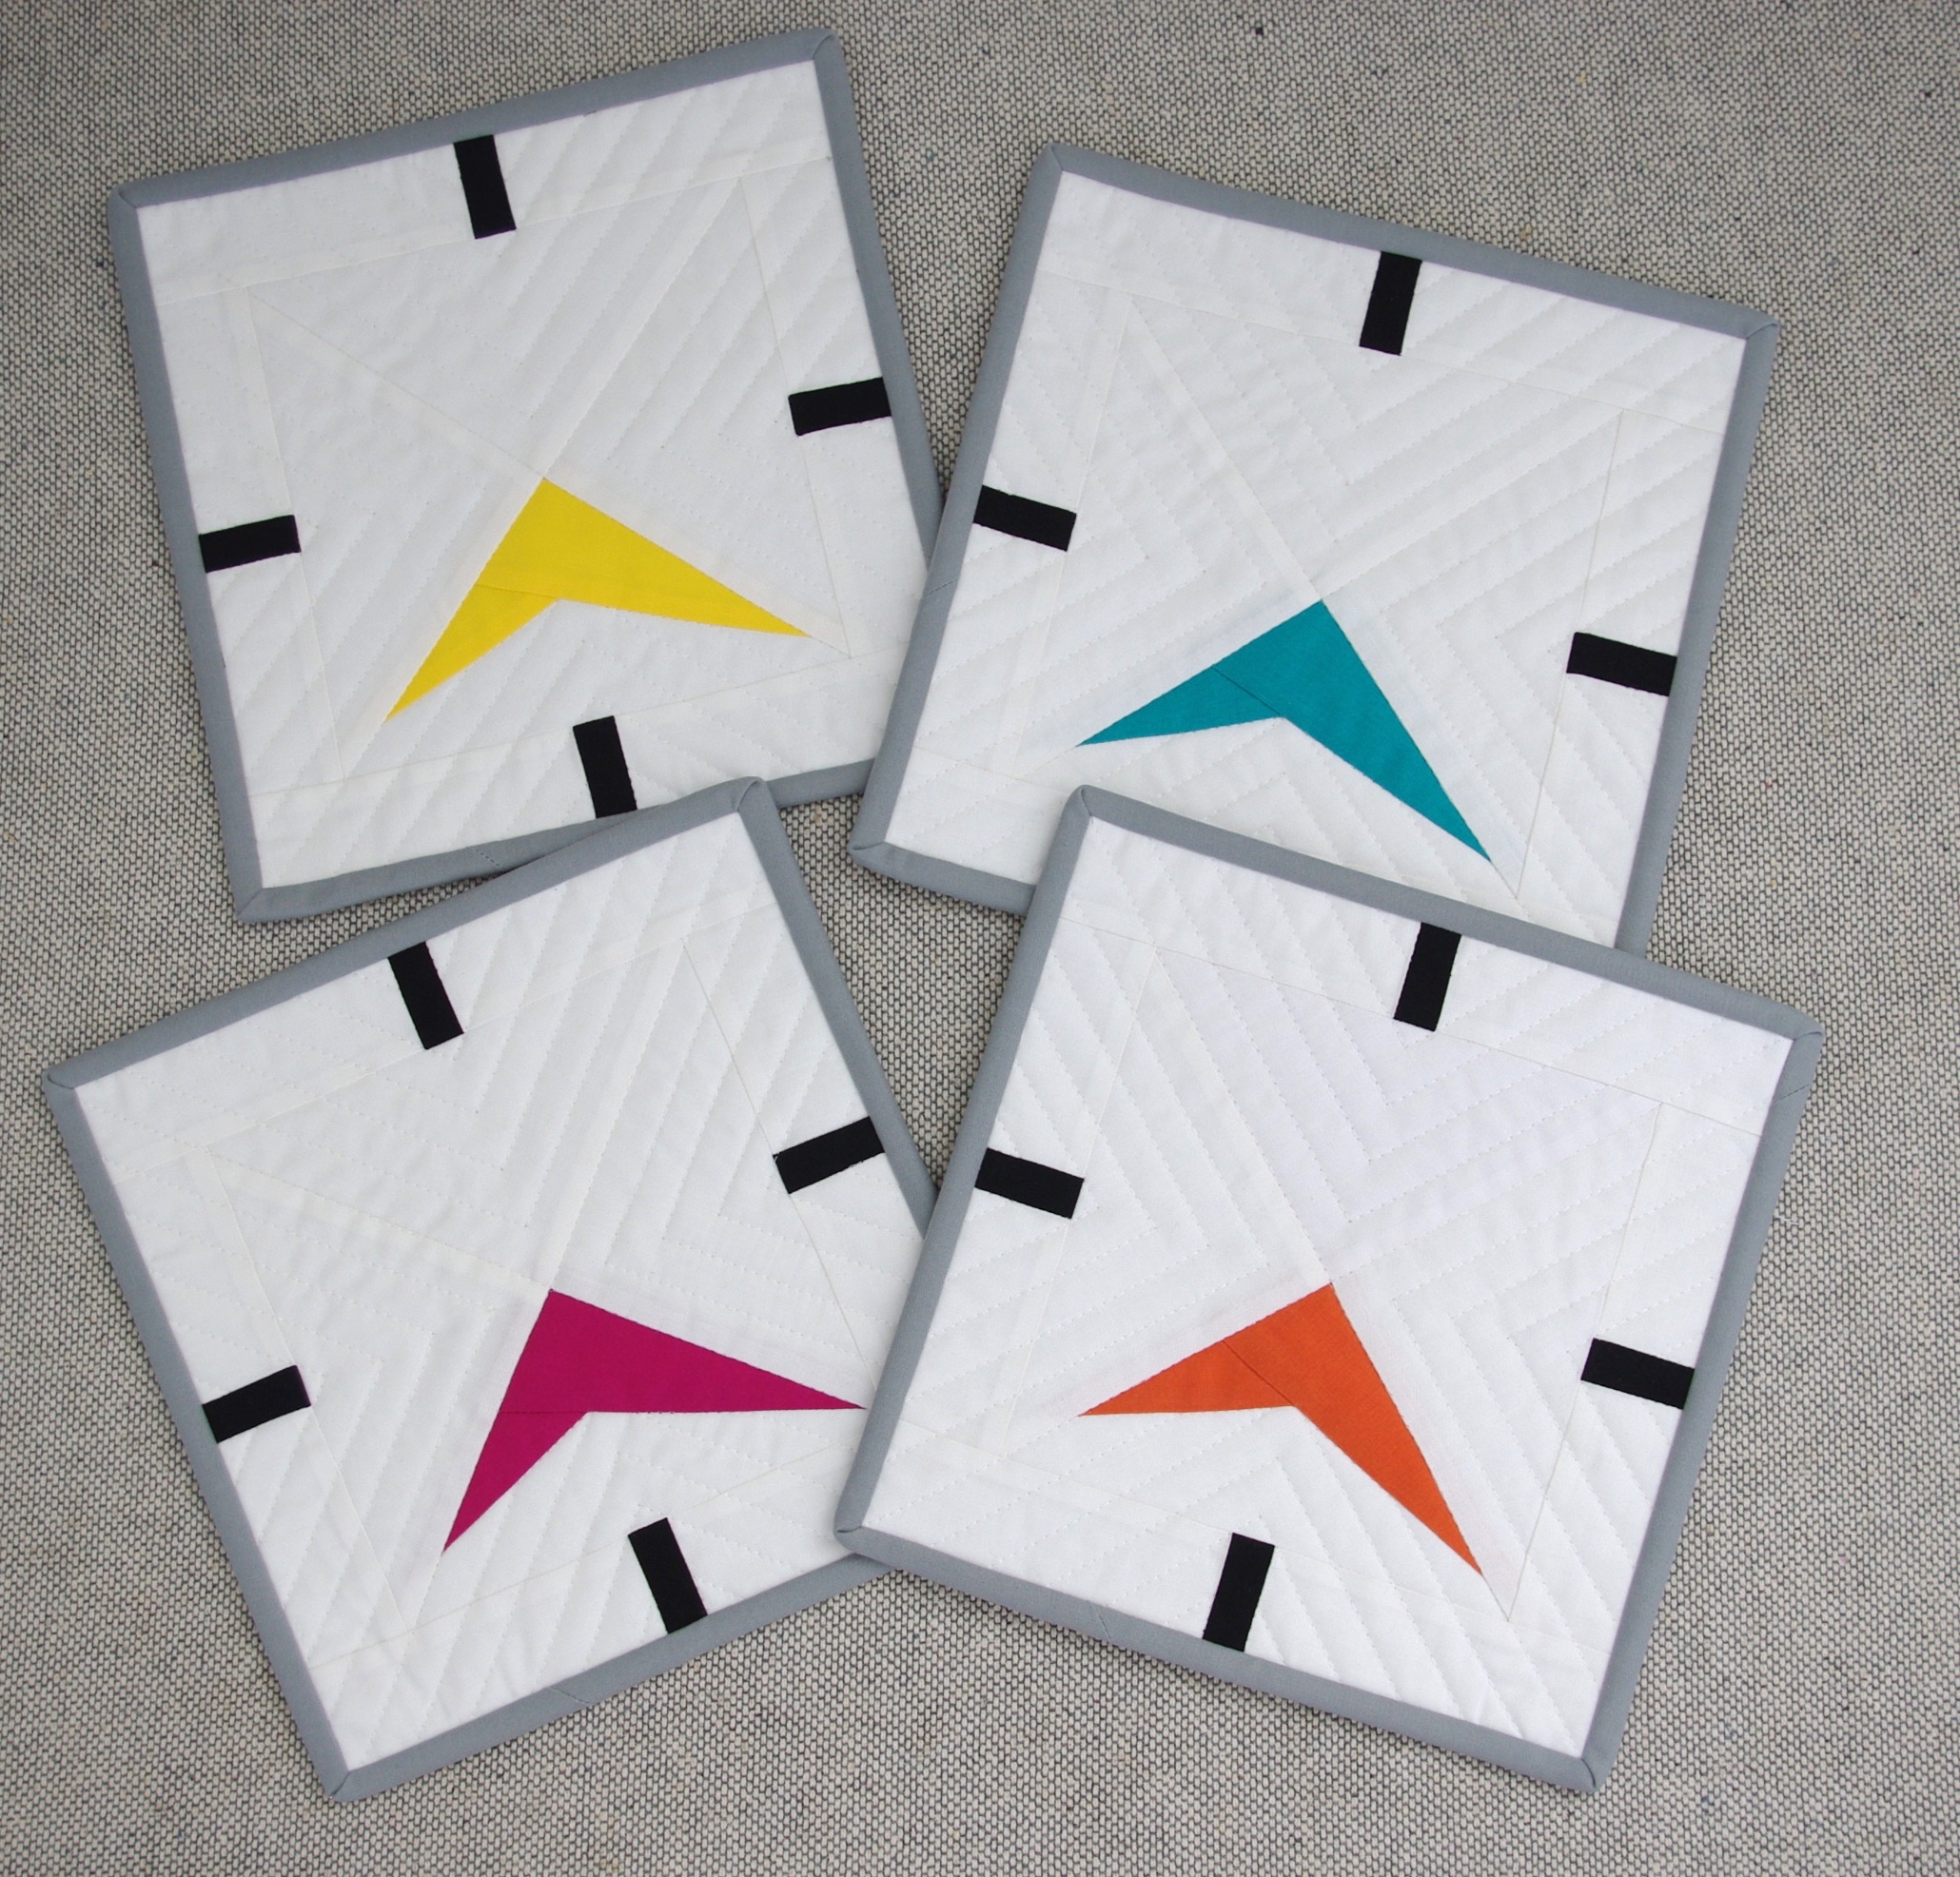
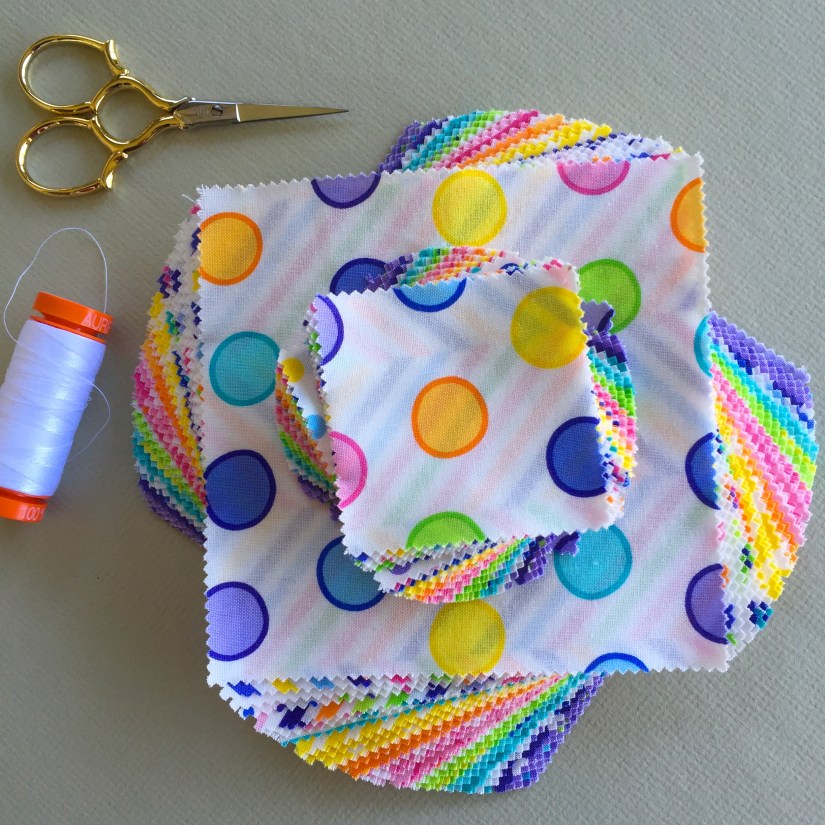
The story behind the idea is pretty simple. As a gift, I was given two charm packs of Moda’s Dot, Dot, Dash! by Me and My Sister Designs. For some reason, I never put them with my stash; I found myself thumbing through the brightly colored fabrics…green, pink, purple, yellow, and blue. And then it came to me—a placemat depicting an outside scene complete with grass, butterflies, flowers, sky and sun! The colors were perfect for it, and all I’d need is one charm pack. I can’t explain where the idea came from other than by just looking at the fabric and thinking about what I could do with it.

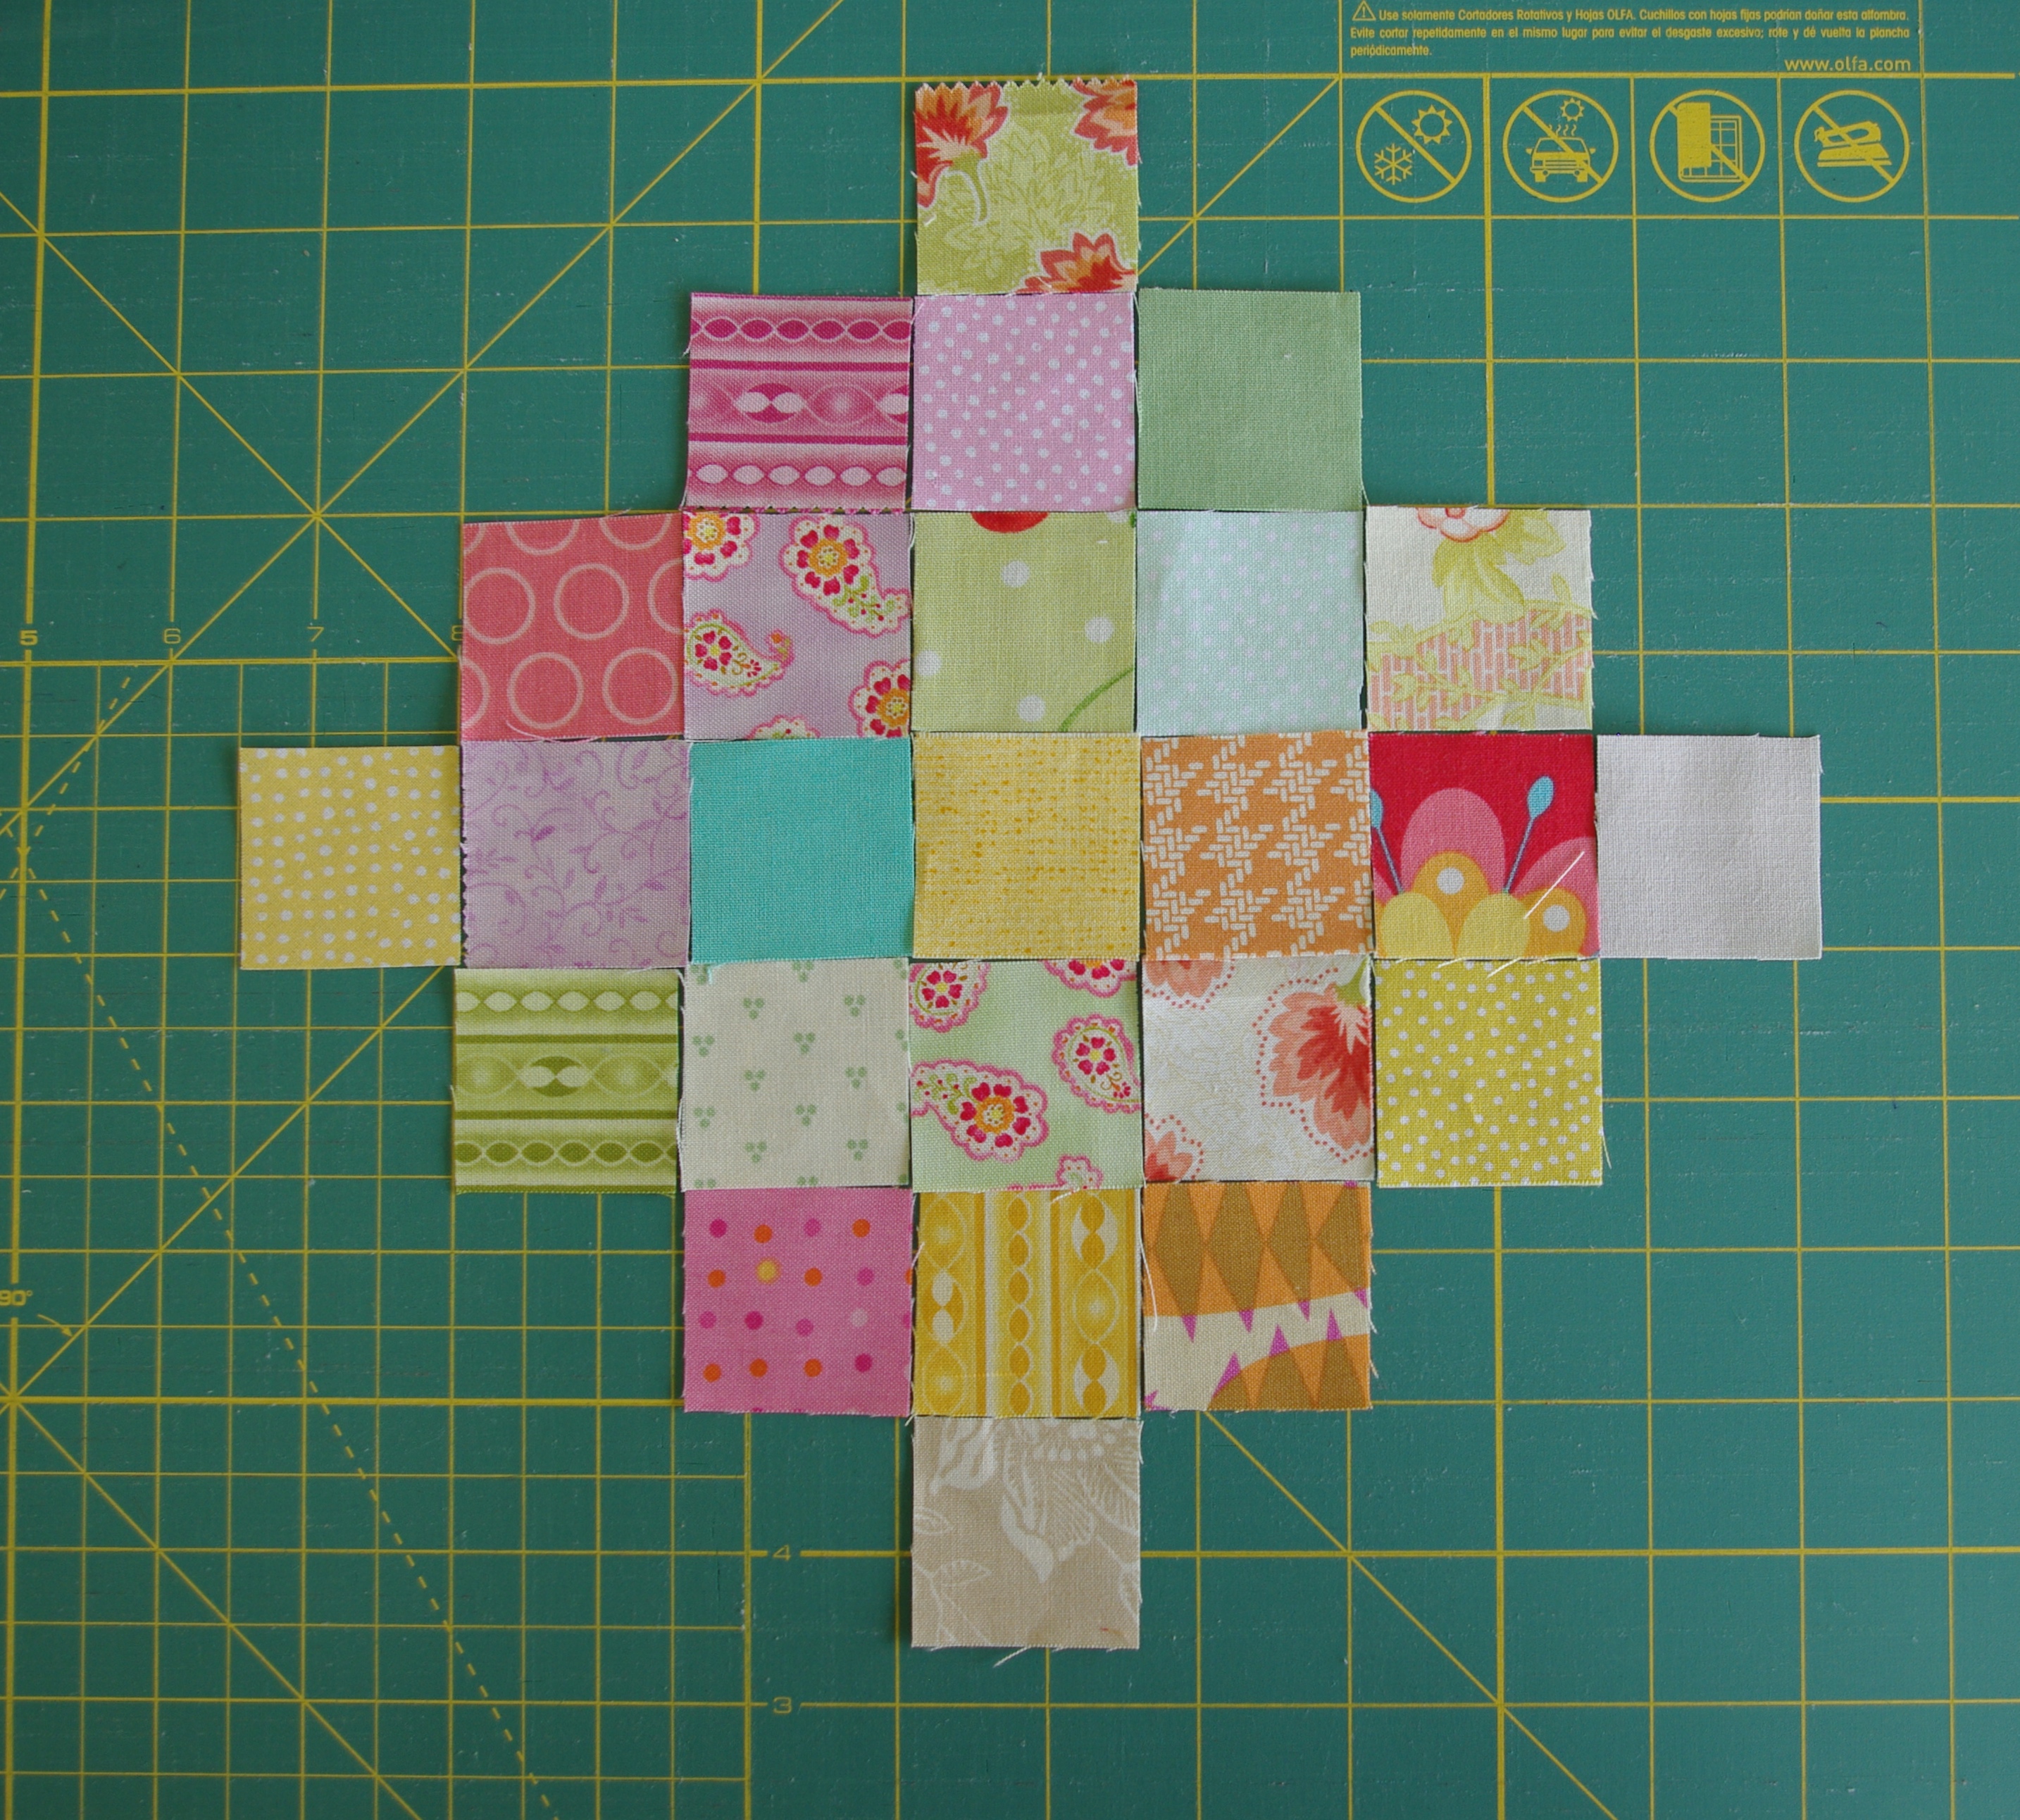
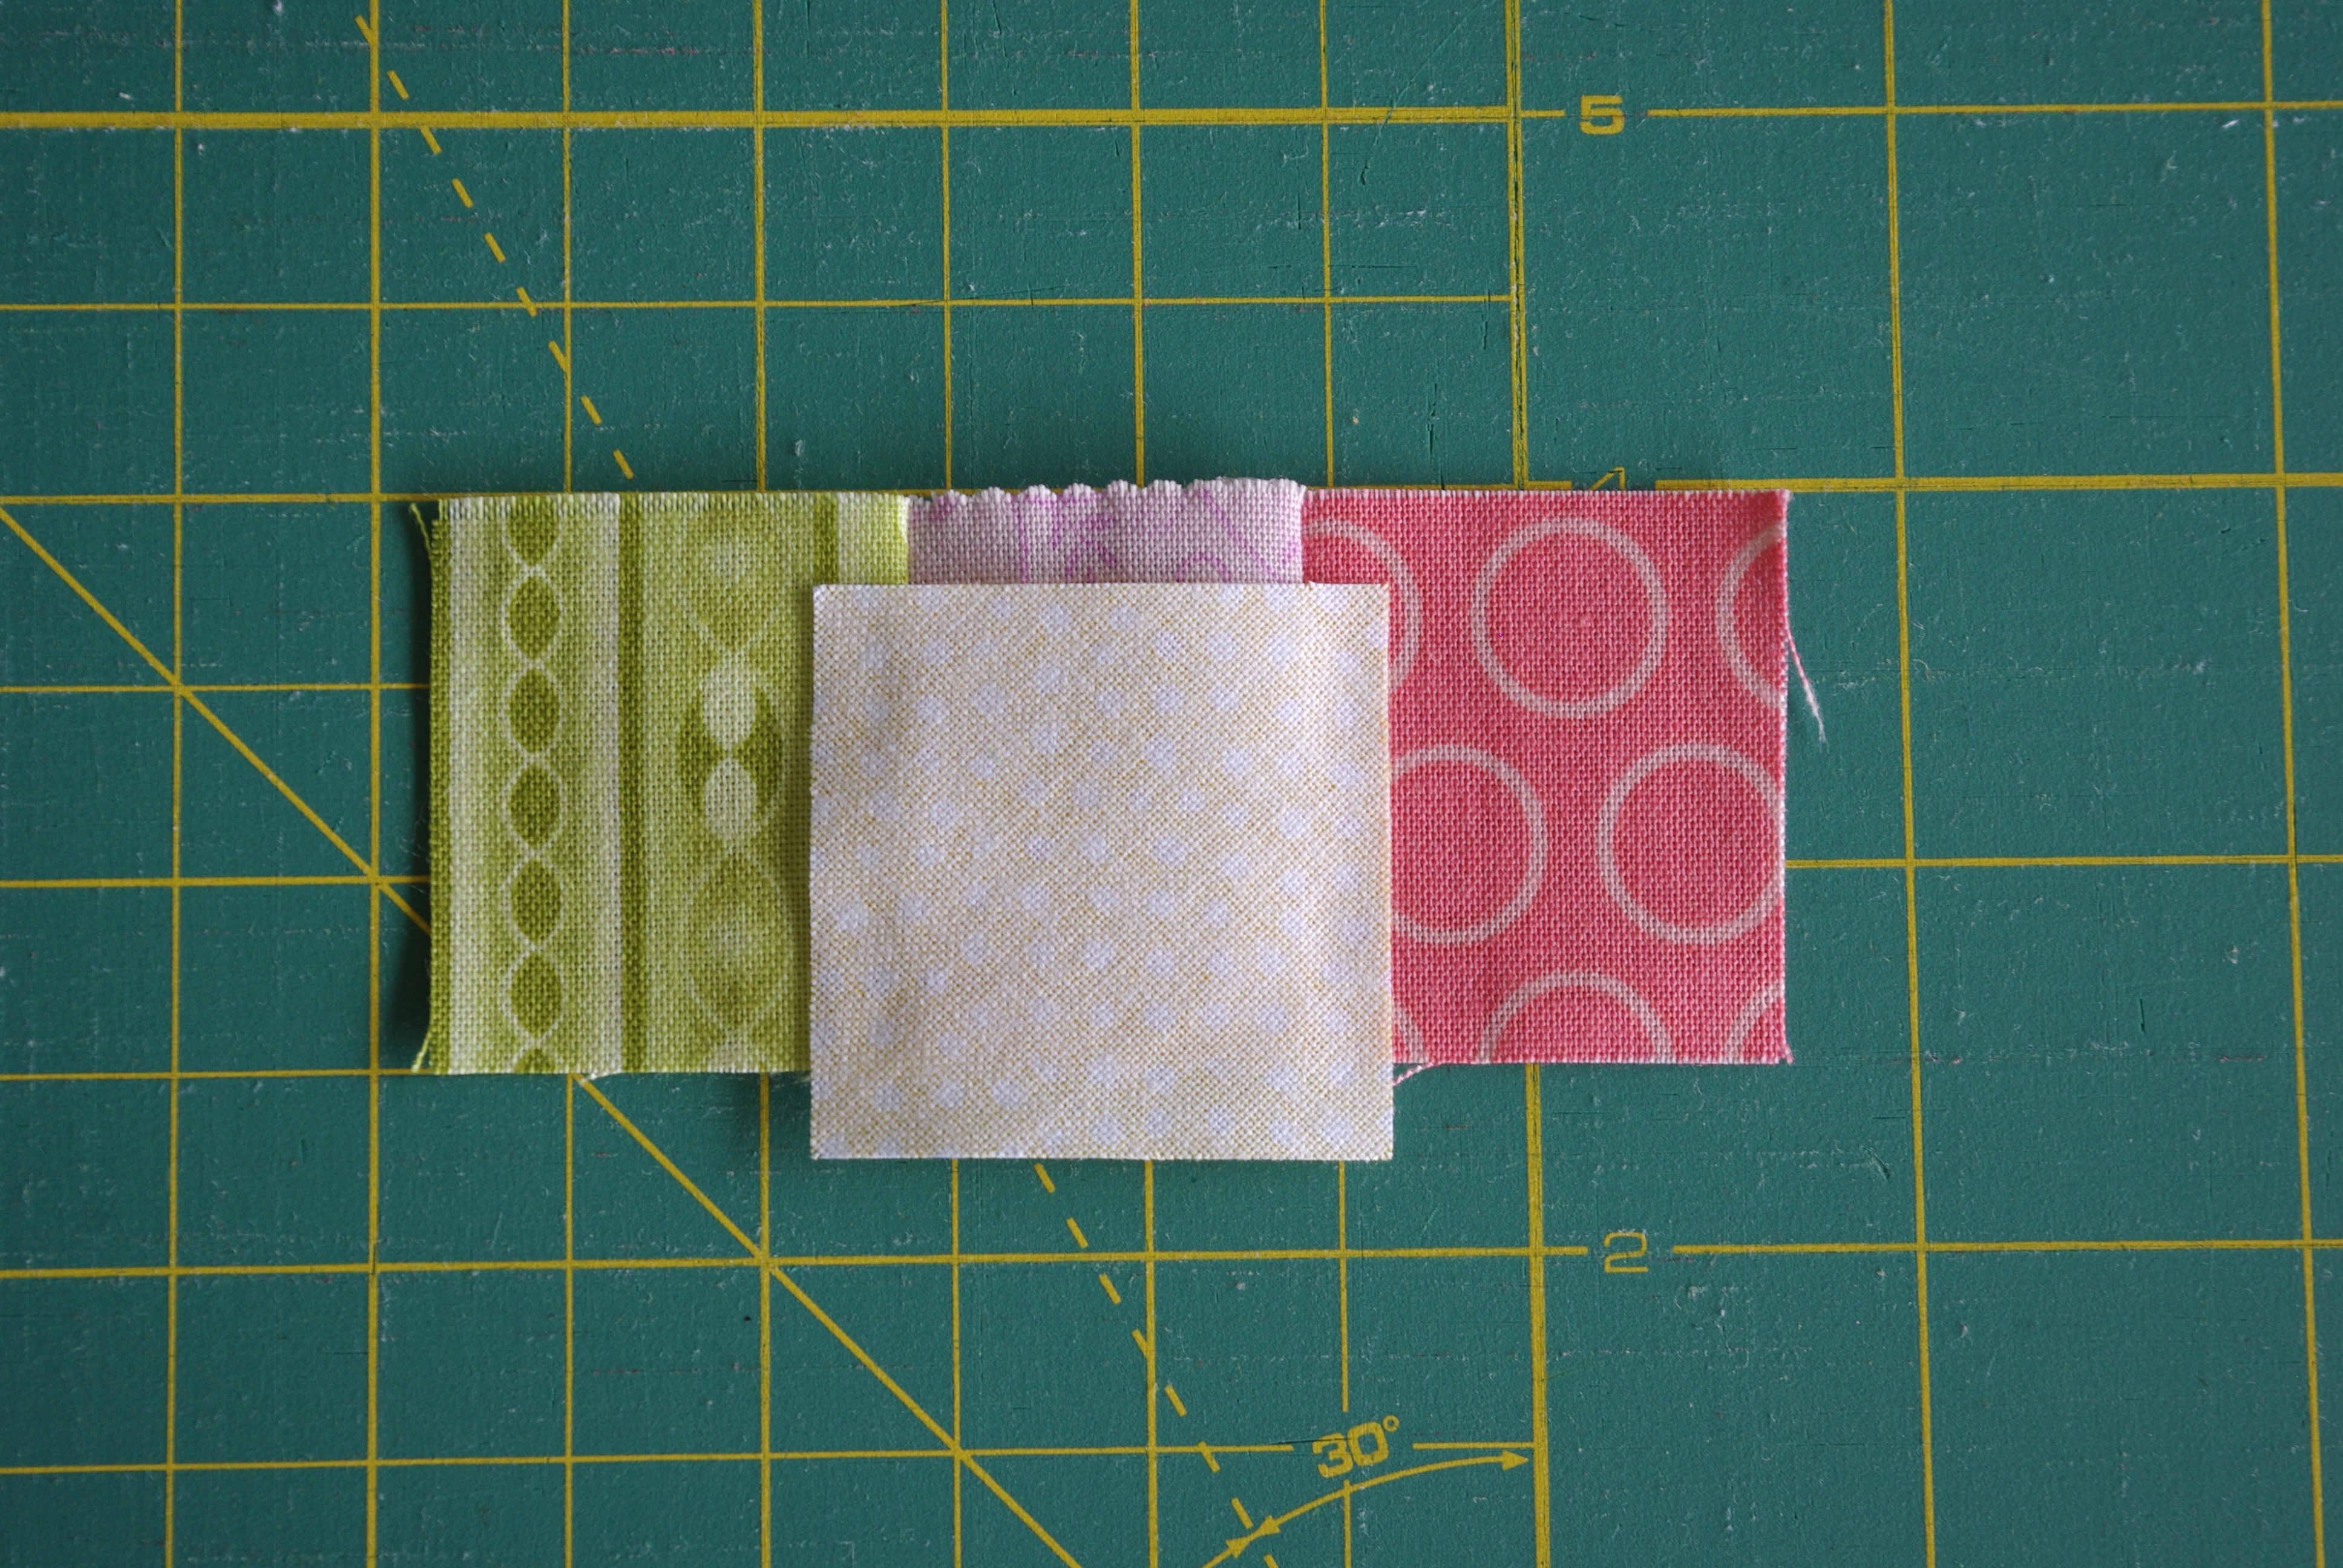
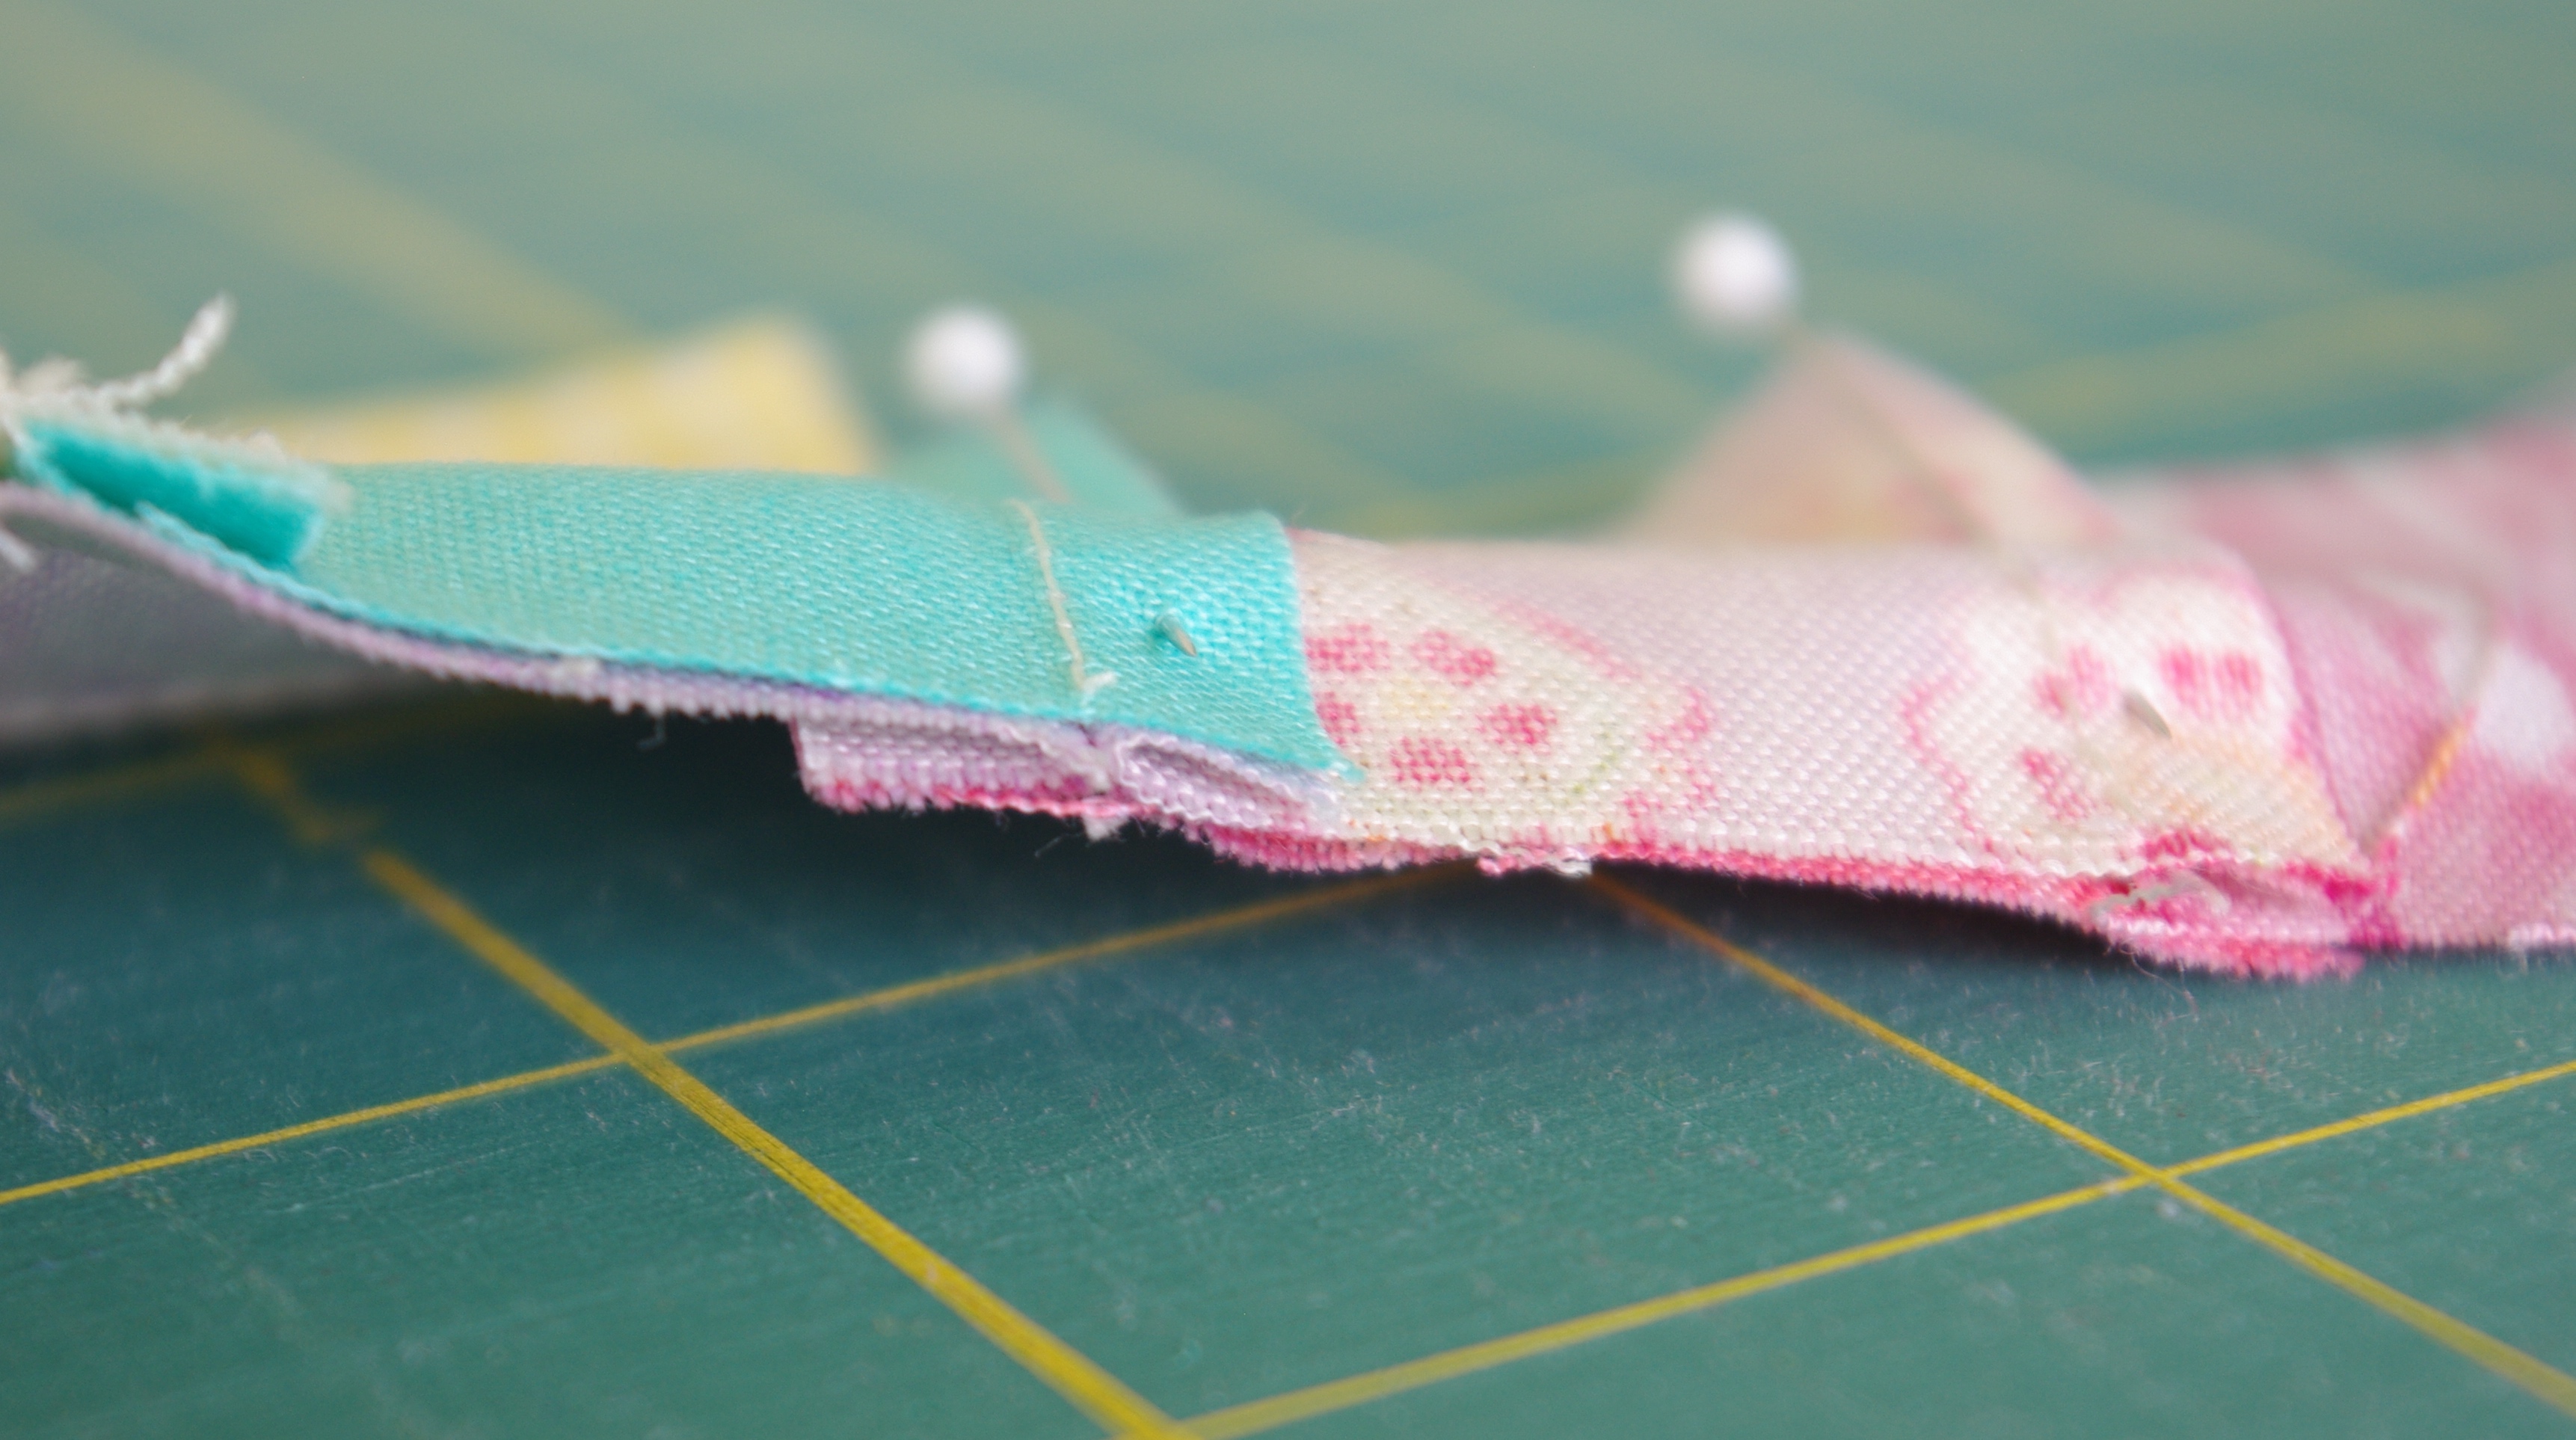
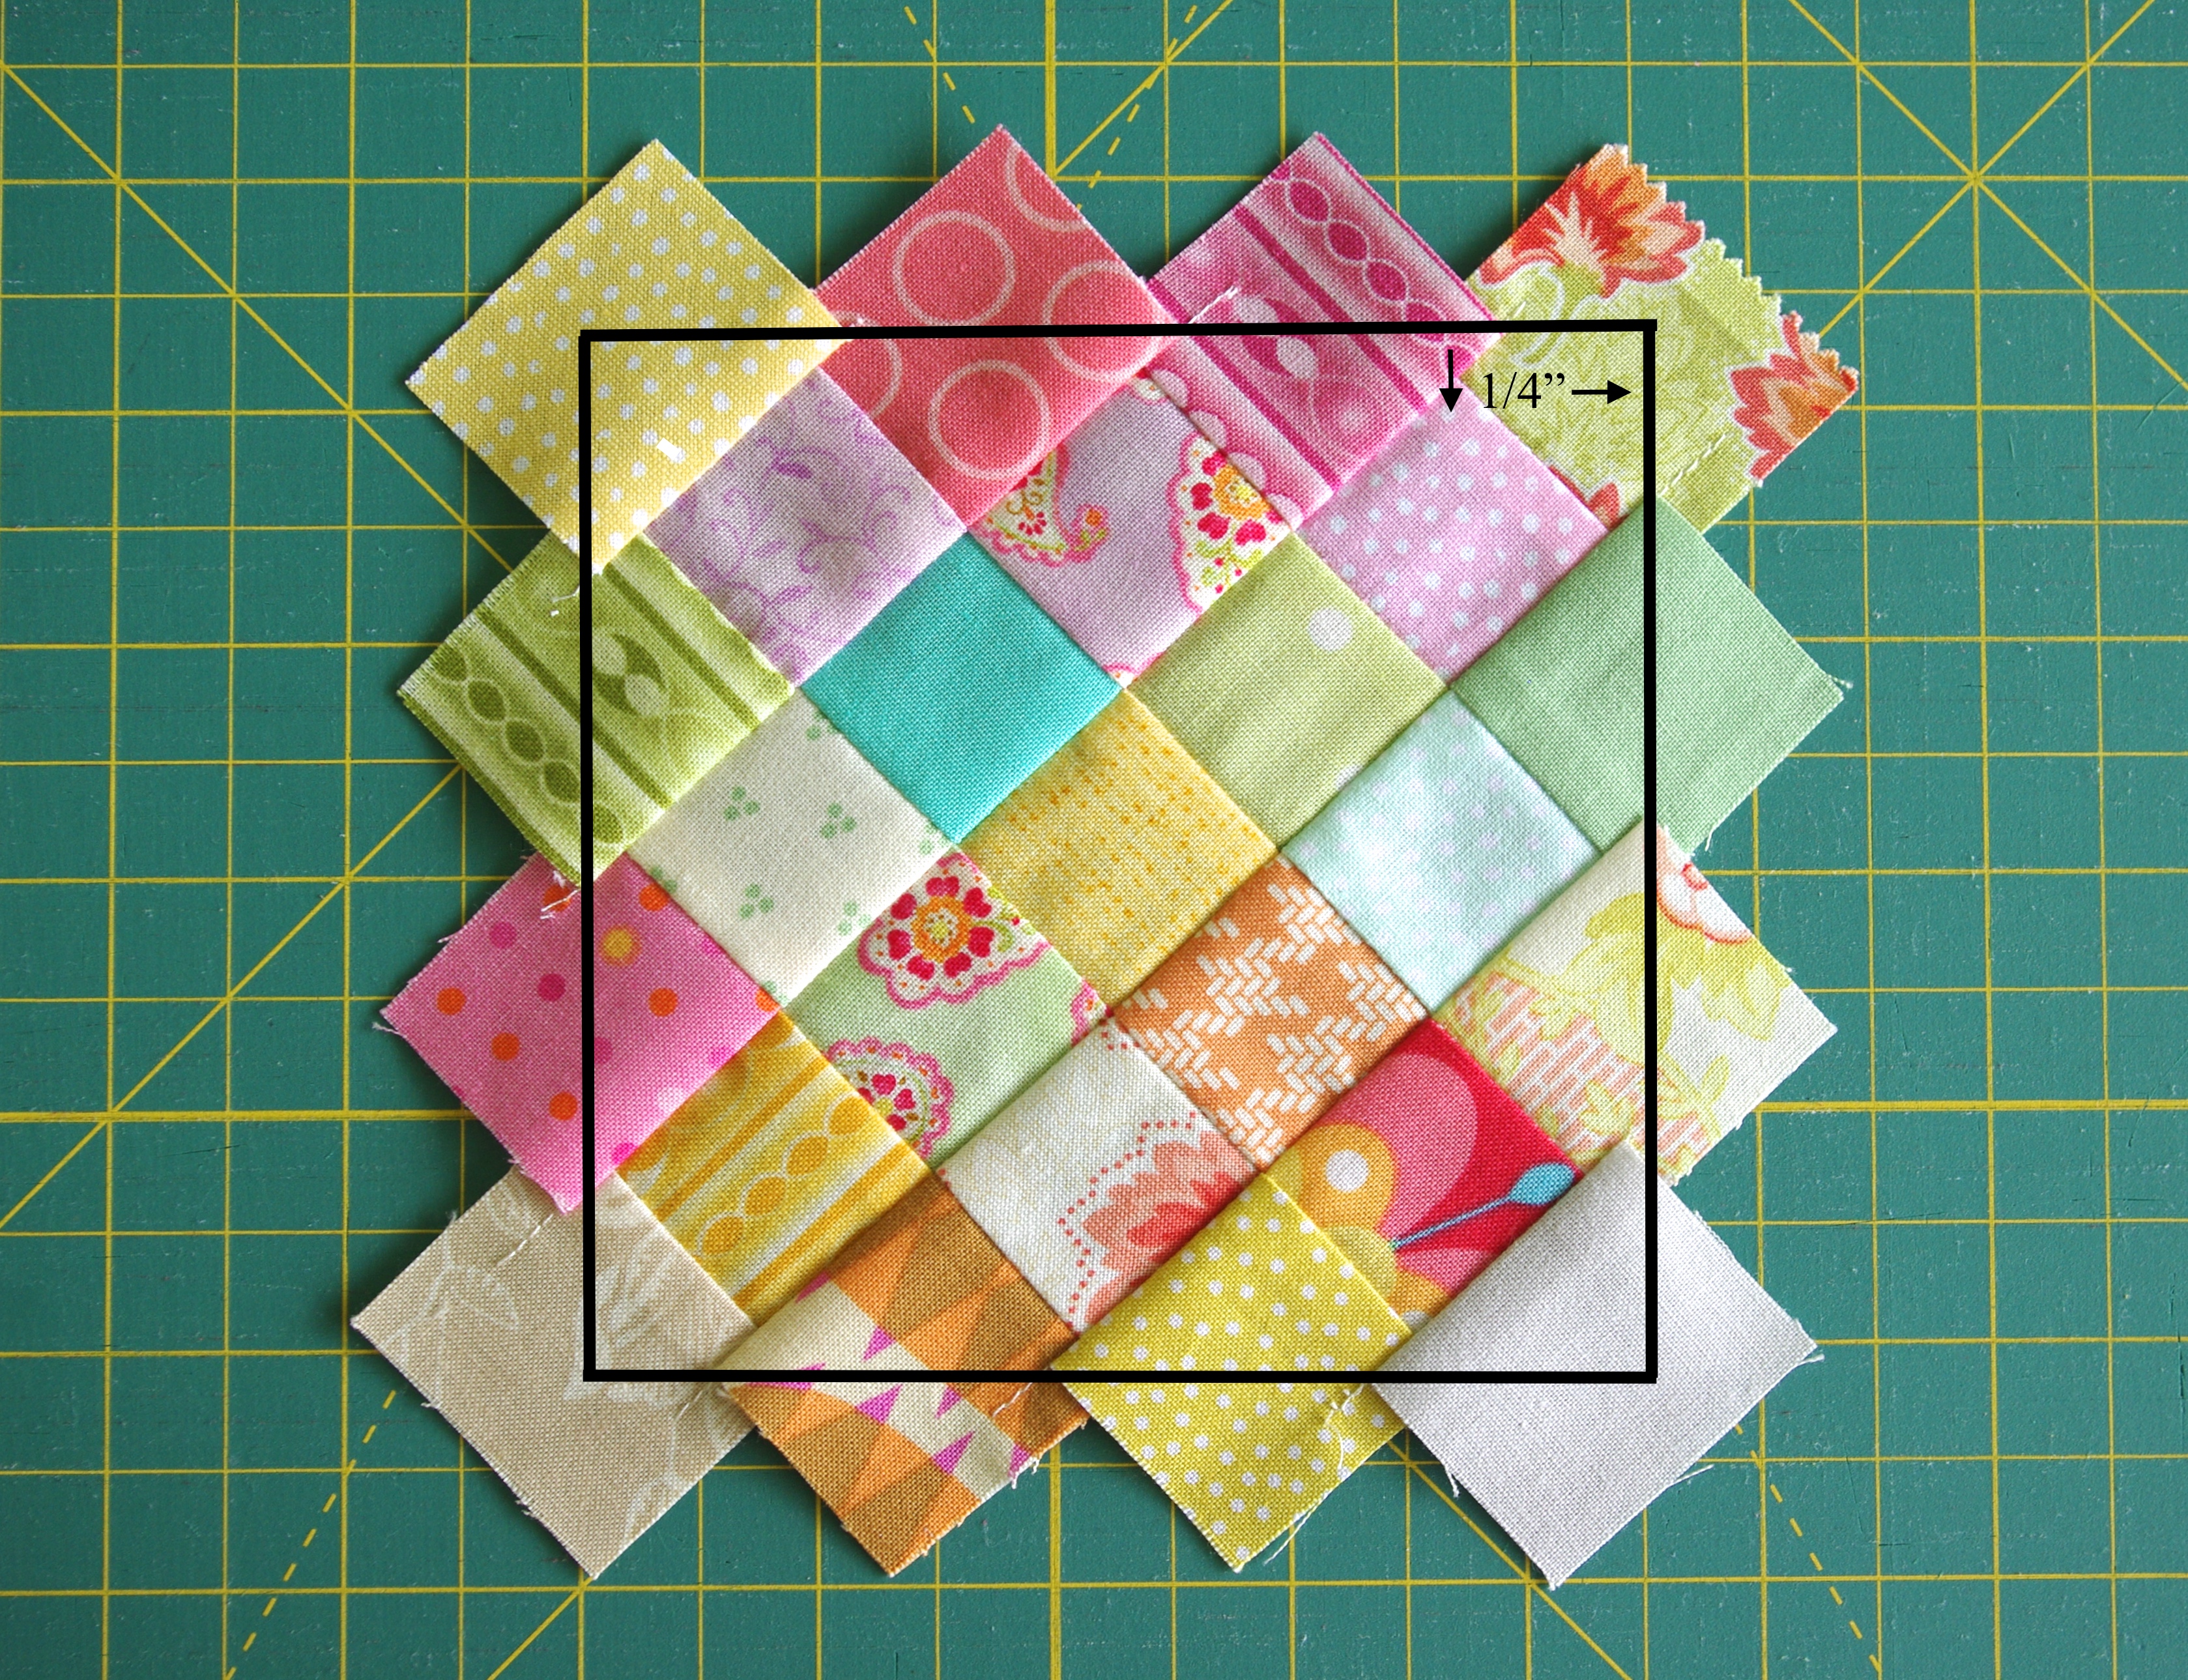
So there it was, I had my idea. To get started, I looked up the average placemat size and then I sketched it. Once the design was determined, I made a sample with scraps. Admittedly, the sample process always takes a few tries. Once I finally got it scaled correctly, I took a photo and sent it to a few family members asking them to tell me what they saw (due to the abstract design I felt this was a necessary step). Everyone recognized it for what it was supposed to be so I was good to go!

Next, I began writing the pattern. While doing so, I decided to make it a tutorial instead. Then I decided to submit the tutorial to the Moda Bake Shop. It was my first time submitting any of my work, so you can imagine how excited I was when it was accepted.

In March 2016, my Dash into Spring Placemat was featured on the Moda Bake Shop. It’s also available on Craftsy and right here: dash into spring placemat tutorial PDF.

IMGP5252c

So, sure, fabric can inspire us. I hope a gift of fabric has inspired you too as a fellow quilter!
quilting

Fun Project Storage Tip / #3

I think it’s safe to say that most quilters work on more than one project at a time. Often times I do, especially when I feel the need to make something with a quick finish while working on a time-consuming quilt. Whether you work on one project at at time or many, good organization is essential. I’ve found that having an efficient storage system in place can also help when other things in life interrupt a project and it has to be put on hold. It can come in handy too, when you work ahead, e.g. cut fabric for an upcoming quilt, etc.

To keep organized, I use plastic bins with a fun labeling system. I found these reusable mini chalkboard labels at Target (four for $3).

IMGP6365

Cute, right? Also easy to attach and fun to use!

Onto my plastic bins…they’re great in a lot of ways—they’re affordable, stackable, washable and nicely sized (10″ W x 13″ L). I’ve found this ‘medium’ size is perfect for both large and small projects. I purchased mine at Target for about $5 each.

IMGP6391

Lastly, fabric storage for everyday use. While I use a plastic cart with only four drawers for my fabric (I don’t have a large stash), I found I didn’t have room or easy access to my leftover layer cake squares. To solve that problem, I purchased this sturdy bin to keep all my pieces in one place. It fits nicely on my closet shelf and I can get to it easily as needed, and who doesn’t love storage with polka dots?!?

IMGP6387

Because I don’t intend to use it for anything else, I applied permanent scrapbooking letters instead of chalk for labeling.

I hope this post helps you with your storage needs and/or gives you some organization inspiration!

Note: I am not endorsed by any product I have mentioned in this post; they are just items I like, use and wanted to share information on.

Uncategorized

Stars & Four Patches Quilt

IMGP6462

While vacationing out west last summer, I visited a beautiful quilt store in Garden City, Idaho (Quilt Expressions). Upon entering, I instantly fell in love with a gorgeous red, white and blue quilt I knew I’d have to make for myself. Before leaving, I purchased the red and blue fat quarter bundle, and because I wanted mine to have an Americana look, I chose Bella Solids Natural as a background fabric.

I didn’t start this quilt until December—figuring it was about time since I bought the fabric in July. Once the top was finished, I decided to have it professionally quilted because it was on the larger side and I didn’t feel I could do it justice. And wow, am I glad I did!

My longarmer, Laurie, suggested a block-by-block pattern and I agreed it would look great…and when I saw it I was floored. She even added an additional scalloped allover edge because the design didn’t go far enough into the borders. Needless to say, I absolutely love it!

IMGP6525

IMGP6541.JPG

IMGP6539

As of today, I have two holiday-themed quilts, this one and a Christmassy one. I plan to continue on, but which one do I do next?

IMGP6483.jpg

Quilt top is a variety of fabric manufacturers. Quilt backing is Moda Sundance Trail/Light Blue Flags by Sara Khammash. Binding is Benartex Moose on the Loose/Stars Cranberry. Finished size is approximately 71″ x 88″.

IMGP6449

Uncategorized

Small Items Storage Tips / #2

I think storing things by stacking is always a good idea. Not only does it help with keeping like things together, it also saves space—mainly because shelves are usually far enough apart that a stack can easily be accommodated. I also like to use containers that are the same; it helps me quickly identify what’s inside at a glance.

For example, I put all my pins in plastic boxes called ‘Really Useful Box.’ I purchased mine at Staples for approximately $1 each. They’re available in different colors and sizes so you can probably find a box to fit your needs. Selling features include: stacking nicely, hinges that insure securely attached lids, transparent plastic, durability and affordability.

IMGP6377

I also like to use storage units that are unique and fun. I received this wooden box as a gift and the first thing I thought was how it would be great for storing thread!

IMGP6385.JPG

By luck, the compartments are the perfect size for both sizes of Aurifil spools as well as other brands, and additional odds and ends too.

IMGP6382.jpg

I hope this post helps with your storage needs, or at least helps spark some ideas!

Note: I am not endorsed by any product I have mentioned in this post; they are just items I like, use and wanted to share information on.

Uncategorized

Mini Quilt Storage Tip / #1

As quilters, or any type of crafter, we’re always looking for ways to get and stay  organized. We all know that if we don’t have an effective system in place, fabric, rulers, notions, tools, etc. can start to pile up around us. Since keeping organized is essential, I’ve decided to blog a mini-series offering organizational tips, ideas and solutions that work for me and ones that you might want to try yourself.

The first tip I’d like to share is my solution for storing mini quilts. A lot of us love mini quilts because they’re cute and fun to make, but if you’re like me and don’t hang them on your walls, they start to accumulate. Since I only hang one at a time on my sewing room door, the others were starting to pile up.

PROBLEM: Space was limited; some would fit in my quilt cabinet and others were too big and kept getting shuffled around ending up with bent corners. I definitely needed one place for all of them.

SOLUTION: Hang them up with regular clothes hangers! It works great. You’ll notice in the photo that the width of the mini determines how far down on the hanger it hangs. The largest one I have is 19″ wide and the hanger still fits, but it probably won’t work for minis much larger.

IMGP6361

I should note that I make my mini quilts by adding sleeves and a dowel rod as demonstrated in this video from The Fat Quarter Shop https://www.youtube.com/watch?v=EsCkY6LK2os

If you don’t already use this method, give it a try!
Uncategorized

Large Granny Square Quilts

I finally finished and gifted the second of two large granny square quilts, and what a long time coming! I made most of the blocks in September 2016 and had a great vision for a quilt, but for some reason I put them aside as a UFO (first time I ever did that). In the mean time, I was sidetracked with several holiday-themed projects…all the while my large granny square blocks sat untouched.

In January 2017, my local guild asked for quilt donations to support the Hopes and Dreams Quilt Challenge for ALS (Lou Gehrig’s disease), and I immediately remembered my UFO. Because the size requirements were pretty small, I used only twelve squares of the blues, tans and oranges, and in no time my quilt was complete and donated.

FullSizeRender

The remaining blocks were put aside until March when I heard a niece was getting married. Of course, the first thing I thought was how they would make a perfect wedding gift! Luckily, I was able to get two more charm packs of Moda’s Miss Kate fabric as I was a few blocks shy. I had already purchased backing and binding fabric so I was set to go. Overall, I finished the quilt relatively quick having quilted it on my Janome in straight-lined crosshatching with machined binding.

IMGP6299

IMGP6274

IMGP6292.JPG

I’m happy that I can finally share these photos as I didn’t want to post them until the quilt was gifted at the bridal shower in August.

IMGP6242.jpg

Here it is photographed on a ladder my husband and I made for hanging and displaying quilts.  And lastly, below is a close up of the fun fabric I used on the back.

IMGP6285.JPG

Uncategorized

Sunrise Clock Mug Rugs

My Sunrise Clock Mug Rugs are featured in the September/October issue of Modern Patchwork magazine! It makes me happy to be able to share this project, and I’m pretty excited to have my work published.

IMG_6141

I’ve been asked what inspired me to design these mug rugs, but I can’t put my finger on it exactly. For as long as I can remember, I’ve always been drawn to clocks and watches. I remember receiving my first watch as a kid and later in life I had a watch collection. I also love the look of a classic or unique clock and I have one in nearly every room of my house. And to this day, I never, ever go anywhere without wearing my watch! I guess that explains my interest.

As far as the idea goes, it was one of those things that just popped into my head. A lot of times I get ideas right when I go to bed, and this was one of them.

About the actual mug rugs…they’re relatively small (9″ finished) and have a lot of negative space, so I made a set of four to incorporate a variety of color (for the hands). Overall, they’re an easy and fun project that can be personalized in so many ways.

If you don’t subscribe to Modern Patchwork, pick up a copy of this issue and give these mug rugs a try!

Here are a few images of the ones I made.

IMGP5842

IMGP5868

IMGP5851

Uncategorized

On Point Pincushion Tutorial

I was asked how I made this pincushion after posting it on Instagram, so I decided to share by making another one with a tutorial.

FullSizeRender

It’s easy, goes together quick and doesn’t require much fabric.  Here’s what you need:
25 – 1 1/2″ squares
2 – 2 1/2″ x 4 1/2″ rectangles (for backing)
Pincushion filler of choice
General instructions: RST = right sides together; Use a 1/4″ seam allowance throughout

PINCUSHION TOP:
Layout fabric squares according to the photo below. Sew squares into rows, keeping your layout order. Taking a photo helps as it can get mixed up while sewing! Another option is to forego a color layout plan and sew at random.

IMGP6306.JPG

When attaching the single square to the adjacent row, line up the square with the adjacent row’s middle square (as shown below).

IMGP6308

TIP: You can use the 1/4″ seam allowance as a guide to center it. The single square will have no seam allowance and look a bit odd, but it will work out in the end.

When the rows are completed, lay them out in the correct order and press seams in opposite directions per row to allow for nesting.  Pin at nested seams; sew.

IMGP6332

Once all rows are sewn together and the top is completed, press seams (direction doesn’t matter).

To get the squares on point, rotate your sewn top so it looks like this.

IMGP6333

Line up a ruler along the points, leaving a 1/4″ and cut away excess (as shown below).

IMGP6333

Top measures 4 1/2″.

BACKING:
Place the 2 1/2″ x 4 1/2″ rectangles RST and make a mark a little more than 1″ from the top and a little more than 1″ from the bottom. Sew up to both marks, leaving an approximate 2″ opening for turning it right side out and adding stuffing. Press seam to one side.

ASSEMBLY:
Place the pincushion top on top the sewn backing piece, RST. Sew around all four sides to close the entire pincushion.

IMGP6336

Clip the corners slightly before turning right sides out (it will help make sharper corners).

IMGP6339

I used the pointy end (blunted) of a bamboo skewer to poke out my corners.

Press one last time.

TO FINISH:
Fill with filler of choice.

NOTE: I have read that for more stability, you can attach interfacing or an extra piece of muslin to the back of the pincushion top. Since I usually use my pincushions just for needles, I didn’t take that extra step. Also, I stuffed mine with crushed walnut shells to help keep my needles sharp.

Lastly, sew the backing opening closed. For extra strength, I used a small blanket stitch.

IMGP6348

Behold the cuteness!

IMGP6355
Uncategorized

Spools vs. Cones

When I first started quilting, I didn’t realize what a difference thread could make. About a year into my new hobby I started reading great things about Aurifil thread (50wt) so I decided to try it and wow, it does make a difference. Not only does it leave virtually no  lint in the bobbin case (unlike less expensive threads), it’s great to work with, it comes in so many colors and three different sizes.

Once I switched over, I used the mid-size spools for a couple of years but found I went through them rather quickly. And since most of us quilters use our ‘go-to’ thread color for piecing, I wondered if it might be cost effective to use cones instead, and the answer is yes.

I did some price searching and found that craftsy.com has the lowest price on both mid-size spools and cones (I didn’t factor in the smallest size spool because I wouldn’t use that size when piecing).

IMGP6204

Here’s how it works out mathematically:

One Aurifil 50wt cotton mako mid-size spool costs $9.80  and has 1,422 yards which works out to approximately .007 cents/yard. The Aurifil 50wt cone cost $35 and has 6,462 yards which works out to a bit over .005 cents/yard.

There is a savings even though the difference might seem minimal, but you have to consider that you pay for shipping every time you place an order (unless you’ve spent enough to get it free) so to me, not constantly having to order is a savings. Also, Aurifil thread isn’t readily available in quilting stores. And honestly, I’m very environmentally-conscious so I don’t like throwing away the spools, plus I like the idea of my thread lasting a long time.

If you do decide to switch over to cones, another thing to consider is a cone stand. It’s an upfront investment but I feel it’s worth it. I found this Superior Thread Holder Handy Stand on craftsy.com. I paid $15 (now it’s $16+). It’s a great product and I can’t see any reason why I would need to replace it (and I highly recommended it). Another option is to make your own thread stand to save on purchasing one.

IMGP6207

So, that’s my thoughts on thread and economics! If you were wondering, my Aurifil thread of choice is #2026 (Chalk).

Note: I am not endorsed by Aurifil or any other product I have mentioned in this post; they are just items I like, use, and I wanted to share information on.

Uncategorized

Matching Fabric Patterns on Quilt Backing Tutorial

We quilters probably can agree that one of the easiest steps in quilting is piecing the back. I usually wait until the top is finished, making it feel so simple and quick! There are times, though, when you have your heart set on a patterned fabric where matching the print along the seam (or not) can make a difference. Overall, it’s not imperative that you do match it, but it does look neater and seamless without taking too much additional time. Here’s how I did my last backing along with the great results I got with just a little extra effort.

First, you’ll have to decide whether you’re going to run your seam horizontal or vertical, which usually depends on the fabric print. When I chose this flag fabric, I knew it wouldn’t look right horizontal, so I ordered enough to allow for a vertical seam that would run the entire length of the quilt (doing it this way usually means you have to buy a bit more fabric).

IMGP6188

NOTE: Remember to always include a few extra inches all the way around to allow for shifting when quilting.

Since I was going with a vertical seam, I determined that lining up the end of the starred section of the flags would make the seam look less conspicuous and be fairly easy. So, from the end of the starred flag section in the pattern, I cut away ½” for the seam allowance on the right edge of the left-hand width of fabric (WOF) piece.

Then I matched the pattern along the top by laying out my right-hand WOF piece and placing the left-hand WOF piece on top (right sides together). Because this fabric has relatively small flags that repeat in closely set rows, I barely had any waste as I matched them as close to the top as possible.

Next, with my left-hand WOF piece still in place, I lined up the starred ends of the flags and pinned. Then, I cut the bottom piece edge the same as the top piece edge (for a ½” seam allowance).

IMGP6146

IMGP6145.JPG

NOTE: I flipped back the top piece to make sure it would line up before cutting and sewing.

I don’t have a photo of it, but both WOF pieces are now cut with a ½” seam allowance and are pinned right sides together all the way down.

Lastly, I sewed the length of the fabric, pressed the seam open and ended up with a nice match up!

IMGP6195

Because this quilt is quite large and I’d rather not quilt it on my domestic machine, I’m having it quilted by my longarmer—which I don’t do often and I’m pretty excited about!

IMGP6186

And of course, before taking any quilt top to get quilted or quilting it yourself, remember to always cut off all the threads on the quilt top back. Yes, this is the worst quilting task ever, but it makes it looks so nice with no unsightly threads to be seen!

I’ll definitely post more photos of this Stars & Four Patches quilt once it’s finished!