A few months back when I released my Love to Quilt cross stitch pattern, I’d mentioned that I had new quilting-related cross stitch patterns in the making. I’ve finished designing all three of them, and am now releasing the first of the series entitled Quiltology.
I’ve taken several quilting terms and cross stitched them into three separate works. Quiltology I is first up and is now for sale in my Etsy shop.
Quiltology I, II and III all showcase different quilting terminology, hence the name Quiltology!
The first in the series has 12 different terms, stitched in 12 different letterings and colors. It’s as easy as combining your favorite floss colors and making it you.
As a bonus, Quiltology I finishes at 5 5/8″ W x 3 3/8″ H (stitched on 14 count Aida cross stitch fabric) making it a perfect fit for a standard 5″ x 7″ frame—so no need for custom framing.
Like my other cross stitch patterns, this one is also suitable for all skill levels.
I’m very excited about this trilogy and hope you enjoy them as much as I did creating and stitching them!
If you’re thinking “‘Didn’t you post that already?” or “That sounds familiar,” you’re right, it’s definitely dé jà vu. I did, in fact, recently make a small cross stitch pattern and named it that. Overall, I wasn’t happy with it so I redesigned it.
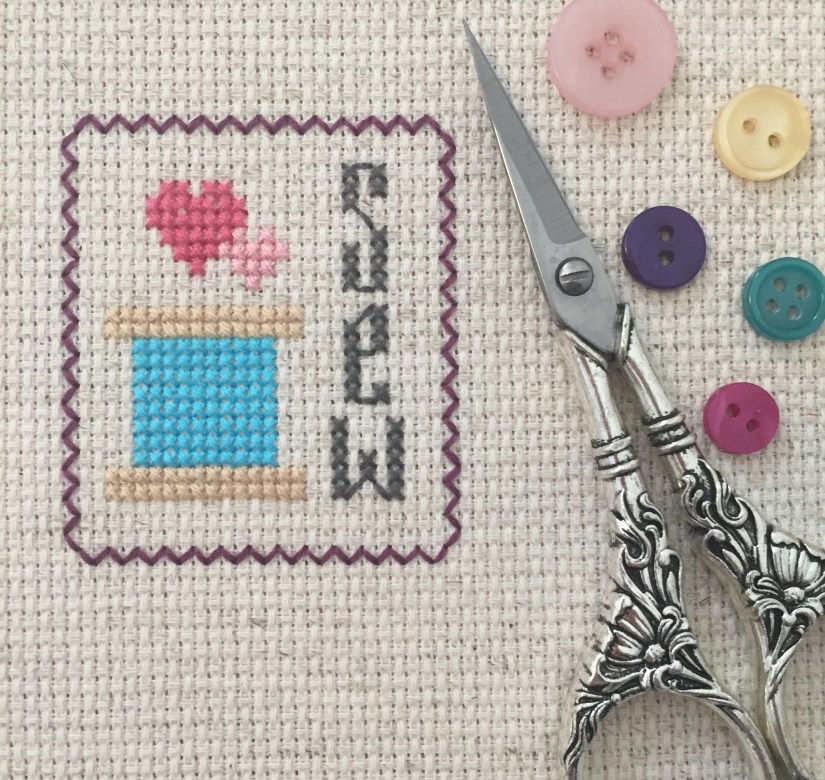
I now have my final Love to Quilt pattern and here it is…
This little pattern is similar to Love to Sew in the way that it’s small but says something big. The neat thing about this pattern is that I have TWO versions available with ONE pattern purchase!
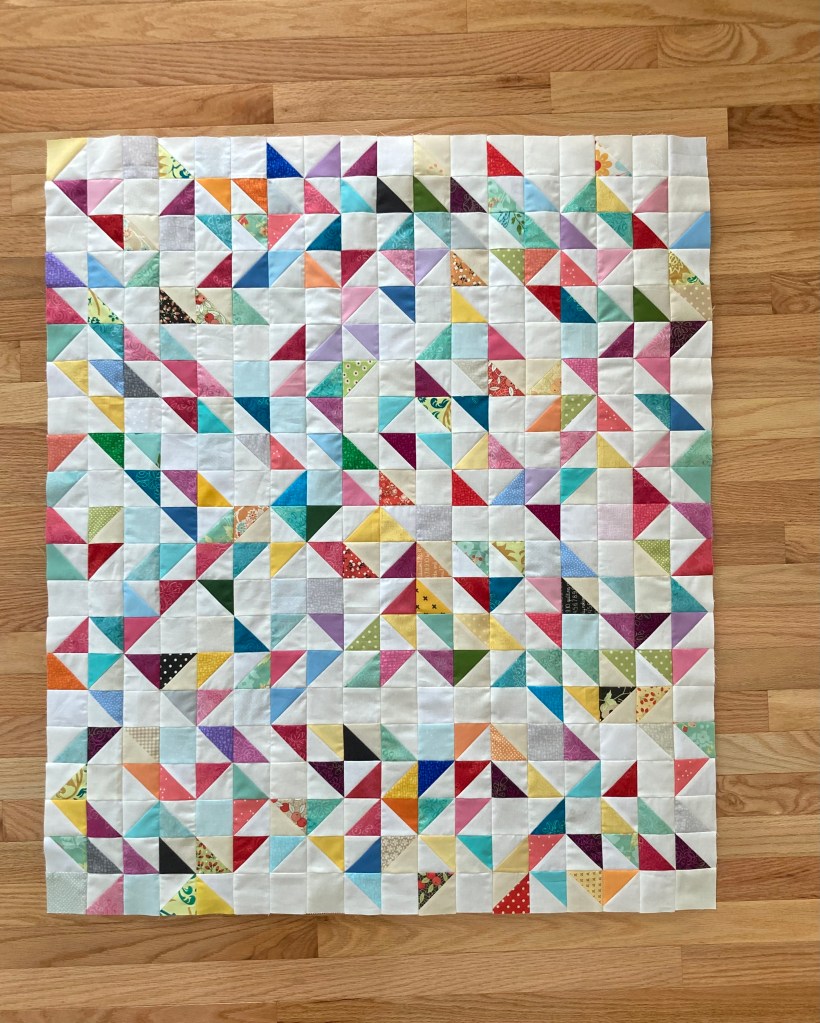
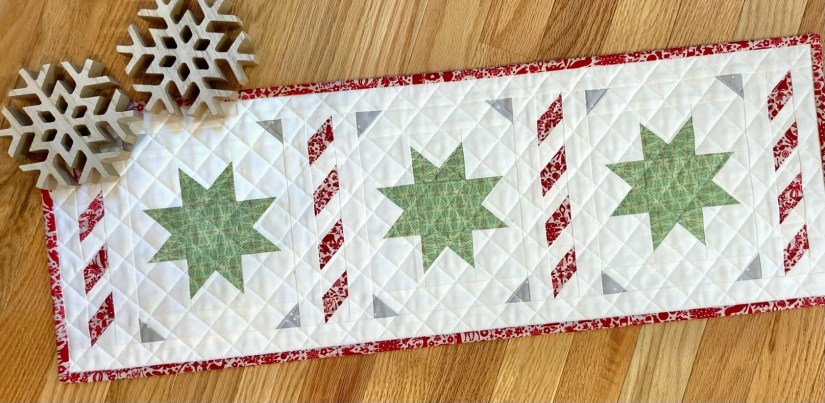
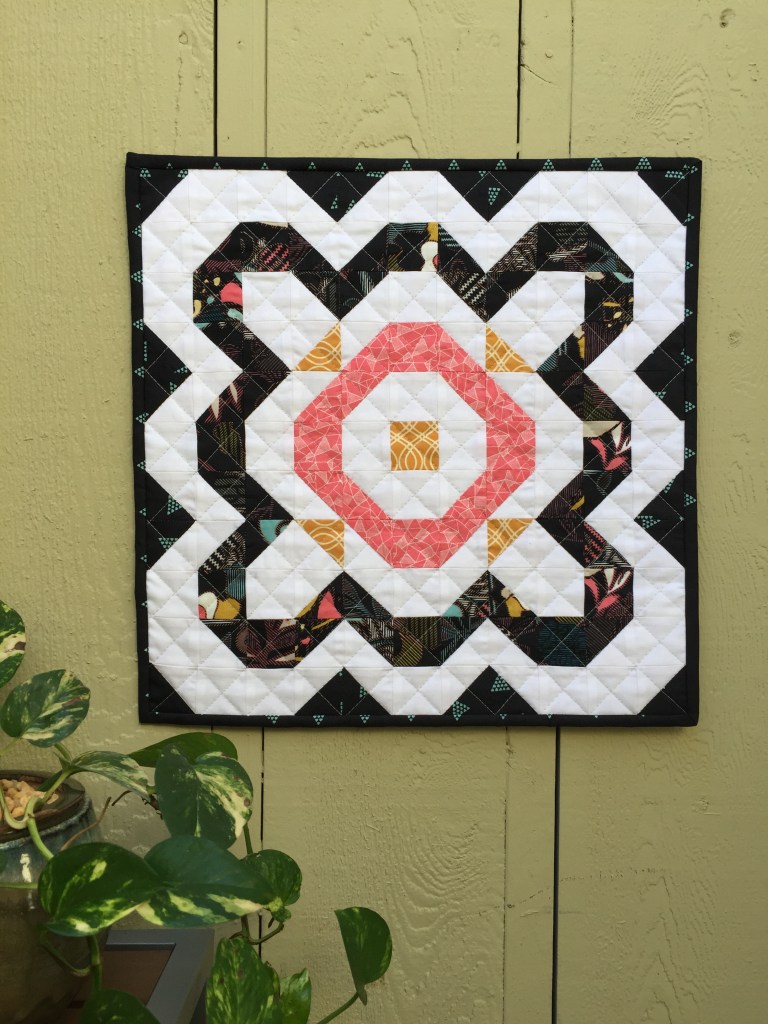
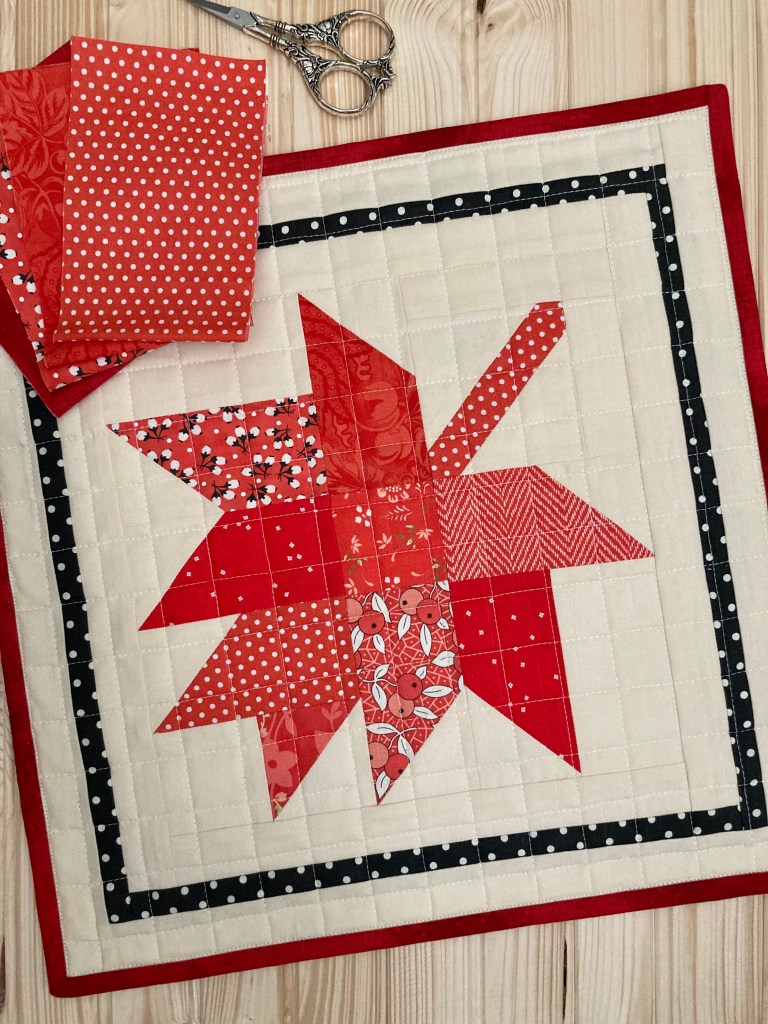
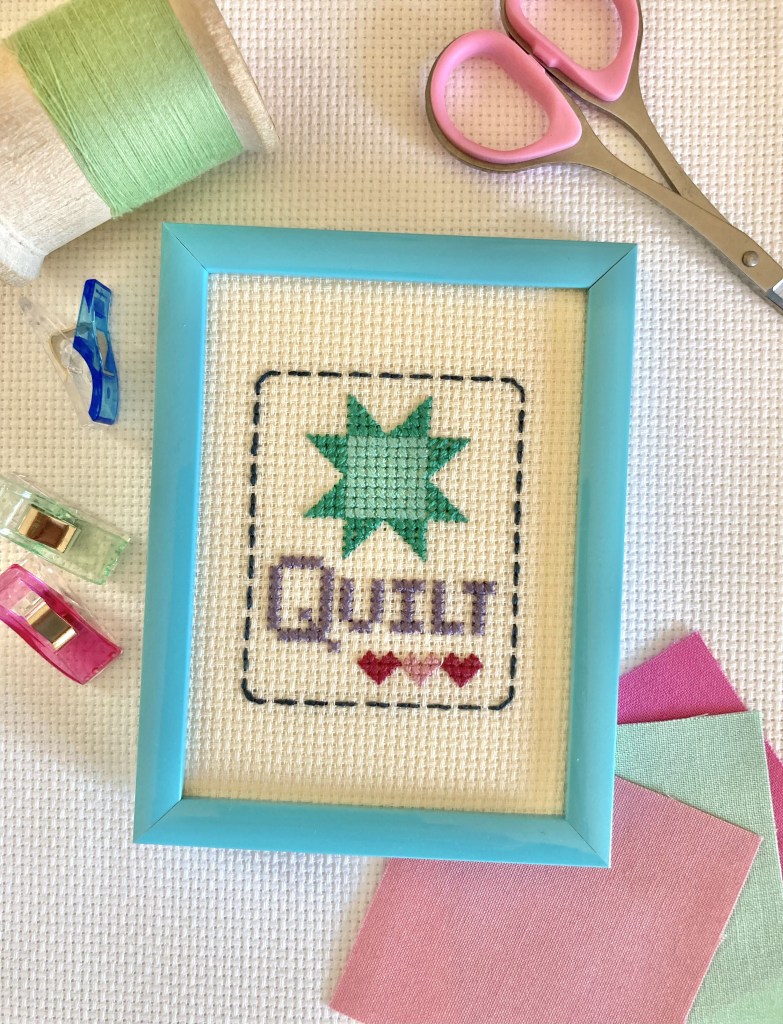
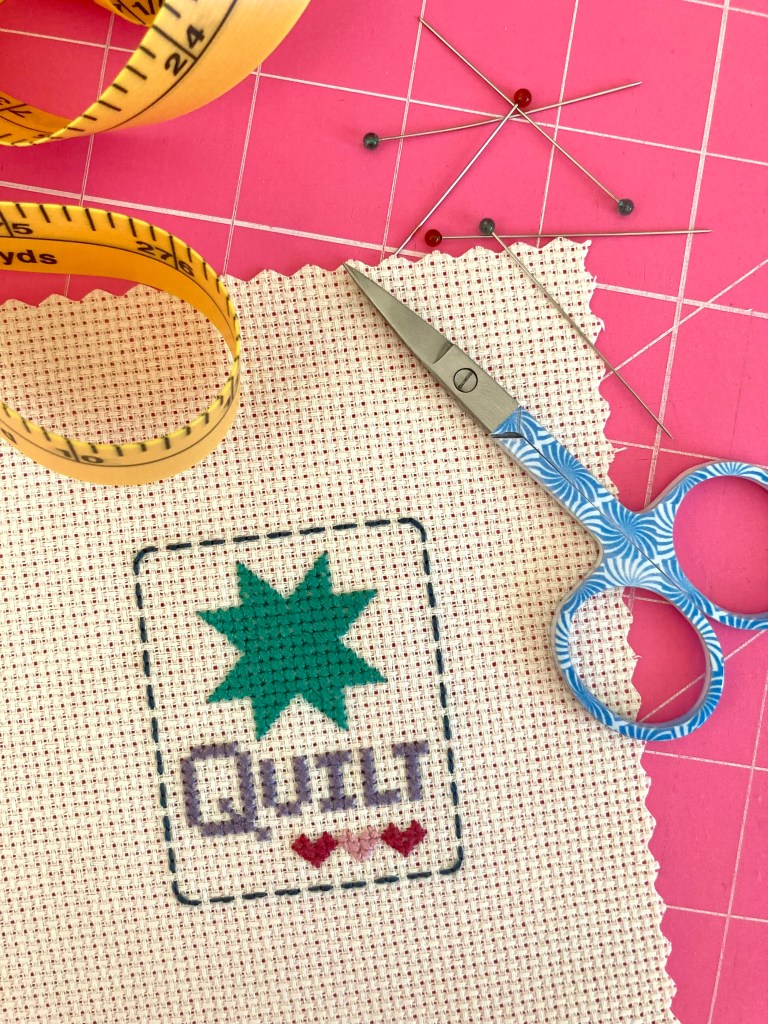
As quilters, we love the sawtooth star. It’s in so many quilts, books, decor items, etc. So when I came up with the ‘new’ Love to Quilt idea, I decided to showcase the star by having a scrappy star version (left photo) and a solid star version (right photo).
This is a fun little project that can be completed in a couple of hours. It’s suitable for any and all cross stitchers.
What’s more– Love to Quilt fits nicely into a 3″ x 4″ or 4″ x 4″ photo frame, so no need for custom framing! Mine is displayed in pretty 3″ x 4″ frame I purchased at Michael’s.
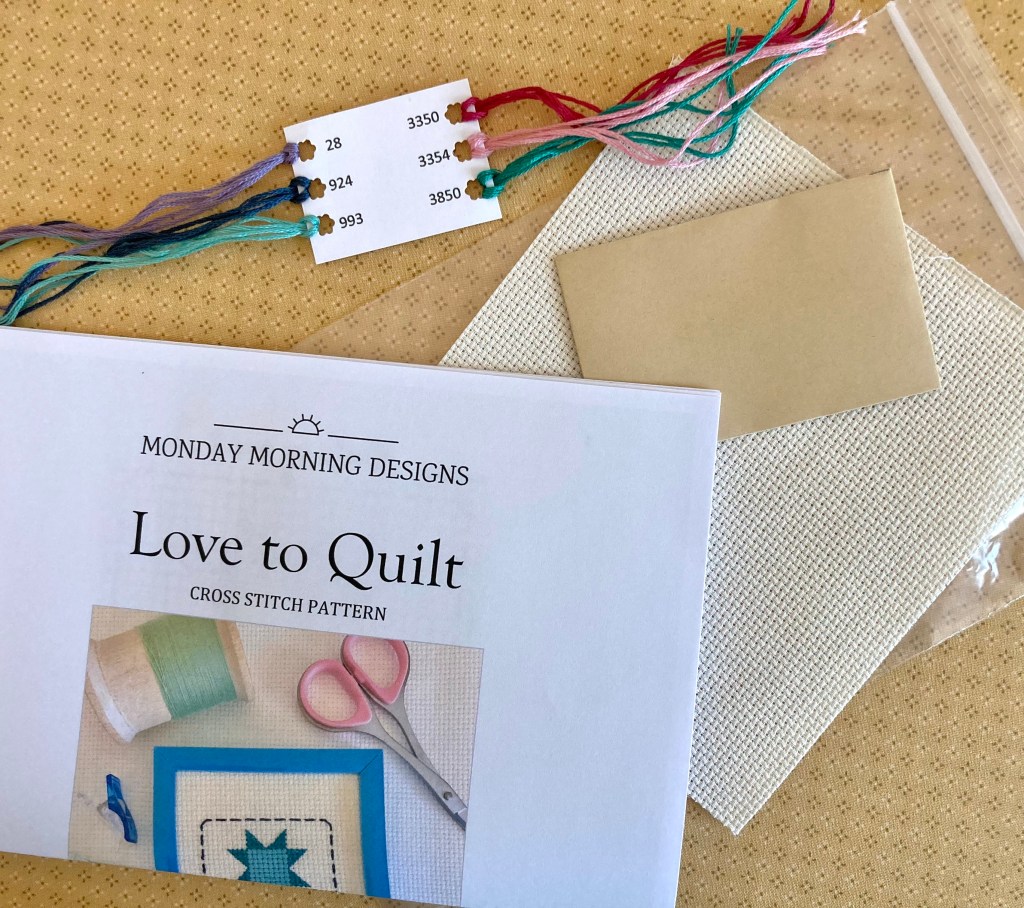
I also have a few Love to Quilt cross stitch kits available for sale in my Etsy shop. The kits include everything you need to make the two-colored version of the sawtooth star, as pictured on the pattern cover.
I want to mention that my next post will demonstrate DIY cross stitch framing. Do it like the pros but for much less the cost. 😉
We cross-stitch enthusiasts enjoy making projects, but having them framed is just so expensive; that’s why I’ll show you how. And…that’s why I design my projects to fit into standard size frames and shadow boxes.
I’ve got a new quilting-related cross stitch sampler in the works so look out for that one soon. 🙂
Every new year I look back at all the projects I’d made the previous year. Some years I’m surprised how much I did; other years I’m surprised how much I didn’t make!
2024 was a year where I really didn’t make a whole lot, partly because I was running out of room to store quilts. I wanted to part with some but needed a good cause. I ended up donating 4; three to Hurricane Helene victims in NC and one to fire victims in LA. I strongly felt they needed quilts much more than I needed them sitting in my curio cabinet, so off they went to new owners.
Here’s a look at what was accomplished last year…
In January I released my Classic Plaid quilt pattern; one that I had written a few years prior. It’s beginner friendly and is a really quick sew. It’s available in my Etsy shop. The quilt is also for sale!
In May, I made a cute little clothespin hanger for the drying rack I use outside. It’s nice to make useful items for around the house.
To add to that, I made some decorative pillows for my bed. I had the yardage for a few years, just waiting for the right project and these were definitely it.
In June, I made another Wee Three Trees with leftover fabric from my Winter Woodlands quilt. I ended up selling this mini on Etsy, but it’s always a fun make. Wee Three Trees has been my most popular pattern since its release!
In August, I listed my Love to Sew cross stitch pattern. Again, I’d written it a few years back but somehow didn’t release the pattern then. It was enjoyable to make something different. I’m thinking about a new cross stitch pattern, just got to put the pencil to the paper…
In August, when it was way too hot for any outdoor activities, I’d decided to take a few hundred already trimmed HST and sew them together. I thought I’d make a throw quilt for myself but then realized there weren’t enough HST for anything larger than crib size. I ended up selling this on Etsy.
In November I released my Merry Little Stars mini quilt pattern. One of my all time favorite fabric collections is Evergreen by Basic Grey for Moda. I had just enough left to make the stars and I was lucky enough to find yardage for the borders and binding. I loved having this displayed on my coffee table during the holiday season.
In December I’d gotten back my Winter Woodlands quilt from my longarmer. It’s quilted in swirls and lovely snowflakes. I released this pattern last year, and it was a favorite both seasons. It’s very simple and all you need is a jelly roll and some background yardage. I used Merry Little Christmas by Bonnie & Camille for Moda.
For now, that’s all I can share. 😉
Upcoming, I have a queen sized quilt to be featured in American Patchwork and Quilting. It’s a pattern that allows for so much color and it’s designed for fat quarters. I’m looking forward to sharing it with everyone.
Designed with cuteness and beginners in mind, this little mini is so easy. Here’s why. The stars are made using the stitch-and-flip method so there’s no points to line up or worry about sewing the points off! The triangles on the top and bottom borders are also stitch-and-flip, giving the stars a bit of flair easily.
As far as fabric requirements go, it doesn’t require much; 2 fat quarters, one 10″ square & yardage, but 2 1/2″ precut strips can easily be substituted for the color fabrics. Even scraps will do if you want a scrappy look. And it can be sewn up in a day or weekend.
Here are a few photos of how I made mine. Quilted lines were sewn 1″ apart using a longer stitch length to give a more sophisticated look. The lines are at a 45 degree angle marked with my hera marker. The results are petite squares on point. 🙂
For the stars, I used fabric from Moda’s Evergreen collection by BasicGrey. This is one of my all-time favorite fabric lines but unfortunately it’s long been out-of-print. The triangles around the stars are Riley Blake’s Blossom in silver. The backing is Frosty Merry-Mints by Wilmington Prints.
I wanted a folk pattern for the striped borders (and binding) to coordinate with the green folk-inspired star fabric, so I purchased a BasicGrey red and white dainty print from the Pine Valley collection. I love all the pretty Christmas symbols included.
Merry Little Stars measures 10 1/2″ x 30 1/2″. It’s versatile because it can be displayed as a wall hanging, laid out on your holiday tablescape or set out as a table runner.
With that one finished, I’ve got another one in the works. I used BasicGrey (a huge fan!) Grunge Seeing Stars in yellow and green. Perfect! The striped borders give a candy cane vibe in classic red and white.
I’m excited to put mine out for the holidays and I’m also thinking about making another with non-traditional holiday colors. I think it would look great in any color combo, wouldn’t it?
During the 2019 holiday season, I released one of my favorite patterns, Wee Three Trees. It’s been nearly 5 years now so I thought I’d revisit the pattern and make a new one.
I decided to use leftover fabric from my Winter Woodlands quilt. Since both patterns are 2 1/2″ strip friendly, I was able to use strips from my Merry Little Christmas jelly roll by Moda.
For my new version, I made a slight alteration by easily changing the direction of the right-hand border. By doing so, it gives a bit of a different look which shows that you can take this pattern and add your own little touches.
In addition, I chose solid white for the background instead of tone-on-tone.
I crosshatch quilted my original Wee Three Trees mini as I did this time, too. I love how crosshatch quilting on a rectangle creates diamonds. Classy and timeless!
Otherwise, nothing else differed. This cute little mini quilt goes together relatively quick—you can finish it in a day or it makes a great weekend project. The pattern is suitable for a confident quilter yet is fun for quilters of all skill levels.
Wee Three Trees mini quilt pattern is available for purchase in my Etsy shop, as a PDF download or paper copy.
Remember, it’s not too early to start that holiday sewing!
After years of the same 2 pillows on my bed, I decided to make new. As usual, using what I already have, I went through my storage drawers and found perfect fabric go-togethers for 3 new pillows.
I planned to make 2 – 16″ x 16″ squares pillows and 1 – 10″ x 18″ lumbar pillow to be placed in front.
For the lumbar pillow, I used a fat quarter from Art Gallery’s Paperie collection. This line is years out of print now, and I’ve had it for a very, very long time.
Also years ago, I was drawn to the Compass print from Andover Fabrics. I’d purchased around a yard so I chose that and a striped polka-dot print from I can’t remember who…
I didn’t sew in zippers, not for any reasons other than 1. they usually show on the bottom unless they’re invisible (don’t have any, don’t know how to sew them). 2. I made pillows recently and hand-sewed the bottom with an intricate blanket stitch which worked well. Additionally, they’re decorative so no need to remove covers for laundering.
For the 16″ pillows, I needed 4 sides which = 12 striped strips and 16 background strips total. I cut all strips 2 7/8″ x 16 1/2″. Using a 1/4″ seam allowance I made 4 panels.
I sewed 2 panels together at the top using the side of my standard foot for the seam allowance. This method allowed me to line up my seams nicely.
To prevent seams from showing through to the front, also to give more loft, I ironed on Pellon Fusible Fleece 987 for a smooth finish.
After attaching the fusible fleece, I sewed the sides and a portion of the bottom, leaving a large enough hole to fit a 16″ square pillow form. I also cut away corners and pushed them out using a blunted stick.
Once the forms were inserted, I pressed a seam at the opening on both panels, pinned them closed, ran a basting stitch then removed pins.
Remember this stuff?
I don’t think it’s made anymore, but one box will last f o r e v e r. I’ve had this for several years and still have plenty left. Since I no longer sew bindings on by hand, I haven’t used it in a long time. But let me tell you, it works like a champ!
Here’s a look at my hand-sewn seams…
I was pretty pleased with the results. And it didn’t take all that long either.
For several years, I’ve seen lovely appliqué projects but it wasn’t until recently that I decided to give one a try. Since the holiday season wasn’t too far off, I thought a small tree would be a cute idea for a decorative pillow.
Initially I set out for a pattern to download, but found nothing. I really wanted to give appliqué a whirl so I decided to make my own pattern (with recruited help from my daughter’s artistic hand.) 🙂
Before long, we came up with the Little Tree pattern. Shortly thereafter, for larger projects, the Big Tree pattern was created.
After researching how to appliqué and acquiring the necessary materials, I set to work. Once finished, I thought it didn’t turn out too bad for a first try!
Next up was to make something using the Big Tree template. Since it measures over 17″ high, I made two as a wall hangings (one for me, one for a gift).
To make them, I used the same plaid fabric, adhered a low-loft fusible fleece, added backing, quilted 1″ rows then ran a zigzag stitch around the edge.
Not only are they festive, they’re easy and fast! Think of all the things you could add to decorate them…buttons, bows, photos, ornaments—just about anything lightweight.
Another idea is to make a Big Tree project for advent or a Christmas countdown. I added cutout numbers to my finished plaid tree. Because the tree is generously sized, there’s plenty of room for attaching pockets for small advent gifts.
I’m convinced these versatile tree templates would make a great addition to your list of holiday project must-makes. 😉
You can purchase both templates together in one download from my Etsy shop.
Why not get your favorite holiday fabric ready and start a project today—I’d love to see what you create.
Every year I like to release a winter holiday pattern and this year’s pattern is ready to go just in time for Christmas in July. It’s called Cozy Kittens and it can be purchased in my Etsy shop.
Cozy Kittens measures 23 ½” wide x 17″ high, so I consider it a mini quilt but it’s also a great size for a table topper.
What’s more? It’s written for fat eighths but I bet if you dig into your scrap bin you’d find plenty in there for this one. 🙂
This cute little mini quilt is suitable for the confident beginner and testers all agreed that it goes together really fast!
If you’re looking for a quick sew and want to get your holiday sewing underway early, get your copy and get started. Happy Sewing!
Recently I purchased a small chair and side table for a reading nook in my dining room (that I don’t want to use as a dining room). To add color to the corner, and because every chair needs a pillow, I decided to make my own. As a side note: purchased lumbar pillows cost a ridiculous minimum of around $45 and were too big.
Because my chair is on the small side, the pillow could be made from a fat quarter. Lucky! Right away I knew exactly what FQ I’d use—a whimsical flower print from the Etno collection by Pat Bravo for Art Gallery Fabrics. It’s an older line that I love and was glad to finally use.
Also, I happened to have 2 new pillow forms on hand. They were 18” x 18” so I removed all the stuffing and resized them to 11” x 18”, then restuffed them.
I revisited my Zippered Quilt Pillow Block Cover Tutorial for a refresher on the zipper sewing technique and other necessary steps, and in no time I had a cute little pillow! It really dresses up the space and gives it a personal touch.
Another nice feature about this pillow size is no seam; the FQ sewed into a tube, giving the pillow a clean finish on top.
Not only is it a custom-made pillow, the total cost to make it is approximately $14 and about 1 hour and ½ of my time. A lot better than $45 AND made exactly how I wanted. 🙂
Since I liked that pillow so much and it was fun to make, I made another. I used the other pillow form and repeated the same steps. For this one I used a Hawaiian themed FQ my son gave me from his trip to Maui. It’s so bright and fun! I love it.
I’m really happy with these results, and I can change the pillows out when I want a new look. I’m now thinking about making some seasonal ones, too.
With the fall season approaching, I’d decided to create an autumnal tablescape for my sofa table. Since June I’d been thrifting, something I’d never done much of before, looking for pretty and elegant items to coordinate with things I already had.
What I didn’t have was a table runner. My first thought was ‘What could I make using what I have?’, then remembering I’d stashed a narrow piece of white Essex Linen leftover from making napkins. Perfect!
While the piece was WOF, it wasn’t long enough to drape over the table ends, so I trimmed the fabric to 9 1/2″ wide by 34 1/2″ long giving nice coverage for my table that measures 11 1/2″by 38 1/2″.
I planned to hem and top-stitch, but after pinning one side it was apparent that it’d be too bulky so I left the edges flat and ran a zigzag stitch all the way around, giving it a bit of a rustic look.
Since the linen was white and not fall-like, I decided to tea dye it. This wasn’t something I’d ever tried before but it was so easy and rather fun! I quickly found a YouTube video with all the info I needed.
Because the runner is a bigger piece of fabric, I doubled the recipe for dyeing: 5-6 tea bags to 2 cups of boiling water (this doubled, using black tea). If you’ve never tea dyed before, just boil the water, add the tea and let it set for 15 min. Remove the tea bags and place your item in the bowl, making sure it’s covered. Allow it set for at least 15 minutes, or until the desired color is achieved. I soaked mine for 2 hours, occasionally turning the fabric. NOTE: Tea dyeing works with natural fibers only.
Once it’s the color you want, remove and rinse with cold water. I gently rolled mine in a towel to remove the excess water. After unrolling and smoothing it flat, I placed it in the sun until dry.
On the first day of autumn I set up everything and am really pleased. 🙂 It’s a lovely display for fall and will do nicely through Thanksgiving.
This is a great way to give your space some seasonal vibes, and if you’re a thrifter, it’s fun to go on the hunt for just the right things.