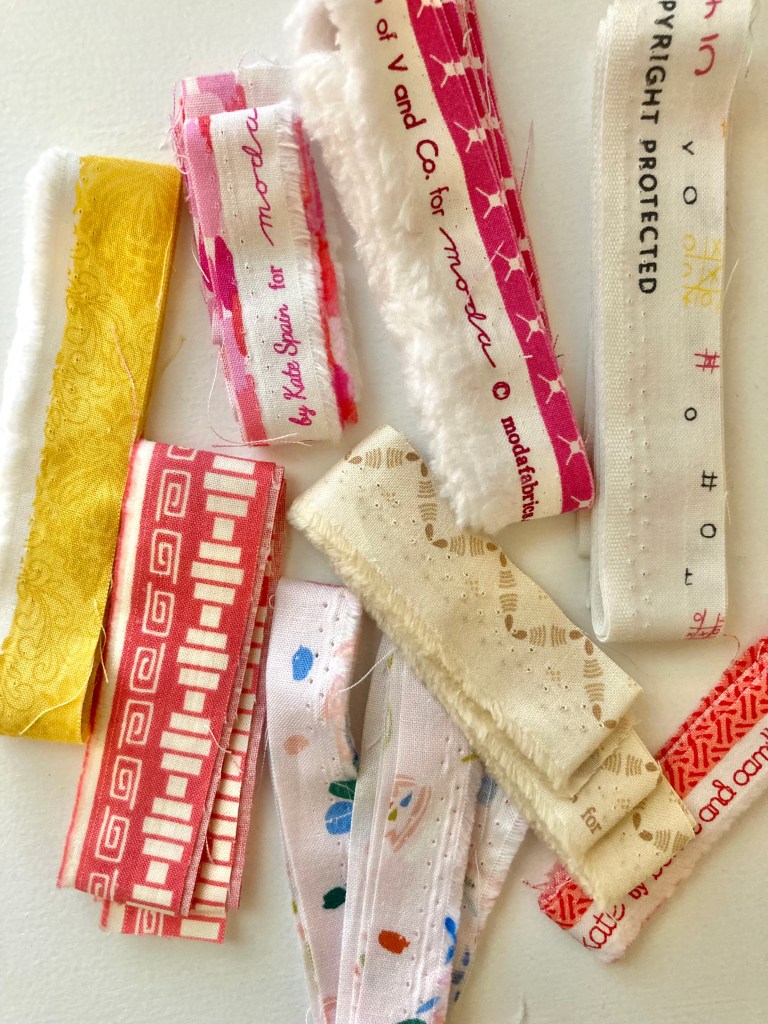
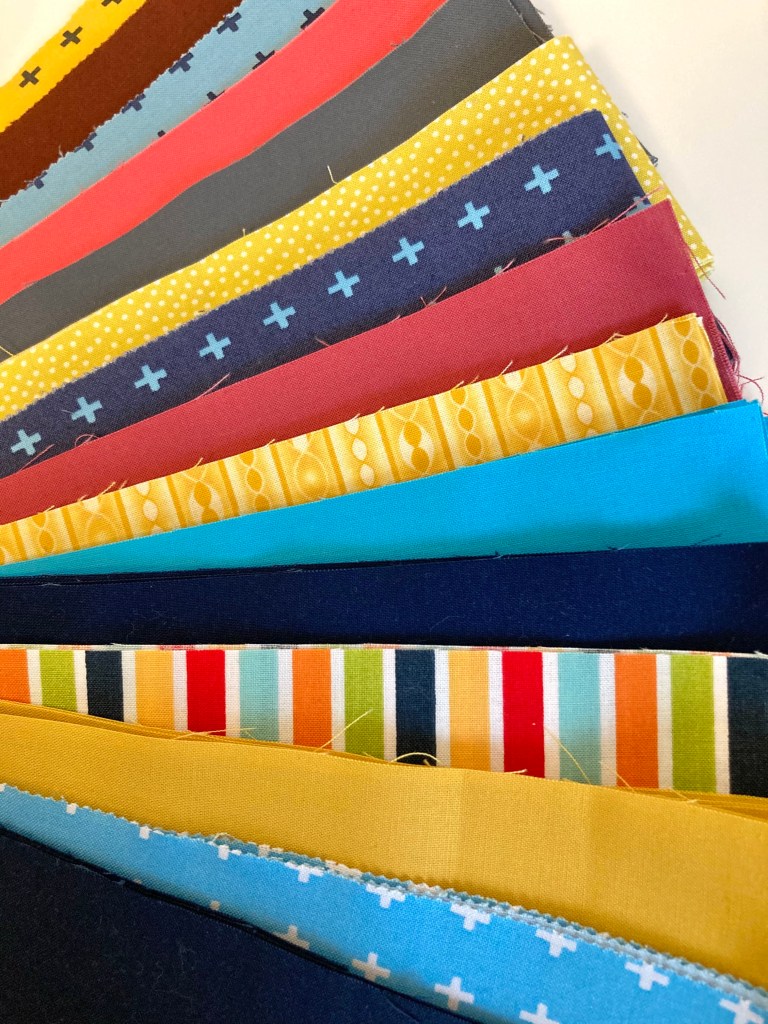
After making a Triangle Peaks Christmas quilt last winter, I had several whimsical fabrics left over from a Moda fat quarter bundle.
I figured the leftovers would be best showcased in smaller, festive projects instead of a quilt so I decided to make handmade stockings for my family and a wine bottle bag for a host/hostess gift for an upcoming holiday party.
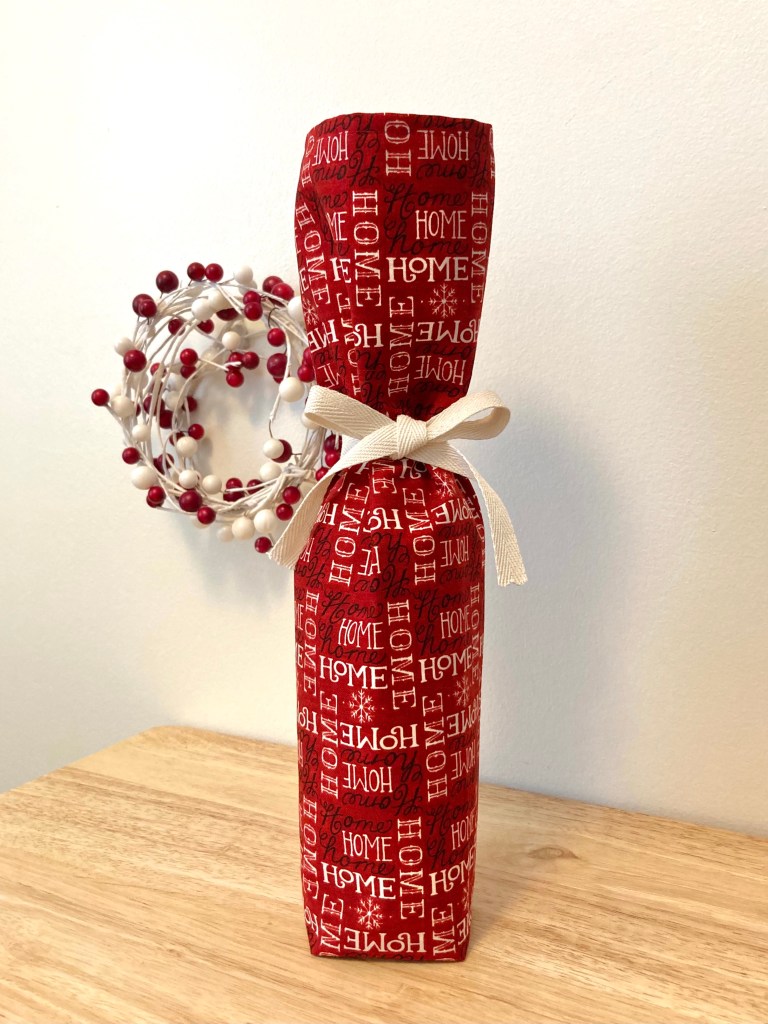
As a side note, I’ve written a tutorial for making this wine bottle gift bag. It’s a really quick make and requires a small amount of materials. I’ll post the tutorial sometime soon!
To get started on the stockings, I did a bit of searching to find a tutorial that best suited my needs. I wanted to make them with a one-piece front and I wanted to quilt them. I found a pattern called ‘Stocking Up’ on the All People Quilt website that was exactly what I had in mind.
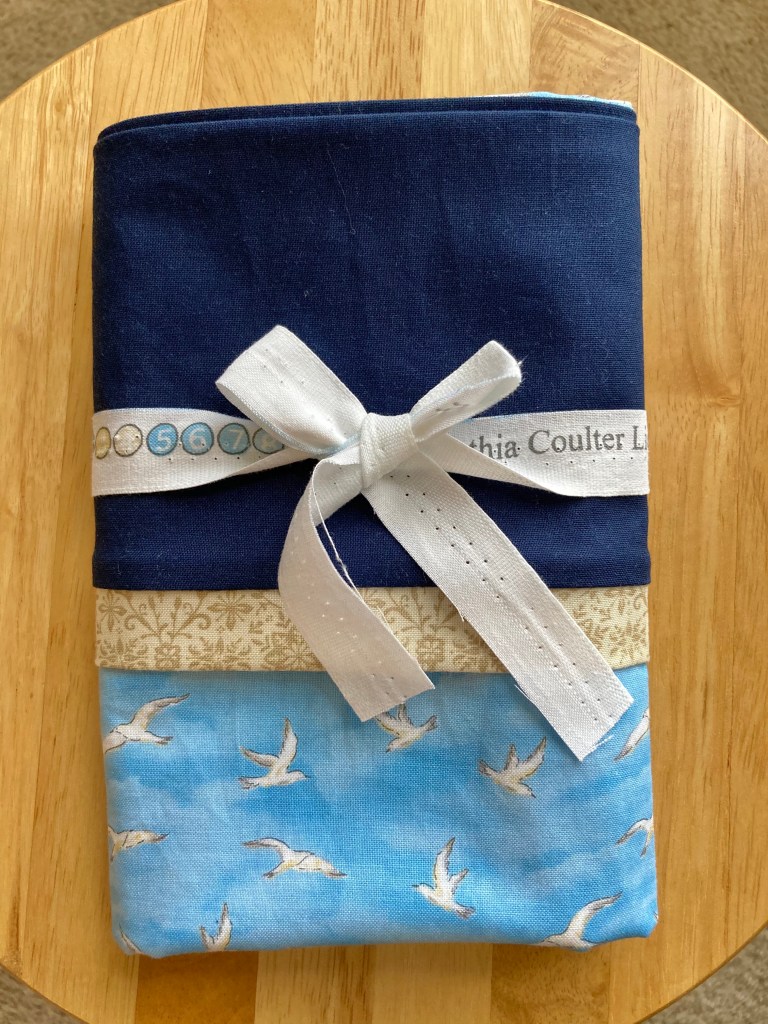
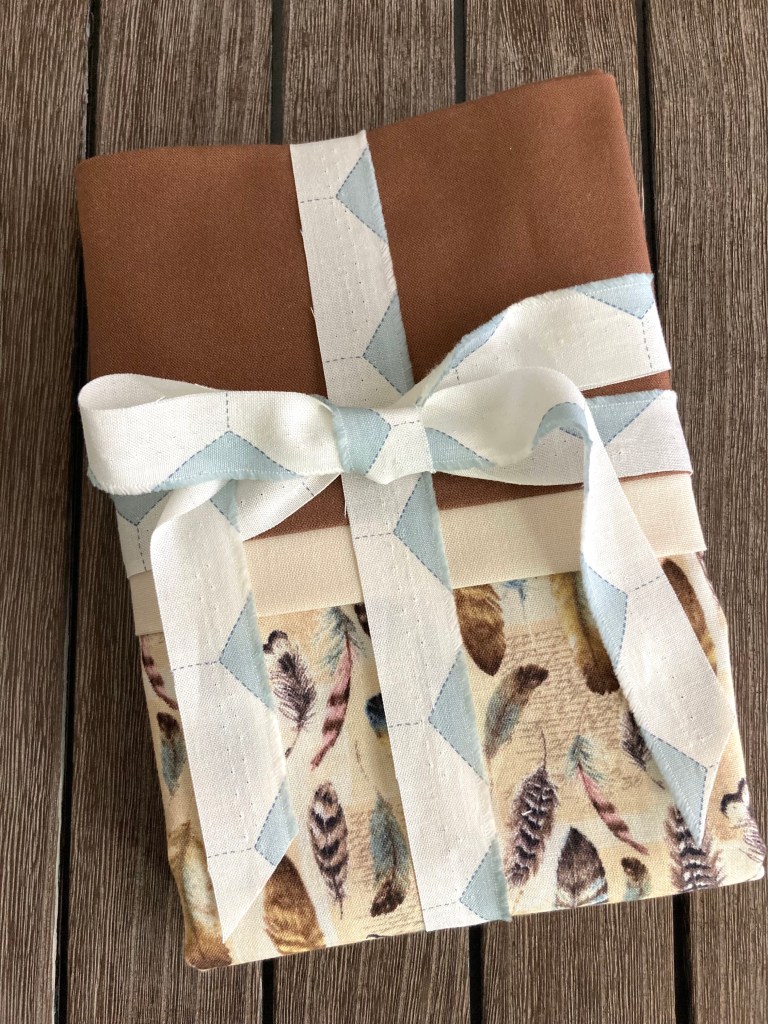
I was hopeful to get two fronts out of one fat quarter, but because all fat quarters are not cut equally, I was only able to get two out of one of them. Since I was making six stockings and one wine bottle bag, and I needed fabric for cuffs, I ended up going to my LQS for an additional fat quarter.
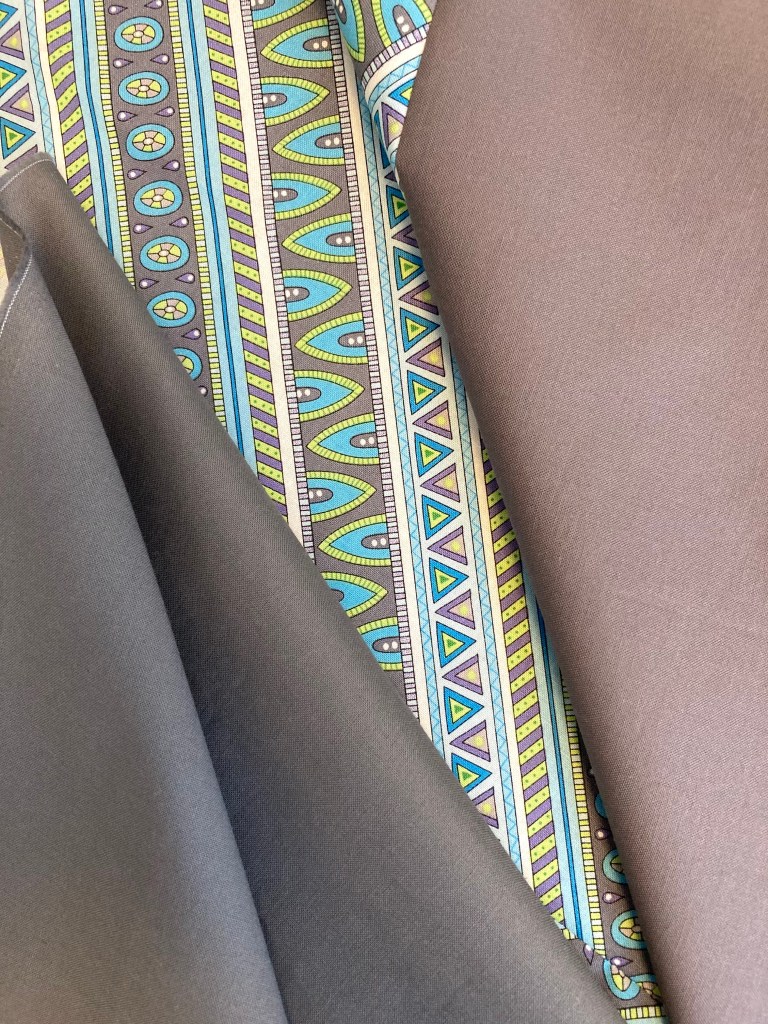
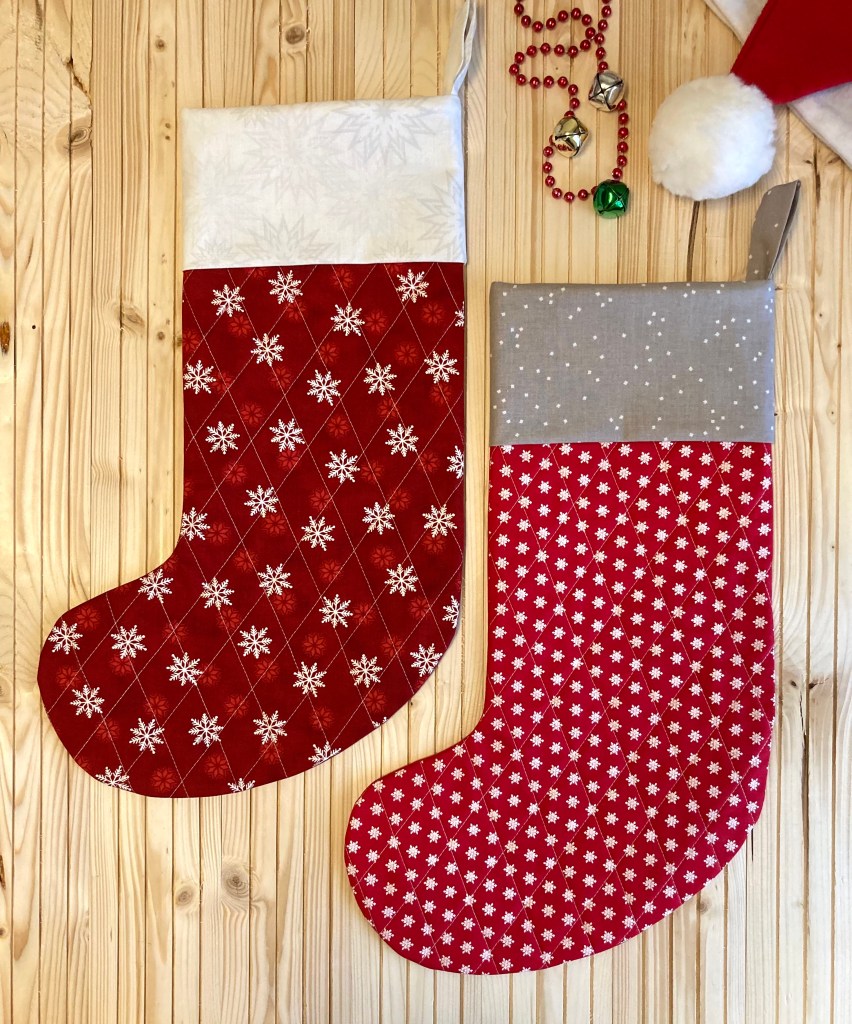
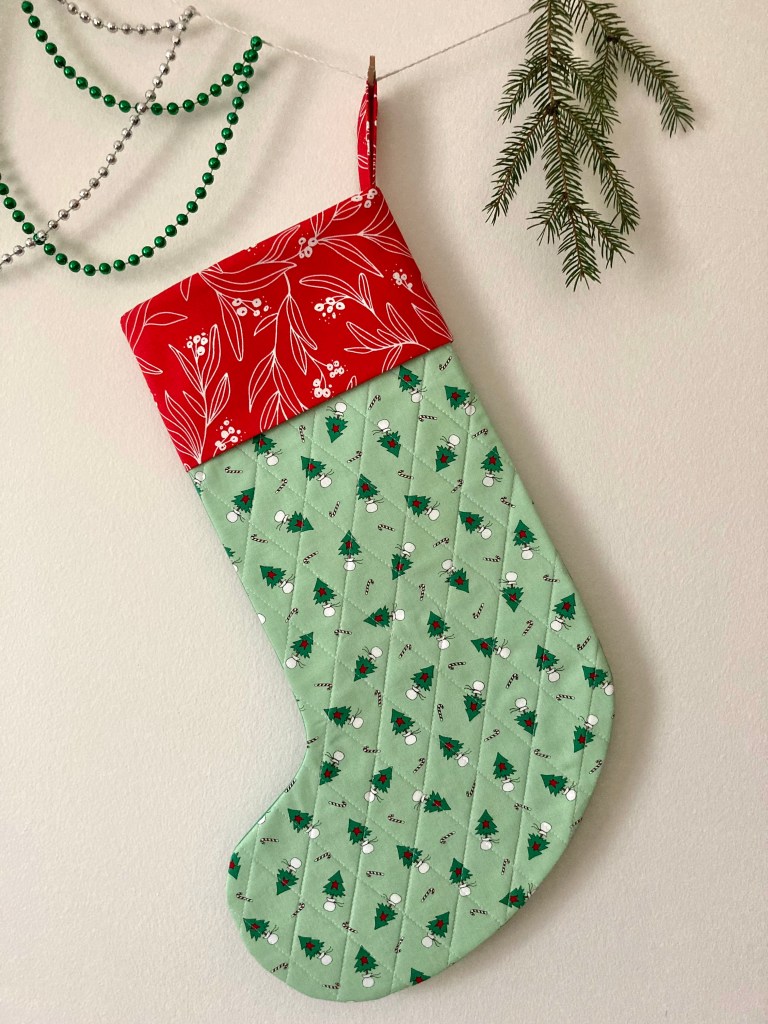
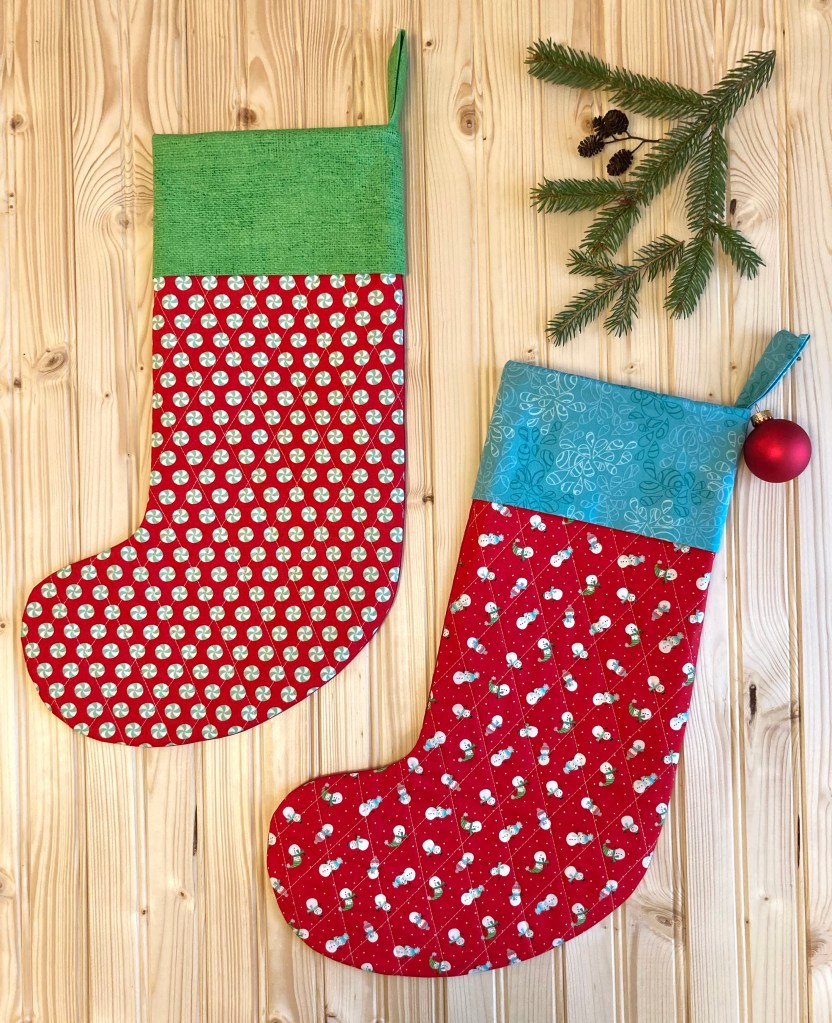
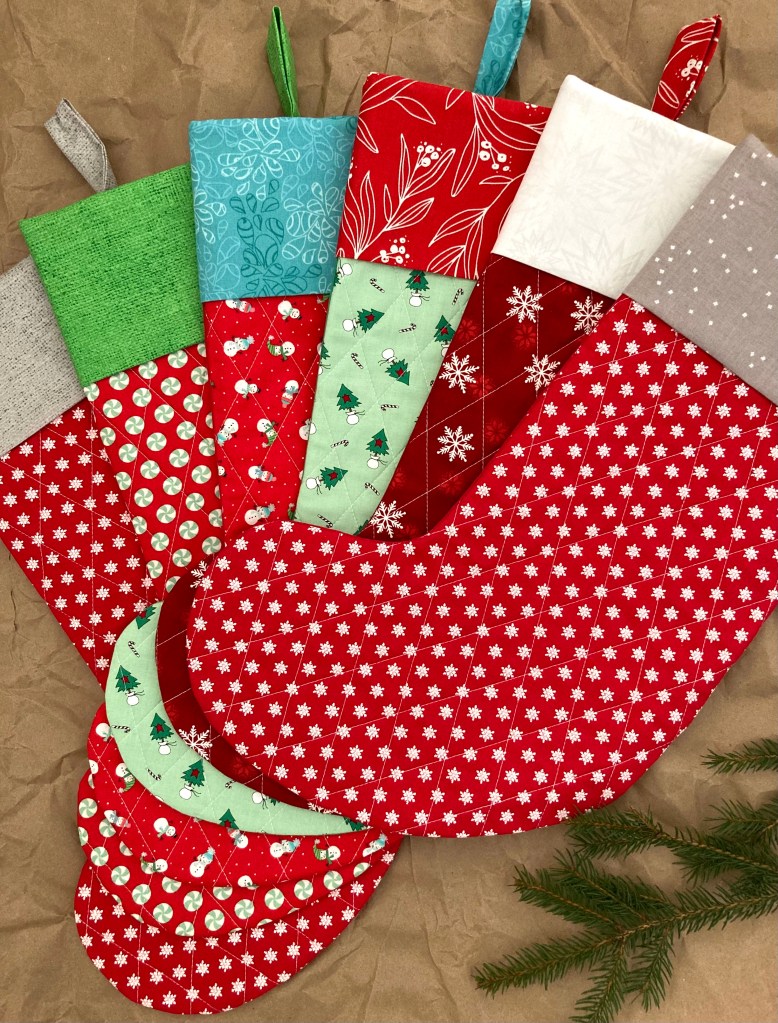
I don’t have much of a stash but I was able to put together nice combinations of stocking fronts and cuffs with what I had on hand (one fat quarter shown ended up getting swapped out).
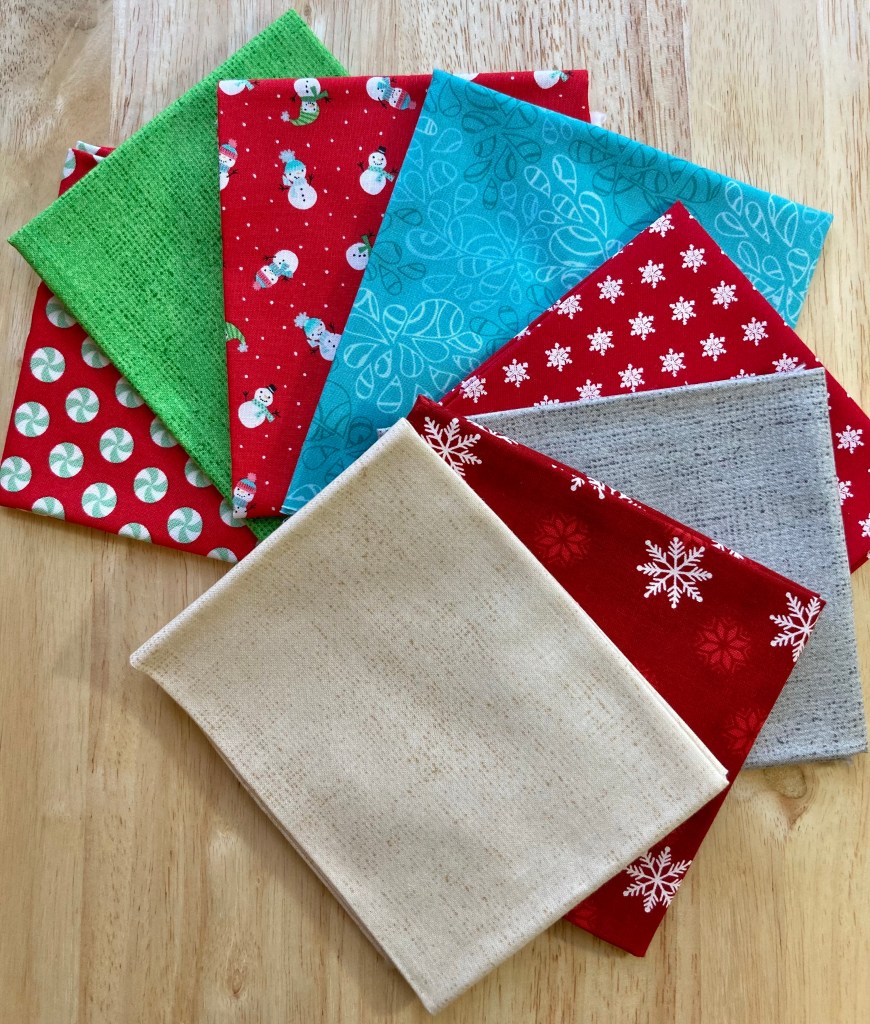
Having used fat quarters instead of yardage, I opted to sew a solid matching color for the backs omitting both the lining and quilting.
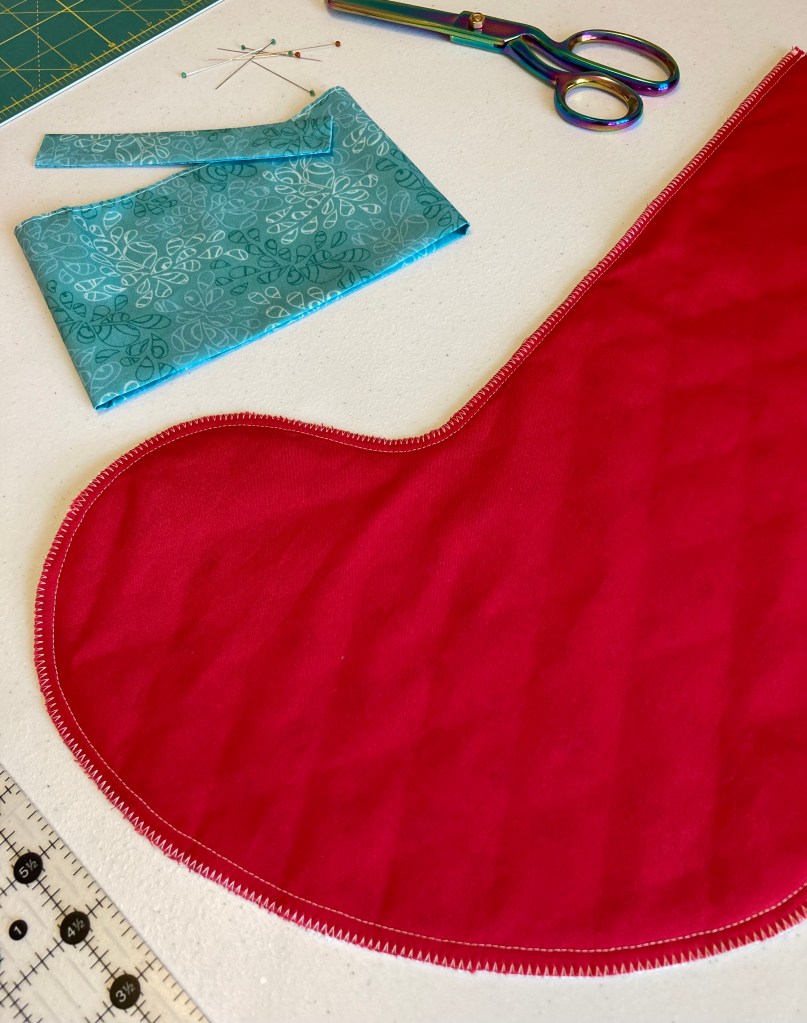
There were a few steps in the making process that threw me—I got confused trying to think inside out and backwards but I managed alright in the end. 😉
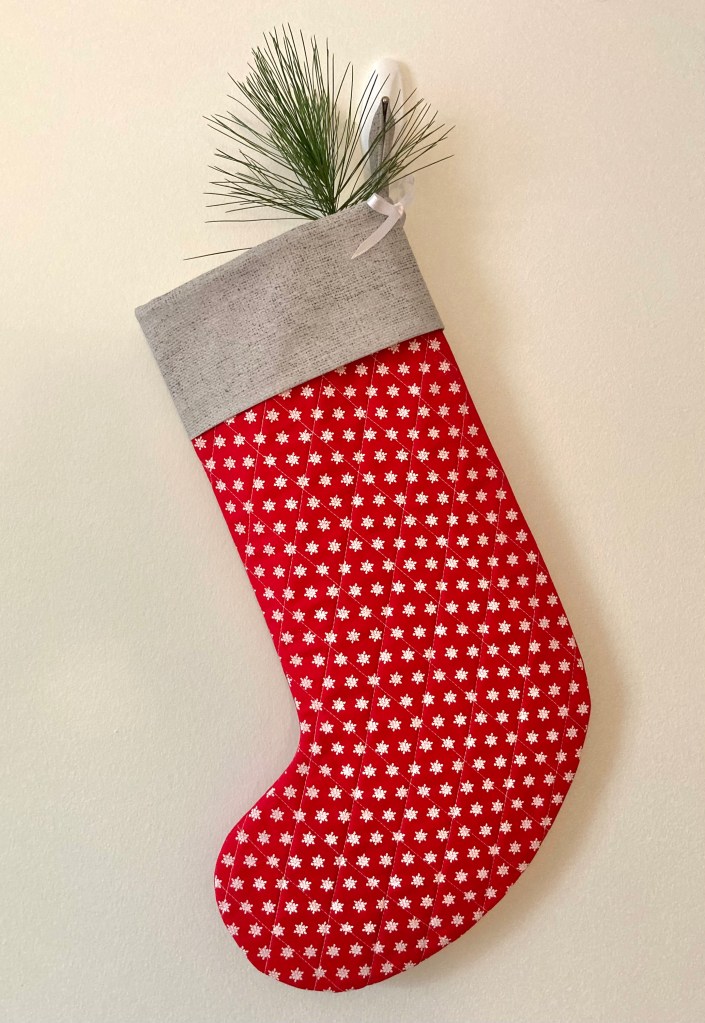
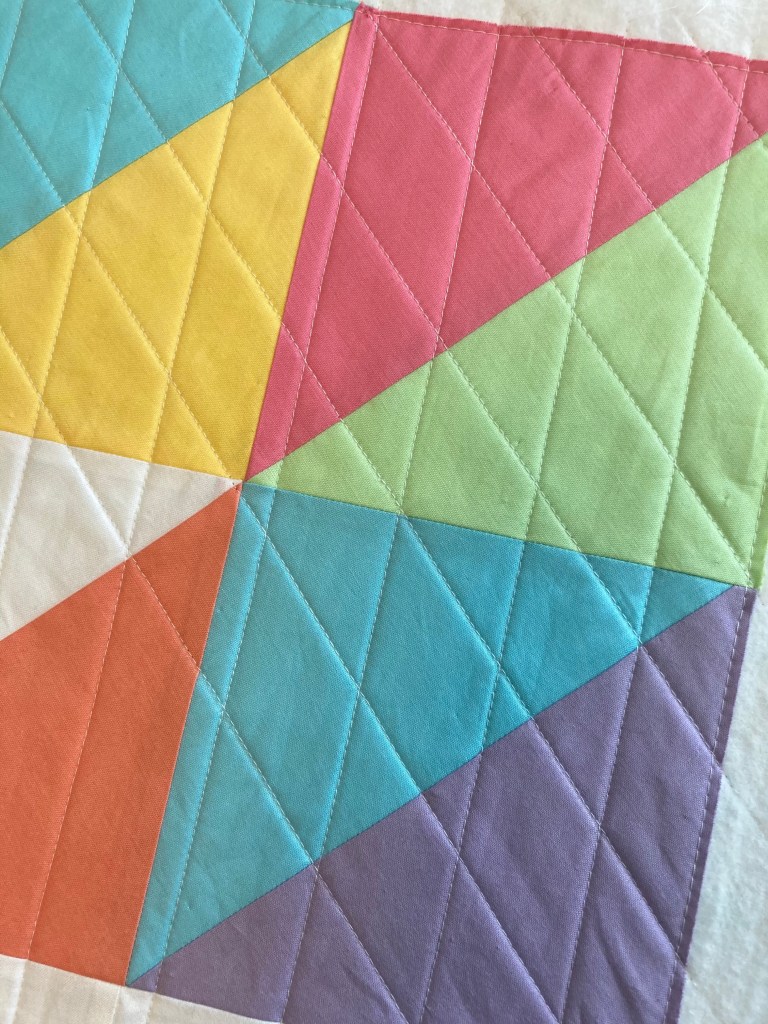
I chose to quilt all six the same. The front piece is a rectangle so I drew a diagonal line from corner to corner using a hera marker then quilted every 1 1/4″ with white thread.
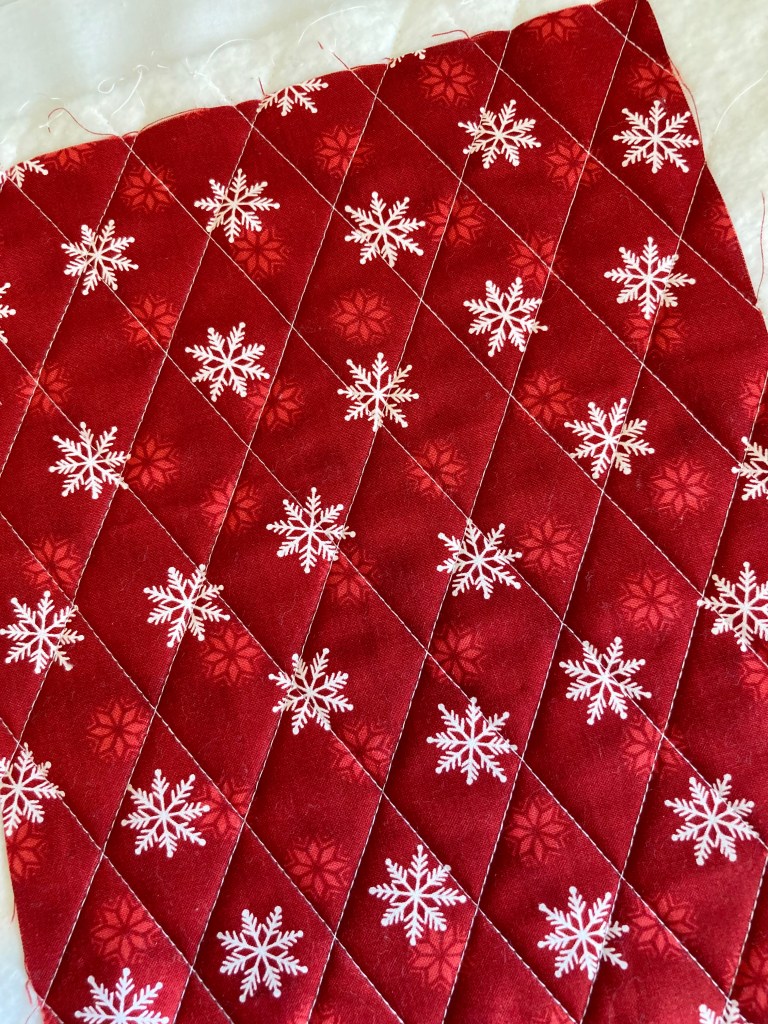
I love the diamond pattern.
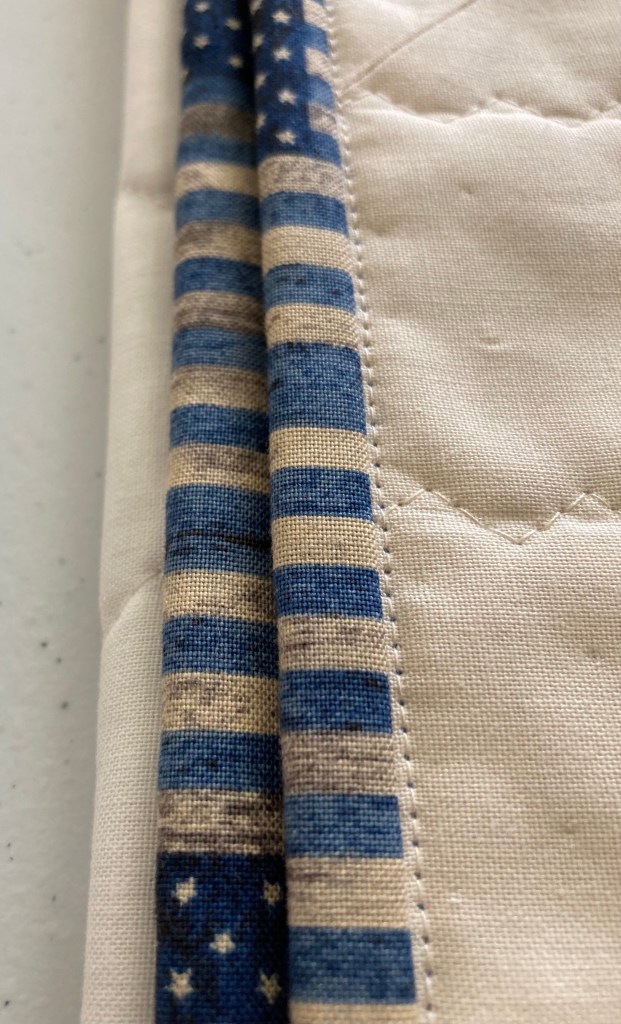
I also made my cuffs a 1/2″ longer than the pattern, just a personal preference.
I really like the variety of colors and fabrics, and overall this was a fun project to make this time of year. I’m very happy with them and I hope my recipients will be as well!
Ever since I started quilting I’ve been saving selvages. Even though I have plenty, I can’t seem to stop saving ones that have fun sayings and cute drawings printed on them.
Since I like to keep things to a minimum, I’ve found a great way to use some of those selvages—wrap them on gifts instead of ribbon—and this is the perfect time of year to do so.
Each Christmas I like to give my family members something handmade, and because everyone has received at least two quilts from me, I’ve had to think of other things to make. For the last few every years I’ve gifted my husband a bird-themed pillow case wrapped with colorful selvage.
Other gifts I’ve dressed up by using selvage is table napkins made for my kids. When I completed this set I wrapped it with selvage and tied a pretty bow. I think it classes up the bundle and makes a nice presentation.
(If you’d like to make table napkins for yourself or as gifts, I have a PDF Table Napkin Tutorial available).
Of course another good way to use selvage is wrapping and gifting a quilt. When I gift a quilt I always find a selvage that compliments the fabrics. By doing this there’s nothing to buy and I’m ready to gift or ship without doing any shopping. Nothing like saving time and money!
Another bonus to saving and using selvages is that they’re really easy to store. I just bundle a few together, place them in a large zip-lock bag and keep it in my scrap bin. It doesn’t matter that they’re creased and wrinkled, just press and trim when needed.
Not only does this put pretty selvages to good use (that may otherwise be tossed out), it’s convenient and environmentally friendly! 🙂
A couple of years ago I made a Maple Charm throw quilt by Coriander Quilts. It’s a definite all-time favorite and I bring it out every autumn (for display only). 🙂
But lately, for some reason, I’ve really slowed down on making larger size quilts and I’ve been focusing on making minis or other small sewing projects instead. Hopefully I’ve just misplaced my quilt-making motivation for a while and it’ll show up soon. 😉
In the meantime, I wanted something more than just the quilt to decorate with so I decided to make minis using just one block. I chose three traditional autumn colors for the leaves: orange, yellow and red. Some fabrics were used in the quilt, others I’ve accumulated recently.
Picking out the fabric is half the fun, isn’t it? So, once my fabric choices were decided, I made one block out of each color. For the background I used Moda’s Cream Solid, the same fabric as in the full size quilt.
Since I wanted the minis a bit bigger than the block, I added a finished 1/2″ inner border using dark brown fabric to frame the leaf in. I then added a finished 1″ outer background fabric border to make it complete. The minis finish at 15″ x 15″.
I quilted the orange and yellow minis with a diagonal serpentine stitch to give a falling/windy effect which I thought worked out rather nicely.
I quilted the red mini in a 1″ square grid, just for something different than the other two.
I also added a corner hanging sleeve in all four corners—that way I can orient the mini any way I want. This hanging method is so easy! If you’re not familiar with it, I have a Corner Hanging Sleeve Tutorial on my website if you want to give it a try.
Overall, these were a really fun project and added great color and variety to my autumn décor. They also would make nice table setting minis for your holiday displays…another reason to make a few.
When this quilt pattern came out 4 years ago (The Ghost Quilt by Pen + Paper Patterns) I knew my daughter would ask me to make her one. What I didn’t anticipate was that it’d take that long for me to actually do it. 🙂
Once fabrics were decided upon, ordered and received, from start to finish it took me a couple of months, mainly because I worked on other things in between and those cute little ghosts could be a challenge to line up!
The quilt itself requires 25 ghost blocks, but I decided to go through my gray fabric and having enough, I made 4 extra blocks, added a small border and made them into minis to give as gifts.
…I did keep one for myself though. 😉
For the throw size quilt fabrics, I used Kona Solid Gotham Gray for the background and Kona Solid Crocus for the binding which looks great paired together and they’re definitely in the spirit of Halloween. For the minis, I used Kona’s Gotham Gray, Coal and Metal for the backgrounds and School Bus for bindings.
For quilting, I ran a vertical serpentine stitch about 1 1/2″ apart. You can see how it gives the quilt movement and a bit of a spooky vibe.
The backing is a fun black and white asterisk print that worked perfectly because the asterisks kind of look like mini spider webs.
I think this pattern is one of the cutest ones out there. And it’s a fun make too. I’m glad I finally got around to seeing this project through even if it was on my list for a really, really long time.
Even though summer has just left us, now’s the time to get started on our holiday sewing projects. It’s definitely not too early especially if you plan to make a quilt and would like to have it finished in plenty of time.
I’ve noticed a lot a quilt patterns out there are so close to being the same as one another, and well, it’s getting kind of old. In order to make what change I could, I decided to design something completely different, and what better subject is there than the holidays? So last year I set to work and came up with my Holiday Hemlocks throw quilt in two versions, Scrappy Holiday Hemlocks PDF pattern…
There’s no denying this quilt design is definitely different than any other holiday quilt, right? Well, that’s exactly what I was going for. But different doesn’t mean difficult. 😉
Here are a few things I’d like to note about these quilts…they’re traditionally pieced with no tricky blocks involved, and the patterns are suitable for anyone who has made only a couple of quilts! In fact, one of my testers was an absolute beginner and hers turned out great.
My patterns are always clearly written with step-by-step instructions, there are also plenty of detailed, colorful diagrams throughout.
Don’t have time to make an entire quilt? Try this festive little mini instead—Wee Three Trees.
This pattern is by far the best seller in my Etsy shop. I made the one photographed here for myself, but I’ve made several of them for gifts, too. Wee Three Trees is a relatively quick make, you could easily whip one up in a weekend.
Most of the time I have only one quilt in the works as I’m better focused and organized when I stick to a single project. But that’s most of the time. 😉 There are occasions when I work a few projects at a time, mainly if I know a specific quilt is going to be a long process. My most recent example is my scrappy on point nine patch quilt.
For Christmas 2018 and 2019 I’d given my kids queen size quilts, so 2020 was the year to make one for myself. I decided on a scrappy nine patch so I could use a big share of the 2 1/2″ squares I always seem to be accumulating. And to give it a bit more style, I decided to make it on point using various white tone on tone background fabrics instead of plain white.
To get started, I determined the size I wanted then designed the layout in EQ8. Using 2 1/2″ squares resulted in relatively small blocks (6″ square finished) so the pattern required a lot more blocks than I’d imagined…a total of 242! Of those, 132 nine patch were needed and 110 white squares. Additional background squares were required for the blocks around the edge that were cut larger and in half. I also added a 2 1/2″ border.
The next step was choosing colors. Because 11 color blocks were needed in each row, I figured I’d need 11 different colors for a balanced look. The colors I used were: coral, pink, orange, green, gray, mint green, teal, yellow, neutral, aqua and red. I averaged 12 blocks per color, but I had more of some colors than others. For example, I had a lot more yellow and pink than mint green and gray.
Here’s a look at my stash before I started.
It doesn’t look like I had much, but I got most of what I needed from what was already cut. How many squares did I need? 660! A lot. This was a really fun step, but it was kind of perpetual…as an example…I would be one square short of orange, so I’d have to cut a strip from a fat quarter for it then I’d end up with more orange in my box. That said, the next picture doesn’t look like I made much of a dent, but I really did.
Once I chose enough colors for a fair amount of blocks, it was time to get sewing.
While I had a several white tone on tone fabrics cut into 2 1/2″ squares, I had larger pieces I needed to cut as I went long. EQ determined the quilt needed about 9 yards of background fabric altogether. Again, a lot! I knew I didn’t have enough on hand, so towards the end I’d pick up or order random fat quarters, 1/2 yard and 1 yard cuts to keep a wide variety of fabrics throughout the quilt.
In mid-November, all my nine patch blocks were finished. I barely had room to lay them out, but I managed alright. Next, I labeled rows accordingly then tackled the task of sewing this huge beauty together.
Here’s a look at the quilt top, pressed and ready for longarming.
Because of the scrappiness, I’ve no way of knowing how many different fabrics went into this, but I’m sure there’s Moda, Art Gallery, Andover, Kona Solids, Bella Solids, Michael Miller, Windham, Dear Stella, Kimberbell, Northcott and Riley Blake fabrics.
EQ calculated the finished size of this quilt approximately 97″ x 106″. Mine always come up a bit short, so my finished top measured 96″ x 104 1/2″. Since I’d wrestled with roughly 9 yards of fabric when piecing the backs of my kid’s quilts, I wanted to avoid that this time so I purchased Windham Fabrics Multi-colored Dots by Whistler Studio in 108″ wide. I think this fun fabric corresponds nicely with the colors on the front. And I’d never purchased wide backing fabric before, so this was a first.
For binding, I used what I had on hand. I have only one quilt top that I never finished (but made binding for) so I used that along with other binding I made for another project but changed my mind on. Might as well go scrappy with the binding too, right?
So finally, here’s my finished quilt!
For quilting, I chose a baptist fan motif with 1 3/8″ wide sweeps. I think the round design compliments the angular composition of the layout.
And that polka dot backing is just right…
From start to finish, there was a huge amount of time involved in making this quilt. I started in March 2020 and finished early July 2021. Even though I had it ready for longarming in January, like so many things the pandemic caused me to put the quilting on hold. I was finally able to drop it off in May and it was quilted in June, making it my latest finish.
Even though this project seemed to take forever, it was worth waiting for.
If you’ve followed my blog for a while, you know I like to be as environmentally friendly as possible. While I do the best I can, there is one thing I do and feel bad about—using a sticky roller brush for quilting. Even though I hate the thought of all those plastic sheets going into a landfill, I haven’t found a more effective way to clean up threads. On the bright side, I never throw away the handles saving on one-time plastic waste and I only buy sheet refills.
Which brings me to my first hack—using the handle for wrapping long strips of fabric. I purchased a twin pack of brushes and kept one for its intended use and kept the other (once empty) for wrapping purposes. It’s a great size; it fits strips up to 4″ wide which is ideal for border strips sewn together. And it’s pretty hard to misplace. 😉
Once wound, I can store it until I’m ready to cut. The handle makes lengthy strips manageable; rolling and unrolling is a breeze, too.
Above shows ten 2 1/2″ sewn together strips totaling about 400″! It’s funny because I’ve done this with white strips too, and I admit I grabbed it a few times thinking it was my sticky brush. 🙂
A couple of years ago I discovered another hack when I needed to store binding. I’d made some before I was ready for it and I needed an object to keep it rolled on. I headed out to the garage to see if there was something I could use. On a peg board I found a 3/4″ x 1 1/2″ PVC pipe for irrigation purposes. It was sturdy and the right size so I thought, why not? I cleaned it up (after making sure my husband didn’t need it) and it worked great!
It’s easy to use as well. When I start to wrap my binding, I use a small piece of washi tape to hold it down, then just wrap to the end.
These little gems are a perfect size for binding at just 1 1/2″ high, and since they’re petite I can conveniently store the PVC pieces in a compartmentalized box when not in use.
Since I thought this was such a great discovery, I purchased a few more at Home Depot for about 45 cents each. It was a while ago, so I’m not sure about the price today but I doubt they’d be too expensive.
I know many quilters use Binding Buddies that are actually made for binding, but quite frankly, those doll heads frighten me so I think I’ll stick to my nonconventional ways. 🙂
It wasn’t until recently that I learned what a tailor’s clapper is, let alone find out it’s a great tool for quilting. Who knew?
If you’re not familiar with this funny little thing, here’s some general information. A tailor’s clapper is an elongated, rounded piece of hardwood (average size: approximately 9″ long x 2″ wide) with a routered groove down each side. Some are straight and some are a bit wider on one end, but no matter the design they can be used in either direction.
What’s the purpose of a tailor’s clapper and how is using one beneficial to quilting? This handy tool helps to achieve wonderfully flat, crisp seams which is exactly what quilters want! And in the end the results will give you a beautifully flat quilt top. 🙂
After reading quilters rave about them and doing a bit of research myself, I thought I’d give one a try. I decided to purchase this one from Amazon. I like that it’s made in the USA and it had a lot of good reviews. This one offers 2 sizes, I chose the standard size.
How does a tailor’s clapper work? Well, they’re pretty basic and very easy to use; here’s how. Once you press your seam with a hot, steamy iron, remove the iron and immediately place the clapper on the seam then hold it down for a few seconds. The clapper will trap the heat and steam leaving an amazingly flat seam.
Here’s a look at fabric I sewed and tested with and without the clapper. It’s easy to tell which one I used the clapper on and which one I didn’t…it really works!
I’m definitely seeing a better outcome in my quilting now that I use a tailor’s clapper when pressing, and I most definitely recommend using one. And what I find so interesting is that this simple garment-making tool that originated in England well over 100 years ago is still useful in today’s complex world!
Note: I am not endorsed by the product mentioned in this post; it is just an item I like, use, and wanted to share information on.
My first quilt pattern of the year is here! Triangle Twizzle is available as a PDF download for purchase in my Etsy shop. This quilt is easy, fun and a quick sew for quilters of all skill levels.
In fact, it’s so easy a beginner quilter could make it in no time! The pattern is written for a 10″ square stacker / layer cake with a bit of yardage needed for the large white triangles.
I made mine using Riley Blake’s Pastels for a bright, cheerful look.
But the color choices are endless, making it such a versatile quilt. Can you imagine one in various shades of a single color, Christmas colors, Halloween colors or rich fall hues? Anything goes!
In keeping with the modern vibe, I quilted mine with a vertical straight line every 1 1/2″ then I quilted straight lines on a 45° angle going the opposite direction of the HST seams. I love the parallelograms.
While I had to run the quilt through my machine over and over (and over) which took a huge amount of time, I’m really happy with the results.
With three sizes to choose from and color options galore, I hope there’s a Triangle Twizzle quilt in your future!
A few weeks ago my daughter requested a quilt specifically for outdoor use. Even though she has a few others I’ve made her, she doesn’t want to use them outside so of course I agreed to make another one. 🙂 We both decided that a scrappy, use-whatever-I-have quilt about the size of an extra large beach towel would work just fine; an approximate size of 36″ x 60″.
Since ‘beach towel’ was mentioned in our conversation, I got to thinking along those lines and decided to go with a strippy theme by using WOF 2 1/2″ strips leftover from other projects. Having recently reorganized all my fabric, I had a good idea of what was what in my stash, so I pulled a variety of print strips that would coordinate, along with all the solid 2 1/2″ strips I had.
To start, I trimmed the print strips to 37 – 38″ so I wouldn’t have to be overly concerned about lining up edges perfectly when sewing, and it would also allow for some wiggle room when trimming the top to its final size. Some of the solids were 2 1/4″ strips and needed pieced to get to the required length. But since this was an improvised project, I figured anything goes!
My layout consisted of alternating light and dark colored stripes, varying the placement of prints and solids. I had enough strips of solid navy blue and gold to make one 4 1/2″ wide strip of each. To add a bit of interest to the design, I placed one wide strip about 1/3 of the way down and the second wide strip about 1/4 of a way down from that.
I pressed all my seams to the dark fabrics, and trimmed the top to 36 1/2″ wide once all the strips were sewn. The length ended up at 60 1/2″.
Here’s the finished quilt top…
For the backing, we decided dark colors would be best since the quilt will be used on the ground. I pieced together various gray fabrics along with a colorful blue/gray diagonal print.
Did you ever have a quilt that you considered an ‘I always wanted to do that’ quilt? This was one for me. I’ve always wanted to make a strippy quilt, improvise a quilt, and quilt using a zigzag stitch. I figured this was the perfect time to do them all.
For the quilting, I set my machine on the zigzag setting with three stitches per zig. Or zag? 🙂 I tested out a few different sizes before I began, deciding on a rather petite stitch that was fun to sew. As always, I pin basted and used a hera marker for marking lines (every 2″). I really like how it turned out.
To finish, I used a blue and tan flag print for the binding, mainly because I wanted to use the last of this fabric and I thought the stripes would show up nicely. Plus, everyone loves striped binding, right?
Here’s the finished quilt! And I’m happy to say I bought nothing to make this one. I even pieced the batting and used thread that I’d had for a few years now.
If you want to make a small, striped quilt for indoor use or out, here’s a layout of the one I made. Overall, there are twenty-seven (approximately) 2 1/2″ strips and two 4 1/2″ strips. This is just a guideline, you certainly can add or take away as needed.
finished size 36″ x 60″
Now it’s time to send it off for the new owner to enjoy!