It’s time to look back on 2022 and revisit completed projects, and in all there weren’t that many!
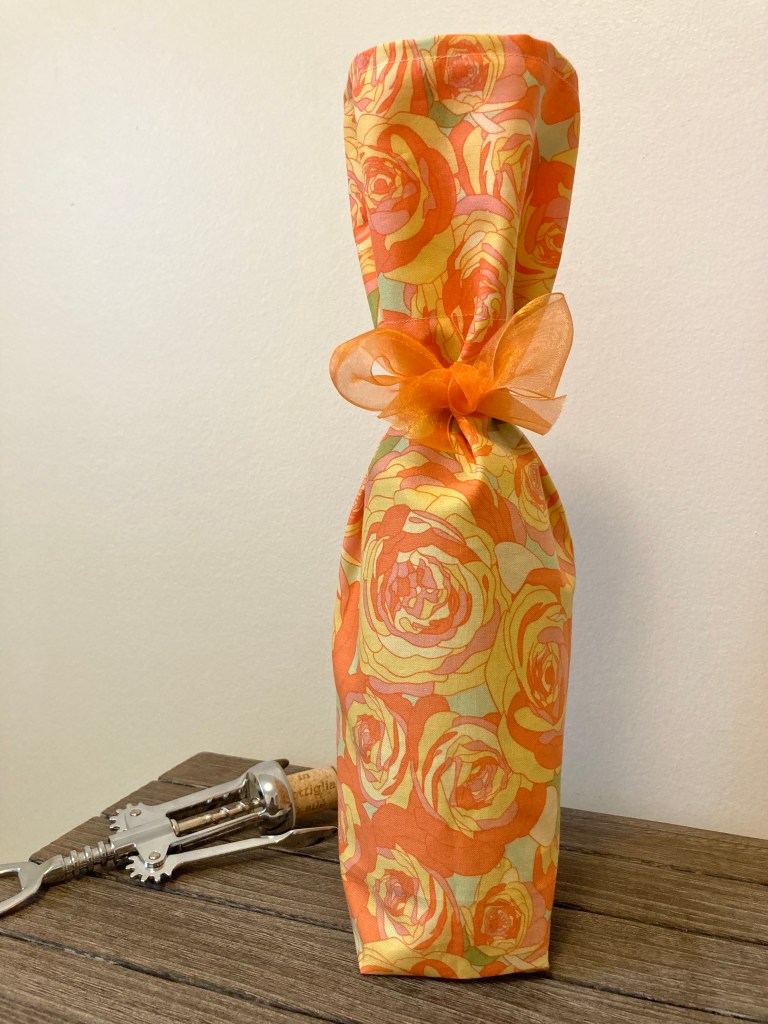
My first finished project was a wine bottle bag as a hostess gift; it definitely makes a lovely presentation when gifting a bottle of wine. It’s a really quick project that only requires a fat quarter and a ribbon! Download the free PDF tutorial here.
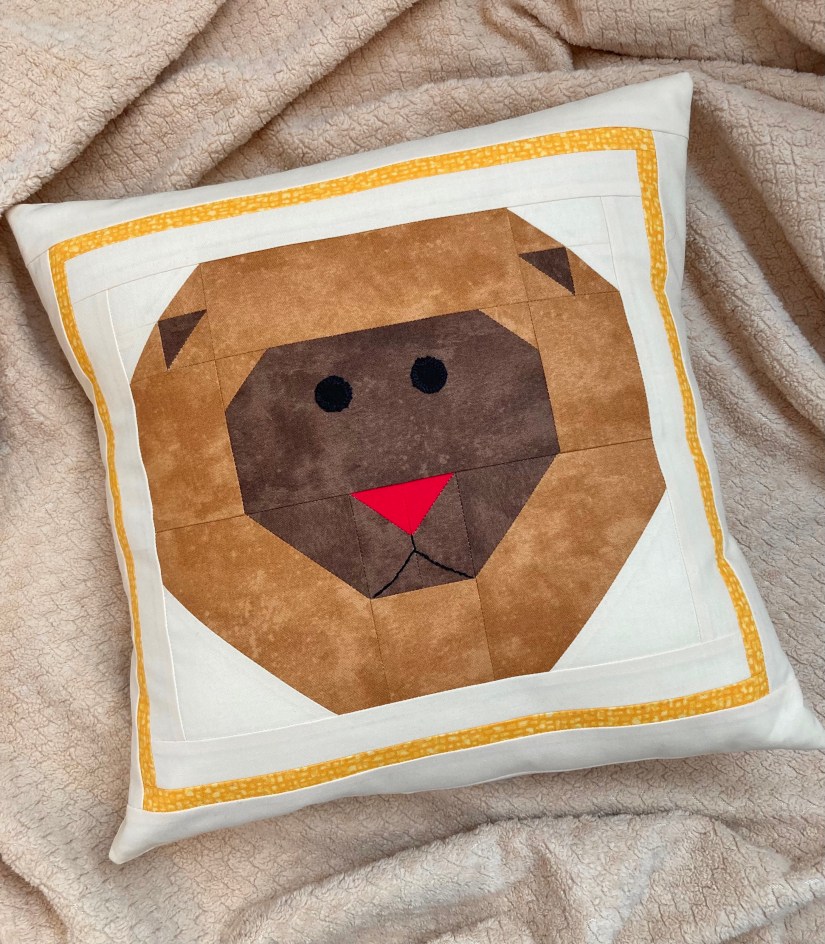
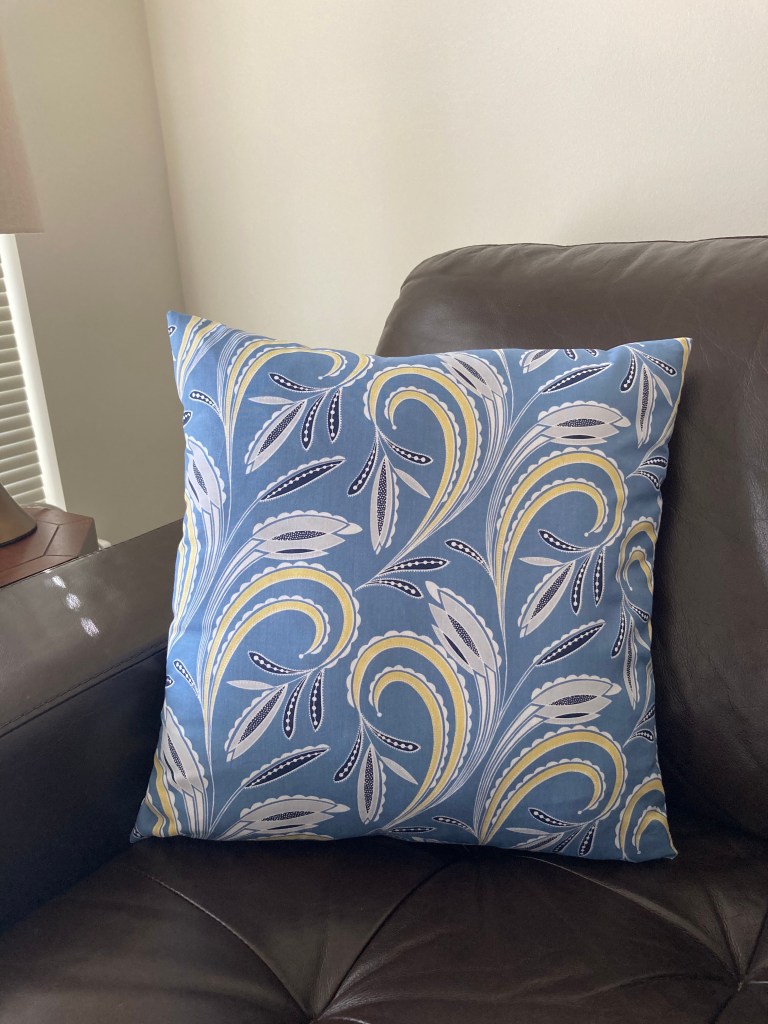
Next up is a pillow cover of a cute little lion. This is an easy project that can be completed in just an afternoon. The cover fits a 16″ pillow form. Lazy Lion pillow cover pattern is available for purchase in my Etsy shop.
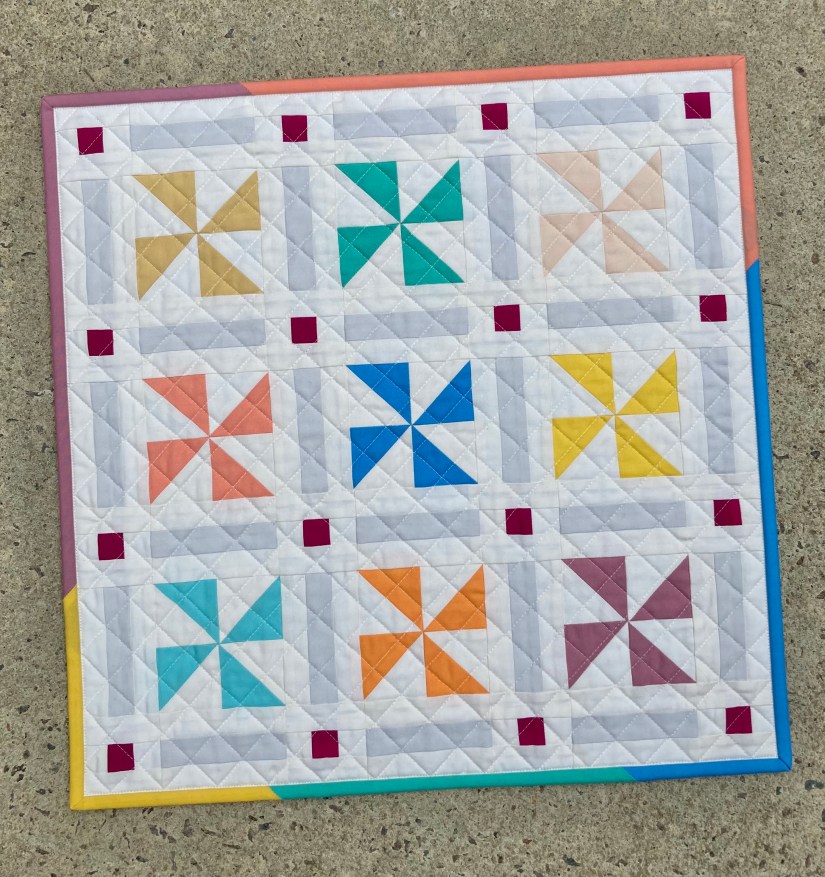
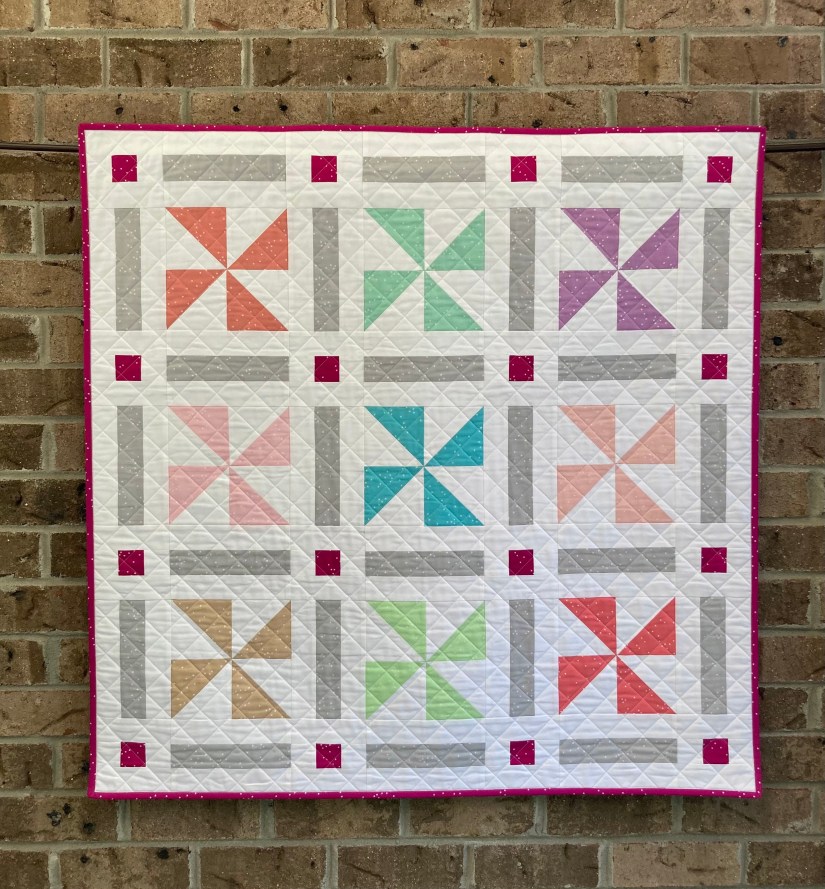
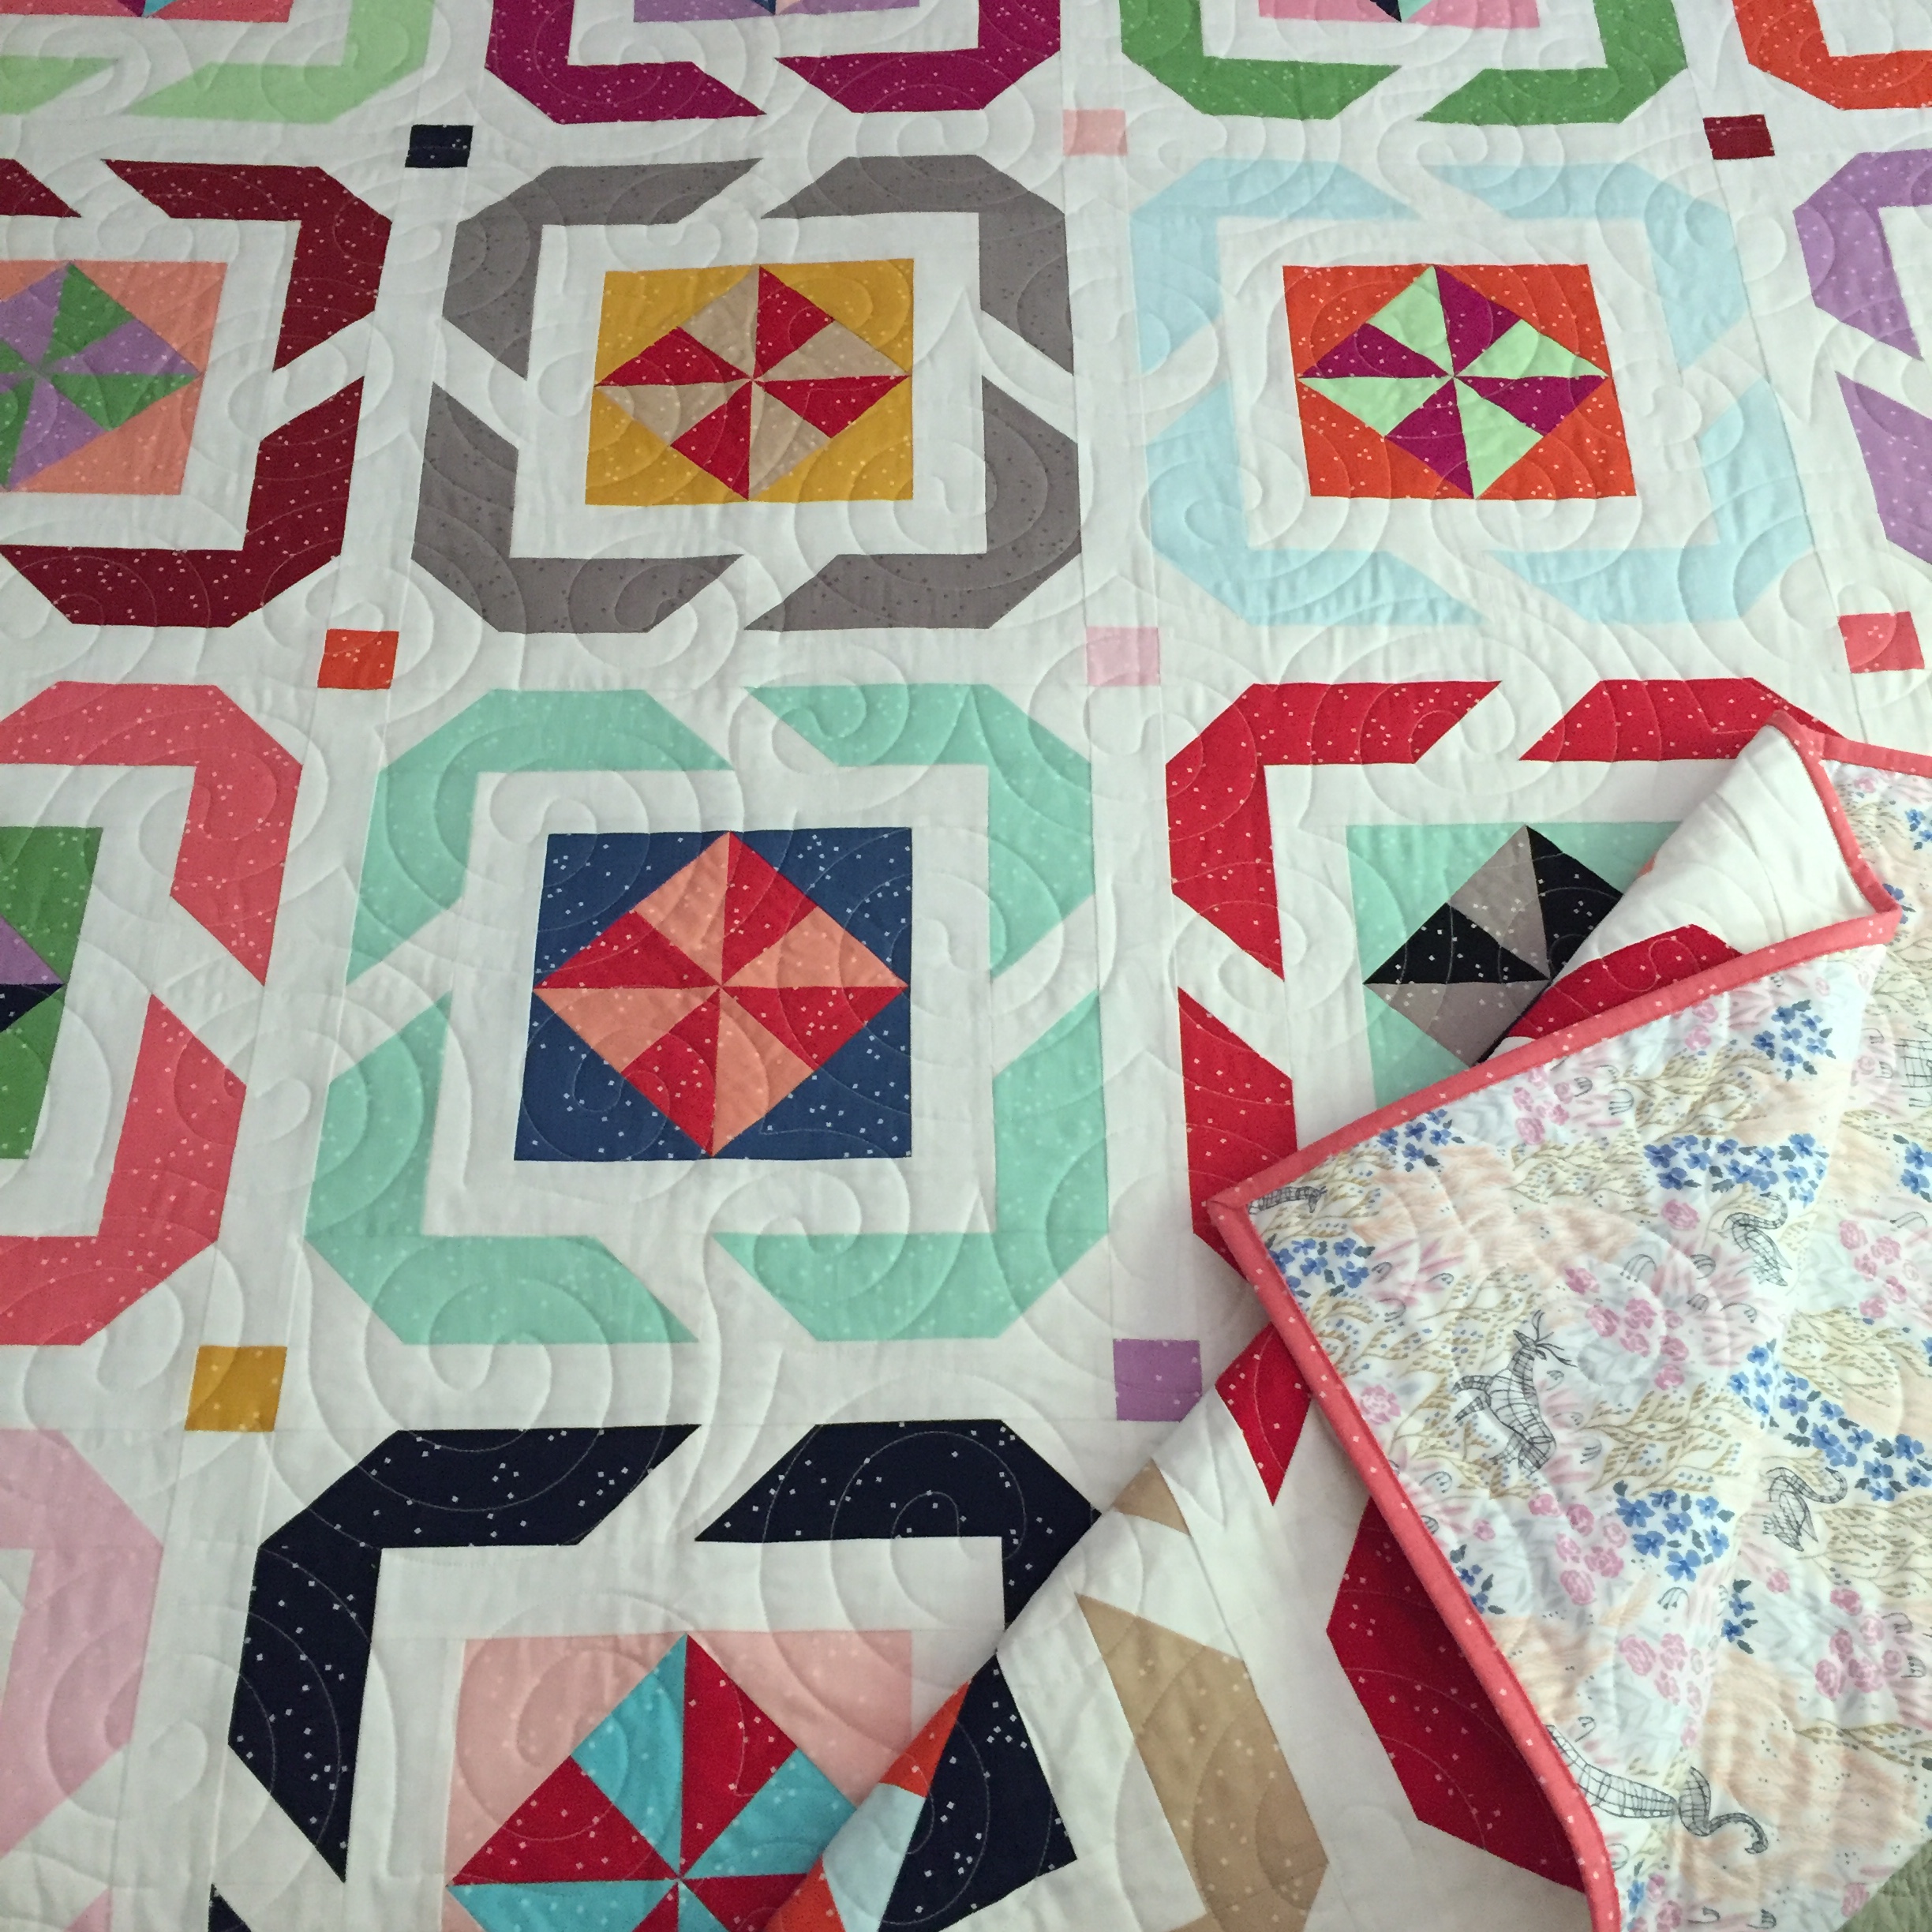
My first 2022 quilt pattern releases were Pinwheels Galore Mini quilt and Pinwheels Galore quilt which is available in several sizes. Both patterns can be found in my Etsy shop.
Pinwheels Galore Mini QuiltPinwheels Galore Baby Quilt
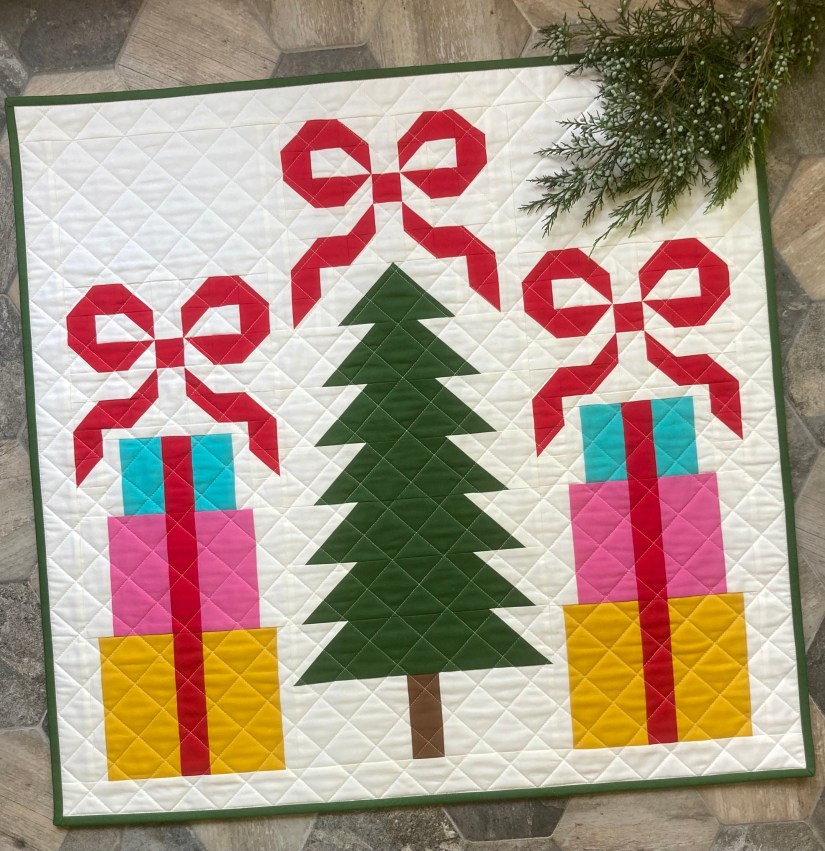
To celebrate Christmas in July, I released a fun and whimsical pattern called Christmastime. It’s a table topper or wall hanging, and it’s definitely a fun one to watch come together. And, the tree is constructed with no half square triangles!
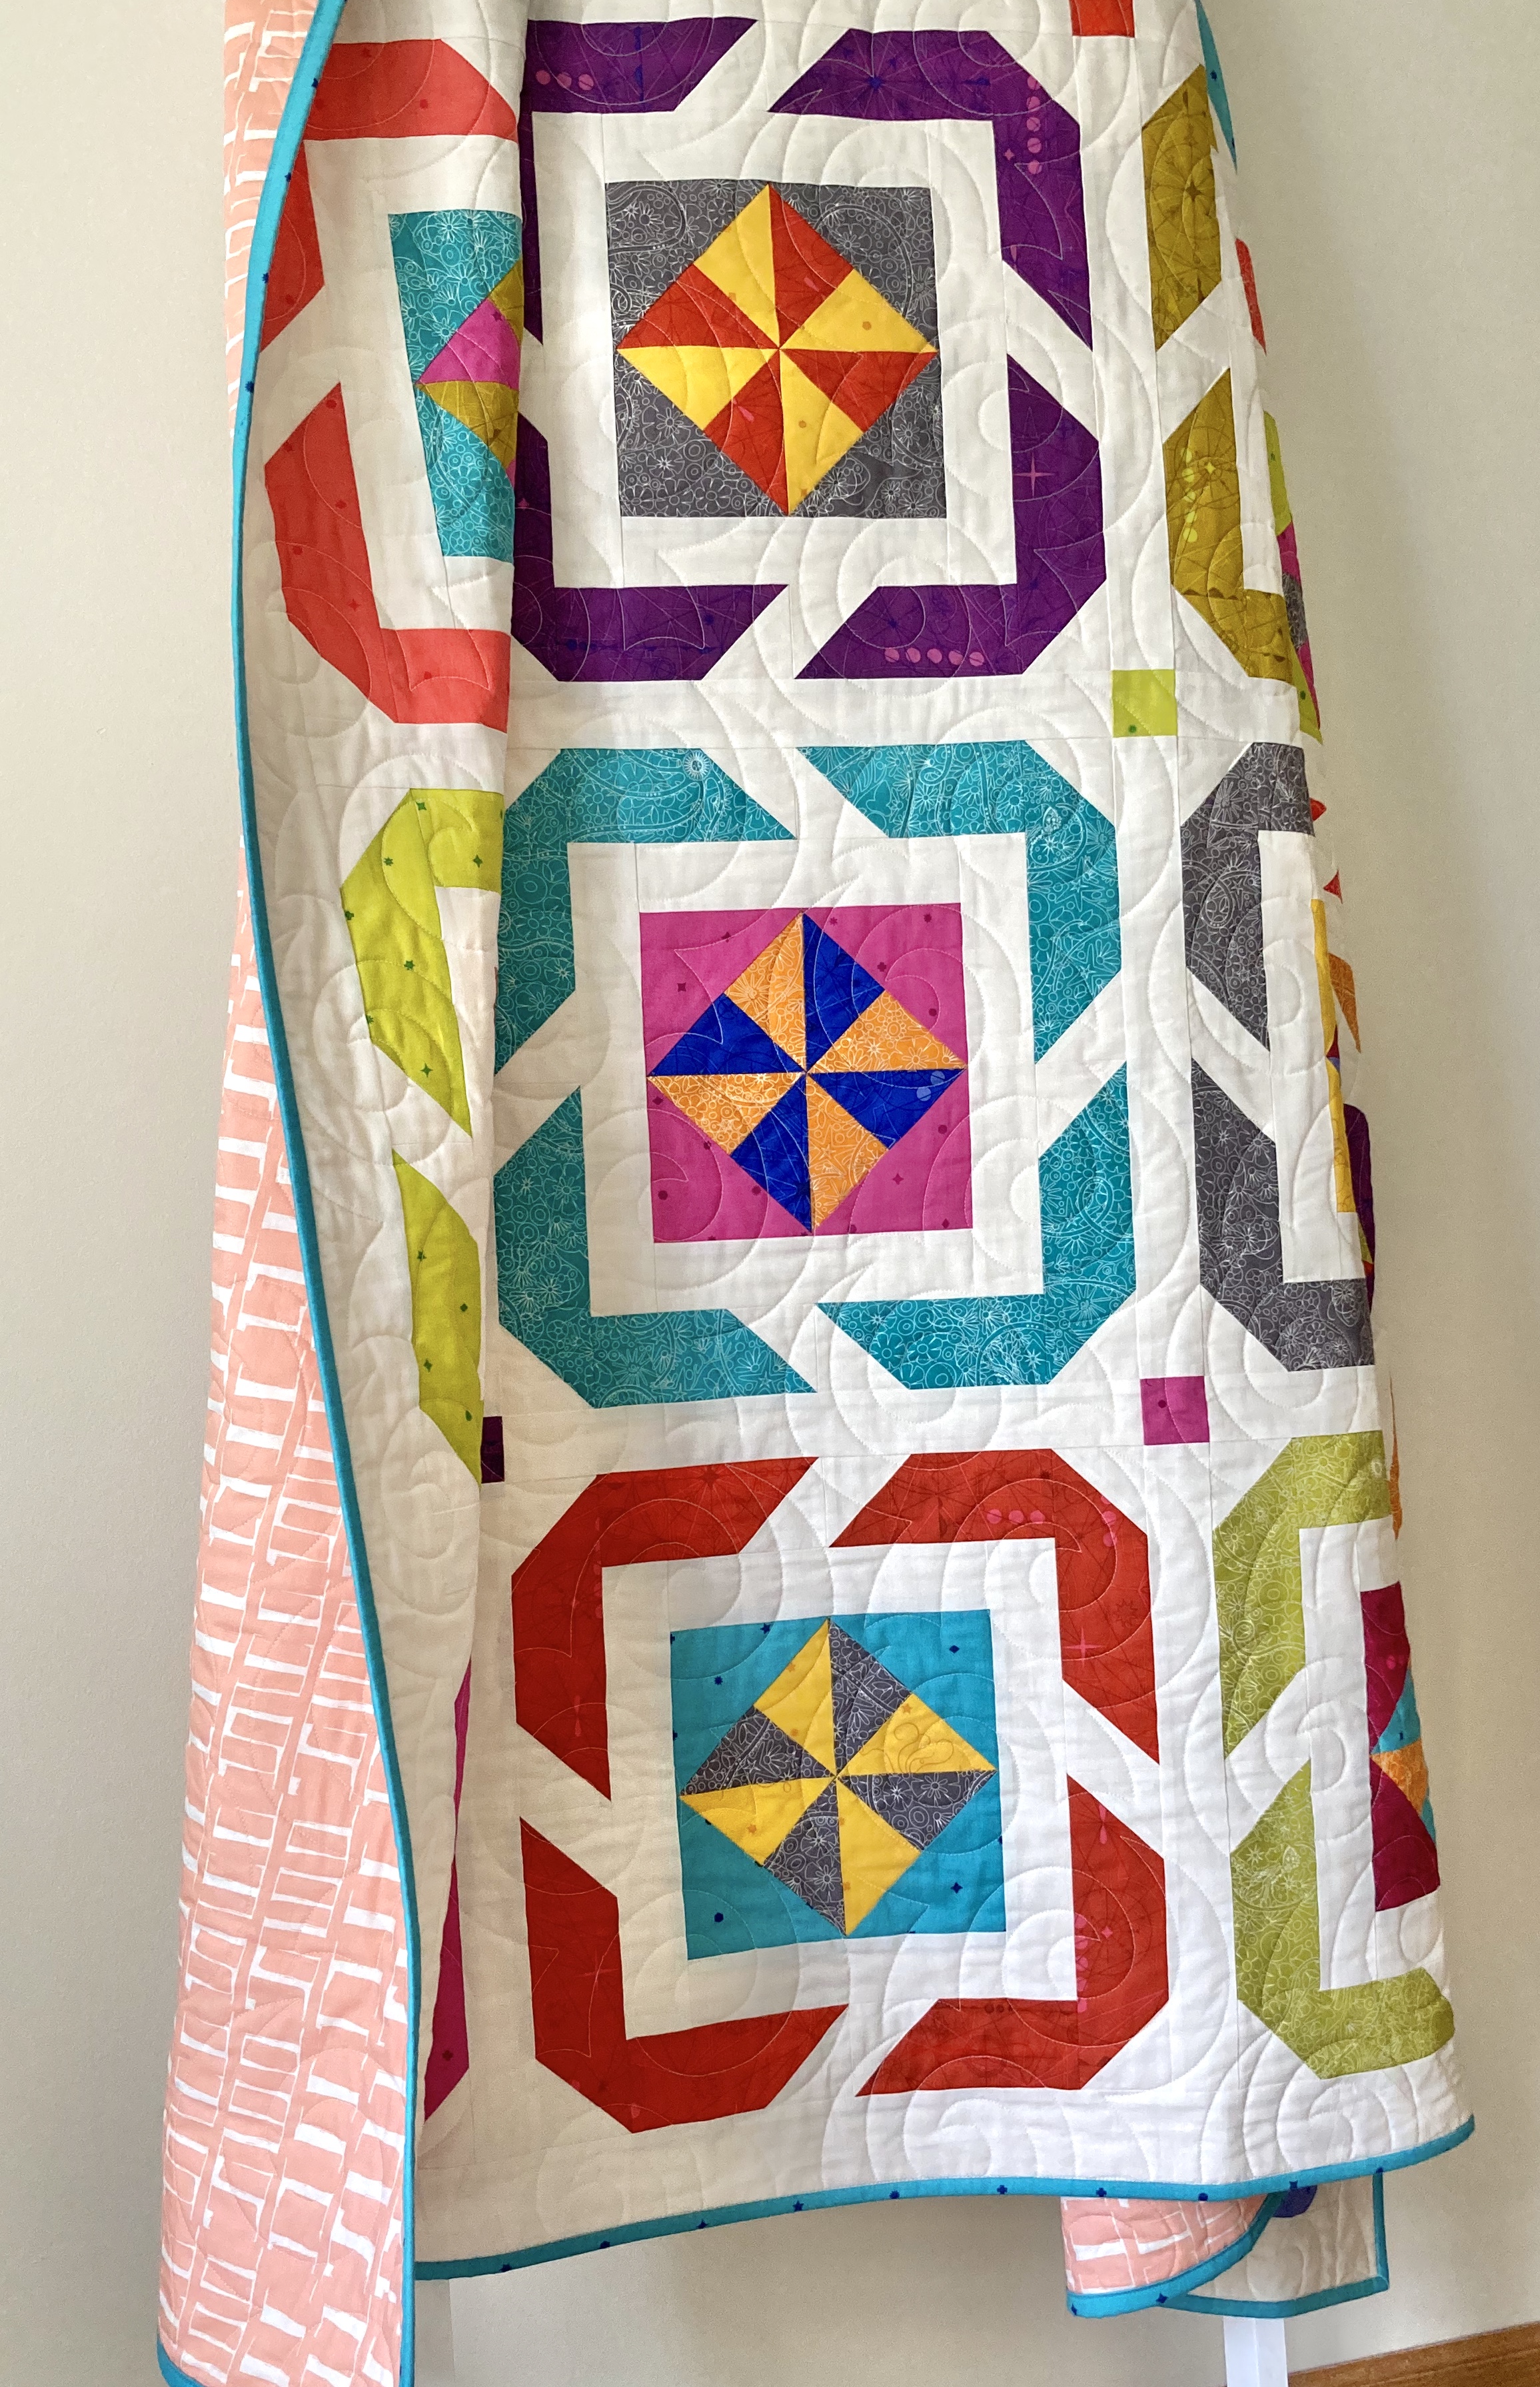
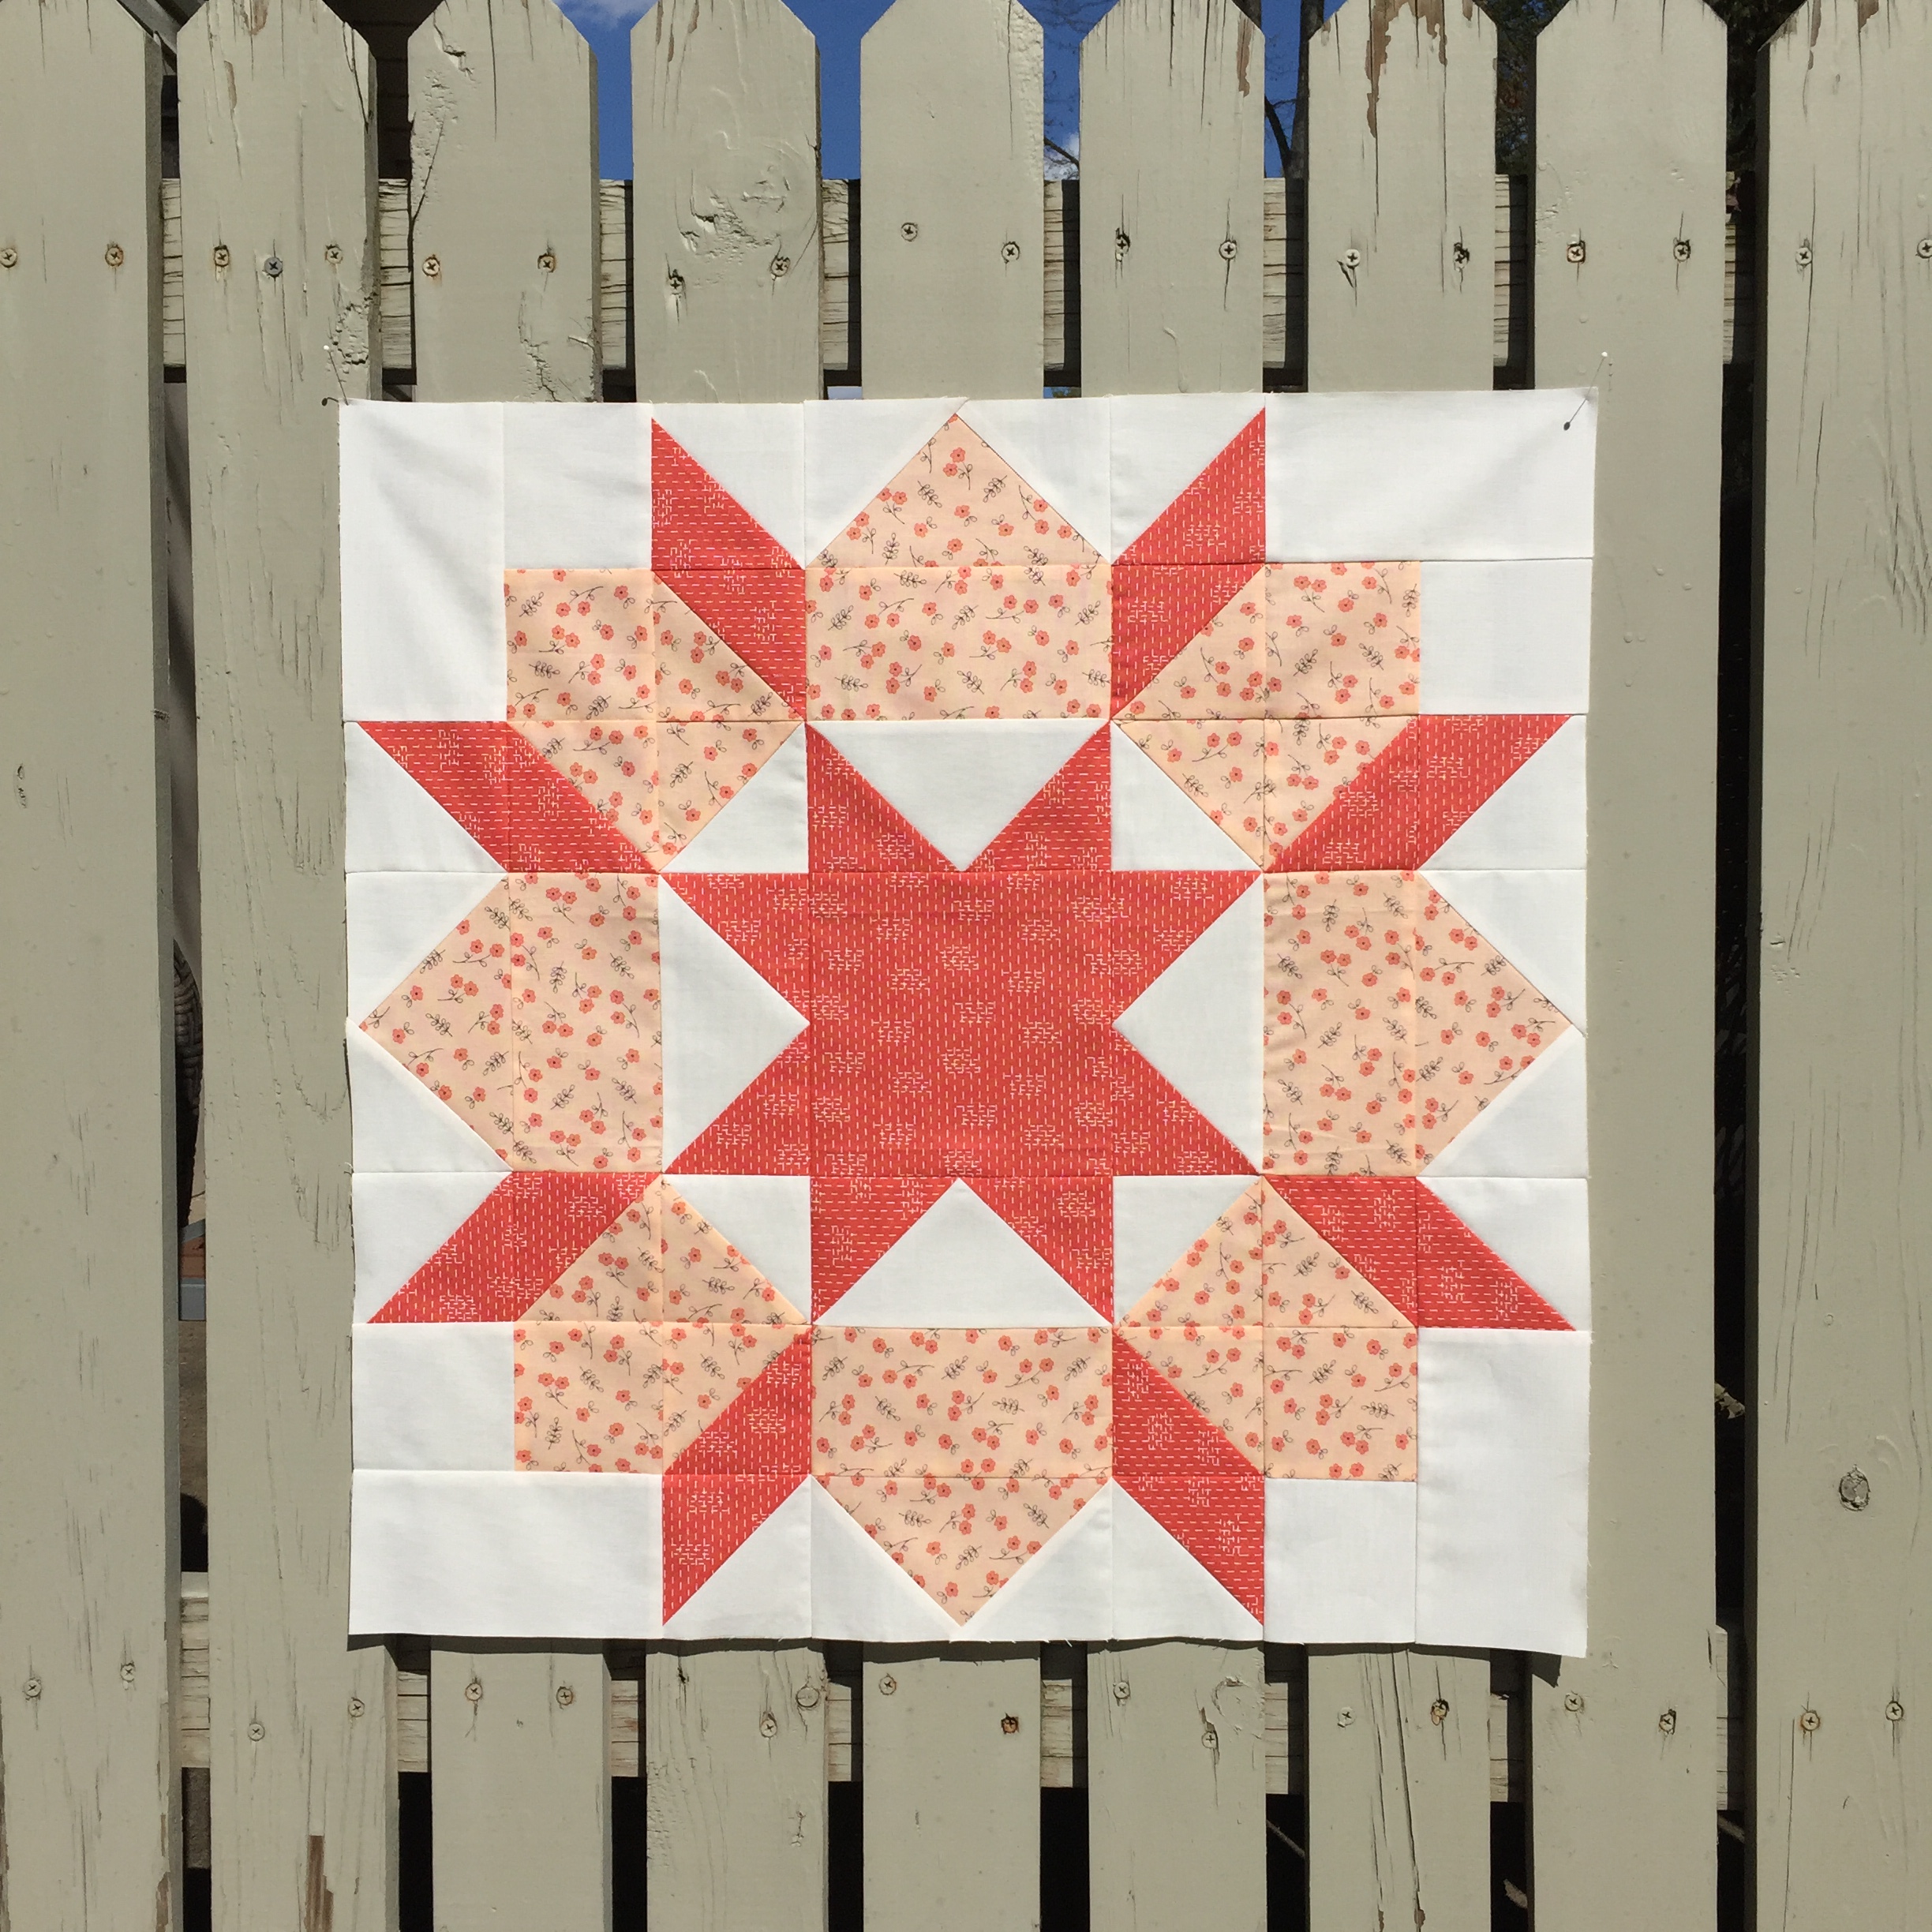
If we want to talk favorites, I’d have to say my Stitches & Stars is up there. I made mine using fat quarters from the Elements collection by Art Gallery Fabrics. I just love this line and I think this pattern is a great way to showcase the beautiful jewel tones. Stitches & Stars comes in four sizes and is a popular choice among quilters. 🙂
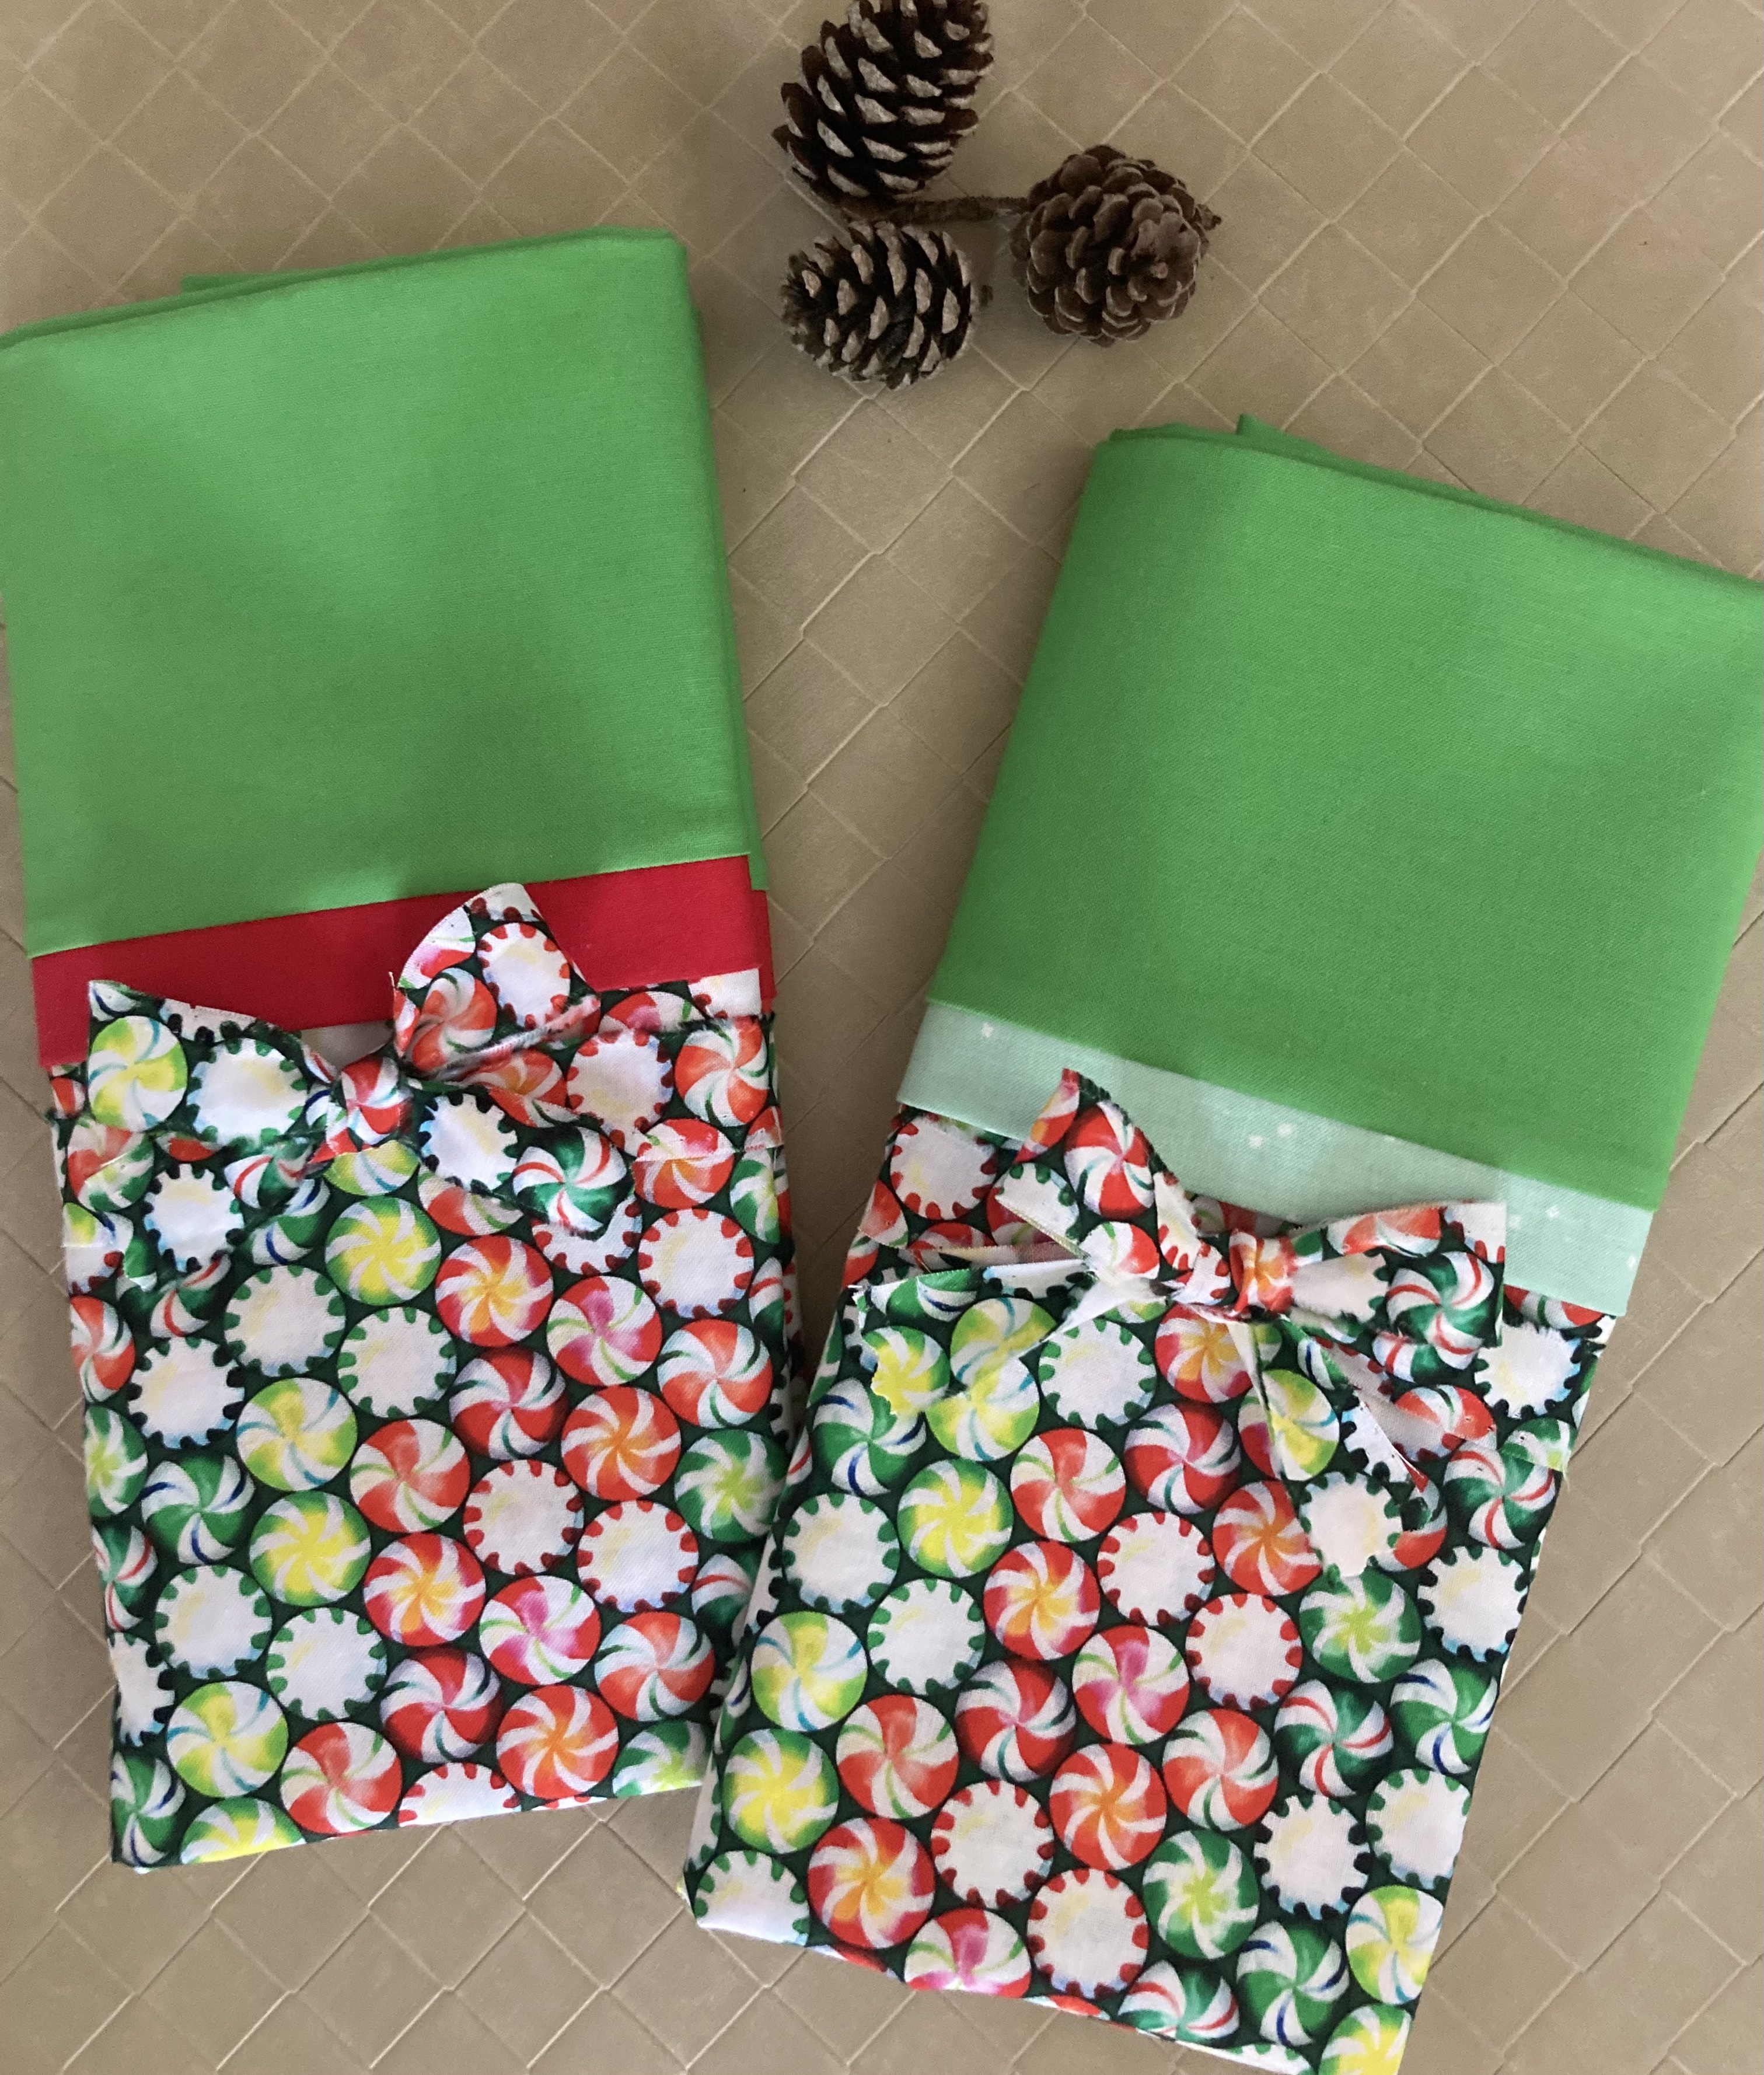
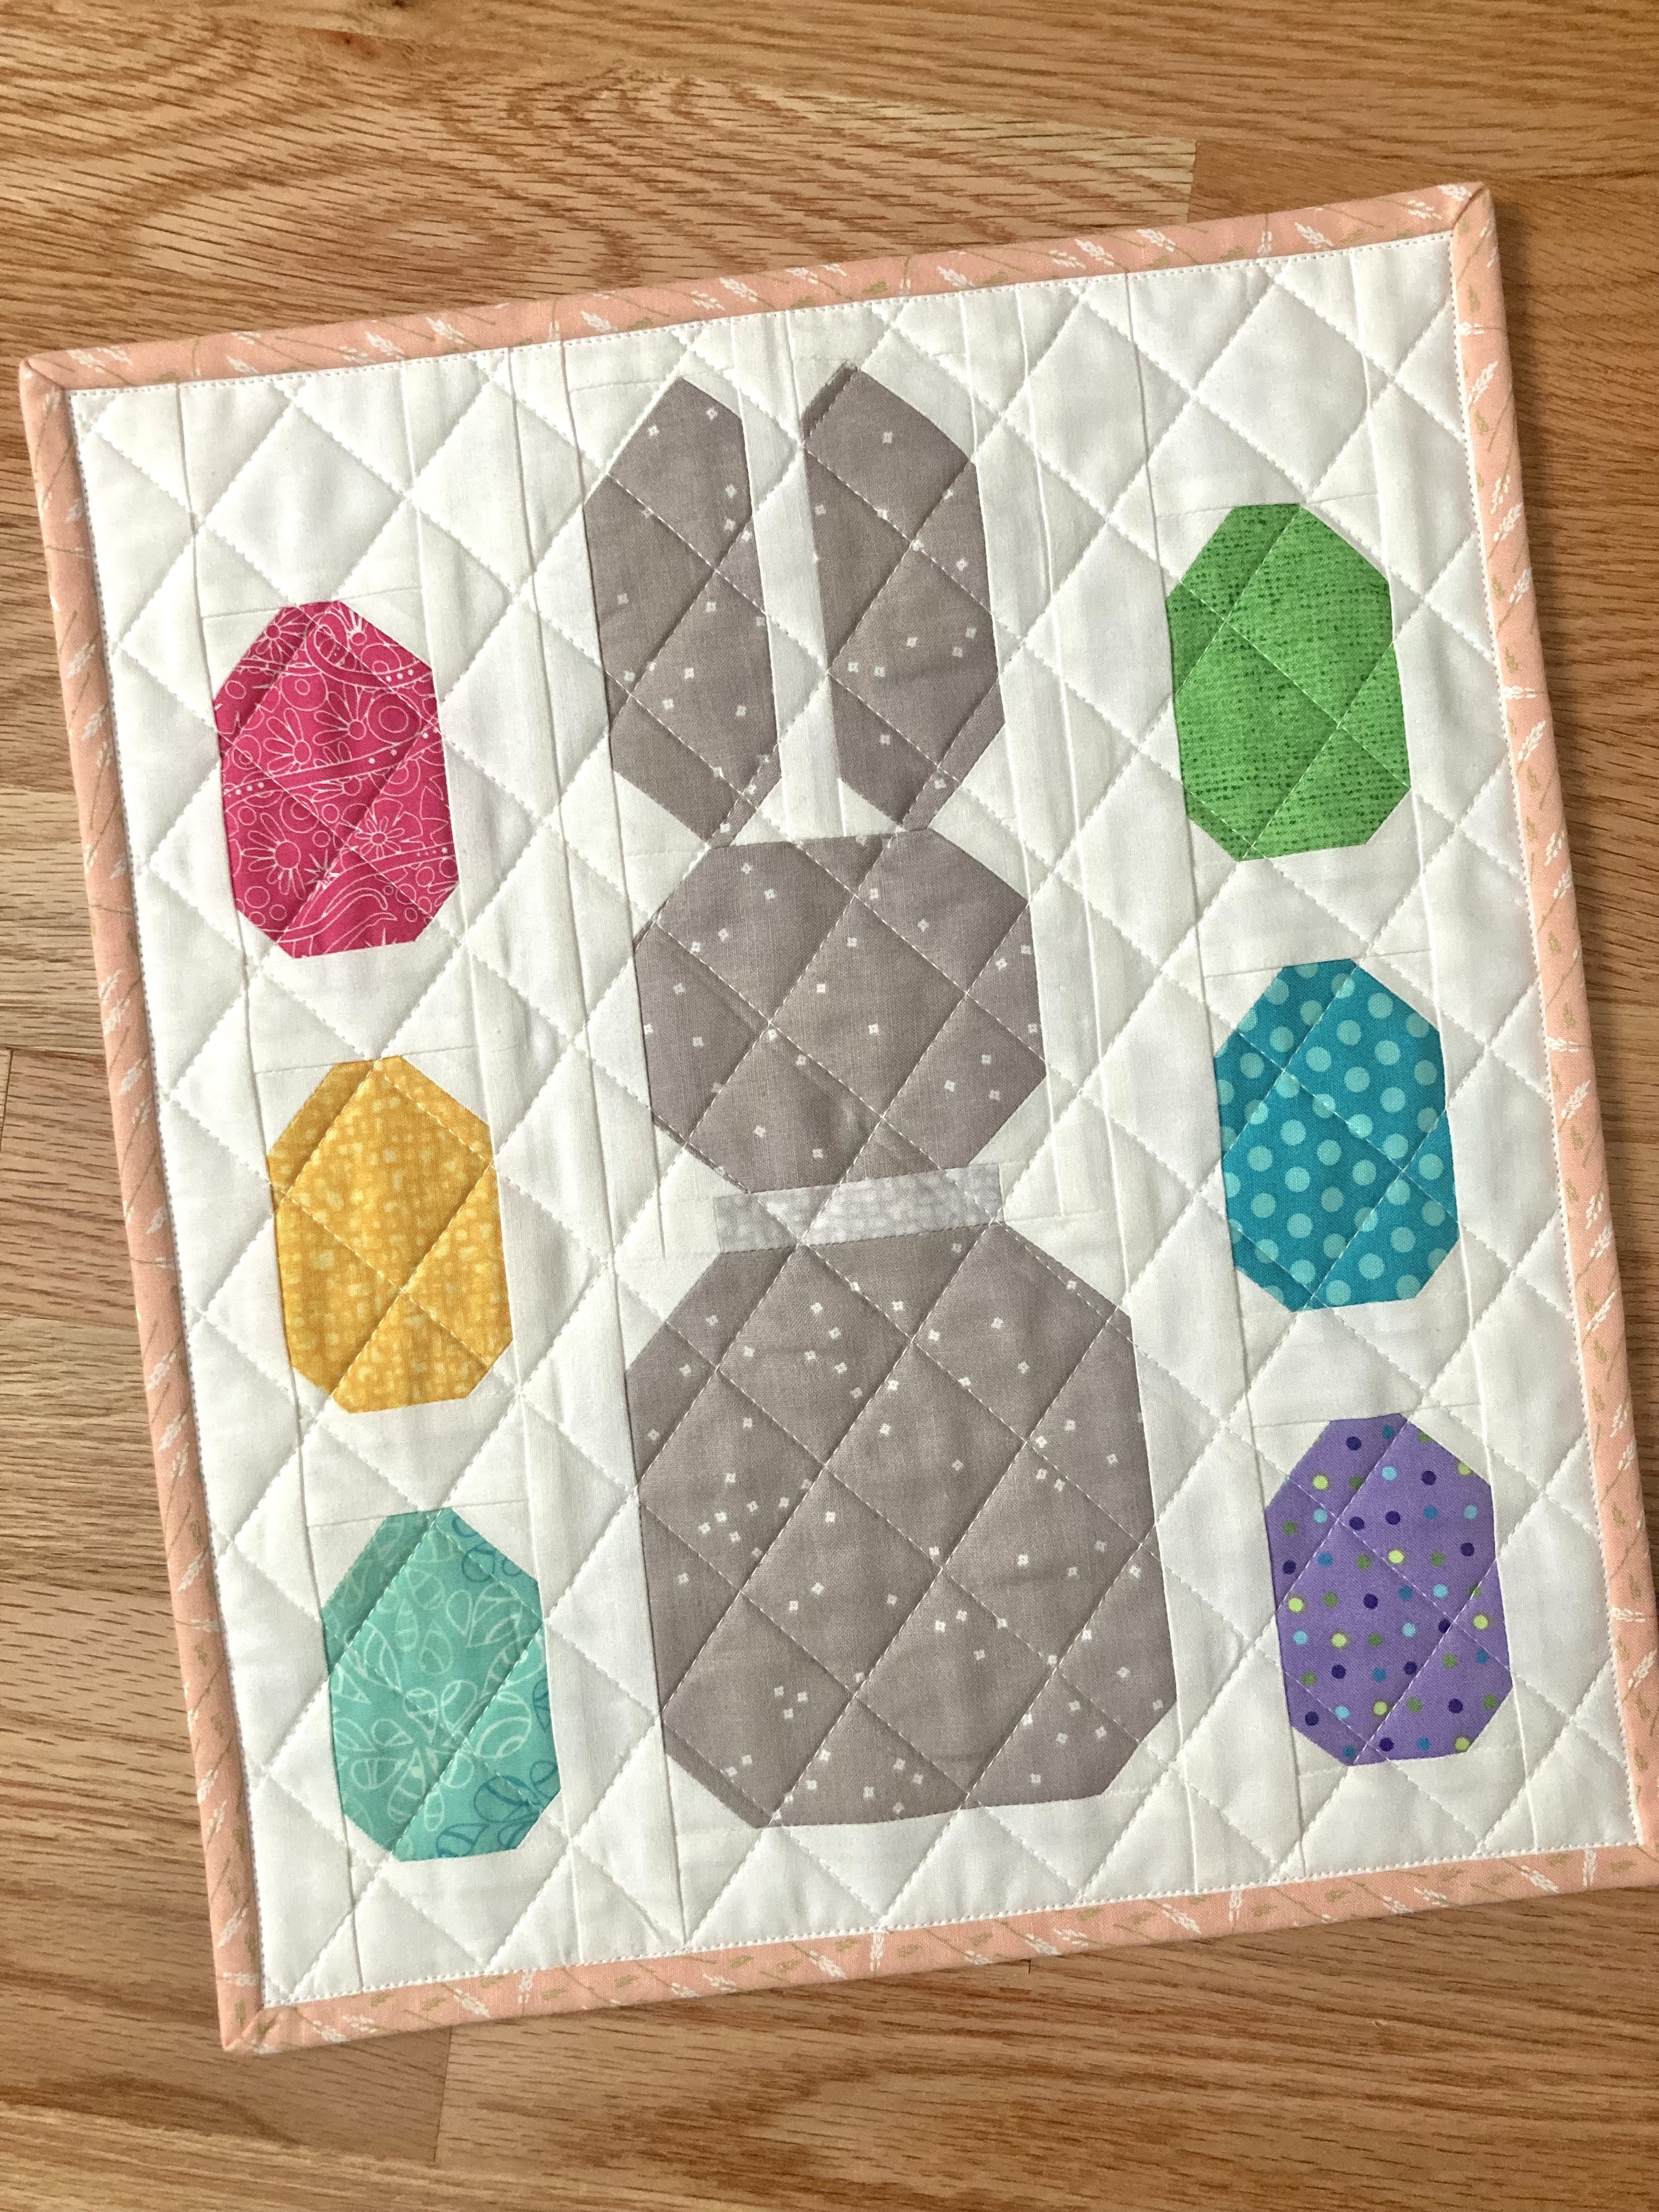
Making handmade gifts for Christmas has become something I do year after year. In 2022, I made pillowcases and a darling Easter mini quilt for family members.
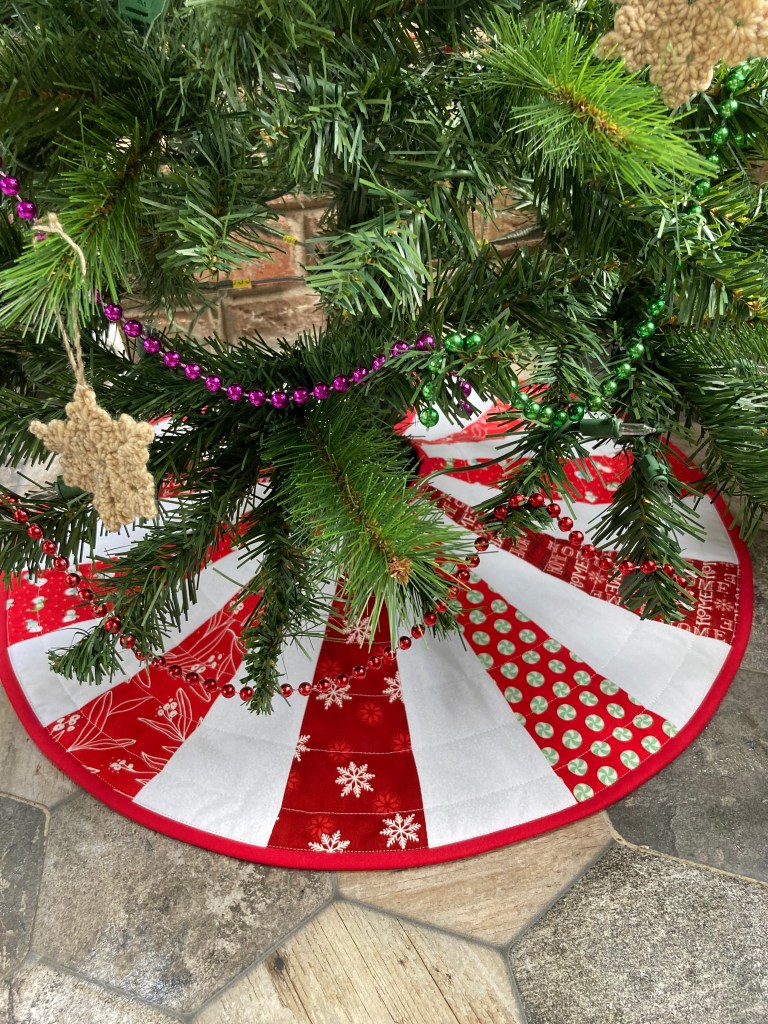
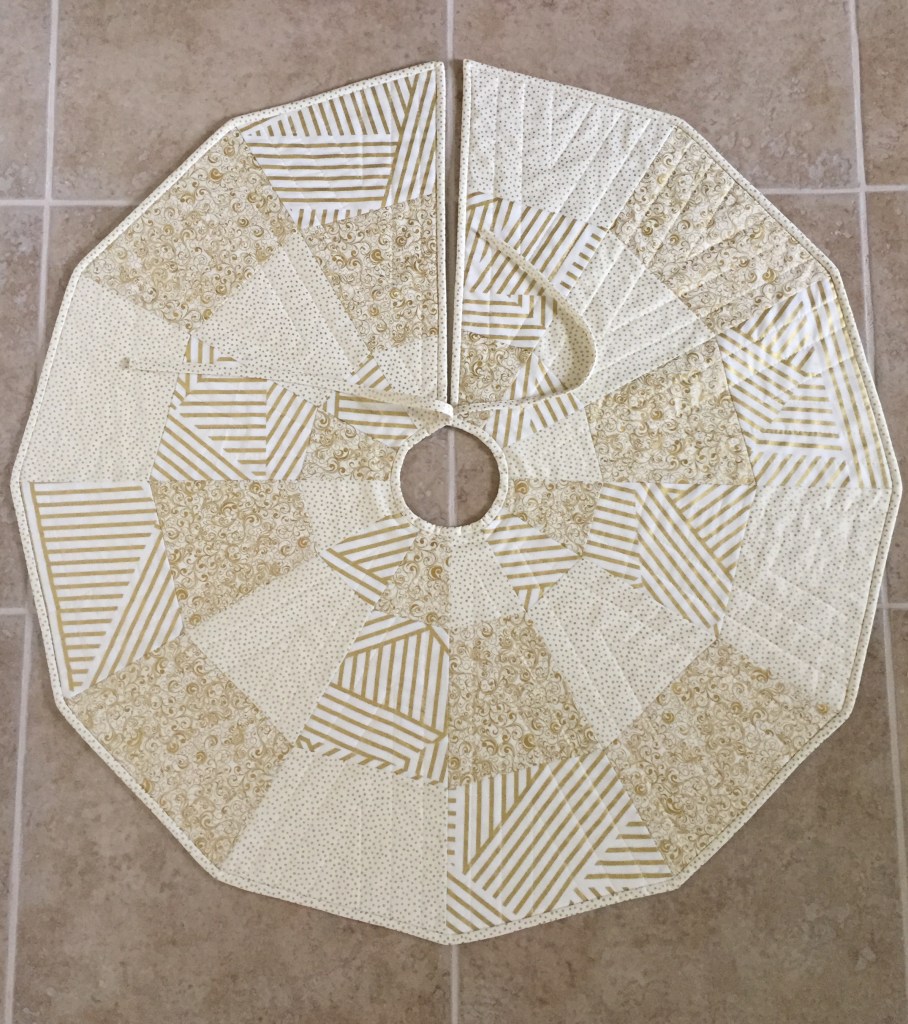
Lastly, I made a mini tree skirt for a new tree addition in my sun room. It’s also a quick and simple project and can be made in no time.
That wraps up 2022 projects. I’ve got plenty planned for 2023 so be sure to stop back! 😉
Looking for a quick and easy-to-make gift with the holidays fast approaching? I’ve got a few suggestions that just might help.
If you have someone on your list that seems to have everything, a personalized handmade gift can be the one thing they’re missing. If you’re like me, you enjoy giving people something handcrafted verses something store bought.
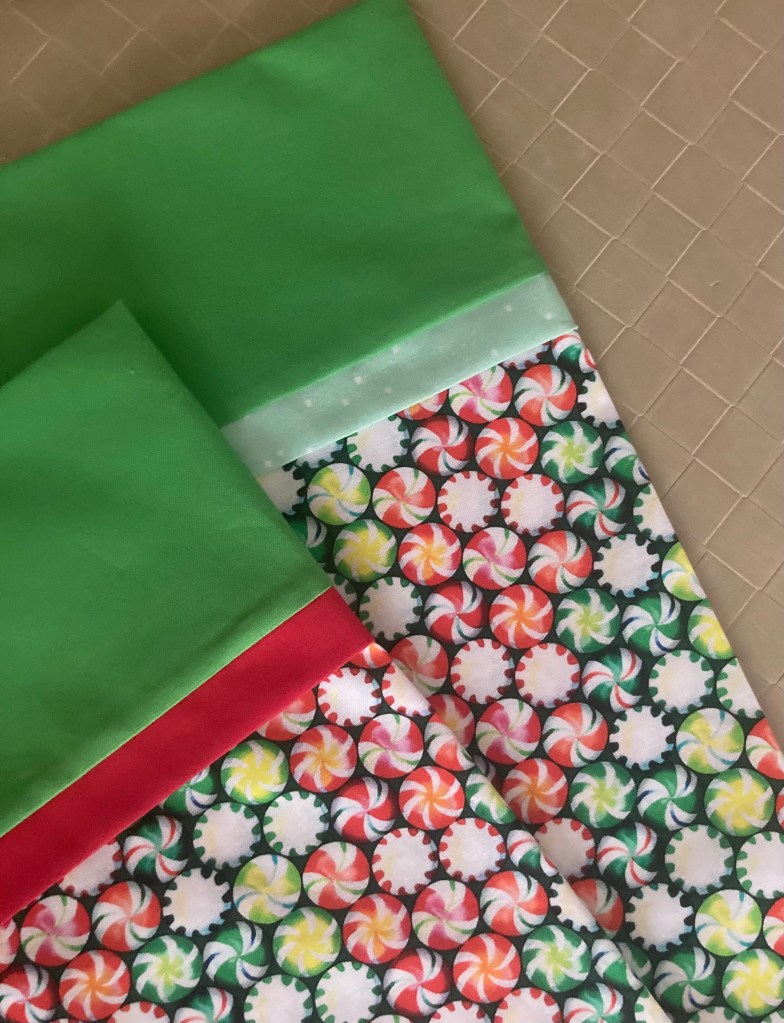
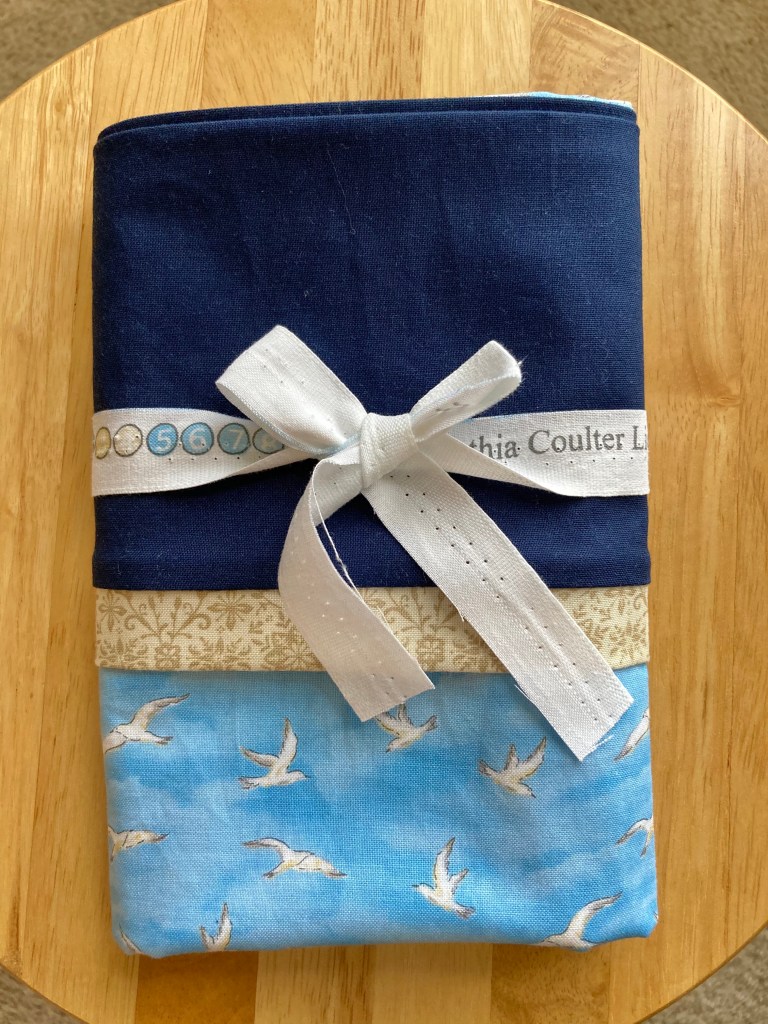
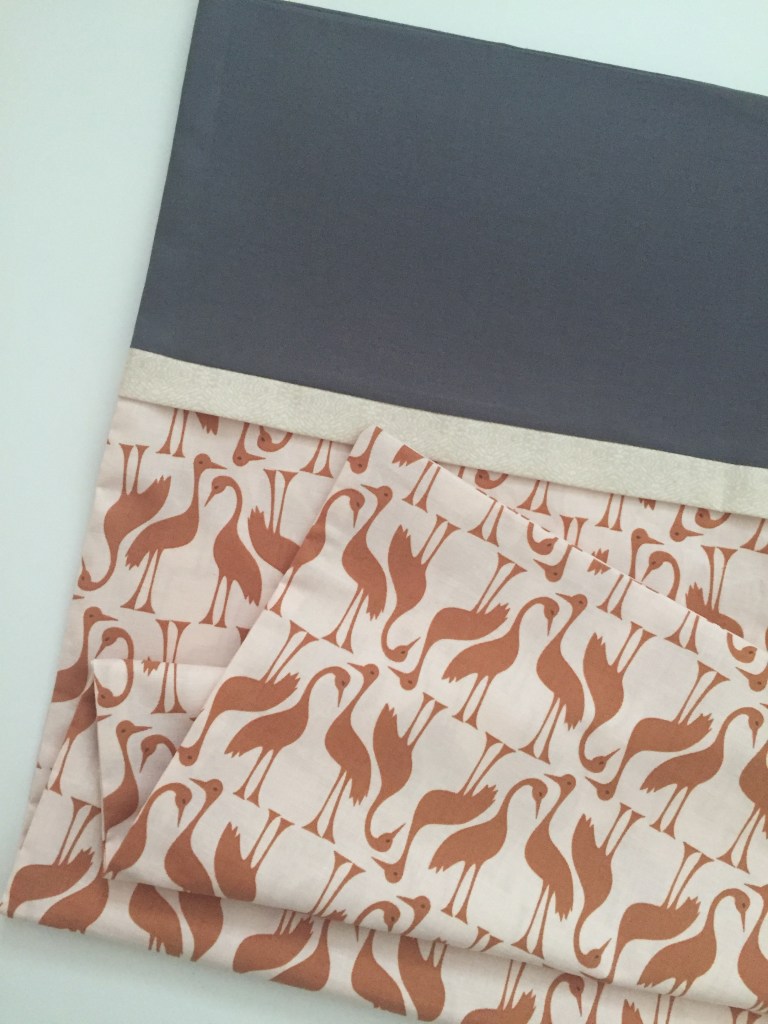
Since everyone in my family has at least two quilts from me, I occasionally move from the realm of quilting for gifts. One great idea is pillowcases. These can be really fun because you can make them personal by choosing fabric that reflects the recipient’s hobbies, interests or simply something they’d enjoy. My husband is a huge bird watcher so I made him a bird print pillowcase.
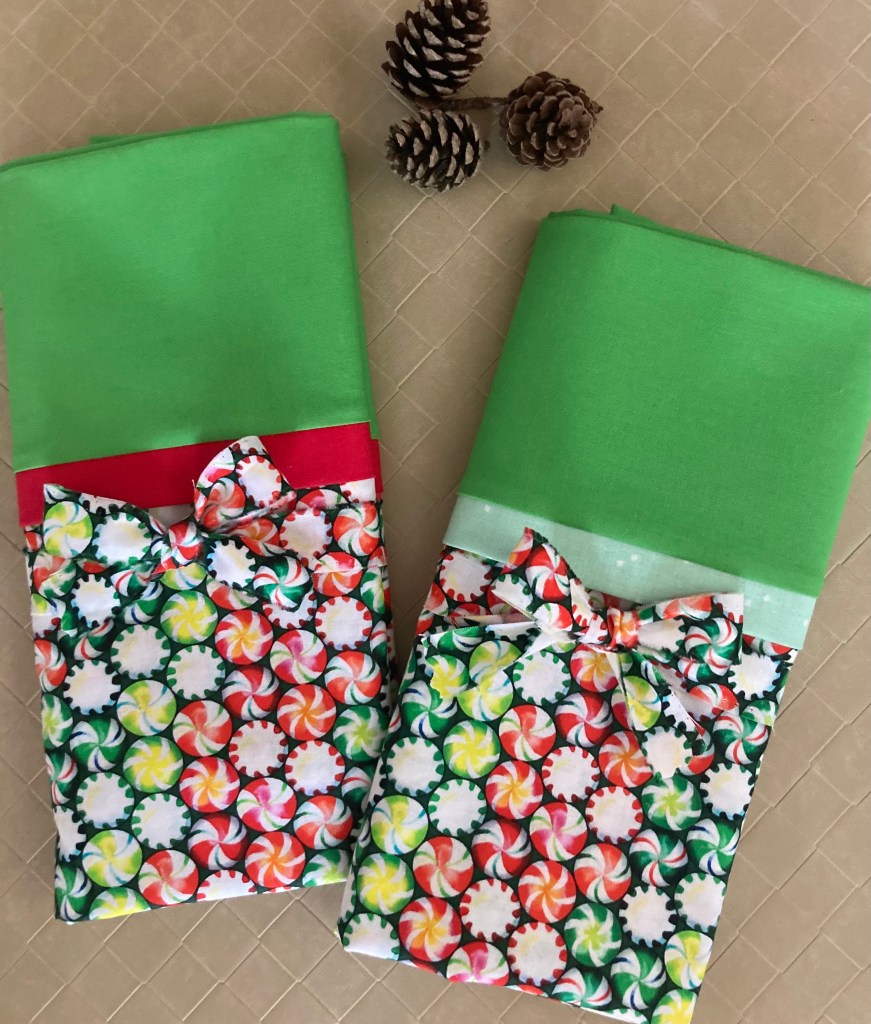
Since I’m all out of ideas for my son, I decided on pillowcases for him and his girlfriend. I chose a bright and whimsical fabric that’ll be perfect throughout the holiday season.
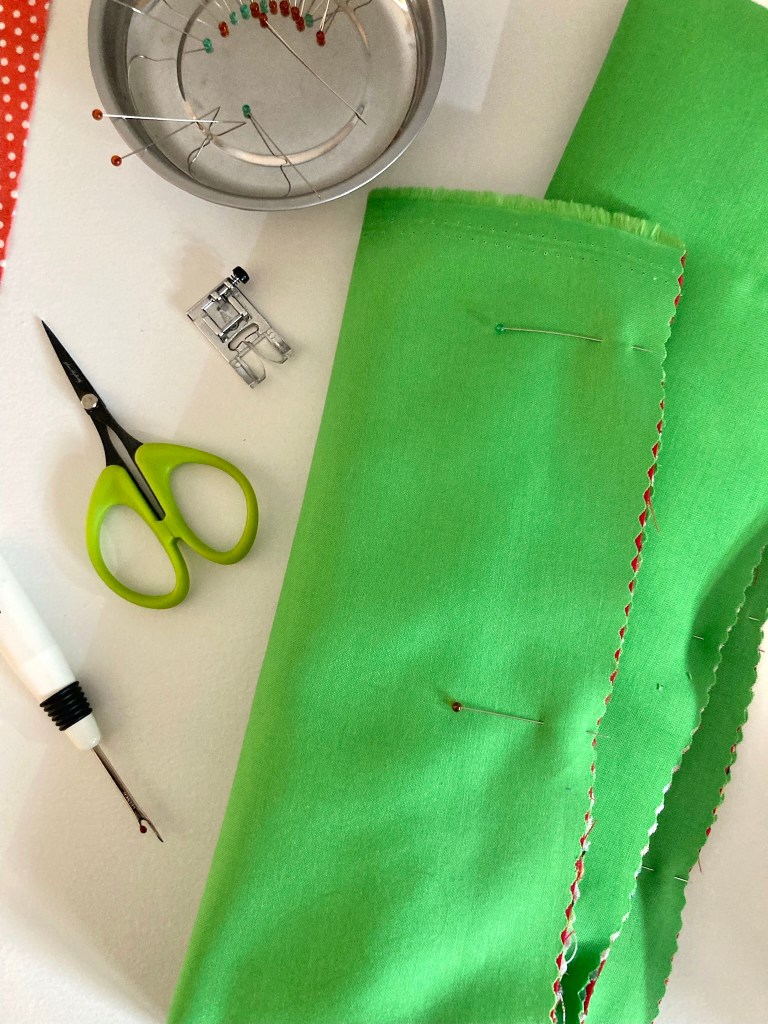
You’ve gotta love those French seams! If you’re not familiar with them, this is a great introduction.
When trimming the pillowcase fabric, use the cutaway selvage for tying it up before gifting. It makes a nice presentation if you use a pinking rotary cutter or pinking shears.
Here’s a future money saving tip—shop for fabric after the holidays. You can get last year’s prints for a lot less than new ones.
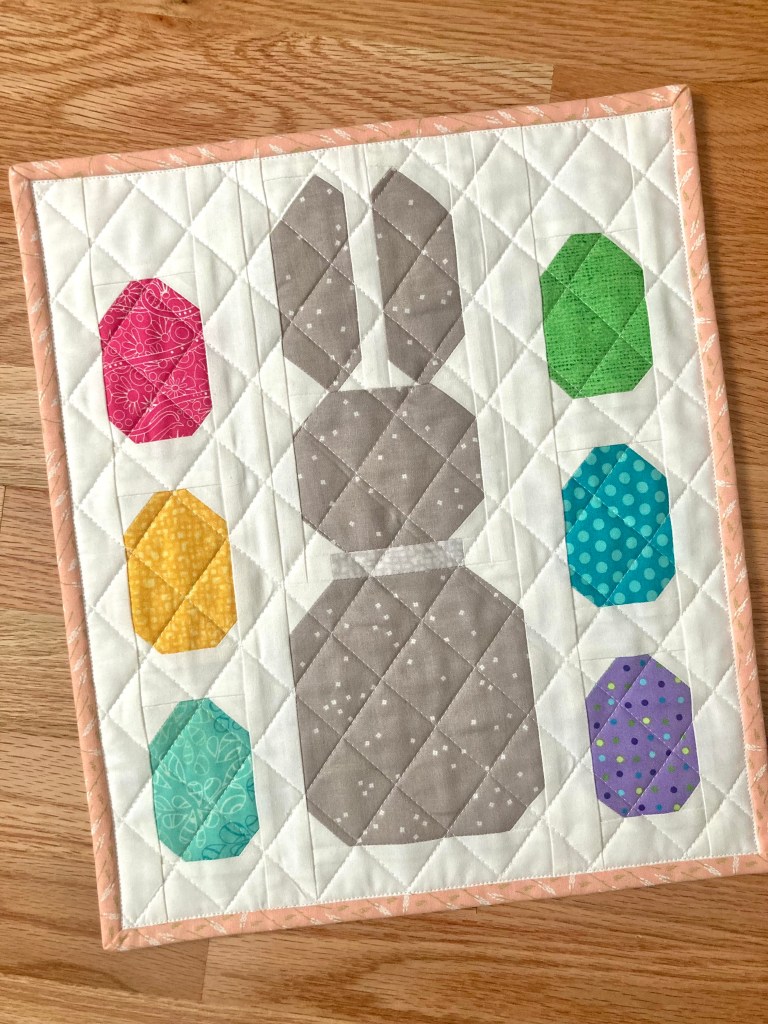
My daughter requested an Easter Bunny mini quilt from a free Bernina tutorial. It’s so cute and easy.
I think it took me more time to cut the fabric than to make it. 😉
So now I’m set and am already planning for next year…
I also have other small gift ideas under my TUTORIALS tab. Check it out and see if there’s anything you’d like to try!
For most quilters, managing stash is an ongoing process—as long you keep sewing, you keep ending up with left over fabric, especially with precuts.
Early this spring I finished a quilt using a layer cake I’d had since 2015. (Wow!) When the quilt was complete, several 10″ squares were left. I knew I’d never use them in a quilt and I didn’t want to store them, but what could I do with a dozen precut squares?
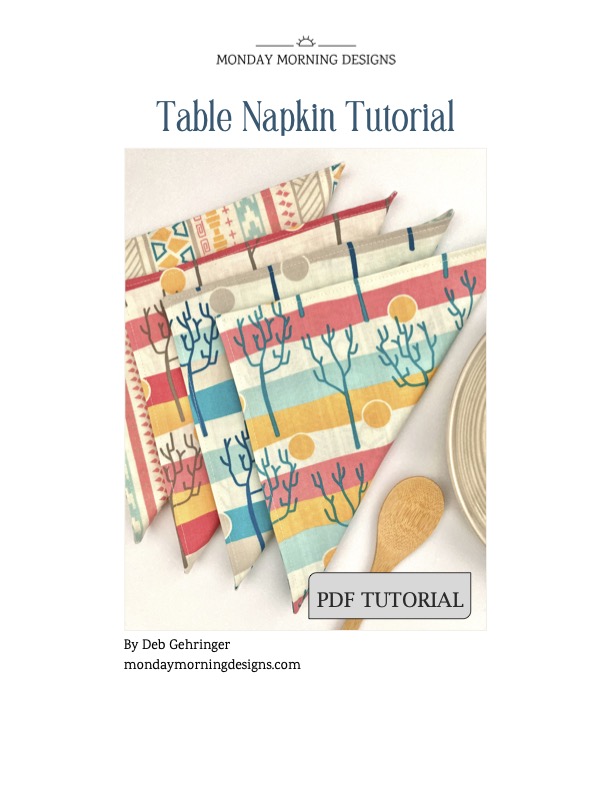
After considering a few options, I decided to make reusable table napkins for everyday use. And because I like all things environmental, it was a fun and practical choice.
These napkins finish around 8 1/2″ square and they’re so easy to make. If you’ve got any 10″ squares lying around, download this detailed Table Napkin PDF tutorial and start stashing down!
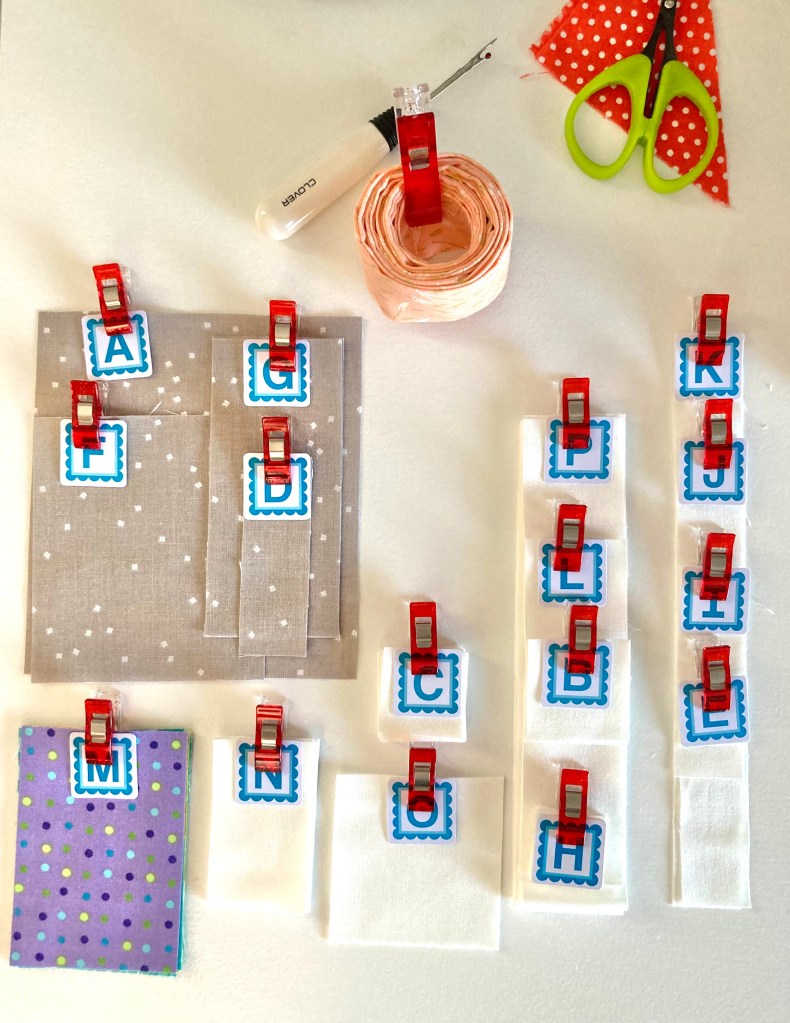
The winter months are a great time to catch up on projects you’ve been planning but have been putting off for a while. In my case it was making reusable grocery bags out of canvas.
To get started, I didn’t want to spend a lot of money, and high quality canvas wasn’t really necessary so I purchased a durable canvas drop cloth (for around $9) which saved me at least half. The weave was comparable to fabric off the bolt, so it was a win-win.
Because I was using cotton, I was able to press seams with an iron and I used my hot ruler for accuracy.
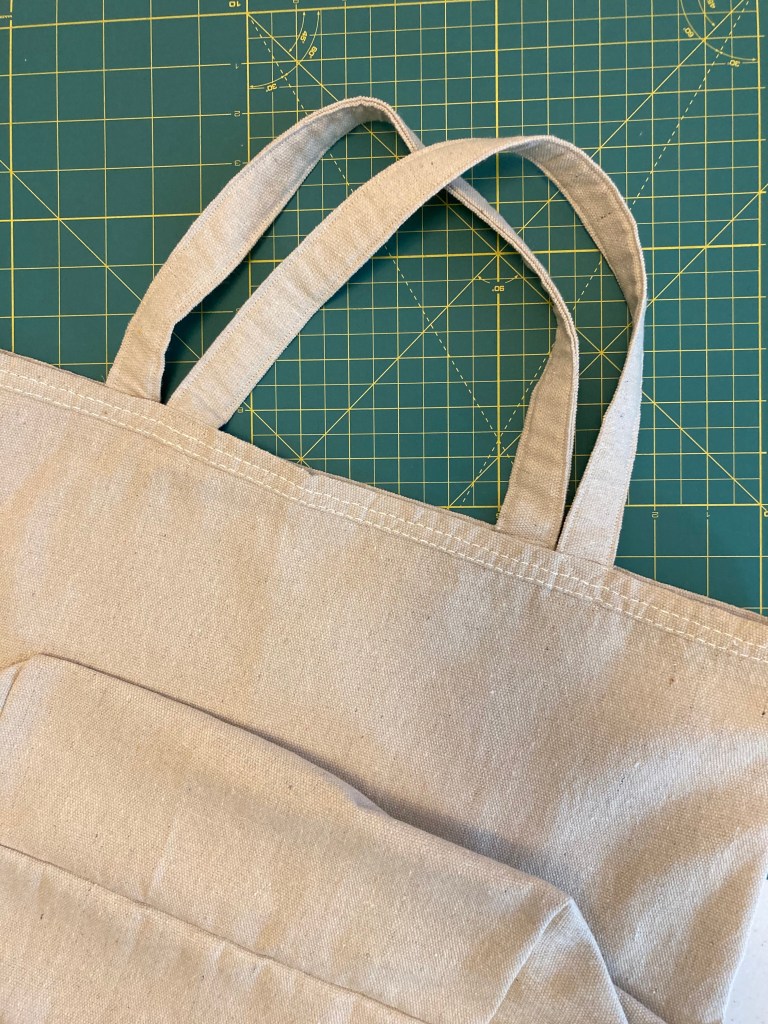
I also had the issue of fraying, so once the seams were sewn and the body portion of the bag was assembled, I ran a zigzag stitch along all the raw edges. A serger would work nicely if you’ve got one.
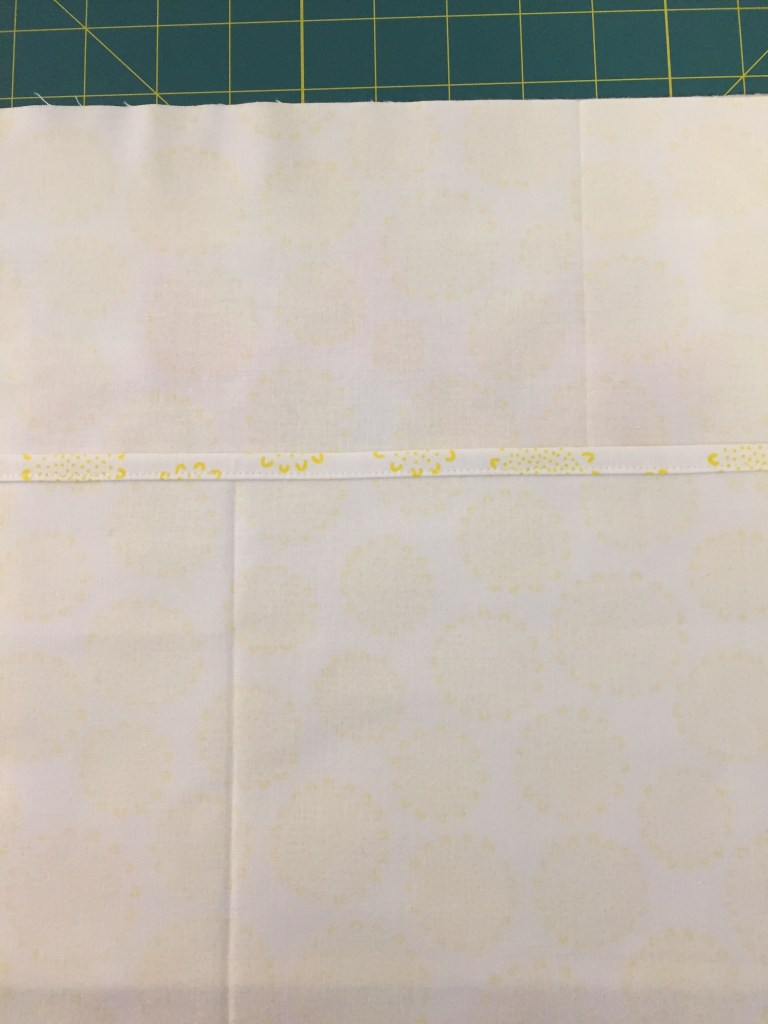
Notice the nice hem along the top? When cutting, I planned to have the factory sewn edge up top for a professional look. It was also a more substantial edge for attaching the handle and it added extra durability.
Overall, the tutorial allowed me to achieve the same results just with different materials. If you decide to make your own reusable bags, I should point out a few things regarding plastic vs. canvas.
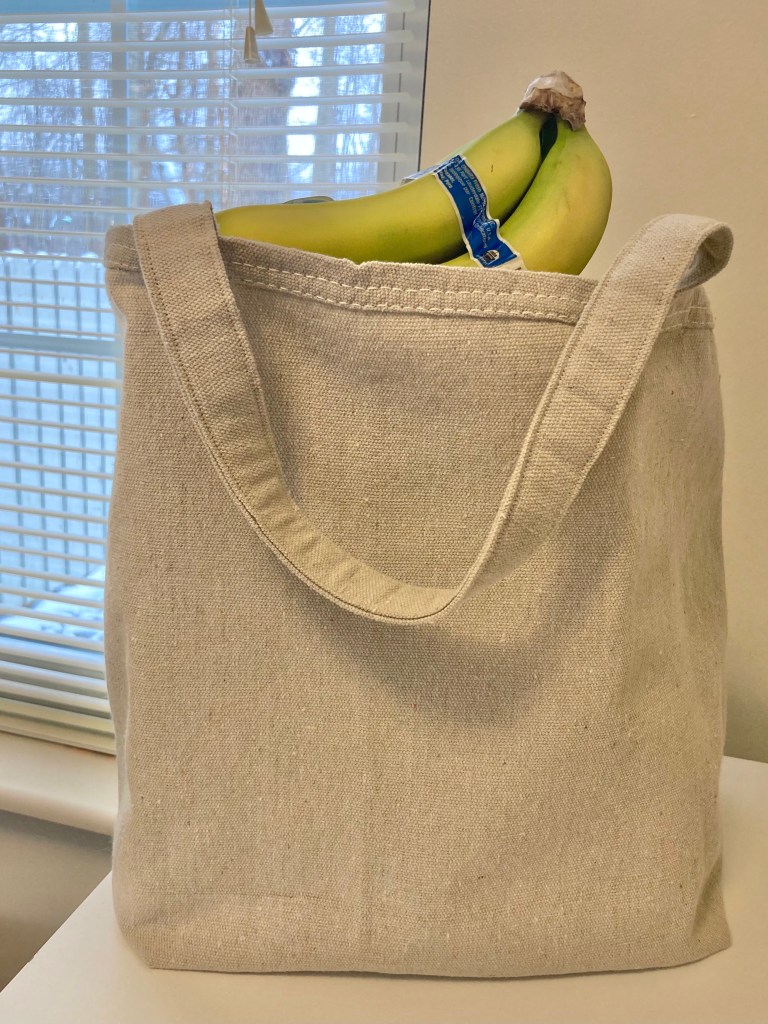
First of all, the canvas bags won’t stand up like plastic! But they’ll definitely last longer and they can be laundered which is a definite plus.
With both types, you’ll want to be sure to add something to the bottom for support. I used fitted cardboard to give the bags a more defining shape and added strength.
My husband does the grocery shopping (he actually likes to) 🙂 and he loves these bags. And of course, if it’s green and eliminates plastic waste I’m all about it!
From start to finish, these bags (I made 3) took just a few hours and they’re a really easy make.
It seems that staying in more than usual made for a productive year. In 2019 I’d completed 11 quilts and thought that was a lot, but in 2020 I surpassed that and made 14! Of the 14, I gave 4 as gifts and I have a few on hand should a gift-giving occasion arise.
Other than having a queen sized quilt ready for longarming, I’d quilted the other 13 myself. That’s quite a bit as I typically have one or two done professionally every year. My goal for 2020 was to use what I had on hand, so I didn’t purchase fabric to make several of these quilts.
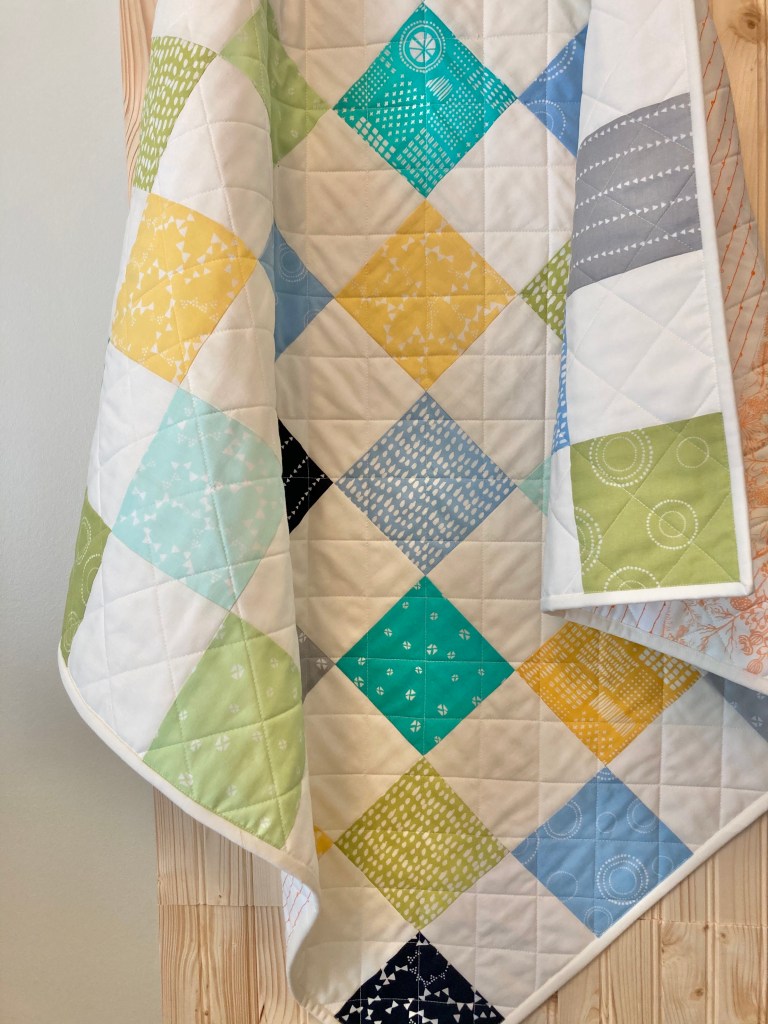
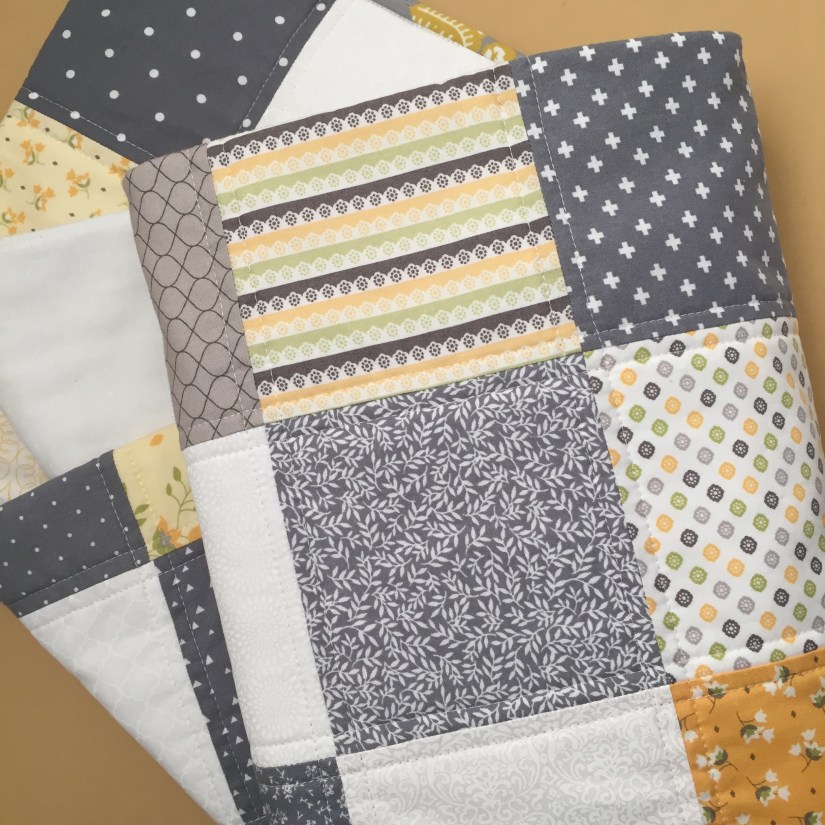
Here’s a look at the past year: These two quilts were gifted along with two others that I can’t show—one is to be published in the Quilts & More fall edition, and the other is a pattern currently in the works. The photo below I now offer as an easy tutorial for a beginner, Checkered Baby Quilt.
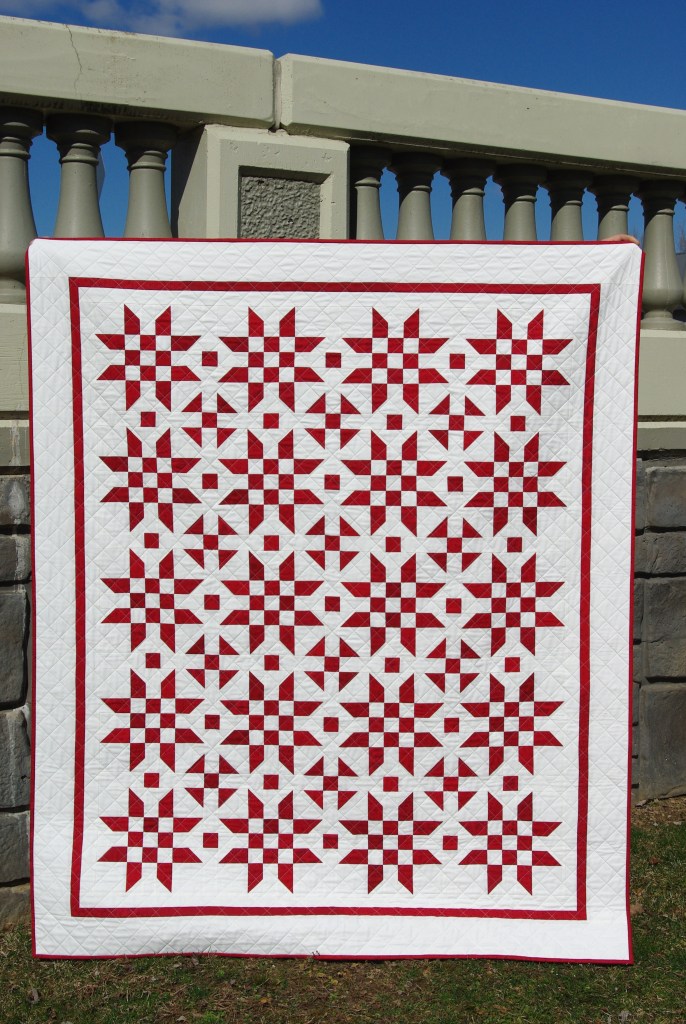
This is the only two-colored quilt I’ve ever made, for me red and white were the obvious choice. 😉 It’s a free Moda pattern called Illusions.
This Scrappy Four Patch Charm is the second quilt I’d made from this free pattern from Robert Kaufman. I just love this design and I wouldn’t be surprised if I make yet another one. For this, I literally took every 5″ square I had, cut a few more and threw it together. It was so fun and it used a lot of what I had on hand.
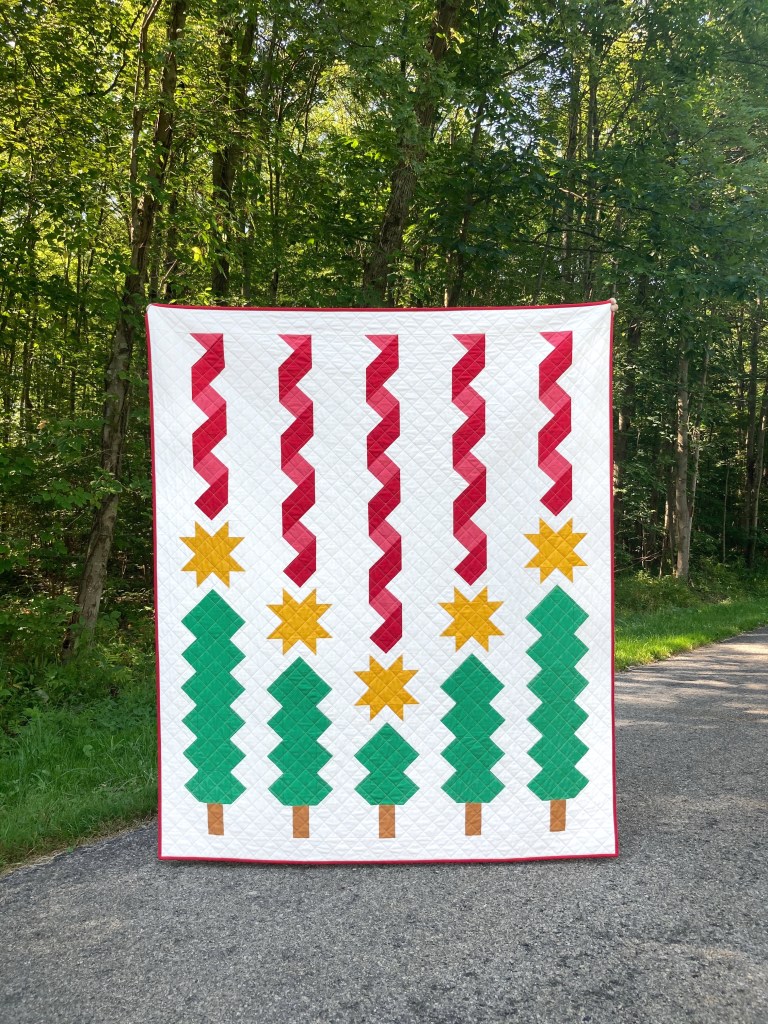
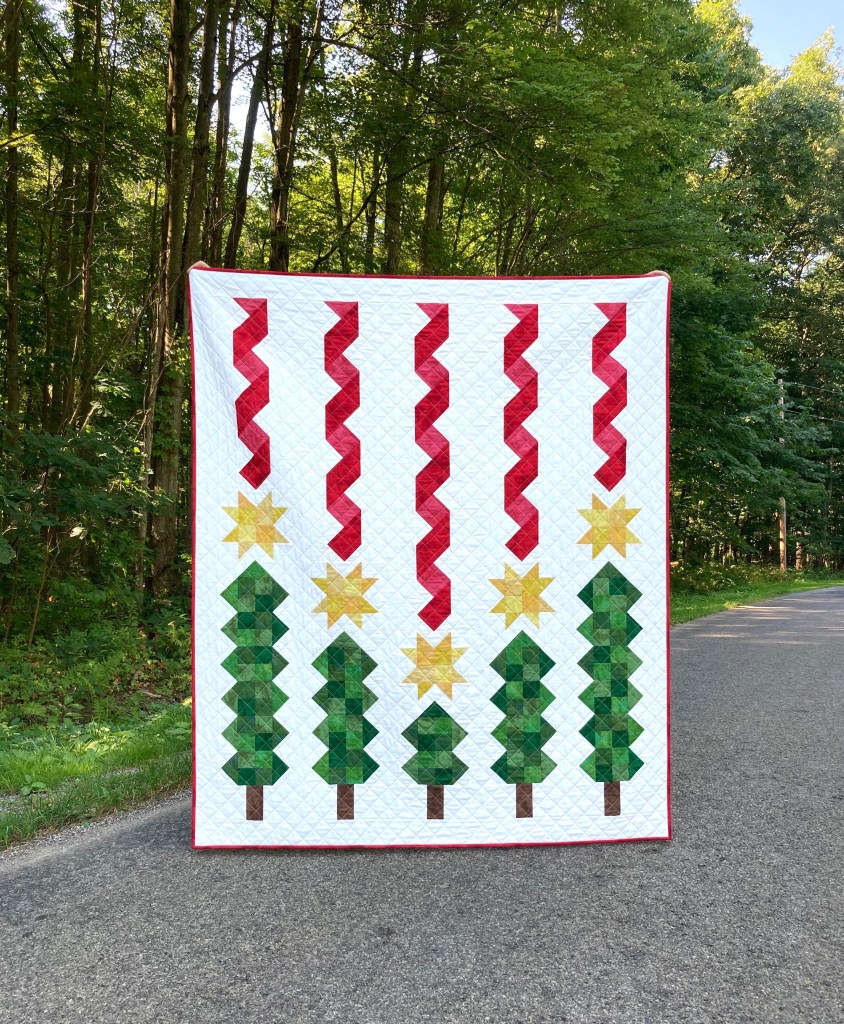
My Holiday Hemlock quilt was a challenge and a joy to design, not to mention how fun it is to watch it come together. While working on this, I decided on a second, scrappy version for all the scrap lovers out there!
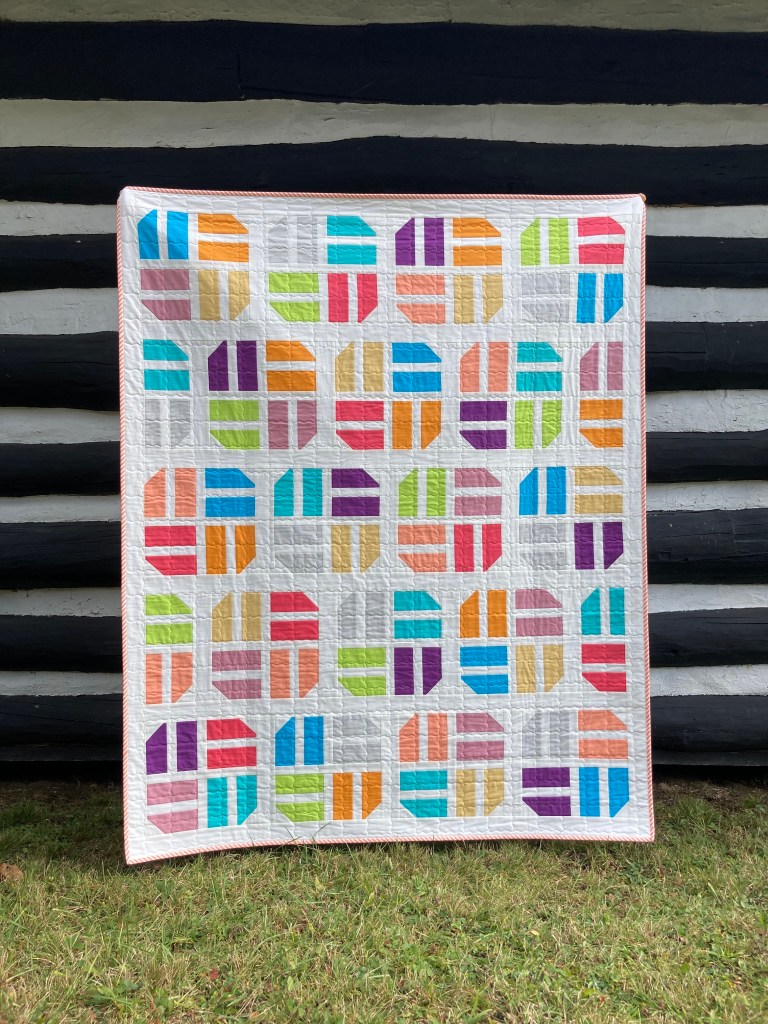
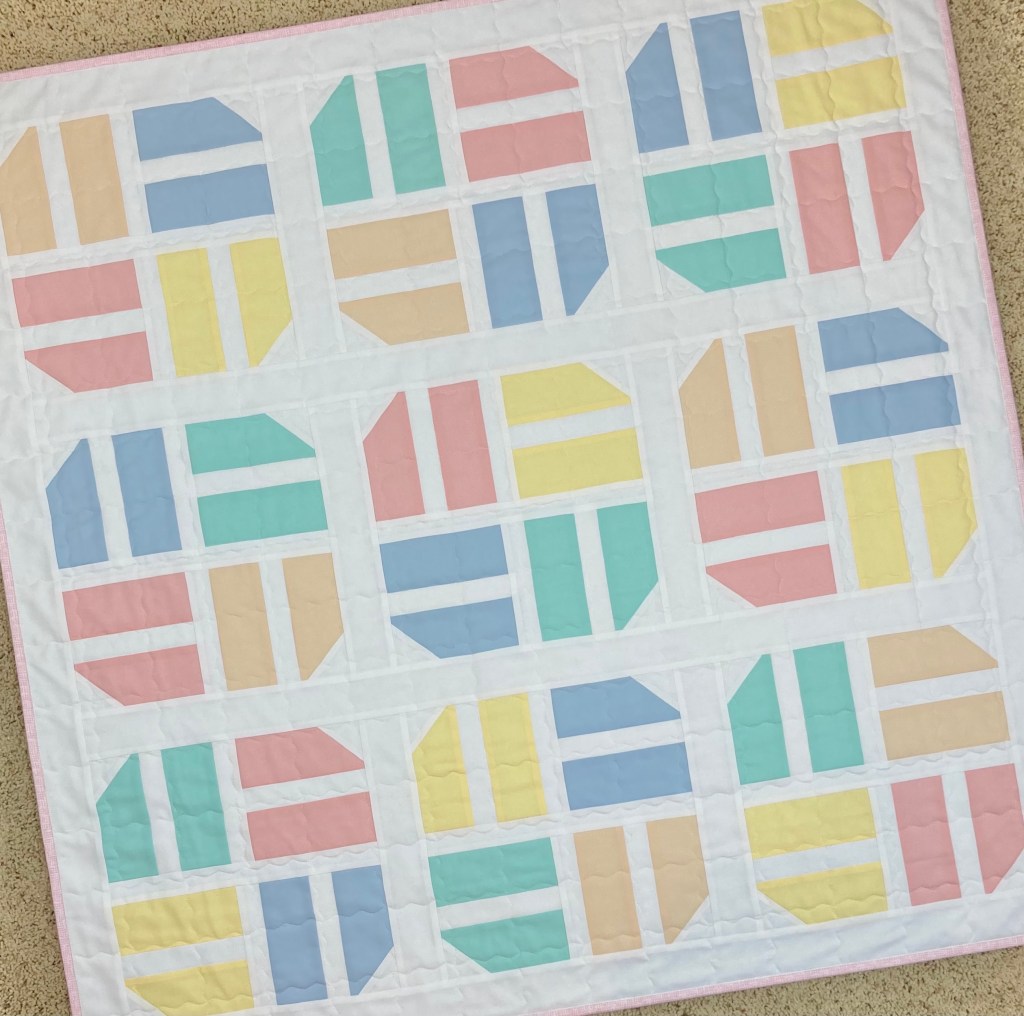
Sweet Stripes is the last of my pattern releases for the year. This cheerful pattern is designed with the beginner quilter in mind. It’s fat quarter friendly and there are 7 different sizes with two layouts versions to choose from. It’s quick AND easy!
I made this baby size Sweet Stripes quilt but I have no baby to give it to, so it’s currently for sale in my Etsy shop. 🙂
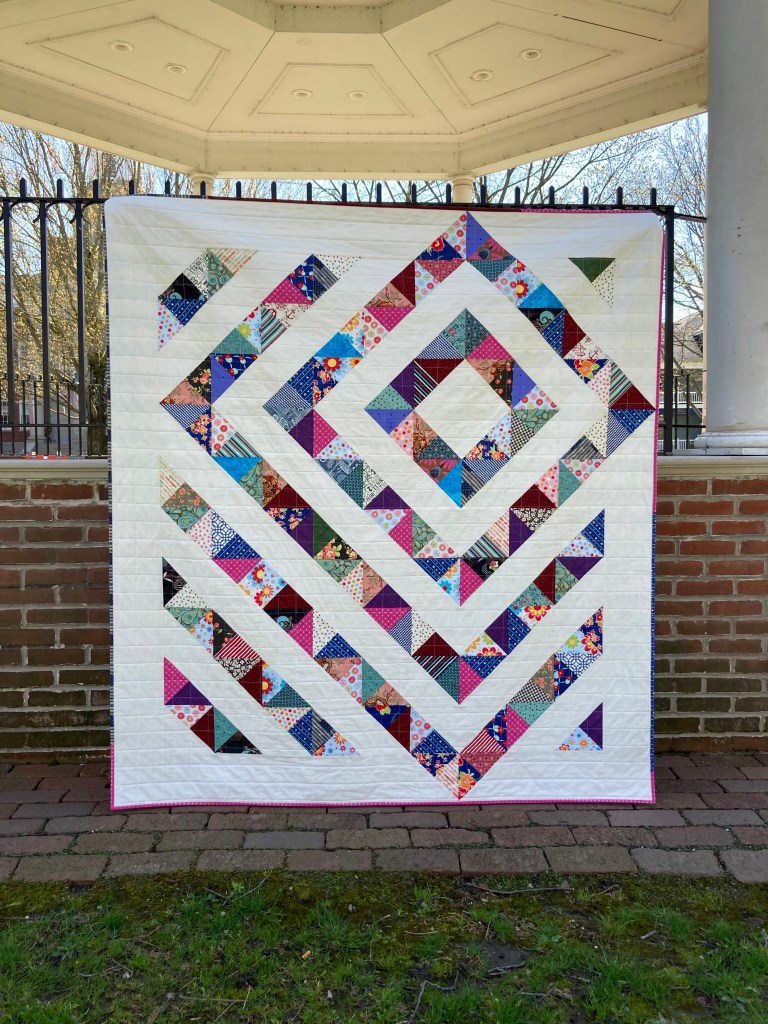
The last quilt finish of the year is my Christmassy Triangle Peaks. I had to make this red and green version for my annual holiday quilt. Even though I finished it mid-December, I’m already planning for this year!
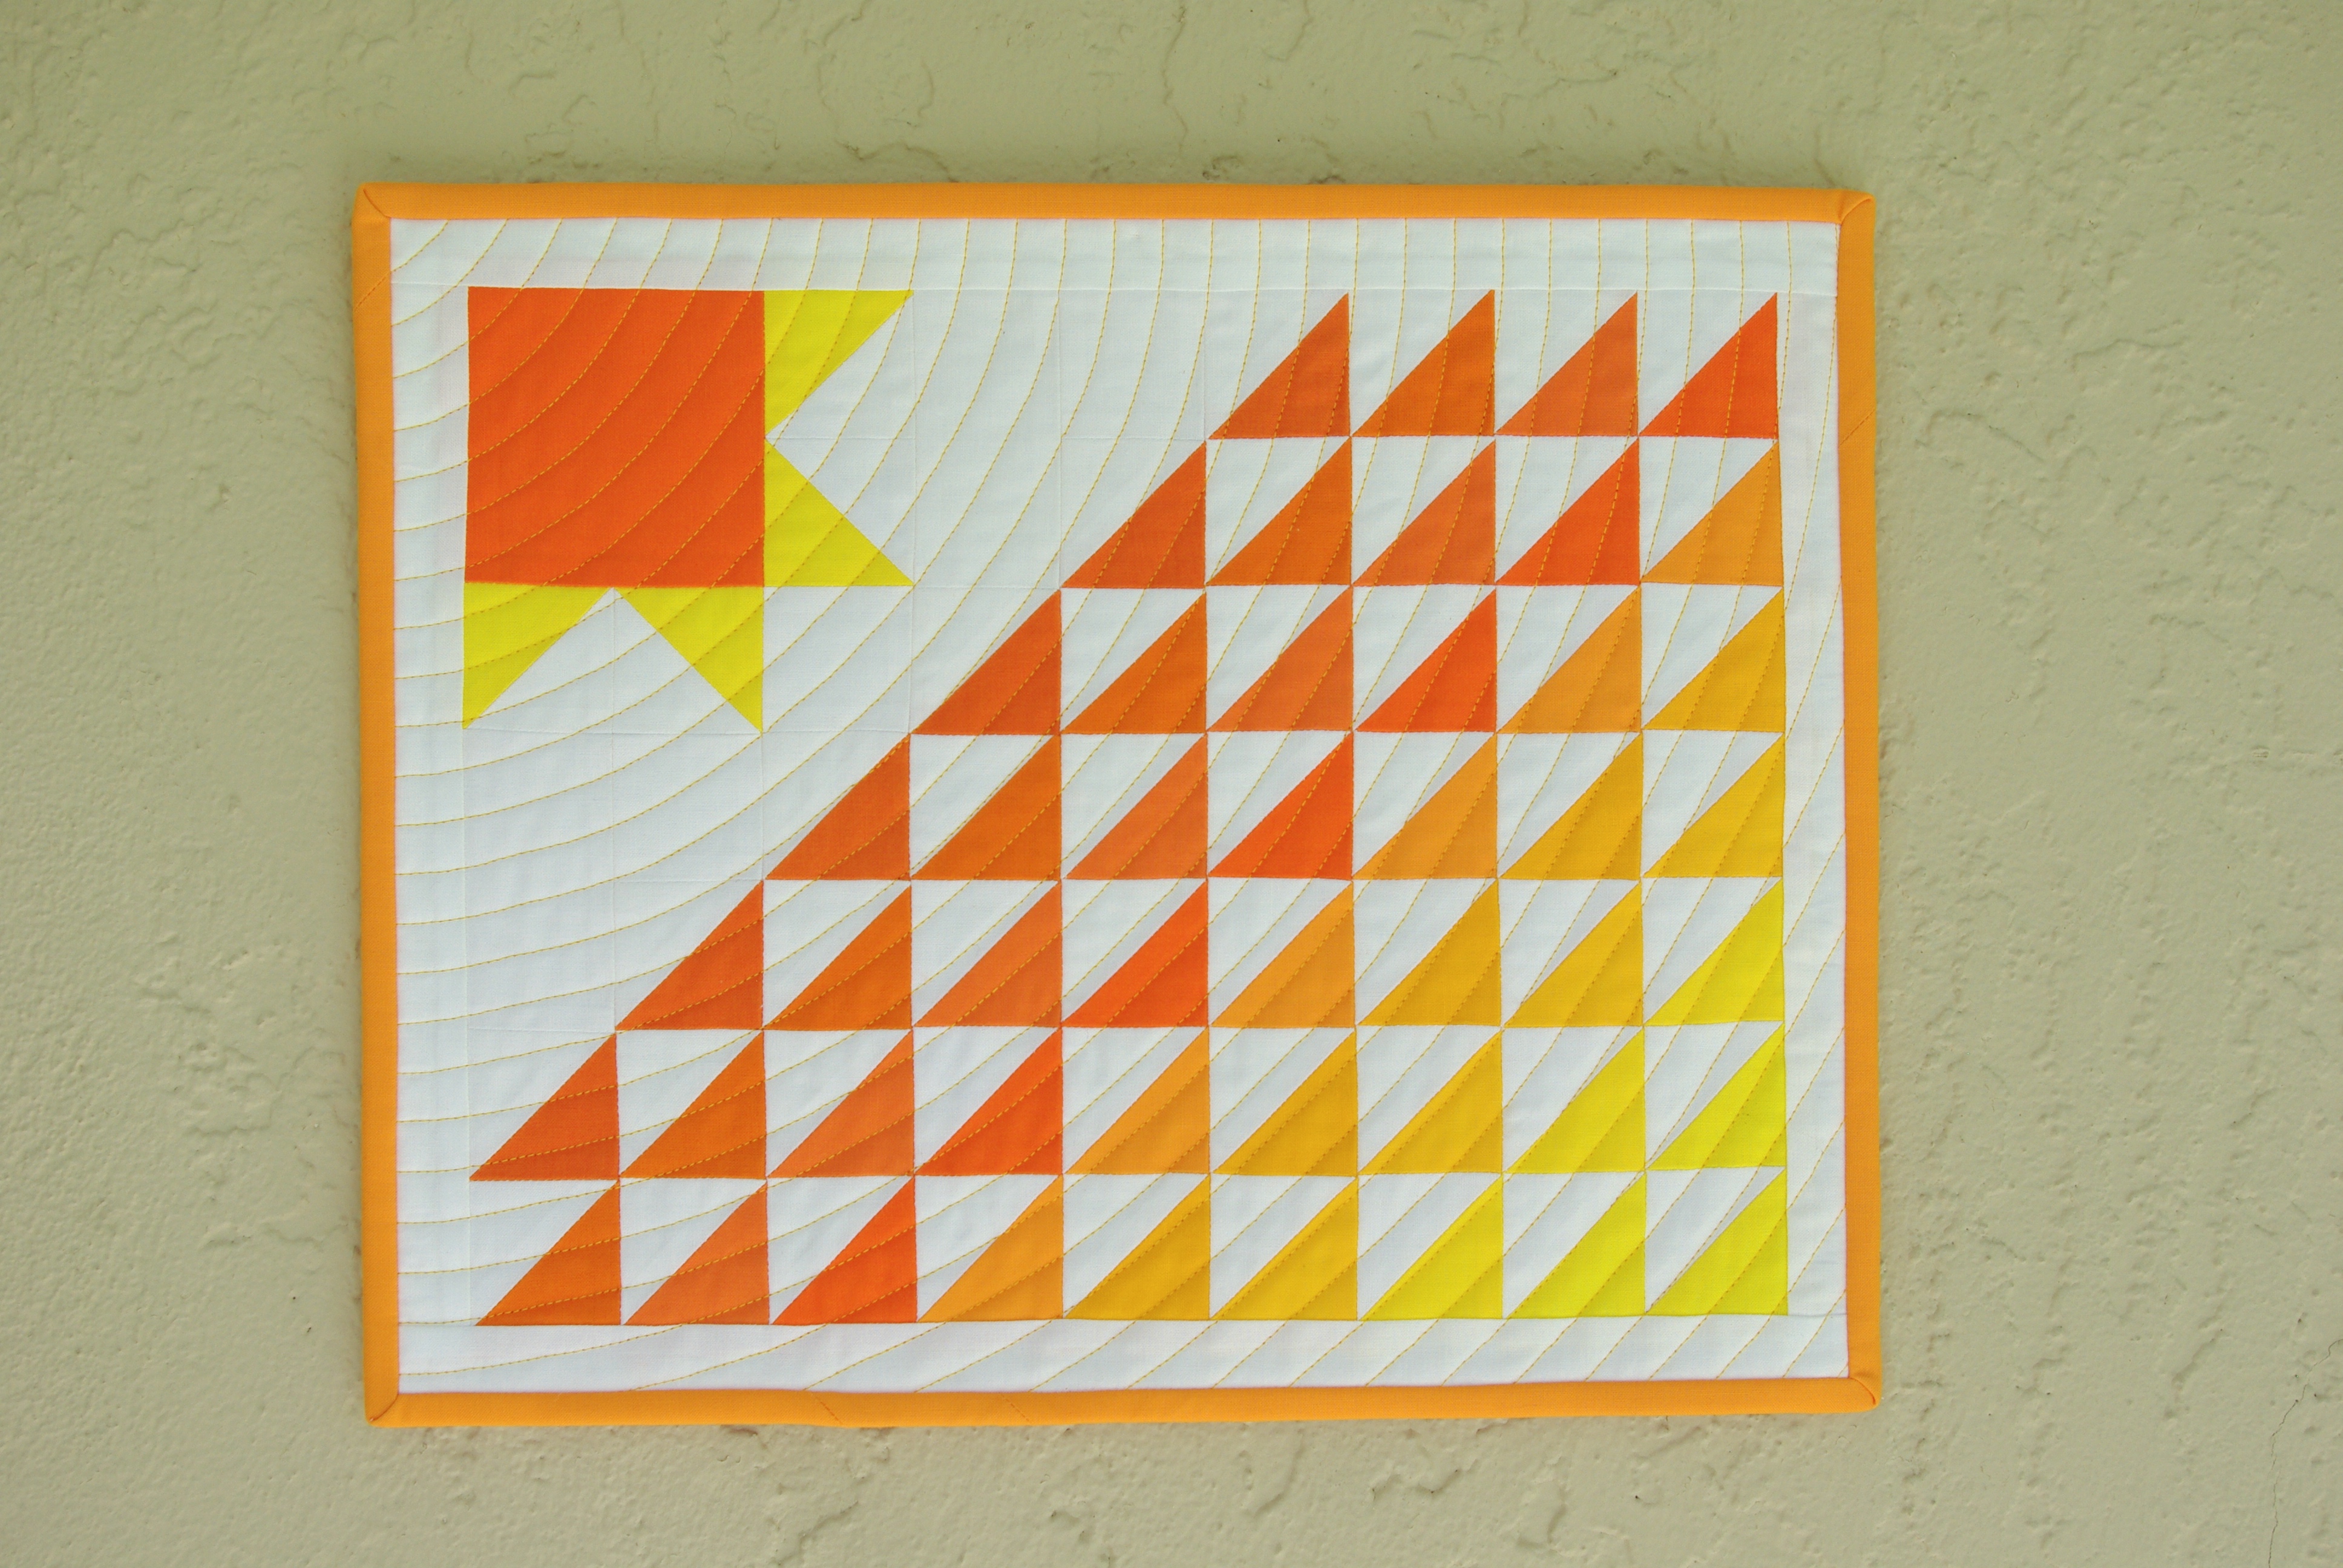
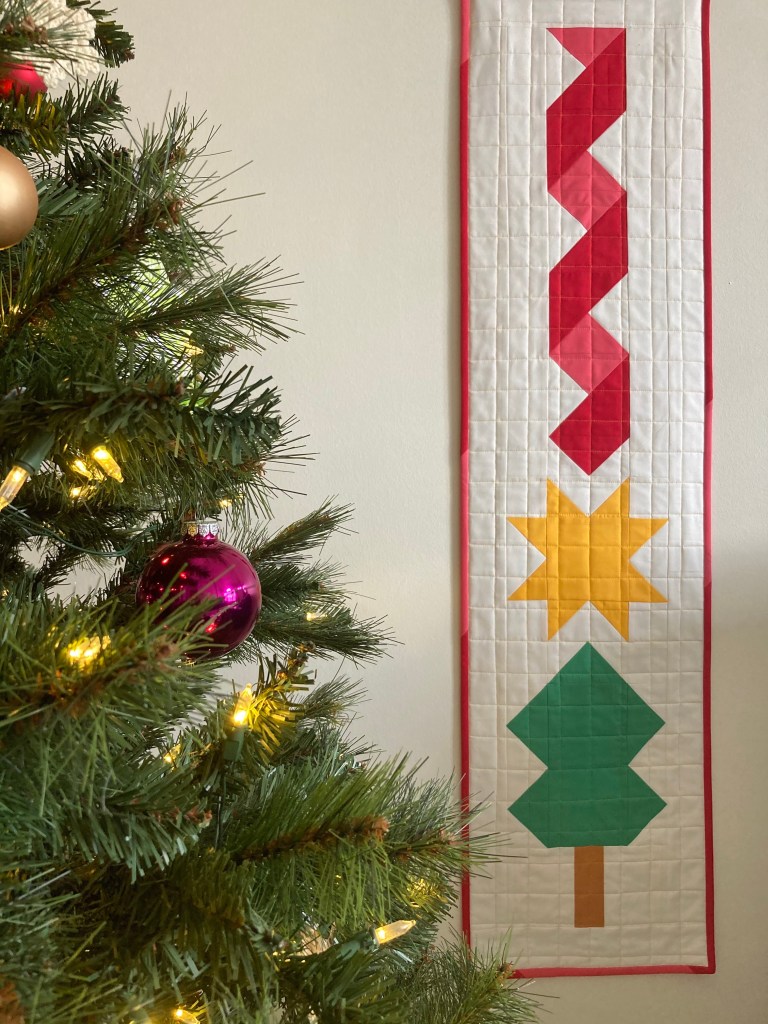
I was surprised that I made only one mini; a section of my Holiday Hemlocks. I put together a center tree and star along with a shorter ribbon and it made a lovely wall hanging. It’s a great way to display part of the quilt if you don’t have time to make a whole one.
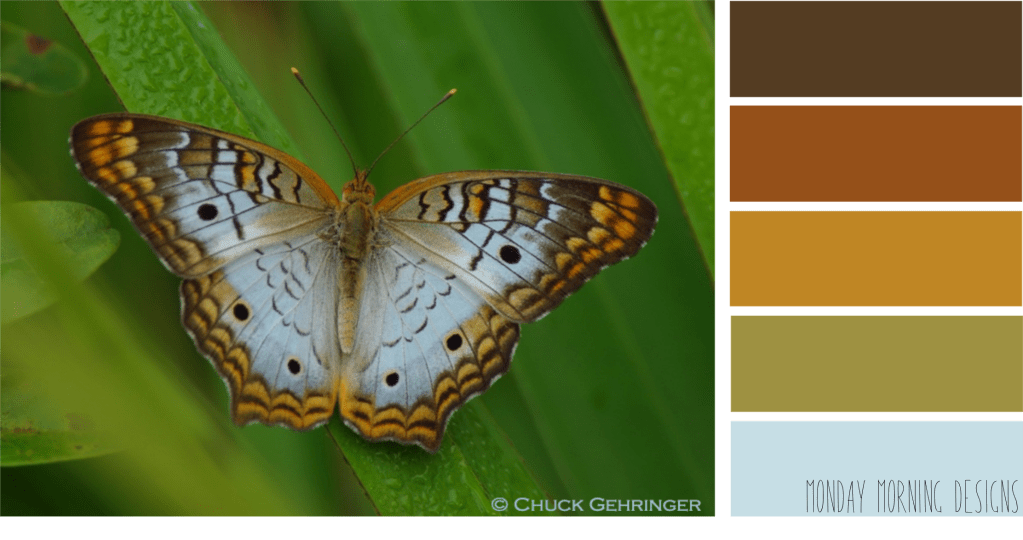
I also added another page to my website, color gallery. It showcases several photos with color tiles to help with your color inspiration. Thankfully my family members allowed me use their beautiful images for this project. I think it’s an excellent resource.
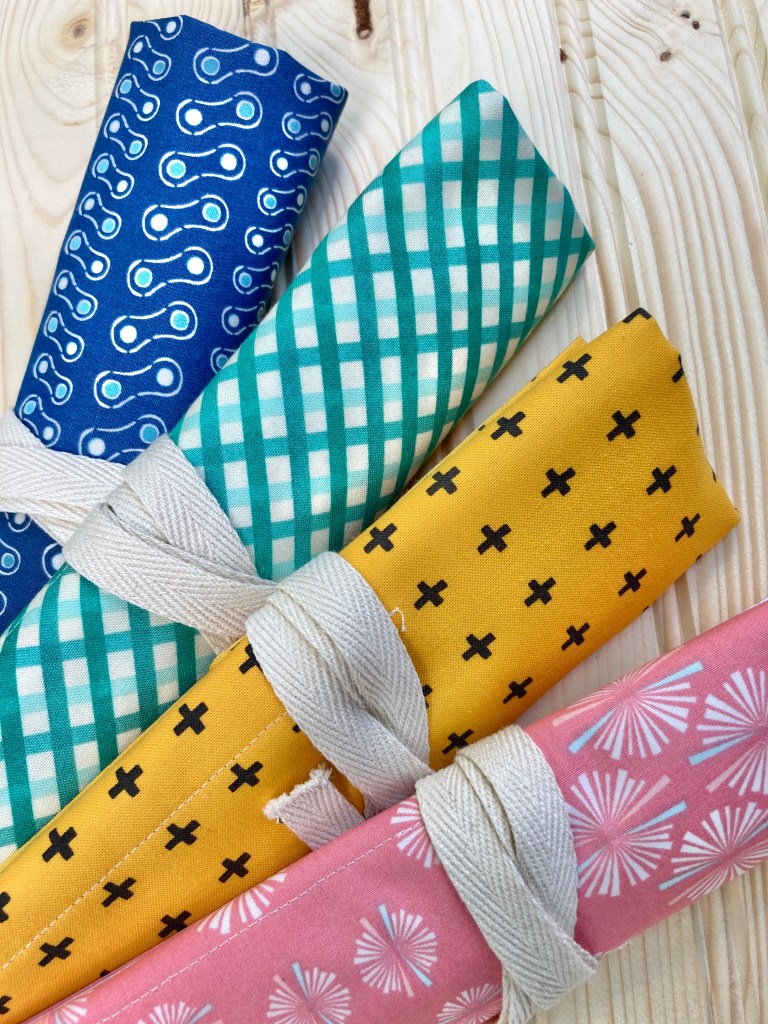
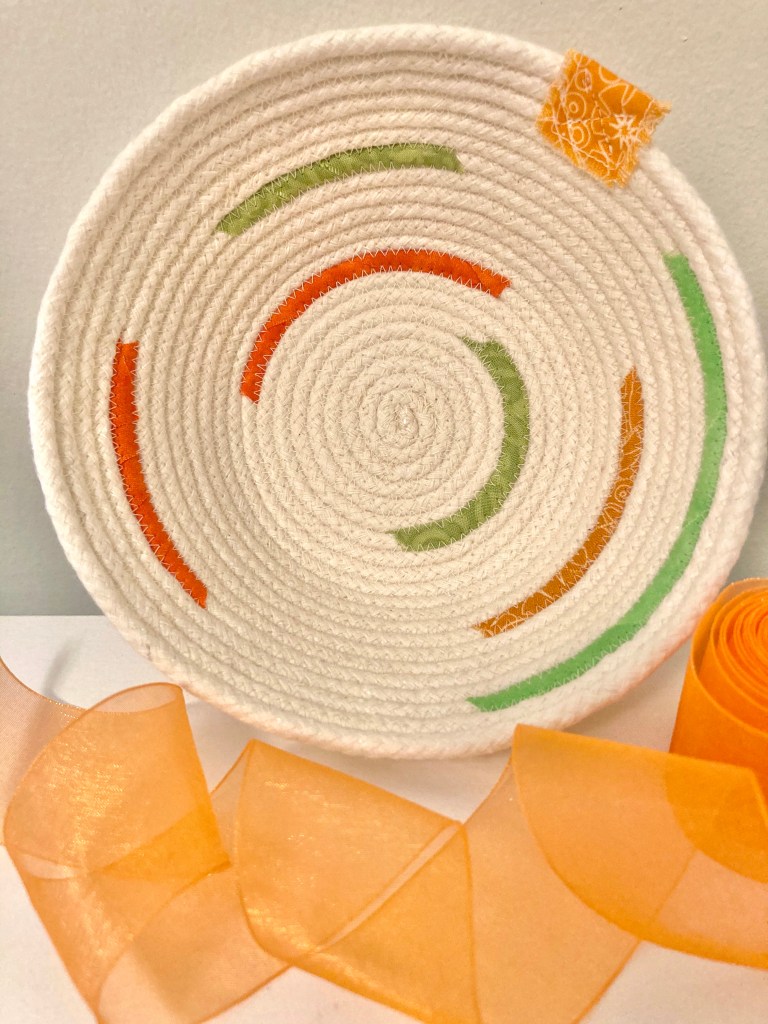
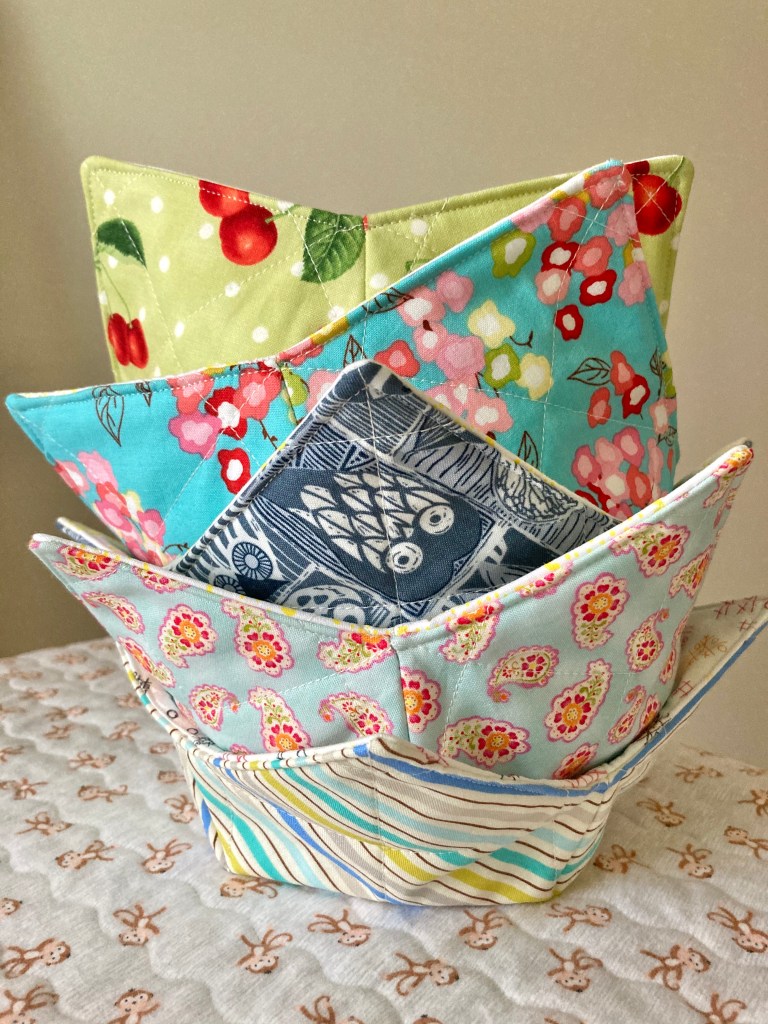
Other projects include pillows for my mom, a pillow case for my bird-loving husband, utensil wraps, colorful rope bowls and microwave bowl cozies.
I also added several tips, tutorials, charts and plenty of other quilty posts to my website. And lastly, I updated my logo and I love it.
Coming soon in 2021…a tutorial for the utensil wrap, a new quilt pattern and more tips and sewing inspiration. I’m looking forward to a great year of creating!
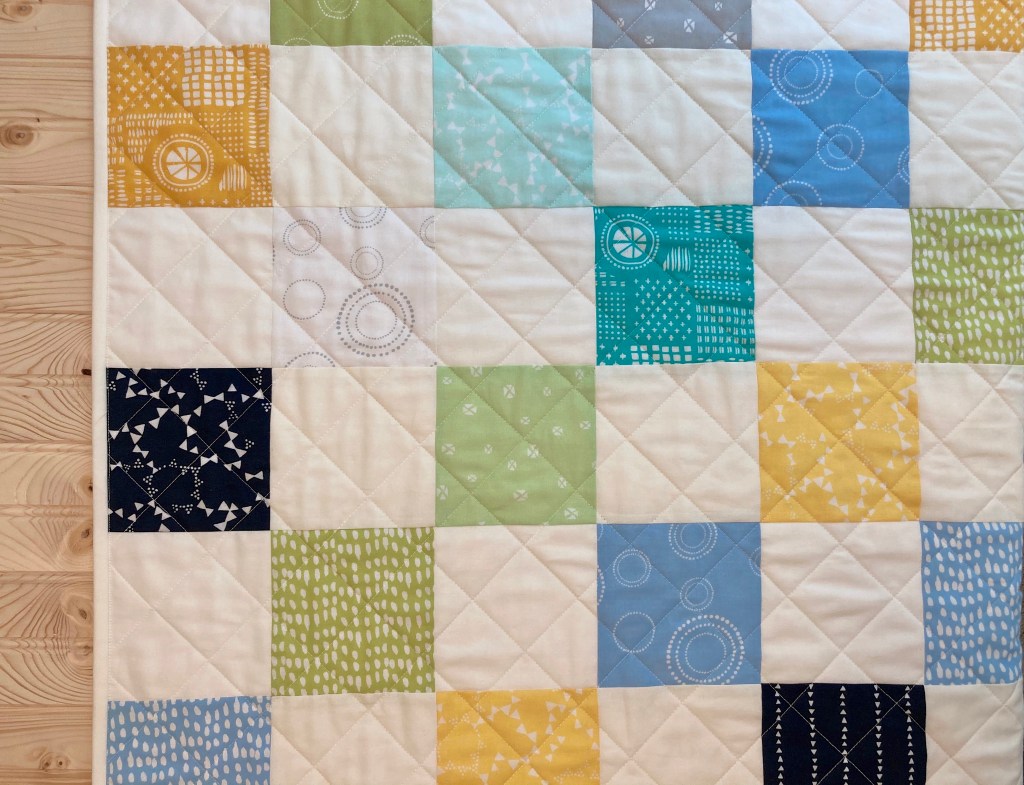
If you’re thinking about taking up quilting as a new hobby but aren’t sure where to begin, I’ve got an easy, basic pattern that’s excellent for the complete beginner, the Checkered Baby Quilt. This quilt is a perfect starter for several reasons—it’s sewing simple squares together, there are no bias edges (when edges can stretch easily), seams nest (fit into one another stress-free) and it can be made with 5″ precuts. For the quilt top you need only two charm packs. And best of all, there’s no pattern to buy, just download my Checkered Baby Quilt tutorial. Easy, right?
I’ve made a few Checkered Baby Quilts and have given them as gifts and I’ve even made a couple for commission, so it’s definitely a classic that stays in style.
Checkered Baby Quilt made with stackers from Riley Blake’s Little Prince collectionCheckered Baby Quilt made with Moda’s Pepper and Flax and various other prints
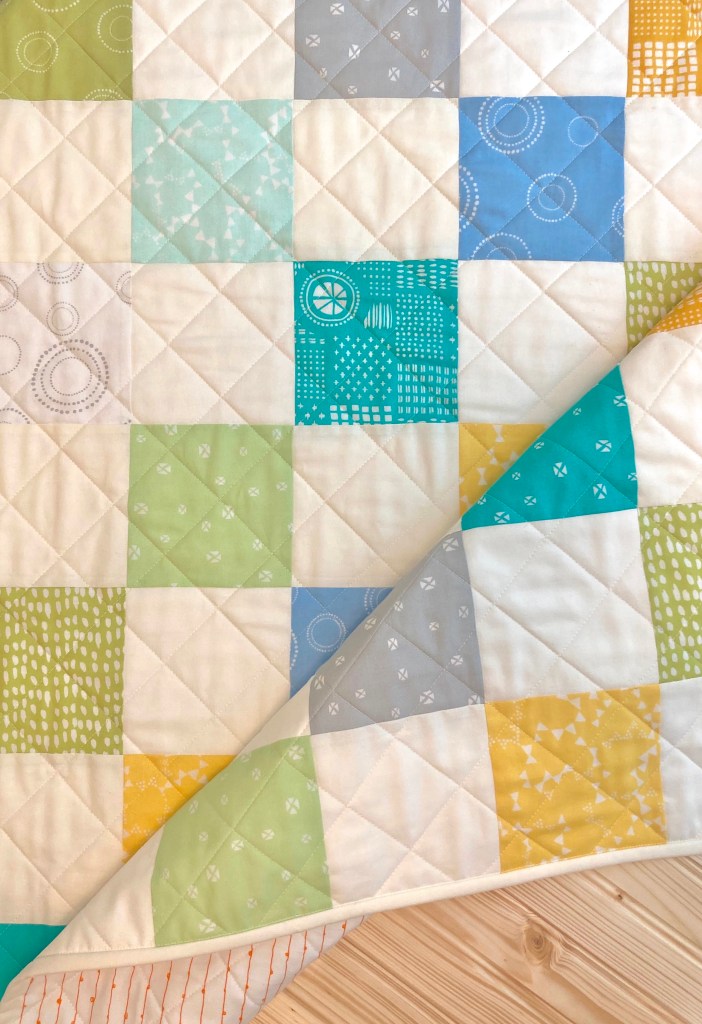
The last one I made with Lily and Loom fabric from Craftsy (remember Craftsy?) and Kona Cotton Solid Snow. I chose crosshatch quilting at 2″ apart and a solid binding.
Other reasons why this is great for a new quilter is that it’s a nice sized project suitable for experimenting with color, fabric, thread, quilting designs, etc. All of those quilting elements are part of the learning process plus it’s a lot of fun. So if it’s time to get started, why not grab a couple of charm packs and try this one out?!?
If you’ve been quilting for a while I bet you’ve accumulated quite a bit of cutaway batting—I have a fair amount myself. For me, I needed to stash down and use what I had plus I’ve found it difficult to purchase any batting because it’s either sold out or on backorder.
Since I had a couple patterns in the works, it was a good time to do some quilt batting piecing so I could finish my projects. First up was a throw quilt that will finish 56″ x 72″.
To get started, I gathered cutaway strips from other quilts I’d made. I had three strips that were long enough and once sewn together, the whole piece would be wide enough. Because the strips were uneven in length, I cut them all to an even and approximate length of what I’d need. I then was ready to get sewing.
Here’s what I did, and if you decide to piece batting too, this is what you’ll need to know. I’ve compiled a list of tips to help you as you go along.
Before you start sewing:
Set up good lighting.
Match the thread to the batting as close as possible.
Cut fresh, straight edges using a ruler and rotary cutter OR if the factory cut edges are straight, they are fine to use.
Make sure the same sides of the batting are up.
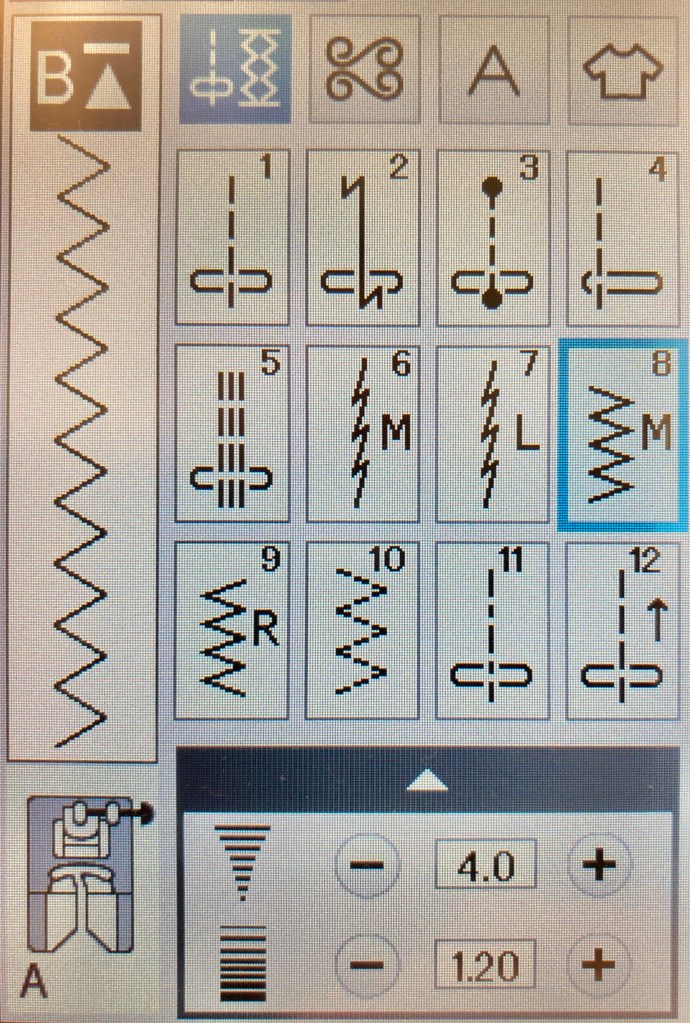
To insure seams stay secure, use a zigzag stitch. I sew on a Janome Skyline S7 and this is the setting I used. Whatever you can set close to this should work fine.
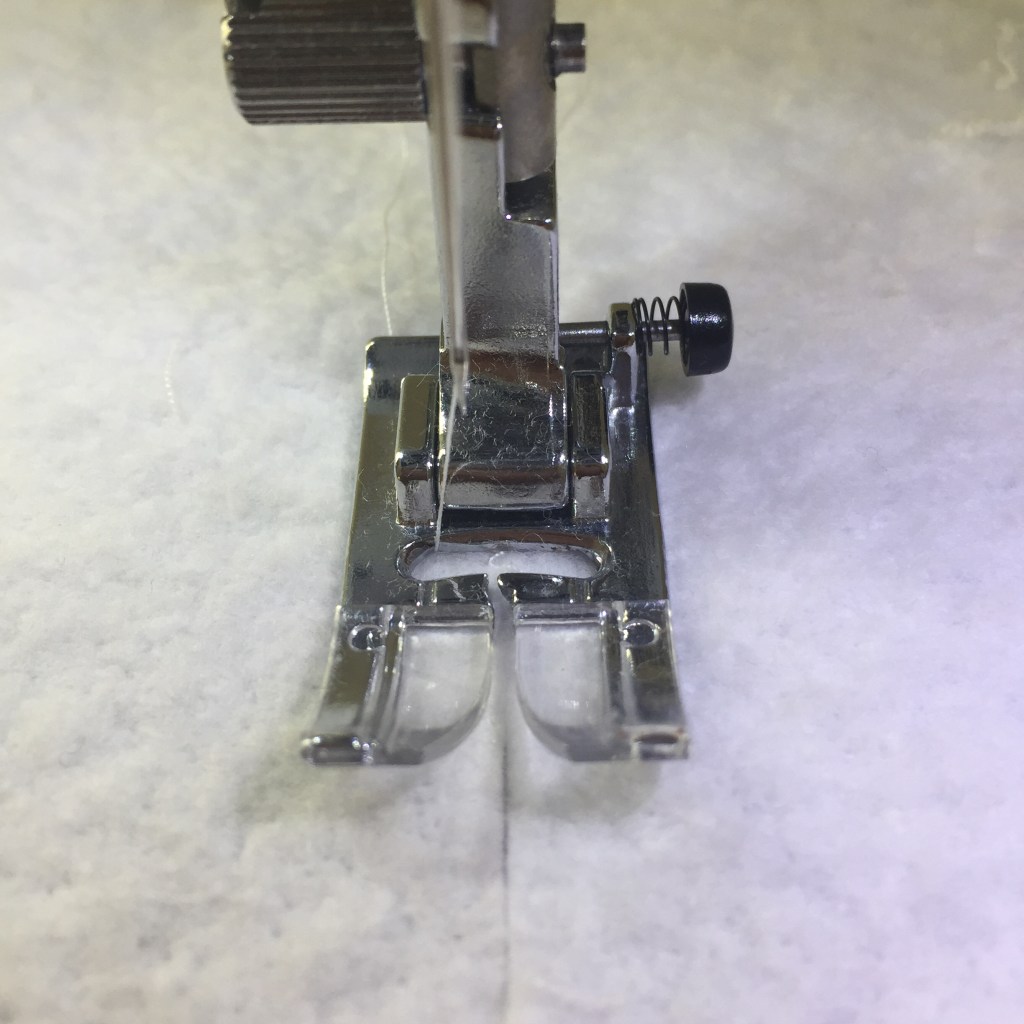
Choose the proper foot for your machine.
Try a sample first to ensure your stitch length is set appropriately.
Once you get started:
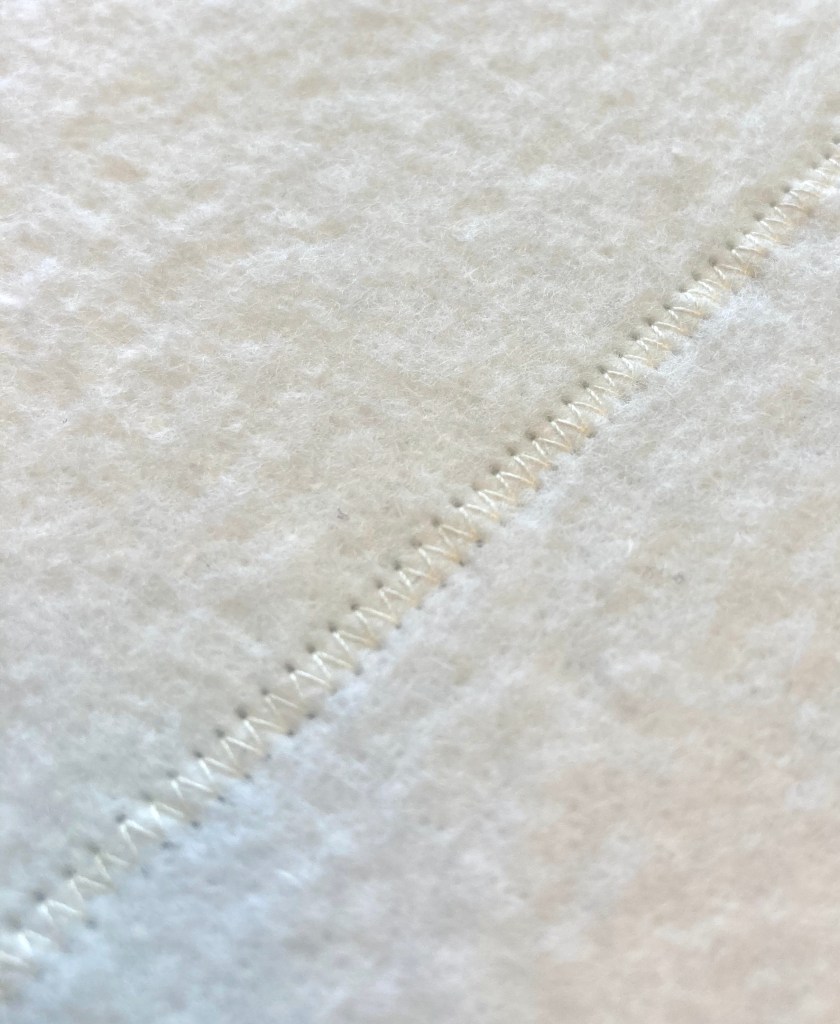
Sew slowly making sure both sides of the batting pieces are caught by the zigzag stitch. Going fast will make batting bunch.
Use quilting gloves for a better grip (batting can be slippery).
Finished pieced quilt batting
Once finished and before use:
If necessary, you can press the seams to help them lie flat, but make sure the entire area of batting where you intend to iron is covered by fabric or you’ll get residue on your iron that’s difficult to remove, trust me. 😉
I spritzed water over my stitching to help relax the seams which worked really well. If you do use water, check that everything is dry before sandwiching and quilting.
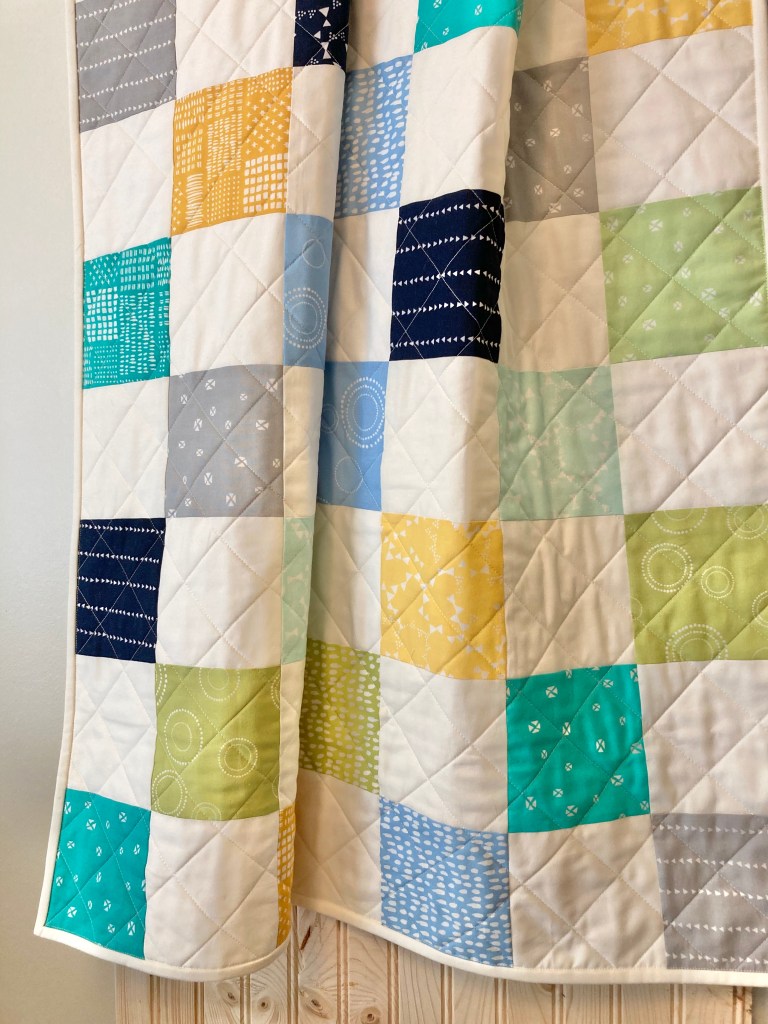
Here’s a photo of an area beneath the quilt top where there’s a pieced batting seam…you’d never know!
Every year I like to write a blog post recapping all the projects I’ve made. I mainly do this to have a quick reference should I ever need to know when something in particular was made. And it’s fun to see how I’ve spent my time sewing. So here goes…
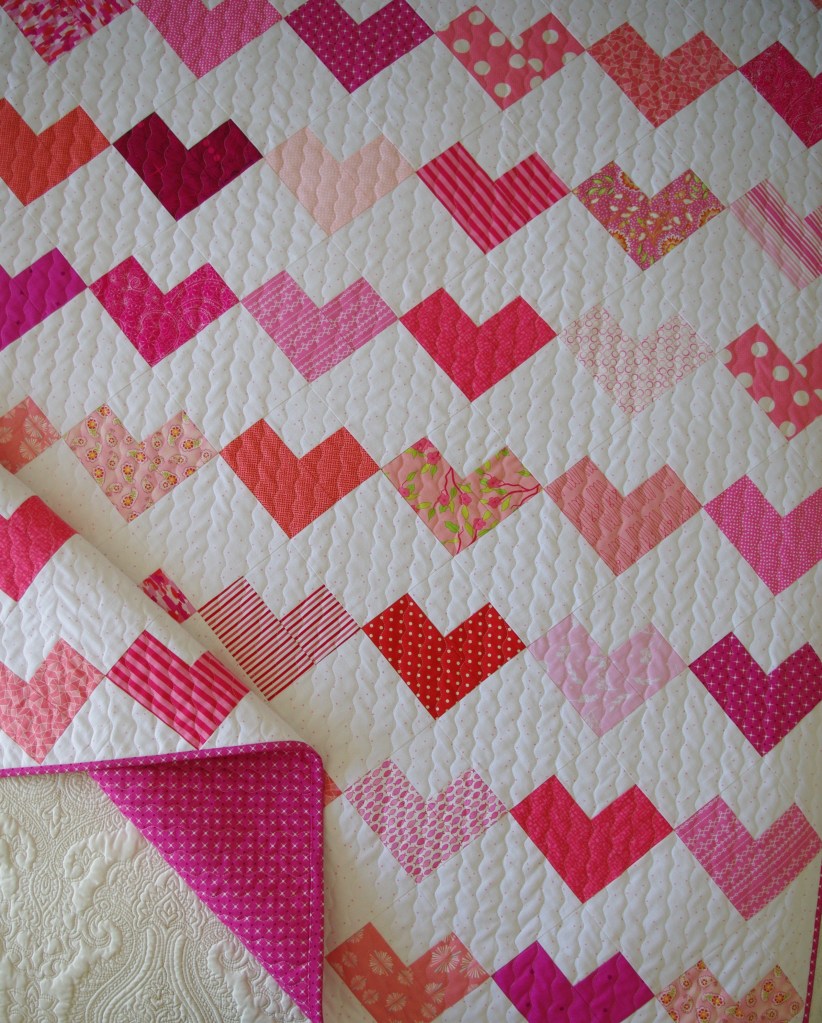
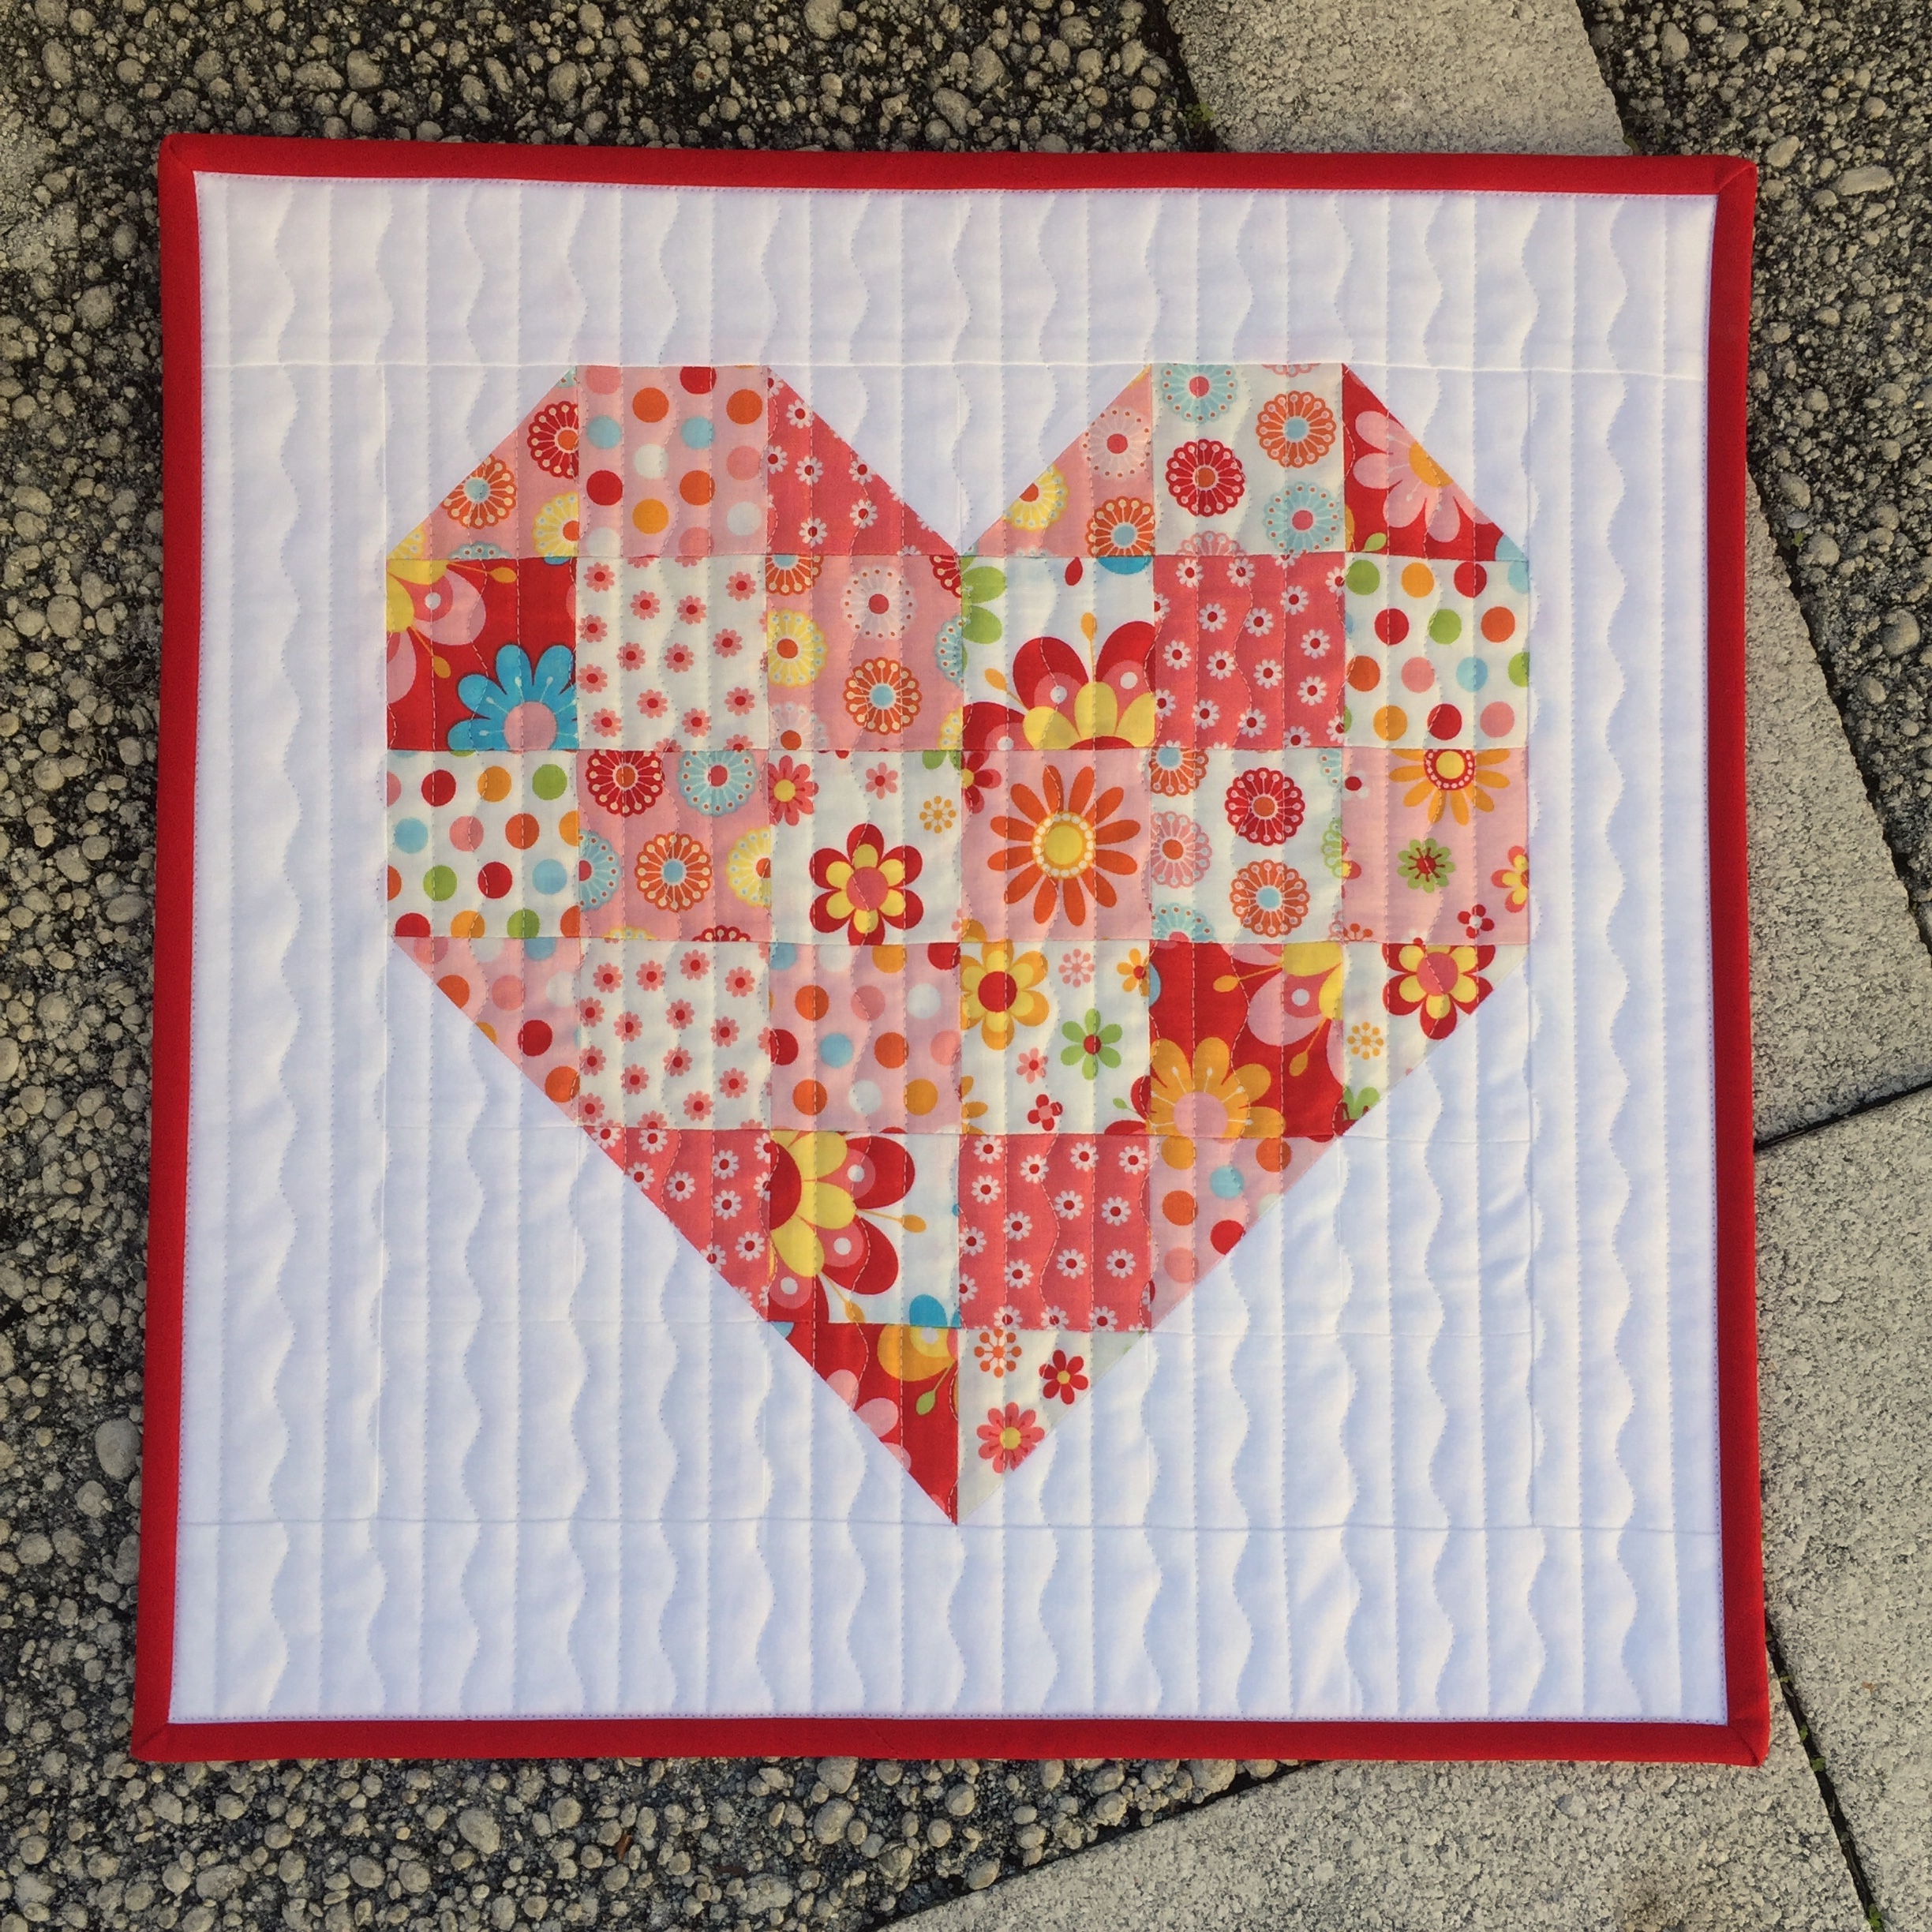
First up is my Petite Hearts quilt that I made on a whim. Definitely a top favorite.
I started making a Swoon quilt by Thimble Blossoms in the spring and got it back from longarming late September. I haven’t written a blog post on it yet because I haven’t gotten any good photos, so these two blocks will have to do for now. 🙂
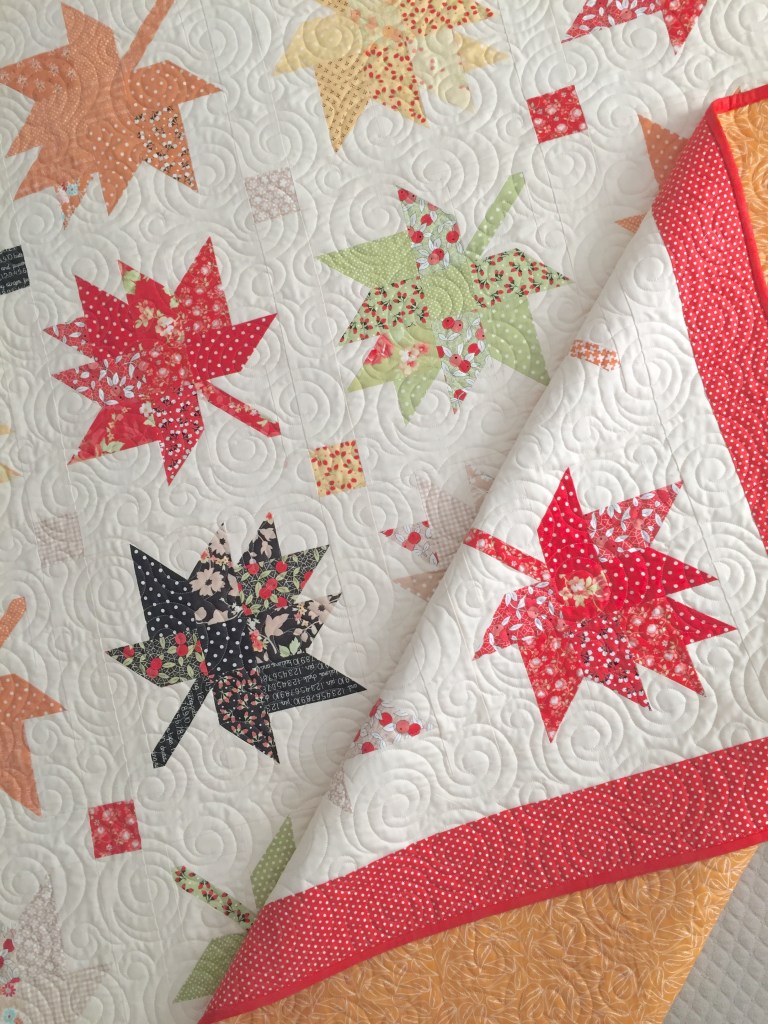
I started my Maple Charm quilt before we moved in April and had it finished just in time for fall. I enjoyed it the entire season.
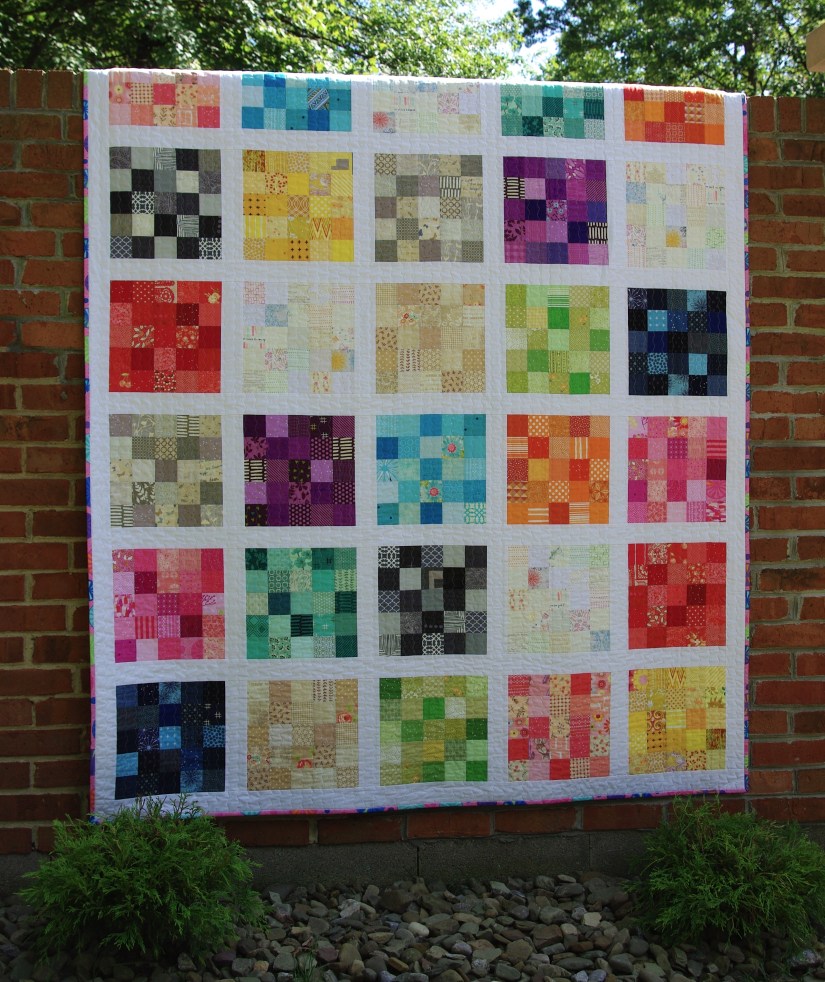
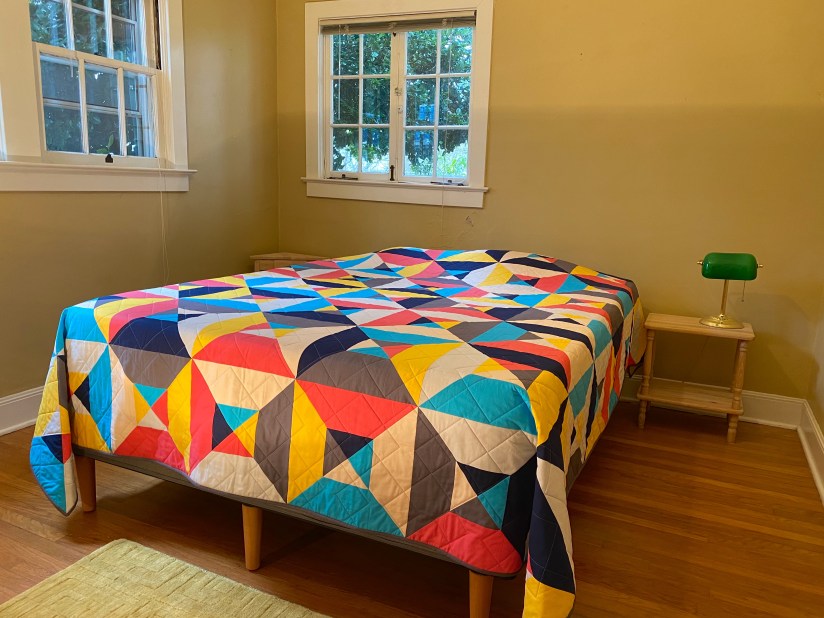
This Five Squared throw quilt is a Monday Morning Designs pattern (available for purchase in my Etsy shop; see sidebar). I made it out of fabrics I had on hand and I love that all the colors of the rainbow are included.
Also while trying to use what I had on hand, I made a Four Patch Charm quilt. I’m hoping somebody has a special event this year so I can gift it.
Lastly, I made my son a Picnic Play quilt designed by Michelle Bartholomew. While this quilt looks innocent, it was a tough one! It was a huge project, too. My son enjoys finally having a quilt large enough to use on his queen size bed.
I made quite a few mini quilts, too. This one was completed early 2019. I’ve also written a tutorial on how to make a Scrappy Heart mini. It’s a fun and quick one to make.
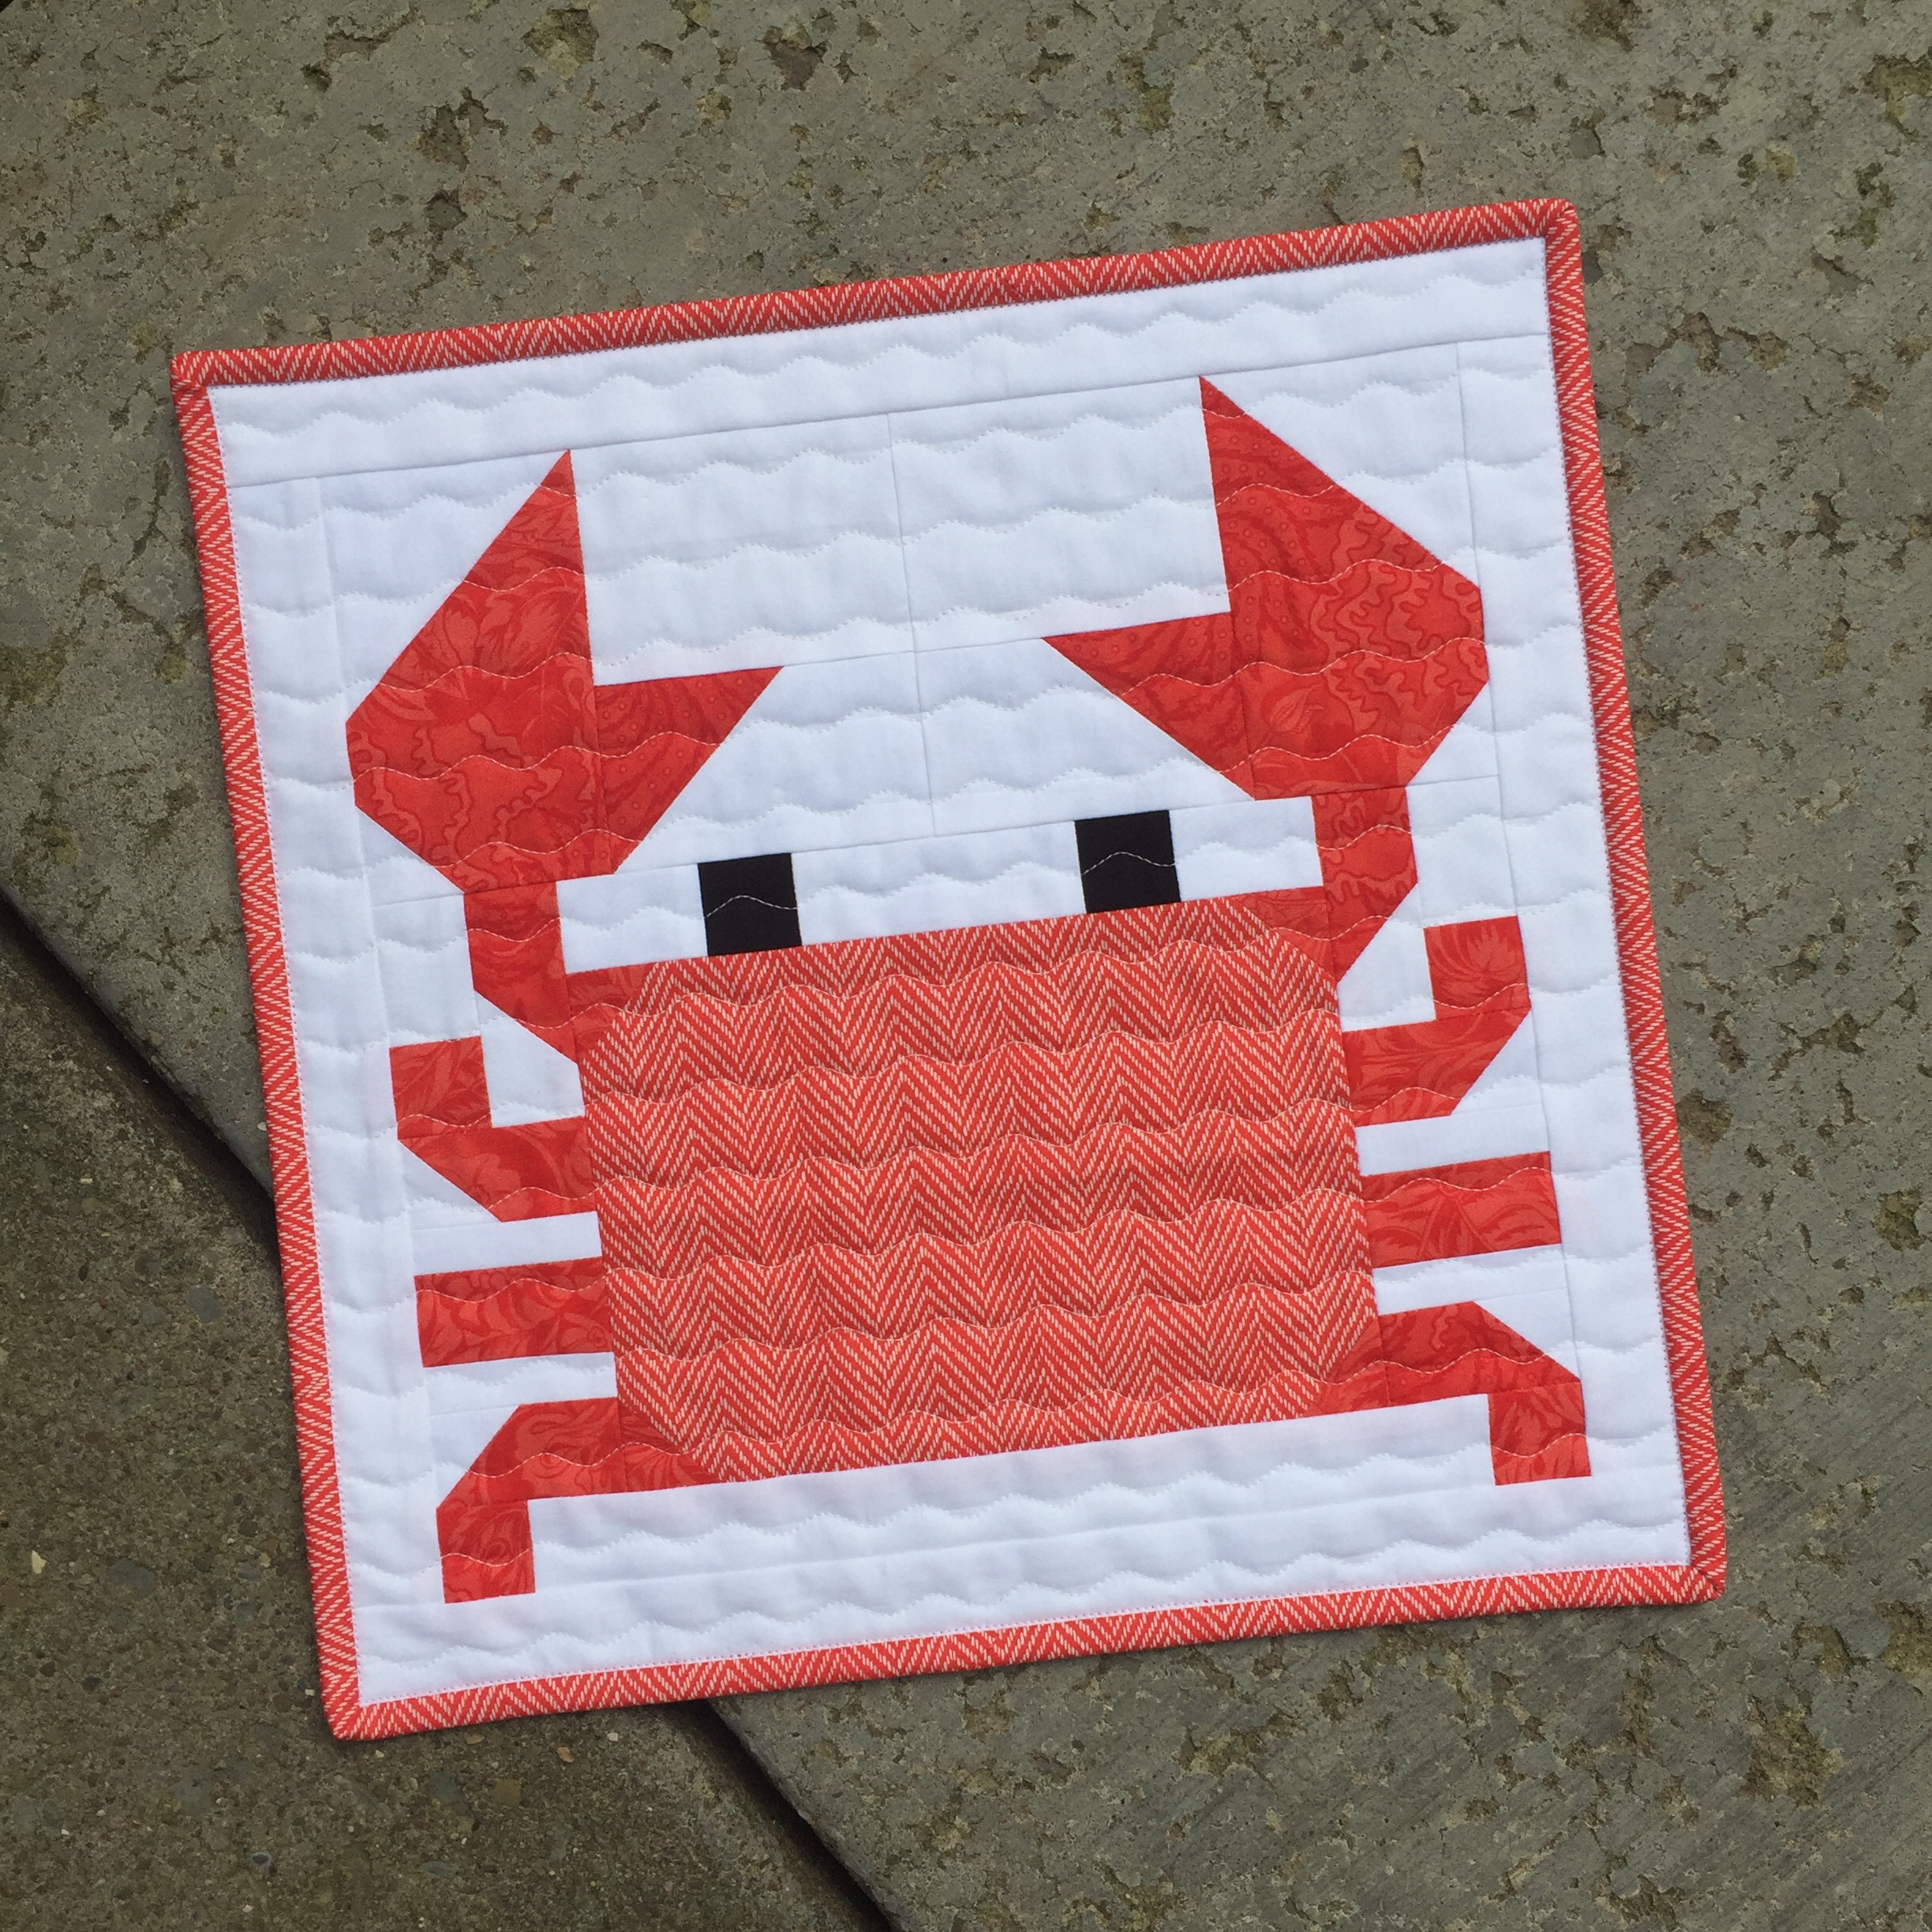
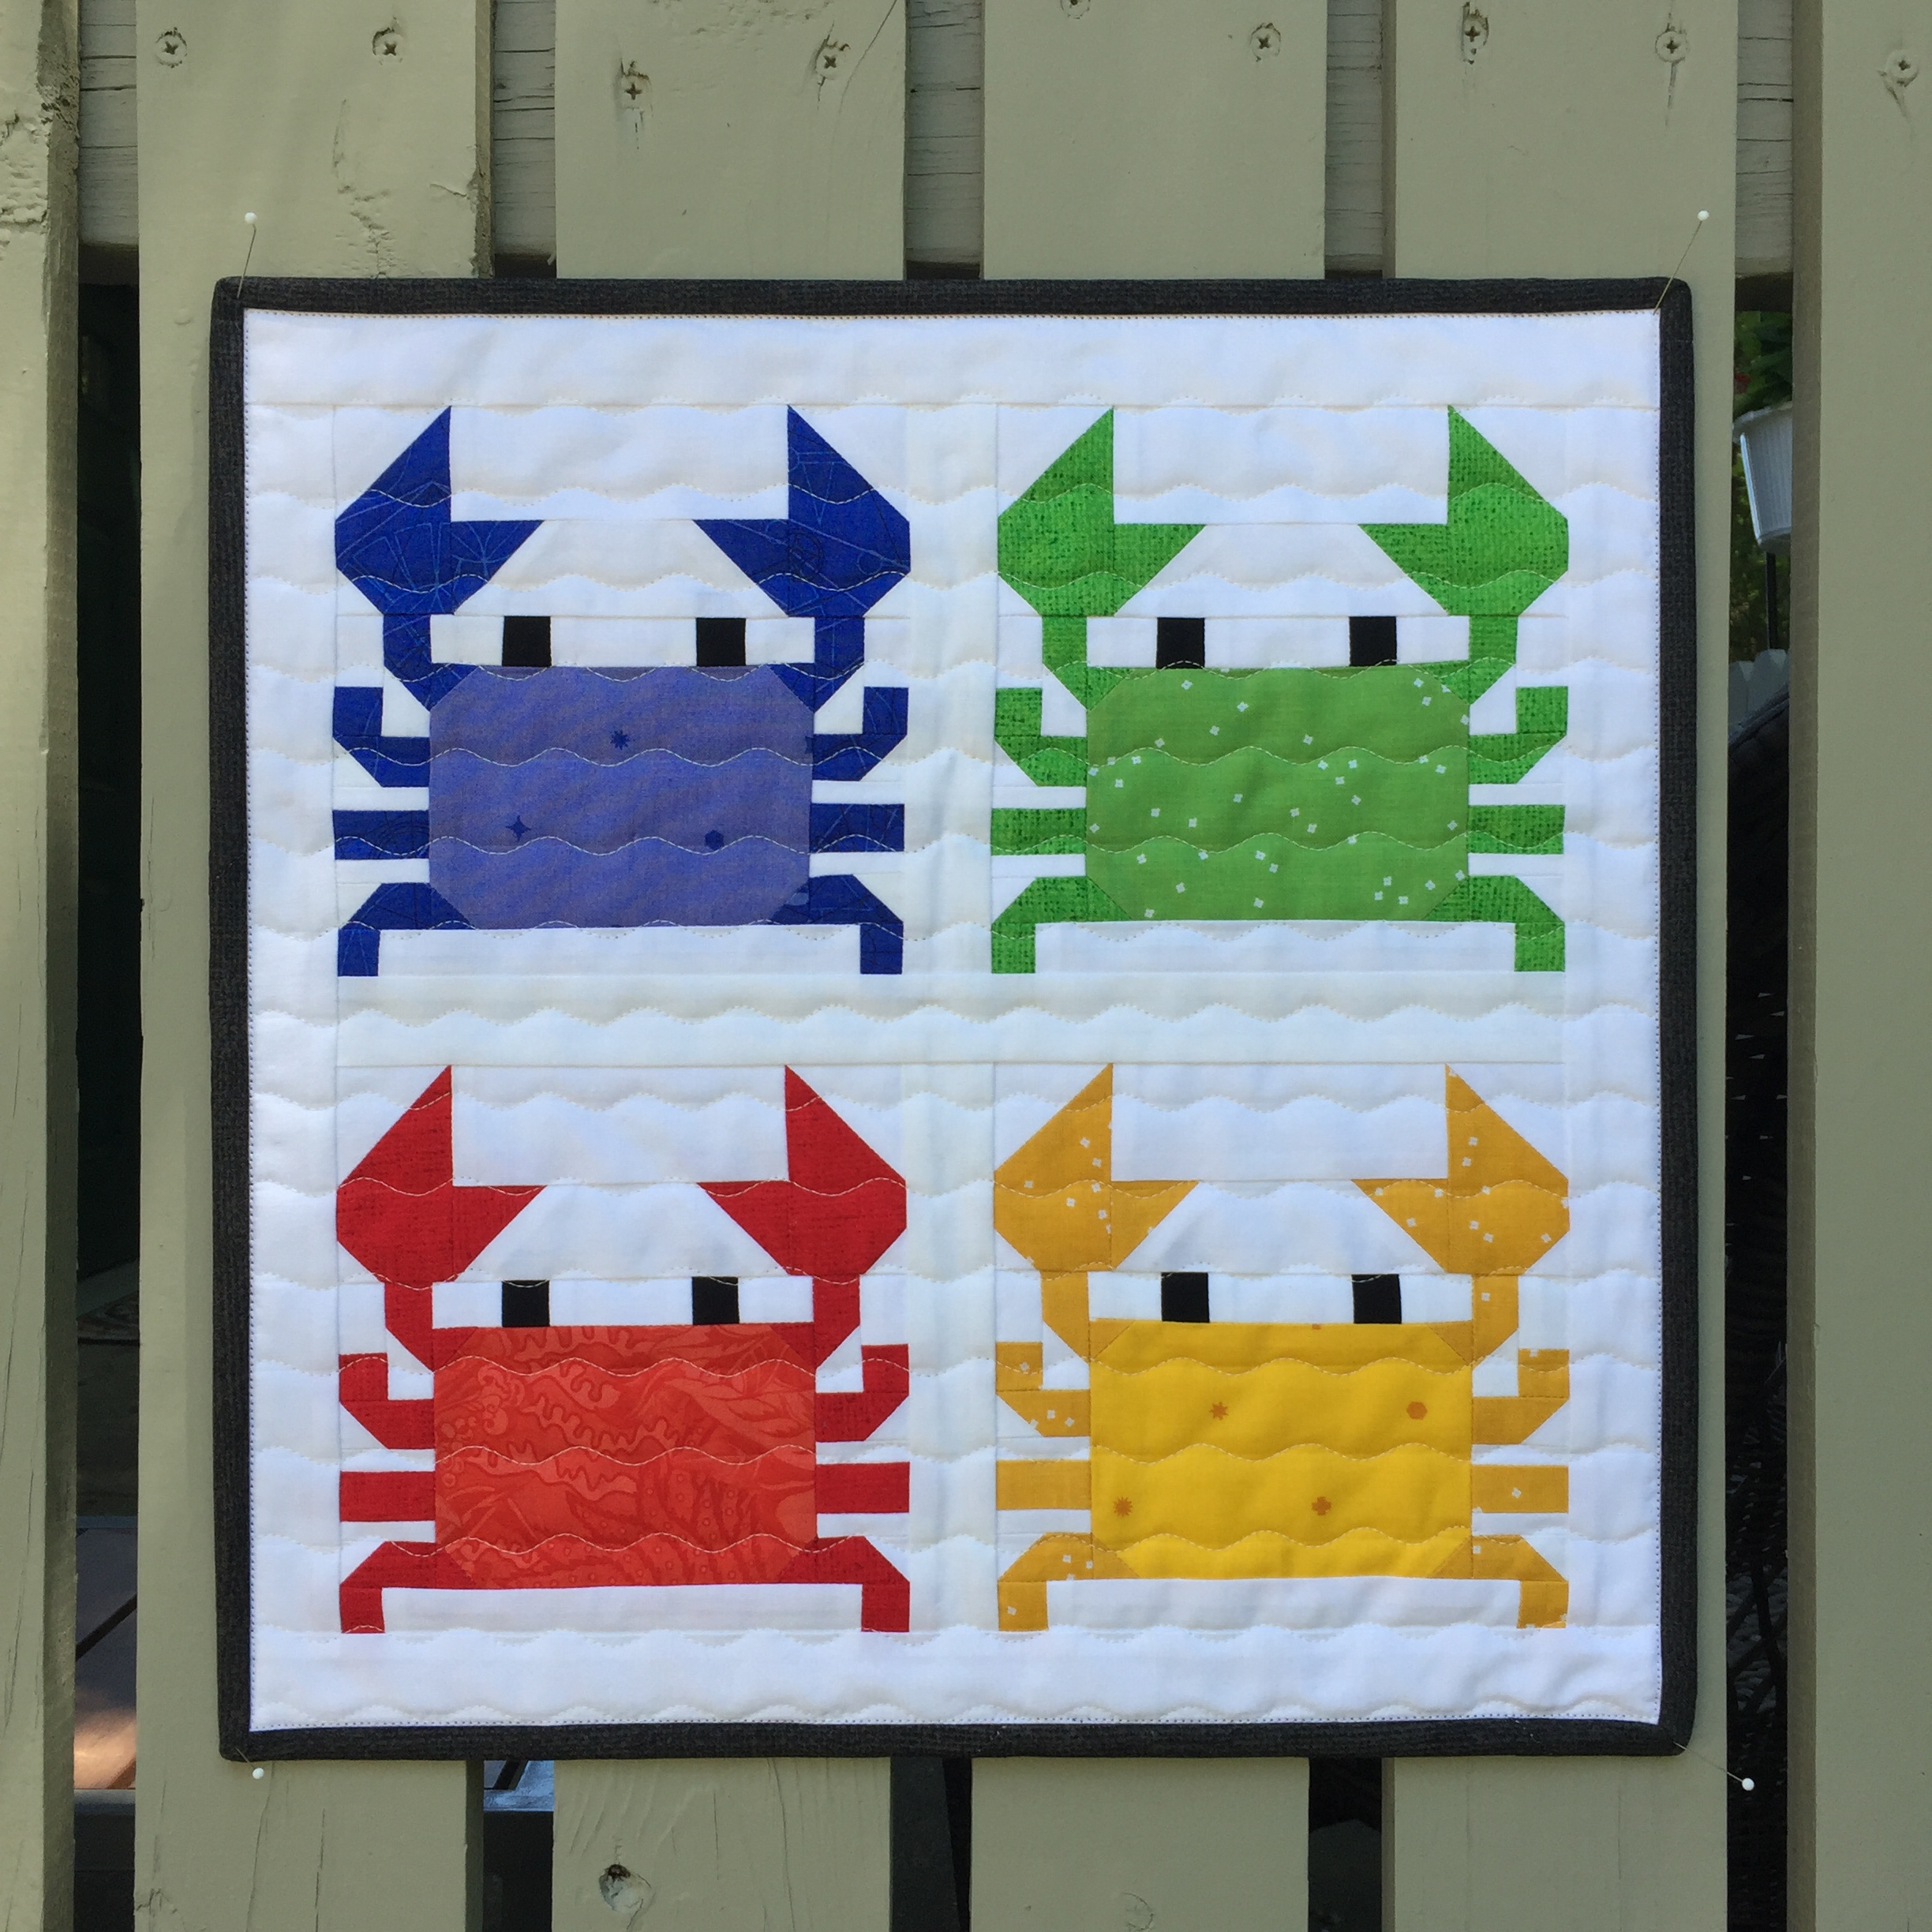
What can I say about this cute crab pattern by Ellis and Higgs? The big crab was a gift for my daughter, the other one is mine.
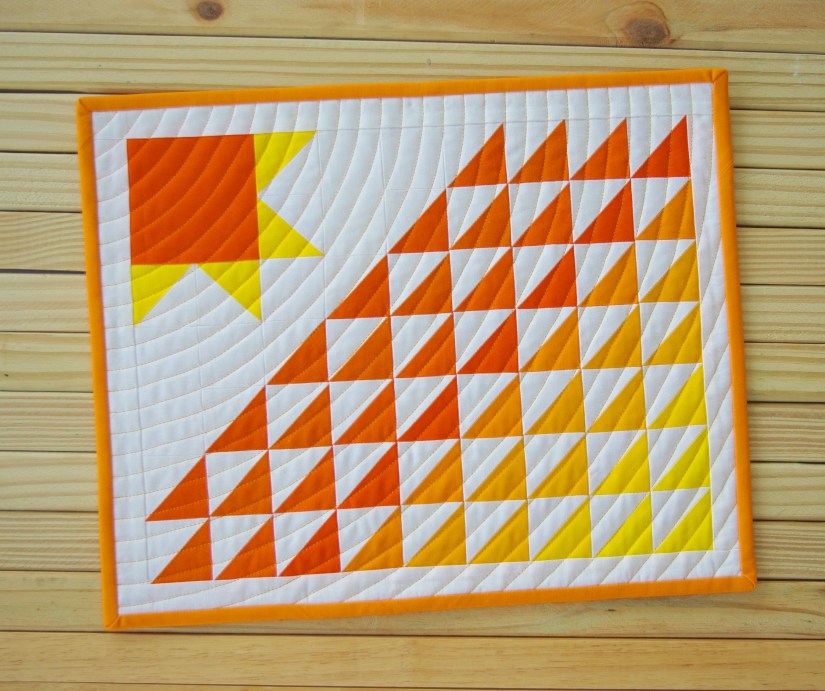
This Radiant mini is also a Monday Morning Designs. I was fortunate to have it featured in the July/August edition of Quiltmaker. It surely brightens up my space! I plan to release the pattern this summer.
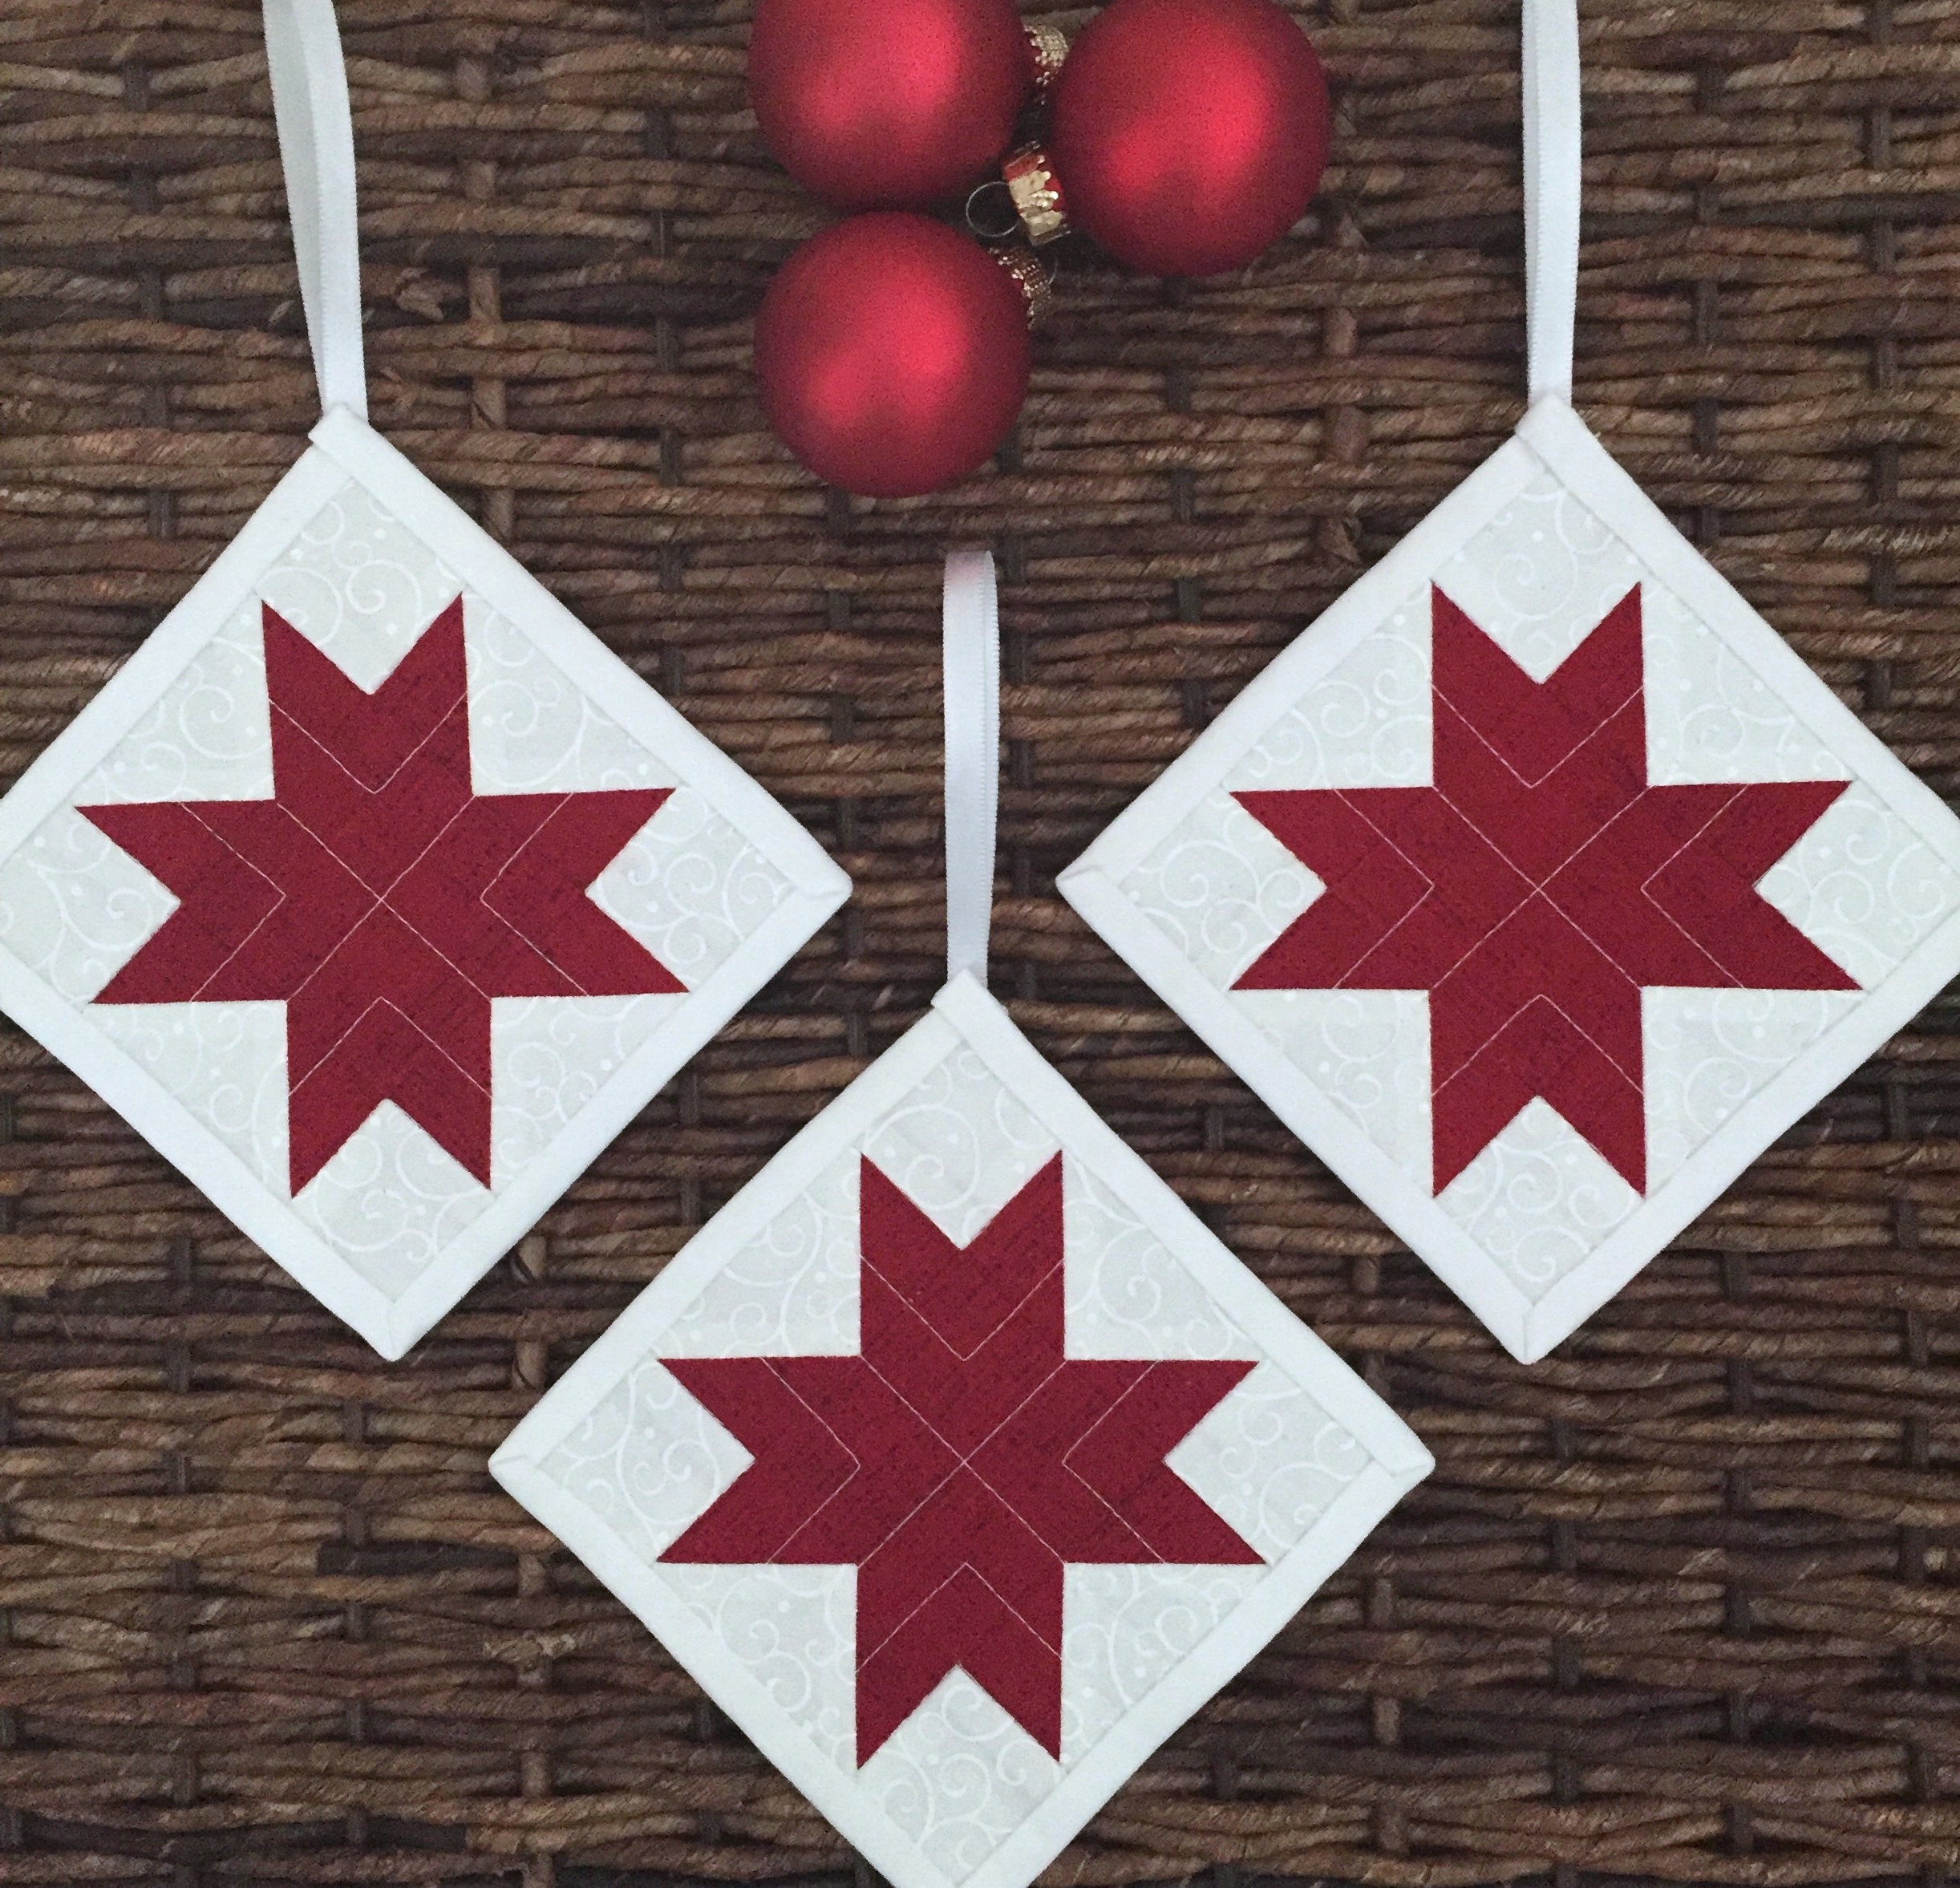
I made quite a few Little Quilted Star ornaments for gifts for Christmas. Very festive.
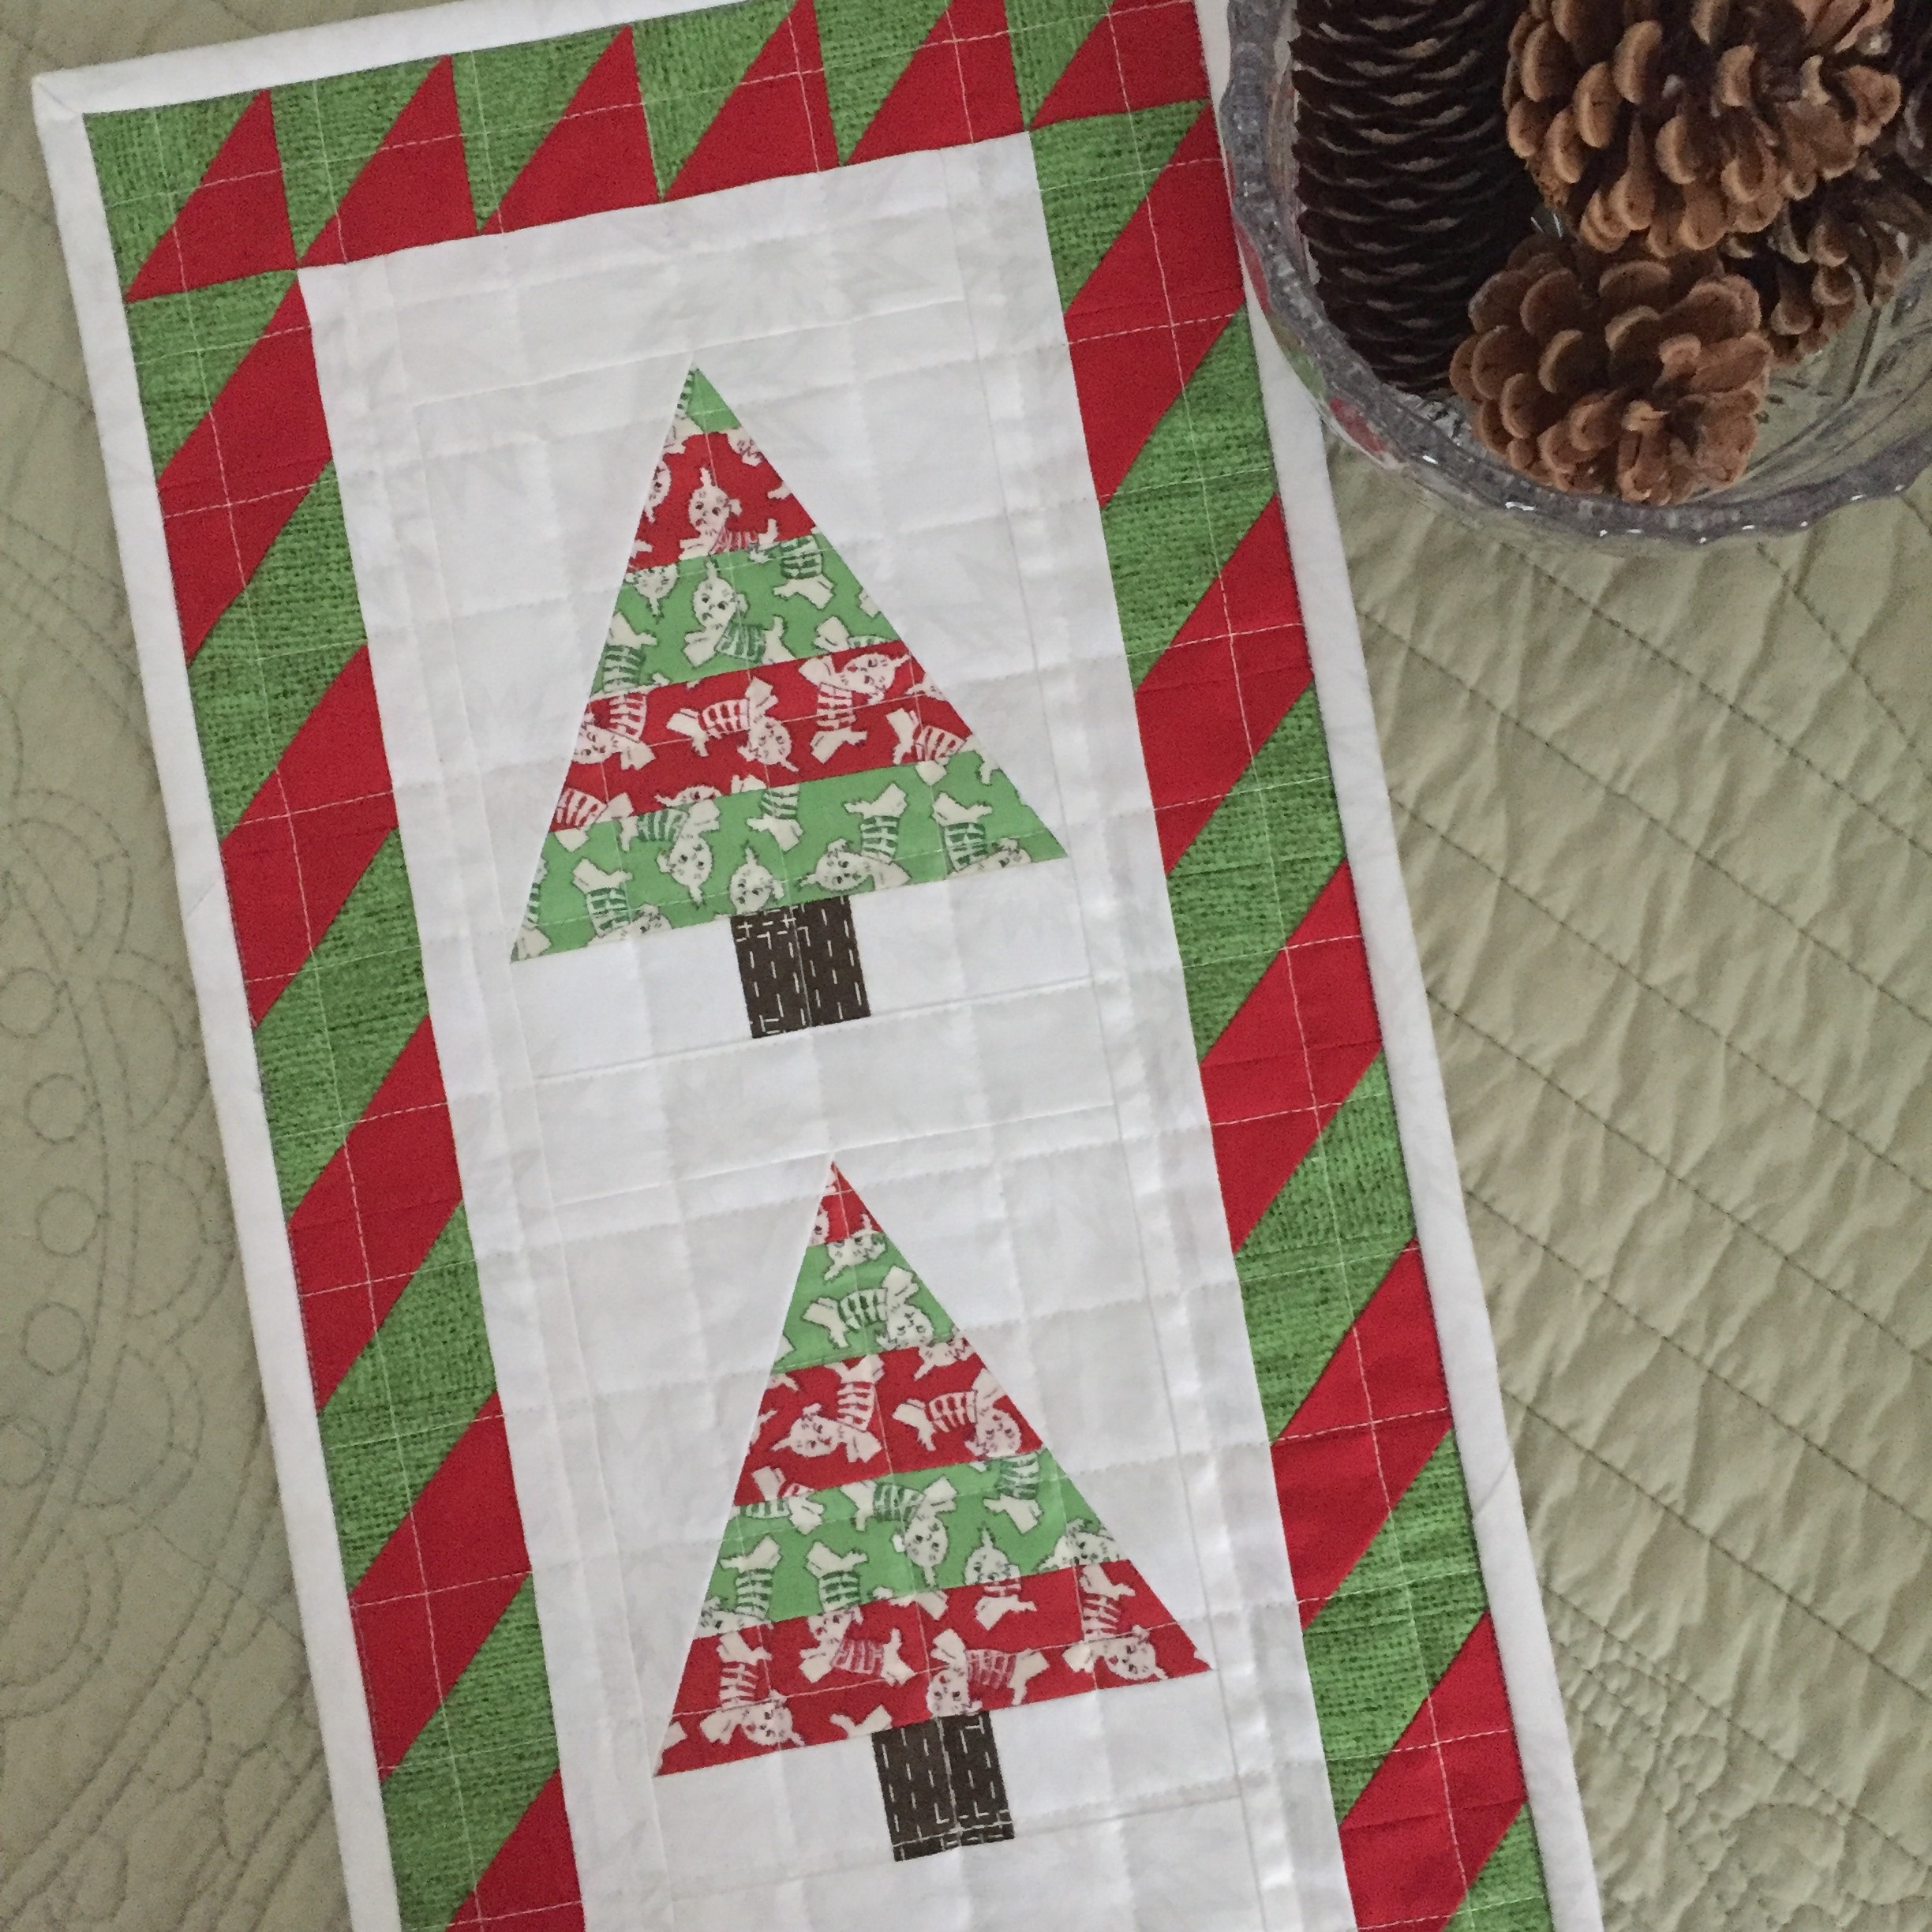
My pattern Wee Three Trees became available for purchase in time for the holiday sewing rush. I made two, one for myself and one as a gift for my niece.
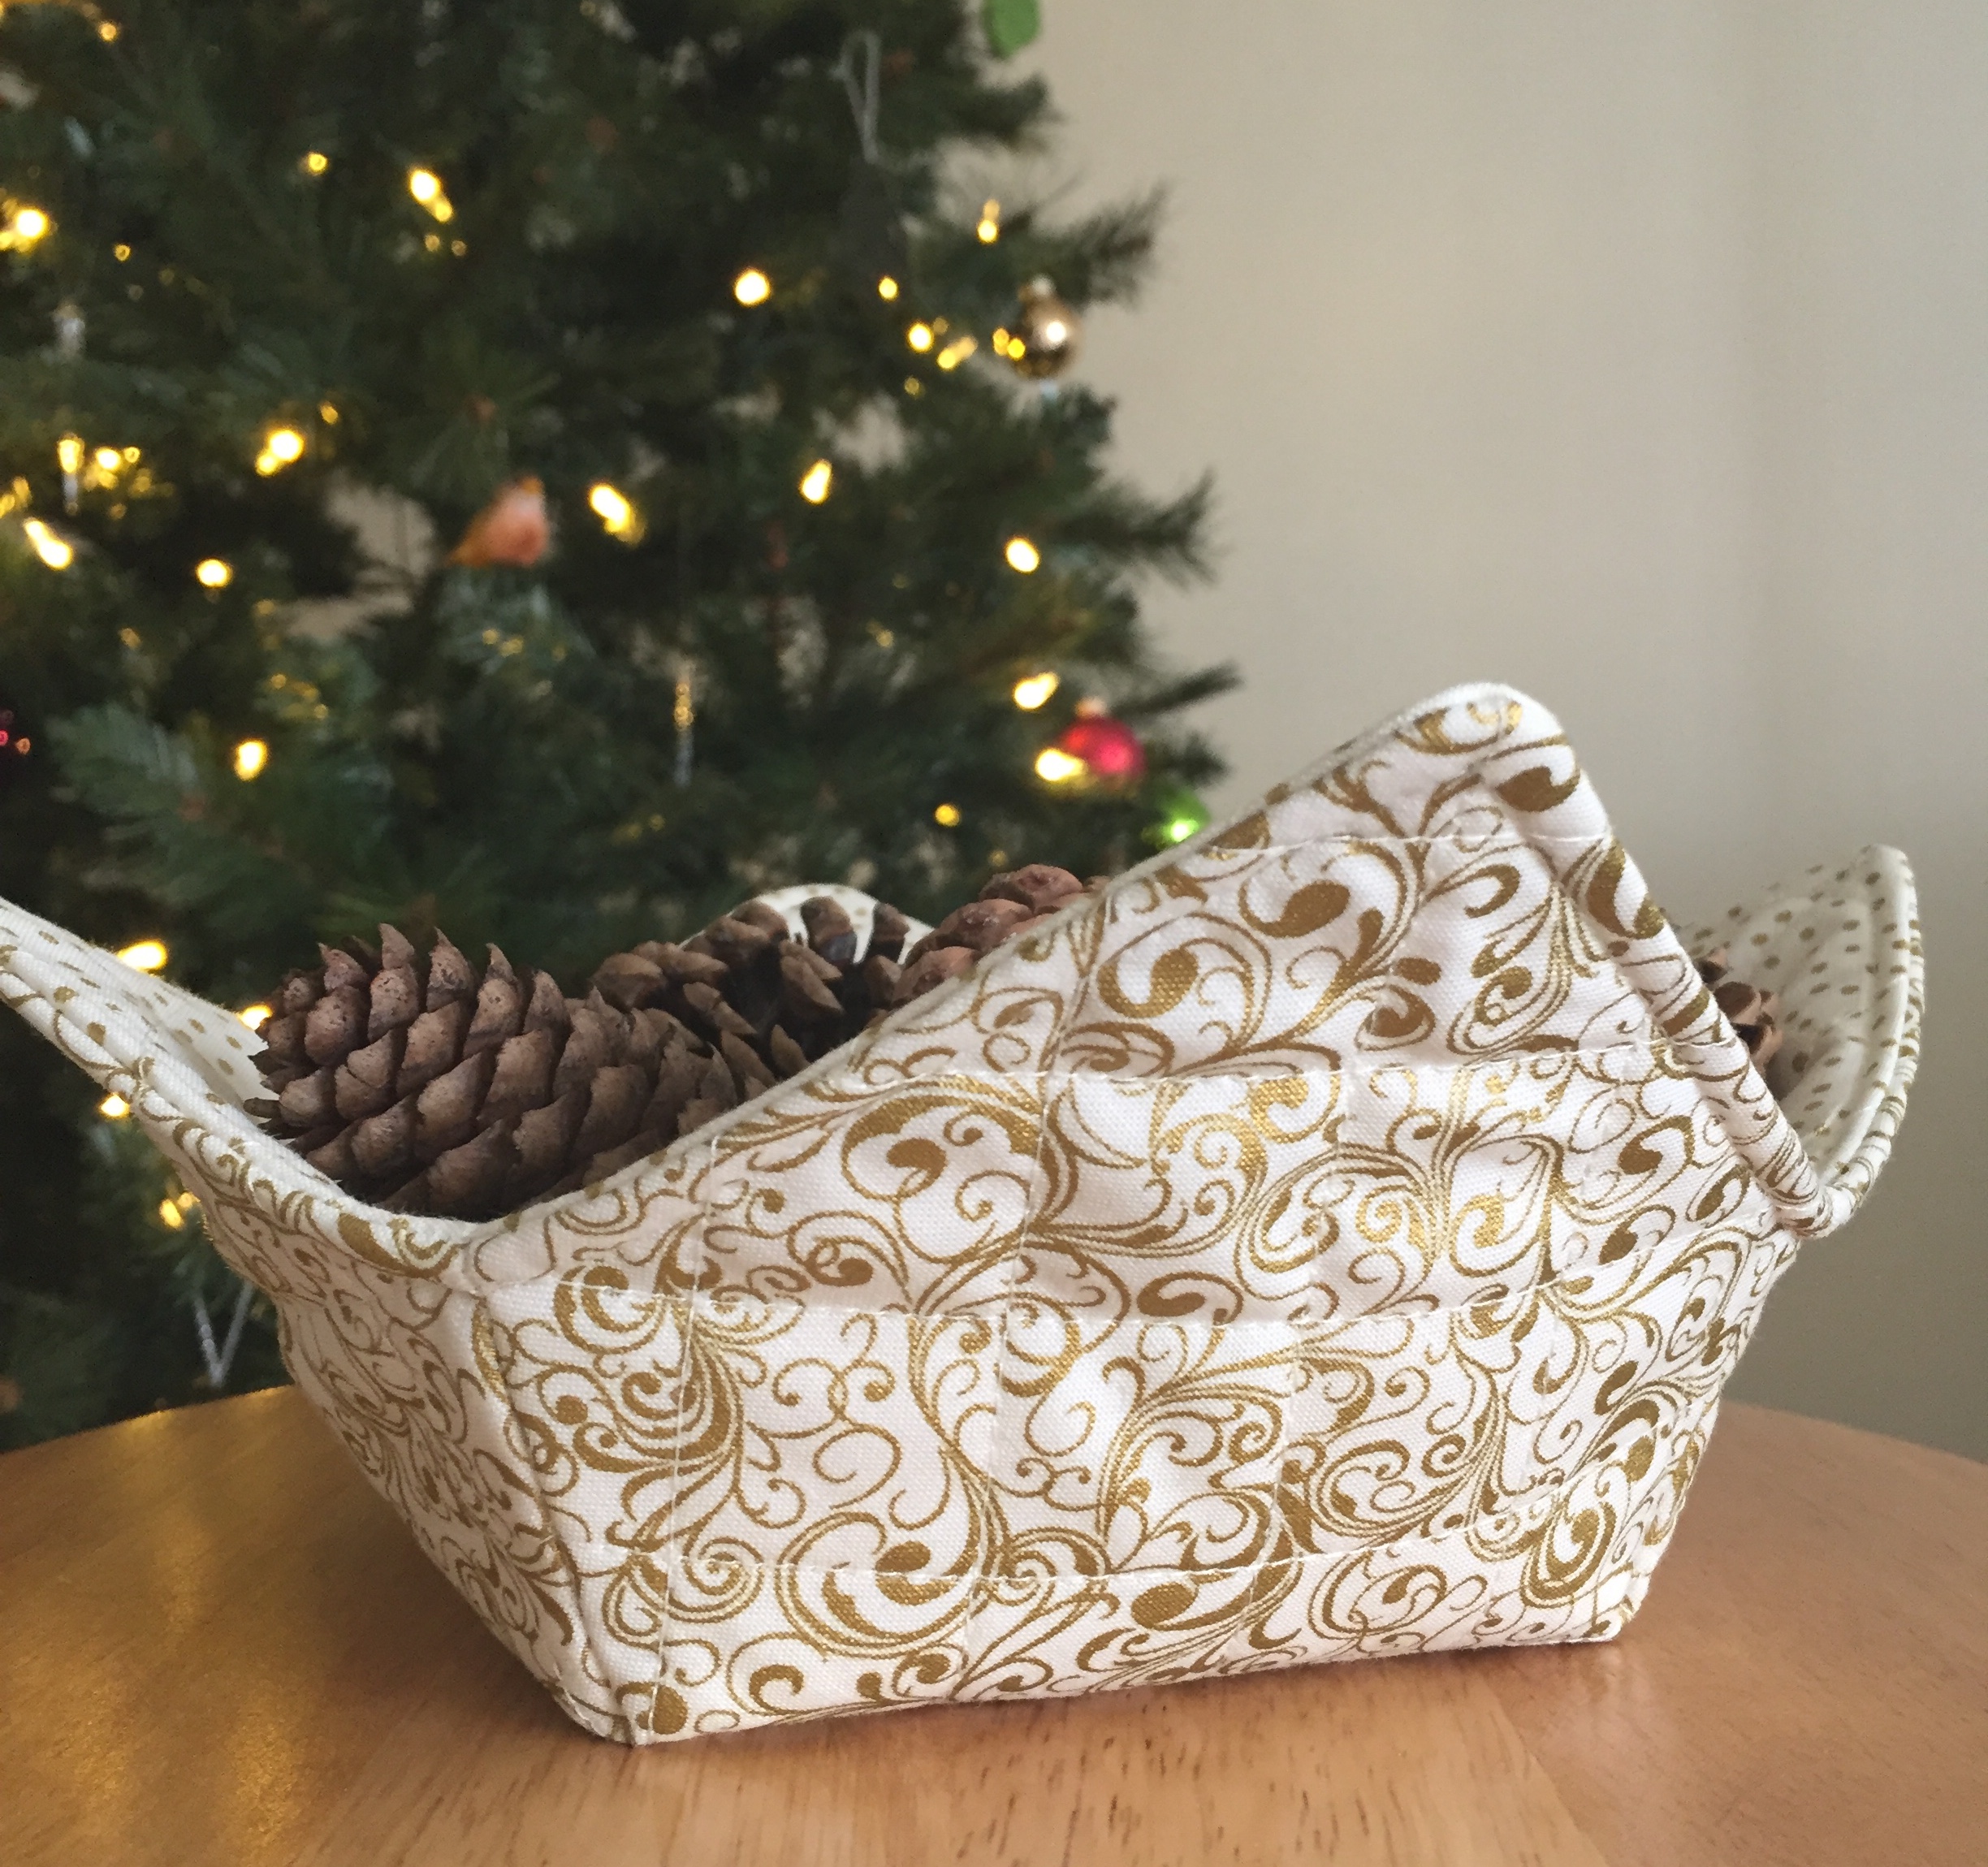
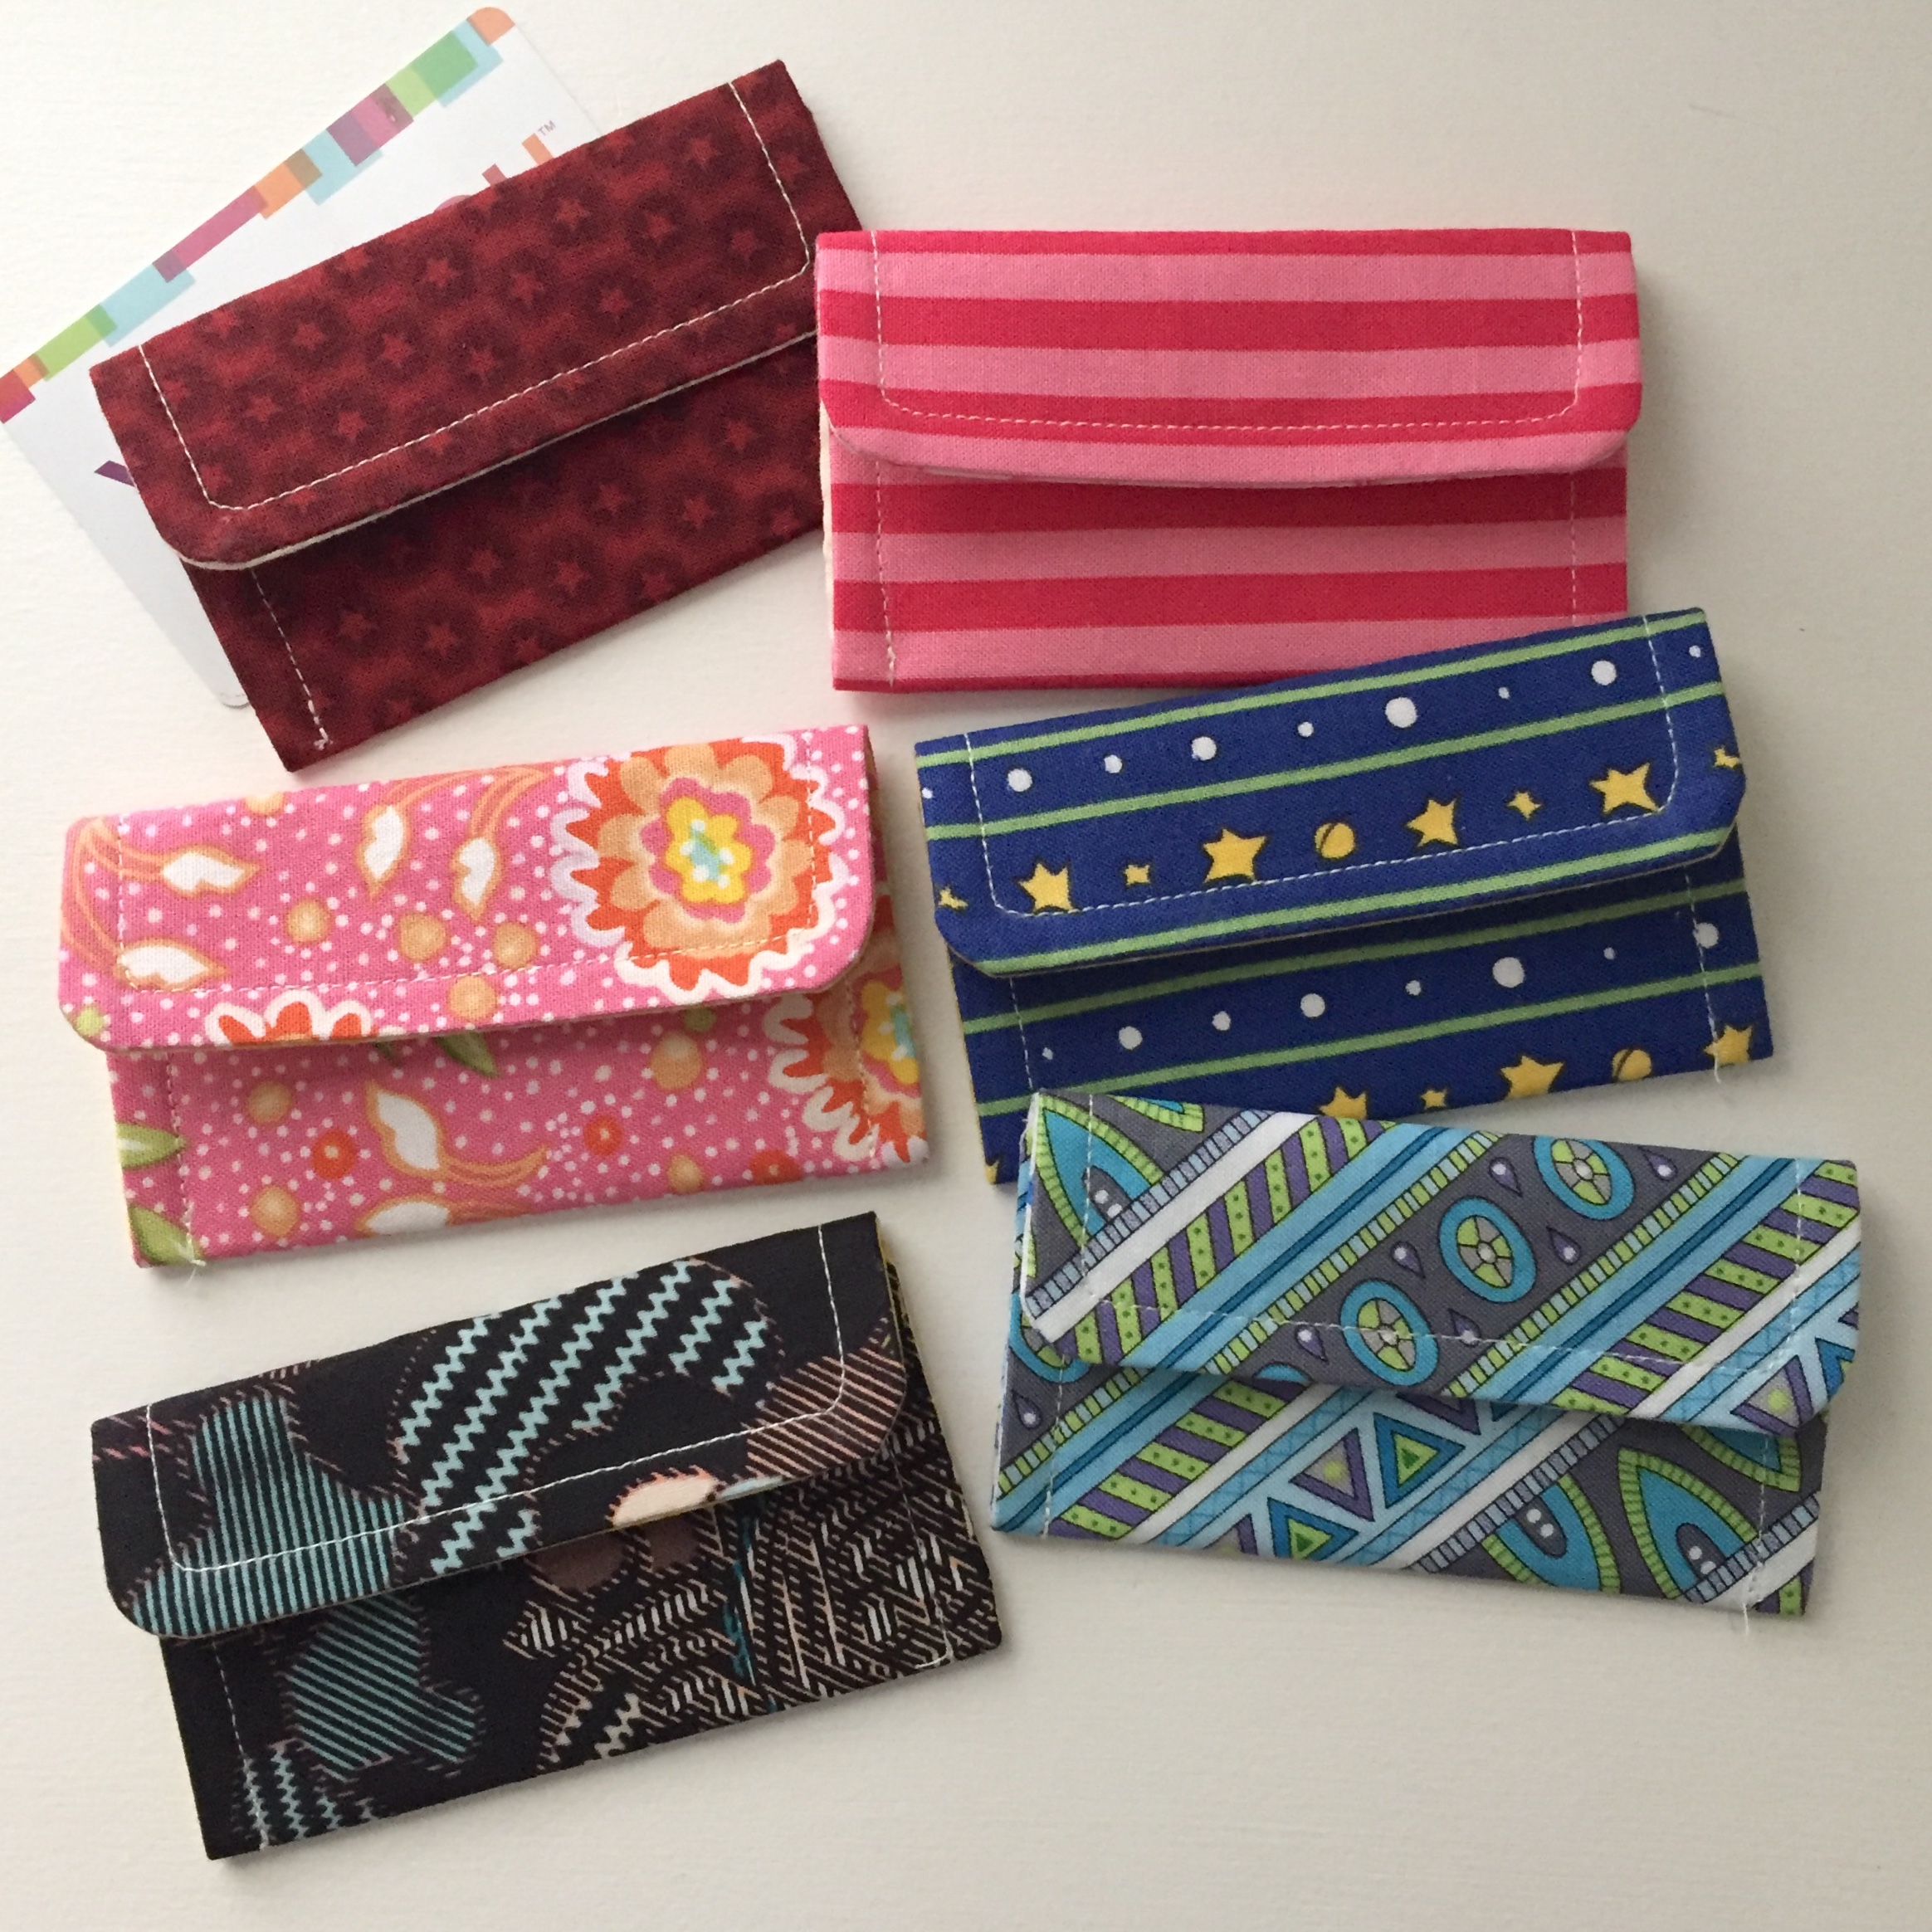
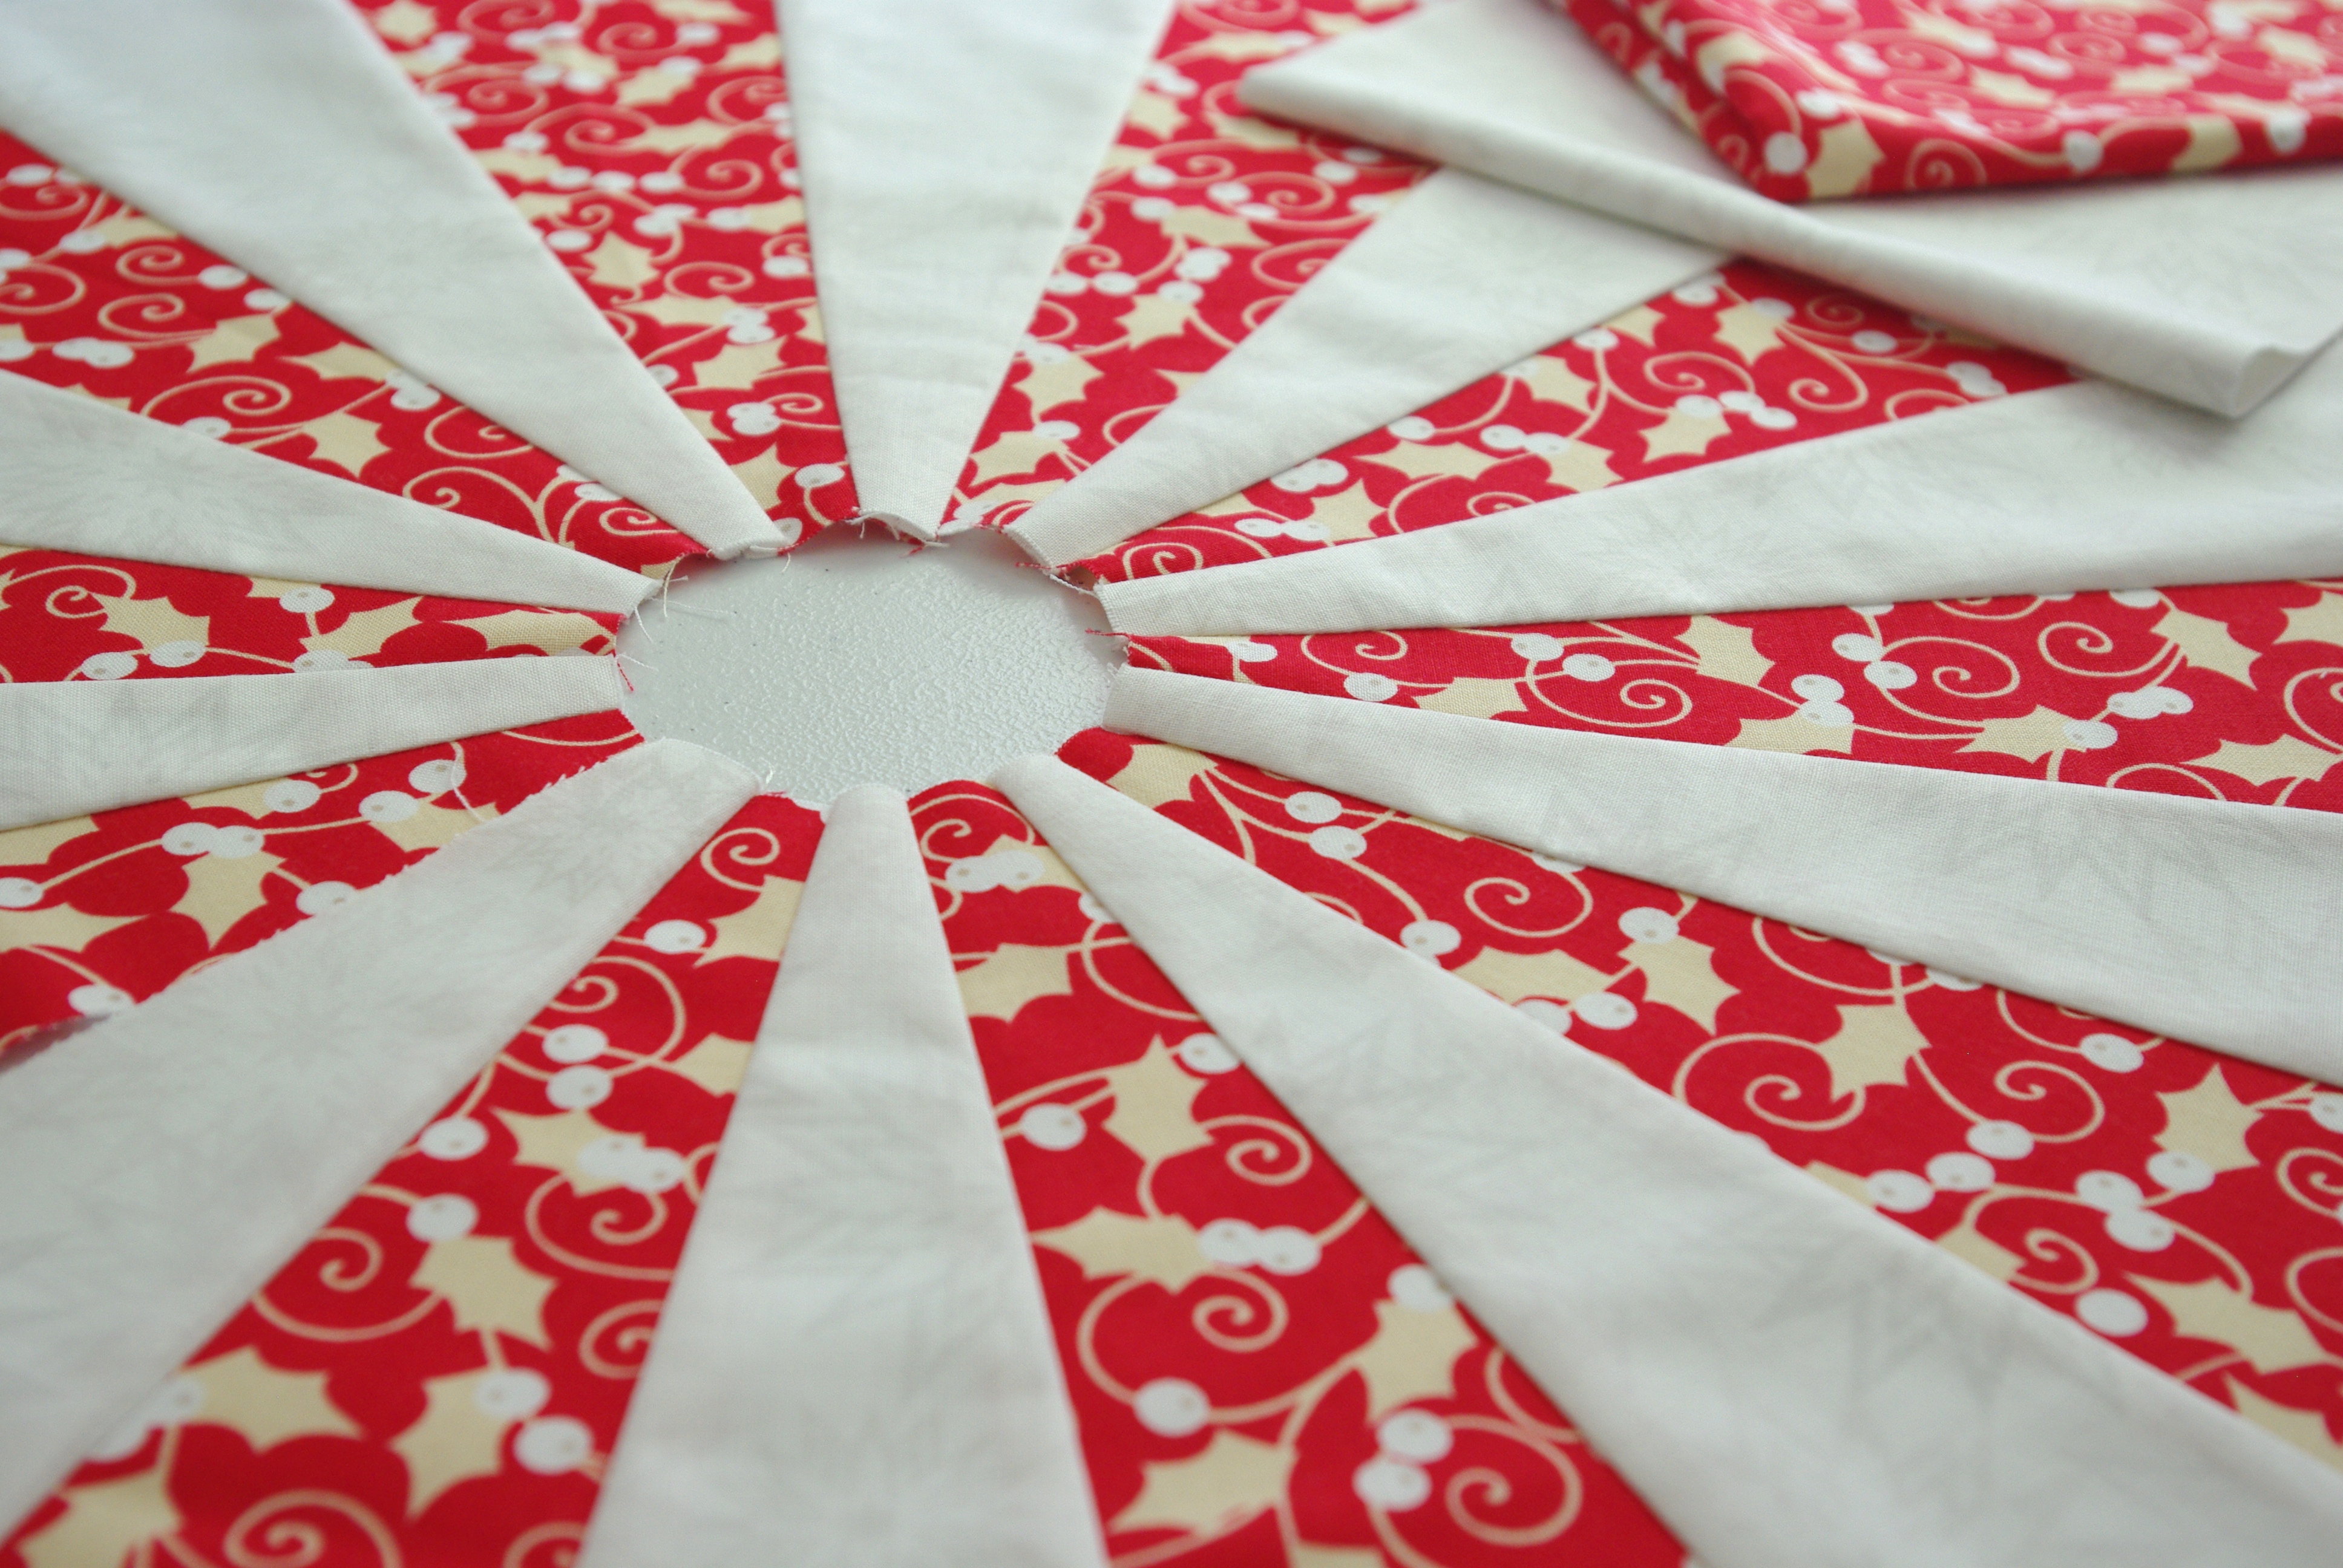
Here’s the last of my projects. I made the microwave bowl cozy for myself as a holiday bowl for pine cones. The little holders are for gift cards; gifted as party favors, and the bottom photo shows my process on a mini Christmas tree skirt.
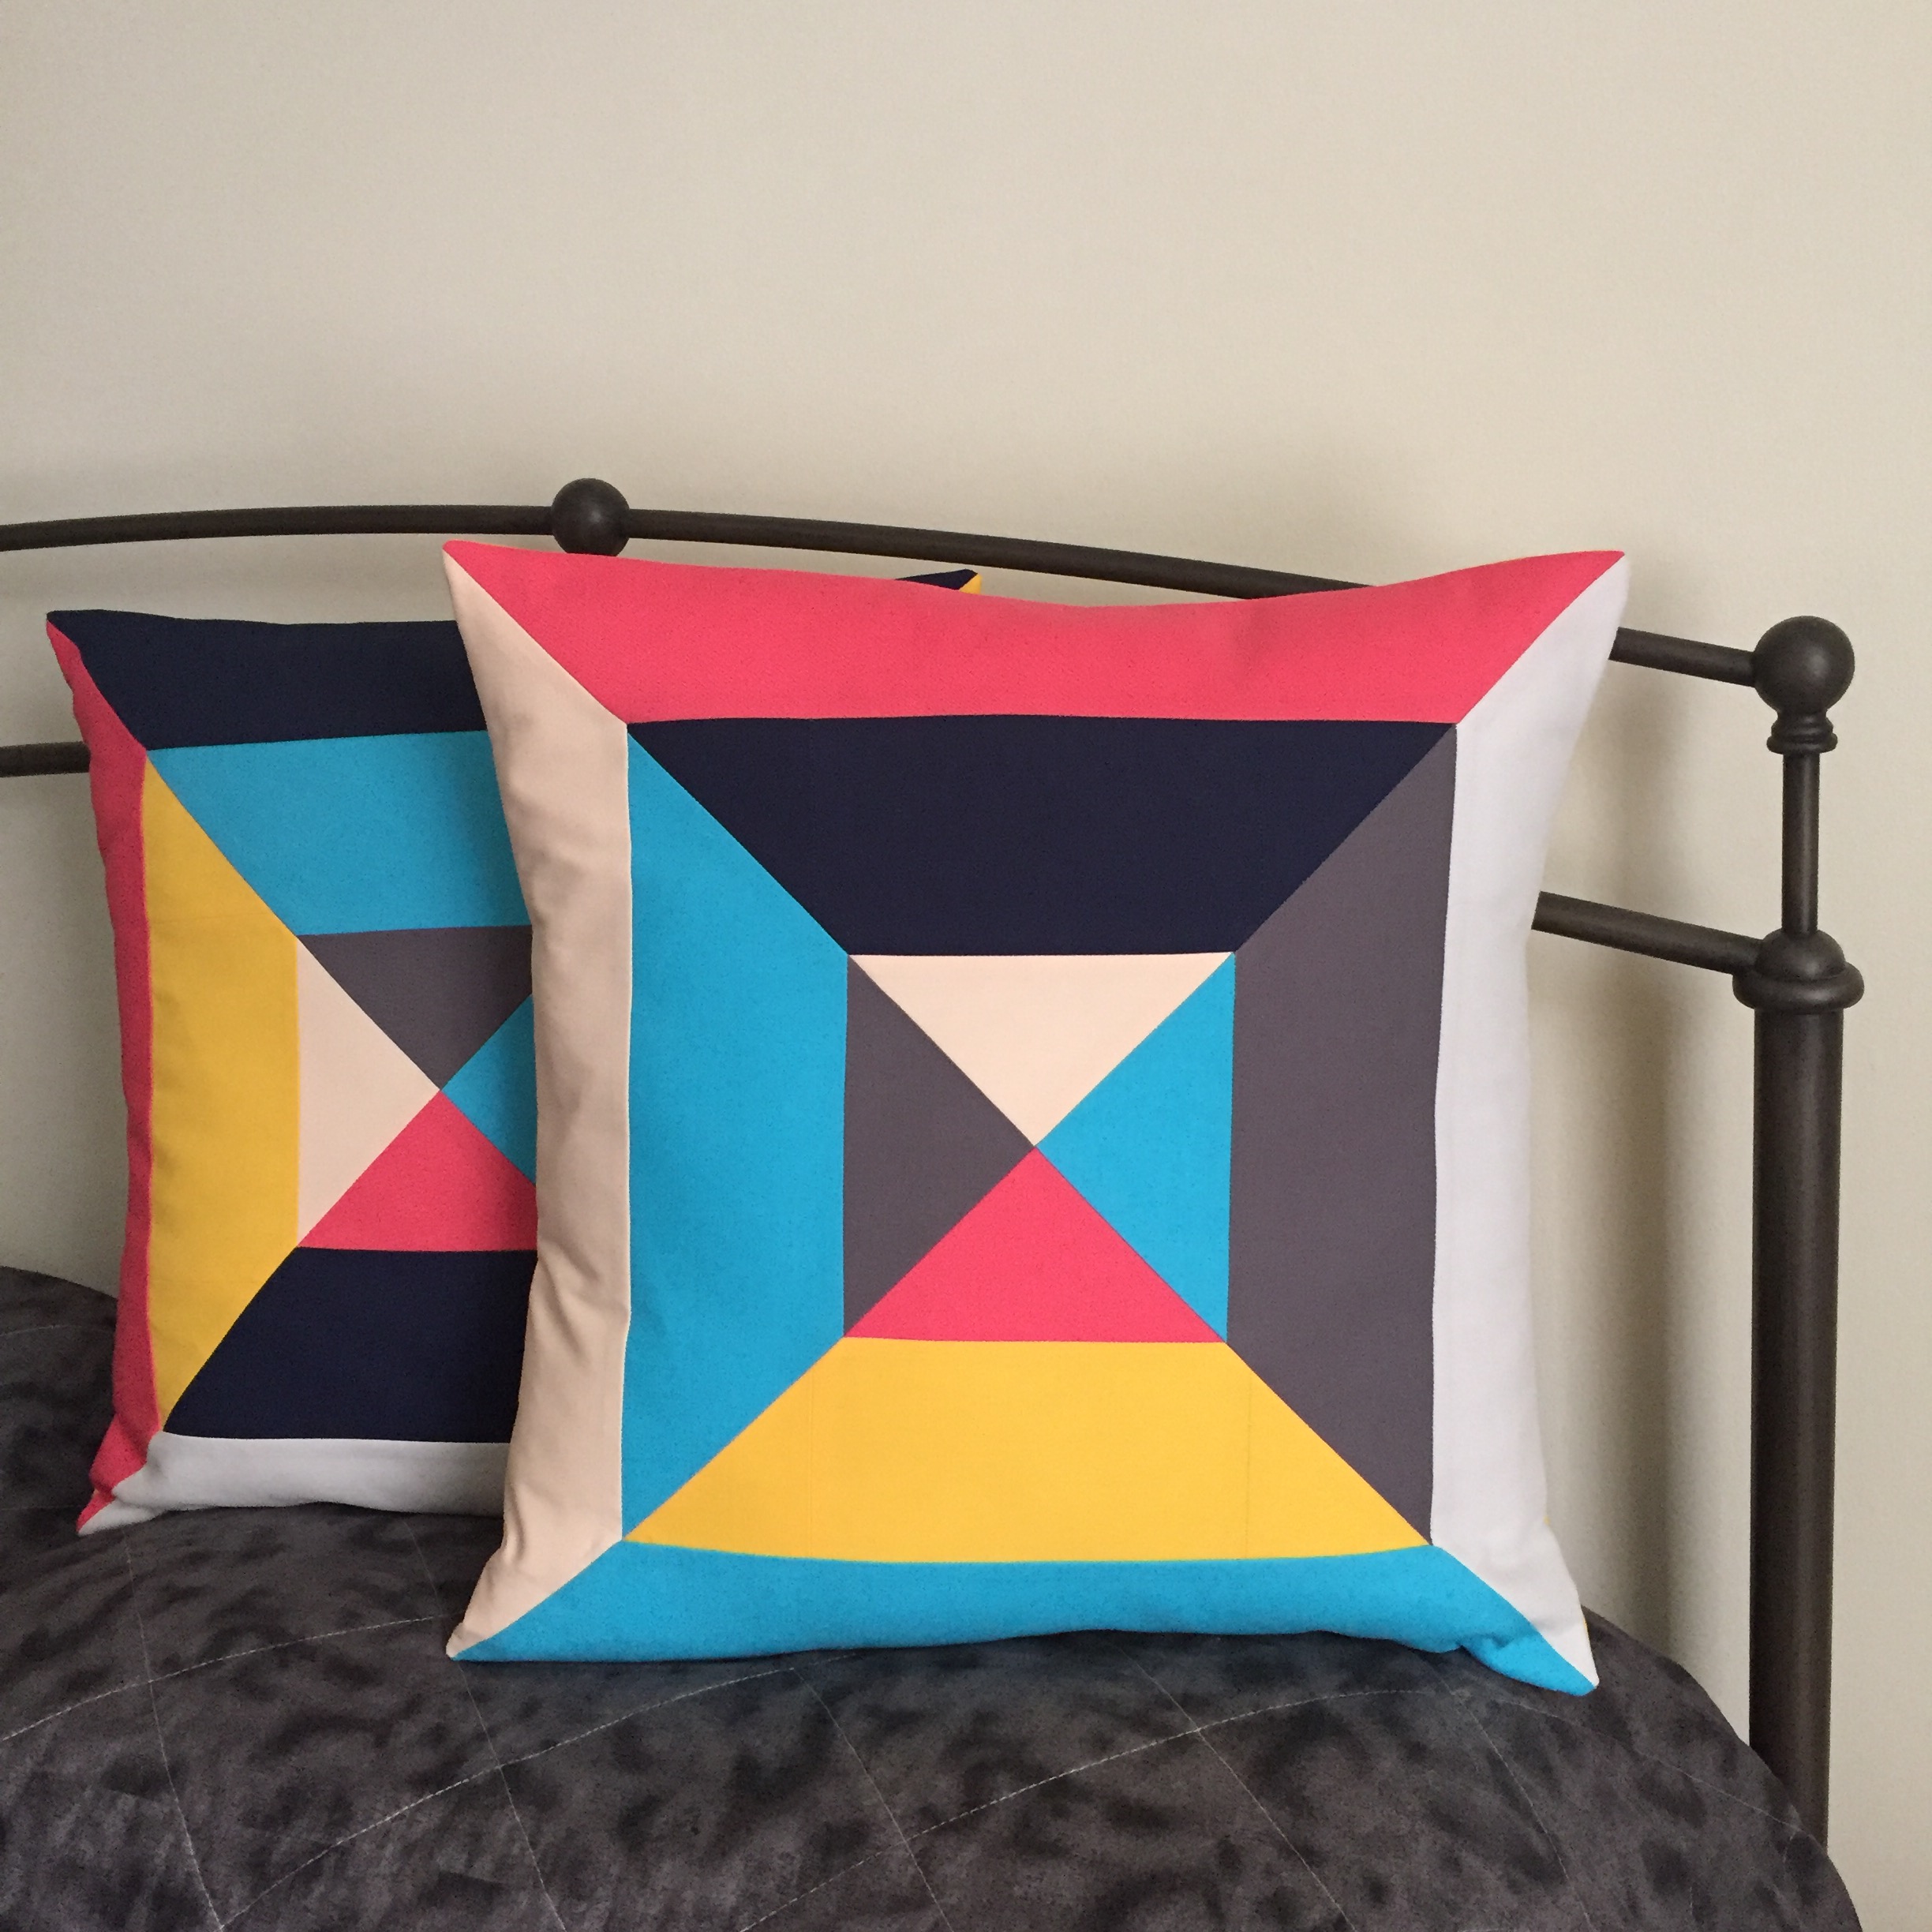
These pillows were also gifts…
And a pillow case for my bird-loving husband.
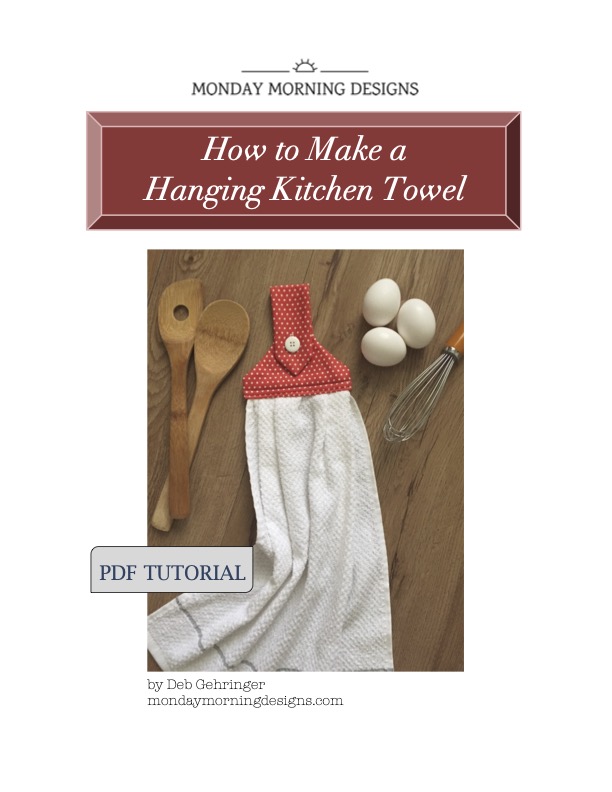
Lastly, towels with cute toppers made for my mom. You can download my free PDF tutorial How to Make a Hanging Kitchen Towel. It’s easy-to-follow, complete with photos, a template and lots of tips!
Well, that sums up last year, and I’m well into making for 2020!
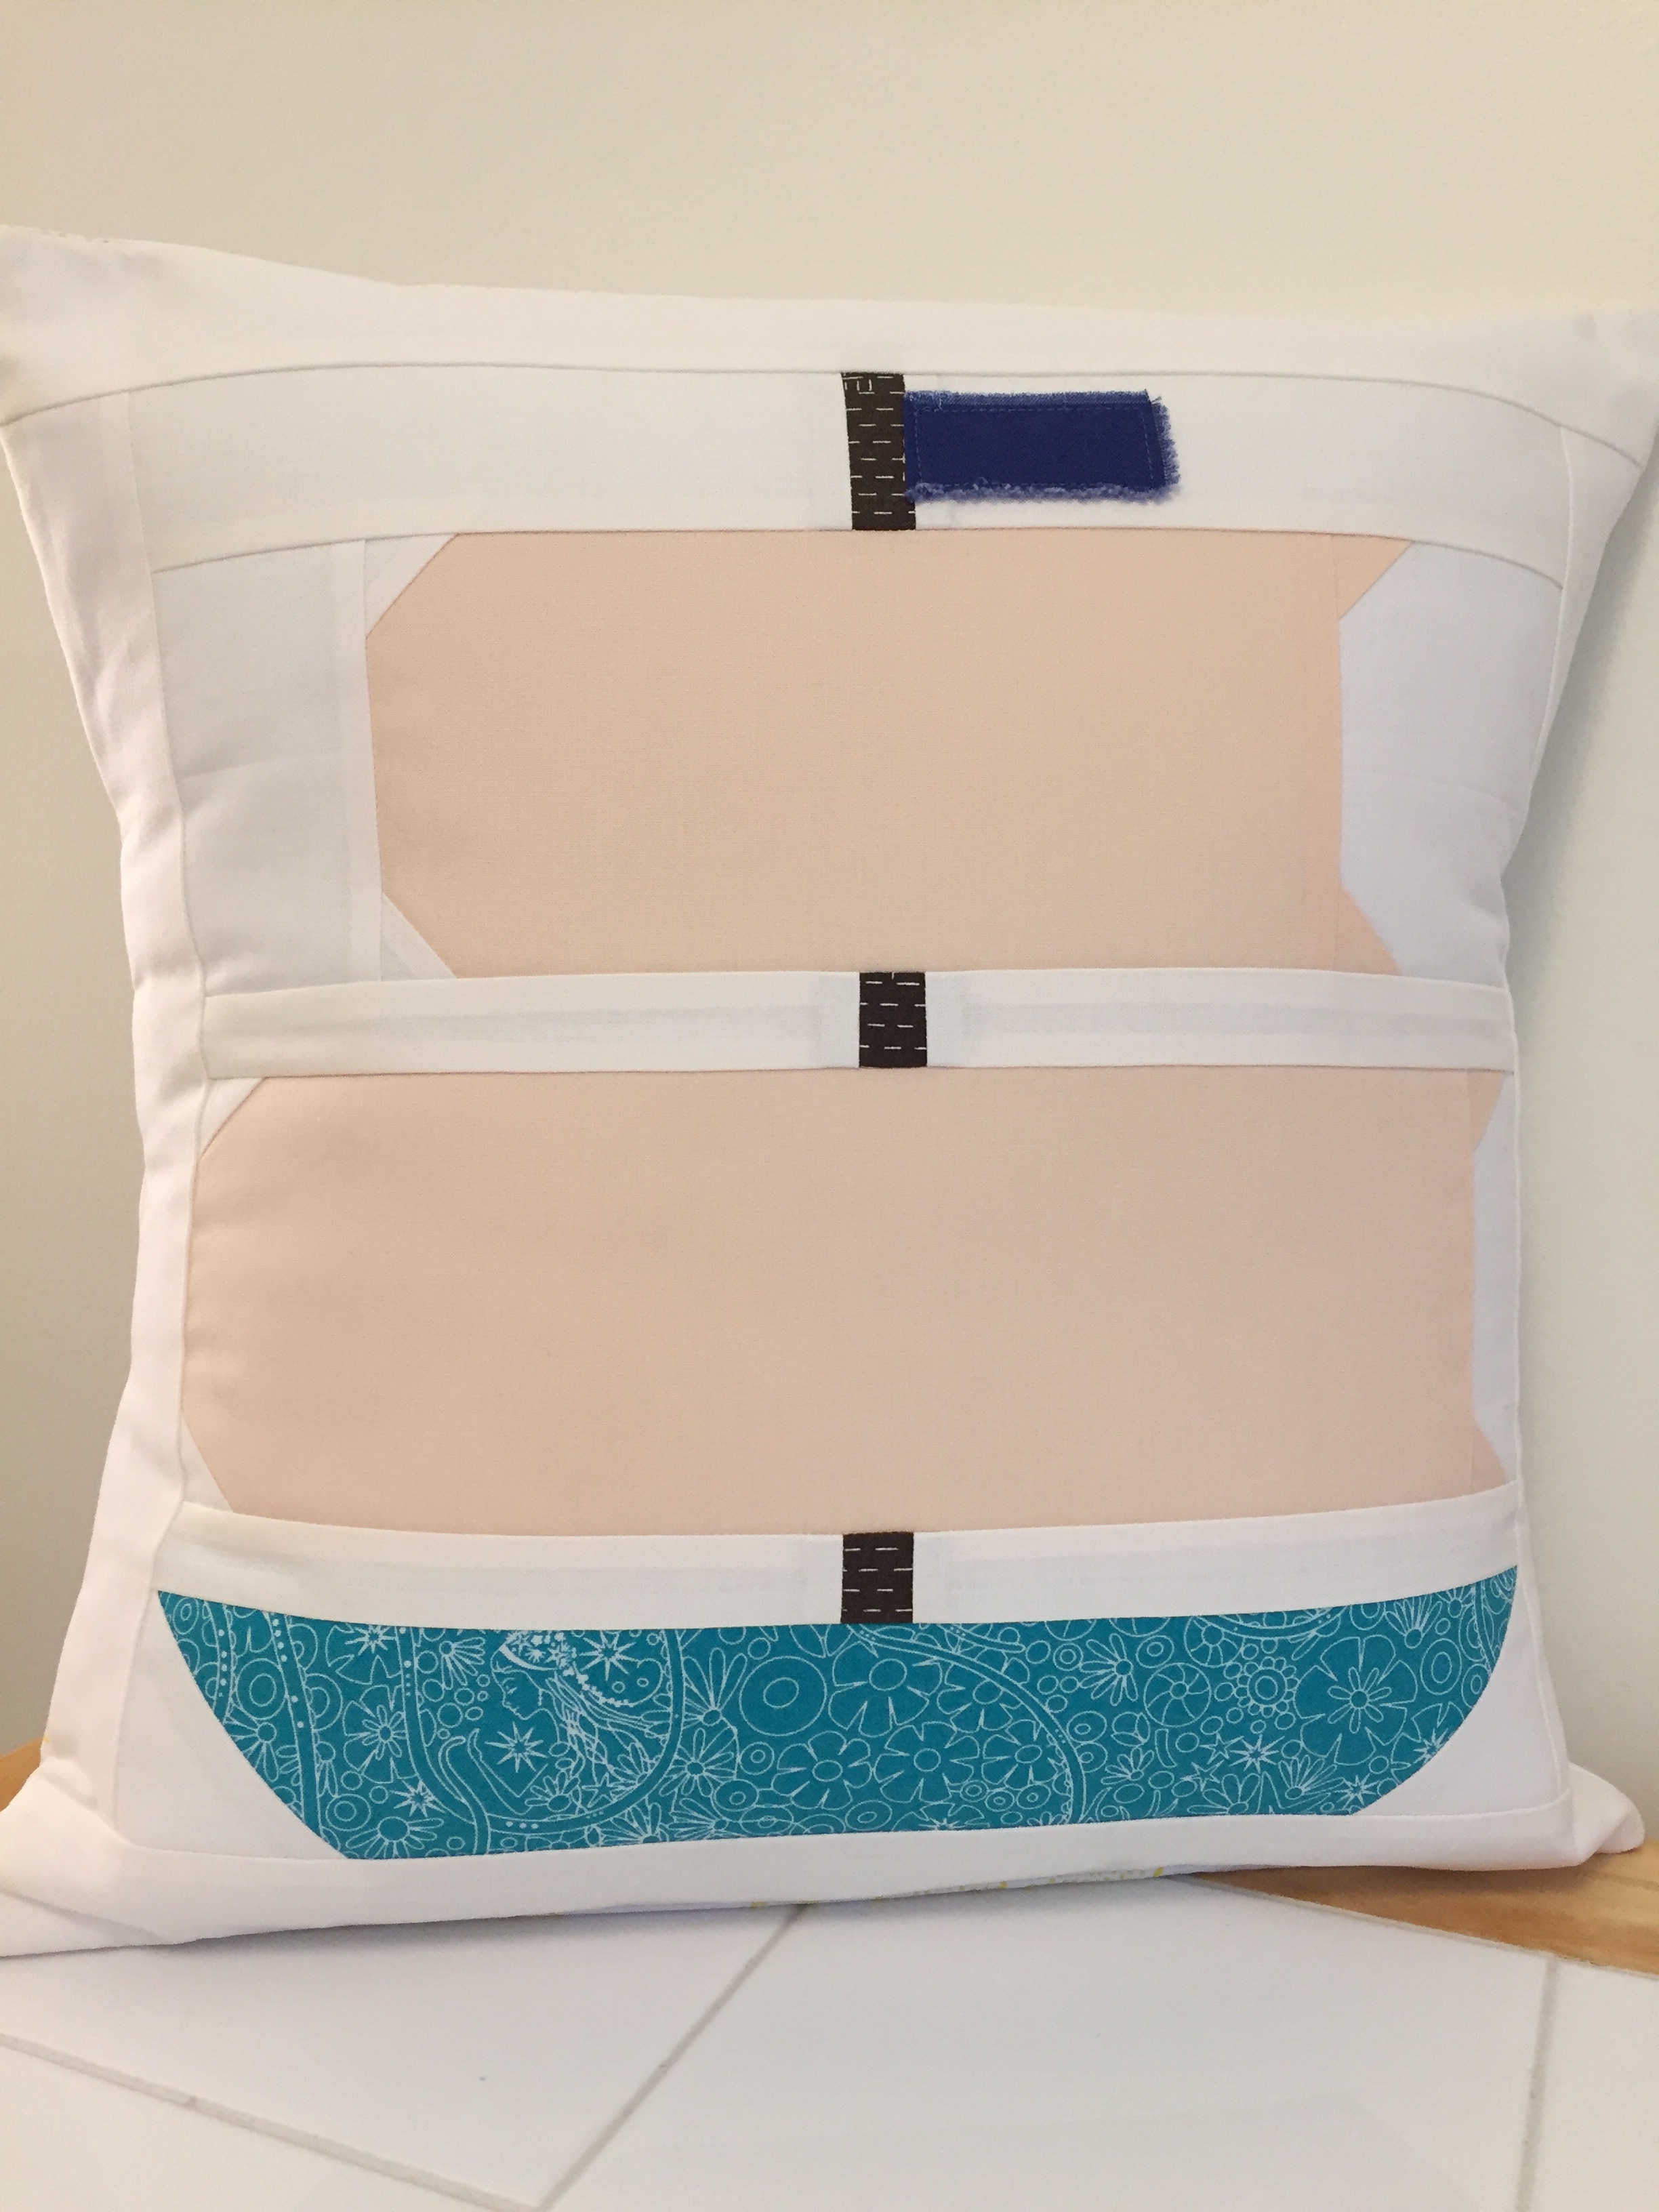
Sometimes when working on a quilt that’s taking a lot of time, I feel I need a break to make something with a fast finish. Over the summer I received a free sailboat pattern from Ellis and Higgs and I thought it would make a nice pillow as a gift for my sister since she lives on the bay and has a nautical theme throughout her house.
I’d been wanting to learn how to make an envelope pillow because I think they look better than a zipper, so what better time to try it out? I found a few tutorials and combined the best of them and came up with one to pass along. It’s really easy and can be made in less than an hour!
For mine, I pieced the front and used interfacing to keep everything in place, but you can make the front easily with a cut of fabric. Here’s how to make a cover for a pillow insert, and also what you’ll need:
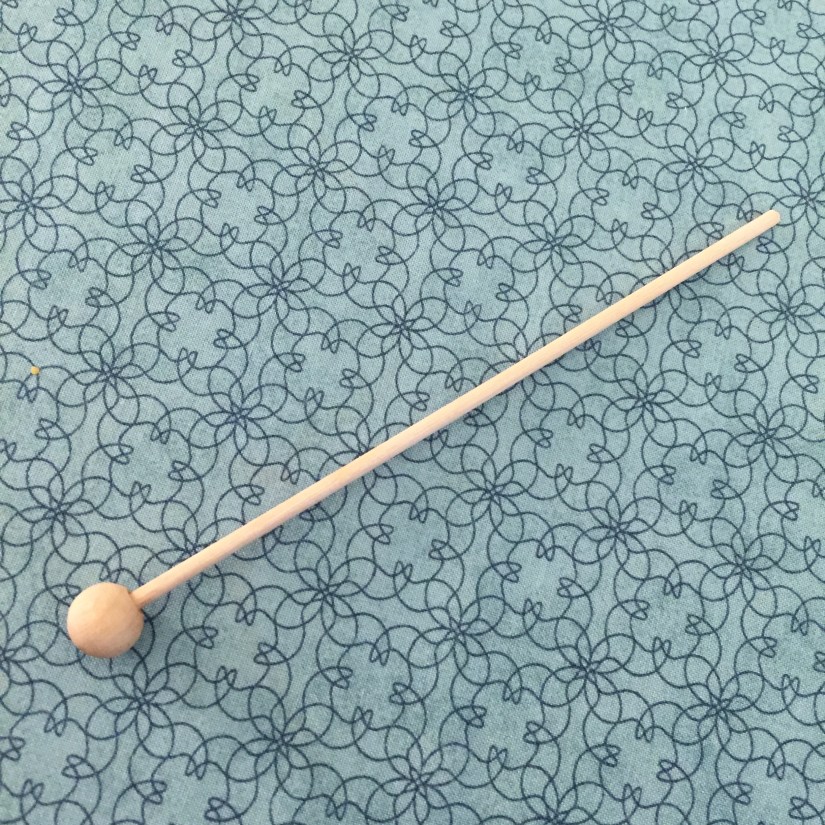
MATERIALS: Either a pieced block with interfacing fused on OR fabric for the front, fabric for the back, pillow insert, hot ruler (optional), bluntly pointed stick, sewing machine, iron, general sewing supplies.
For the pillow FRONT: Make your block to measure the same size as your pillow form. If you choose to make a fabric front, the same measurement applies, cut your fabric to the pillow form size.
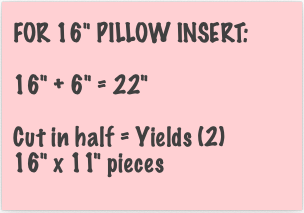
For the pillow BACK: You will need one piece of fabric to be cut into two (or two pieces). The width will be the same as your pillow form, but the length will be the size of the pillow form plus 6″.
Examples:
If you’re using a quilt block and it’s too small, just add borders. For example, I added 2″ borders to my sailboat block to get it to measure 16″ x 16″.
Once the pieces are cut to size, fold under one edge of each back piece 1/4″ and then again 1/4″ to form a small hem for the flaps. A hot ruler works great here.
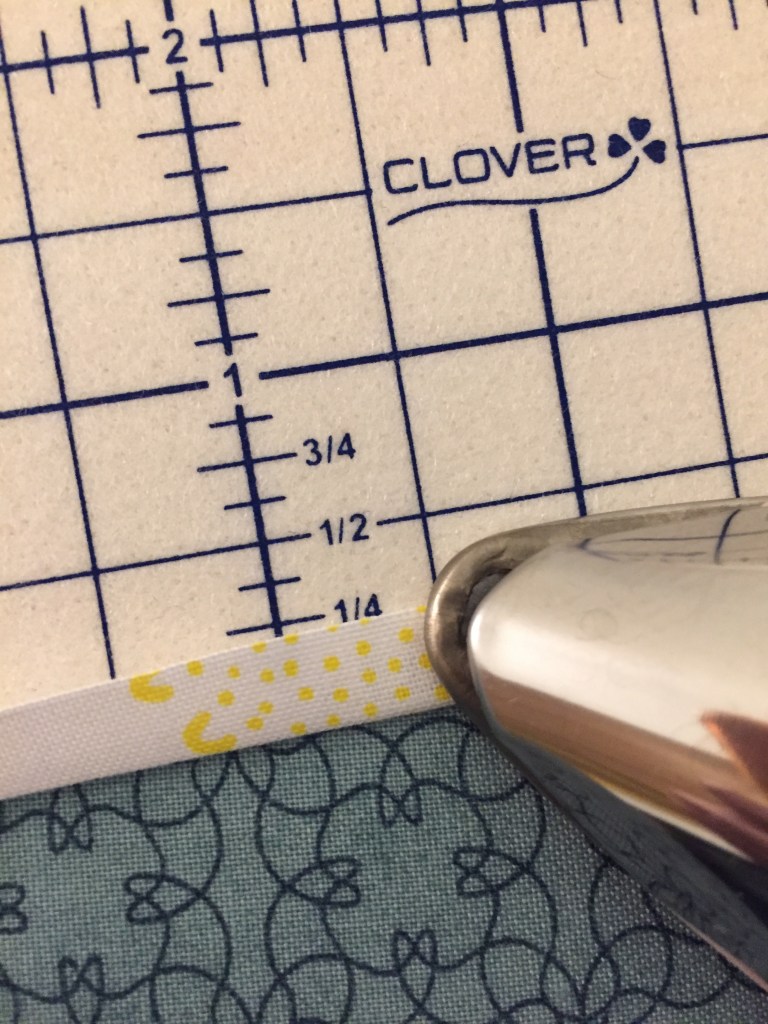
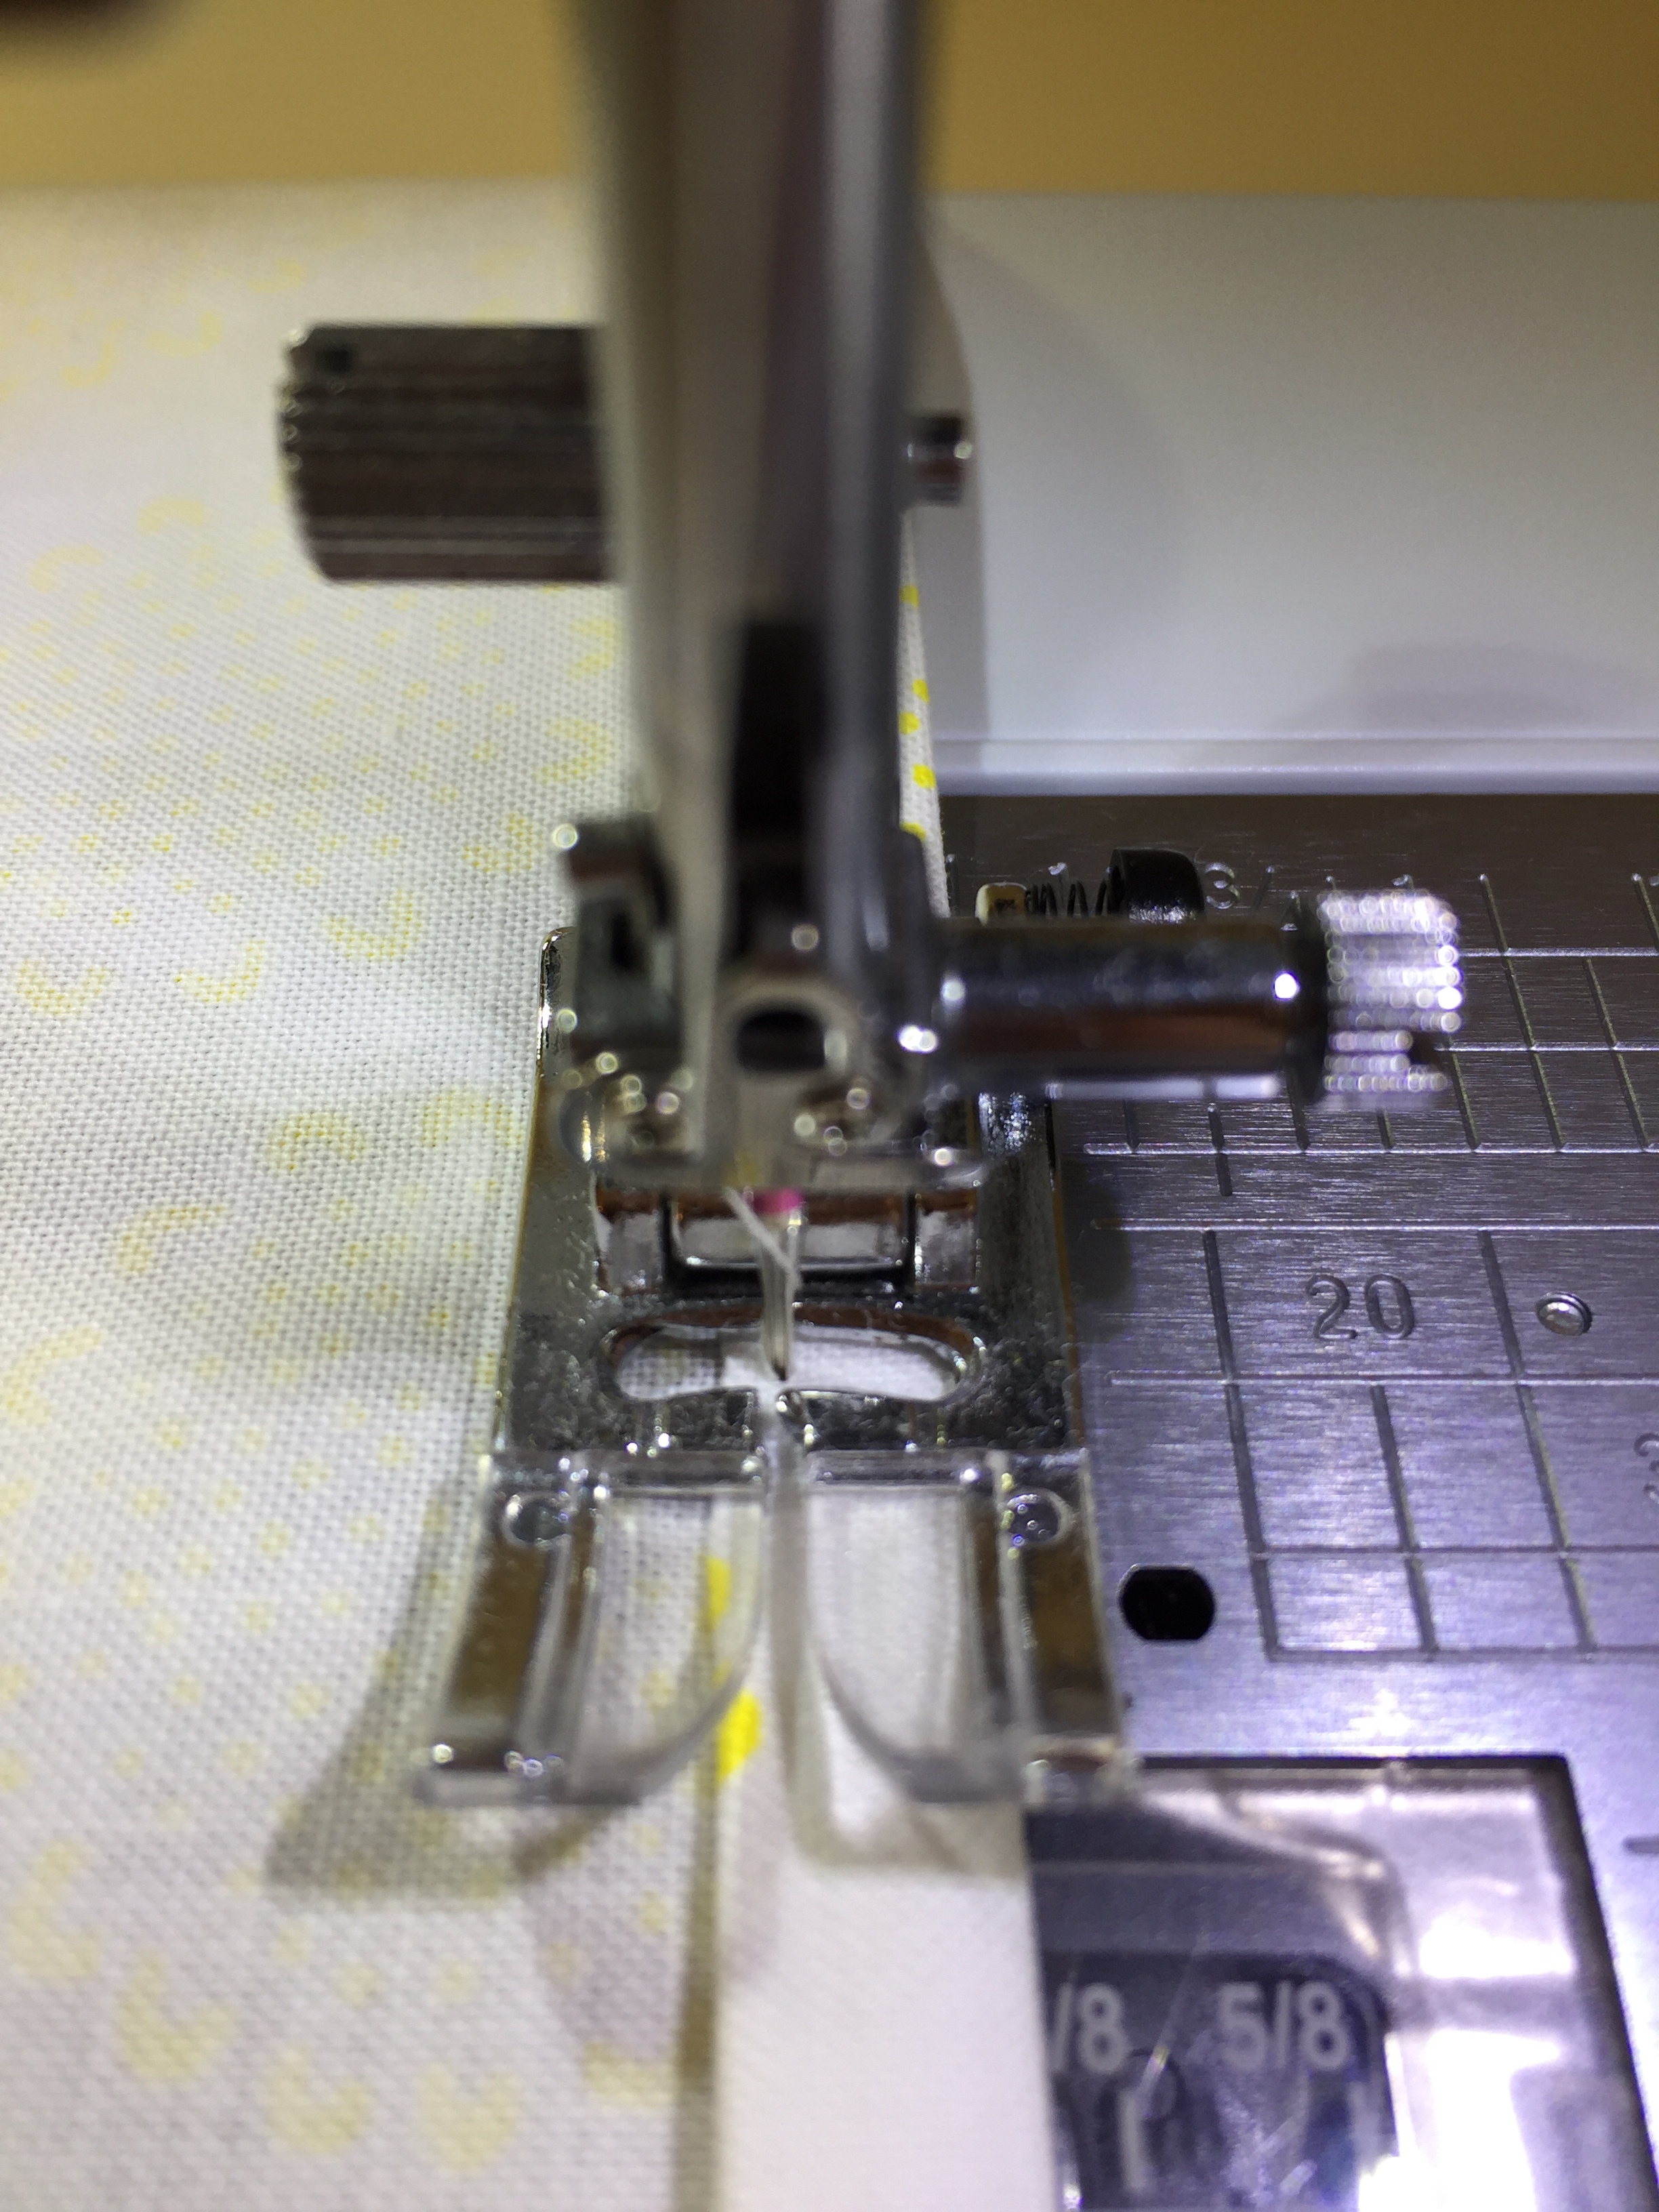
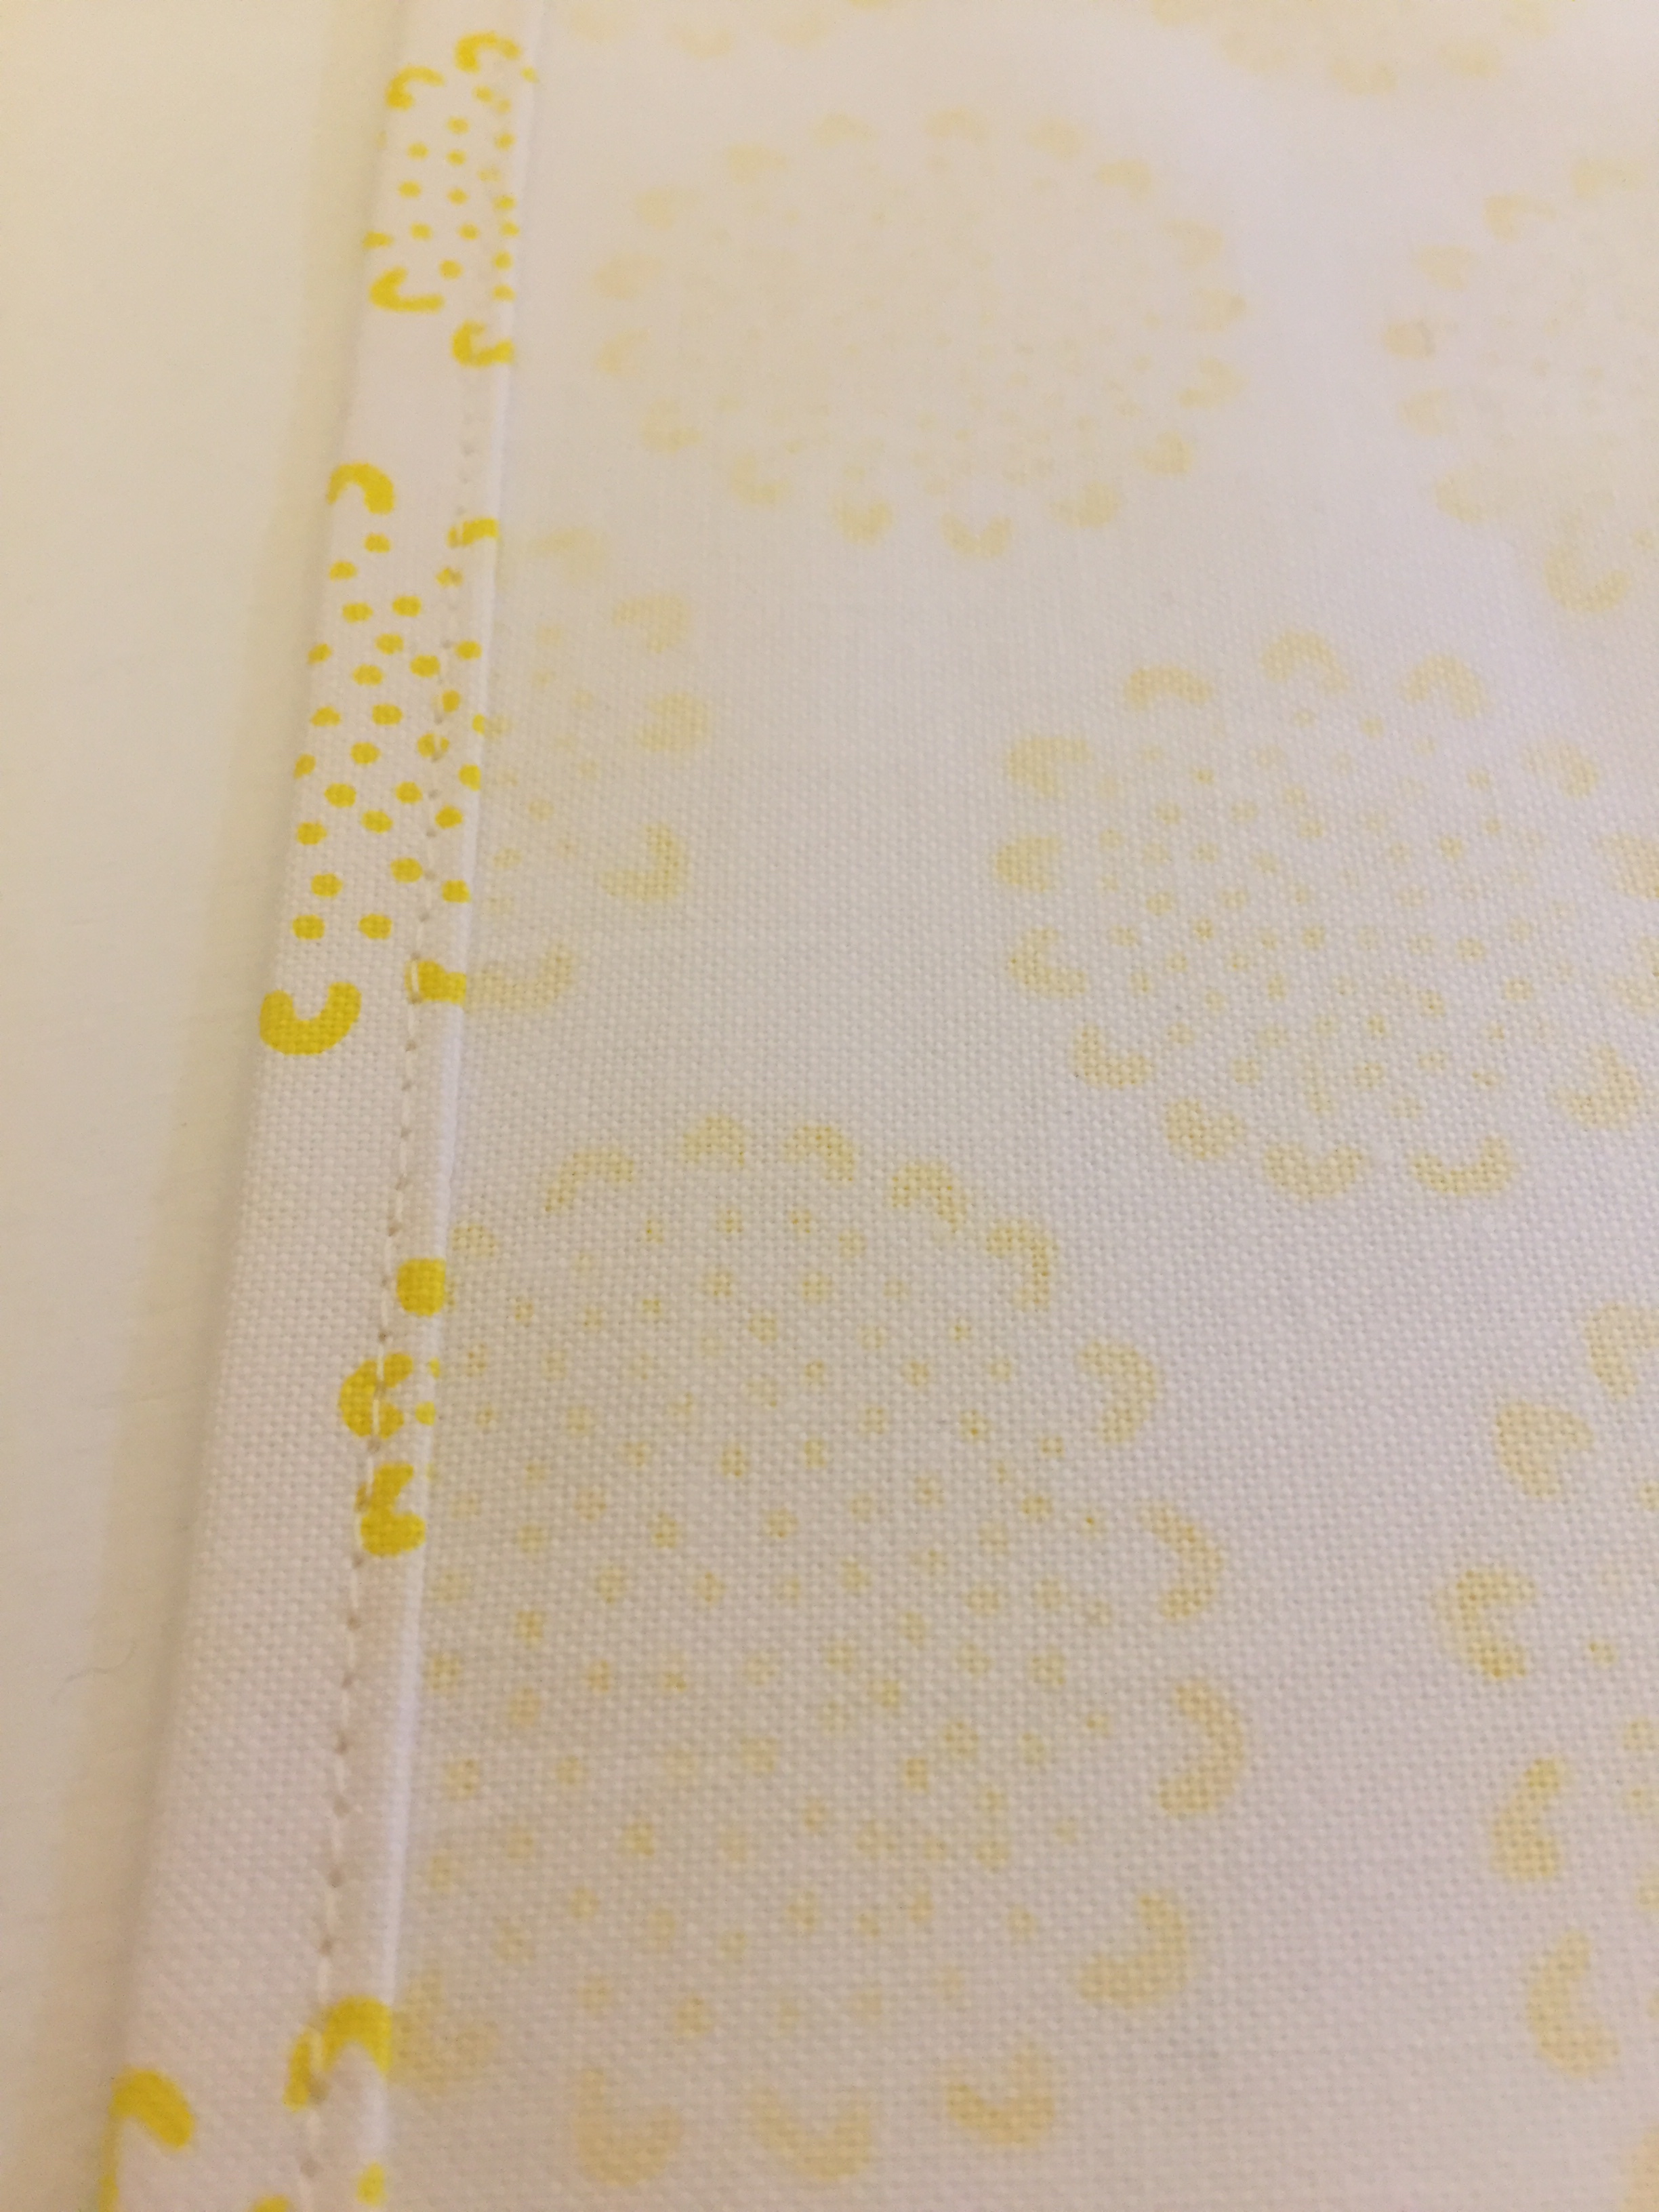
Sew the hem for the flaps, stitching close to the edge. Press the seam.
Next; sewing everything together. Pin the front and back pieces right sides together with the two back pieces overlapping in the middle. It will look upside down and backwards, but it ends up as it should once you turn it right side out.
Sew around all four sides of the pillow cover using a 1/2″ seam allowance. If you want to keep the raw edges from fraying, add a zigzag stitch around all the edges.
Once sewn, trim away the corners and turn the cover right side out, making sure to push out the corners. Using a bluntly pointed object helps get the corners sharp.
Lastly, give it one final press and insert the pillow form. And you’re done!
Not only are these pillows easy and fun, they’re an inexpensive way to add a splash of color and style to your living space.
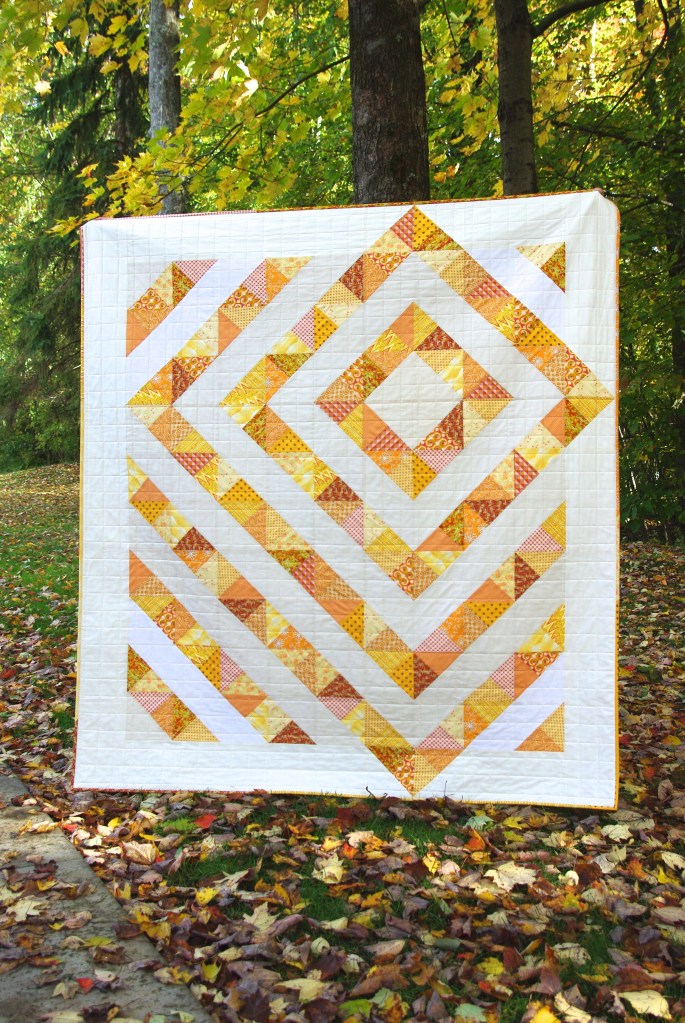
Lately I’ve been going through my fabric trying to find a good use for leftovers. So far I’ve made my colorful, controlled scrappy Five Squared Quilt and my Four Patch Charm quilt, made with a ray of lovely golden yellows.
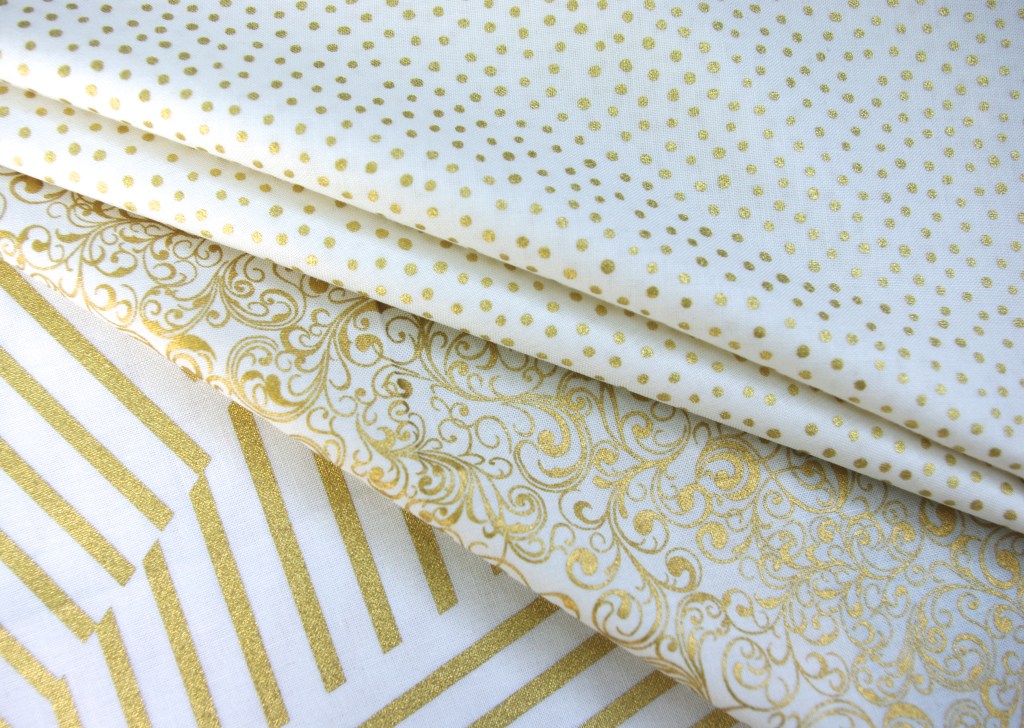
Even with those two completed, I still have fabric left from other projects. Three years ago I made my son a tree skirt for Christmas using a mix of beautiful metallic fabrics by Marcus Brothers, RJR and Andover Fabrics. And…
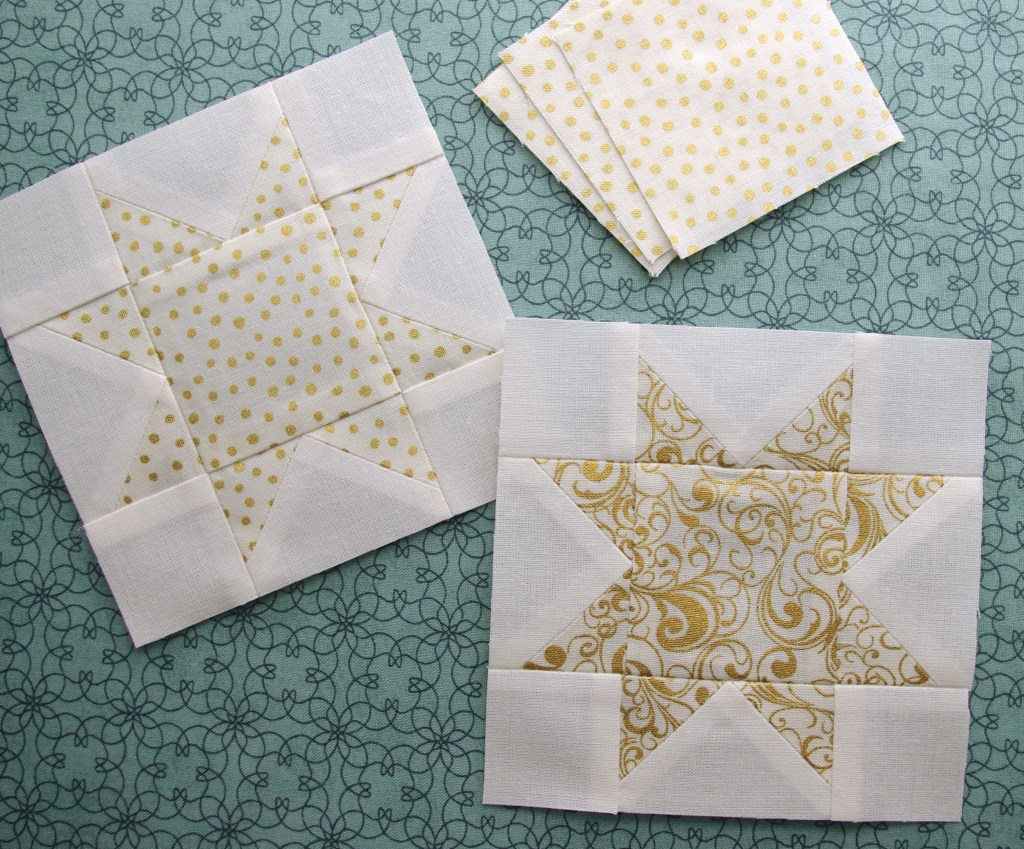
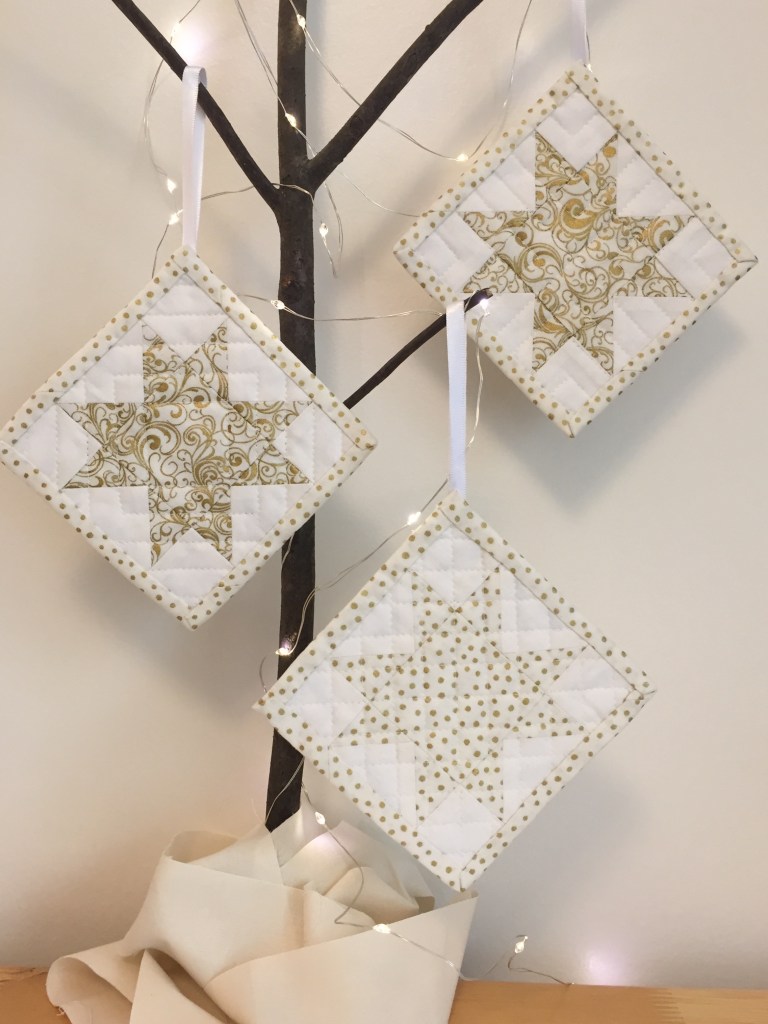
while scrolling through Pinterest I found a great idea for using smaller scraps, little quilted star ornaments. Right away I knew these metallics would be a perfect choice for this project.
Since I only saw a photo and the dimensions weren’t given, I experimented until I had made one small enough without using exceptionally tiny pieces. I also decided to make a tutorial because other quilters may be looking for a fun way to use up little scraps, and just in time for the holidays. So here it is…
Materials needed to make one 4 ½” x 4 ½” star ornament:
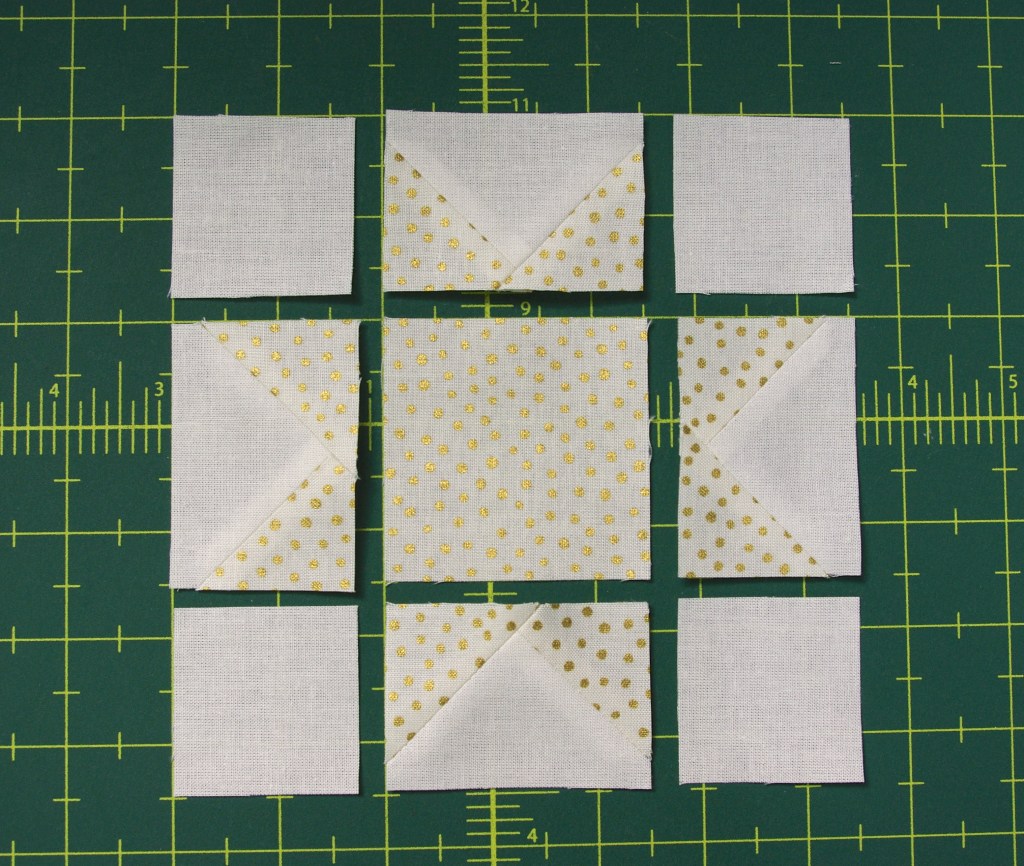
For Star: Gold fabric – (1) 2 ½” x 14 ½” strip Subcut (1) 2 ½” x 2 ½” square and (8) 1 ½” x 1 ½” squares
For Star: White fabric – (1) 2 ½” x 14″ strip Subcut (4) 1 ¾” x 2 ½” rectangles and (4) 1 ¾” x 1 ¾” squares
For Backing: Gold fabric – (1) 5 ½” x 5 ½” square
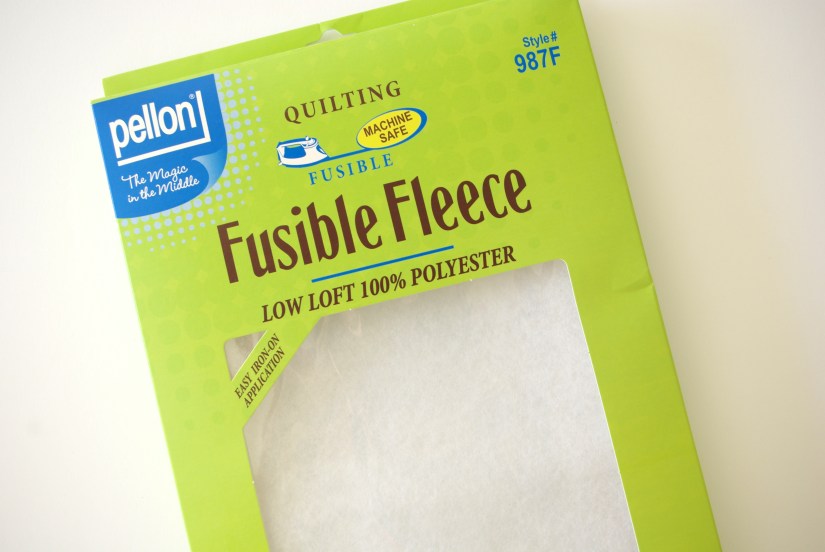
For Interfacing: Pellon Fusible Fleece – (1) 4 ½” x 4 ½” square
For ¾” Bias tape binding: Gold fabric – (1) 1 ¼” x 20″ strip (approximate)
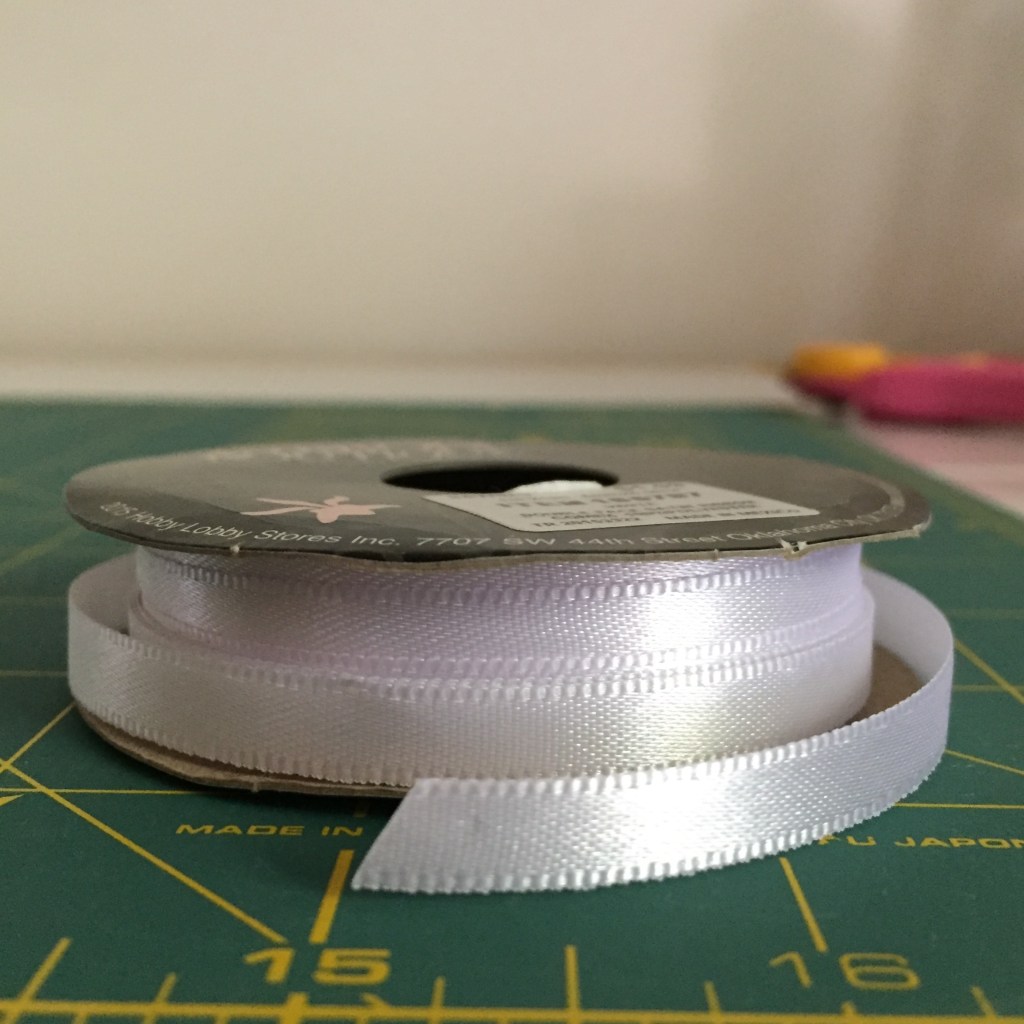
For Hanger: White ribbon – (1) 7″ piece (or material of your choice)
Once the fabric is cut, draw a diagonal line on the back of all the gold 1 ½” squares. As though making a flying geese unit, sew two 1 ½” x 1 ½” gold squares to the top corners of a 1 ¾” x 2 ½” white rectangle, attaching them to the 2 ½” side. Make 4.
Next, lay out squares and sewn units with the 2 ½” sides facing toward the center, as shown below. Sew together to make rows. Press the top and bottom row seams toward the outer squares. Press the middle row seam toward the center square.
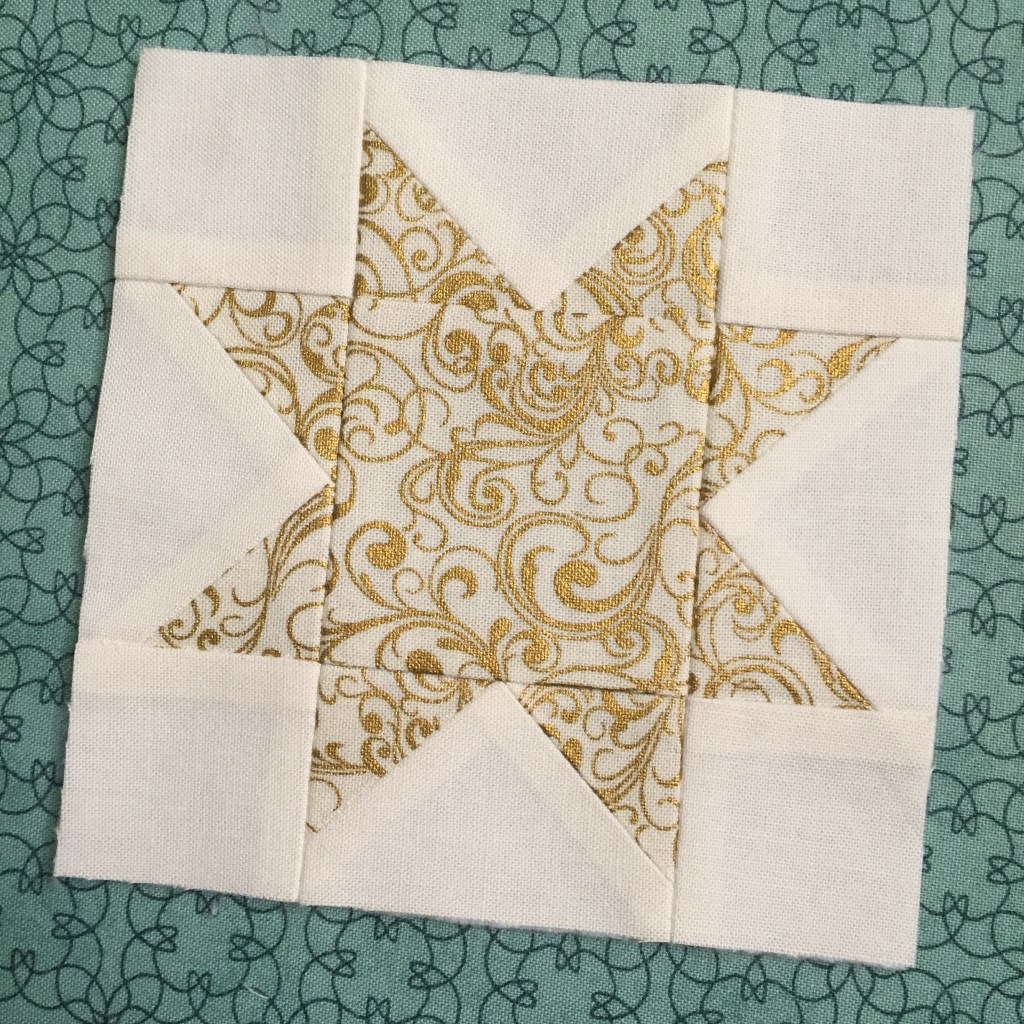
Sew the rows together to complete the star; seams will nest. Press seams open. Trim block to 4 ½” x 4 ½” square making sure to leave a ¼” all the way around.
Trim any threads off the back to prevent them from showing through to the front. This is always a good rule to follow. 🙂 Next, adhering the interfacing. I used 987F Pellon fusible fleece because of the low loft, yet there’s enough to give some depth when quilted.
I always put a scrap piece of fabric over my projects to prevent any adhesive from getting on my iron.
Once the fusible fleece is adhered, sandwich the star unit to the backing. The backing square will be a bit bigger to allow for shifting when quilting.
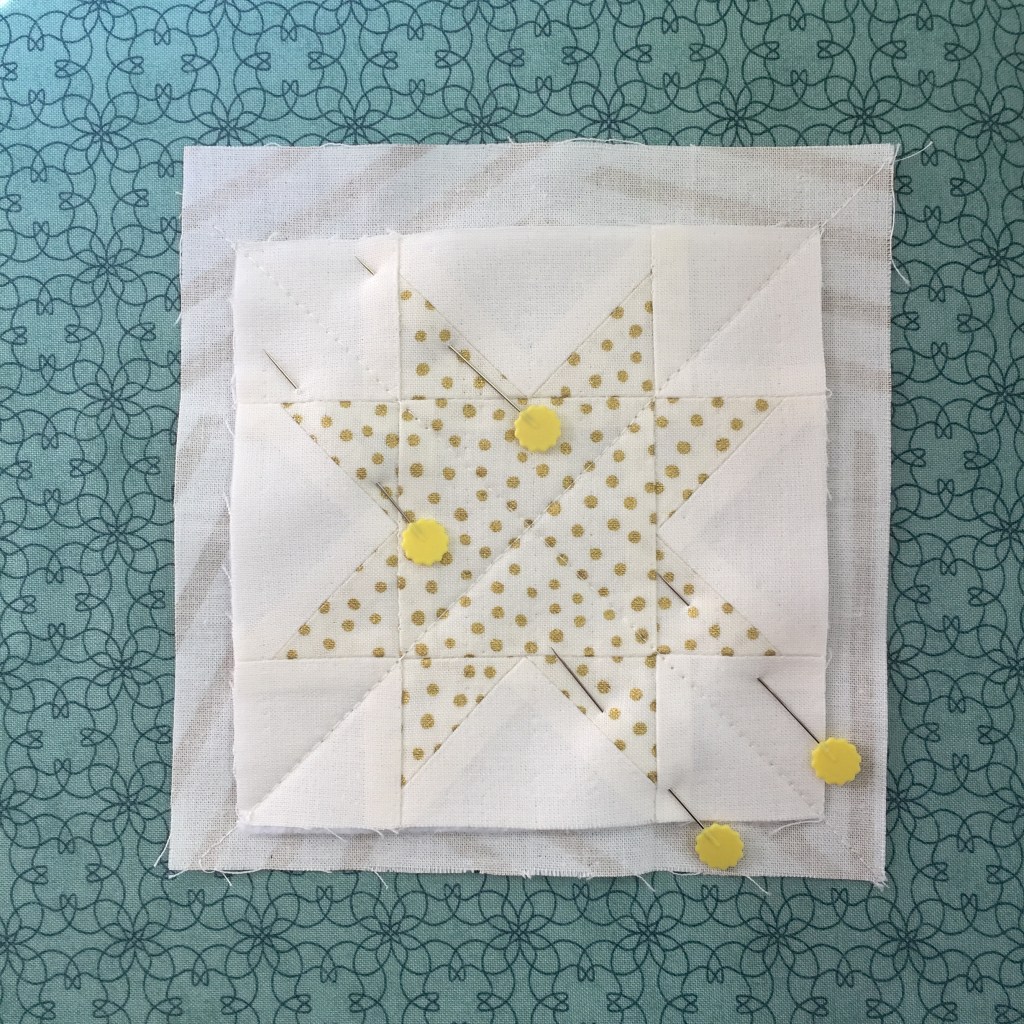
With a hera marker, I marked the first two lines to be quilted then I used straight pins to hold the pieces together. After the first lines were finished, I removed the pins.
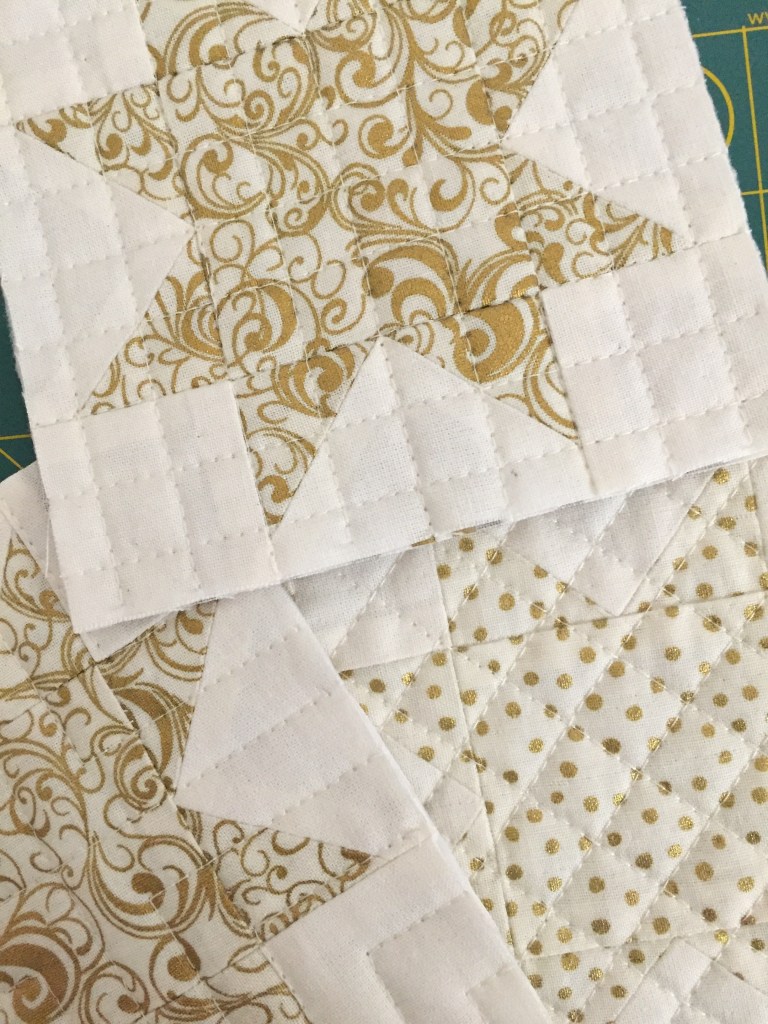
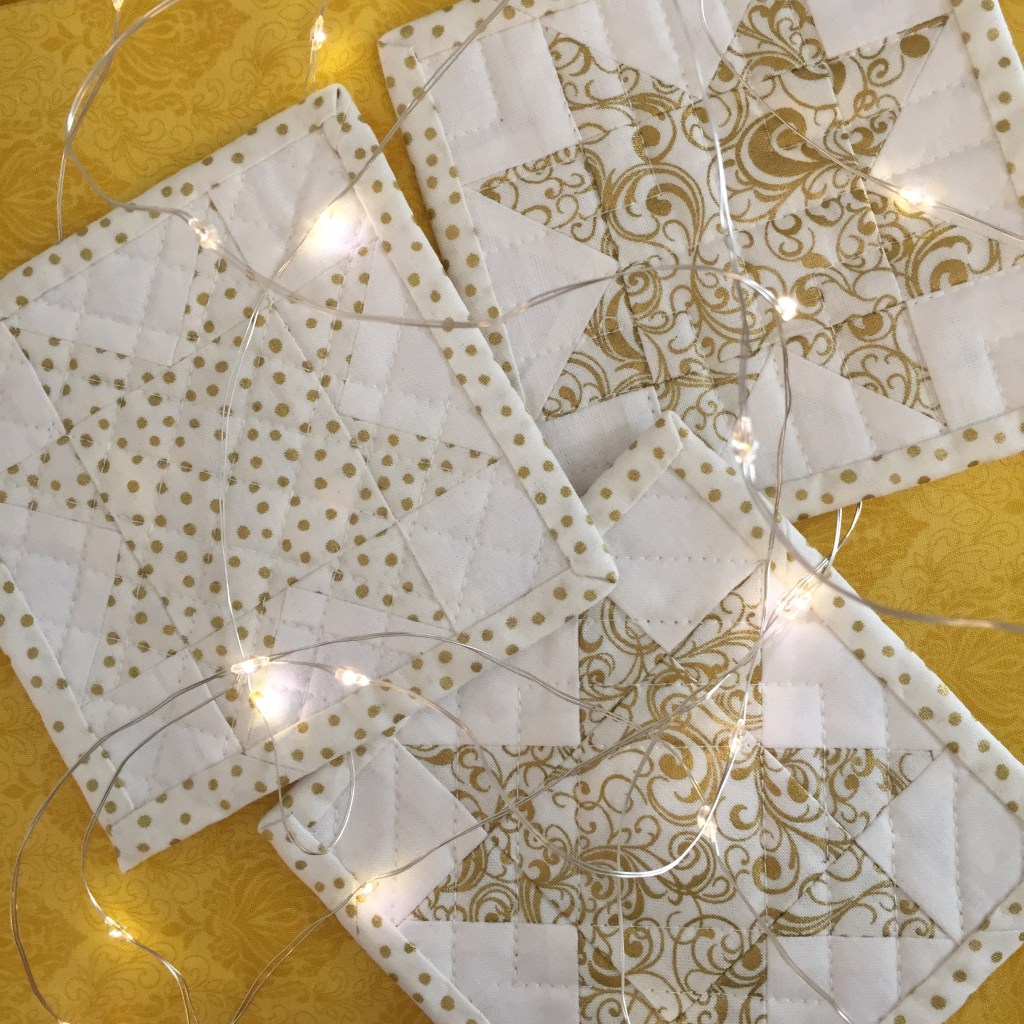
I chose a different quilting pattern for each one. I really like how they turned out!
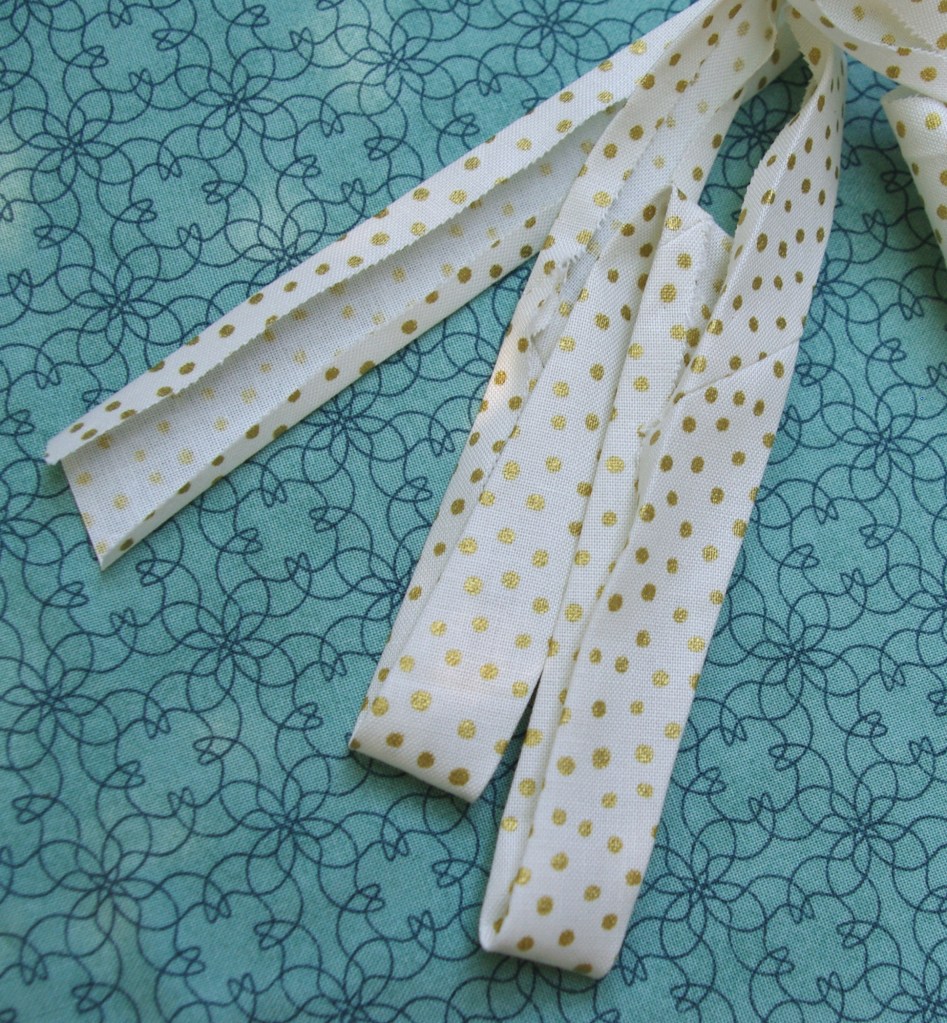
Once your blocks are quilted, it’s time for binding. Since the ornaments are small, and to reduce bulk, I made bias tape using a ¾” bias tape maker. (If you don’t have one, they can be purchased at most sewing stores inexpensively or you can buy bias tape already made). You’ll need enough to go around all four sides including a few inches extra.
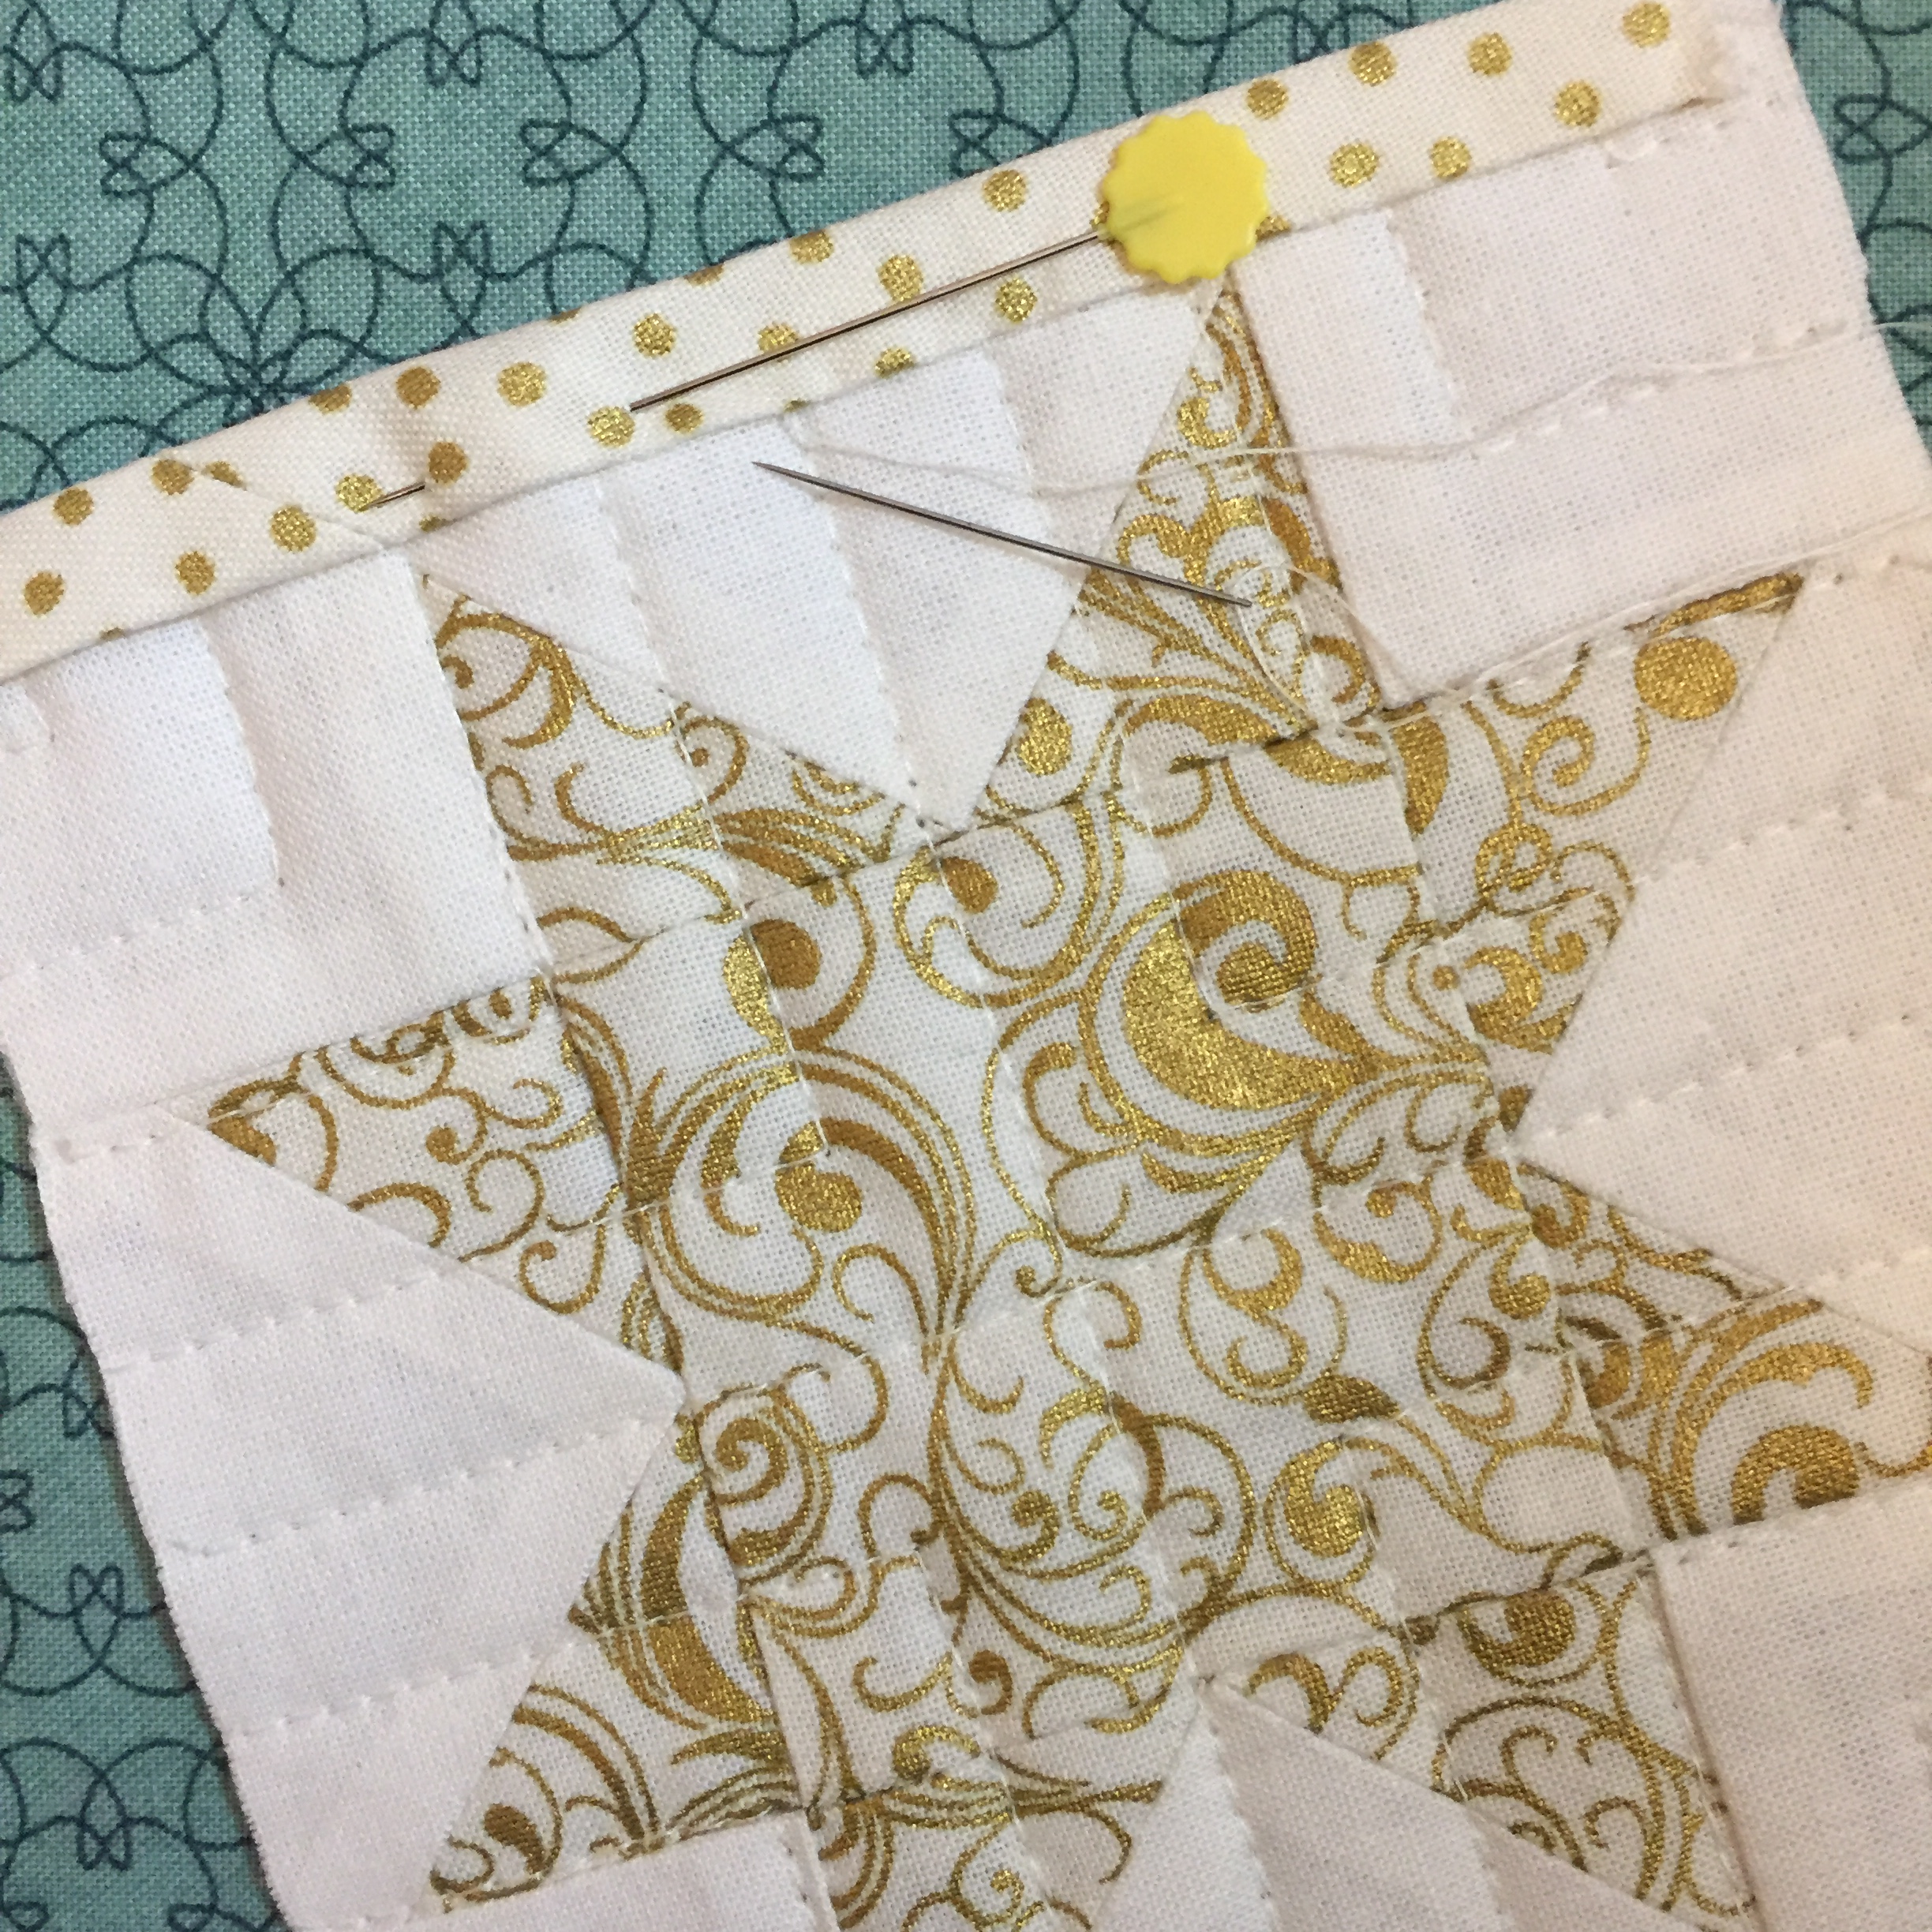
Once made, press the bias tape in half lengthwise before sewing it on; that’ll help to keep it even on each side. I sewed mine on by hand (each side, one at a time) which was easier than trying to line everything up and sew through all the layers at once.
One the binding is attached, the last thing to do is add a hanger. There are a lot of options here…you can use jute, ribbon, cording—whatever you like. I used a lovely white ribbon I had on hand. I looped it and tacked the ends together before stitching it on.
1/4″ double face satin ribbon
And done! Easy to make and fun, too, plus I think they’ll make great gifts!