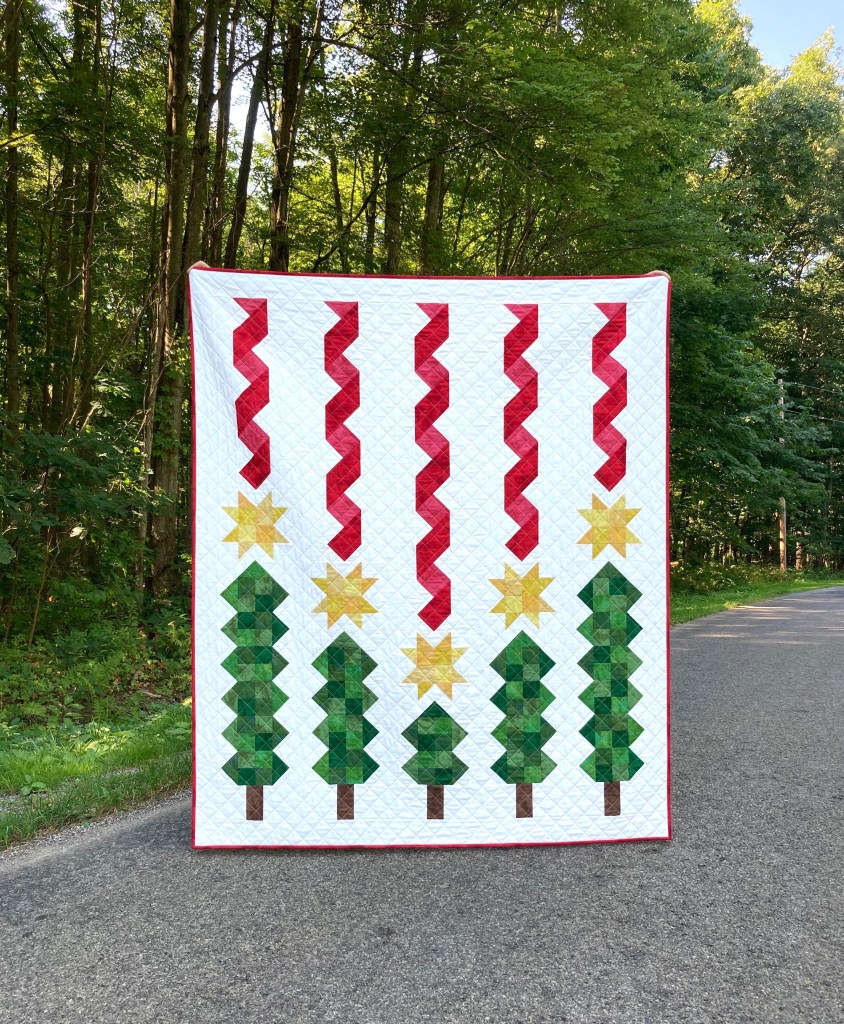
As promised, here’s my scrappy version of Holiday Hemlocks! Scrappy Holiday Hemlocks is available for purchase in my Etsy shop.
Since we quilters love to use our scraps, I thought it would be fun to offer this whimsical quilt in an alternative pattern. It’s made the same as the original except for the stars and trees (see Holiday Hemlocks here). And as a bonus, it’s great way to stash down.
Since the holidays seem like forever away, but will be here before we know it, there’s plenty of time to have one ready for the season.
This throw size quilt measures 56″ x 66″ and it’s easy enough for the advanced beginner. Now that you’ve got two choices, pick your favorite and have some fun quilting!
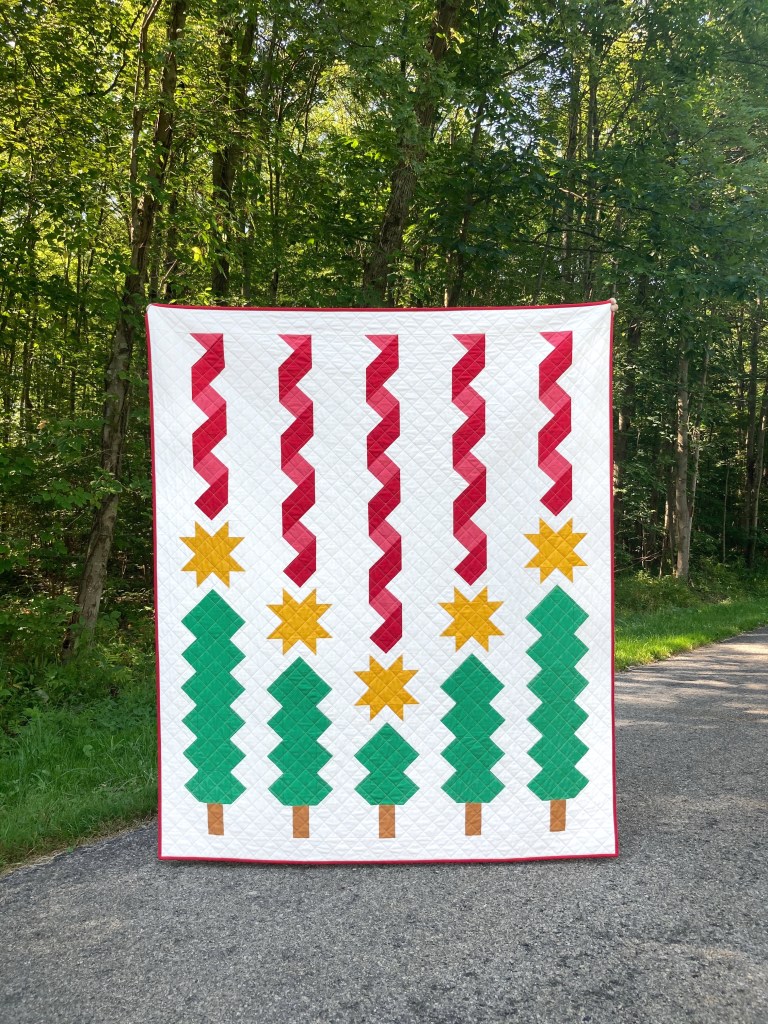
My latest quilt pattern is here! Holiday Hemlocks is available for purchase in my Etsy shop. This one was difficult to keep secret so I’m happy to finally share it with everyone. 🙂
The idea came to me in June and after the long process of designing, tweaking, making one, sending it out to testers, taking photos, etc.— keeping everything under wraps was tough! Plus, it’s the first throw size holiday pattern I’ve designed which made it pretty exciting.
Here’s some information about the quilt…it measures 56″ x 66″ and the pattern is a PDF download with detailed instructions and plenty of colorful diagrams. I would rate it easy enough for an advanced beginner. The best news is that it’s still August and the holidays are months away so you have plenty of time to whip one up. And I think you’ll agree with me on how fun it is to see this come together.
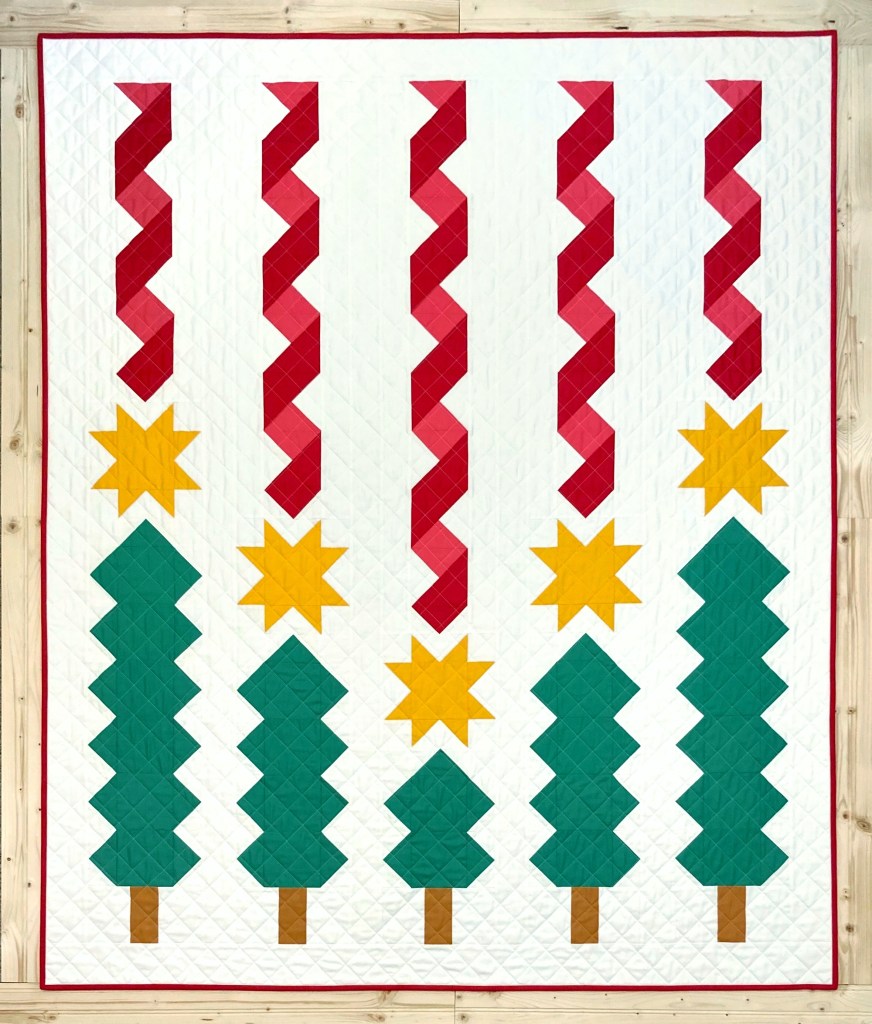
I made mine using traditional colors, but I think it would look great in non-traditional colors, too. How about teal trees and silver stars…
If you love scrappy quilts (as we quilters do) I have a scrappy version coming soon, so be on the look out for it if you want to use up some stash.
I hope you enjoy this pattern as much as I do! Happy holiday sewing. 🙂
Once spring arrived and I’d completed my 8th quilt for the year, it was time to make something else. Not that long ago microwave cozies were really popular and I was seeing them everywhere, so I figured now was a good time to try them out. I’m always in favor of making practical things people can actually use, and stashing down is always a plus.
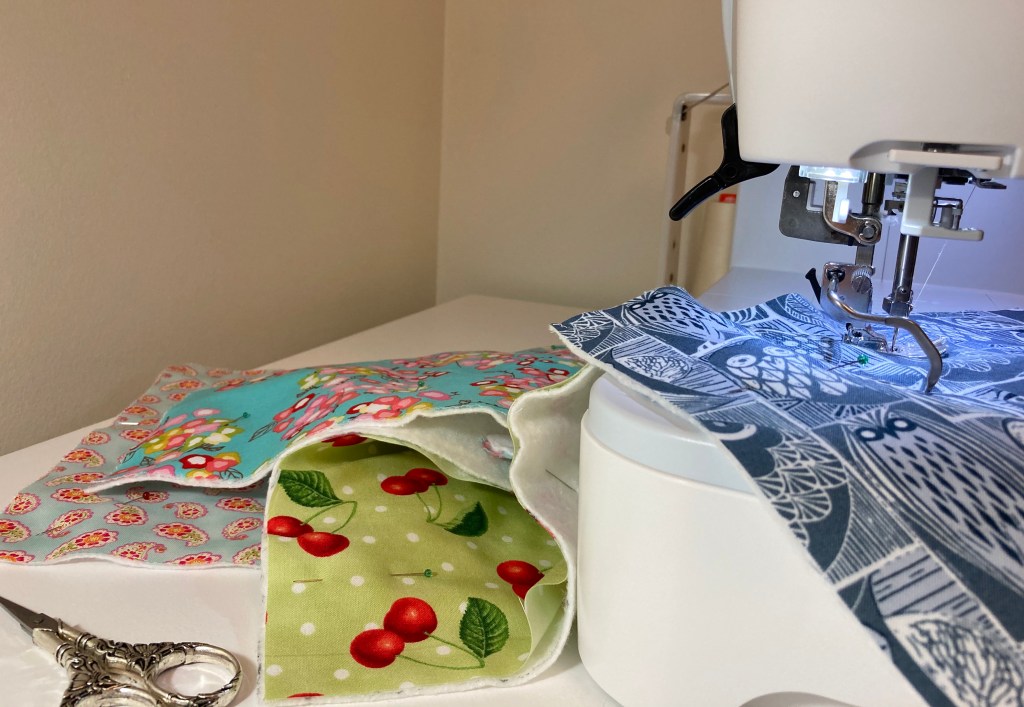
There are plenty of tutorials available on how to make these and they’re pretty much all the same. I followed a YouTube video by The Sewing Room. To make one bowl cozy you need 10″ squares for everything—the inside and outside fabric and the cotton batting in between.
The process is pretty basic: you quilt the squares, sandwich the pieces, sew them together adding darts, turn it inside out and top stitch. After making five, I discovered a few tips and compiled them for those of you who decide to make your own.
Instructions have you quilt an X from corner to corner. For accuracy, I marked my lines with a hera marker. I chain quilted the X on all five to save some time. Is chain quilting actually a thing? Carrying on…I used my walking foot guide for the rest of the quilting. Don’t forget to pin!
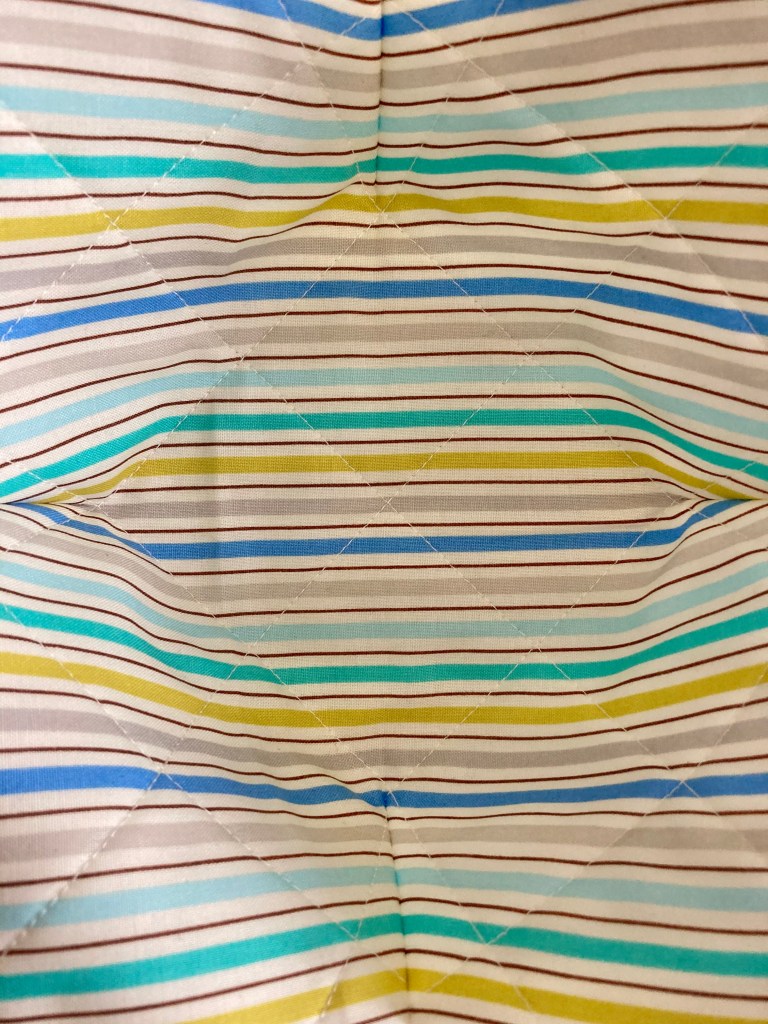
I quilted mine 2″ apart, a bit closer than in the video.
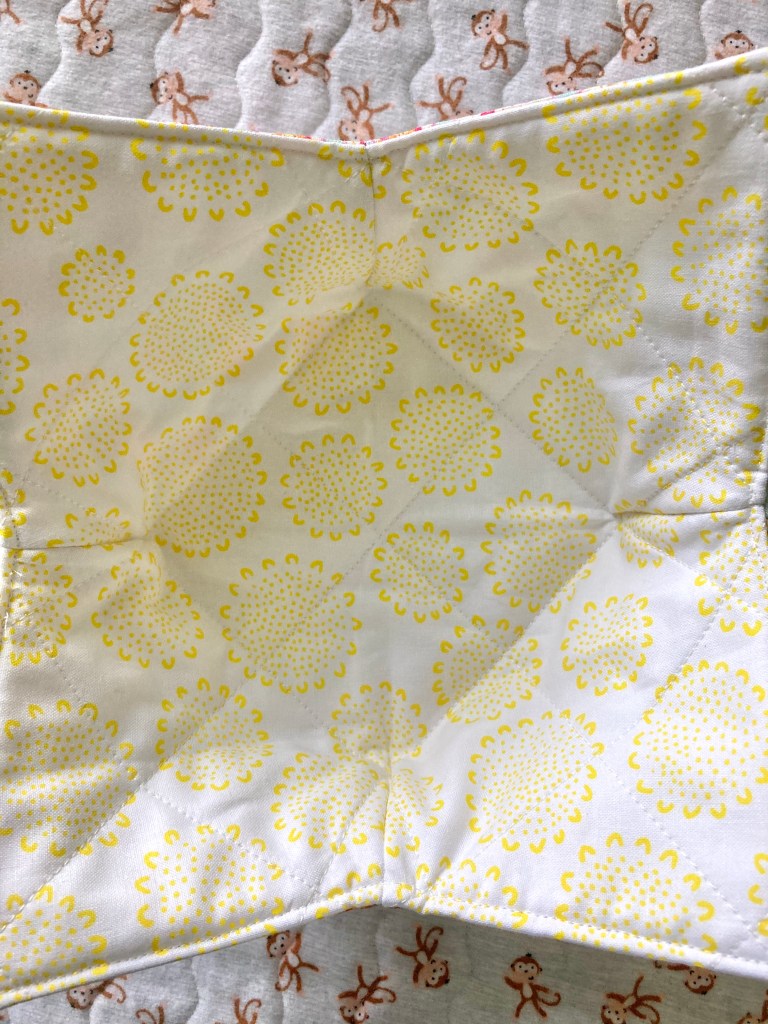
By doing so, the quilting helped shape the bottom of the cozies. I didn’t expect that but it turned out nicely.
And I certainly didn’t expect the lines on my fabric to line up either! 🙂
Since you’re going through two layers of fabric and batting, take it nice and slow when top stitching.
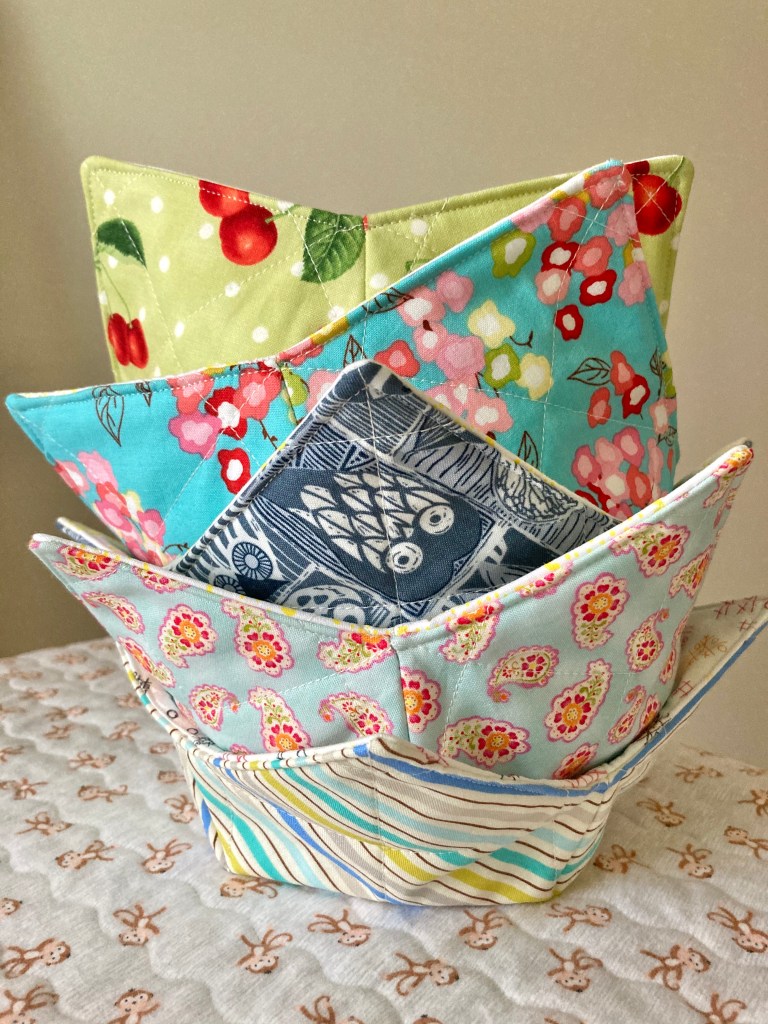
I spent a few hours making all five of these. I kept one for myself and gave the rest to my family.
Because I didn’t have 100% cotton batting, we don’t use ours in the microwave, but we do use them to keep food warm. They work great and all the bowl sizes we tried fit just fine.
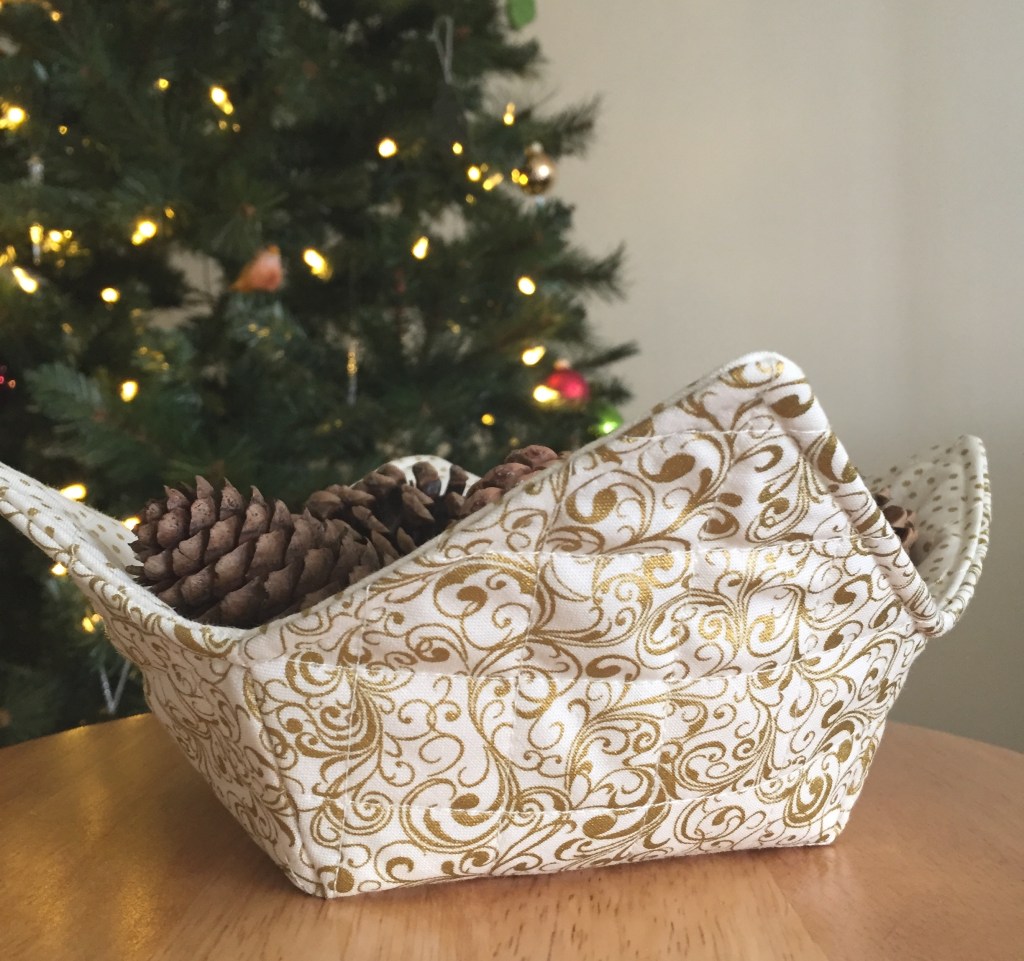
You can also make them for decoration. I made this one for displaying pine cones around Christmas. The beautiful metallic fabric and 1″ quilted lines give a festive holiday feel.
If you’re on your umpteenth quilt for the year and need a change of pace, you can quickly make a few bowl cozies to mix it up.
Not all that long ago quilt batting was pretty hard to get a hold of and I was nearly out. Luckily at the same time my trimmed quilt edges of excess fabric and batting was piling up in my sewing room. And I needed to make some quilts. 😉 The obvious thing to do was to take the strips apart and piece the batting after cutting away any overage quilting stitches.
If you take quilts to a longarmer, you know about the extra 4″ of backing needed all around for loading on the machine. I noticed sometimes my longarmer loaded it more to one side leaving some pretty wide strips when completed. Either way, those strips can add up to a lot of fabric!
Here I go again with the waste issue, but I never throw these materials away, I always take the time to separate them out.
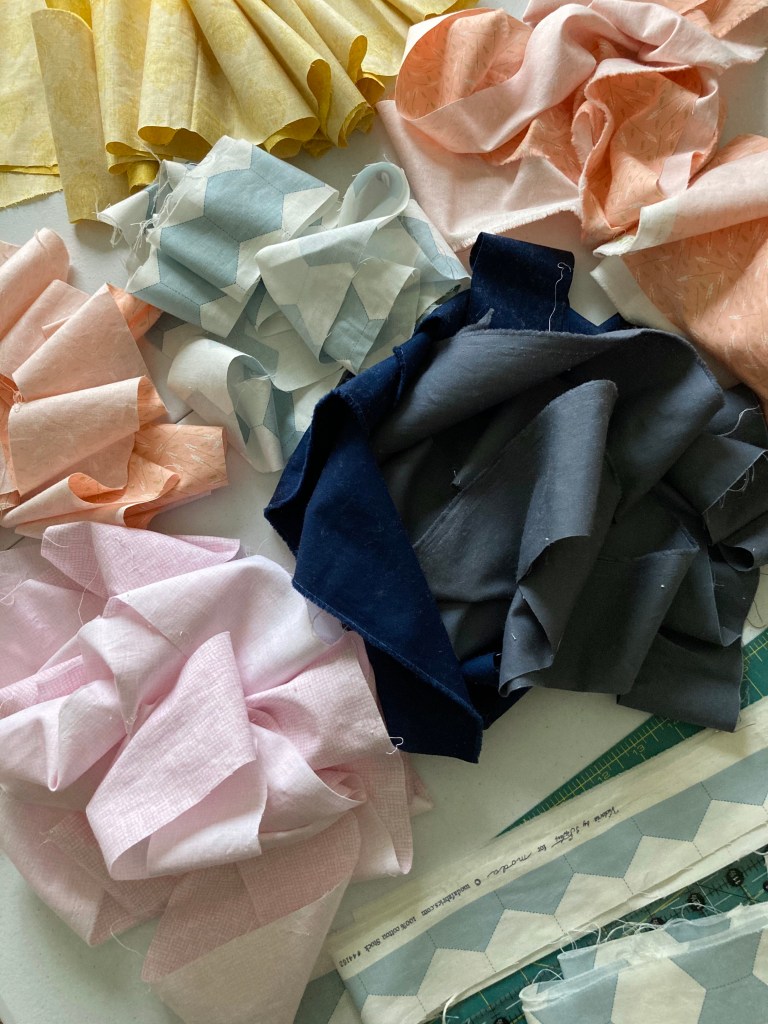
My latest fabric/batting stack consisted of four quilts worth—one longarmed queen size and three throws I quilted myself. After removing the fabric, this is what I ended up with…
And after a bit more effort—pressing and cutting strips to the biggest size I could get—this was the end result…
I’m not going to deny this project took me a few hours, but now I have a lot of precut fabric on hand that would’ve been a shame to toss. It was definitely worth the effort and what a great way to use materials on hand.
Out of the batting, I was able to piece enough to make one throw quilt, one crib size quilt and two baby quilts. And, as of today, batting is once again on backorder.
If you’ve got a stack of edges piling up, consider their reuse. Save and cut that fabric, your future self will thank you. 🙂
If you’re thinking about taking up quilting as a new hobby but aren’t sure where to begin, I’ve got an easy, basic pattern that’s excellent for the complete beginner, the Checkered Baby Quilt. This quilt is a perfect starter for several reasons—it’s sewing simple squares together, there are no bias edges (when edges can stretch easily), seams nest (fit into one another stress-free) and it can be made with 5″ precuts. For the quilt top you need only two charm packs. And best of all, there’s no pattern to buy, just download my Checkered Baby Quilt tutorial. Easy, right?
I’ve made a few Checkered Baby Quilts and have given them as gifts and I’ve even made a couple for commission, so it’s definitely a classic that stays in style.
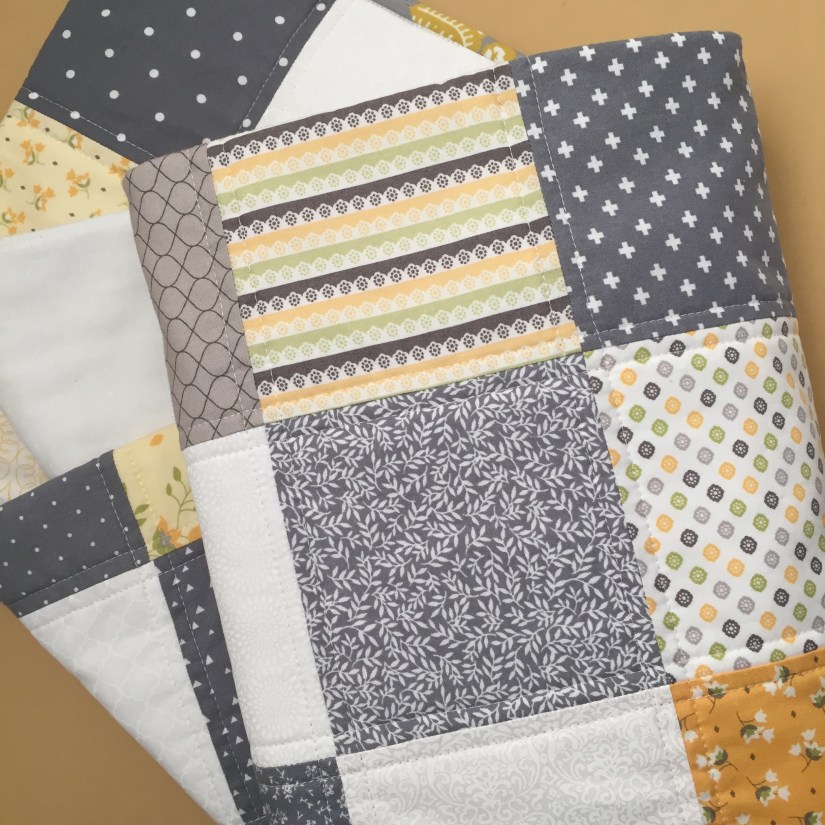
Checkered Baby Quilt made with stackers from Riley Blake’s Little Prince collectionCheckered Baby Quilt made with Moda’s Pepper and Flax and various other prints
The last one I made with Lily and Loom fabric from Craftsy (remember Craftsy?) and Kona Cotton Solid Snow. I chose crosshatch quilting at 2″ apart and a solid binding.
Other reasons why this is great for a new quilter is that it’s a nice sized project suitable for experimenting with color, fabric, thread, quilting designs, etc. All of those quilting elements are part of the learning process plus it’s a lot of fun. So if it’s time to get started, why not grab a couple of charm packs and try this one out?!?
When I bought my sewing machine a few years ago, the sales lady gave me very thorough instructions on machine use, even though I didn’t think it necessary…then one particular thing got my attention—how to ‘unthread’ the machine. I’m sure it’s not really known as that, but changing thread is something we do all the time.
Until then I always pulled the thread from the spool back through my machine, but thanks to Karen I now know that can cause tension issues as the machine is made for thread to go out in only one direction via the needle. That said, the proper way to remove thread is to cut it from the spool and pull it through the bottom. Am I the only person who didn’t know this? Probably. 😉 It makes perfect sense, and I’m glad for the tip because tension problems are the worst.
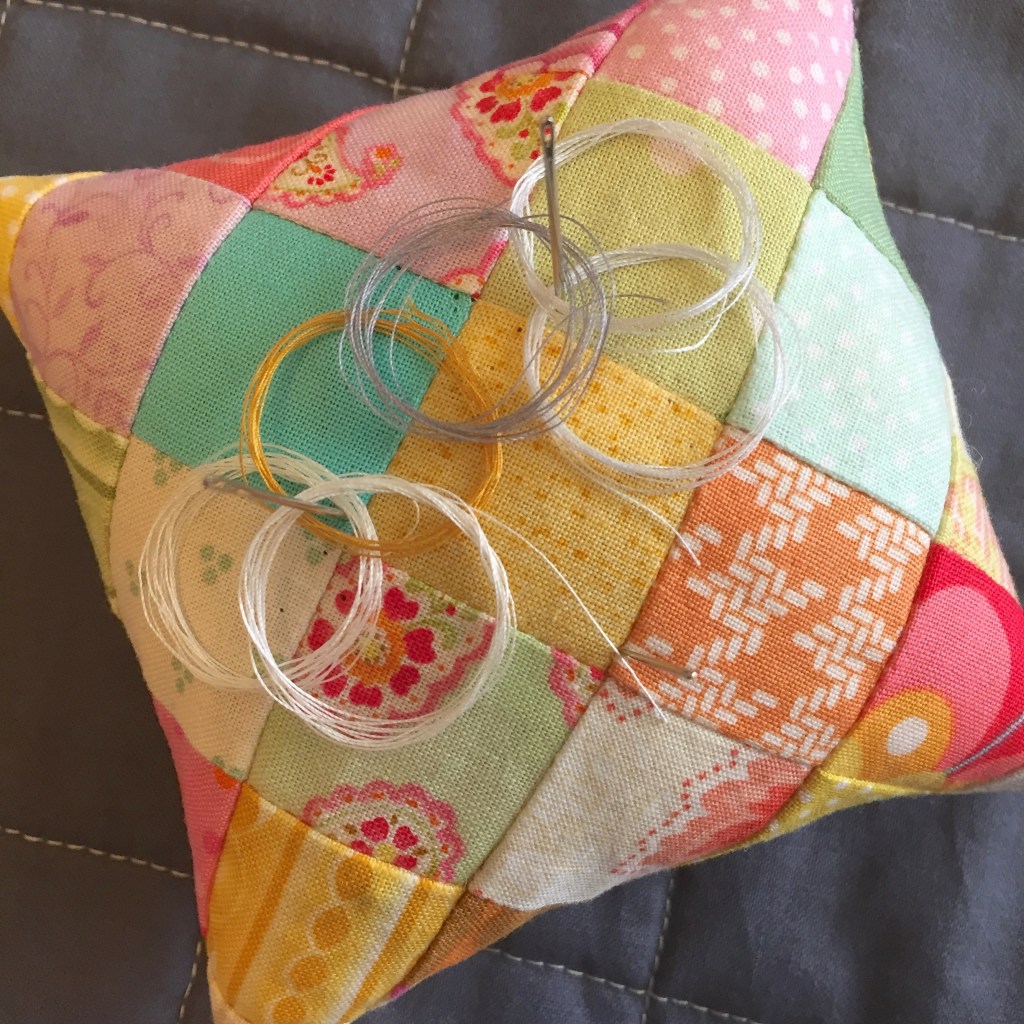
As time went by and after several thread changes, I realized it’s a lot of waste to throw those strands away. Since thread is expensive and I don’t like waste, I had to ask myself ‘what can I do with these strands?’ I didn’t know at first, I just started saving them on my pincushion.
My thread cutaways measure about 24″ long, so it doesn’t go all that far, but I’ve come up with a few tips on putting them to good use.
Keep a needle or two threaded, it’s a great way to save time when in a hurry.
Use threads for basting. I always baste my binding before machine sewing, I mainly use these strands for stitching them down.
Sew on buttons. A short thread length is plenty.
Clothing repairs. They’re just right for a minor fix.
If you hang on to your cutaway strands, you’ll be surprised how quickly they accumulate and in so many different colors, too. And mostly, you’ll see how much it’ll save on thread waste. 🙂
If you’ve been quilting for a while I bet you’ve accumulated quite a bit of cutaway batting—I have a fair amount myself. For me, I needed to stash down and use what I had plus I’ve found it difficult to purchase any batting because it’s either sold out or on backorder.
Since I had a couple patterns in the works, it was a good time to do some quilt batting piecing so I could finish my projects. First up was a throw quilt that will finish 56″ x 72″.
To get started, I gathered cutaway strips from other quilts I’d made. I had three strips that were long enough and once sewn together, the whole piece would be wide enough. Because the strips were uneven in length, I cut them all to an even and approximate length of what I’d need. I then was ready to get sewing.
Here’s what I did, and if you decide to piece batting too, this is what you’ll need to know. I’ve compiled a list of tips to help you as you go along.
Before you start sewing:
Set up good lighting.
Match the thread to the batting as close as possible.
Cut fresh, straight edges using a ruler and rotary cutter OR if the factory cut edges are straight, they are fine to use.
Make sure the same sides of the batting are up.
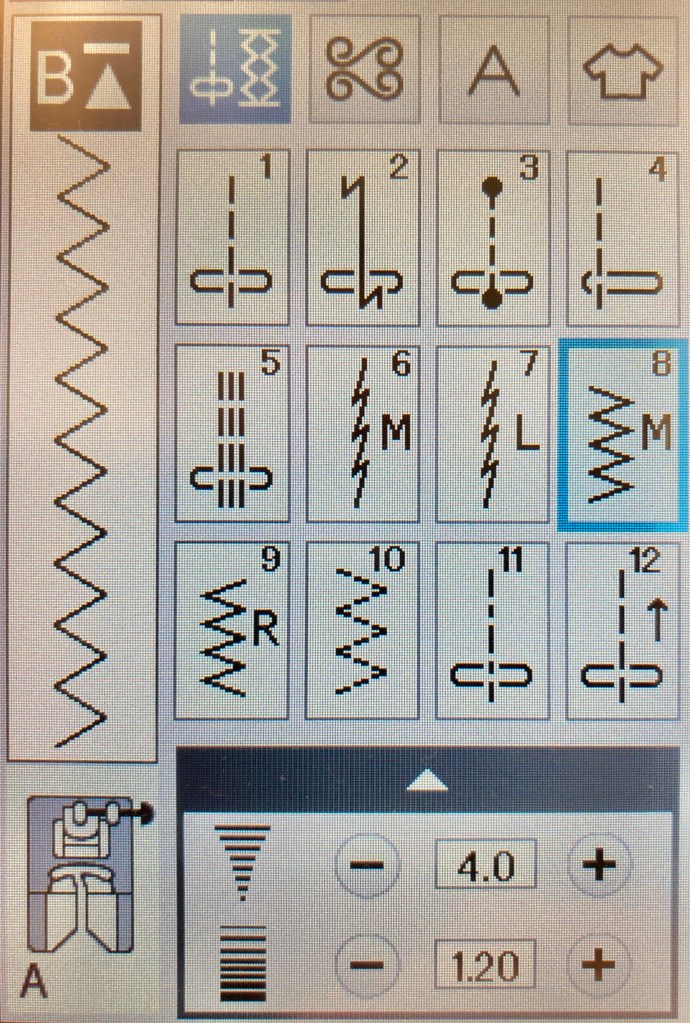
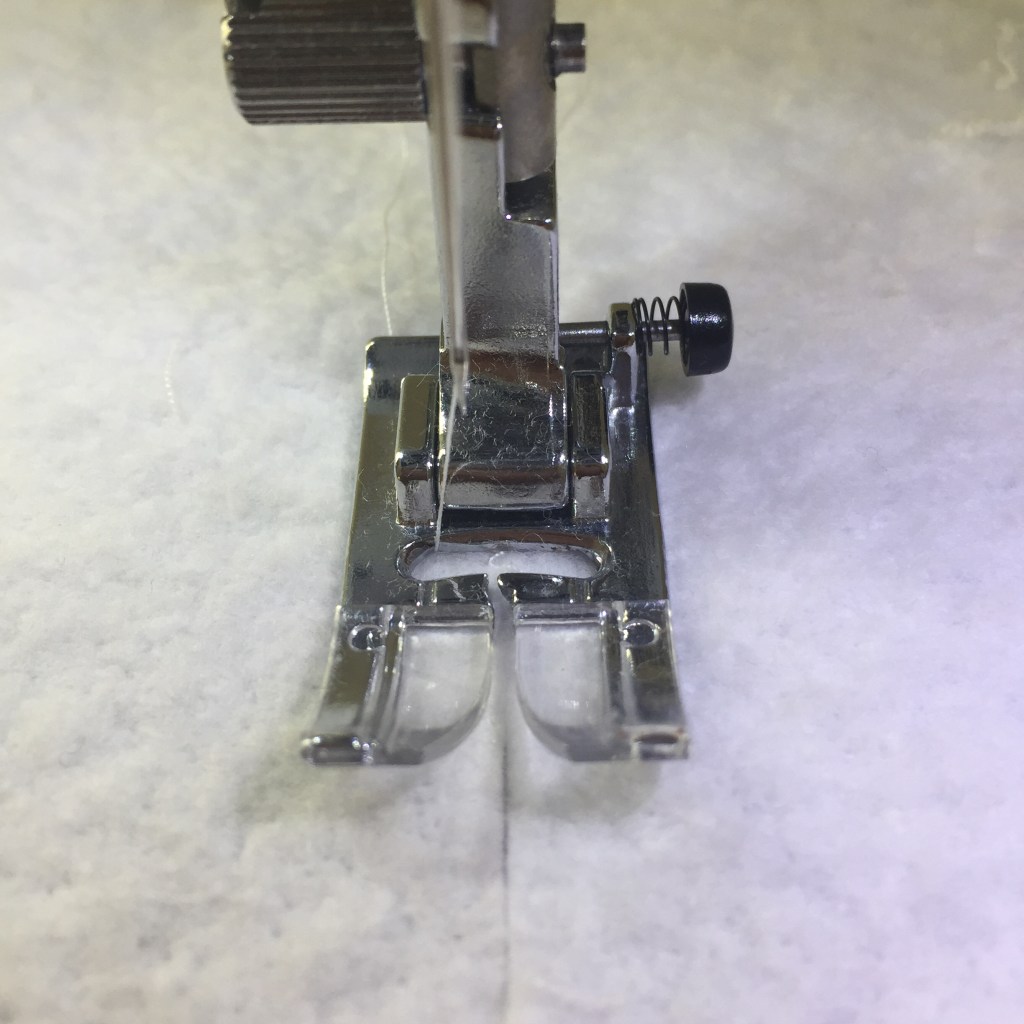
To insure seams stay secure, use a zigzag stitch. I sew on a Janome Skyline S7 and this is the setting I used. Whatever you can set close to this should work fine.
Choose the proper foot for your machine.
Try a sample first to ensure your stitch length is set appropriately.
Once you get started:
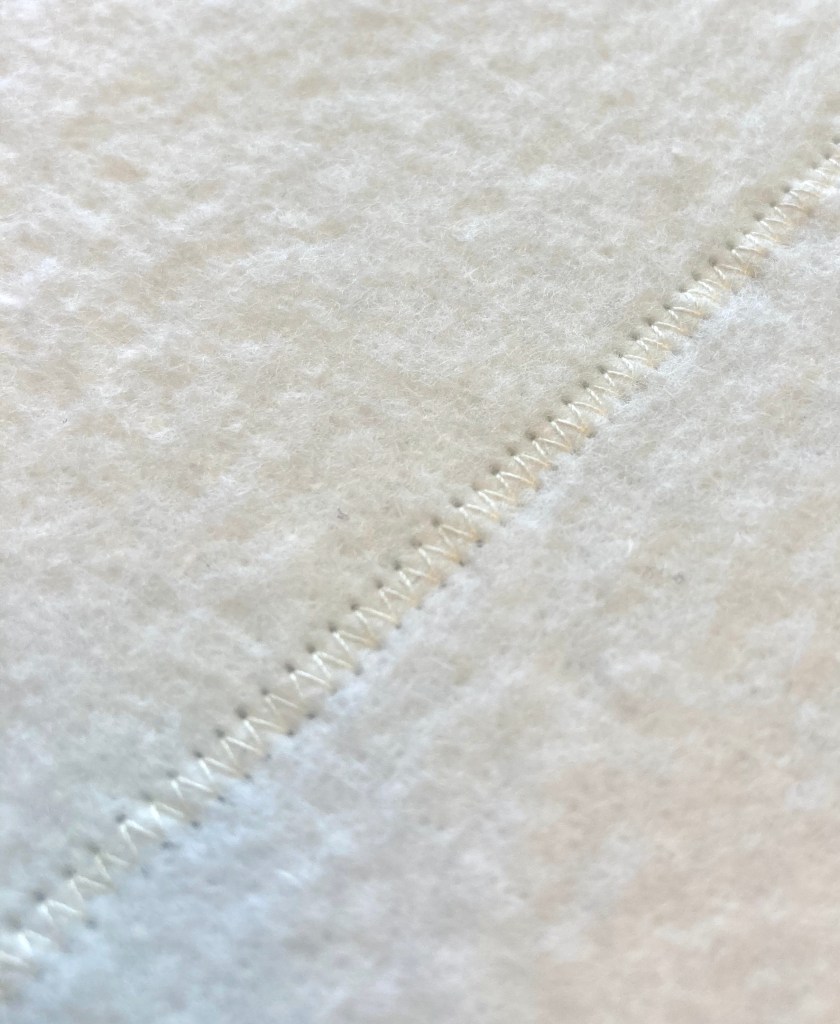
Sew slowly making sure both sides of the batting pieces are caught by the zigzag stitch. Going fast will make batting bunch.
Use quilting gloves for a better grip (batting can be slippery).
Finished pieced quilt batting
Once finished and before use:
If necessary, you can press the seams to help them lie flat, but make sure the entire area of batting where you intend to iron is covered by fabric or you’ll get residue on your iron that’s difficult to remove, trust me. 😉
I spritzed water over my stitching to help relax the seams which worked really well. If you do use water, check that everything is dry before sandwiching and quilting.
Here’s a photo of an area beneath the quilt top where there’s a pieced batting seam…you’d never know!
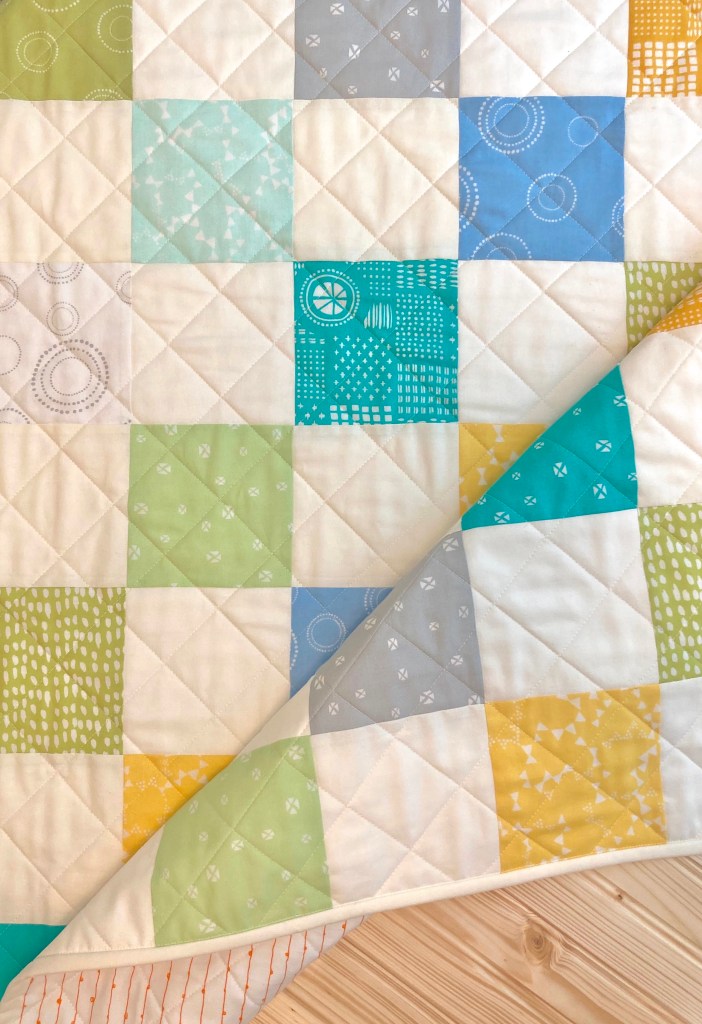
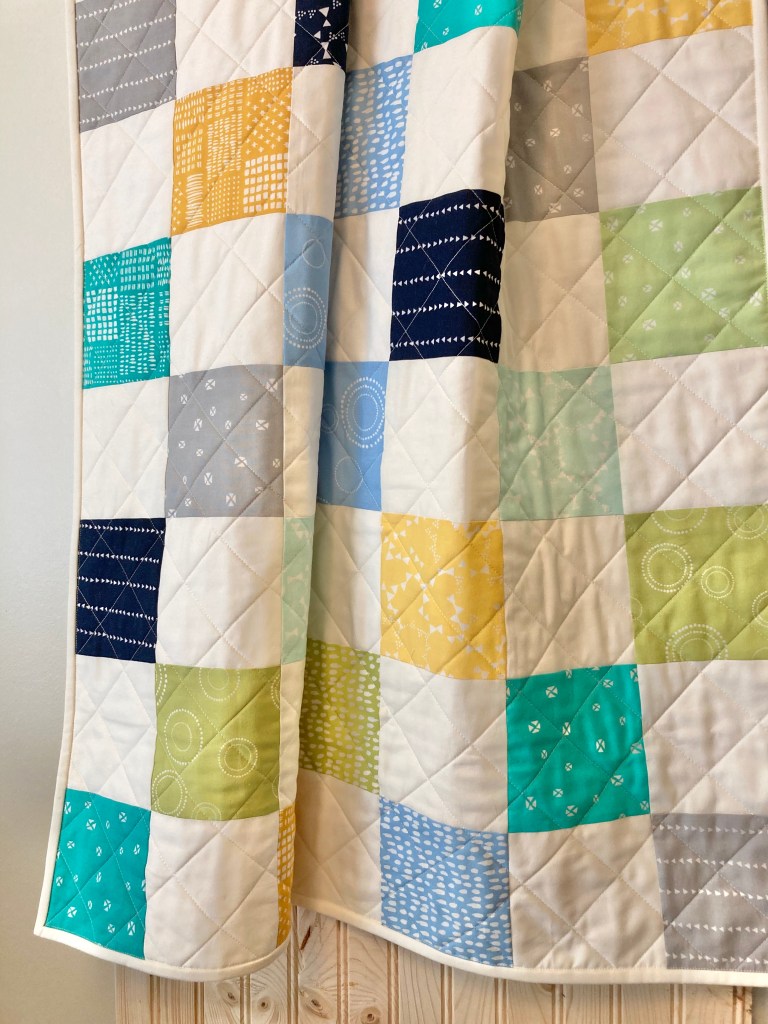
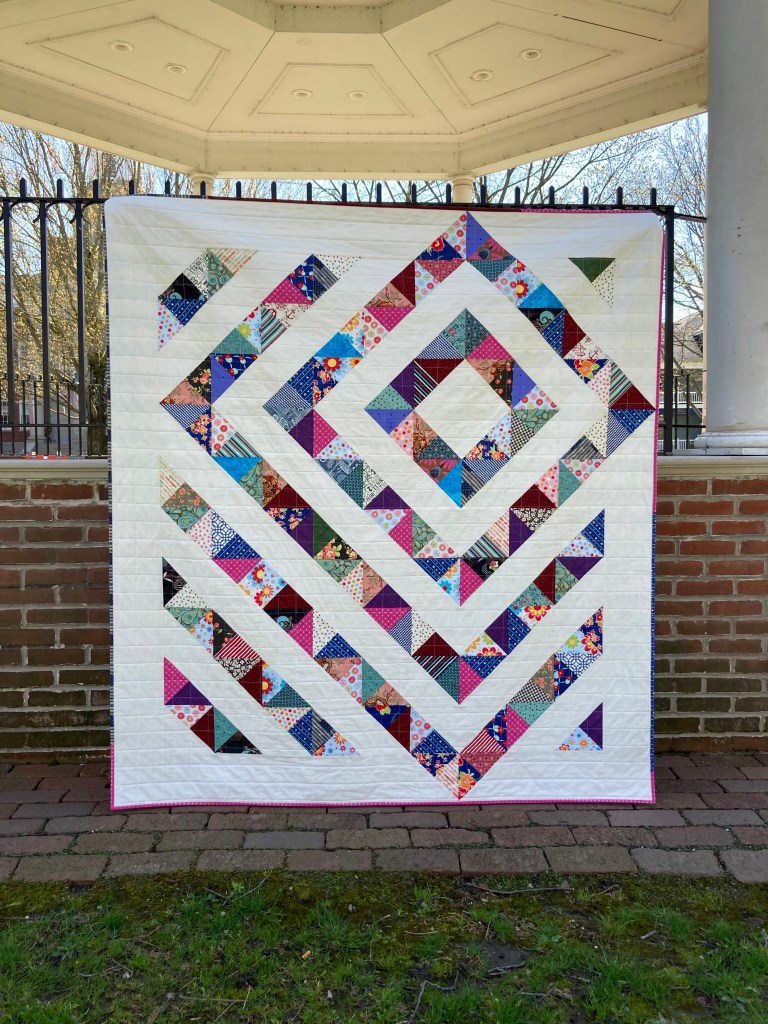
In keeping with my goal to use fabric on hand, a few weeks ago I decided to pull all my leftover 5″ squares and make a quilt out of them. Due to the large variety of prints it was a risky move, leaving me to question if all the fabrics would blend. Nonetheless, I was determined to make it work.
I planned to make another Four Patch Charm quilt (I’d made one back in September) that required 96 five inch squares. From the pile, I had about half. Needing another 45 or so, I headed back to my stash of leftover fabric and pulled what I thought would work. That batch included fabrics from my first quilt, other quilts, various small projects, quilt backs, bindings, etc. I cut until I reached my number.
To get started, the pattern required the squares to be cut in half diagonally then sewn in pairs.
After sewing together of 96 pairs, I still wasn’t sure if everything would look OK even though I blended colors as best as possible. Then I thought, well, everyone loves scrappy, right? How could I go wrong?
To finish the blocks, I used Kona Cotton Snow (the background triangle) choosing it for a less-than-bright-white look. The next step, trimming blocks. You can see they were pretty close to the size needed, but I never skip this step. Sure, it’s time consuming but it’s always, always worth the effort. 🙂
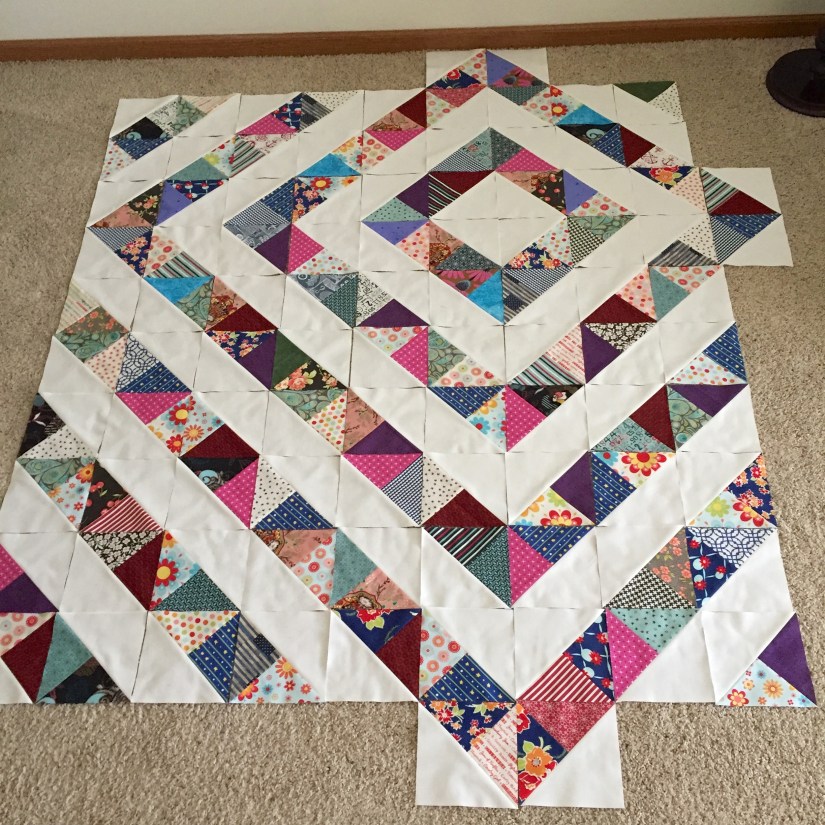
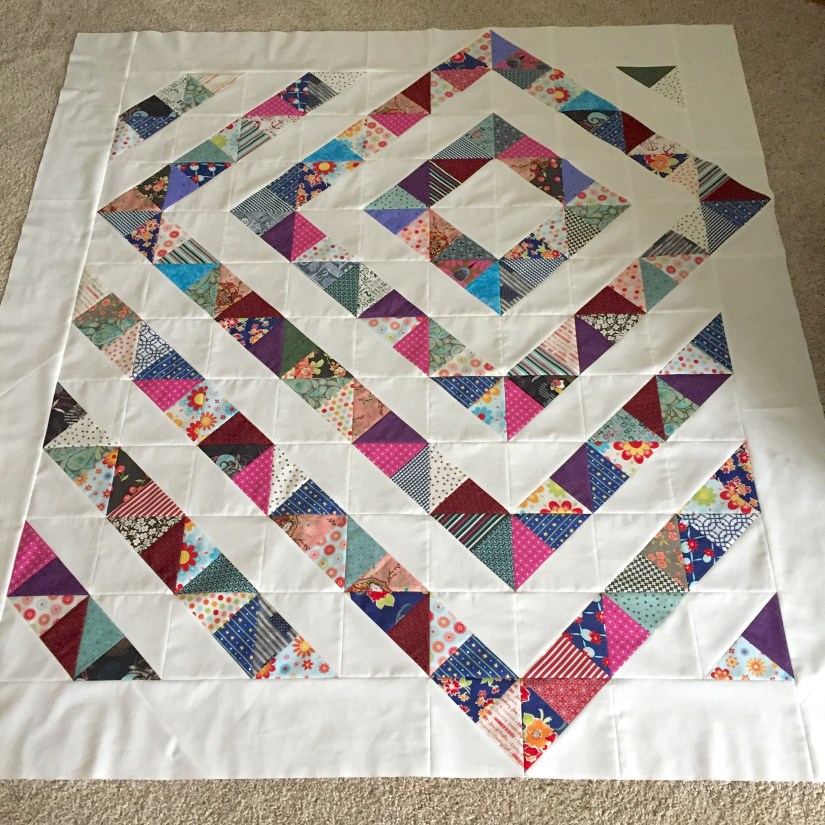
The layout didn’t take much time, as it was one of those quilts where you move one block it messes up the colors in another area, so I left it pretty much as I laid it out initially. Once I’d gotten to this point I was happy with how the colors worked together and I liked it more than I thought I would.
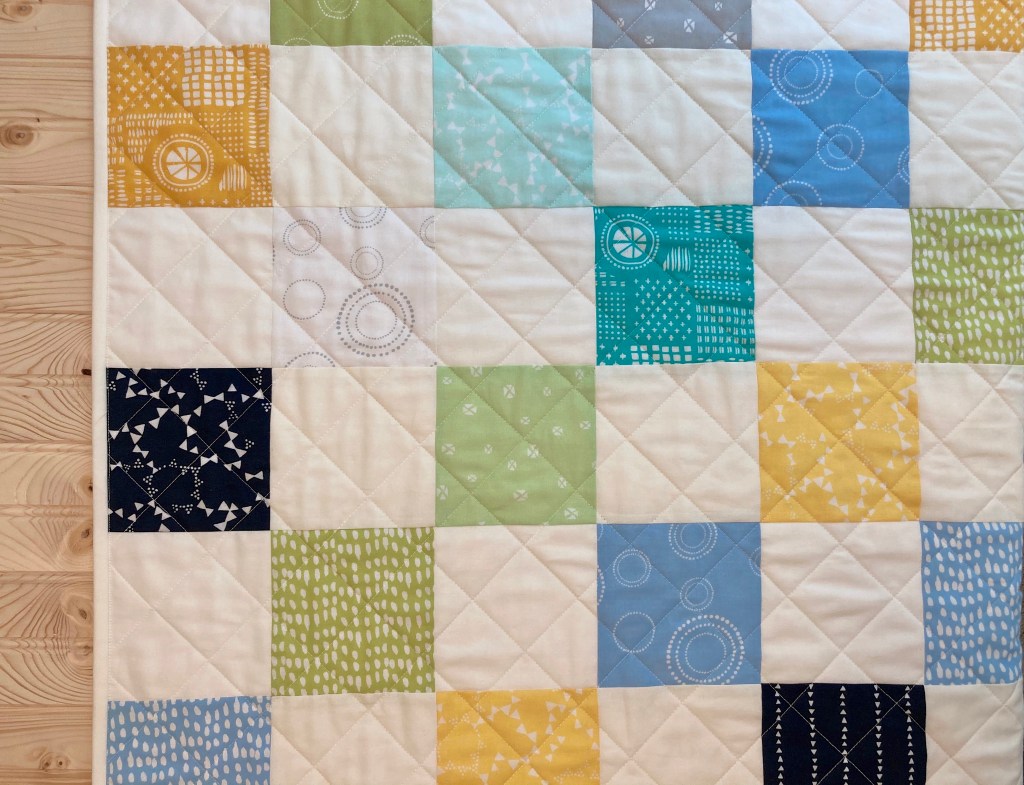
I quilted a 2″ square grid to compliment the diagonal pattern, and made scrappy binding using four different fabrics found in the quilt top.
For the back, I used a pleasant blue and white hexagon fabric from Moda’s Victoria line.
At last, here’s the finished quilt! I have no plans to keep this one for myself, I hope to give it as a gift to someone, sometime.
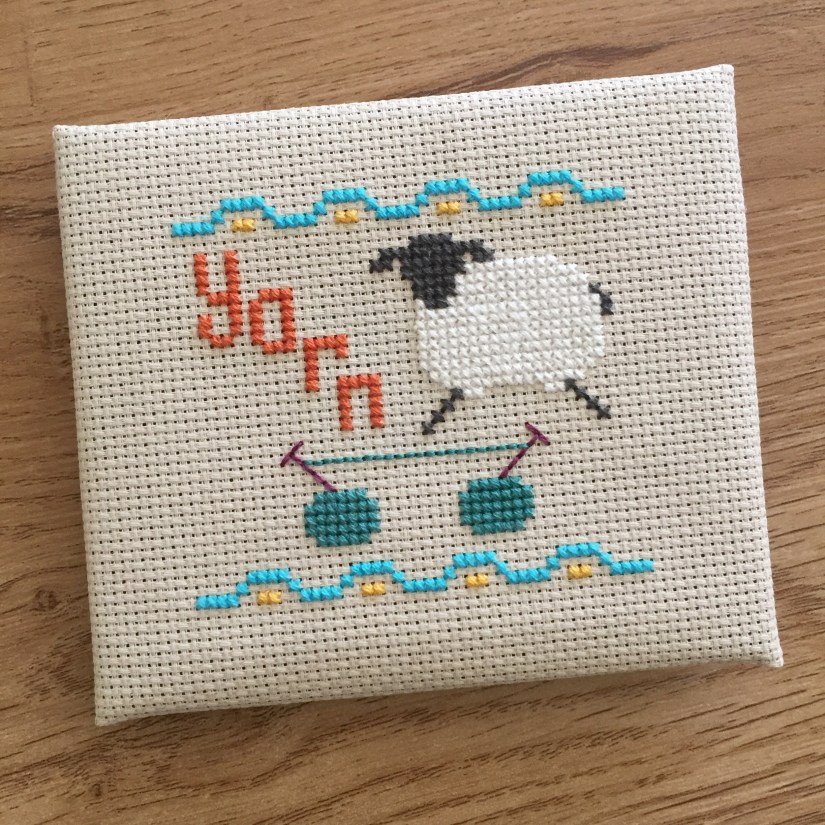
My latest cross stitch pattern is ready! It’s named Yay for Yarn, and it depicts a happy sheep jumping over yarn and knitting needles. I designed this one for all the yarn enthusiasts out there (inspired by my daughter who is an avid knitter).
Yay for Yarn is available for purchase at my Etsy shop. It’s an easy project suitable for cross stitchers of all levels. It’s finishes at 2 1/2″ x 2 3/4″ so it’s on the small side, making it an quick finish.
There’s something about a red and white quilt, isn’t there? Ever since I started quilting, every time I saw one I knew eventually I’d make one for myself. But in my mind, it couldn’t be just any quilt pattern, it had to be a star pattern and a traditional one at that.
After recently finishing a few huge quilts, I figured it was a good time to make my long-awaited red and white quilt. I never know which should be decided on first, the pattern or the fabric? In this case, the main thing to consider was fabric. Last fall I started buying red fat quarters here and there, but I found the shades differed too greatly once put together, so I scrapped that plan and headed to a favorite online store, The Fat Quarter Shop. There I found a perfectly coordinated tone-on-tone red bundle. I was sold!
Bella Solids were on sale so I opted for Bleached White PFD yardage for my background. Next, the pattern. Finding a traditional star pattern for fat quarters wasn’t difficult; I decided on a free pattern from Moda, Illusion.
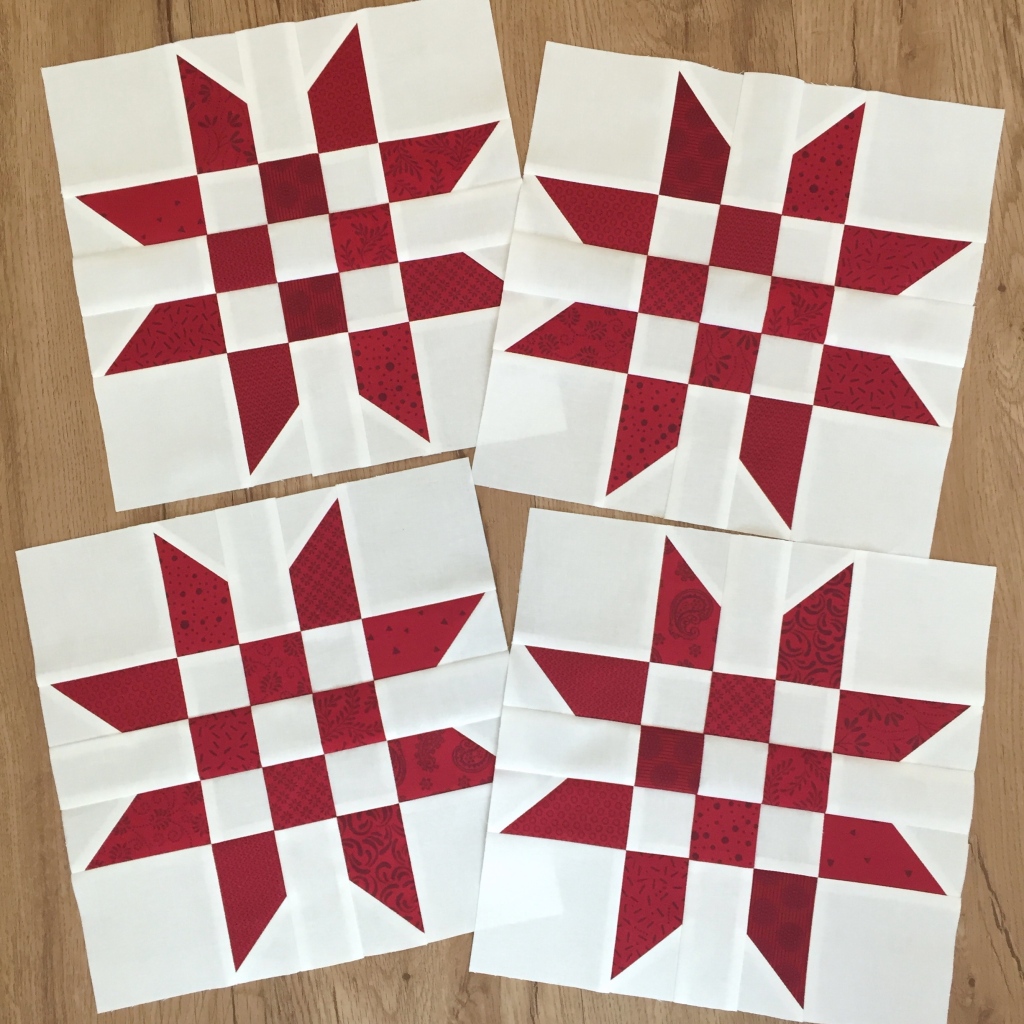
Once my fabric arrived, like a kid at Christmas, I opened it and started right away. As in many quilt patterns there was a lot of cutting. For me, I usually spend a day cutting and start sewing the next. After a few days I had some blocks made.
What I liked a lot about this pattern is there are no points that need lined up. The ends of the stars are made using the stitch-and-flip method, and a strip in between means there’s no aligning. Also, seams nest so you end up with nice, crisp corners.
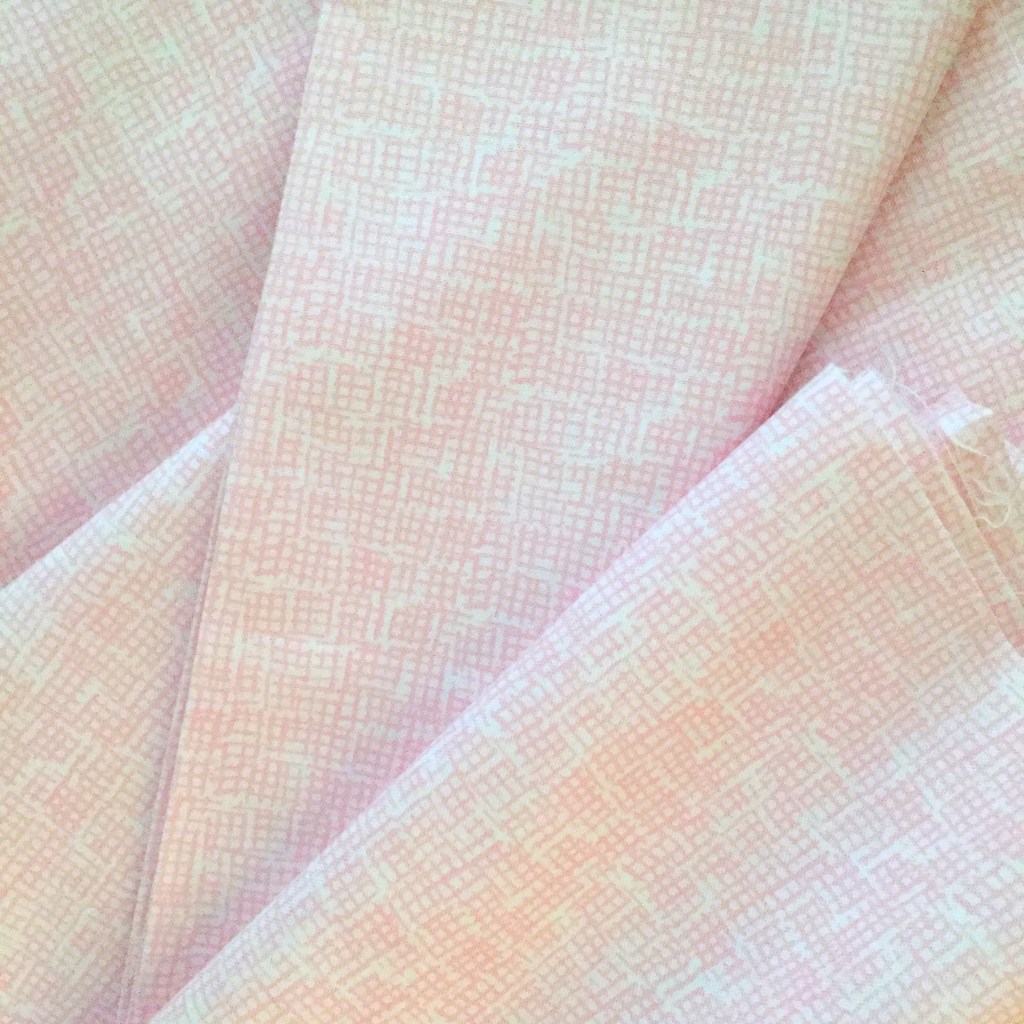
Since there’s a substantial amount of white on the front, I wanted something light colored on the back. I had Dear Stella Net fabric in light pink on hand which worked perfectly.
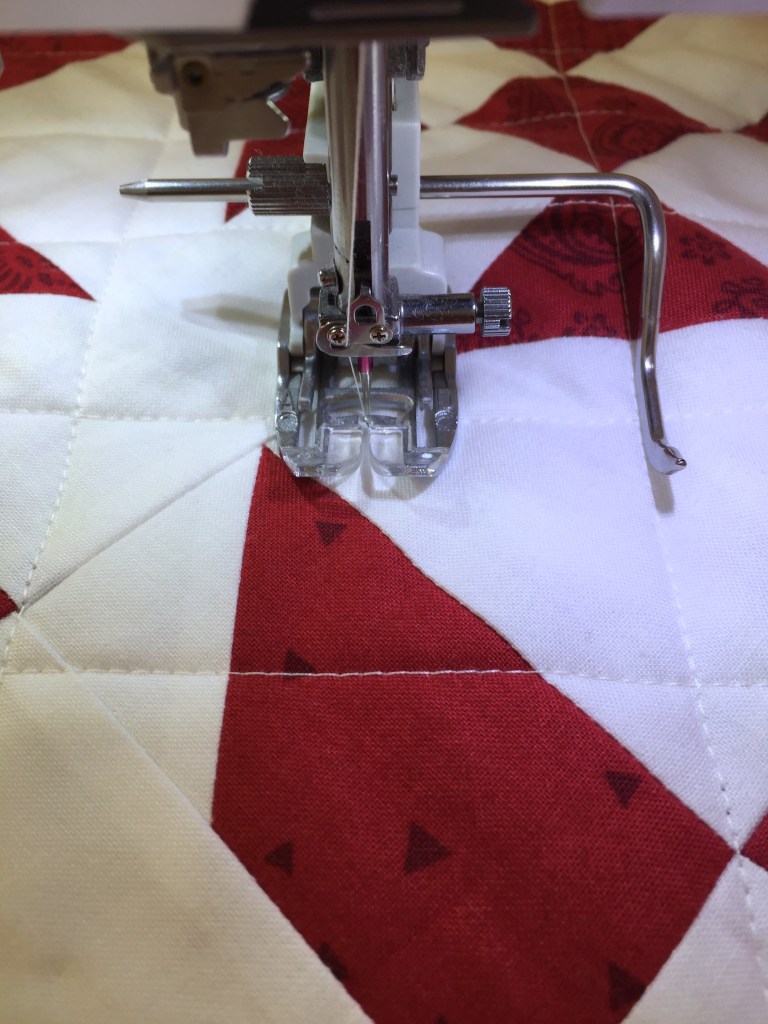
Longarming, unfortunately, isn’t always in the budget and this quilt wasn’t very big so I decided to quilt it myself. I quilted a crosshatch pattern—using my hera marker I marked every three inches and sewed on the line with a 3.0 stitch length. I used my guide for the in-between rows so I’d have less to mark.
Crosshatch quilting can be tough because you’re sewing the quilt on an angle, meaning there’s a lot of bulk (from the center to the corners) when you run it through your machine. But…I love the look of a crosshatched quilt so I deal with the difficulties. 🙂
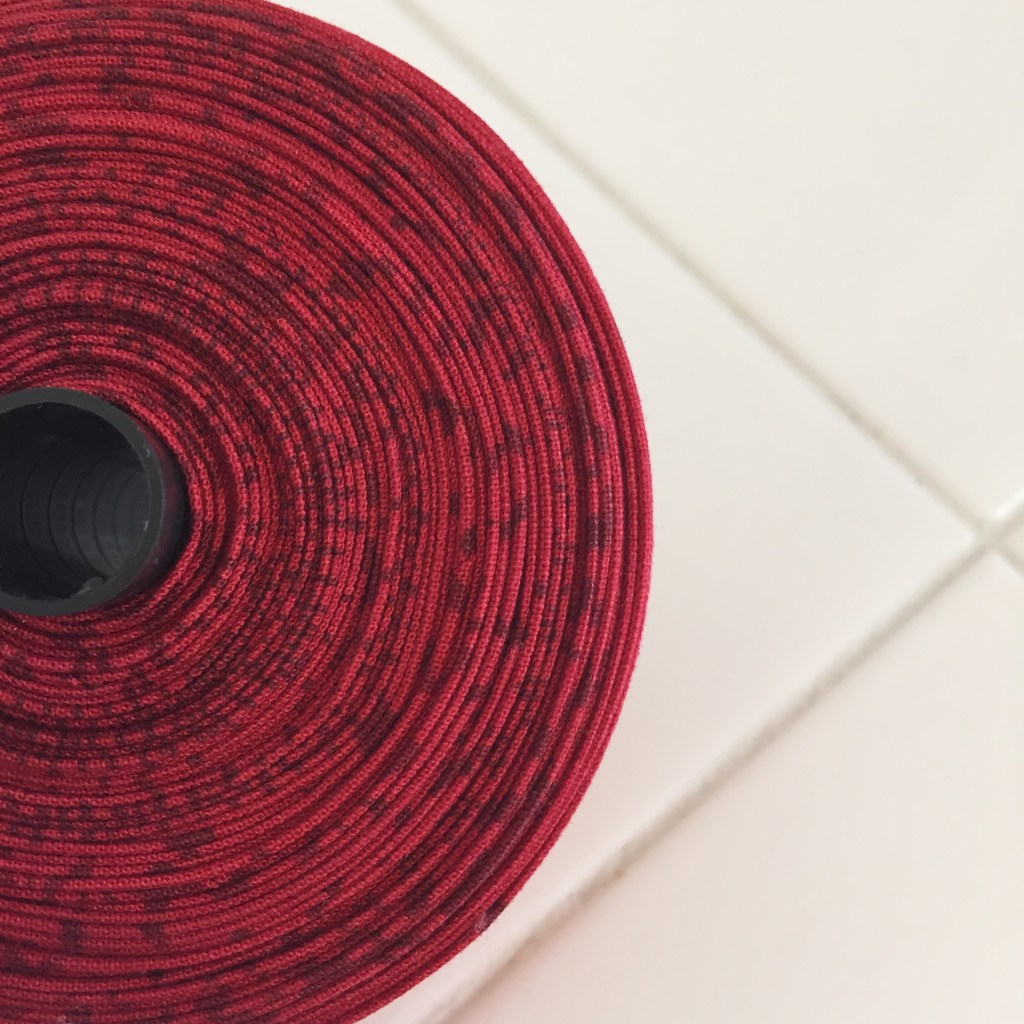
The binding took a bit longer to make because the strips were cut from the fat quarters which made for more piecing than usual. I love the fact that the quilt top required only 12 fat quarters and yardage. And I have quite a bit of lovely red fabric leftover for another project.
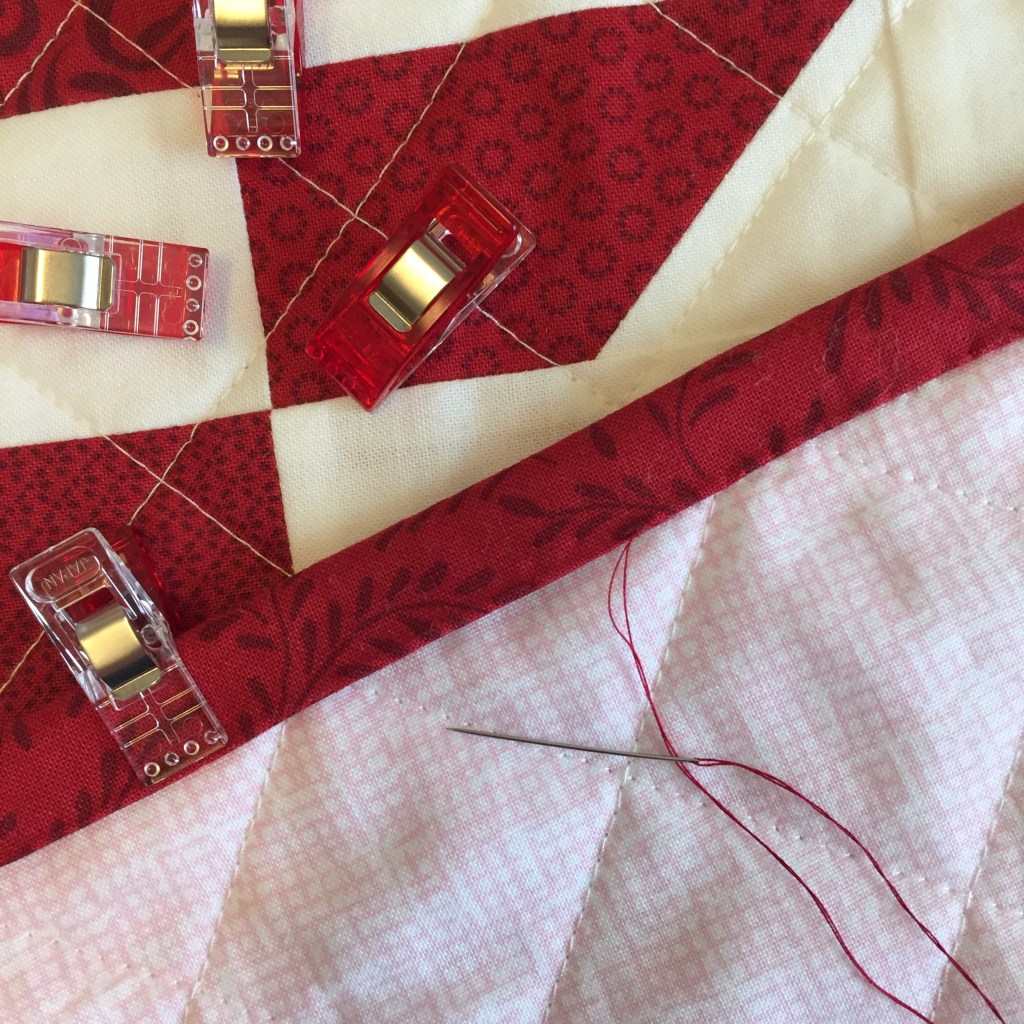
Lately I’ve been sewing on my bindings by hand. I find it relaxing and I like how it looks better than machined.
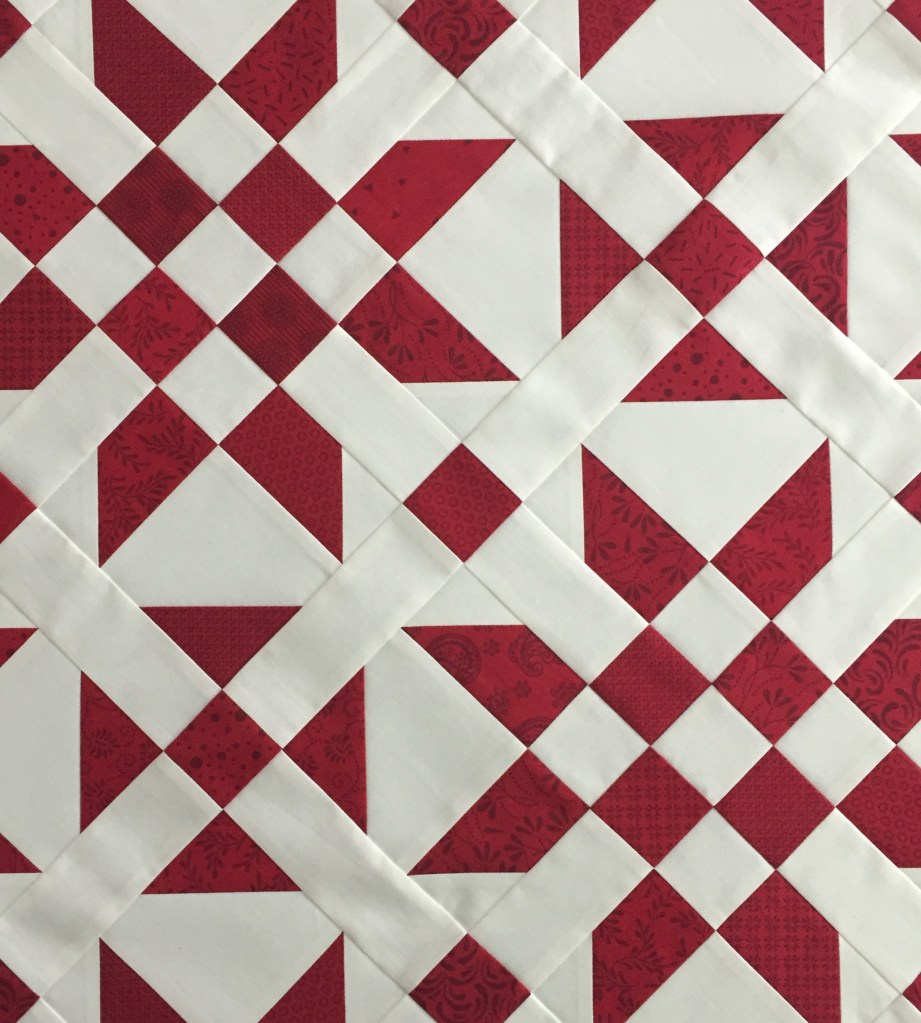
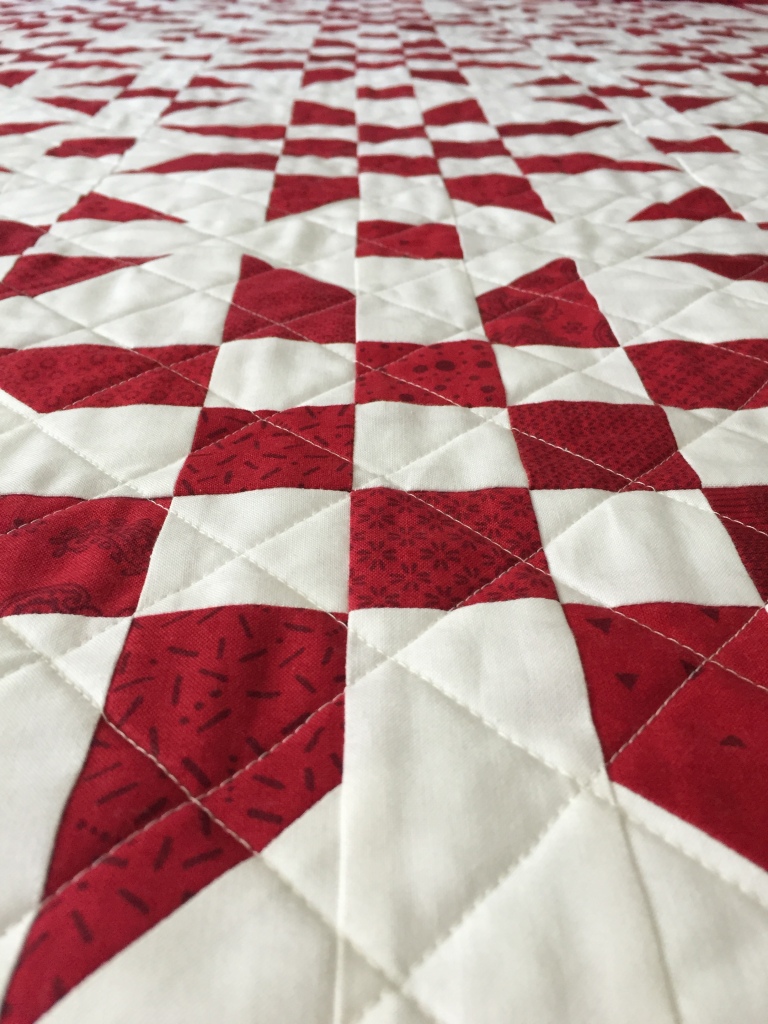
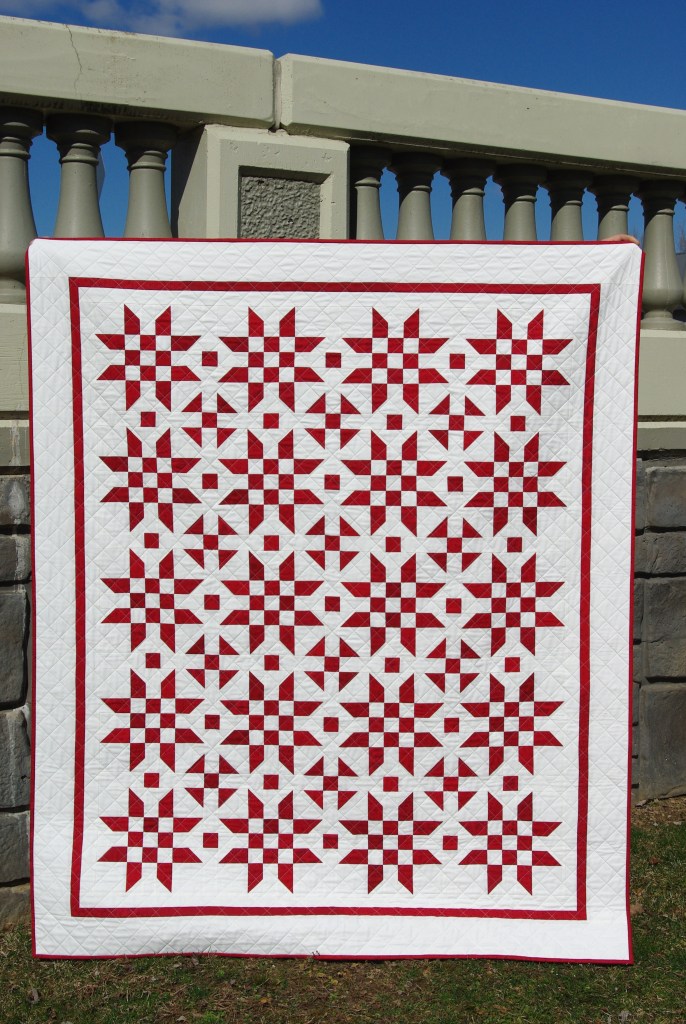
And here’s my finished Illusion quilt. I finally have my red and white quilt!
I enjoyed making this pattern and have considered making it again in another color combination. So many choices…