modern quilts, quilting, quilts, Uncategorized

Scrappy Four Patch Charm Quilt

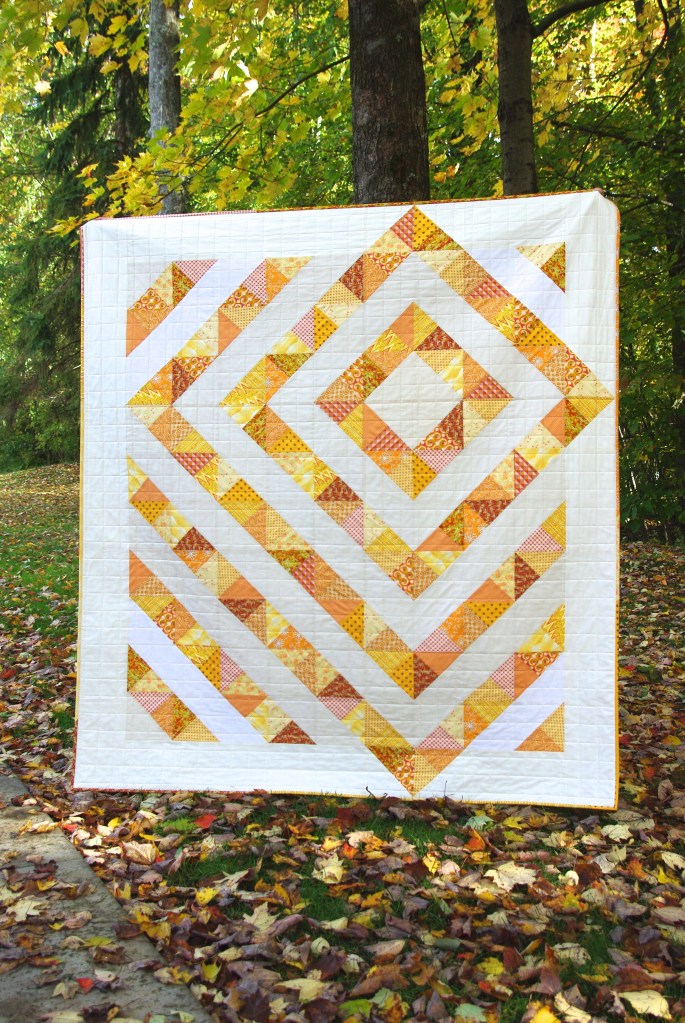
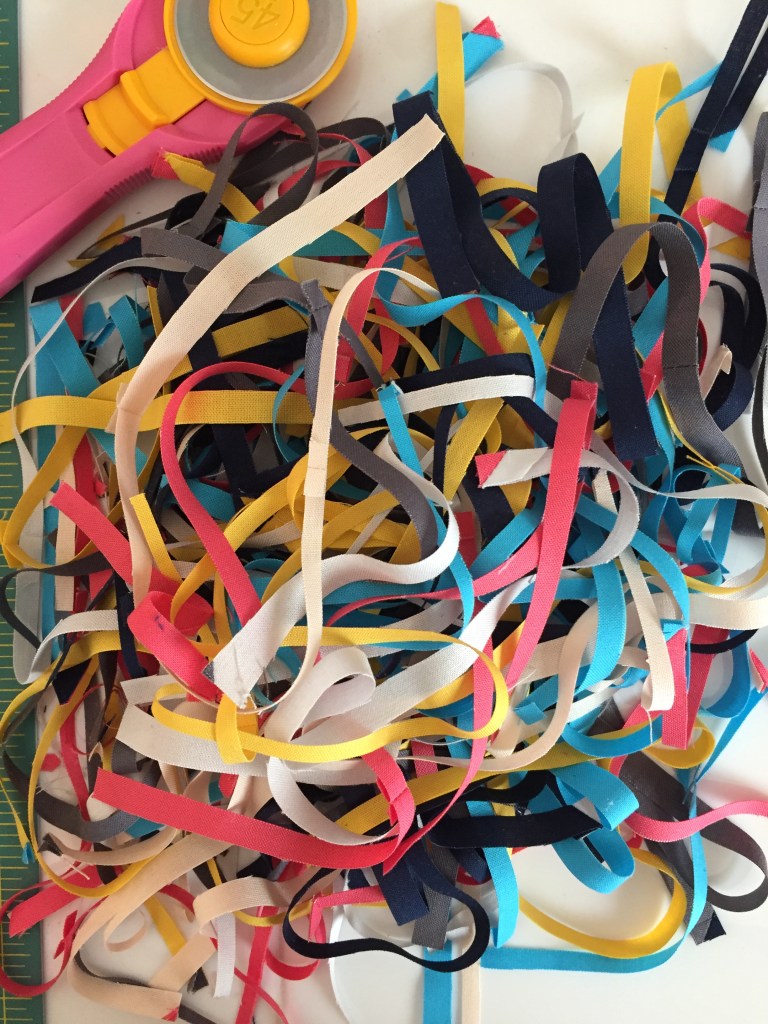
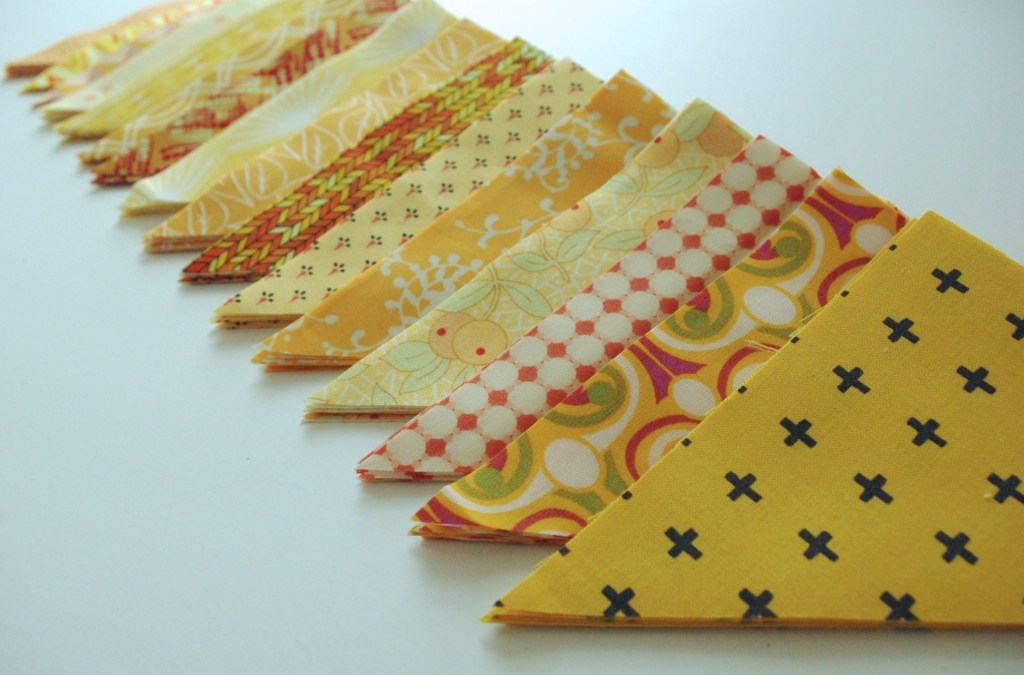
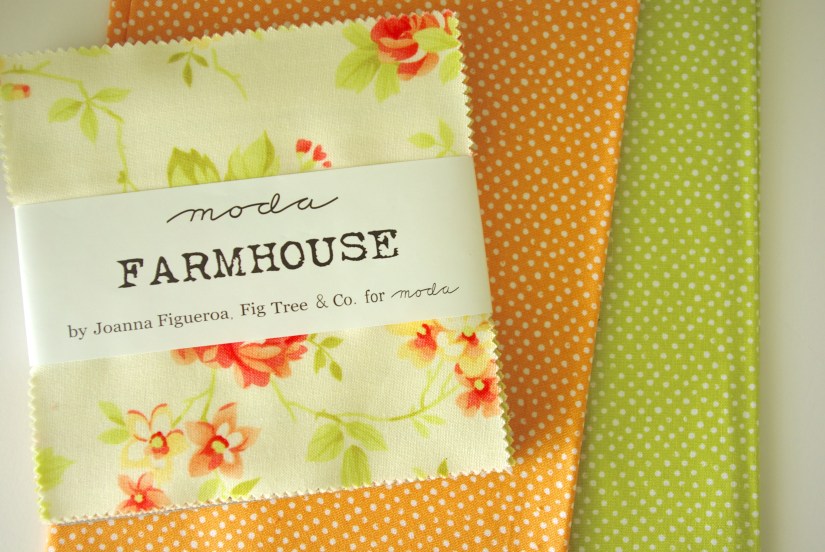
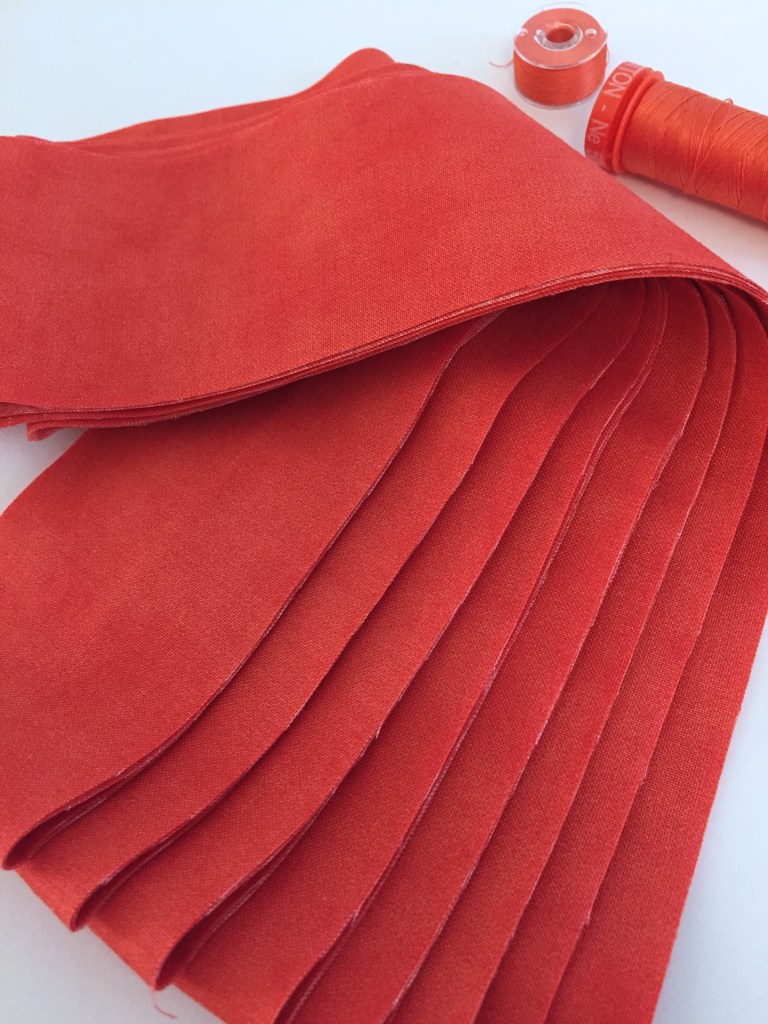
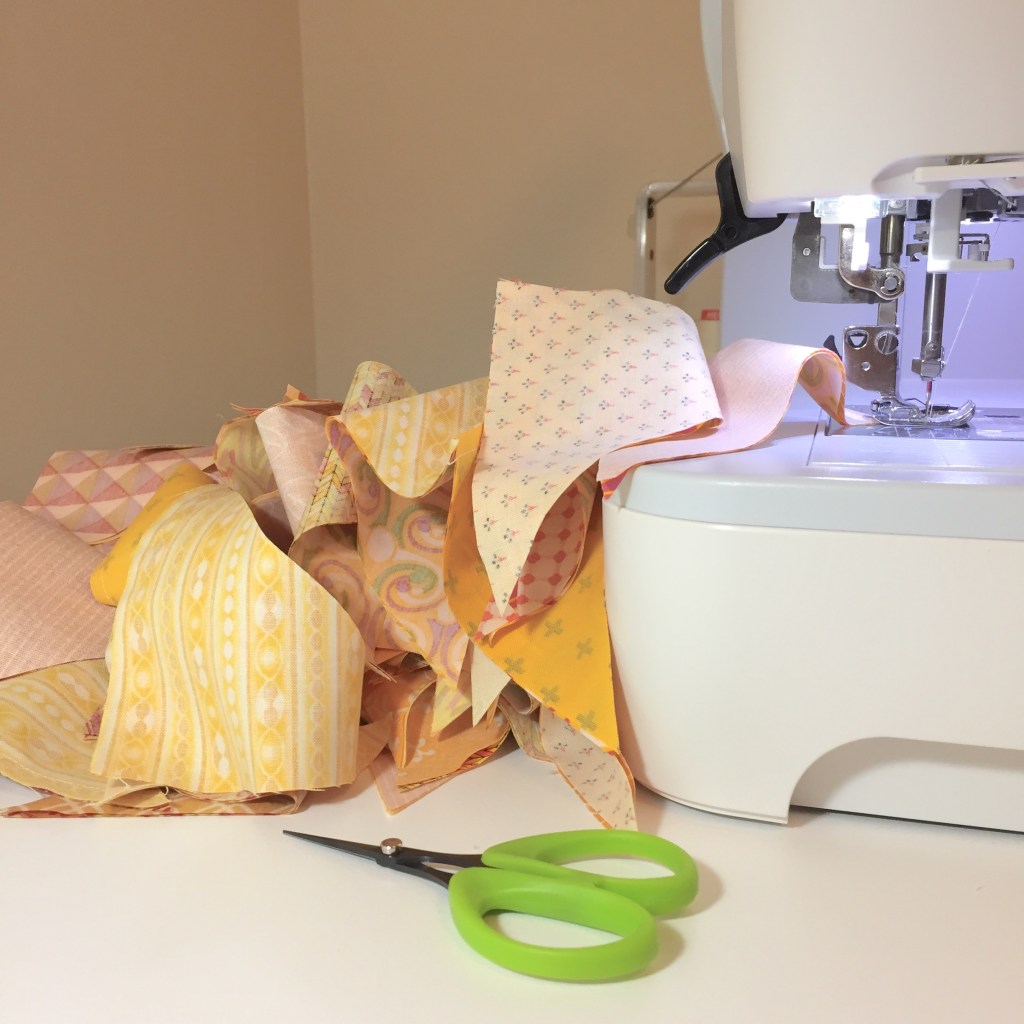
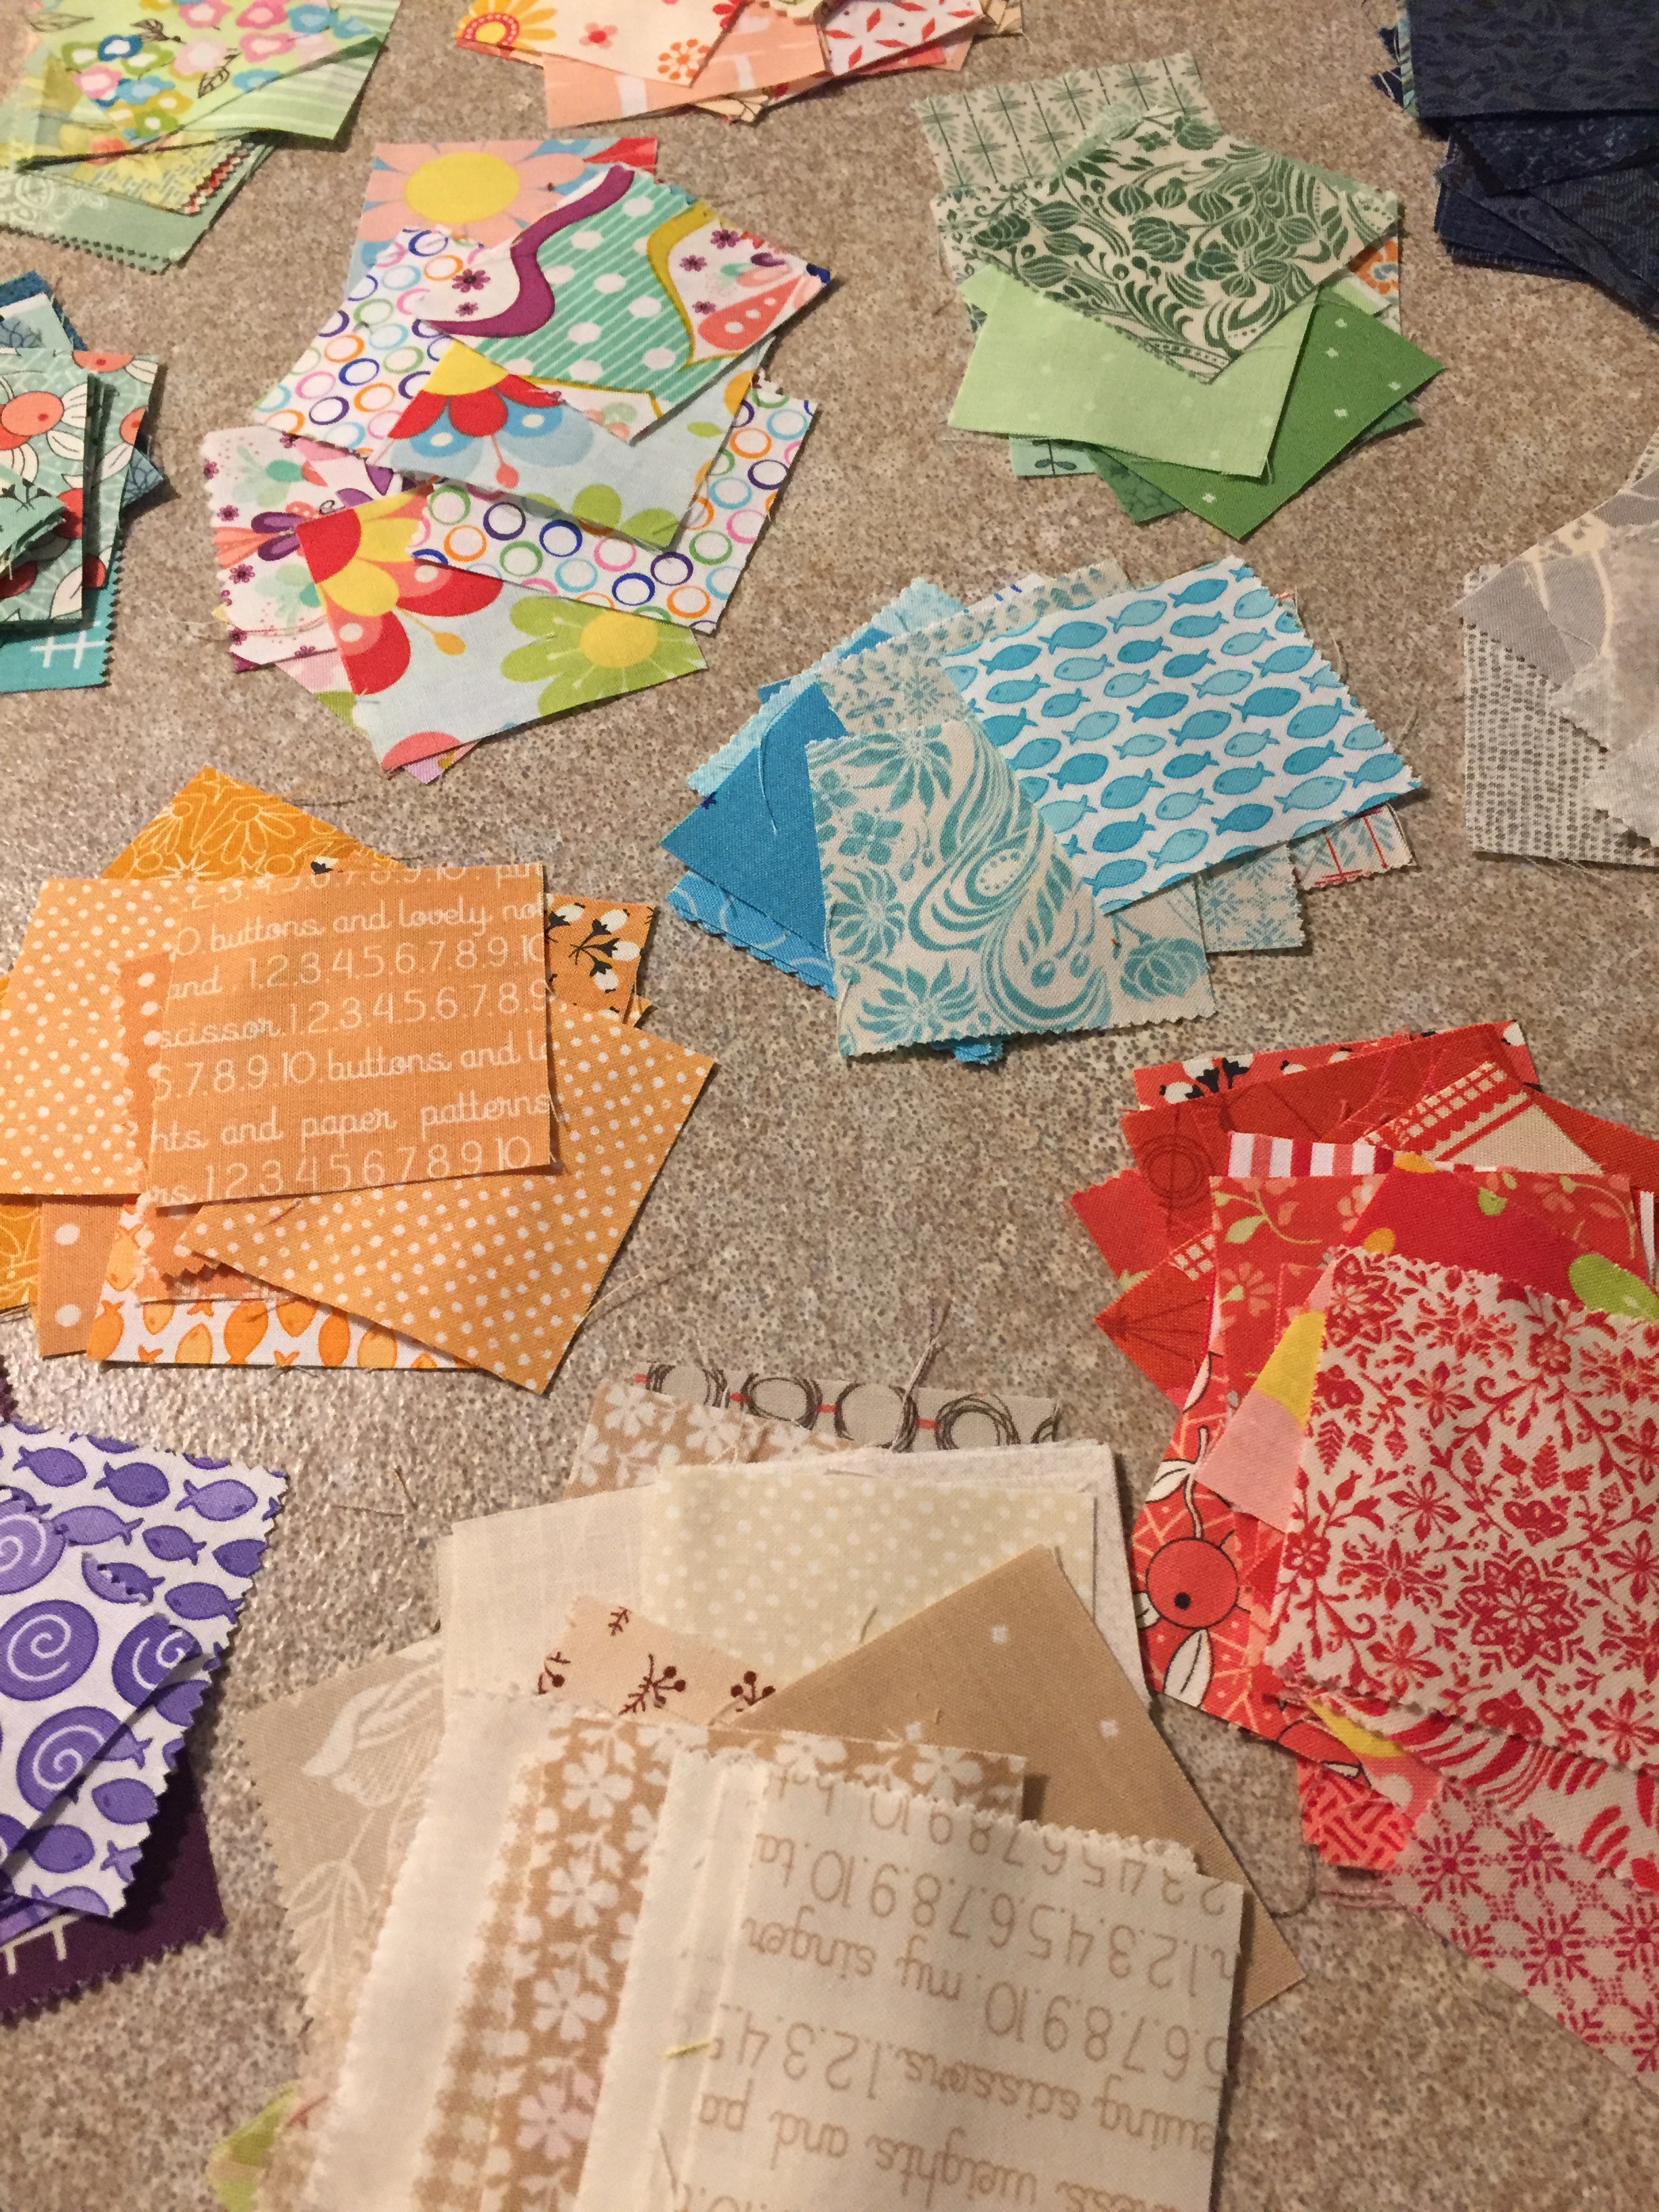
In keeping with my goal to use fabric on hand, a few weeks ago I decided to pull all my leftover 5″ squares and make a quilt out of them. Due to the large variety of prints it was a risky move, leaving me to question if all the fabrics would blend. Nonetheless, I was determined to make it work.

I planned to make another Four Patch Charm quilt (I’d made one back in September) that required 96 five inch squares. From the pile, I had about half. Needing another 45 or so, I headed back to my stash of leftover fabric and pulled what I thought would work. That batch included fabrics from my first quilt, other quilts, various small projects, quilt backs, bindings, etc. I cut until I reached my number.

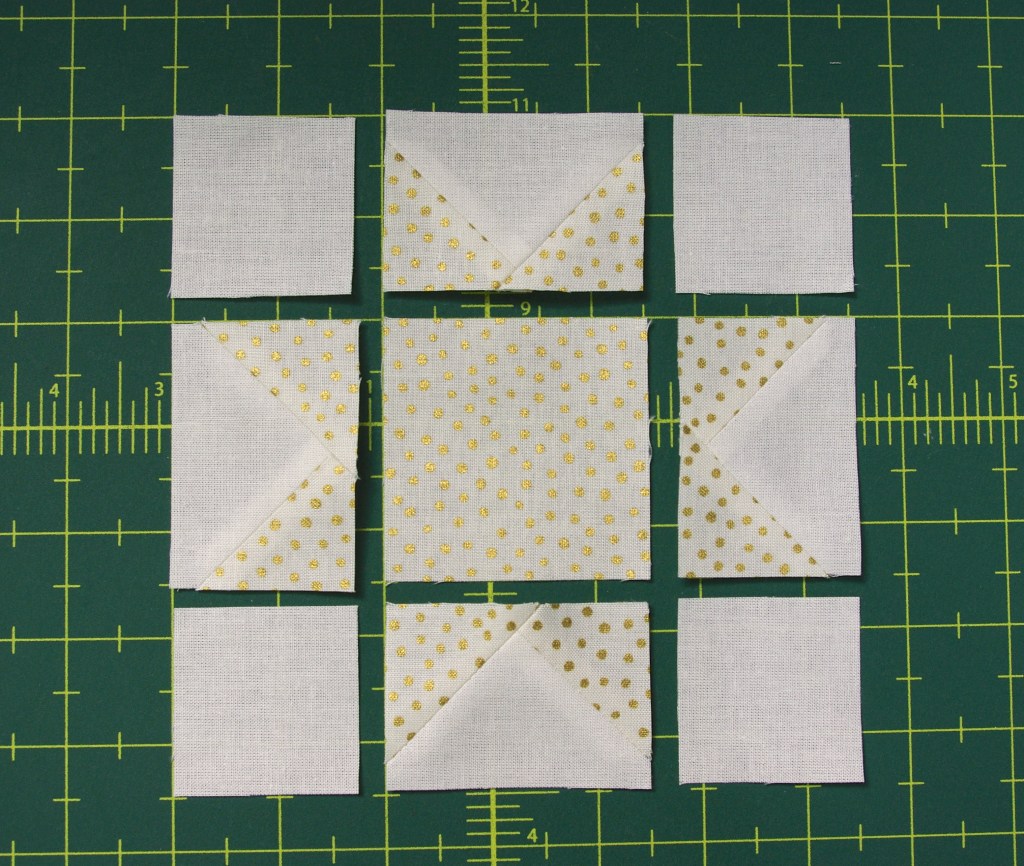
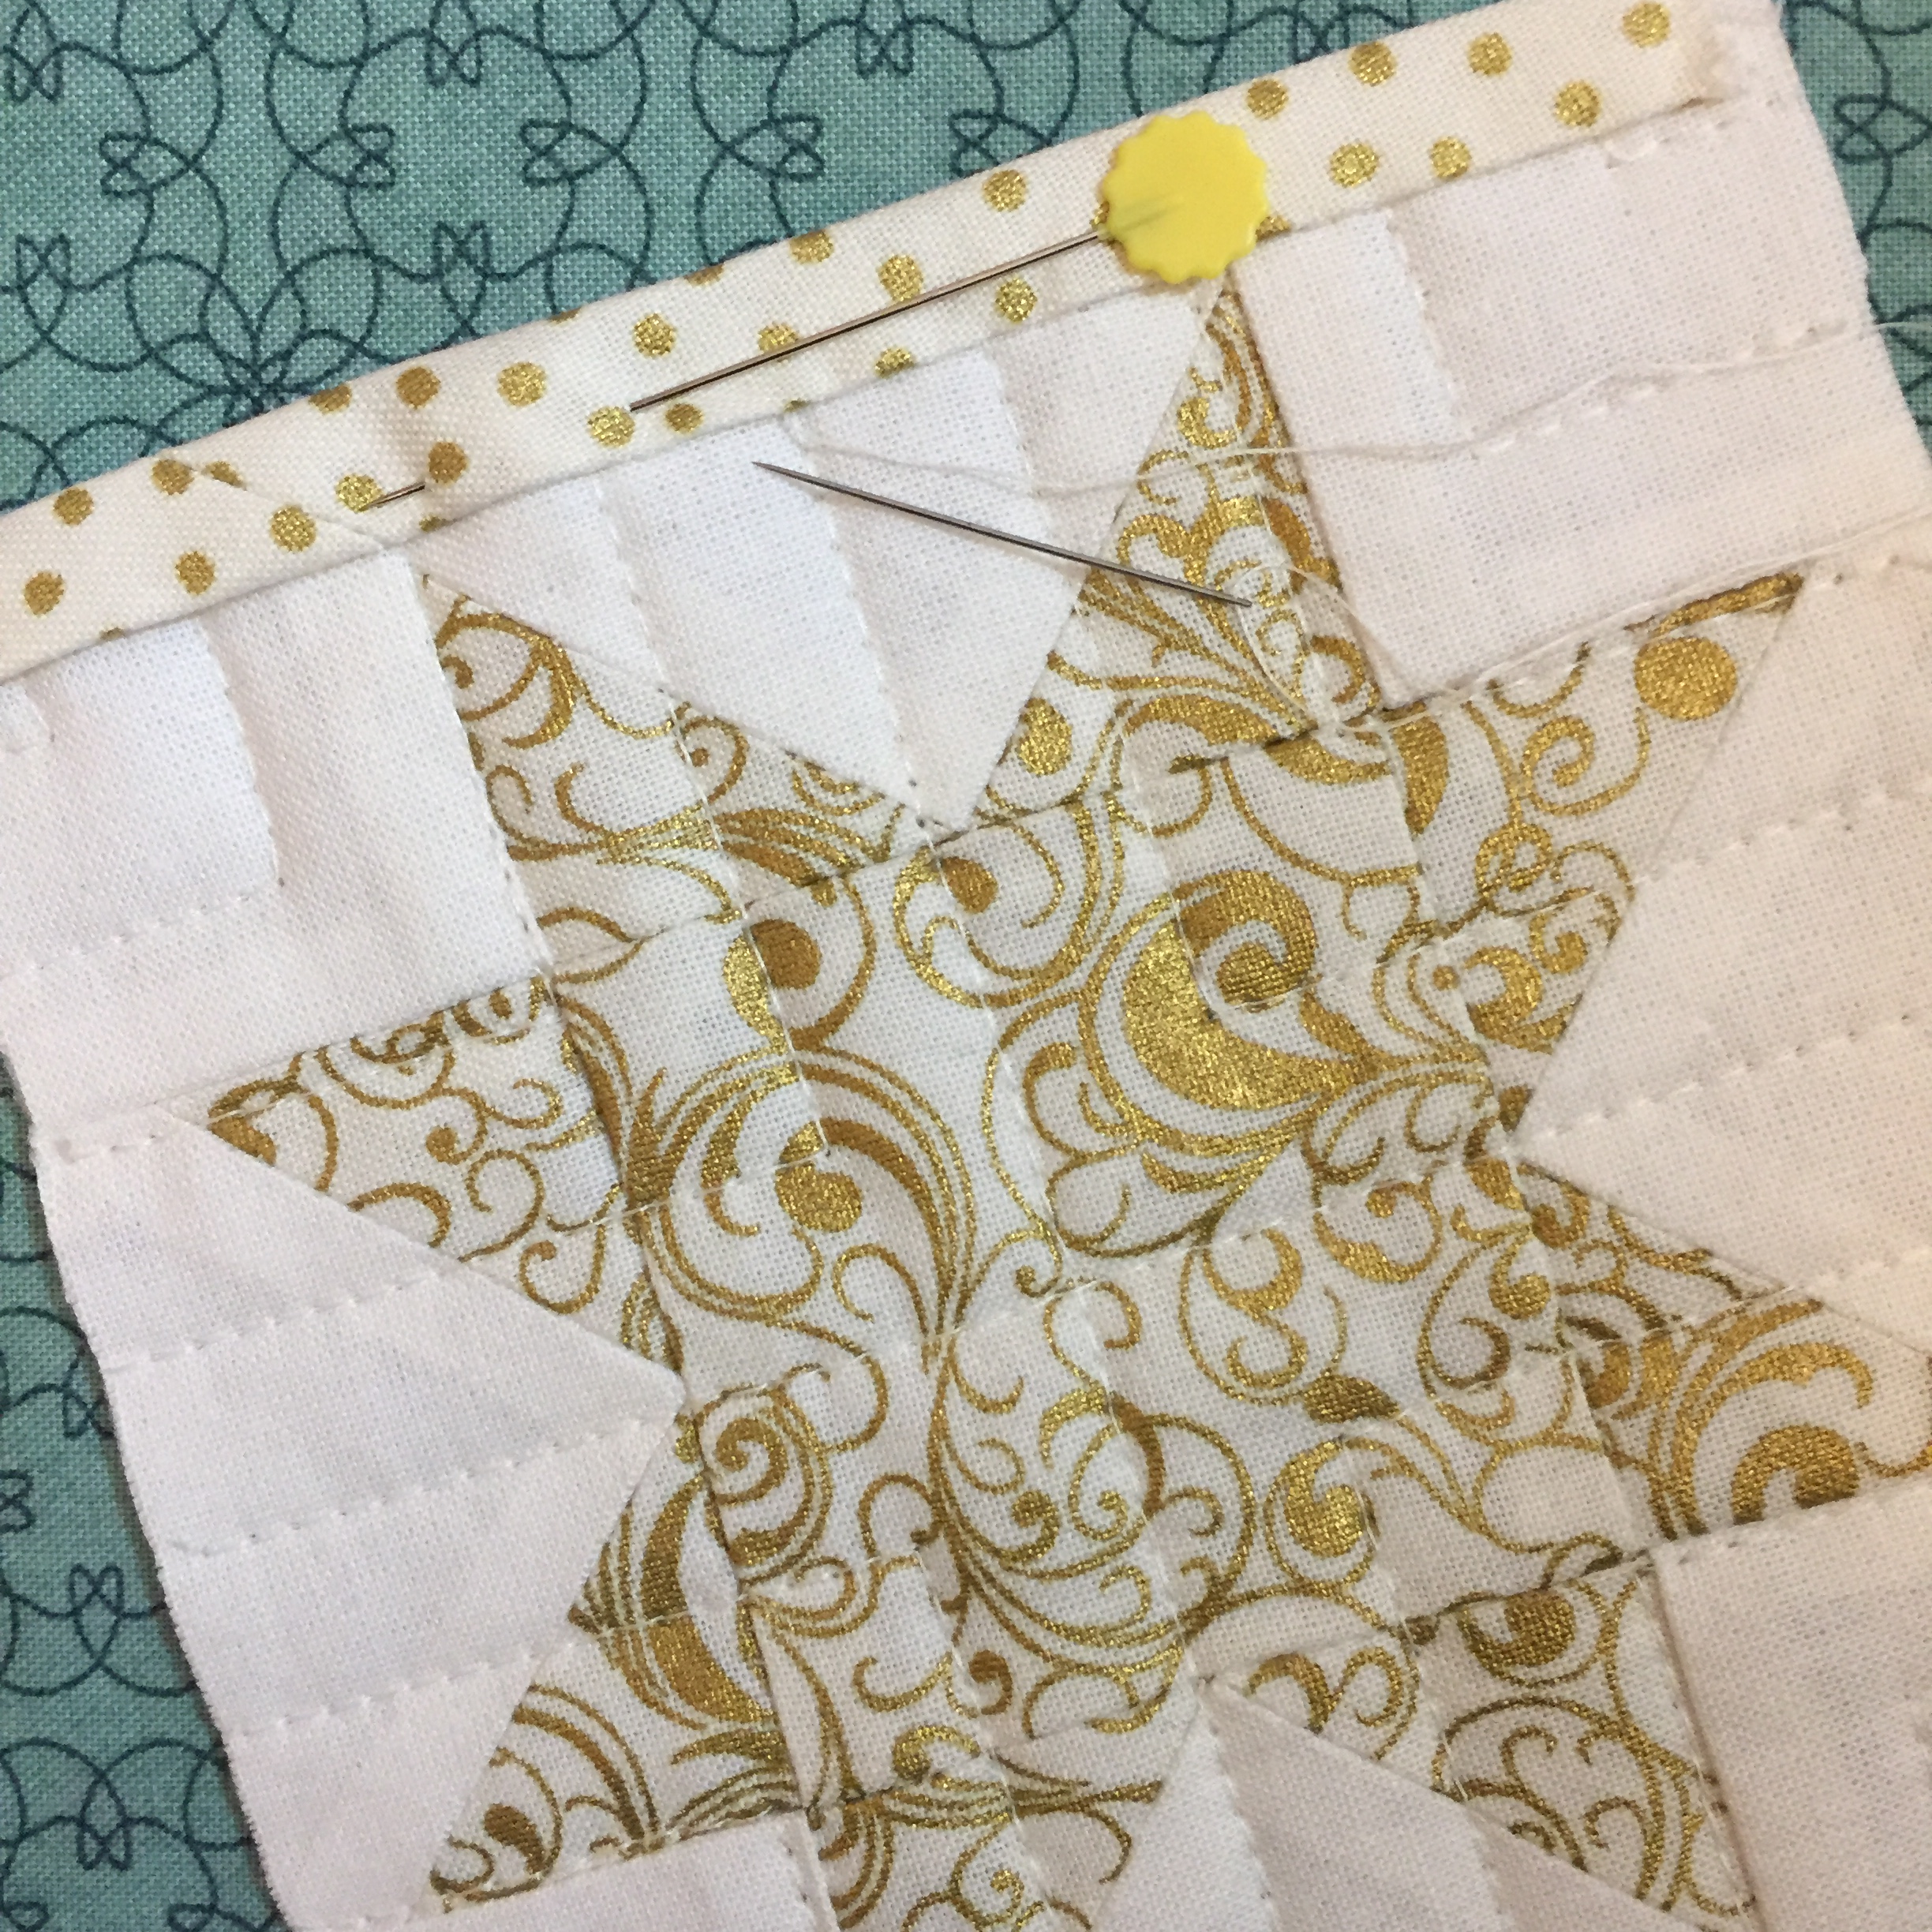
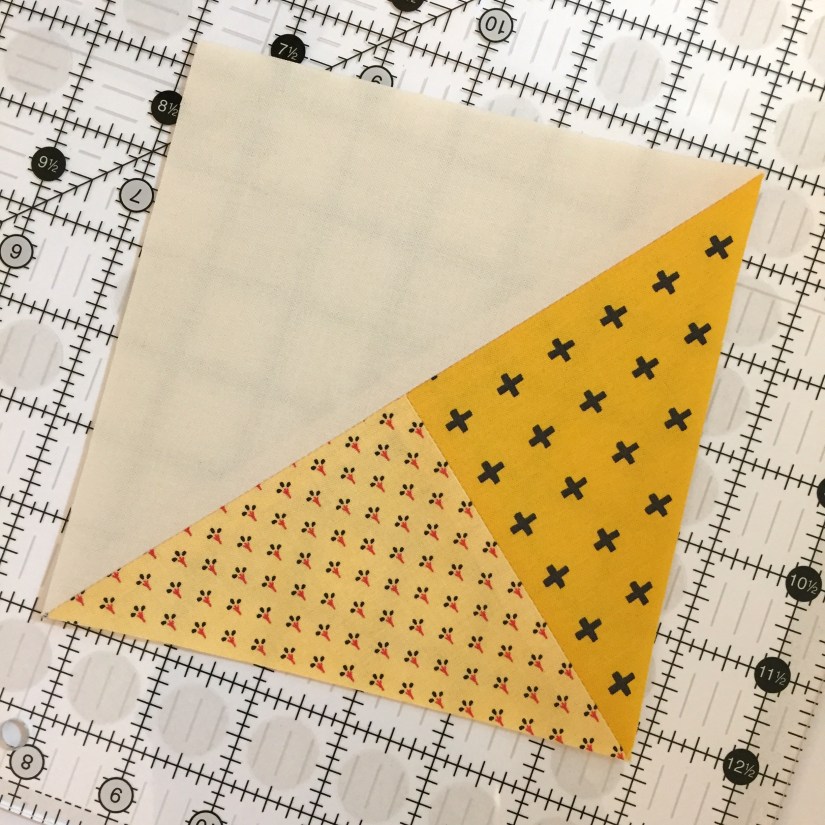
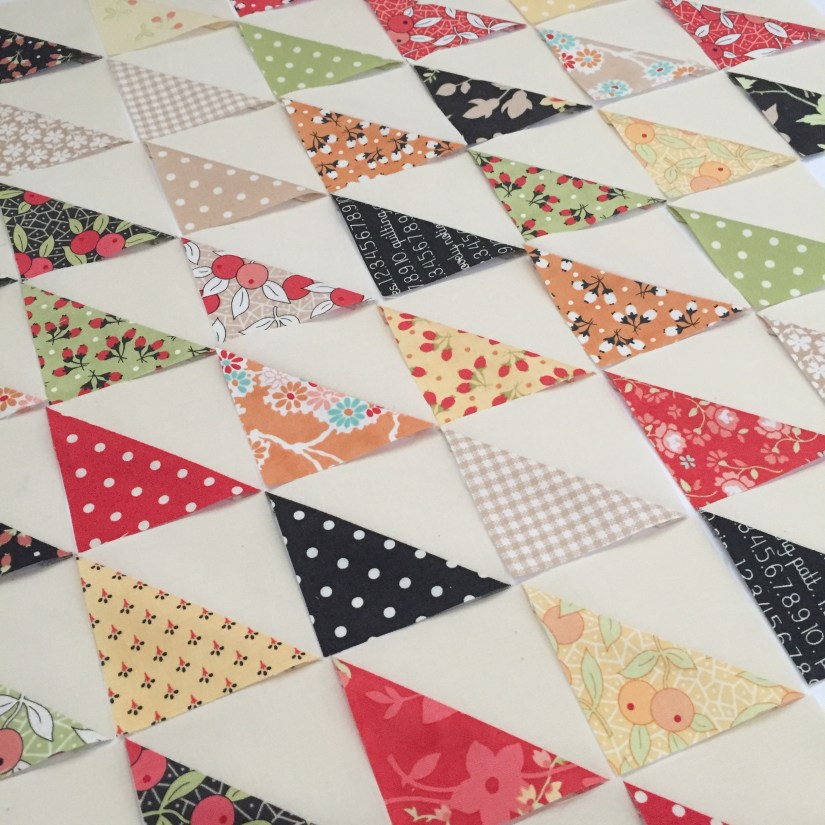
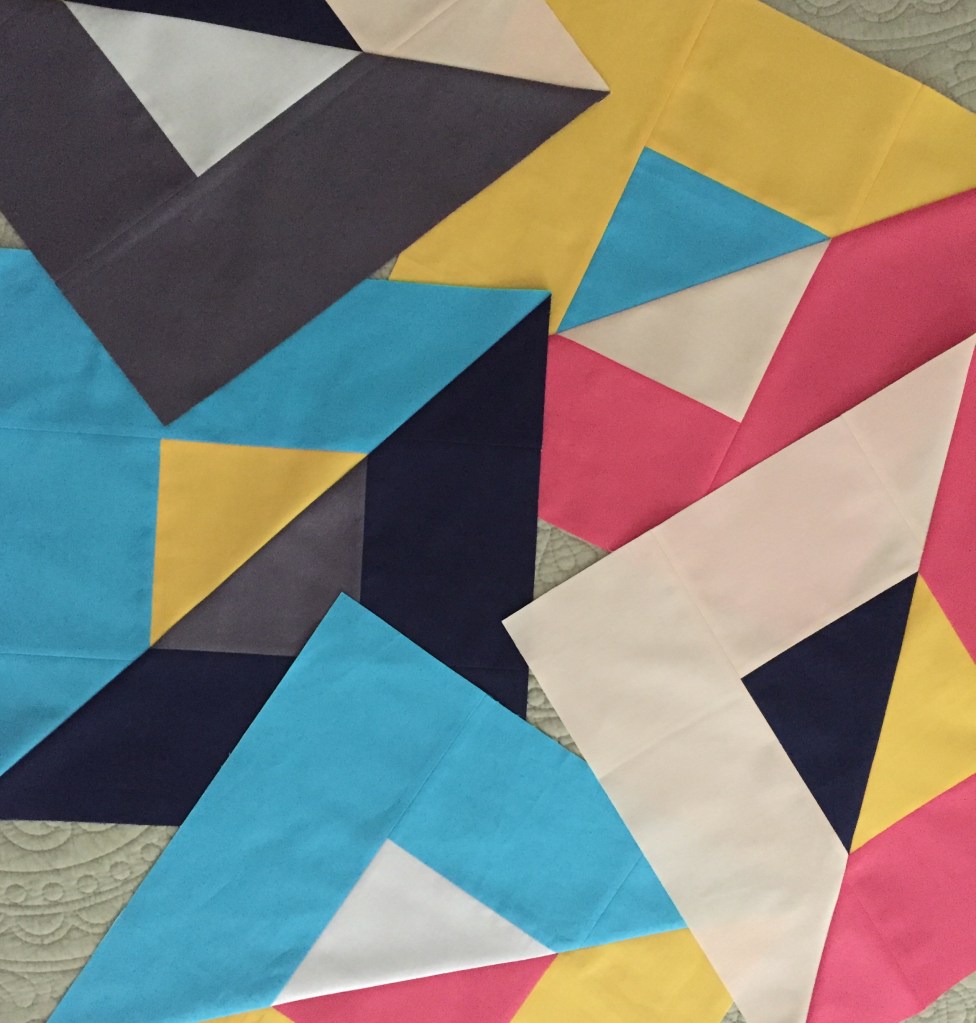
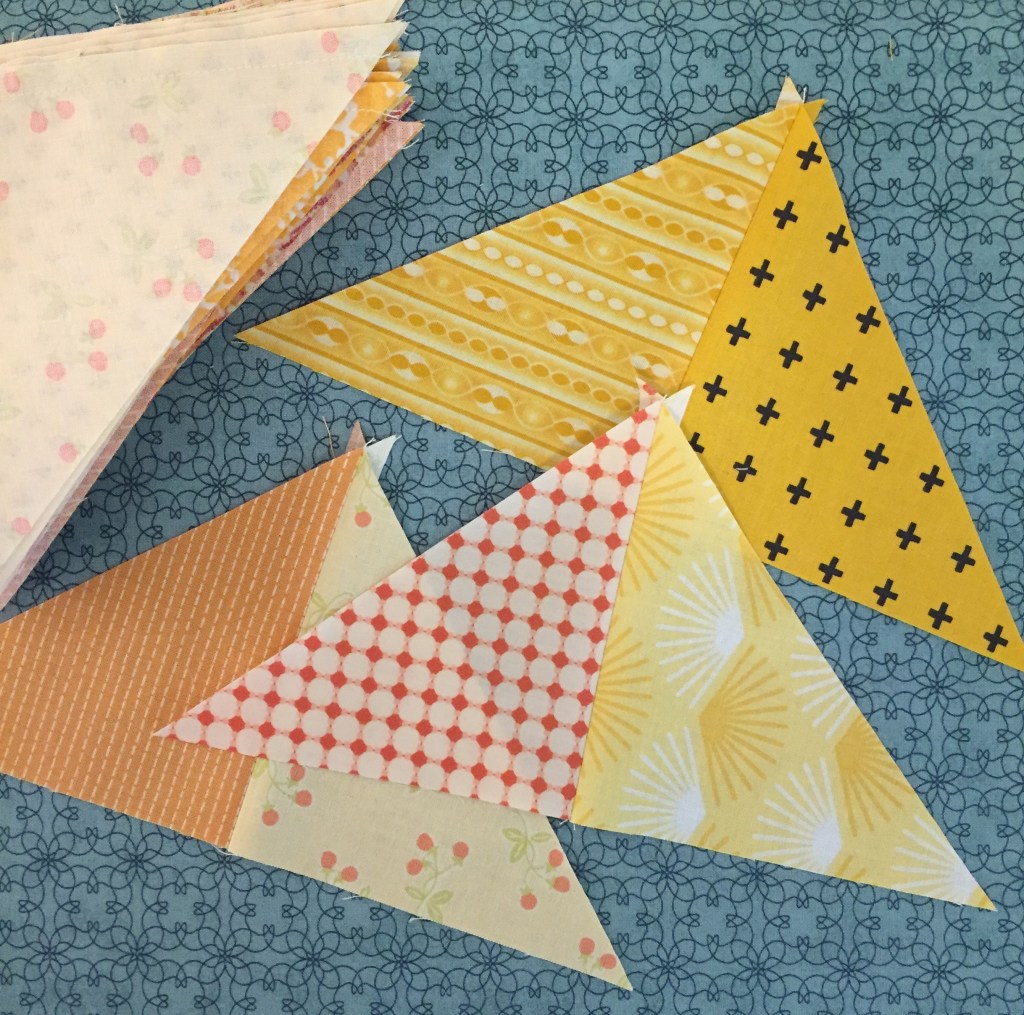
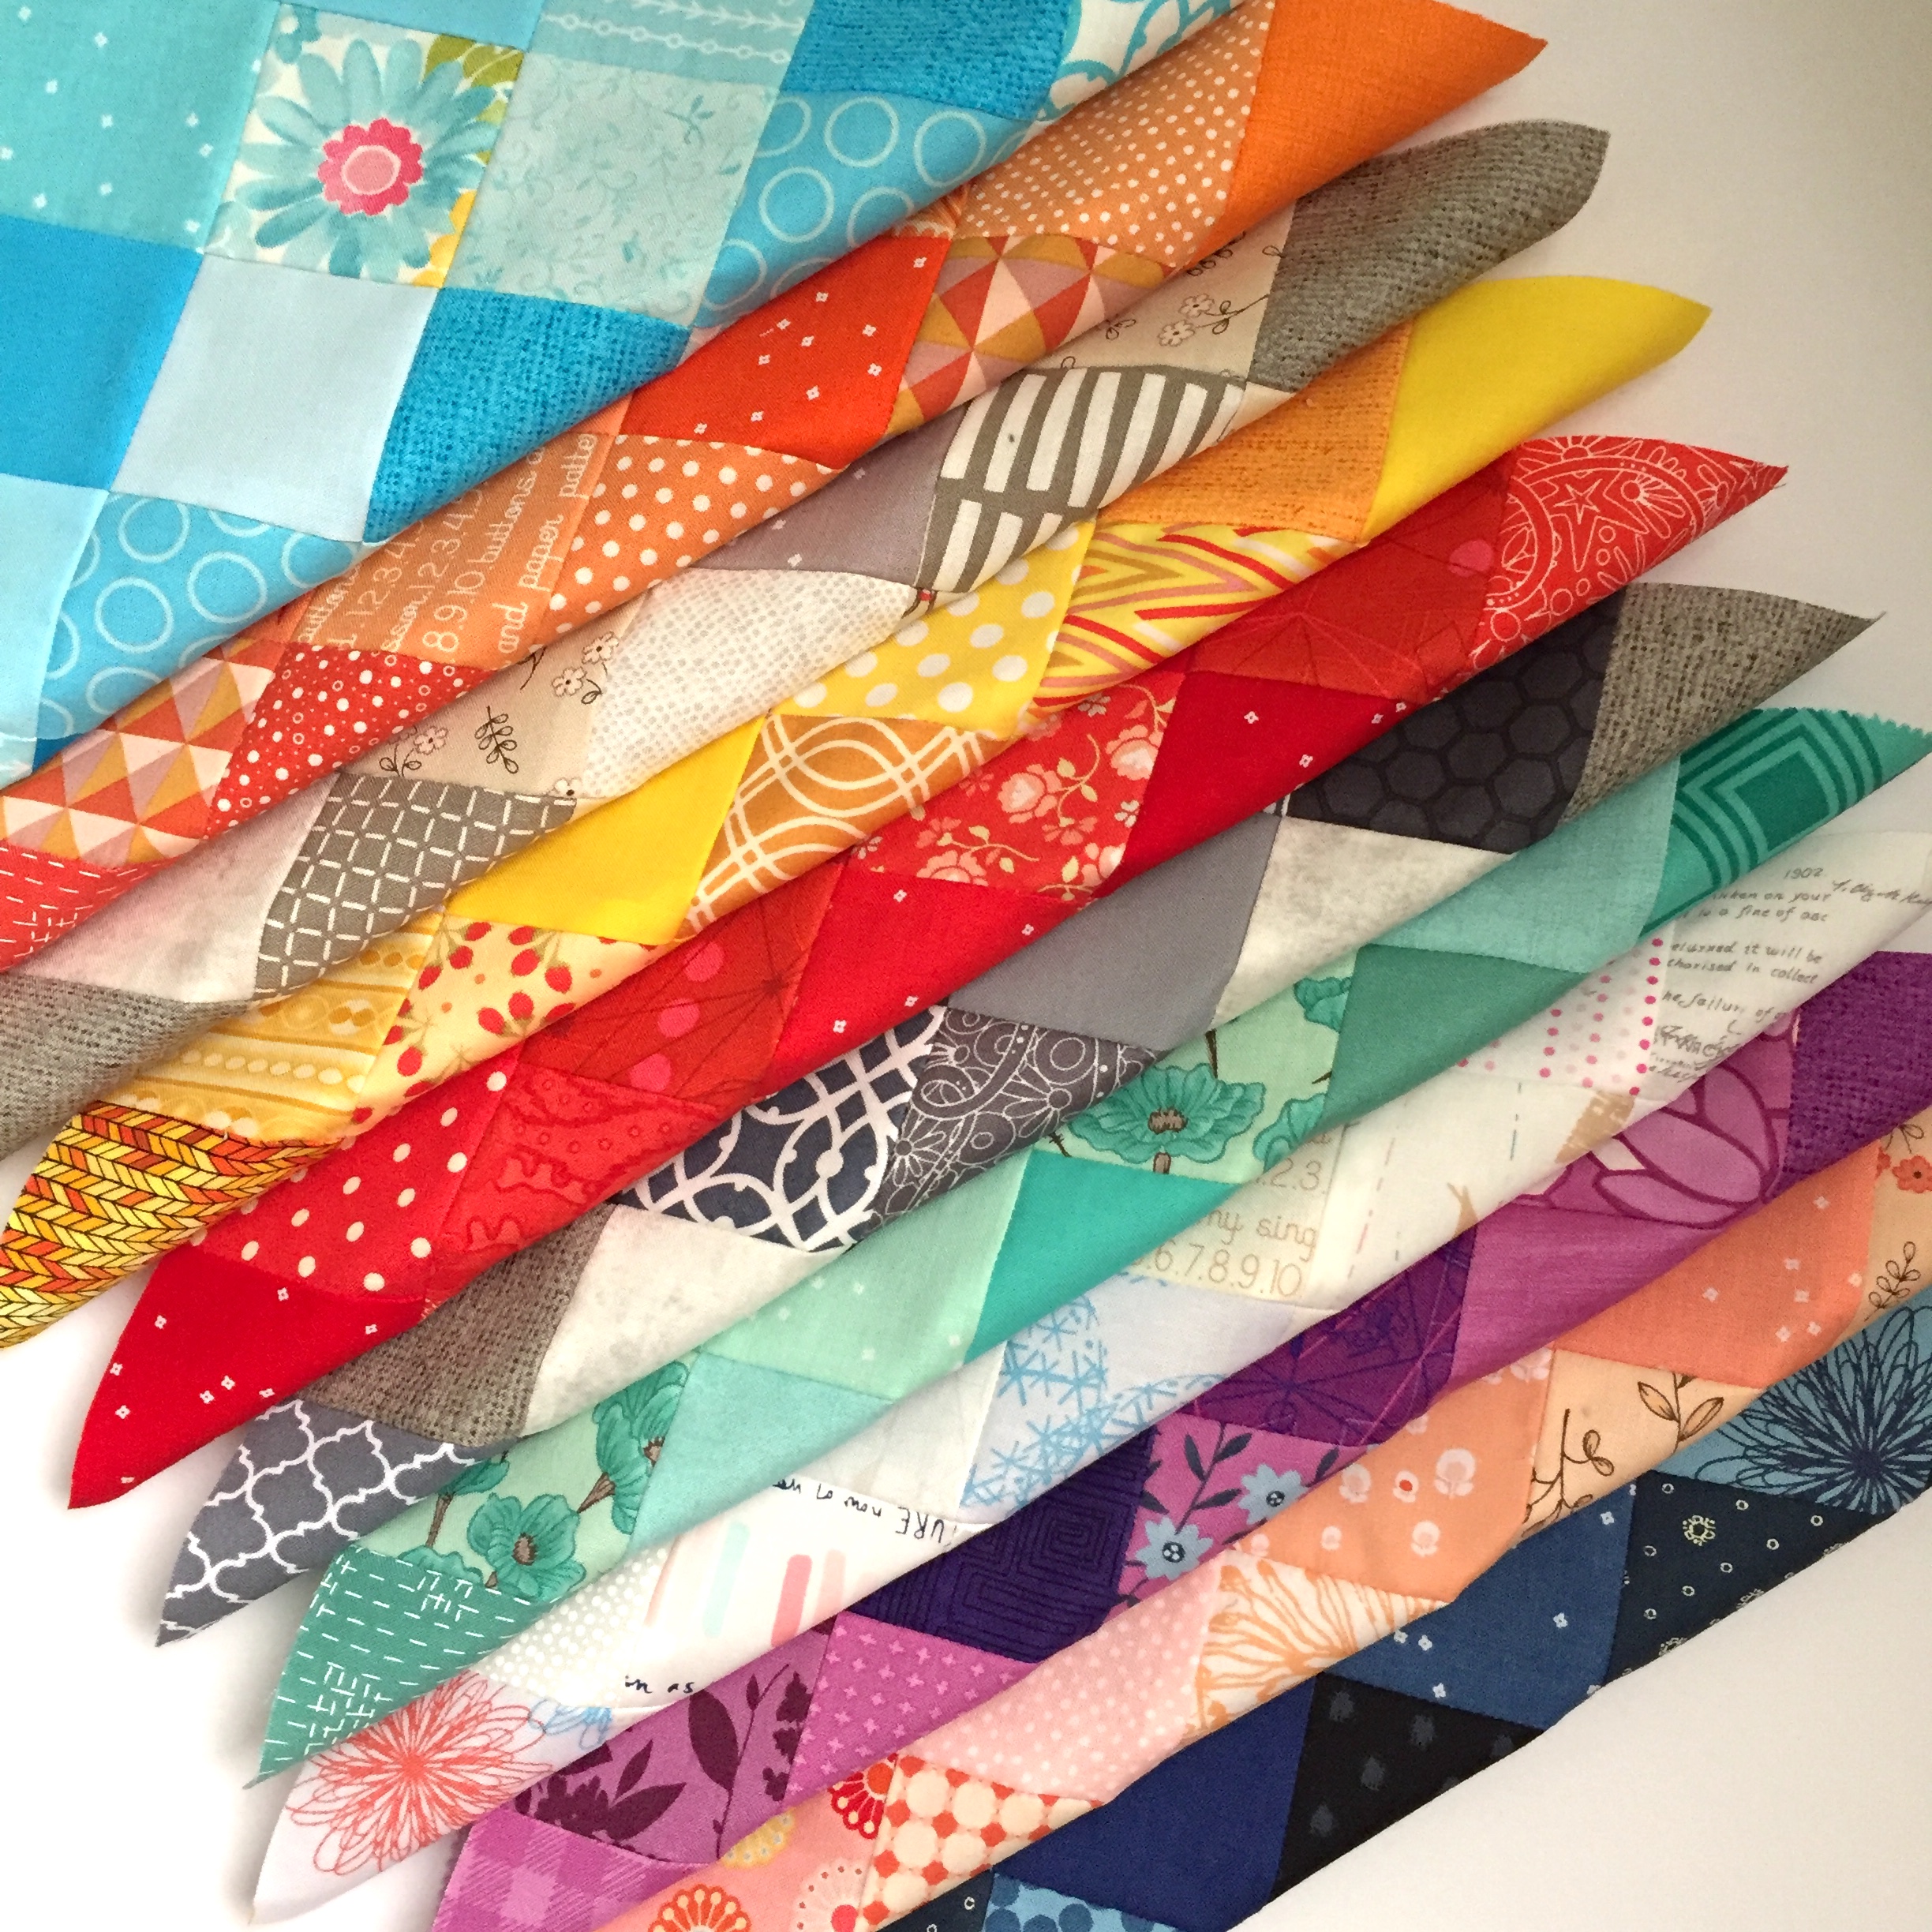
To get started, the pattern required the squares to be cut in half diagonally then sewn in pairs.

After sewing together of 96 pairs, I still wasn’t sure if everything would look OK even though I blended colors as best as possible. Then I thought, well, everyone loves scrappy, right? How could I go wrong?

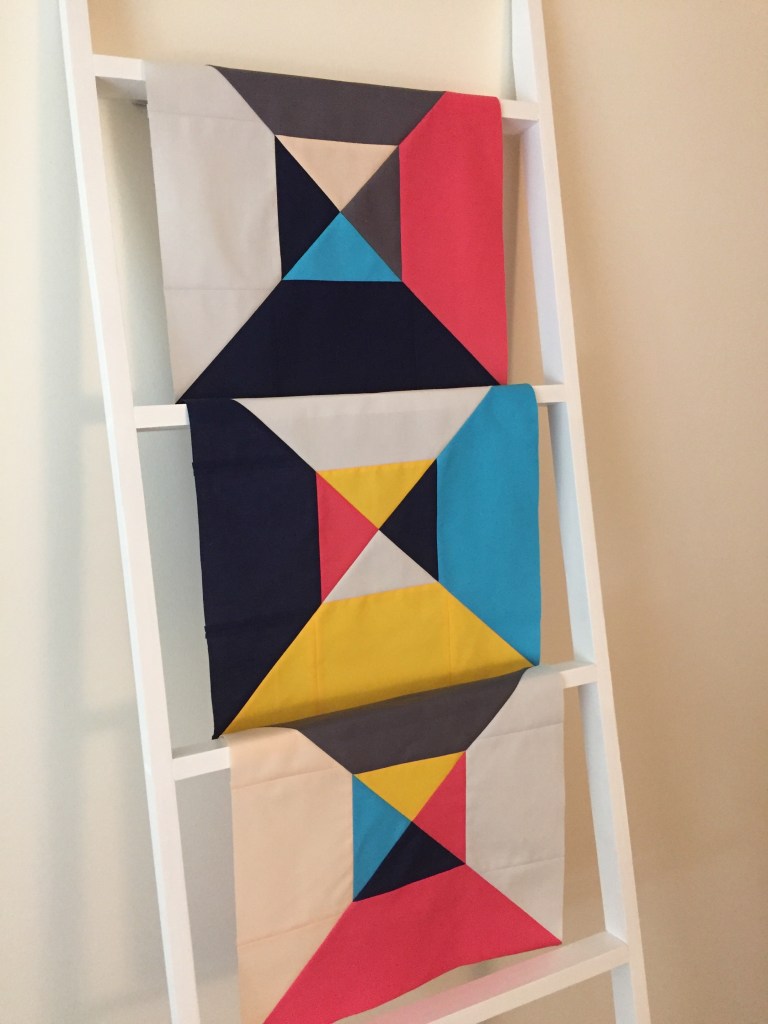
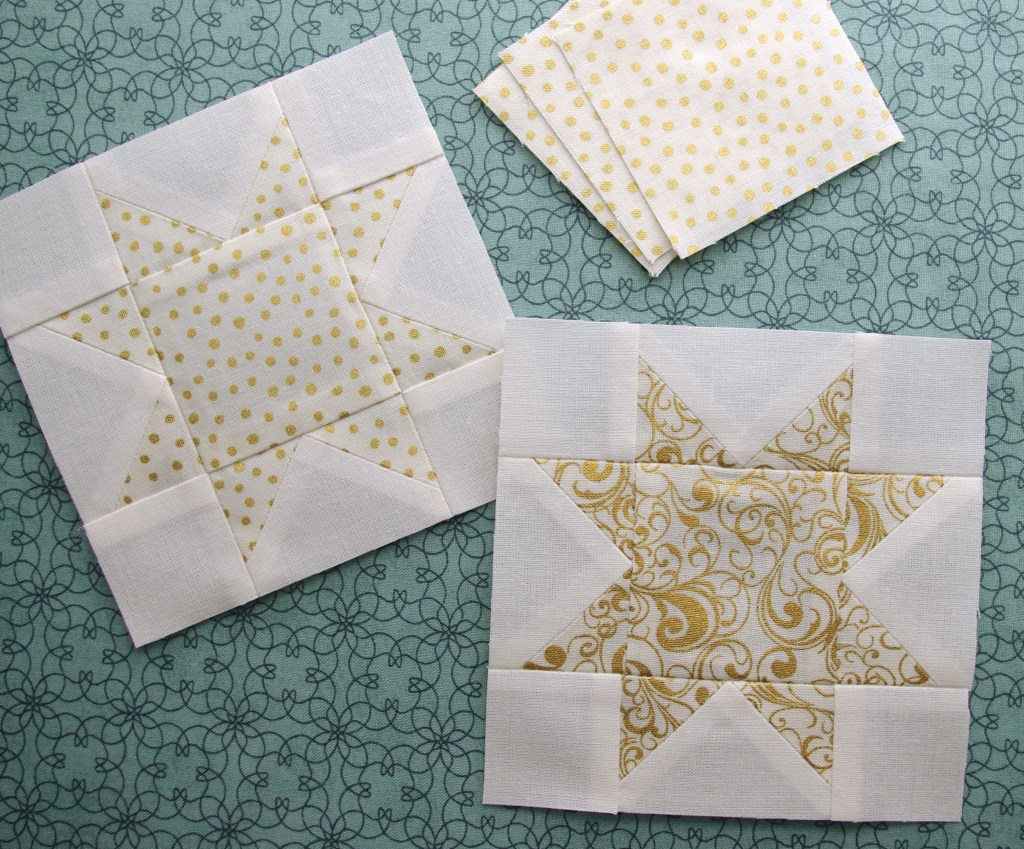
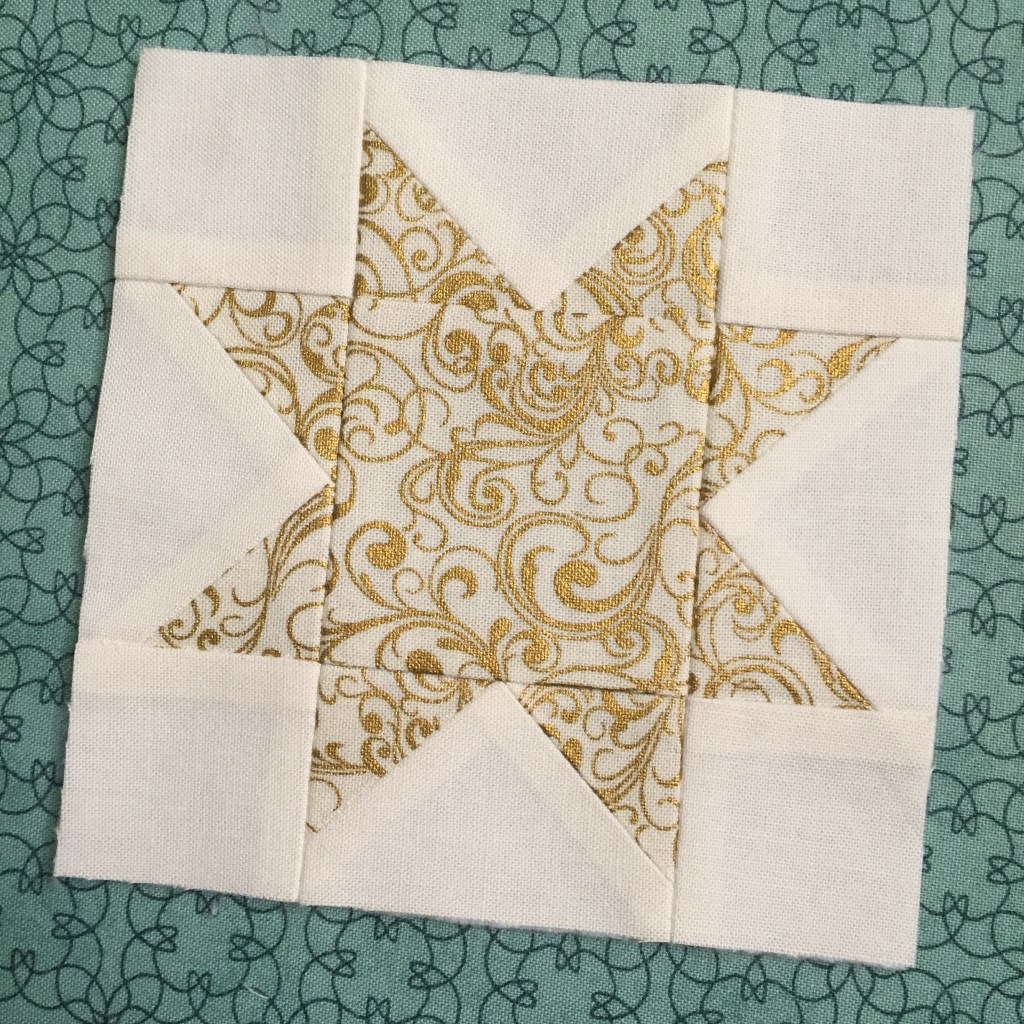
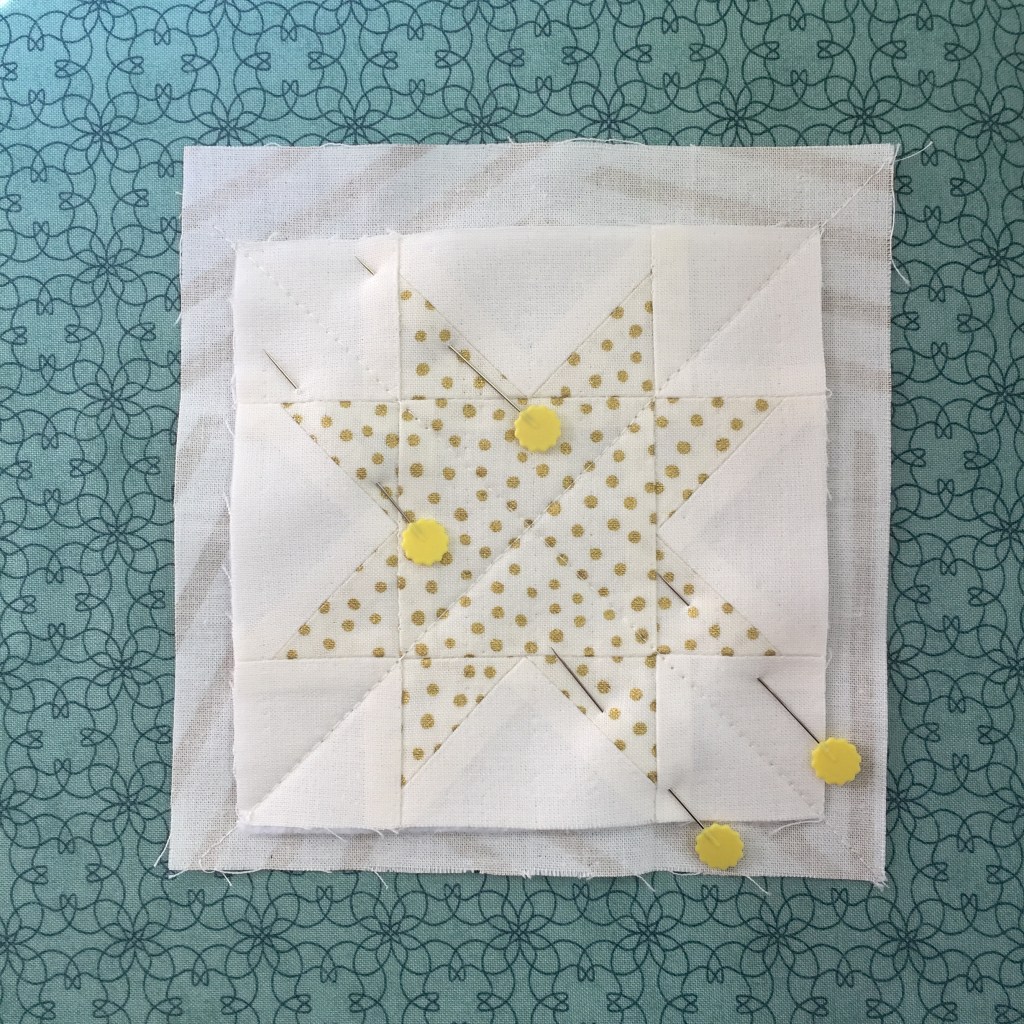
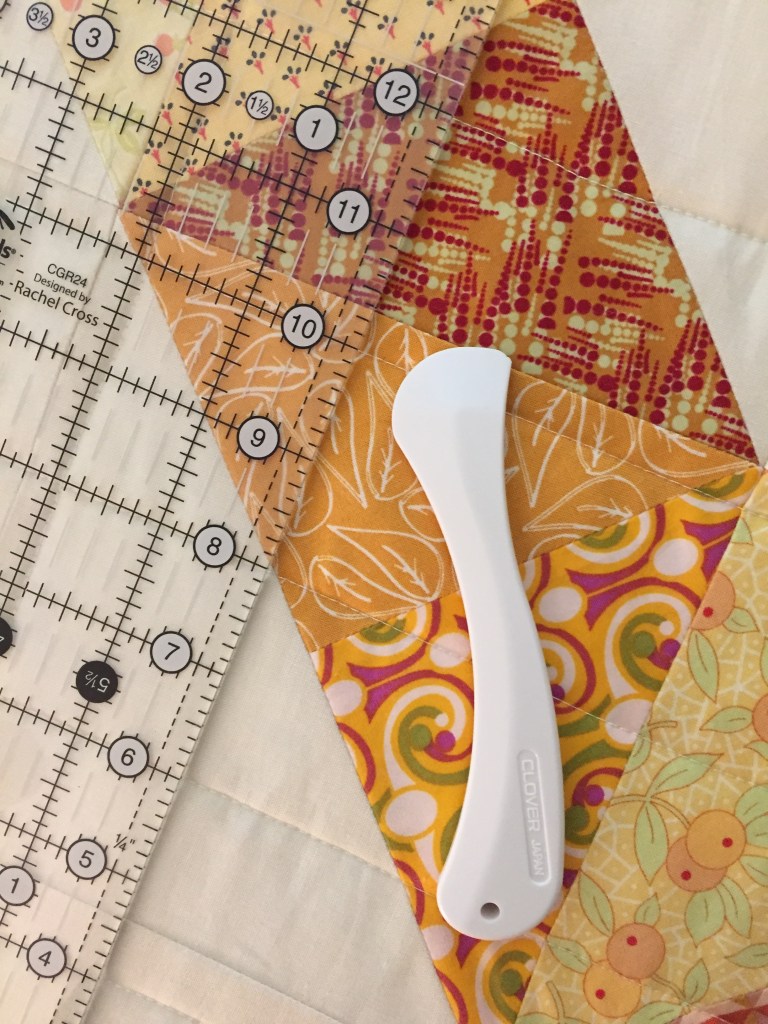
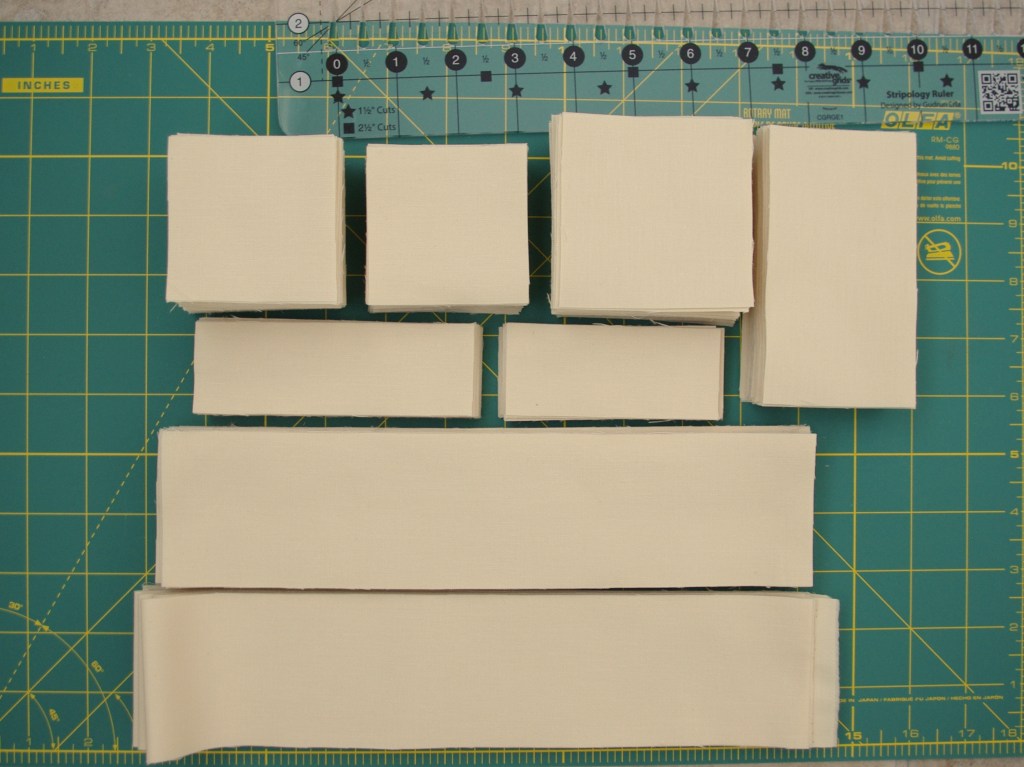
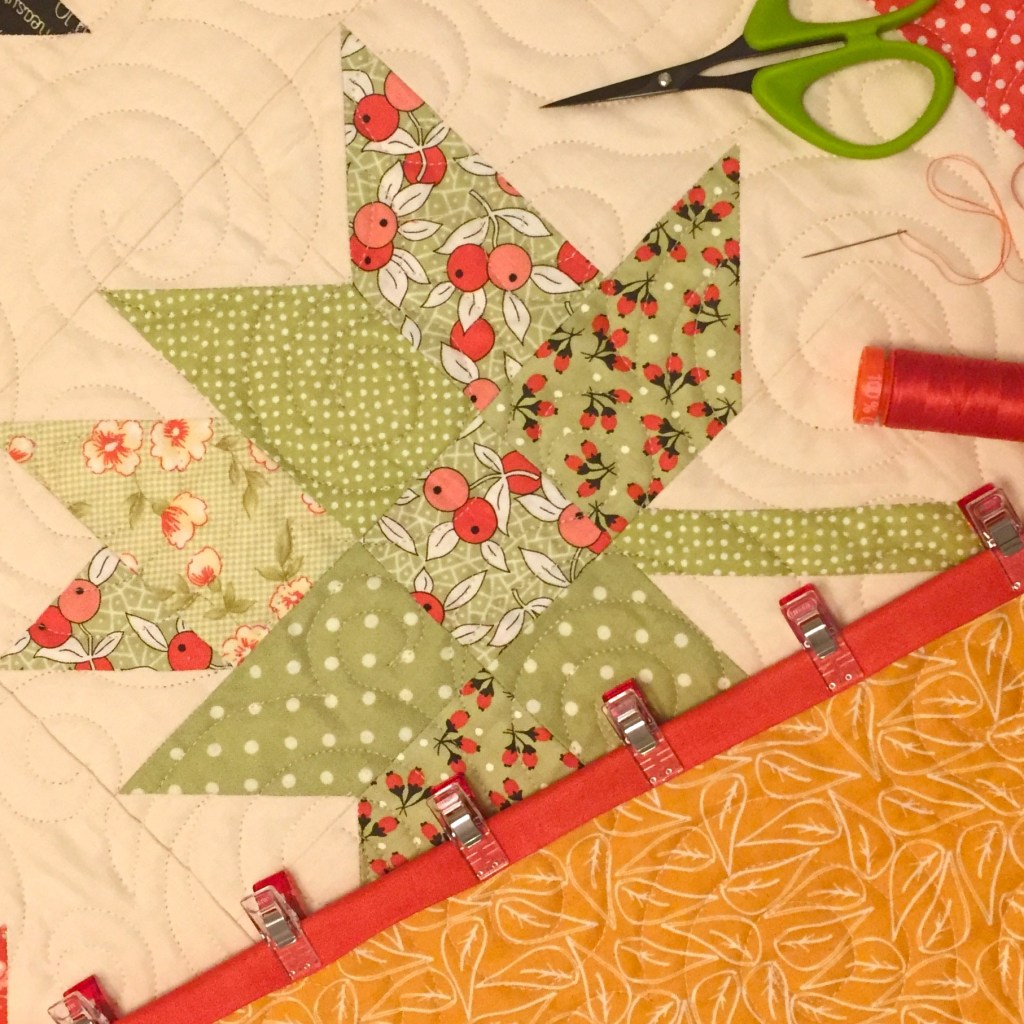
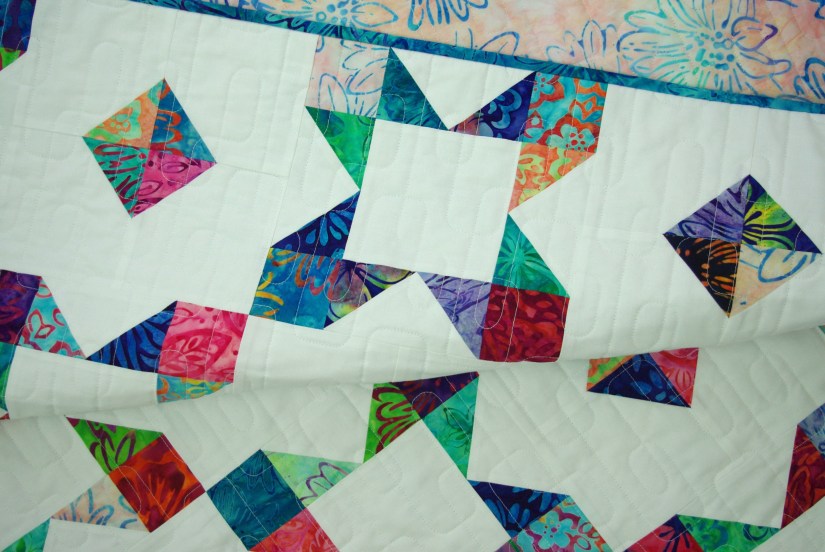
To finish the blocks, I used Kona Cotton Snow (the background triangle) choosing it for a less-than-bright-white look. The next step, trimming blocks. You can see they were pretty close to the size needed, but I never skip this step. Sure, it’s time consuming but it’s always, always worth the effort. 🙂

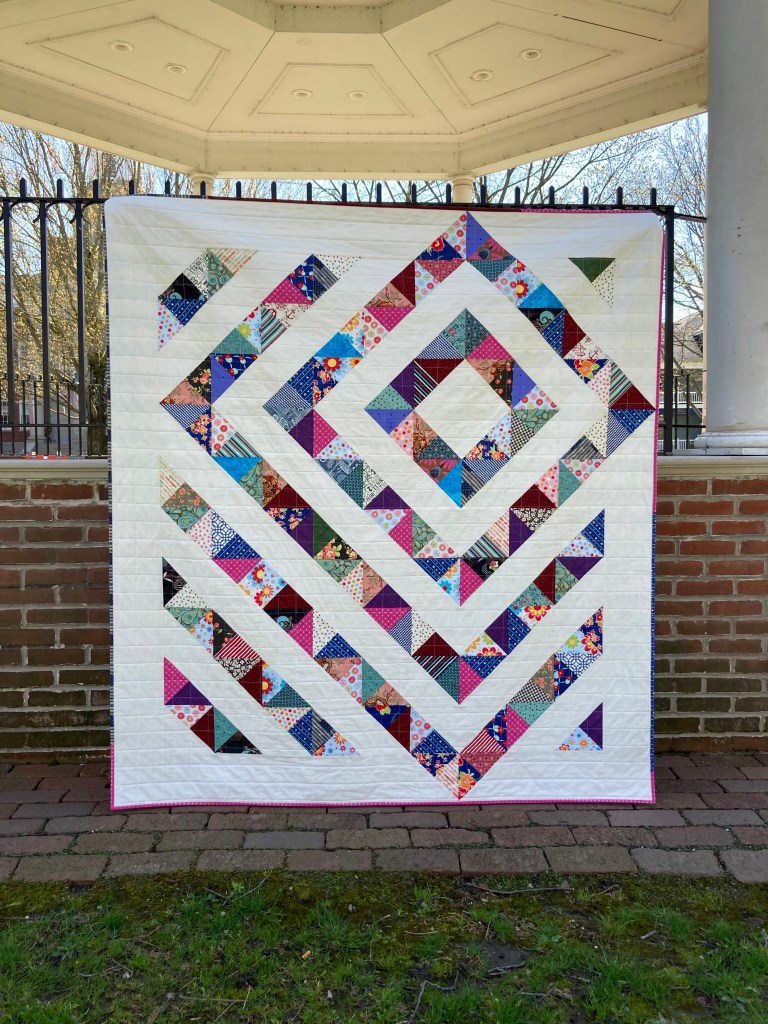
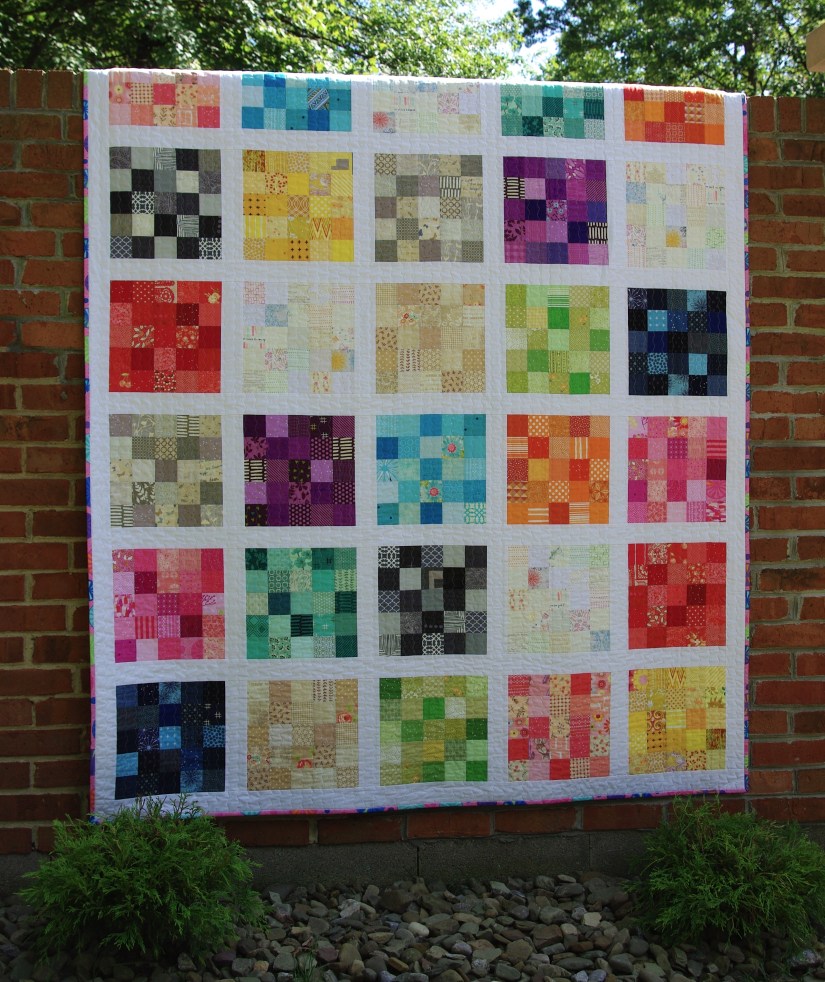
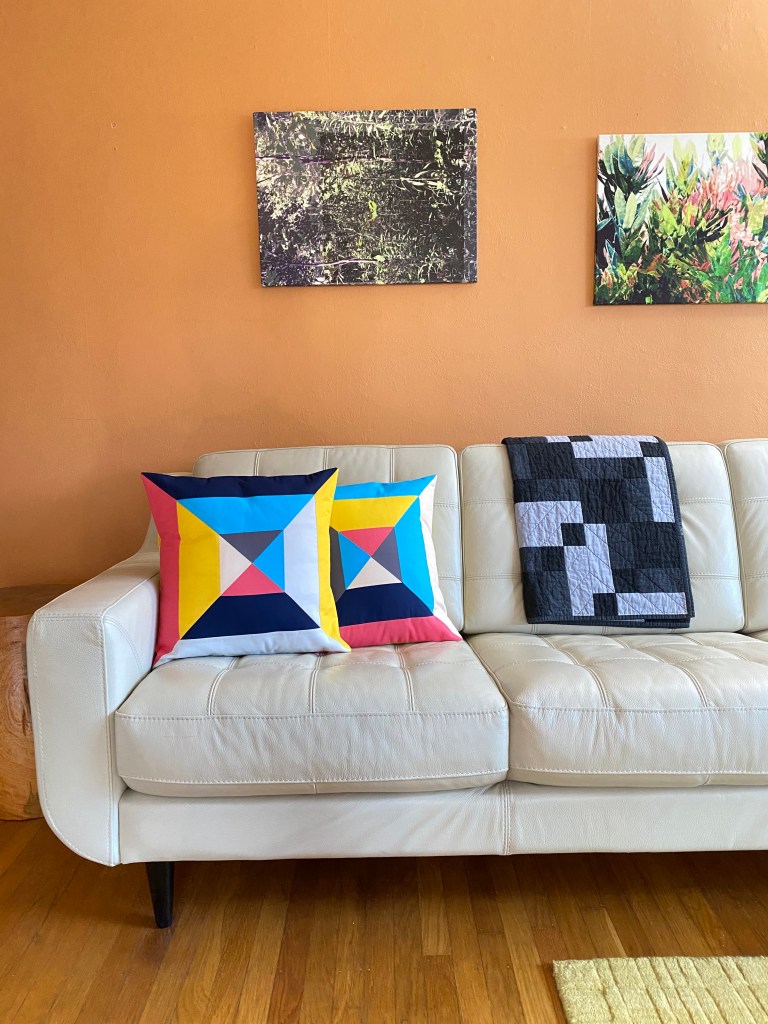
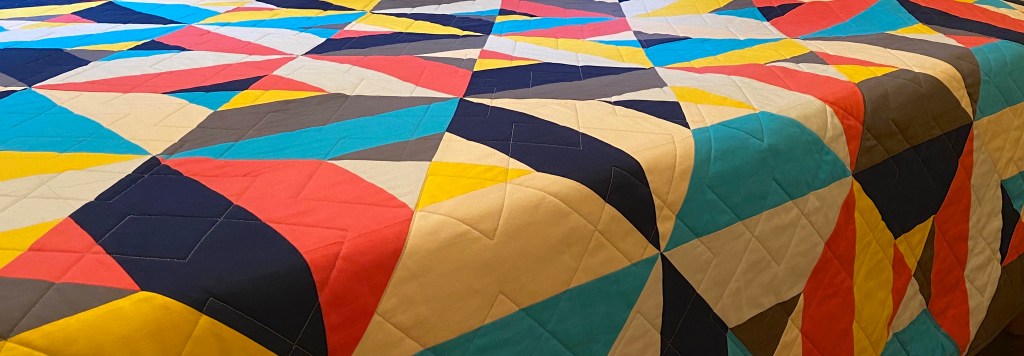
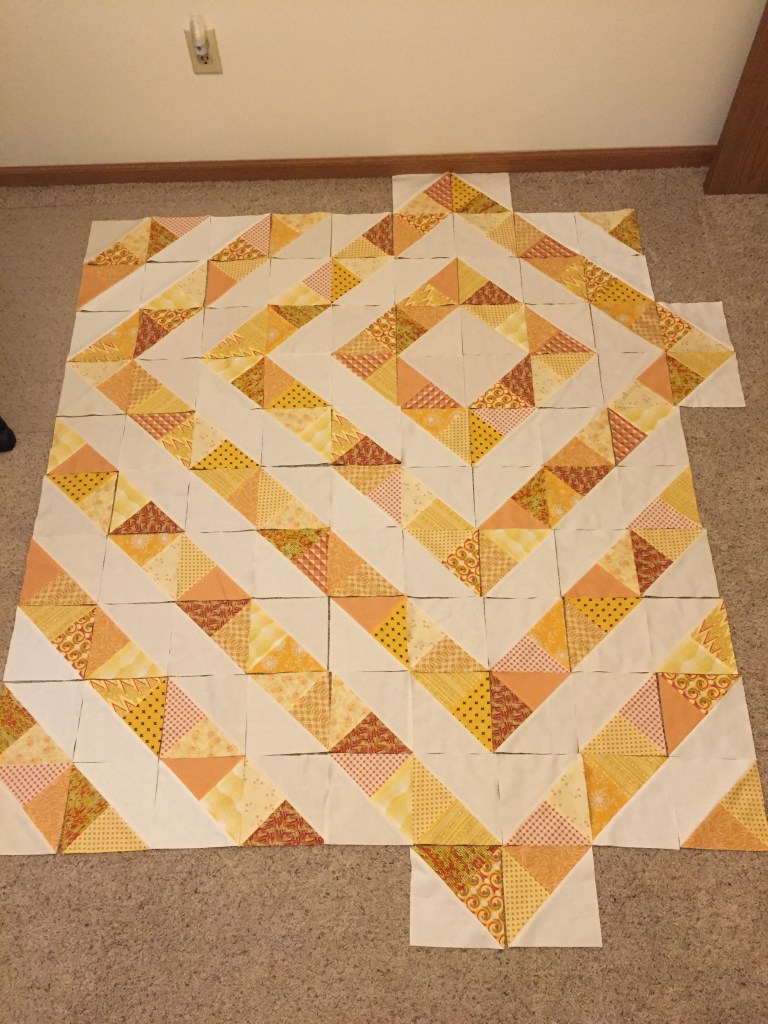
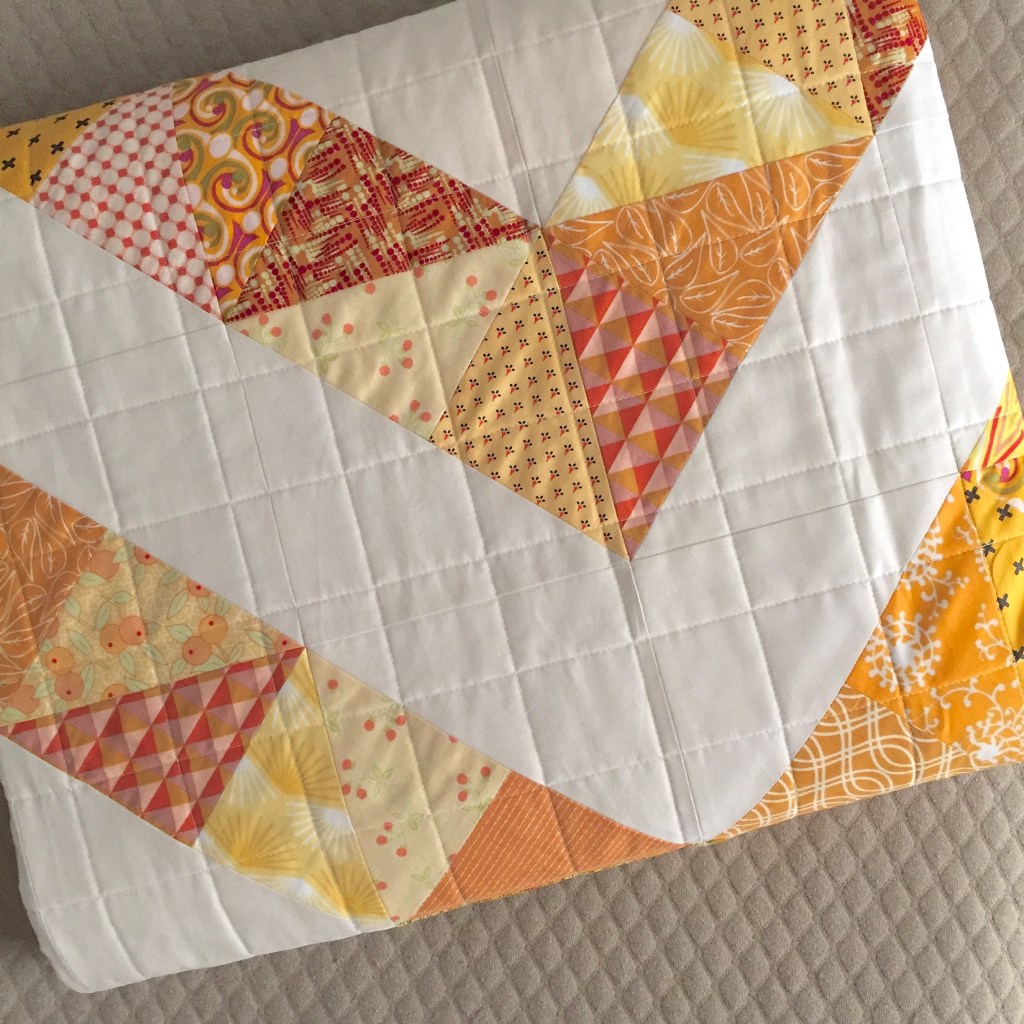
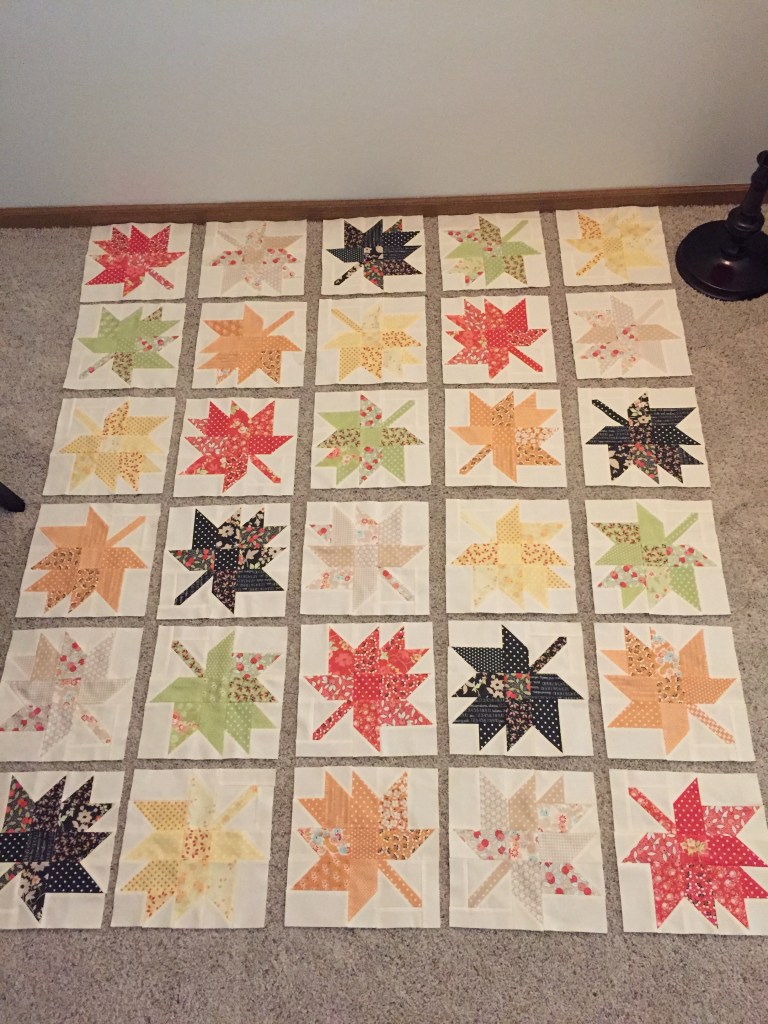
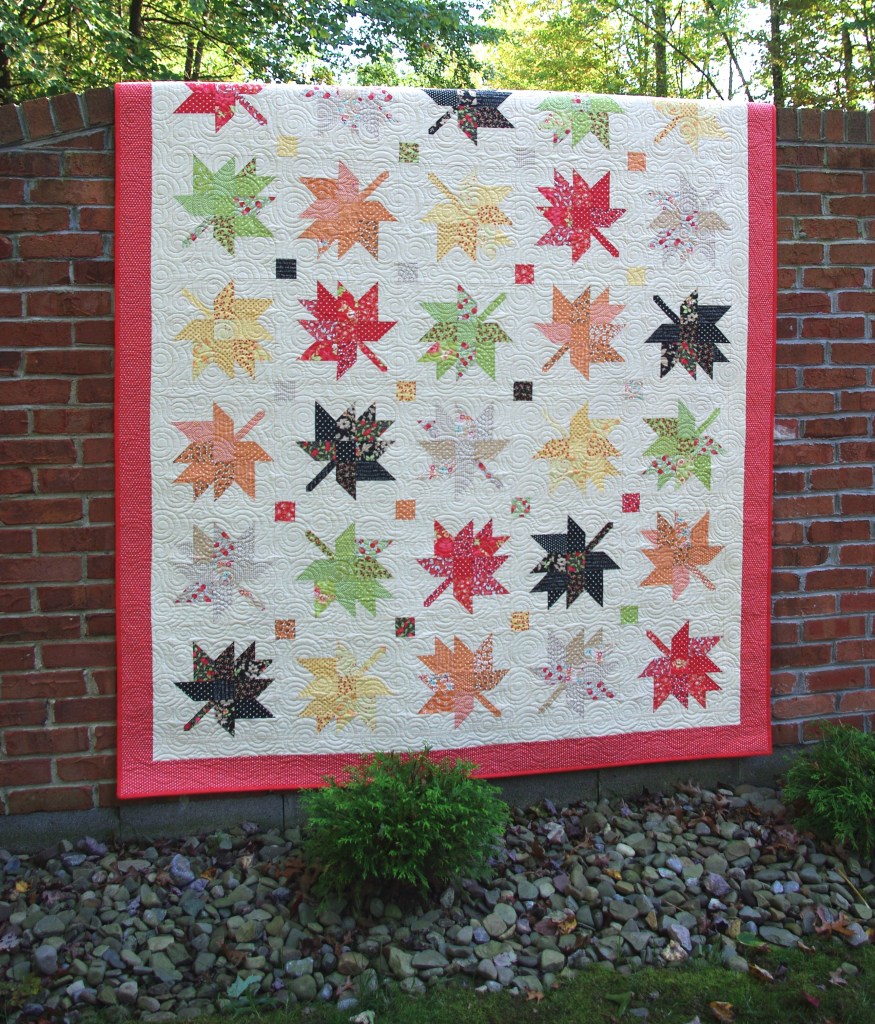
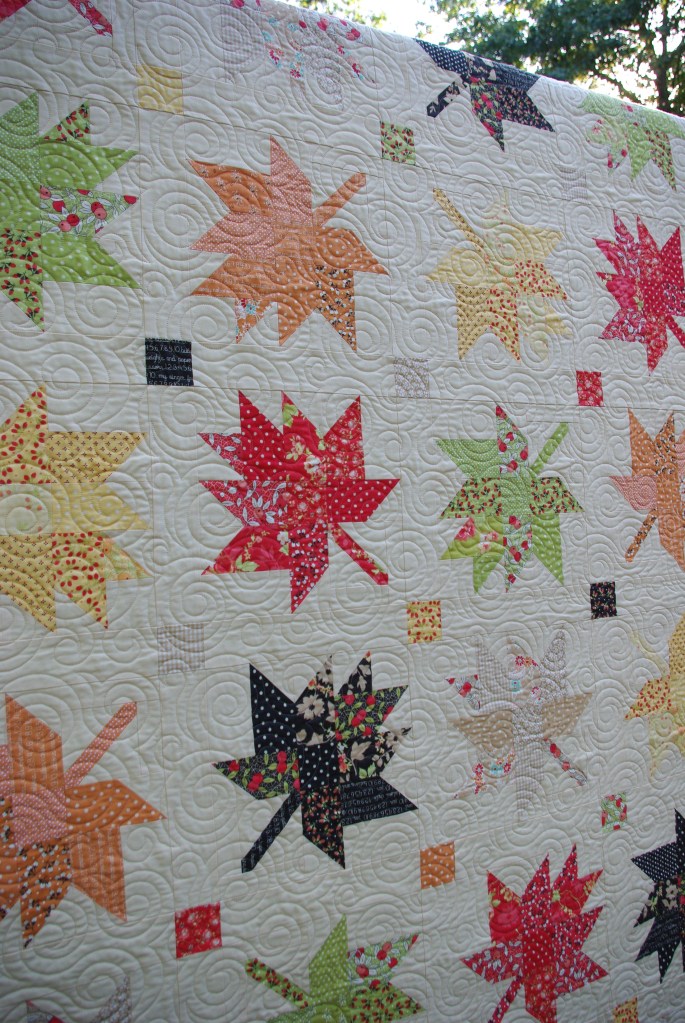
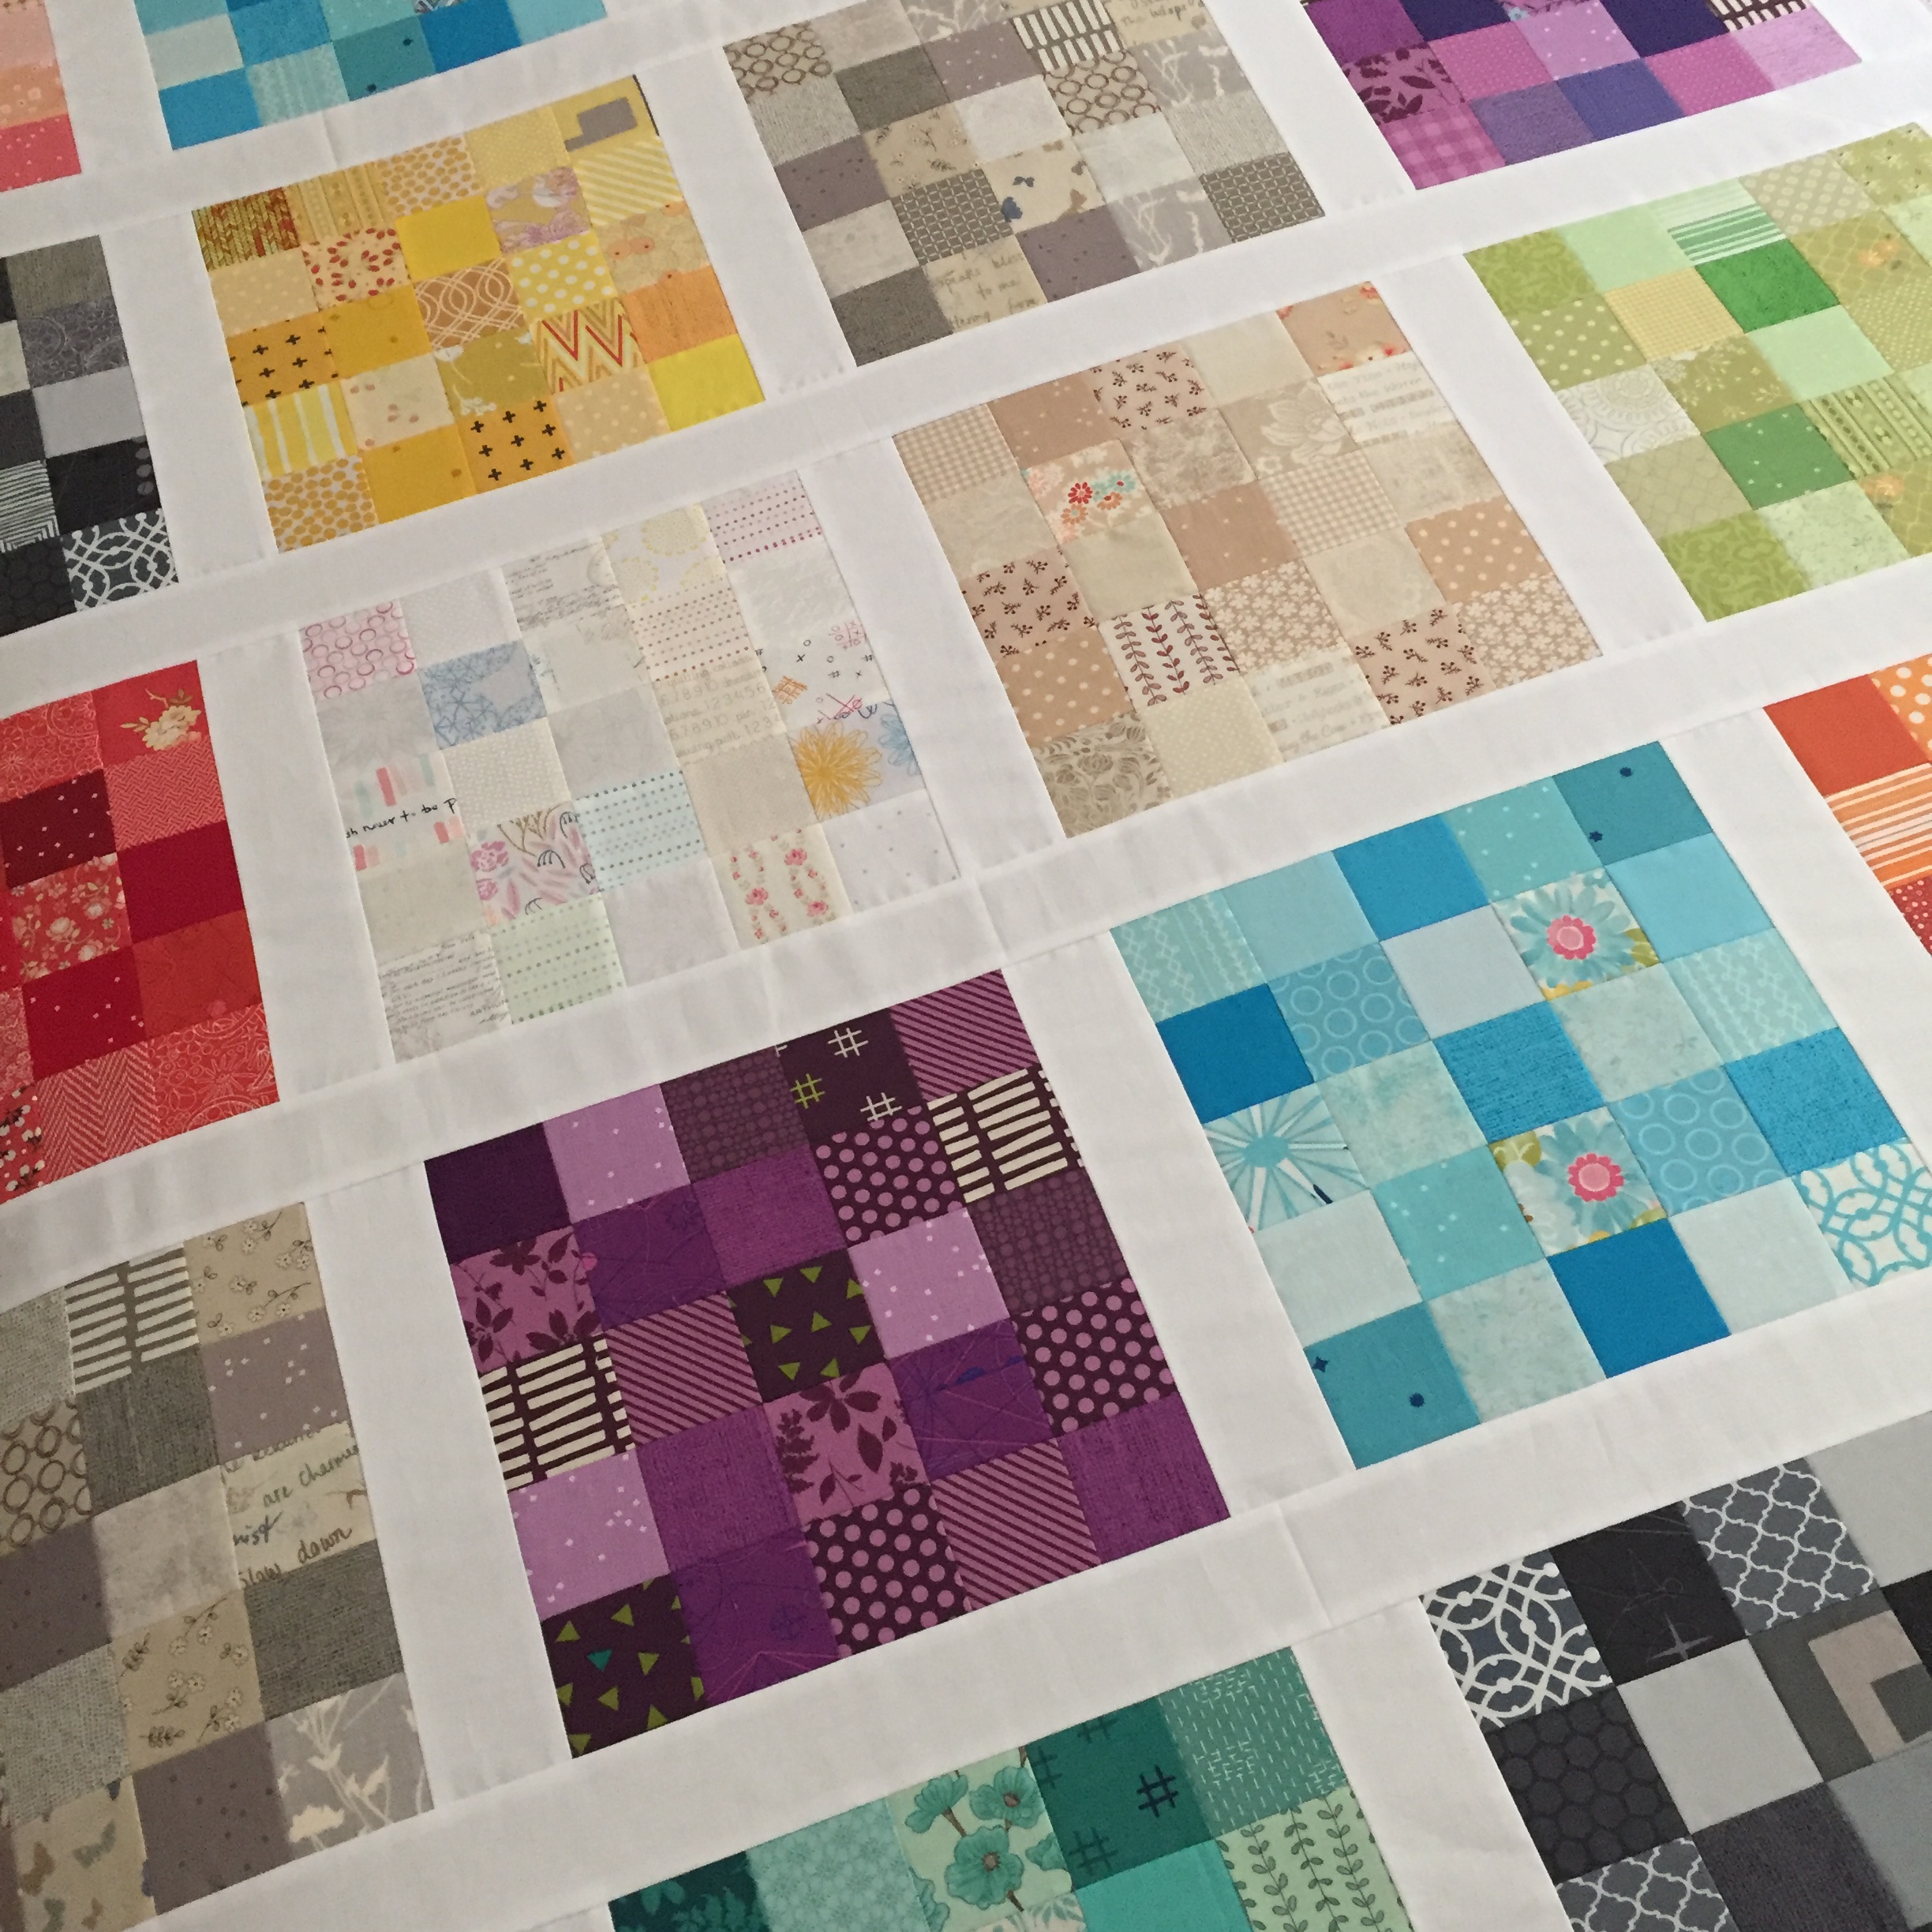
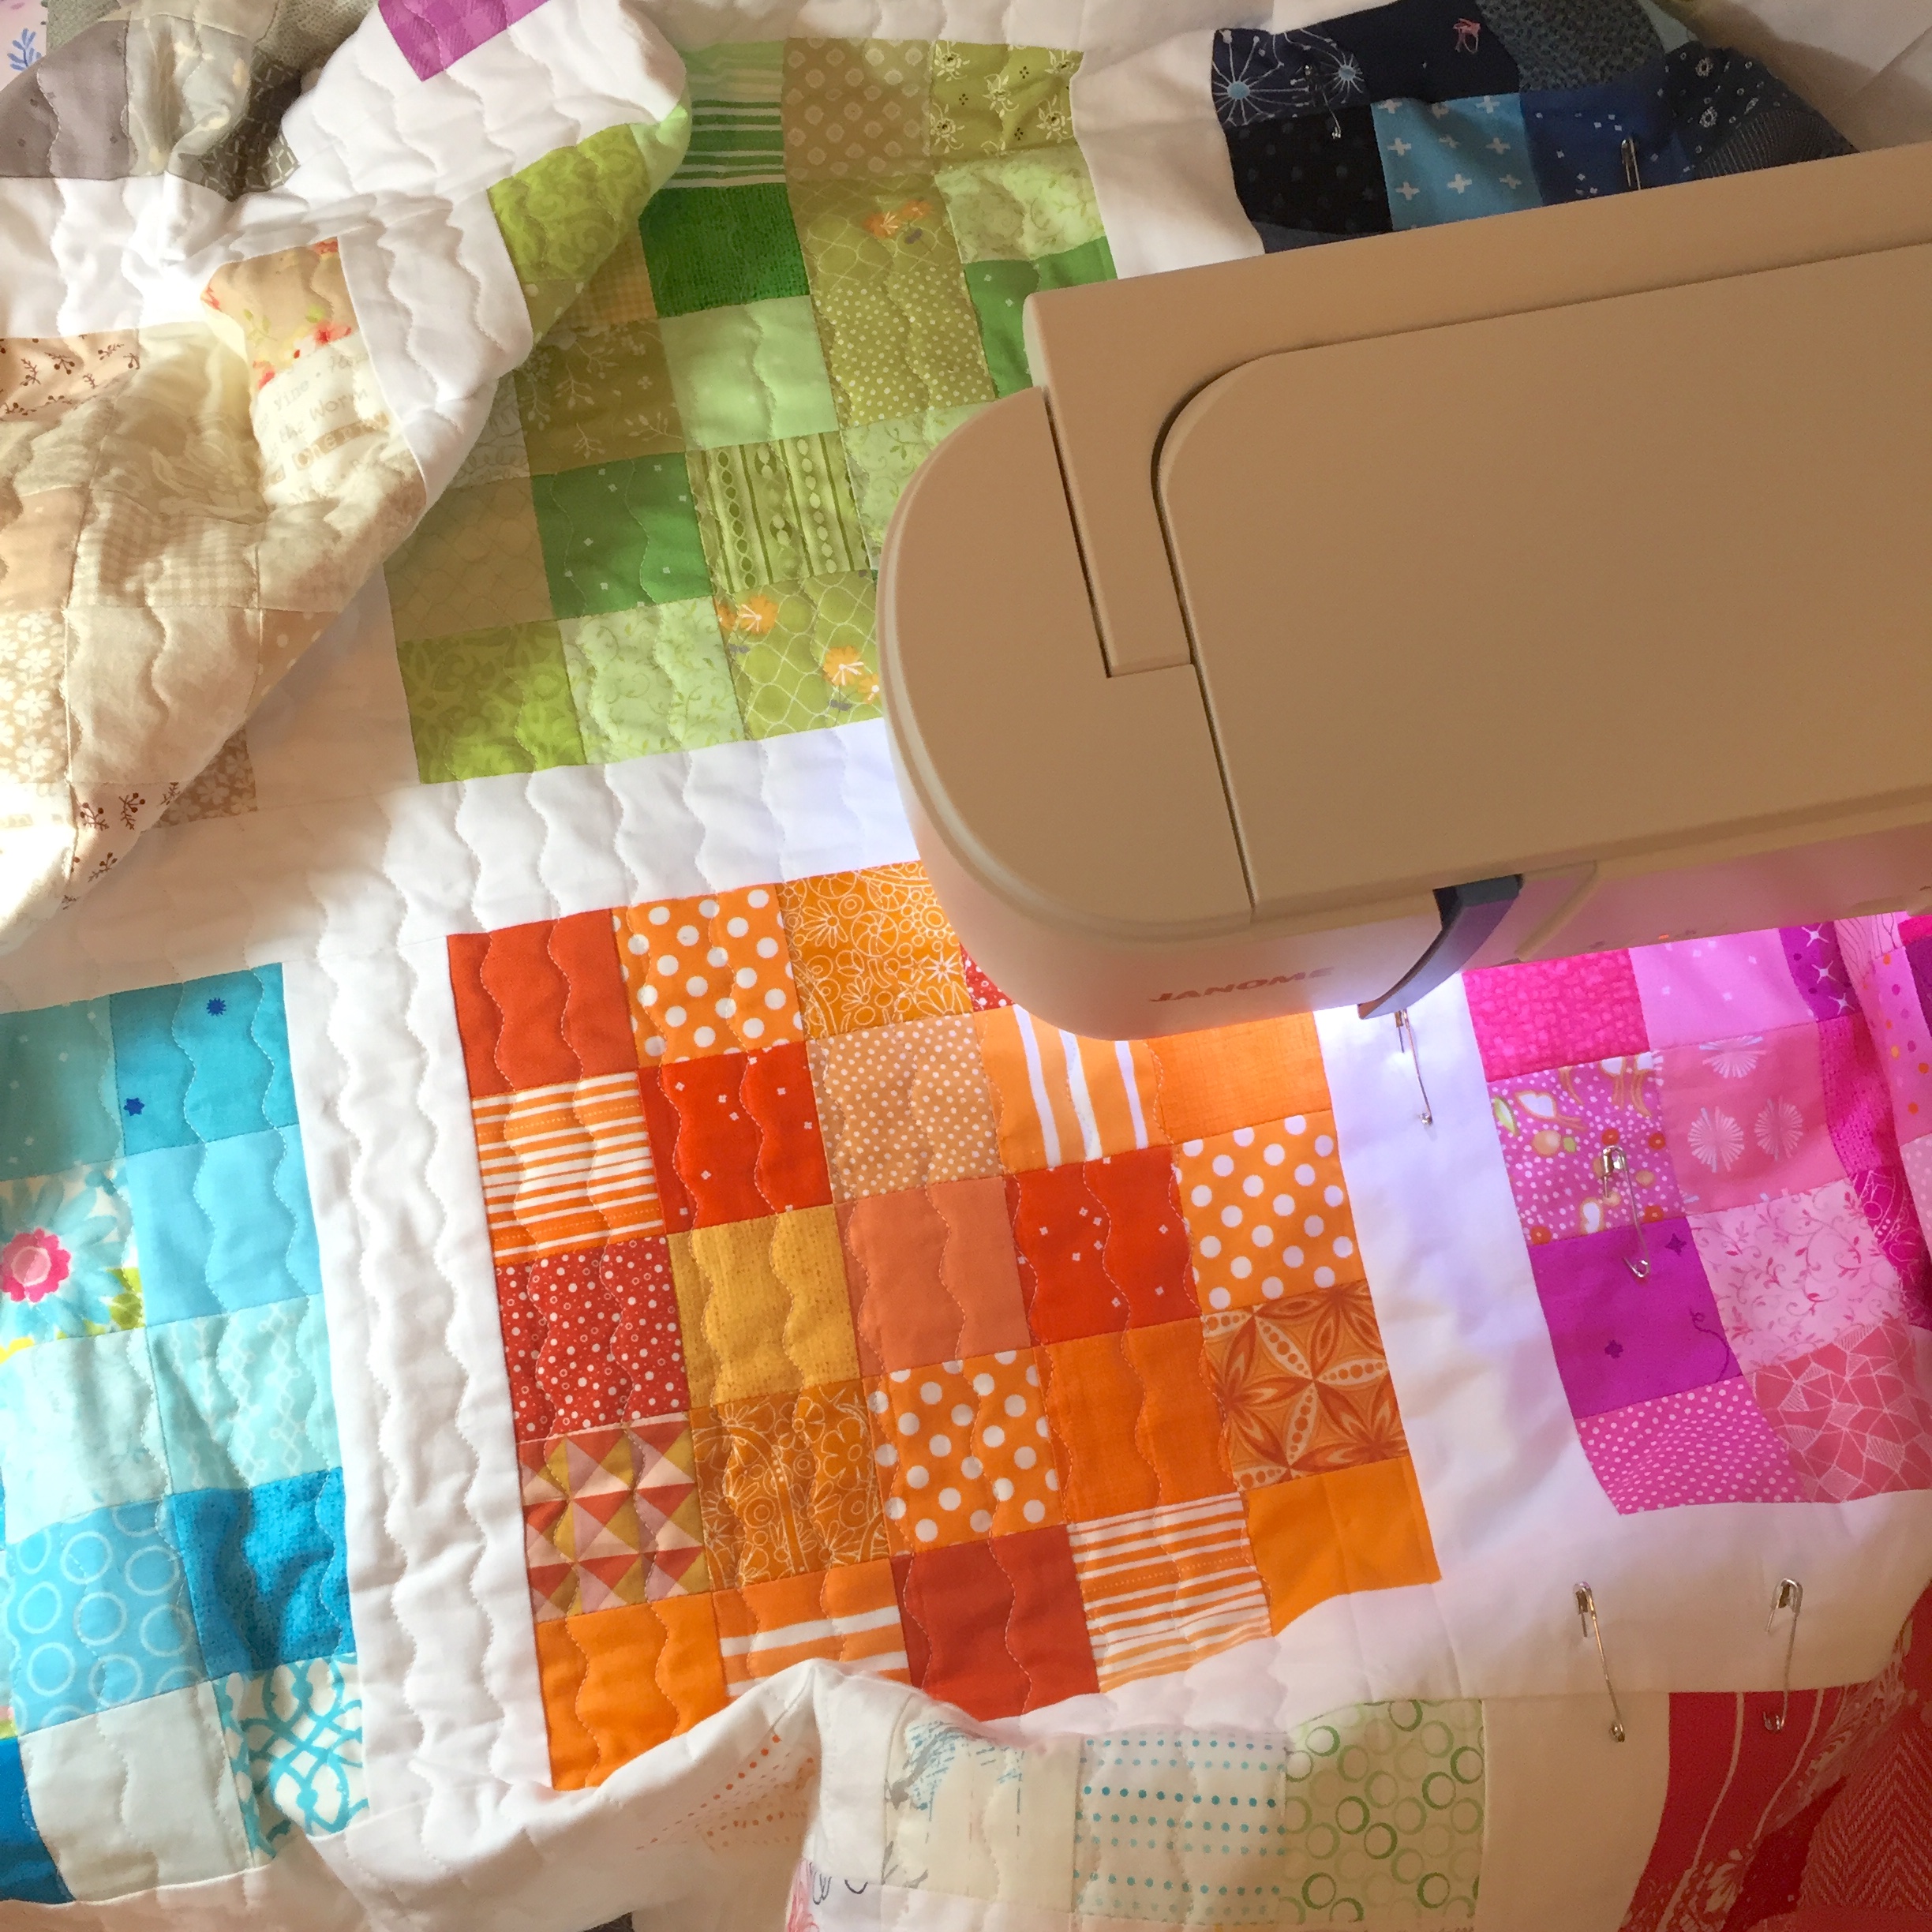
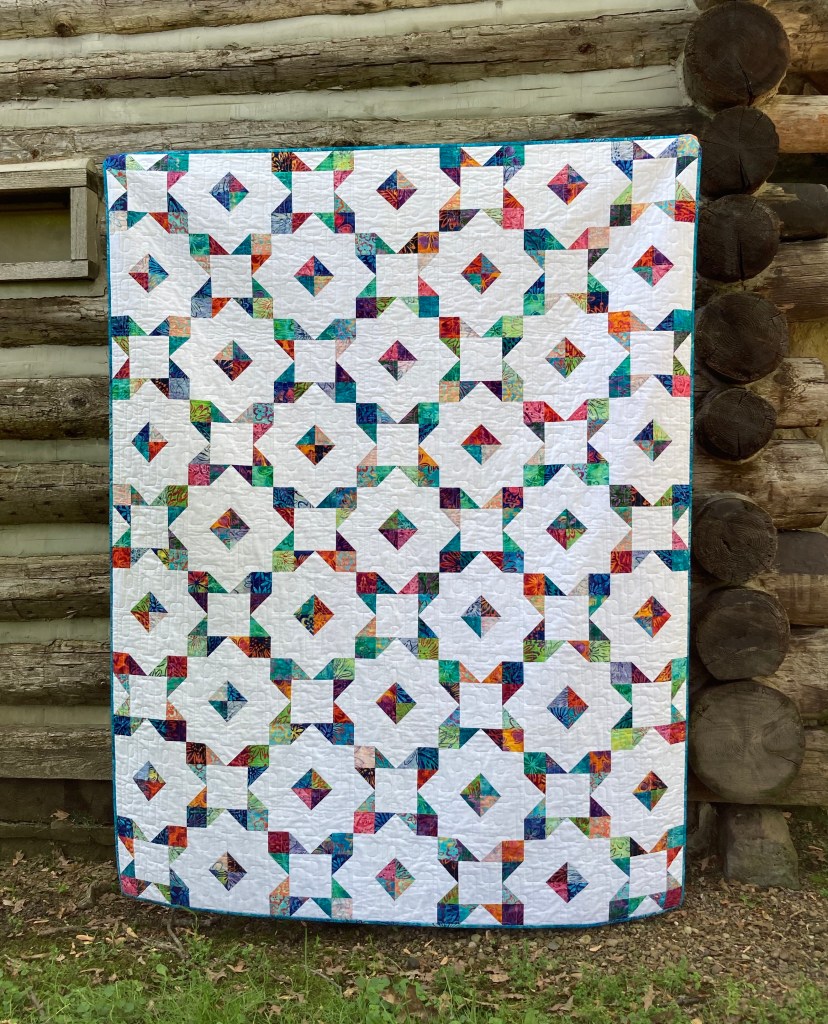
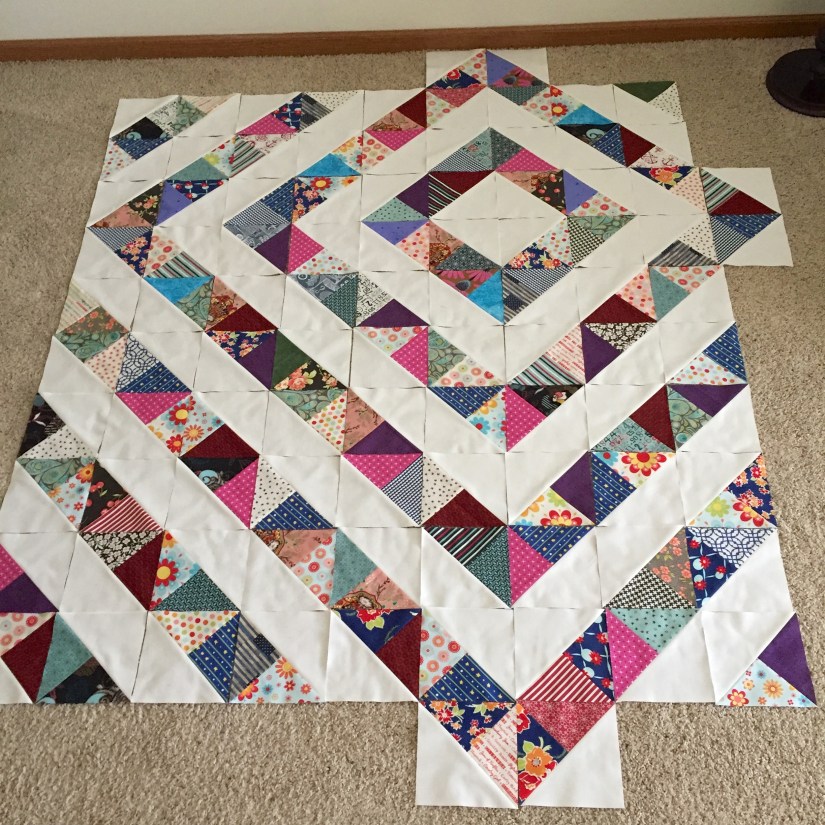
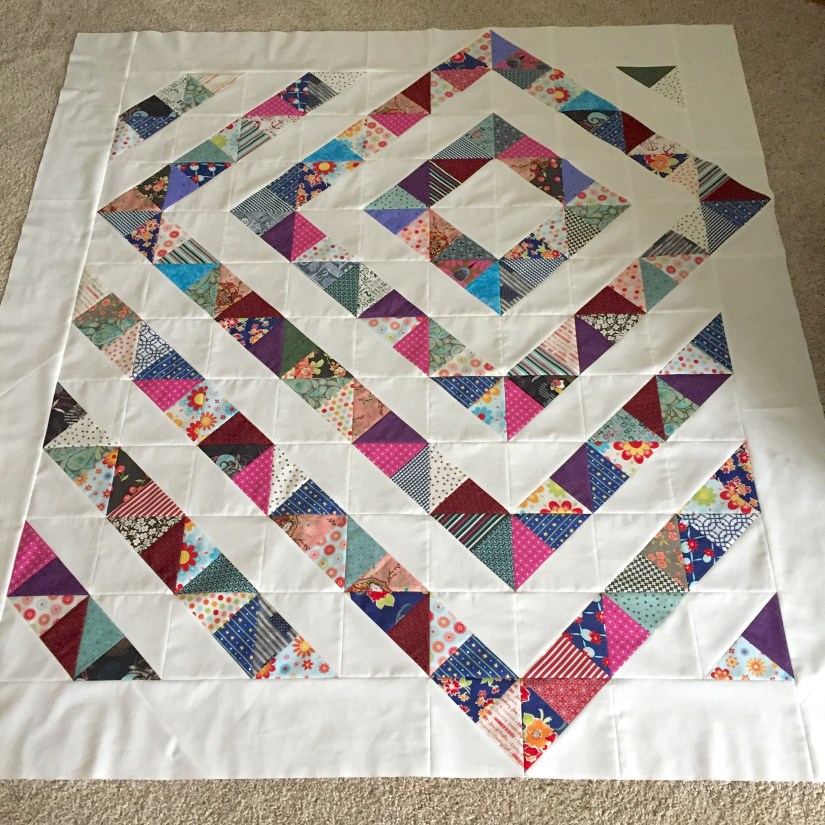
The layout didn’t take much time, as it was one of those quilts where you move one block it messes up the colors in another area, so I left it pretty much as I laid it out initially. Once I’d gotten to this point I was happy with how the colors worked together and I liked it more than I thought I would.

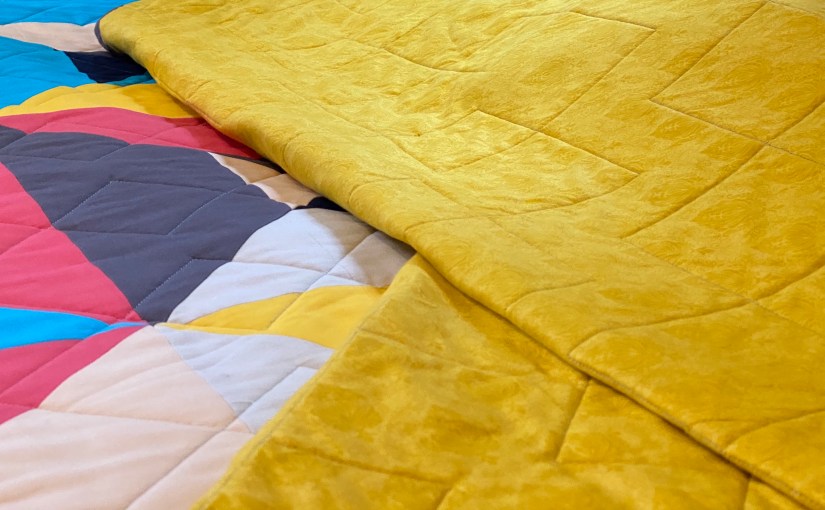
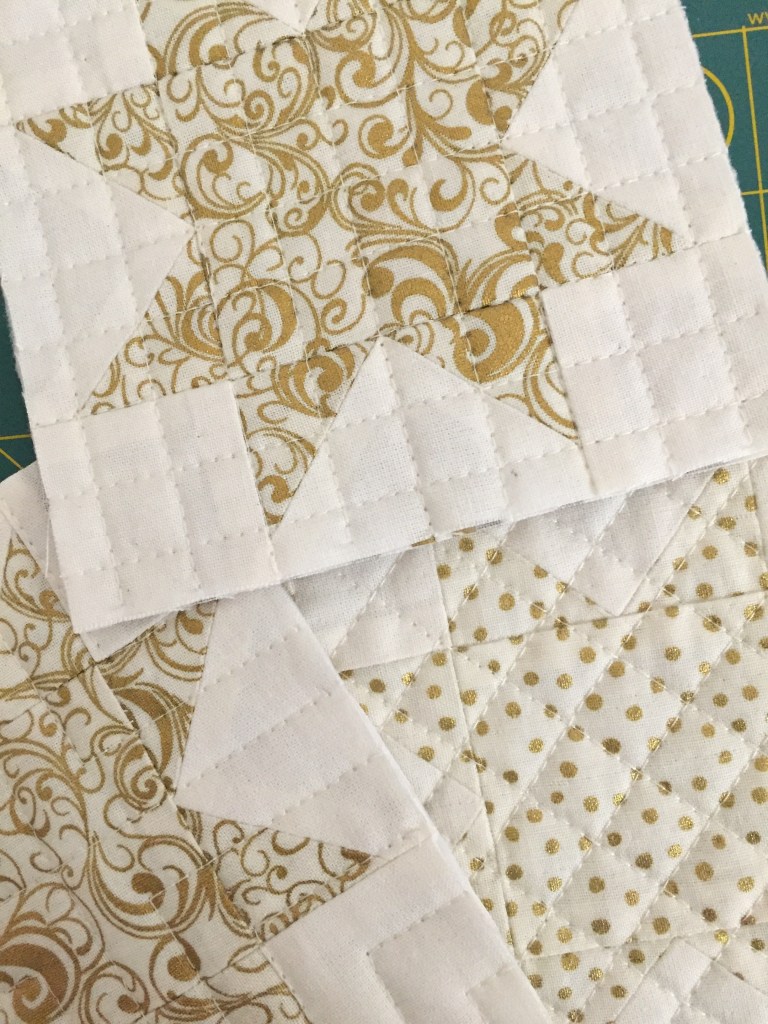
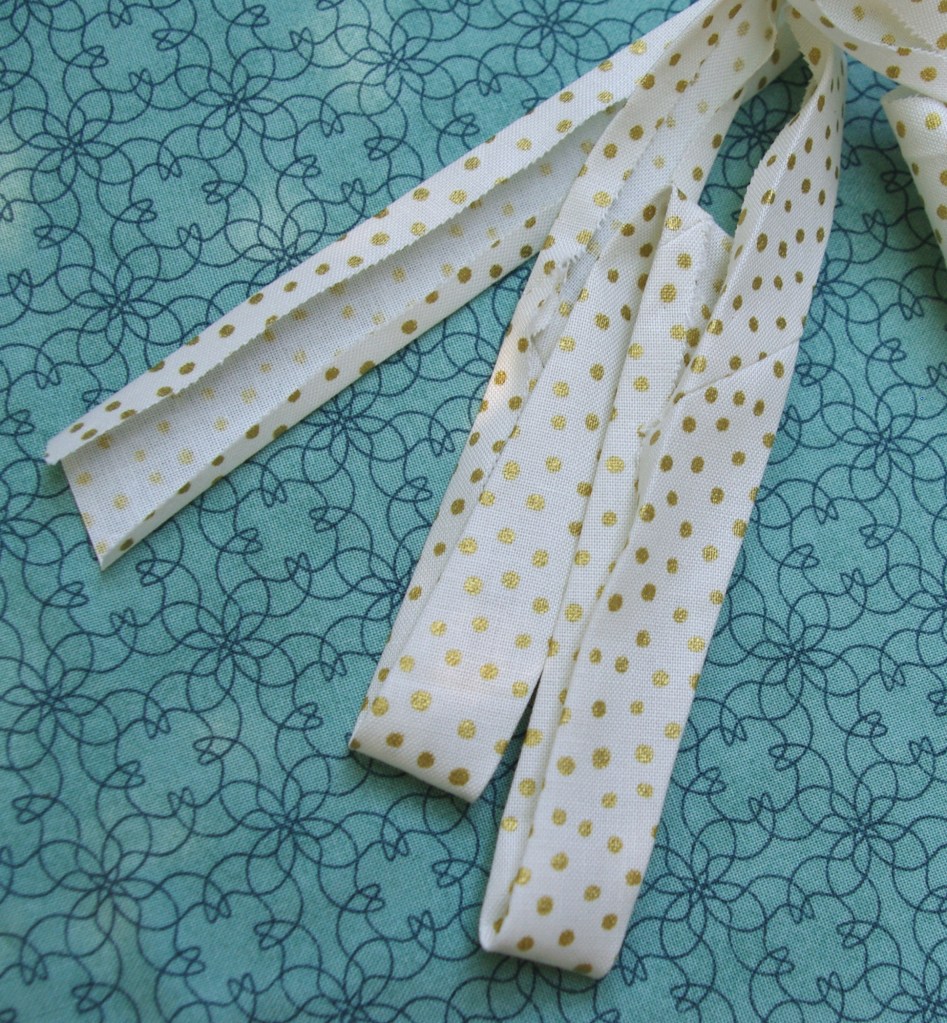
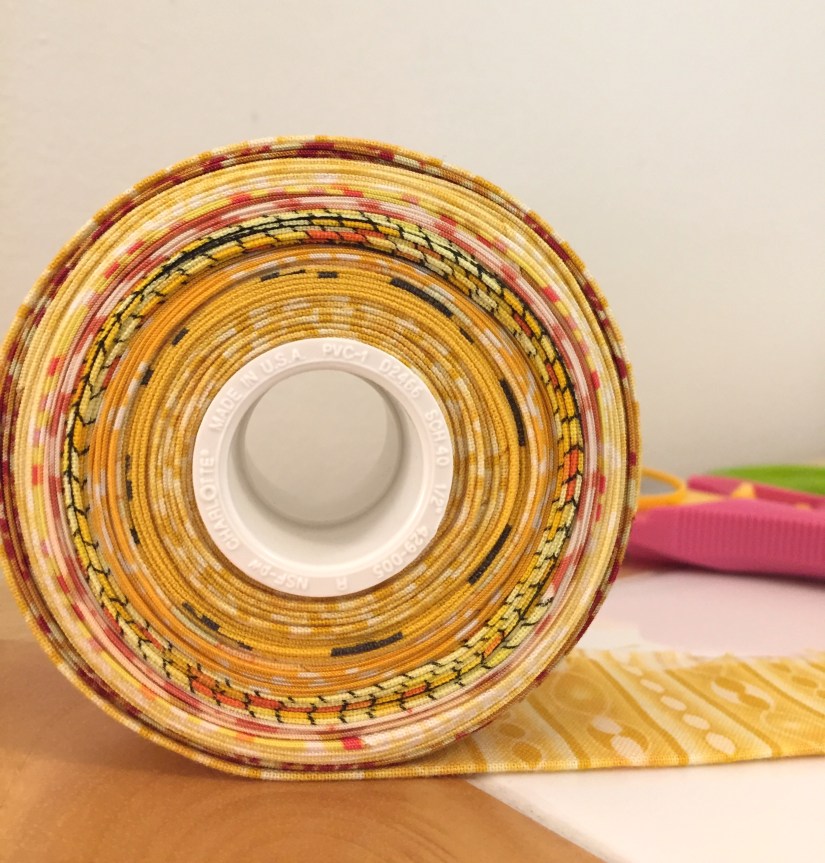
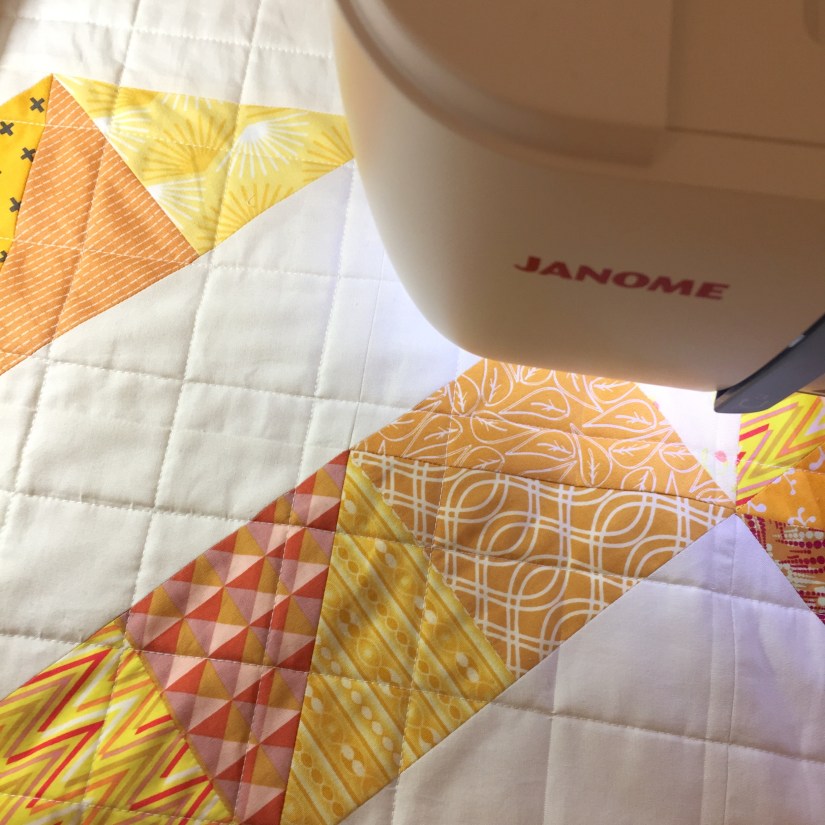
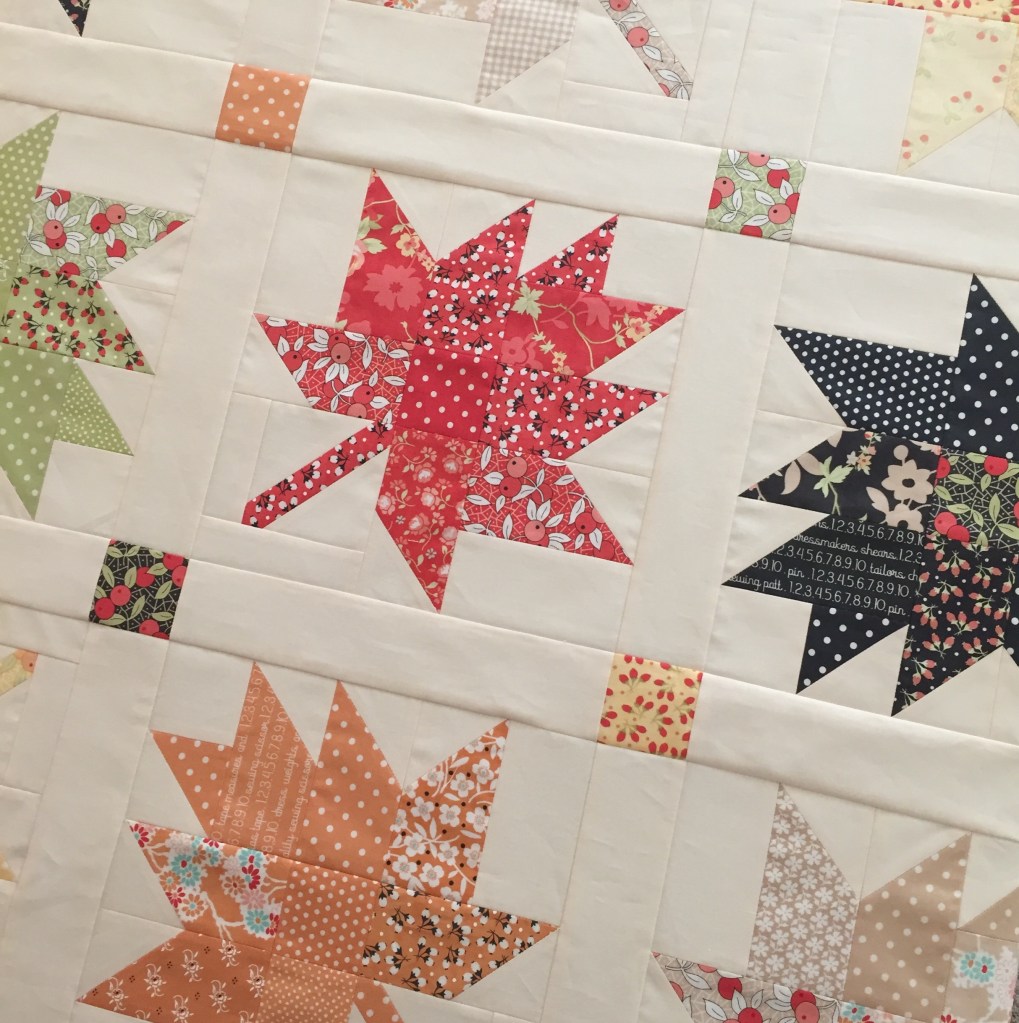
I quilted a 2″ square grid to compliment the diagonal pattern, and made scrappy binding using four different fabrics found in the quilt top.

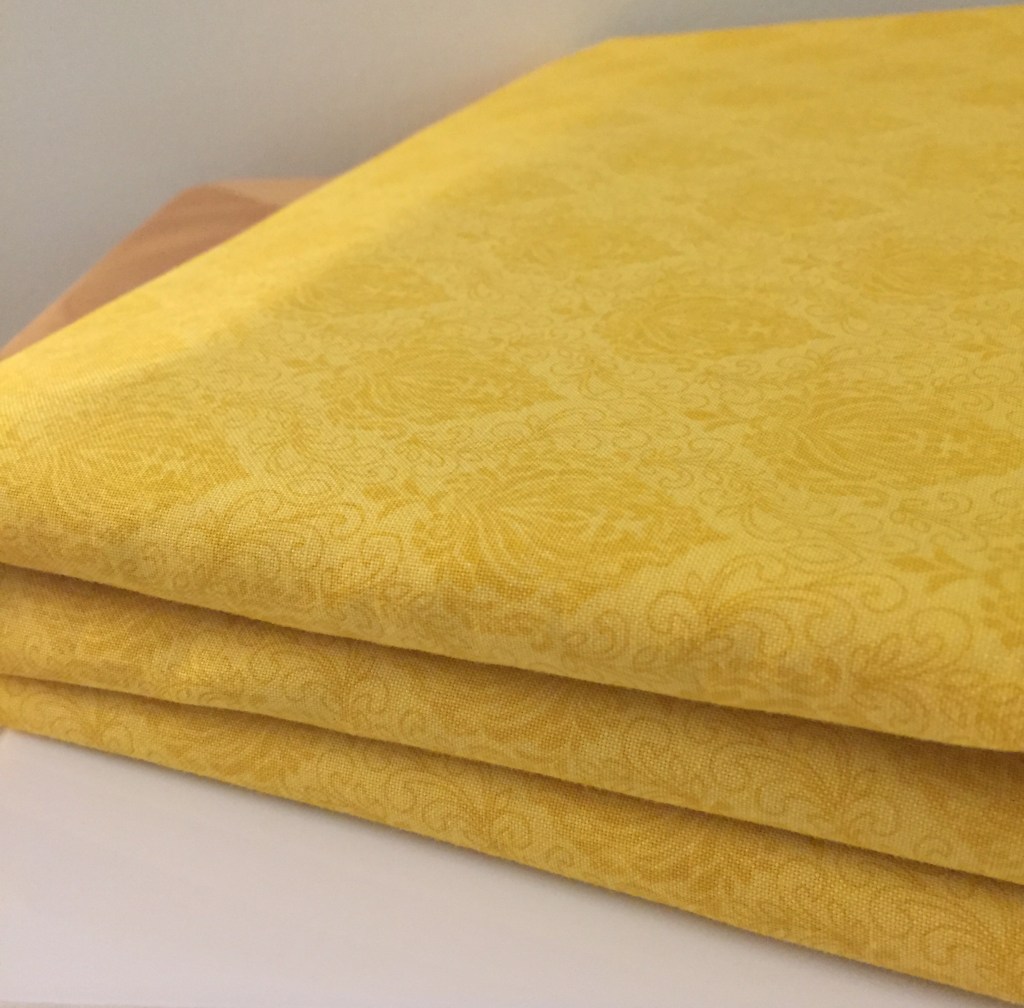
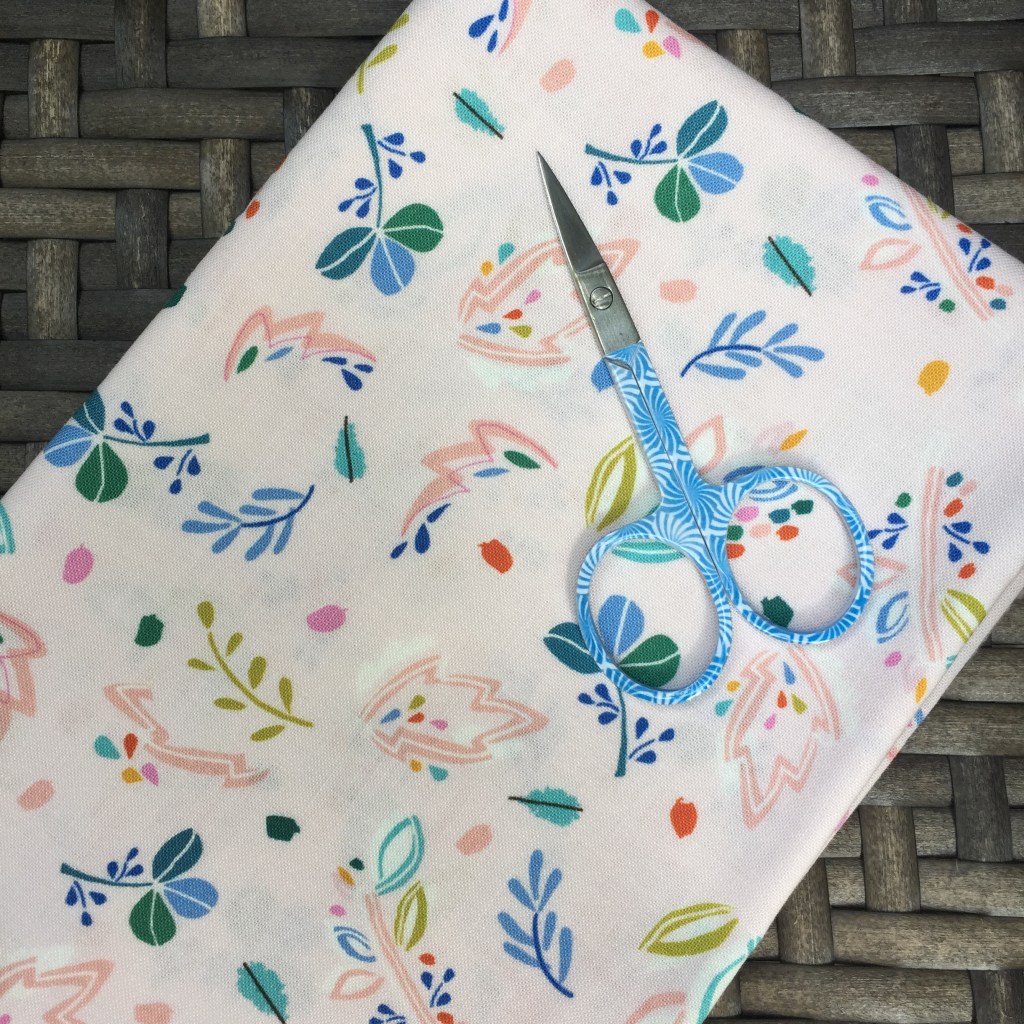
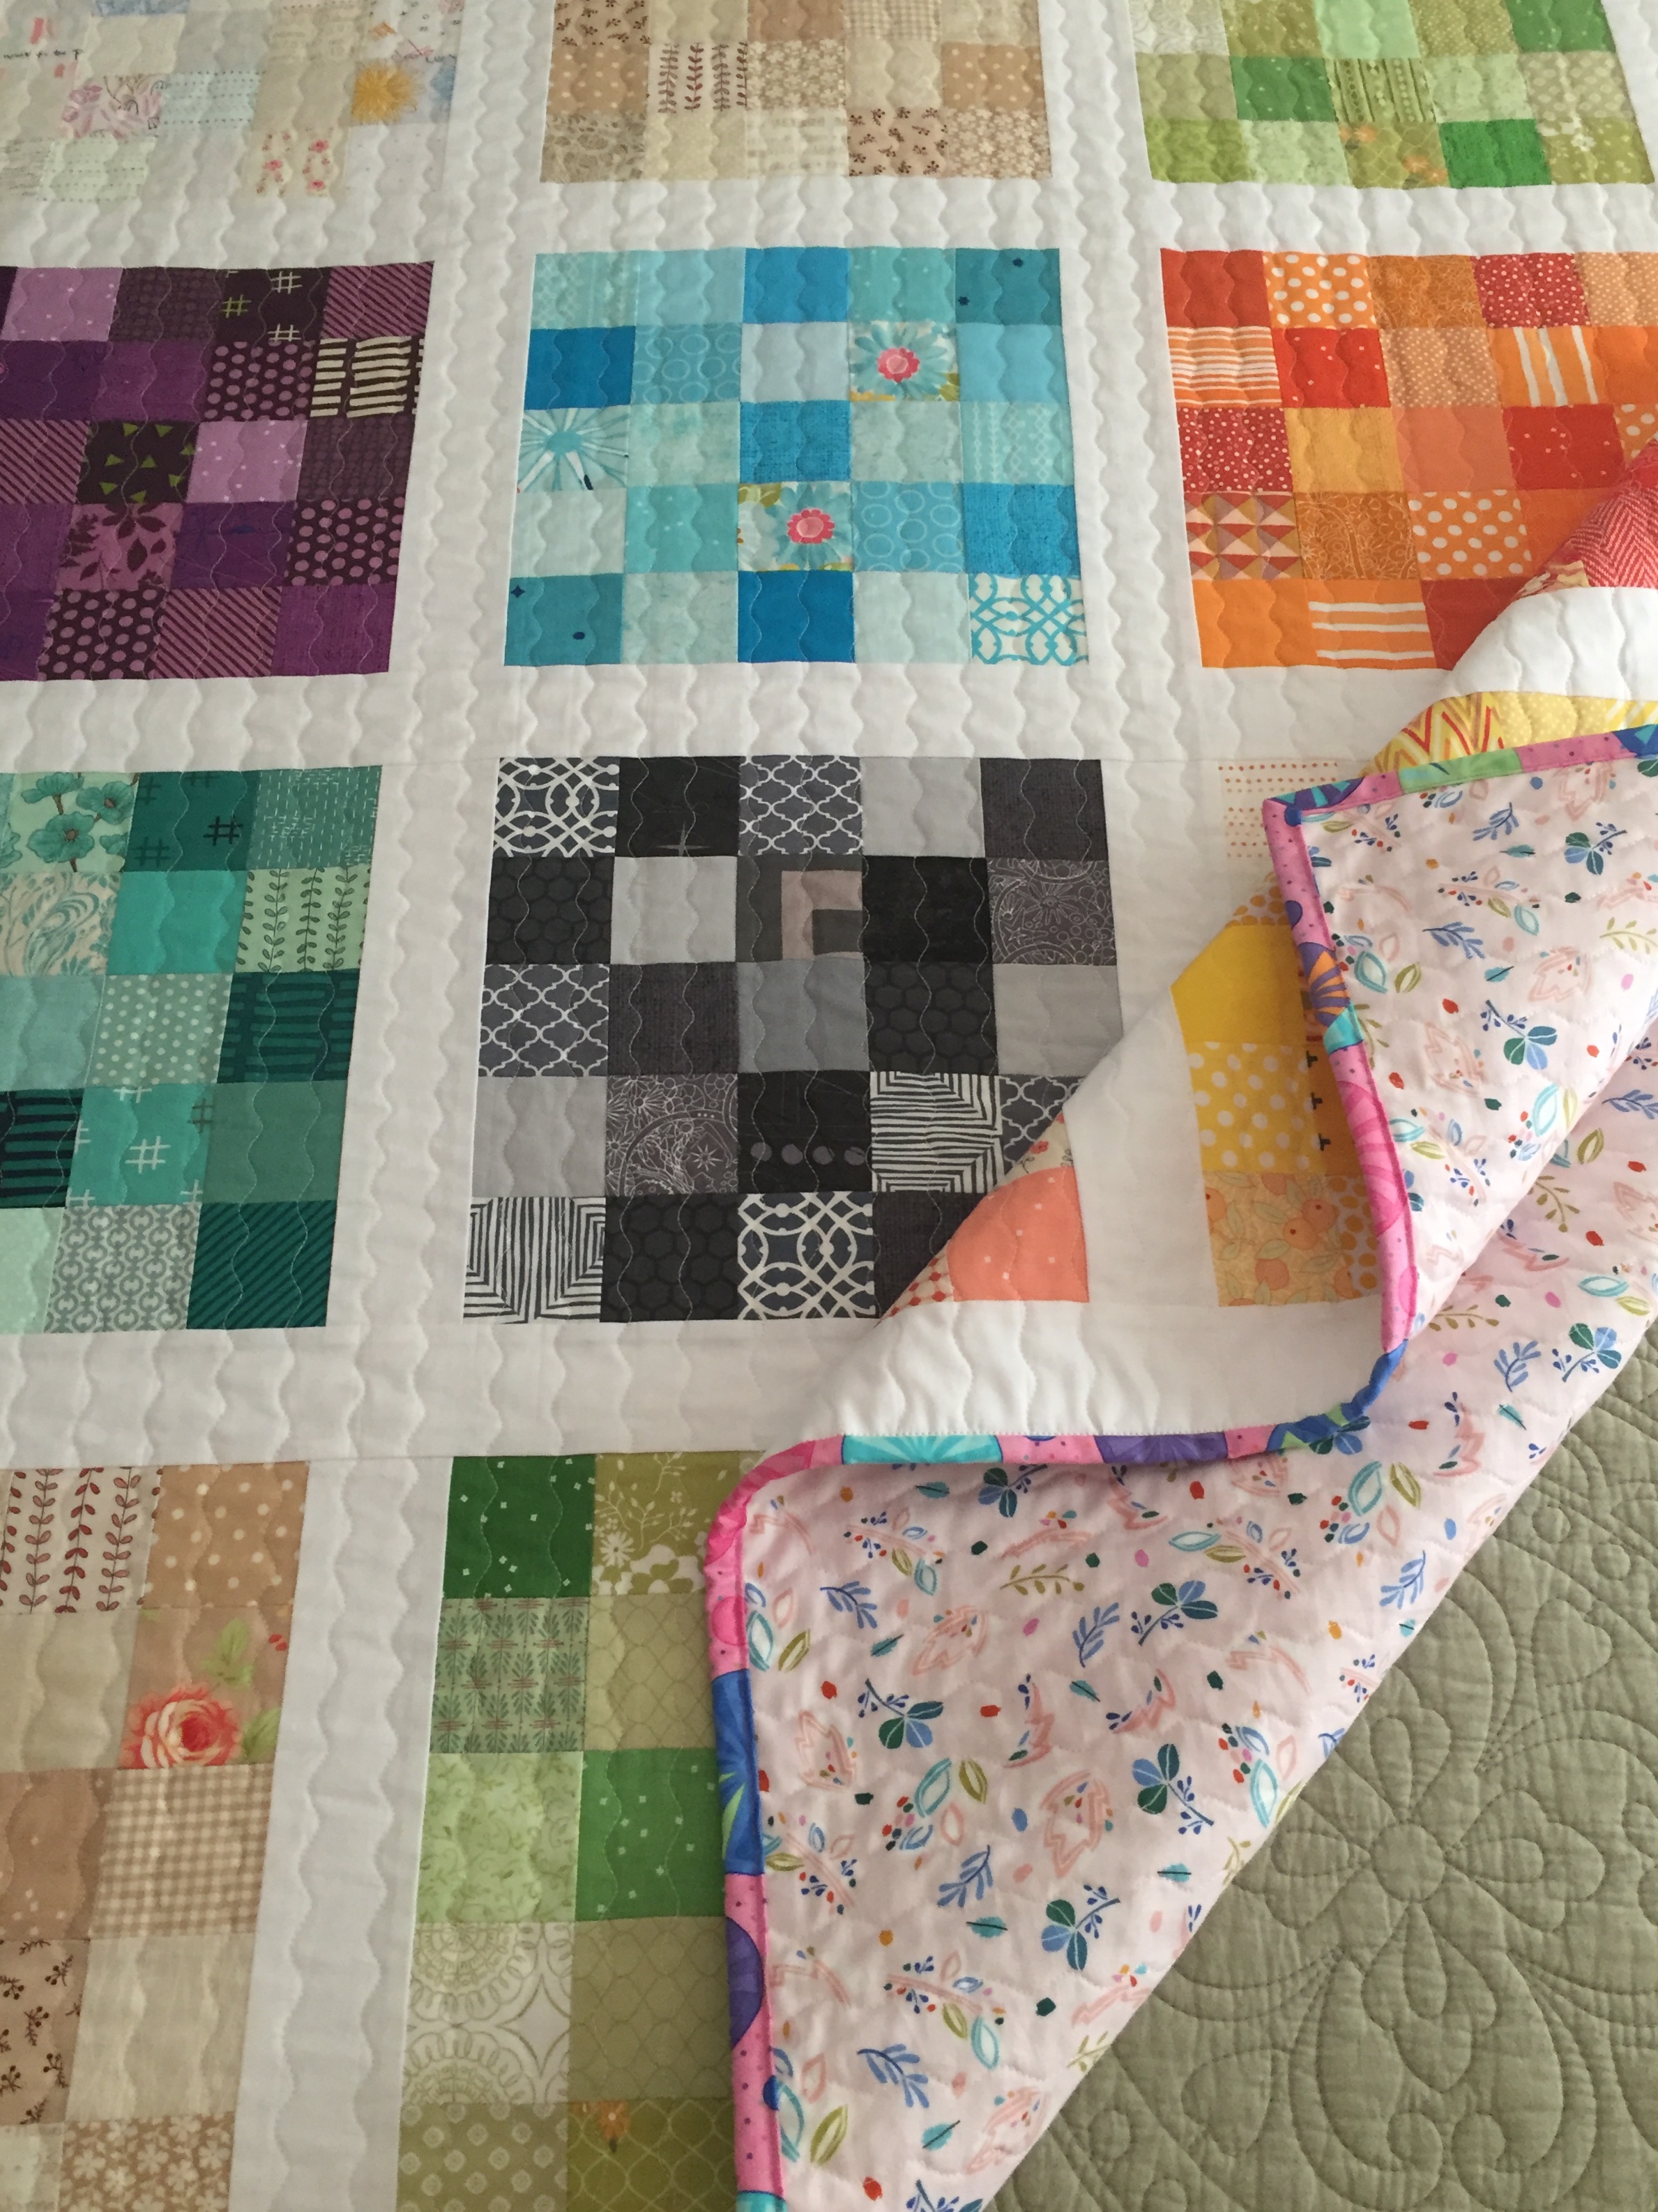
For the back, I used a pleasant blue and white hexagon fabric from Moda’s Victoria line.

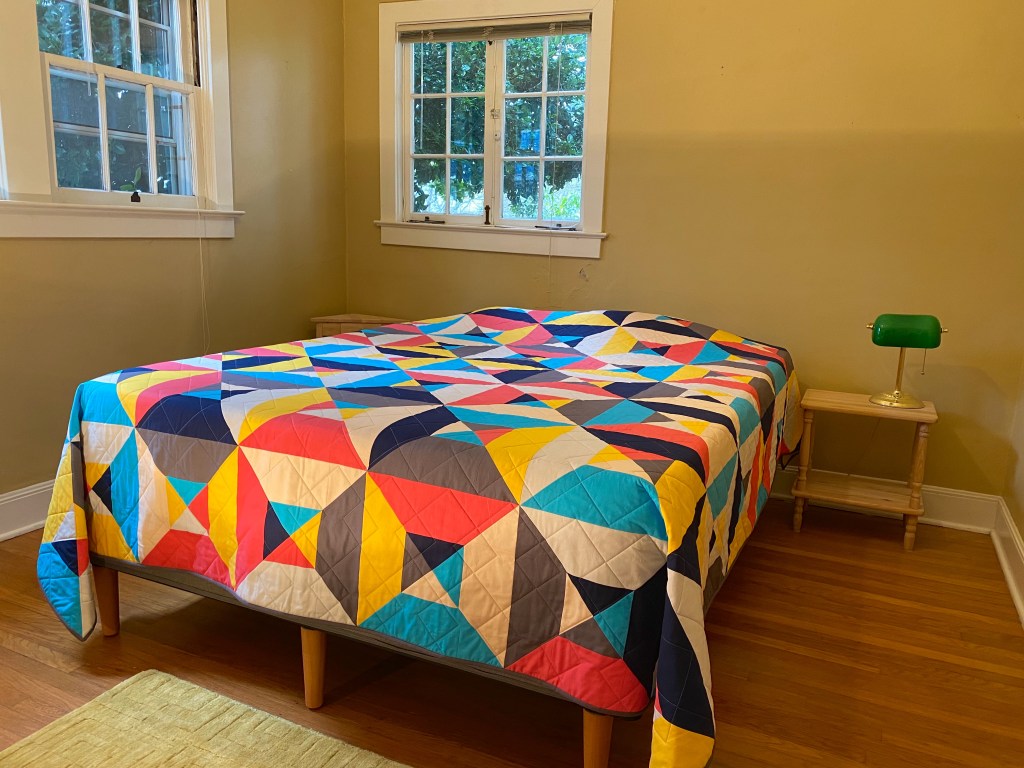
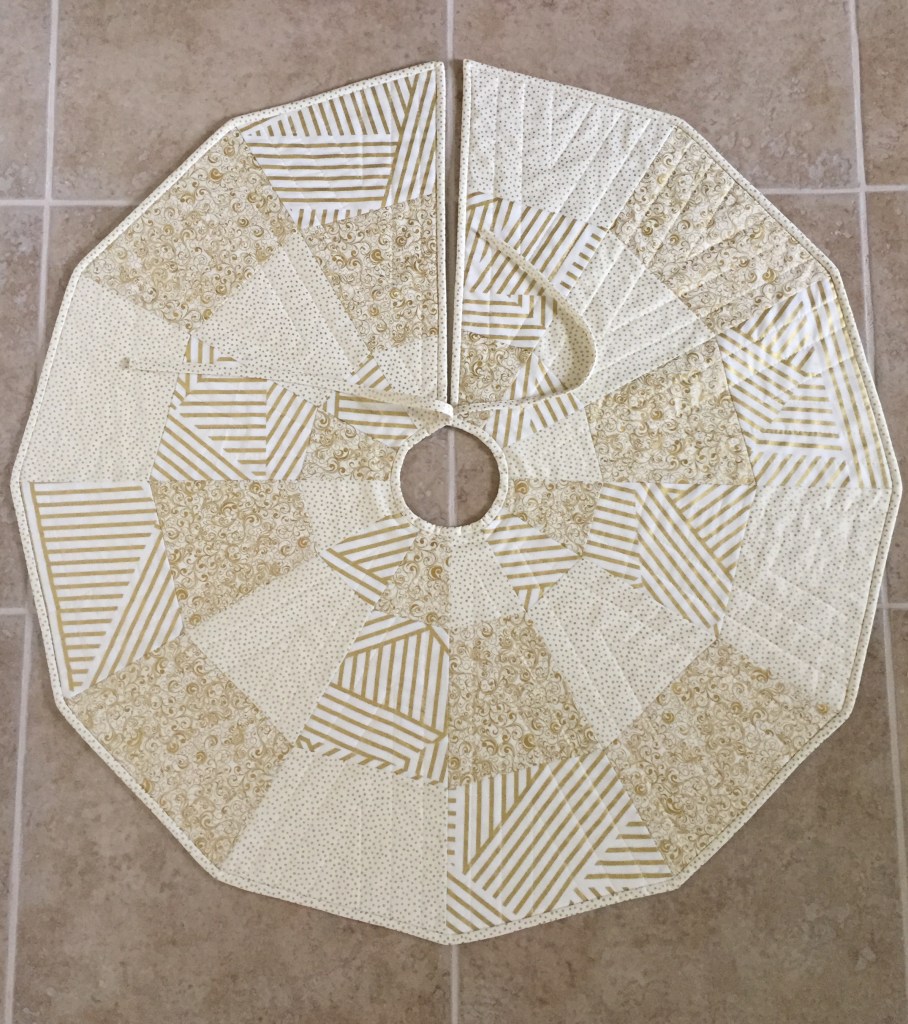
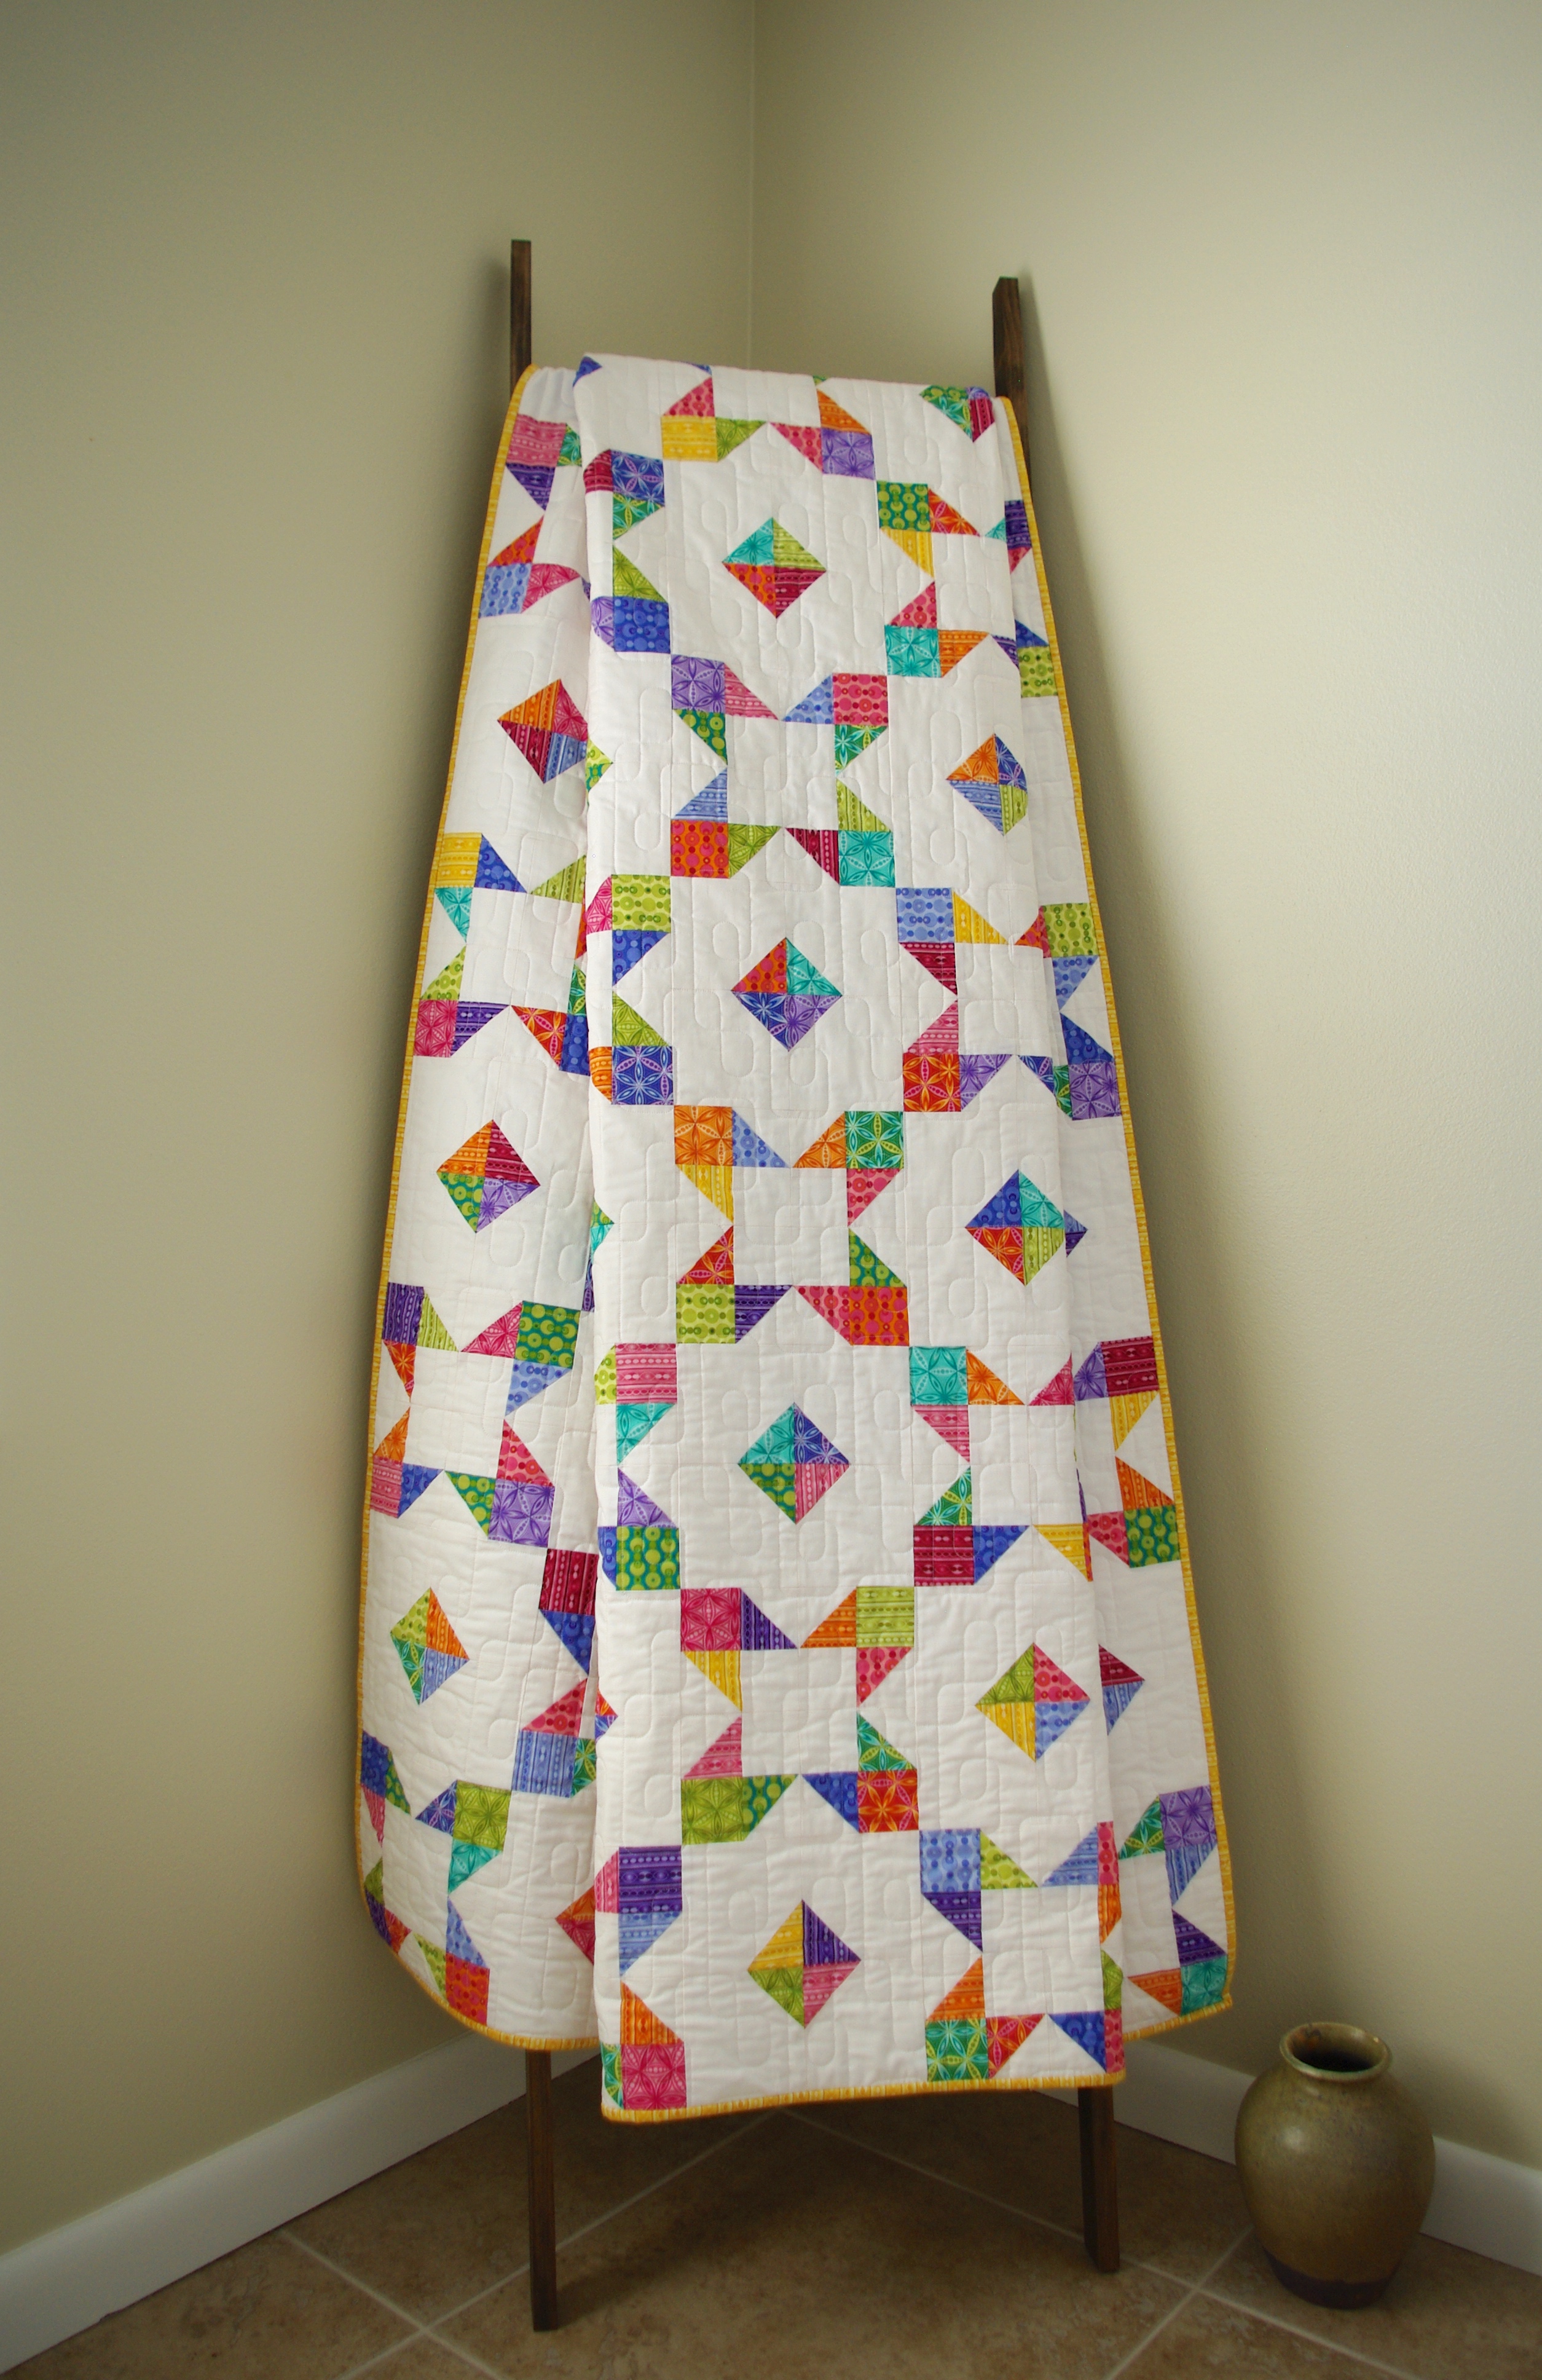
At last, here’s the finished quilt! I have no plans to keep this one for myself, I hope to give it as a gift to someone, sometime.

Christmas, fall decor, home decor, how to, mini quilts, patterns, PDF pattern, quilt blocks, quilting, sewing, tutorials, Uncategorized

2019 Project Recap

Every year I like to write a blog post recapping all the projects I’ve made. I mainly do this to have a quick reference should I ever need to know when something in particular was made. And it’s fun to see how I’ve spent my time sewing. So here goes…

First up is my Petite Hearts quilt that I made on a whim. Definitely a top favorite.

I started making a Swoon quilt by Thimble Blossoms in the spring and got it back from longarming late September. I haven’t written a blog post on it yet because I haven’t gotten any good photos, so these two blocks will have to do for now. 🙂

I started my Maple Charm quilt before we moved in April and had it finished just in time for fall. I enjoyed it the entire season.

This Five Squared throw quilt is a Monday Morning Designs pattern (available for purchase in my Etsy shop; see sidebar). I made it out of fabrics I had on hand and I love that all the colors of the rainbow are included.

Also while trying to use what I had on hand, I made a Four Patch Charm quilt. I’m hoping somebody has a special event this year so I can gift it.

Lastly, I made my son a Picnic Play quilt designed by Michelle Bartholomew. While this quilt looks innocent, it was a tough one! It was a huge project, too. My son enjoys finally having a quilt large enough to use on his queen size bed.

I made quite a few mini quilts, too. This one was completed early 2019. I’ve also written a tutorial on how to make a Scrappy Heart mini. It’s a fun and quick one to make.

What can I say about this cute crab pattern by Ellis and Higgs? The big crab was a gift for my daughter, the other one is mine.

This Radiant mini is also a Monday Morning Designs. I was fortunate to have it featured in the July/August edition of Quiltmaker. It surely brightens up my space! I plan to release the pattern this summer.

I made quite a few Little Quilted Star ornaments for gifts for Christmas. Very festive.

My pattern Wee Three Trees became available for purchase in time for the holiday sewing rush. I made two, one for myself and one as a gift for my niece.

Here’s the last of my projects. I made the microwave bowl cozy for myself as a holiday bowl for pine cones. The little holders are for gift cards; gifted as party favors, and the bottom photo shows my process on a mini Christmas tree skirt.

These pillows were also gifts…

And a pillow case for my bird-loving husband.

Lastly, towels with cute toppers made for my mom. You can download my free PDF tutorial How to Make a Hanging Kitchen Towel. It’s easy-to-follow, complete with photos, a template and lots of tips!

Well, that sums up last year, and I’m well into making for 2020!

modern quilts, quilt blocks, quilting, quilts, Uncategorized

Picnic Play (A Queen Size Quilt)

It finally happened, I finished another queen size quilt. In 2018 I made one for my daughter so 2019 was the year to make one for my son.

Since this is more than likely a one-time thing, I wanted to make it for him as per his request. To start off, I had him choose a pattern. Probably not so much fun for a young man to sit and go through quilt pattern after quilt pattern, but ultimately it was his choice. 🙂 After much searching, he decided on a pattern by Michelle Bartholomew called Picnic Play.

It’s a very modern quilt and perfect for a guy, which isn’t always easy to find in the quilting world. The pattern requires seven solid fabrics; and while the original pattern colors were a good starting point, he swapped out a few and here’s what he chose:

As far as the block construction goes, they’re kind of like an extended hourglass block, and they were a lot harder than I thought they’d be! They were relatively big too, unfinished at 14″ square.

And since the pattern was written for a throw, we had to do some math to figure out how many additional blocks I’d need to add to get it queen size. Trimming for 56 large blocks took quite a while, but what colorful trimmings.

Yet somehow and somewhere along the way I miscounted the number of blocks and ended up with a few extra. No problem—I made toss pillows.

I should mention that making these pillows wasn’t so easy, I had to extend the blocks even further to get them to 18″ square. My process for doing this is explained on my Mitered Borders on Pillows blog post.

When it came time for purchasing backing fabric, I didn’t think my son would have much interest so he told me what color he wanted and I sent him a few choices. He decided on a warm, tone on tone vertical print by Windham Fabrics, Eliana Medallion in Sunshine.

The same process happened for the quilting. I sent him three patterns and he ended up going with Knitterly #2 by Urban Elementz. I think it was a great choice!

I really enjoyed working with bright solids and it was a lot of fun to make something this modern.

So…after many months in the making, a lot of decisions, waiting forever for longarming, sending it across the country and hoping it arrived safely, and in time for Christmas, here it is!

The quilt finished at 95″ x 108″. My son is really happy with it and is enjoying its warmth. And that’s exactly why we quilt…isn’t it?

Christmas, home decor, mini quilts, modern quilts, patterns, PDF pattern, quilting, Uncategorized

Wee Three Trees Mini Quilt Pattern

With holiday sewing in full swing, I’ve decided to release a Christmas tree mini quilt pattern that’s fun and fast to make, and most of all, it’s festive!

I call this little mini Wee Three Trees. The pattern is made up of three little trees; perfect for 2 1/2″ precut strips or scraps, and the background requires just one fat quarter so there’s not a lot of fabric needed. And it’s a suitable project for both beginner and experienced quilters alike. Wee Three Trees is available for purchase in my Etsy shop.

I’ve made a few of these for gifts, and one for myself. For mine, I used Greetings by Kaye England for Wilmington Prints. I also used this fabric for my Christmas Irish Chain quilt last year. I love the nostalgic holiday feel of this wonderful collection.

I also did some experimenting with a variety of prints and colors for a non-traditional look. I think this pattern lends itself to so many possibilities! 🙂

If you decide to give it a try, I’d love to see what you create. Happy holiday sewing!

Christmas, home decor, mini quilts, quilt blocks, quilting, tutorials, Uncategorized

Little Quilted Star Ornament Tutorial

Lately I’ve been going through my fabric trying to find a good use for leftovers. So far I’ve made my colorful, controlled scrappy Five Squared Quilt and my Four Patch Charm quilt, made with a ray of lovely golden yellows.

Even with those two completed, I still have fabric left from other projects. Three years ago I made my son a tree skirt for Christmas using a mix of beautiful metallic fabrics by Marcus Brothers, RJR and Andover Fabrics. And…

while scrolling through Pinterest I found a great idea for using smaller scraps, little quilted star ornaments. Right away I knew these metallics would be a perfect choice for this project.

Since I only saw a photo and the dimensions weren’t given, I experimented until I had made one small enough without using exceptionally tiny pieces. I also decided to make a tutorial because other quilters may be looking for a fun way to use up little scraps, and just in time for the holidays. So here it is…

Materials needed to make one 4 ½” x 4 ½” star ornament:

For Star: Gold fabric – (1) 2 ½” x 14 ½” strip
Subcut (1) 2 ½” x 2 ½” square and (8) 1 ½” x 1 ½” squares


For Star: White fabric – (1) 2 ½” x 14″ strip
Subcut (4) 1 ¾” x 2 ½” rectangles and (4) 1 ¾” x 1 ¾” squares


For Backing: Gold fabric – (1) 5 ½” x 5 ½” square


For Interfacing: Pellon Fusible Fleece – (1) 4 ½” x 4 ½” square


For ¾” Bias tape binding: Gold fabric – (1) 1 ¼” x 20″ strip (approximate)


For Hanger: White ribbon – (1) 7″ piece (or material of your choice)


Once the fabric is cut, draw a diagonal line on the back of all the gold 1 ½” squares. As though making a flying geese unit, sew two 1 ½” x 1 ½” gold squares to the top corners of a 1 ¾” x 2 ½” white rectangle, attaching them to the 2 ½” side. Make 4.

Next, lay out squares and sewn units with the 2 ½” sides facing toward the center, as shown below. Sew together to make rows. Press the top and bottom row seams toward the outer squares. Press the middle row seam toward the center square.

Sew the rows together to complete the star; seams will nest. Press seams open. Trim block to 4 ½” x 4 ½” square making sure to leave a ¼” all the way around.

Trim any threads off the back to prevent them from showing through to the front. This is always a good rule to follow. 🙂 Next, adhering the interfacing. I used 987F Pellon fusible fleece because of the low loft, yet there’s enough to give some depth when quilted.

I always put a scrap piece of fabric over my projects to prevent any adhesive from getting on my iron.

Once the fusible fleece is adhered, sandwich the star unit to the backing. The backing square will be a bit bigger to allow for shifting when quilting.

With a hera marker, I marked the first two lines to be quilted then I used straight pins to hold the pieces together. After the first lines were finished, I removed the pins.

I chose a different quilting pattern for each one. I really like how they turned out!

Once your blocks are quilted, it’s time for binding. Since the ornaments are small, and to reduce bulk, I made bias tape using a ¾” bias tape maker. (If you don’t have one, they can be purchased at most sewing stores inexpensively or you can buy bias tape already made). You’ll need enough to go around all four sides including a few inches extra.

Once made, press the bias tape in half lengthwise before sewing it on; that’ll help to keep it even on each side. I sewed mine on by hand (each side, one at a time) which was easier than trying to line everything up and sew through all the layers at once.

One the binding is attached, the last thing to do is add a hanger. There are a lot of options here…you can use jute, ribbon, cording—whatever you like. I used a lovely white ribbon I had on hand. I looped it and tacked the ends together before stitching it on.

1/4″ double face satin ribbon

And done! Easy to make and fun, too, plus I think they’ll make great gifts!

Enjoy your holiday sewing!

modern quilts, quilting, quilts, Uncategorized

A Quilt On Hand

Giving away quilts is half the fun, isn’t it? I’ve purposely made most of the quilts I’ve given as gifts, but I got to thinking recently…what if I need one for a gift and I don’t have time to make it? This, of course, set my mind reeling so naturally I had to make a quilt ‘just in case’ because you never know!

My first thought was it has to be a quilt that would work for any occasion and anybody (I might have messed up the ‘anybody’ part after putting a floral backing on 🙂 ). Anyway…a pleasing pattern in a nice throw size would do. I always wanted to make an Around the World type quilt so I decided on the Four Patch Charm pattern by Kathy Schwartz that finishes 63″ x 69″.

I’m still sewing with fabric I have on hand, and luckily I had enough golds and yellows in my stash for this project. I used 16 different prints to avoid too often of a repeat. I also had approximate one yard sections of solids for the background so I blended three different colors, Kona Bone, Kona Snow and Bella Wheat. I placed them in symmetrically so mixing the colors worked.

I liked that this pattern introduced me to a new block, and it helped me to overcome my fear of bias edges.

half quarter square triangle

Everything went together relatively fast, and the layout was a lot of fun even though I had to do so on the floor.

Also in keeping with using only what I had, I made scrappy binding.

I thought quilting a grid would balance out the triangular points nicely, so I used my hera marker and quilted lines every two inches.

And there you have it, a finished Four Patch Charm quilt ready for a new home!

I’d love to make this quilt in every color…couldn’t you see it? 🙂

fall decor, modern quilts, quilt blocks, quilting, quilts, Uncategorized

My Maple Charm Quilt

My Maple Charm quilt is finished just in time for fall, and it’s been a long time coming since I cut fabric in March 2018 and made blocks in February 2019. Shortly after that, we sold our house and moved 1,200 north where everything was nicely packed away for another time. In late summer I put the quilt top together hoping to have it done in October—mission accomplished!

Most of my quilt is made from Moda’s Chestnut Street collection by Fig Tree and Co., a bundle I purchased in October 2017!

There’s also some Farmhouse fabric included as I had a charm pack from a few years ago (back when fabric stores would sell them as a daily deal for $2, remember that?!?) I only used natural leaf colors from the bundle and I added some Dear Stella Mini Dot fabric as needed.

I chose Kona Cotton Cream for the background to give the quilt a nice, warm feeling. And of course I love to save on cutting time by using my Stripology ruler.

Since selling my house, I no longer have a design wall so I have to use the floor for laying out my quilt tops. 😦

Because I had all the blocks made and the sashing strips cut before moving, sewing together the quilt top went pretty fast.

But, it wasn’t without issues…when I set out to make this quilt I didn’t plan on a border. I don’t really like borders on quilts; I just don’t feel they’re necessary (even if they’re written in the pattern). As an exception, I thought this particular quilt would look better with one, so I decided to add it. Since I didn’t purchase border fabric in the beginning, and so much time had passed since the fabric line came out, finding something I liked and available was quite a challenge! I ended up going with a red polka dot border and a solid red binding, both from Fig Tree’s Farmhouse II collection.

For the back, I used a leaf print in mustard from Moda’s Valley collection by A Quilting Life. I bought yardage on sale ages ago when I planned to make this quilt. I think it’s a perfect fit, I just love that fabric!

And after many, many months—my finished quilt!

Pattern by Coriander Quilts – Quilted in Whirlpool

I’m really happy with this fall quilt and plan to display it on my quilt ladder through Thanksgiving. After all that time it is finally finished! 🙂

modern quilts, quilt blocks, quilting, quilts, Uncategorized

Breaking the Bias Edge Bias

I admit, I fear the bias edge. I’m not sure why really, I never had that terrible of an experience with bias edges. I guess I’m mostly afraid that something terrible is going to happen and because of that, I go out of my way to avoid them. Well, no more.

A recent quilt pattern I’ve been working on instructs you on the usual steps when making a HST—draw a diagonal line then sew ¼” from the line. Since the blocks in this quilt are multi-colored quarter square triangles, I was having a hard time getting my points aligned, so I figured I’d have better luck if I cut on the diagonal line, then sewed. I knew I’d be dealing with bias edges but I gave it a try and guess what? Not only did I have greater accuracy, it was actually easier. I fear the bias edge no longer! (I also had to remind myself that as an experienced quilter such avoidance/fear is kind of irrational). 🙂

Fast forward to my newest project that’s made up of half quarter square triangle units. It’s called Four Patch Charm and it’s similar to an Around the World quilt. I opted for this one because of the funky border and offset center and it’s forcing me to make bias edged units.

I’m continuing to make quilts with fabric I already have, and I chose a variety of golden yellows/oranges for this one. After cutting fabrics, I set to chain piecing (bias edges were present) and within 35 minutes I had 96 triangle pairs sewn.

The next step, pressing seams open…

then attaching the large half square to complete the unit. Lastly, press and trim.

No problem! Quilters know to handle bias edges gently, and to ensure that I handled them by the seams and put them on a ruler to move them from my pressing board to my sewing desk. I’m happy to say that no stretching or misshaping has occurred; I’m pretty confident everything will go together smoothly.

Now that I’ve tried a few different techniques, I won’t think twice about projects that require bias edges. If you’re like me and have avoided them, don’t! They’re not nearly as scary as you think.

modern quilts, patterns, PDF pattern, quilt binding, quilt blocks, quilting, quilts, Uncategorized

Five Squared Quilt

Looking for a colorful quilt that’s easy to make and designed to bust your stash? Give my Five Squared quilt a try! It’s a great way to use your scraps and it’s precut friendly. The PDF pattern is available for purchase at my Etsy shop.

Five Squared is geared for using what you’ve got on hand, and it’s an excellent choice for beginners. I realize a beginner quilter might not have that many scraps, but don’t worry, you can use 5 charm packs instead. And remember, with scrappy quilts, anything goes…

Because I like a controlled scrappy look, I decided to make mine using color-coordinated blocks with as many different colorways as my fabric would allow. I used only what I had, I bought nothing new (with the exception of the backing).

preliminary sorting of my precuts

That said, I went through all my fabric and ended up with 14 different colorways: red, pink, coral, taupe, gray, aqua, teal, orange, dark blue, purple, beige, yellow, green and low volume. Ideally, 2 of 15 different colored blocks would balance out the quilt equally, but I improvised and made 4 low volume blocks instead.

I wish I could take all my quilts to be professionally quilted but it’s not in the budget, so most of the time I do the quilting myself. While it’s not my favorite part of the quilting process, once I get going I don’t mind it all that much.

I quilted mine with serpentine stitched lines approximately 7/8″ apart, marked with a hera marker. I used Aurifil 50wt thread 2026, Chalk.

Here’s something interesting…while i was working on my quilt I did a story on Instagram asking quilters if they, at some point while quilting, unpin and repress their quilt. I was curious because I do when I’m nearing the right-hand side edge, and here’s why. At that point I’ve had the quilt rolled up pretty tight to fit through the throat of my machine, and it’s rather wrinkled. When I get to that section, I feel that taking extra time to press and repin gives me a smoother, flatter finish. Do other quilters do this I wondered? Here’s what they said…

Overwhelmingly no! I was surprised not many people did. Who knew? Guess I’m in the minority on that one.

Anyway…for the backing I purchased Dear Stella Fabrics Flockstar Blush because it had every color in it that I used on the front. I absolutely love this fabric!

And it blended lovely with Moda’s Rainy Day! Umbrella Pink that I used for the binding, which I also had on hand, left over from when my Boxed Candy Toss Quilt was featured on the Moda Bake Shop.

Here’s my finished Five Squared quilt.

Not that I’m wishing away summer by any stretch but I am looking forward to cooler weather so I can finally use this beauty!

modern quilts, patterns, PDF pattern, quilting, quilts, Uncategorized

Diamond Jubilee Quilt Pattern (A Throw Size Quilt)

It’s Monday morning and it’s time for a pattern release! My Diamond Jubilee quilt is now available for purchase as a PDF download at my Etsy shop.

This modern quilt is throw size, measures 56″ x 72″ and it’s 2 ½” precut strip friendly. The pattern is made up of two distinct blocks, a scrappy star block and a diamond block, set in an alternate layout. And, it’s easy enough for a confident beginner quilter.

Fabric: Bright Blooms by Artisan Batiks for Robert Kaufman Fabrics
Quilting: Random Curved Squares

Looking to showcase some bright fabric? Download your copy of Diamond Jubilee, have some fun sewing and celebrate an explosion of color!

If you’re on Instagram, share your project #diamondjubileequilt—I’d love to see what you create.