quilting, Uncategorized

Quilting 101: Precuts

Fact: Quilters love precuts. 🙂

IMGP8318

If you’re new to quilting you might be asking, “What are precuts?” It’s pretty straightforward, precuts are fabrics cut to specific sizes and quantities and usually feature fabric from the same collection. Precuts came into existence as a way for fabric manufacturers to promote their new lines. Luckily for us quilters, these gems are available from a variety fabric manufacturers such as Moda, Robert Kaufman, Riley Blake, RJR Fabrics and Windham Fabrics—just to name a few.

Here’s a list of information on available precuts along with some examples of projects I’ve made with them.

Note: Manufacturers have named precuts differently as noted below.

IMGP8334.JPG

Mini Charm Pack
2 ½” x 2 ½” squares; 42 per pack

IMGP8481.jpg

IMGP8483.jpg

IMGP8176
Scrappy Nine Patch Quilt made with 2 1/2″ squares
IMG_5959
Summer Star Mini Quilt made with a mini charm pack

Charm Pack, Stacker
5″ x 5″ squares; 42 per pack

IMGP8493.JPG

IMG_6626
Checkered Baby Quilt made with a charm pack (A Monday Morning Design tutorial)

Layer Cake, Patty Cake
10″ x 10″ squares; 42 per pack

IMGP8492.JPG

IMGP6709
Boxed Candy Toss Quilt is layer cake friendly (A Monday Morning Design tutorial)

Jelly Roll, Roll Up, Rolie Polie
2 ½” x 44″ strips; 40-42 per roll

IMGP8499.JPG

Honey Bun
1 ½” x 44″ strips; 40-42 per roll

Fat Quarter
18″ x 22″; bundle sizes vary

IMG_3249

IMGP7215
Fireworks Quilt made with fat quarters

Fat Eighth
9″ x 22″; bundle sizes vary

Turnover
6″ triangles

There’s a whole world of quilting fun out there using precuts. If you haven’t given them a try, put it on your ‘to do’ list. You’ll find that they’re a great choice by saving you a lot of cutting time making your quilting projects easier and faster!

quilting, Quilting 101, Uncategorized

Quilting 101: Quilting Terminology for Beginners

When I started to quilt, some of the quilting language had me really confused. Everyday words referring to animals, winter and food with a quilting-related meaning….huh? It just didn’t make sense. If your experience is one of the same, this post will help clarify some of the terminology used that has other meanings.

I chose my top ten favorites, or I should say, my top ten most confusing quilting terms. 🙂

1. Dog ears – Dog ears are those small pieces of fabric that appear in quilt block corners and edges when two triangular pieces are sewn together—results of a diagonal seam. Always trim dog ears before finishing a quilt block.

IMGP8415.JPG

2. Feed dogs – The feed dogs are the metal teeth located in the slots in a sewing machine’s needle plate. Feed dogs are comprised of metal bars, crosscut with diagonal teeth that move back and forth; they grip fabric and pull it through the machine and away from the needle.

IMGP8411.JPG

3. Flying geese – Flying geese is a traditional quilt block pattern created by sewing a triangle at each end of a rectangular piece of fabric, forming a peak in the middle. Finished flying geese blocks resemble geese flying in formation, hence the name.

IMGP8428.JPG

4. Nesting seams – Seams that line up precisely at an intersection of a block or quilt are known as nesting seams. To achieve nesting, press seams in opposite directions to reduce the bulk created by the seam allowance.

IMGP8450

IMGP8454.JPG

5. Snowball – The snowball technique is used when a quilter chooses to give a square a rounded effect (like a snowball). To achieve this result, the quilter draws a diagonal line on a background fabric square (white or light colored), sews on the line, cuts away the corner and presses back the triangle. This process can also be done in reverse, using a central white square and a color triangle in the corner.

IMGP8457
Preparation to snowball a corner
IMGP8462
Snowballed corner

6. Quilt sandwich or sandwiching – Sandwiching is assembling the quilt top, batting and backing, then securing the layers together by basting with either quilting pins or glue–readying it for quilting. The batting and quilt backing are always cut a few inches larger than the quilt top to allow for fabric shifting while quilting.

IMGP8436

7. Chain piecing – Chain piecing is sewing together squares in one continuous length of thread instead of sewing piece by piece. This method saves time and is popular among quilters. Once multiple squares have been sewn in a strand, the thread is easily cut to separate individual pieces.

IMGP8432.JPG
chain piecing

8. Sashing – Sashing is a strip of fabric sewn between blocks on a quilt top. It gives a windowpane effect and shows off blocks individually. Most often lighter-colored fabric is used for sashing to make the other colors pop. As a variation, sashing can be used to contrast quilt block colors.

IMGP8159 (2).JPG

9. Stitch in the ditch – Stitching in the ditch is a technique where the quilting stitches on the quilt top are minimized by quilting ‘in’ the seams that were created when the quilt blocks were pieced together. Using a specialized foot helps makes this process neater with more accurate results.

IMGP8418.JPG

10. Fussy cut – A fussy cut is used when a quilter wants to showcase a specific section or element of a fabric pattern, e.g. a flower, an animal, etc. A fussy cut should always include a seam allowance.

IMG_7159.jpg

I hope this blog post helped clarify some quilting terminology confusion.

I plan to continue my Quilting 101 series with my next post delving into the variety of precut fabric.

quilting, Uncategorized

Quilting 101: Acronyms

If you’ve been bitten by the quilting bug, you probably have already heard quilting references that use everyday language (e.g. quilt sandwich, snowballing) and your mind could be swimming in quilting-related acronyms. All the abbreviations and terminology can be really confusing. When I first started, I was baffled over all the different terms used when watching how-to videos and looking at Instagram posts.

If you’re a confused beginner like I was, this post offers some help. I have listed the most common quilting acronyms, their meaning, and a few examples.

IMGP8299.JPG

WOF – Width Of Fabric – The width of the fabric from selvage to selvage (side to side). It’s important to know what that measurement is when purchasing, cutting and sewing fabric.

RST – Right Sides Together – When quilting, fabrics are sewn with the ‘right’ sides facing. ‘Right’ sides are the printed side, or what some call ‘the pretty side.’ You’ll see this term used in patterns and tutorials.

WIP – Work In Progress – Any project in the works. Many quilters tend to have several at once. 🙂

UFO – UnFinished Object – Just what it says…something you haven’t yet finished. A lot of the time UFOs are abandoned projects, usually due to something else that’s caught a quilter’s eye. 😉

IMGP8307.JPG

FMQ – Free Motion Quilting – This is a quilting process where you drop the feed dogs on your sewing machine and move your quilt sandwich around freely. Stippling or meandering is commonly the first design beginners learn to quilt. Here’s an example of what meandering looks like:

IMGP7451
This is the extent of my FMQ abilities…however, some people are phenomenal at this! 🙂

HST – Half Square Triangle – HSTs are one of the most popular quilt block units used in quilting. There are a variety of methods to making HSTs.

IMGP6934
half square triangle

QAL – Quilt Along – A quilt along consists of a host posting tutorials on a blog/website for other quilters that join in at home. Goals are set, example: make blocks 1-10 this week, and everyone makes the same project. Often times I see QALs taking place on Instagram but I’ve never participated in one.

LQS – Local Quilt Shop

TBQ – To Be Quilted – (I just learned this one!)

Hopefully this helps clear up some of the obscurity in the quilting world! I will continue to provide information for beginning quilters in my Quilting 101 series. My next post will provide a rundown on other popular terms you’ll come across throughout your quilting journey.

mini quilts, quilts, Uncategorized

Patriotic Flag Mini Quilt

The month of May always brings out patriotism here in the US, with Memorial Day kicking off the summer season then Flag Day and the Fourth of July not too far behind. Right now I have two quilts in the making, a Christmas gift and a new pattern of mine, and I could use a break from larger projects so I set out to find something patriotic that I could finish quickly using left over fabrics.

I usually don’t sew with blue (I don’t know why, I just don’t seem to choose it) but since I made my Americana Stars & Four Patches quilt last year, I had enough blue fabric for something small. Same with red, I don’t use it a lot, but I had some on hand from previous projects plus I got a small fat quarter bundle freebie with some lovely reds included.  🙂

IMGP7940.JPG

After quite a bit of searching, I decided on a free flag tutorial from Cluck Cluck Sew. While she made a lovely pillow, I wanted something for my sewing room door so I added a light blue border and made mine a mini quilt.

IMG_7293.jpg

For the star and stripes, I used a white low volume fabric with handwriting that reminded me of old-fashioned handwritten letters and historic signatures; I thought it was fitting for a flag. It’s kind of difficult to see it unless it’s close up…

IMGP7937IMGP7939

Before I began quilting, I did some ‘thread painting’—my quilting tip that consists of laying out thread on a project to help decide on a quilting pattern. To read more about it, click here. I do tend to gravitate toward crosshatch quilting, especially on rectangular blocks because the end results are diamonds, and I love the look! So yes, I went with crosshatch quilting, yet again.

IMGP7954.jpg
thread painting

When basting a mini quilt, I always use my flower straight pins instead of actual quilting pins. Reasons being: they’re easier to put in and take out, they’re nice and sharp and long, and they seem flatter than other pins.

IMGP7979

I used my guide for quilting accuracy and it gave me very precise results!

IMGP7988.JPG

I was happy to have had enough red and white striped fabric for this project, left over from a Christmas tree skirt. And of course, striped binding is always a favorite.

IMGP8008.JPG

And speaking of binding…how lucky was I to get this tiny stripe to align when I finished off my binding? Absolutely pure luck! Doubt that ever happens again.  🙂

IMGP8022.jpg

For the back, I had this very appropriate fabric from my Stars & Four Patches quilt. As far as backing goes, it’s easy to match up prints, especially on a small project. I have more information on this topic on my Matching Fabric Patterns blog post.

IMGP8019.jpg

And…here’s the finished project!

IMGP7982.JPG

I love everything about this mini—it’s cute, a great size for my sewing room door and I can get it out to enjoy several times a year. Lastly, it was a small but significant scrap buster!

IMGP8000

Happy Memorial Day

quilting, quilts, Uncategorized

Scrappy Nine Patch Quilt

It seems as though a lot of quilters plan out their projects; I see plenty of Instagram posts with lovely planners available for purchase along with planner images of scrawled notes and ideas. While I’m an organized person to a fault, I just couldn’t see myself planning out my quilts. I’m not exactly sure why, I suppose it’s because I just like to wing it from time to time. Enter my Scrappy Nine Patch quilt.

A while back I had been thinking about making something scrappy, mainly because I rarely do and I was tired of looking at fabric left over from so many past projects. One day while working on something else, I completely switched gears and began pulling fabric and putting together scraps in color combinations. Now I know why scrappy projects are so much fun; you don’t need an exact plan (other than a pattern), anything goes and nothing is considered wrong.

I set to work making a variety of nine patches—if a fabric looked good, it went in. It’s funny how I still can remember what projects I used those fabrics for, what collection they’re from, why I bought them, etc. I guess that’s why scrappy quilts are also called ‘memory quilts.’

Here are a few of my block groups.

IMG_4047

IMG_4055

IMG_4054

IMG_4052

Had a little fun putting this together…

IMG_4068

Upon completion, I was surprised that I ended up using 144 different fabrics! I wouldn’t have guessed I even had that much variety in my stash at the time. In all, I made 48 blocks, added sashing, and ended up with a throw quilt measuring roughly 49″ W x 57″ L. And it definitely helped with my stash down.

IMGP8176

I’ve since gifted this quilt, but because it was so fun to make I’m thinking about making another one, with an entirely different selection of fabrics, of course. And I won’t be planning it either! 🙂

quilting, Uncategorized

Pillowpalooza!

Since I’ve made a lot of pillows lately, I thought it would be a good time to show my work on a blog post. I’ve also included a couple of others I made a few years ago.

Starting with my oldest projects first…the next two sets of pillows date back to when I dug out my Kenmore sewing machine in 2012 and started sewing (then consequently, quilting) as a hobby. These two are some of the the first ones I ever made, and they’re still a favorite.

IMGP7557.JPG

If you read my ‘About’ section, you may recall I was given a store-bought comforter quilt with lovely Laura Ashley fabrics that consisted of a variety of colors and textures, which I slowly and surely took apart, and yes, with a seam ripper.

I made an ensemble from the backing. I followed a tutorial for a foam seat, and I got really adventurous and made bias binding!

Out of all that fabric, those four pillows and the seat cushion is all I have left, and I still have yards and yards of that funky ribbon! The panels in the quilt were about 12″ square, pretty large for a quilt but pretty small for pillows.

This one was made with repurposed half square triangles I had used in a Moda Bake Shop project submission. They were perfectly fine and there was no sense in them sitting in a drawer, so I reused them.

IMGP7318
front
IMGP7321
reversible back

I made it ‘reversible’ so it looks good no matter what side is facing out. I did the same thing with a few others. Sometimes I turn them around just for new look.

The next one is a Dutch Rose block pattern I found in McCall’s online library of 150+ quilt block patterns. All free and a great resource! Here’s the link: The Quilting Company.

IMGP7051.JPG

Personally, I think this is the prettiest block I’ve ever made. I left it on my design wall for a month just so I could look at it. 🙂

And here it is in pillow form on my bed. Still love it.

:.,bcxz .jpg

The front consists of a mix of Moda fabrics; the yellow is Benartex from a bright collection called Transformation by Sarah Vedeler Designs.  As always, I used Kona Cotton for my background, this is Kona Cotton Snow. I put a lovely Art Gallery fabric by Amy Sinibaldi on the back. Such soft and gorgeous colors!

IMG_7167.jpg

The next two are pillow covers I made for my mom, also with printed fabric on the back. I used mostly leftover fabric from the quilt I made for her this past Christmas. Hope she likes them!

IMG_7082

IMGP7420

Overall, these zippered pillow covers are fairly easy to make and the quilt block possibilities are endless. If you’d like to create some for yourself, here’s the link to my Zippered Quilt Block Pillow Cover Tutorial.

I’m sure you noticed that none of these quilt block pillows are quilted. I opted not to quilt them because I love the look of fresh, crisp fronts. Sure, quilting is an option, I just wanted to mix things up a bit.

That pretty much wraps up my current pillow collection. I’m in the process of making a queen size Hunter’s Star quilt for my daughter and I plan to make a few throw pillows to go along it. Oh, and of course I have other ideas in the works, so eventually there’ll be a Pillowpalooza II!

quilting

My First Quilt

Recently, a friend asked me about my first quilt, and wow, that brought back a lot of memories! Even though it wasn’t all that long ago when I made it, a lot has changed since then. Our discussion made me think it might be fun to write a blog post about my first quilt and show some photos. Fun…and maybe embarrassing too, but I figured, why not.

If you’ve read my ‘About’ section, you’re familiar with how quilting became part of my life. In a nutshell, nearly four years ago I was making box bags for my daughter’s knitting projects, and one tutorial in particular made reference to ‘getting out your quilter’s ruler.’ After figuring out what a quilter’s ruler actually was, I thought I’d try my hand at making a quilt. It certainly seemed like something I’d enjoy as a hobby. Like most quilters, after one I was hooked, and I haven’t stopped since.

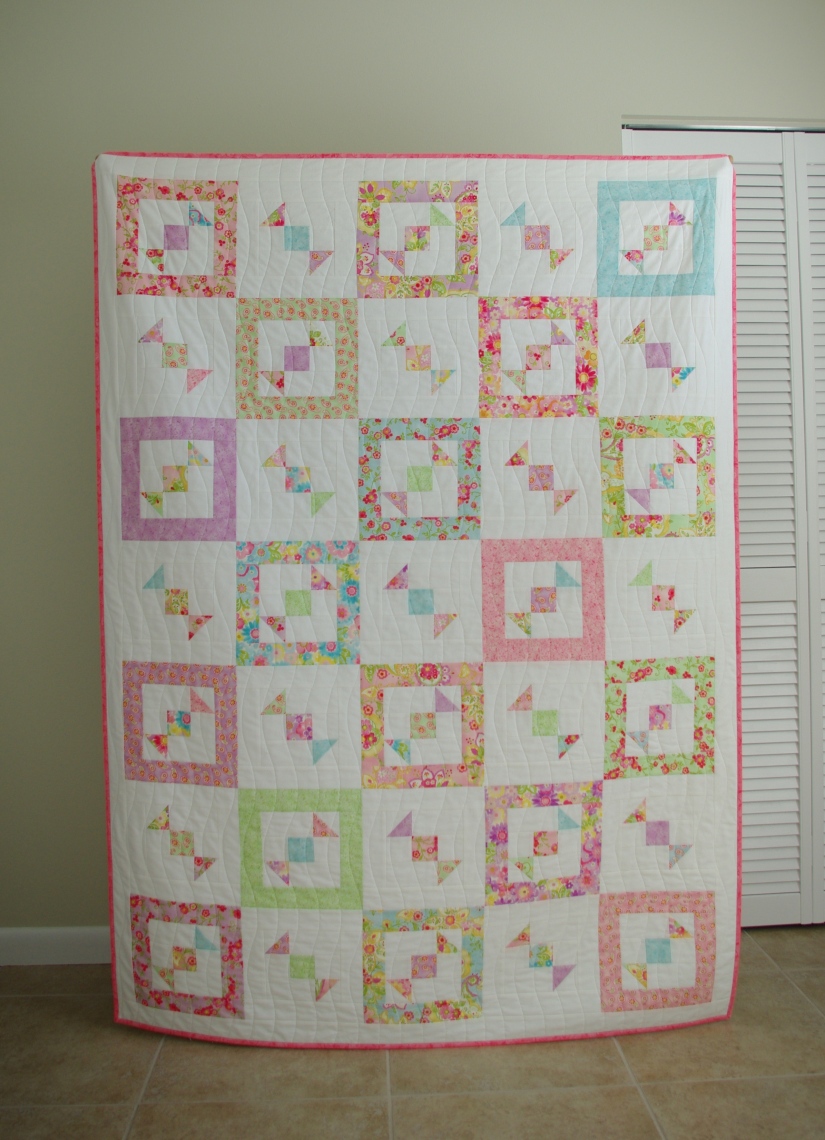
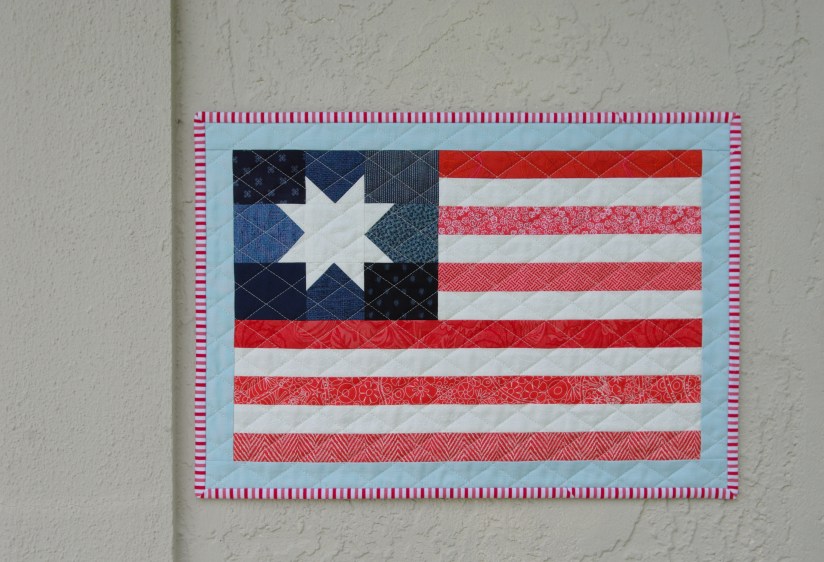
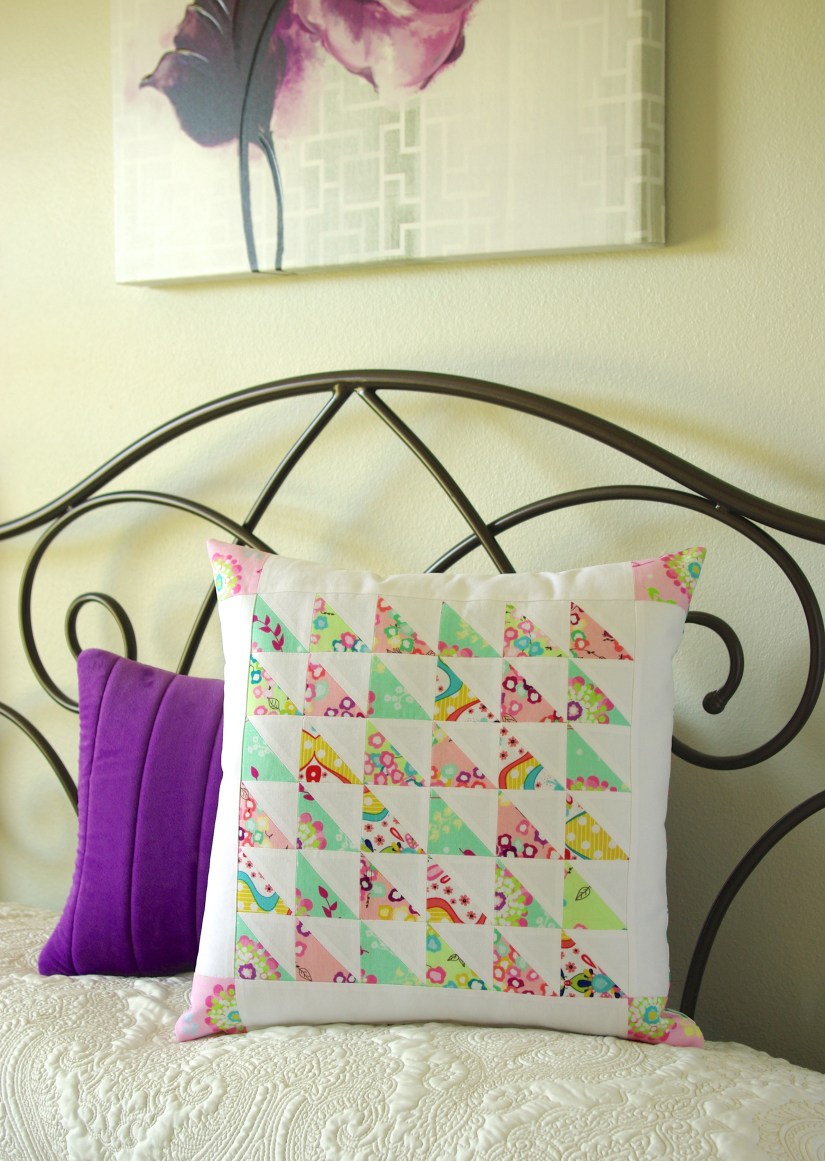
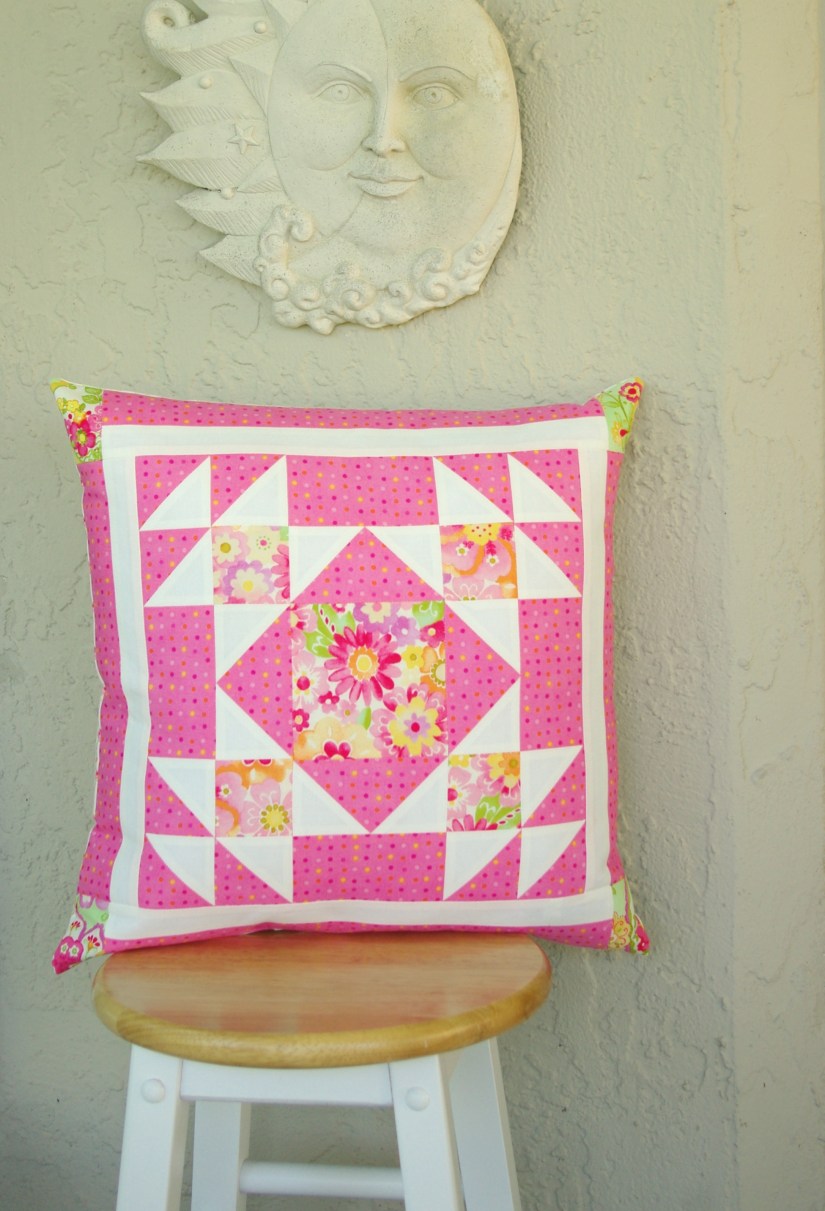
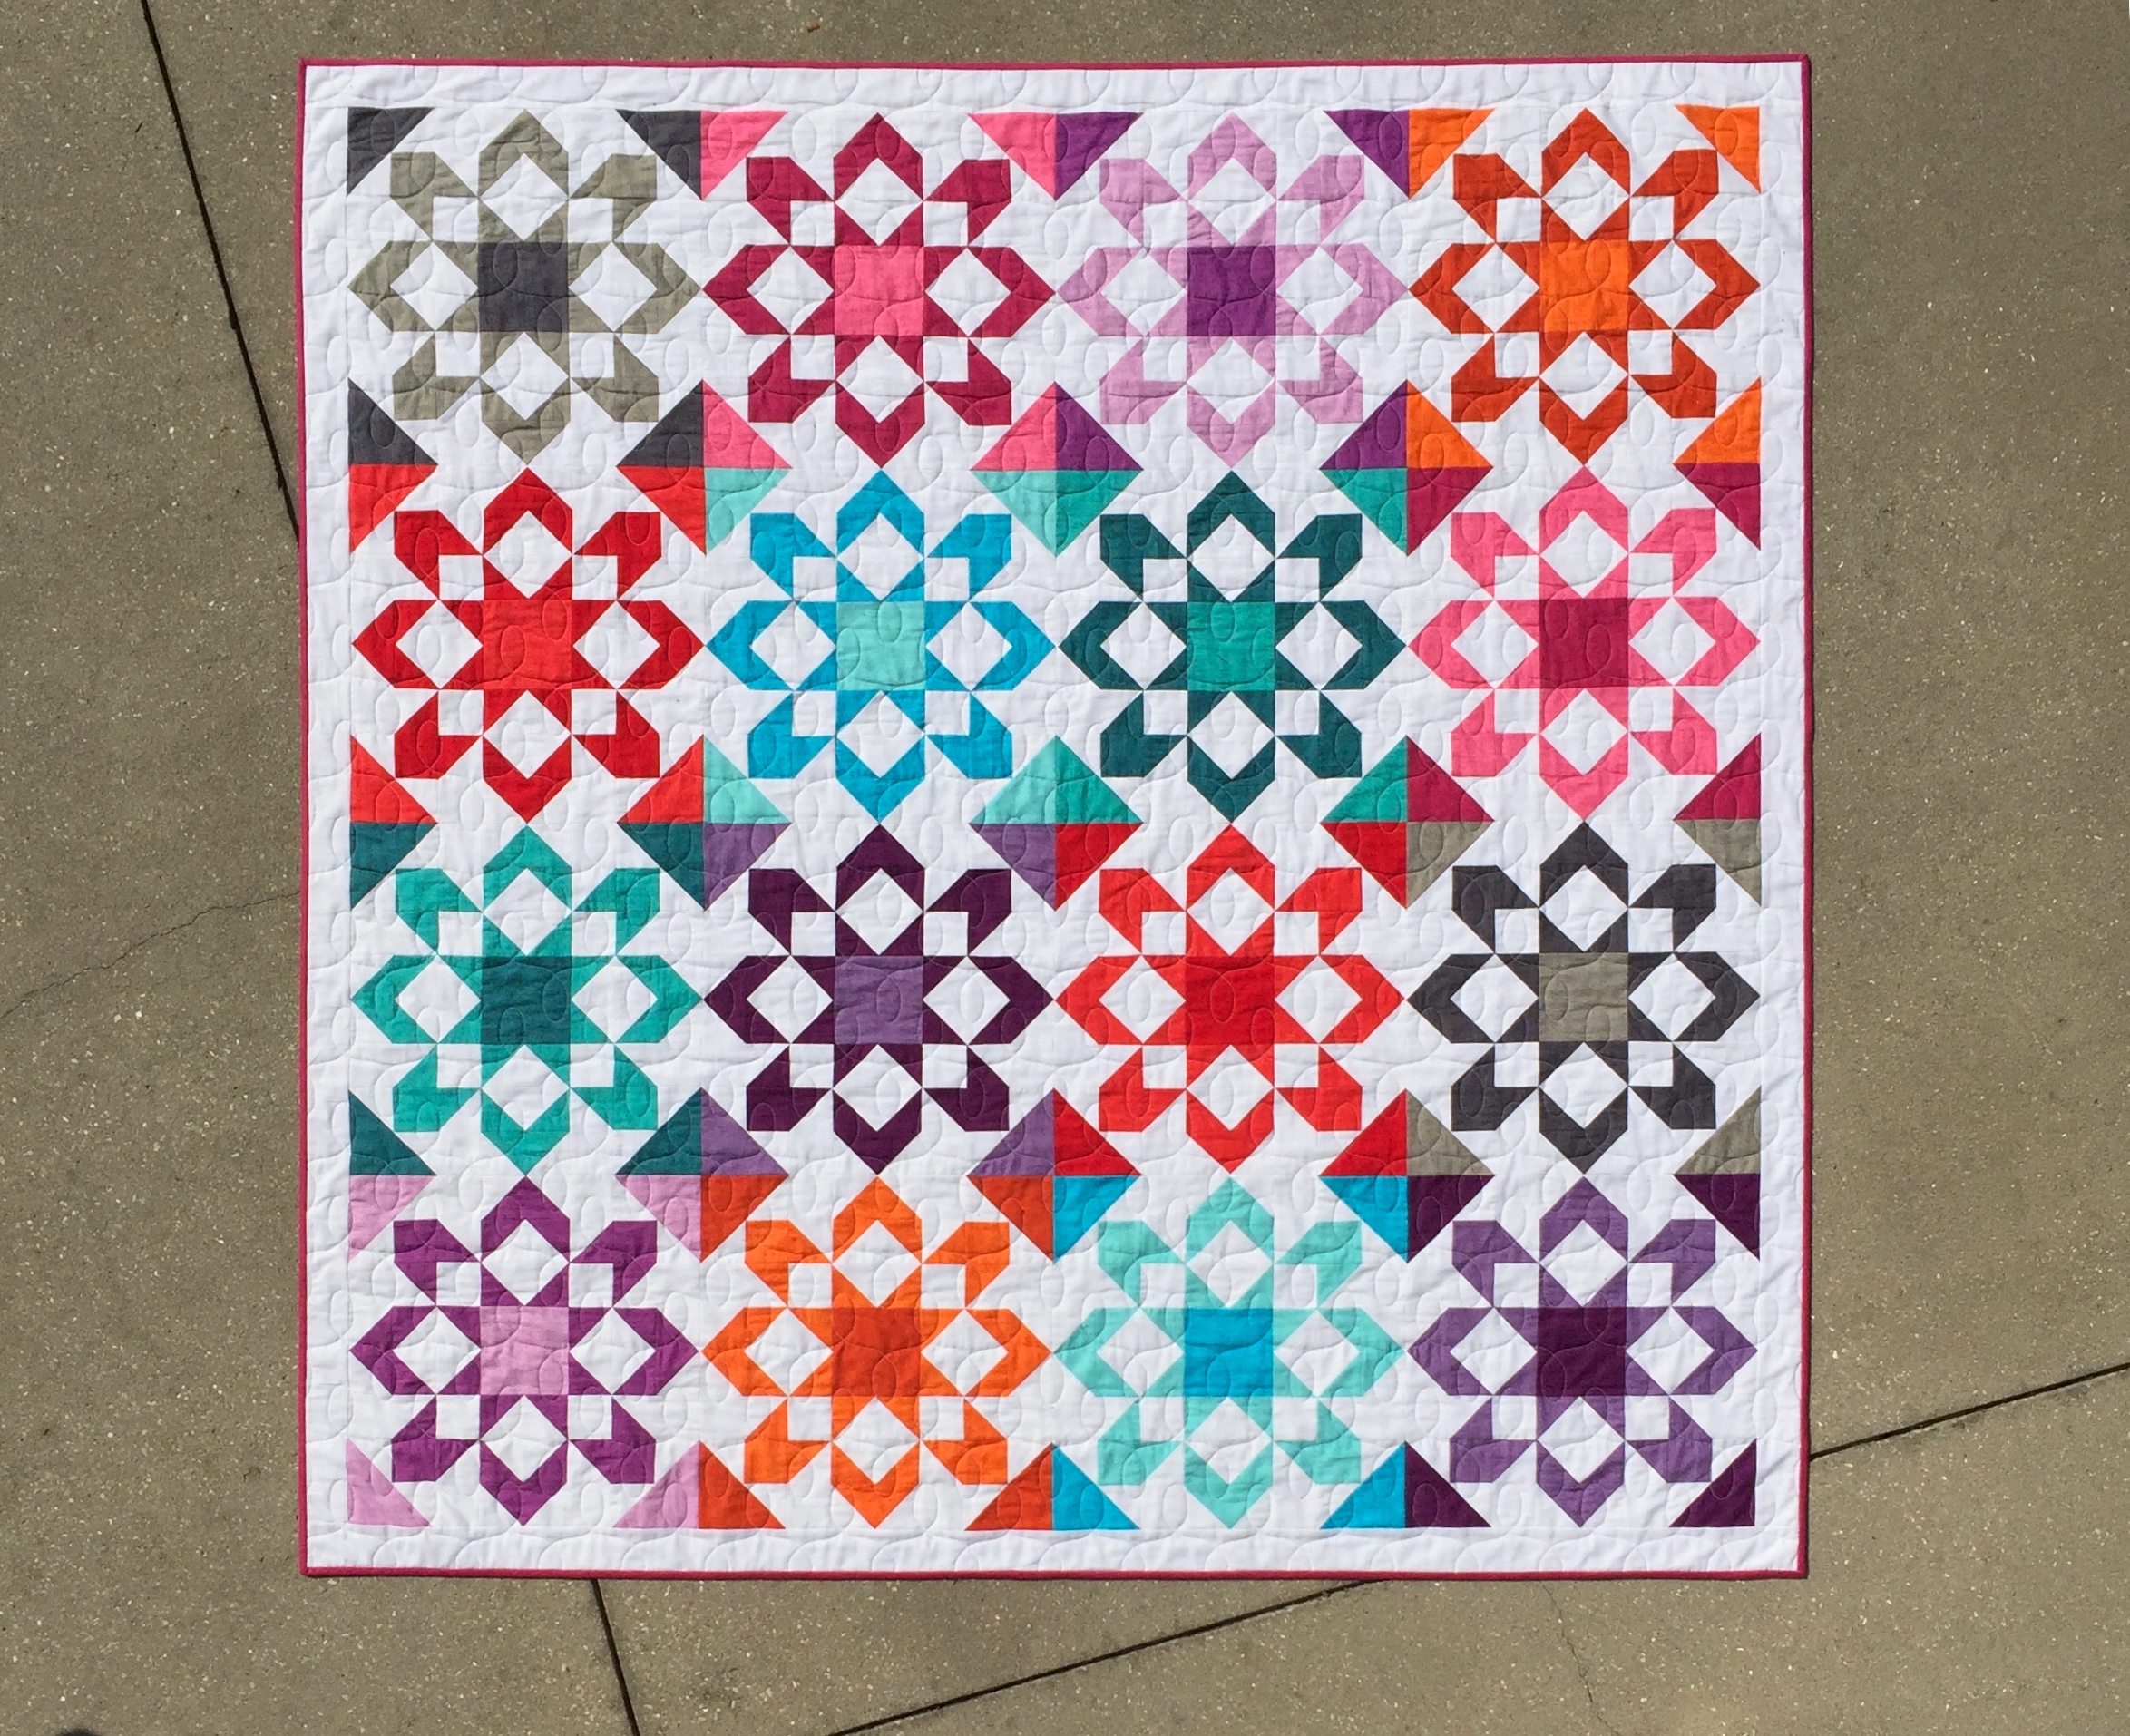
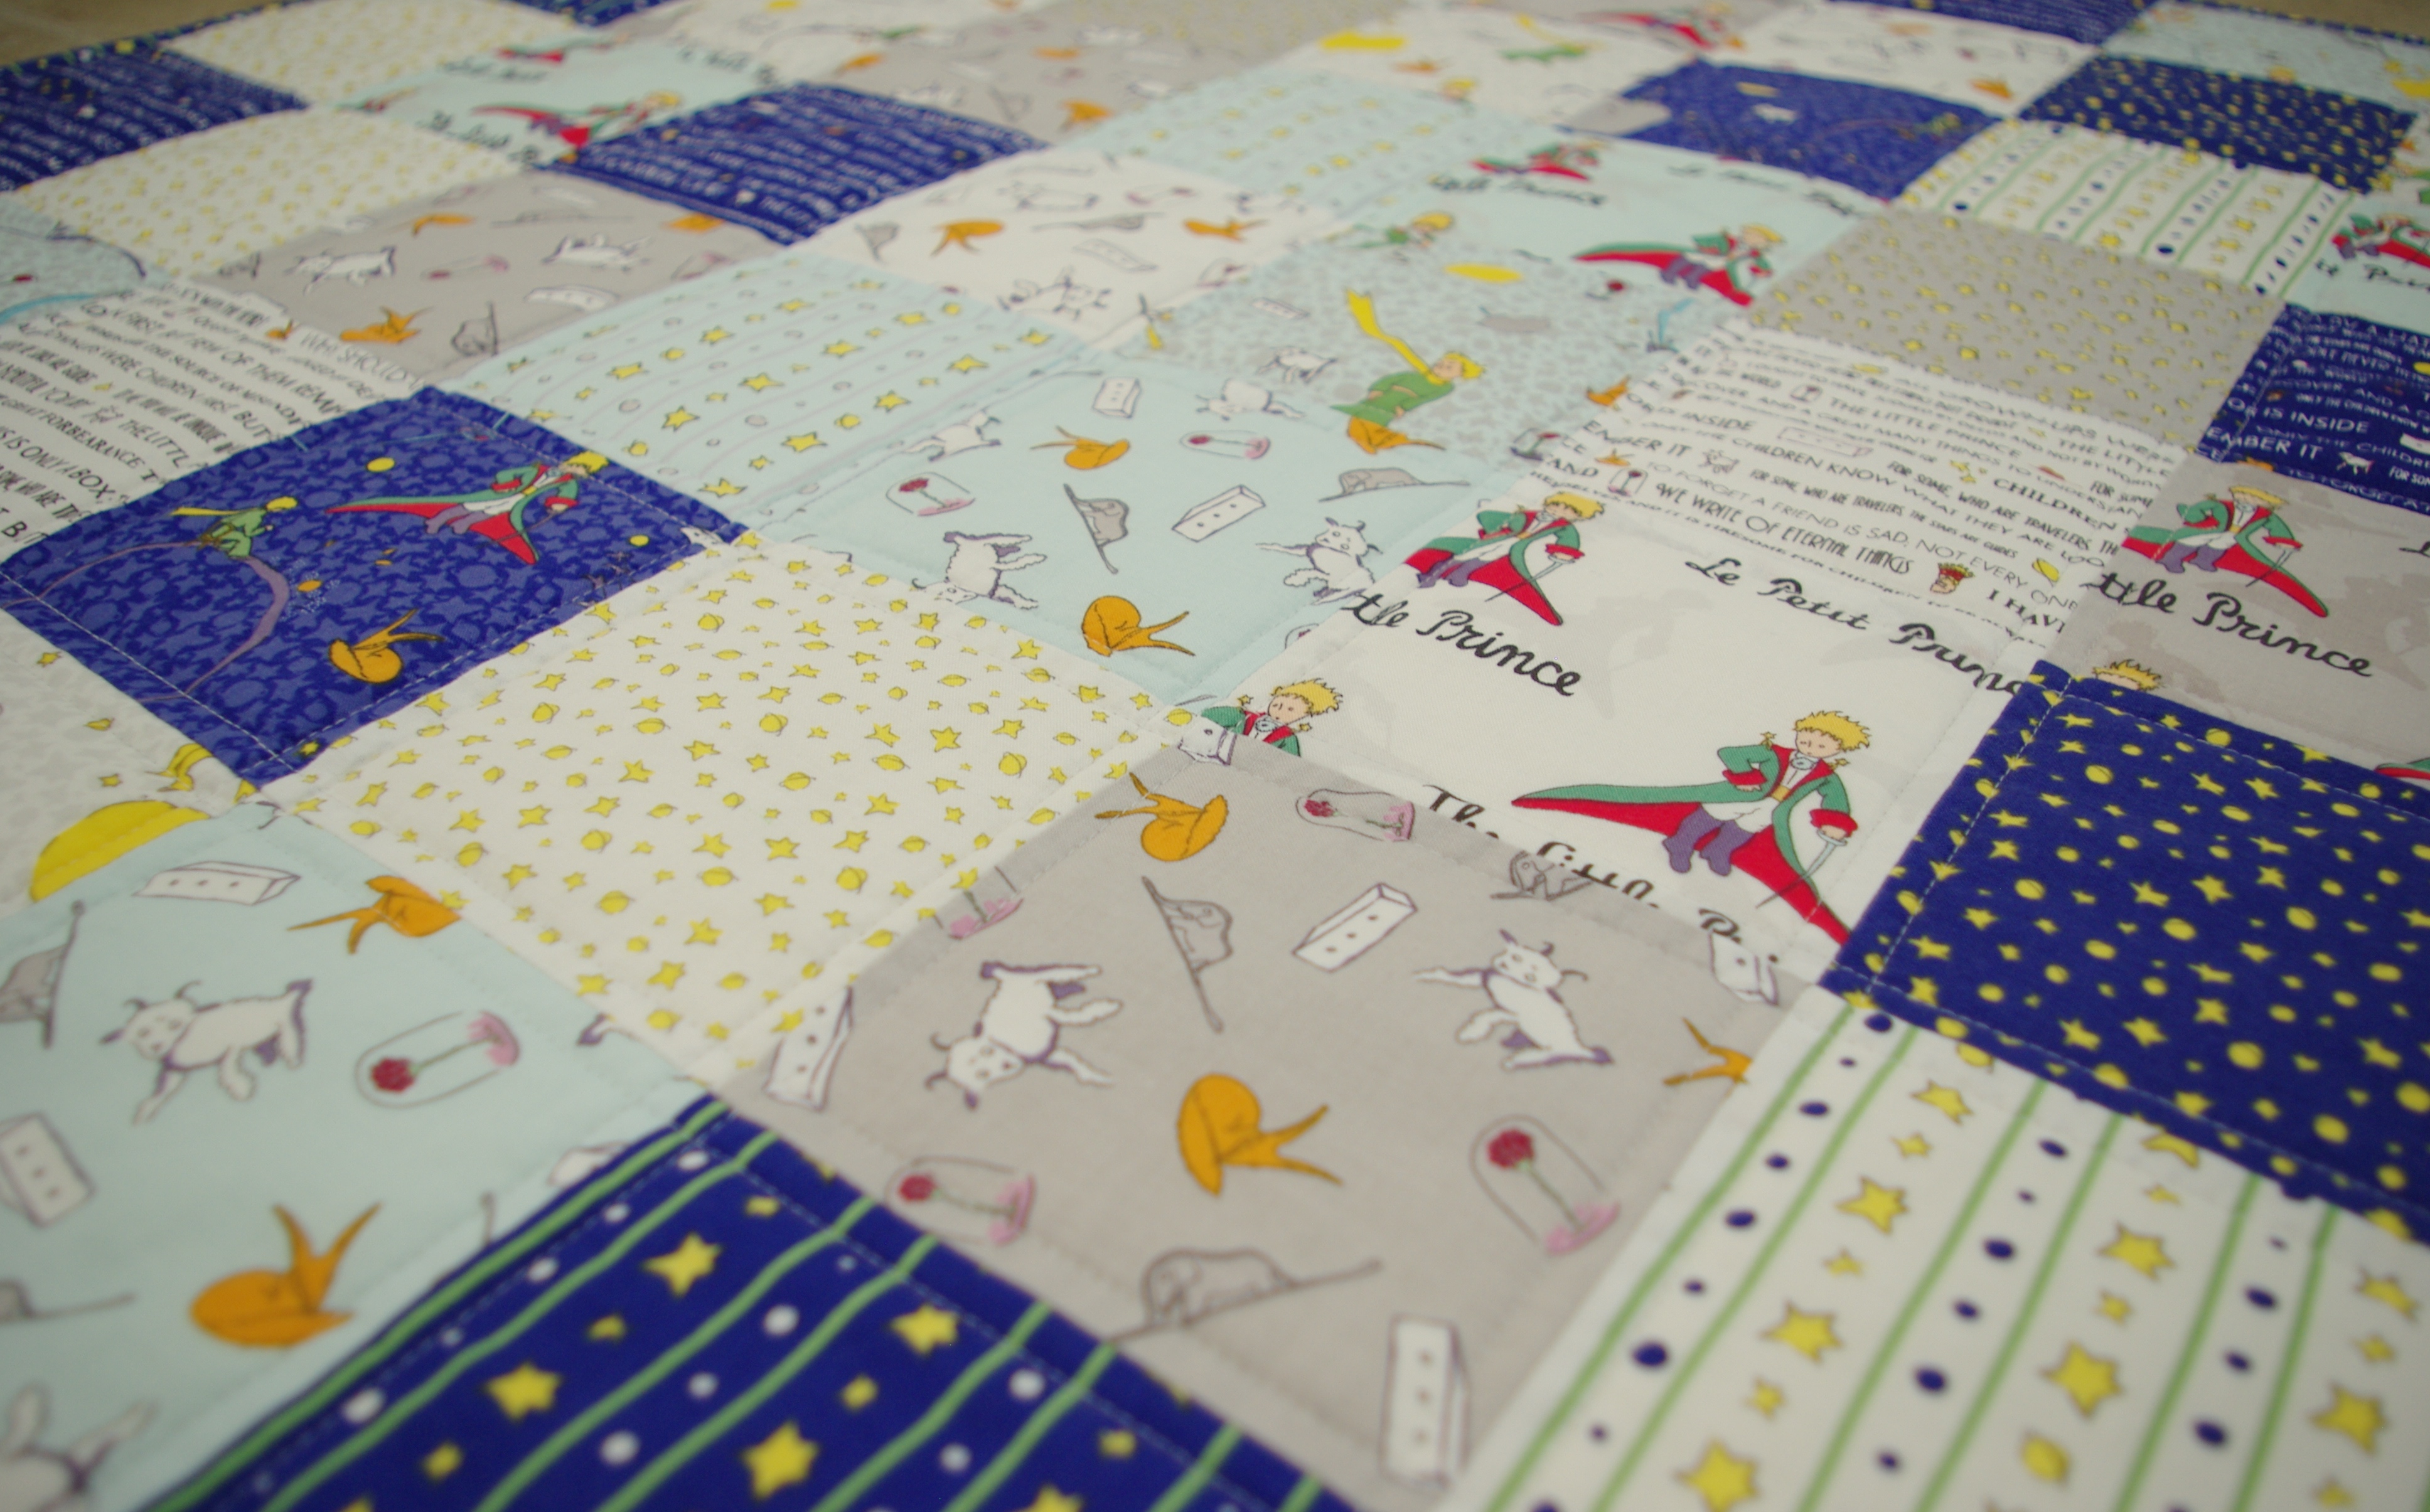
So here it is. My first quilt.

IMGP7451.jpg

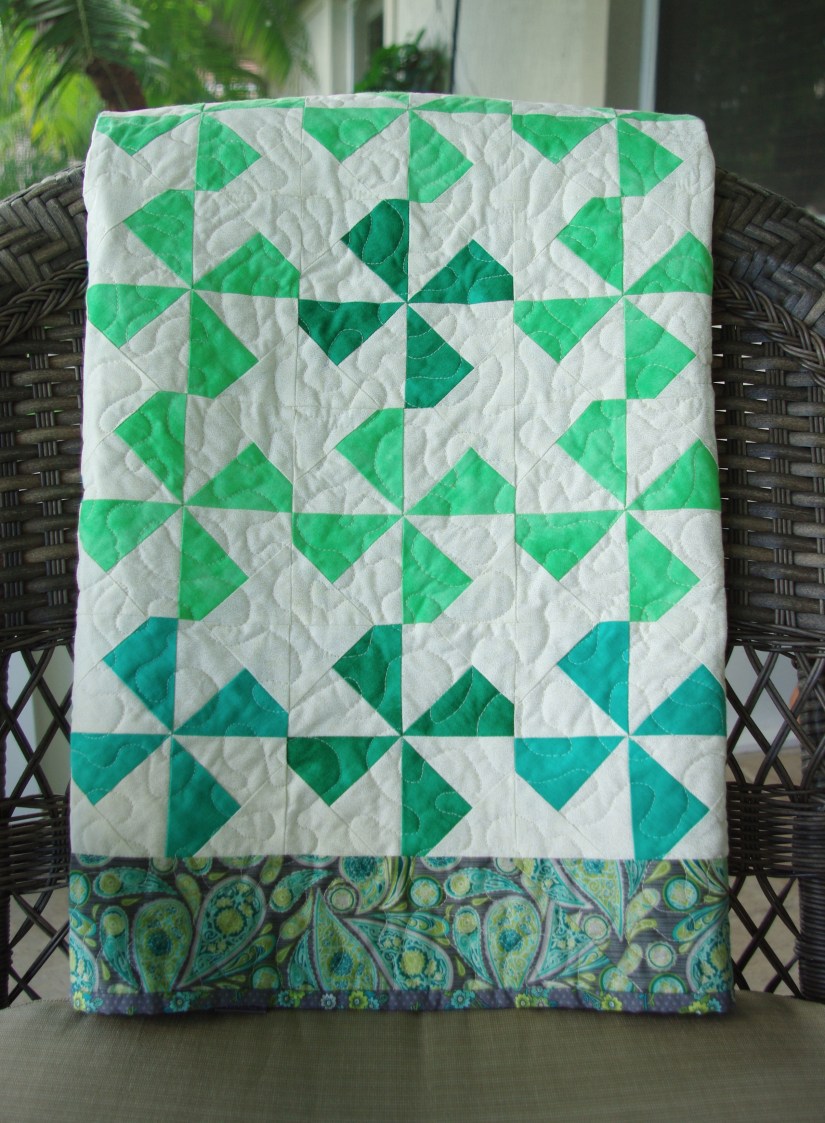
In all honesty, it really didn’t come out too bad!

Since I had absolutely no idea what I was doing, I chose a pattern from a Missouri Star Quilt Company tutorial, (I love those, btw) called The Snowballed Pinwheel Quilt. If you’re new to quilting, I do not recommend this for a beginner (it’s definitely for the more advanced quilter). 🙂  I’d love to make this quilt again now that I know what to expect. Nonetheless, back then I was excited and ready to go. I didn’t even know enough to consider whether this was a beginner-friendly pattern or not.

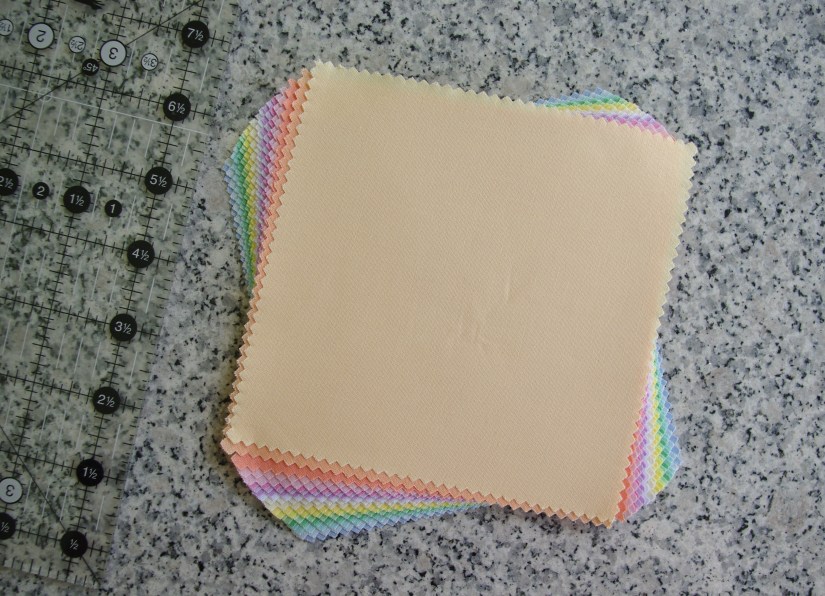
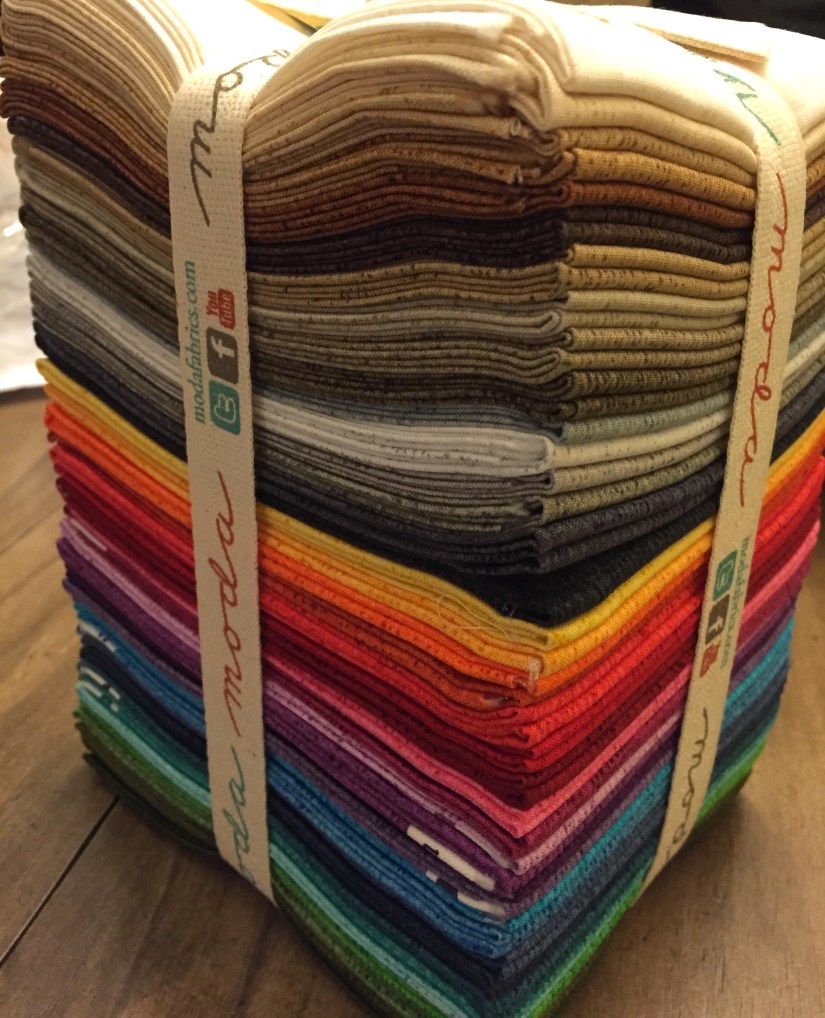
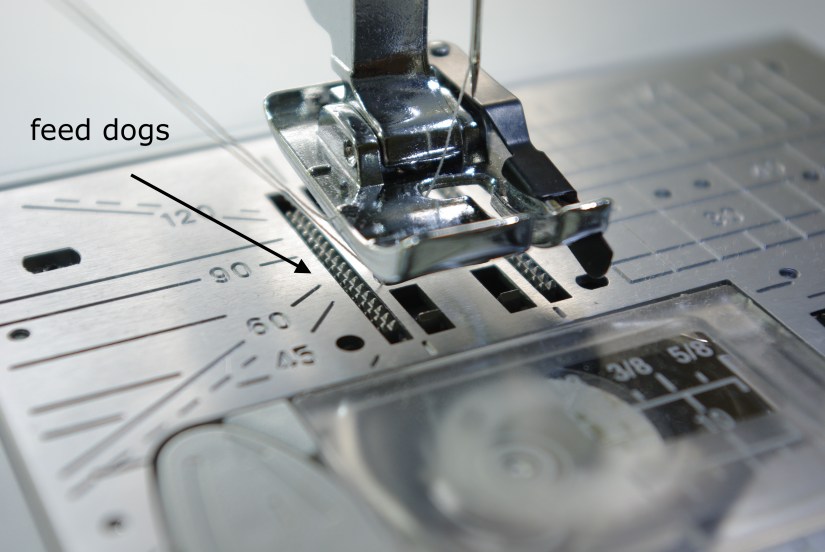
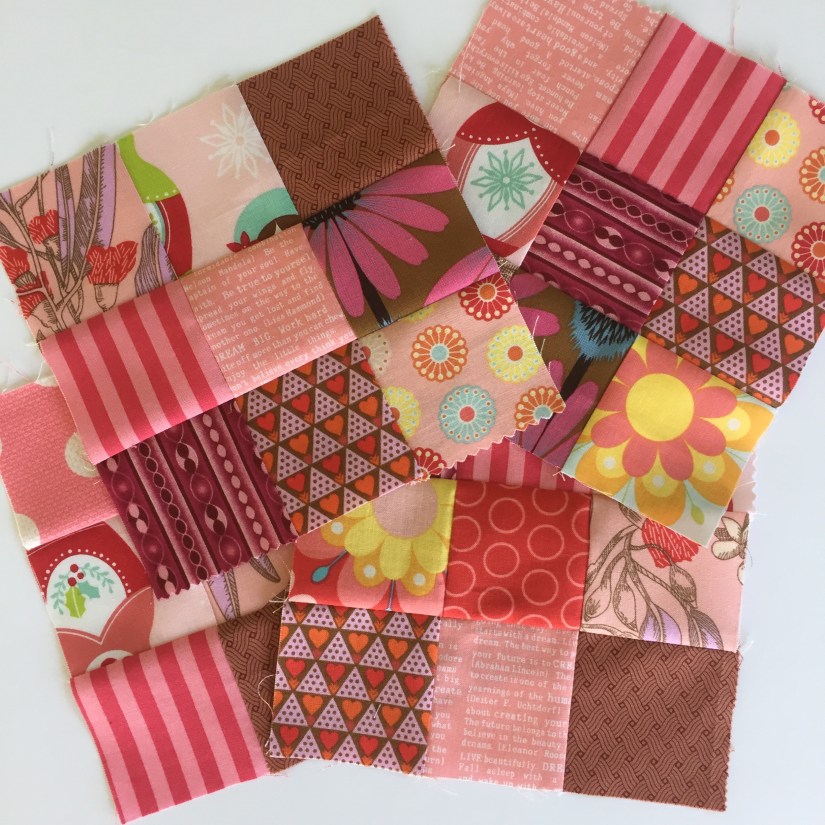
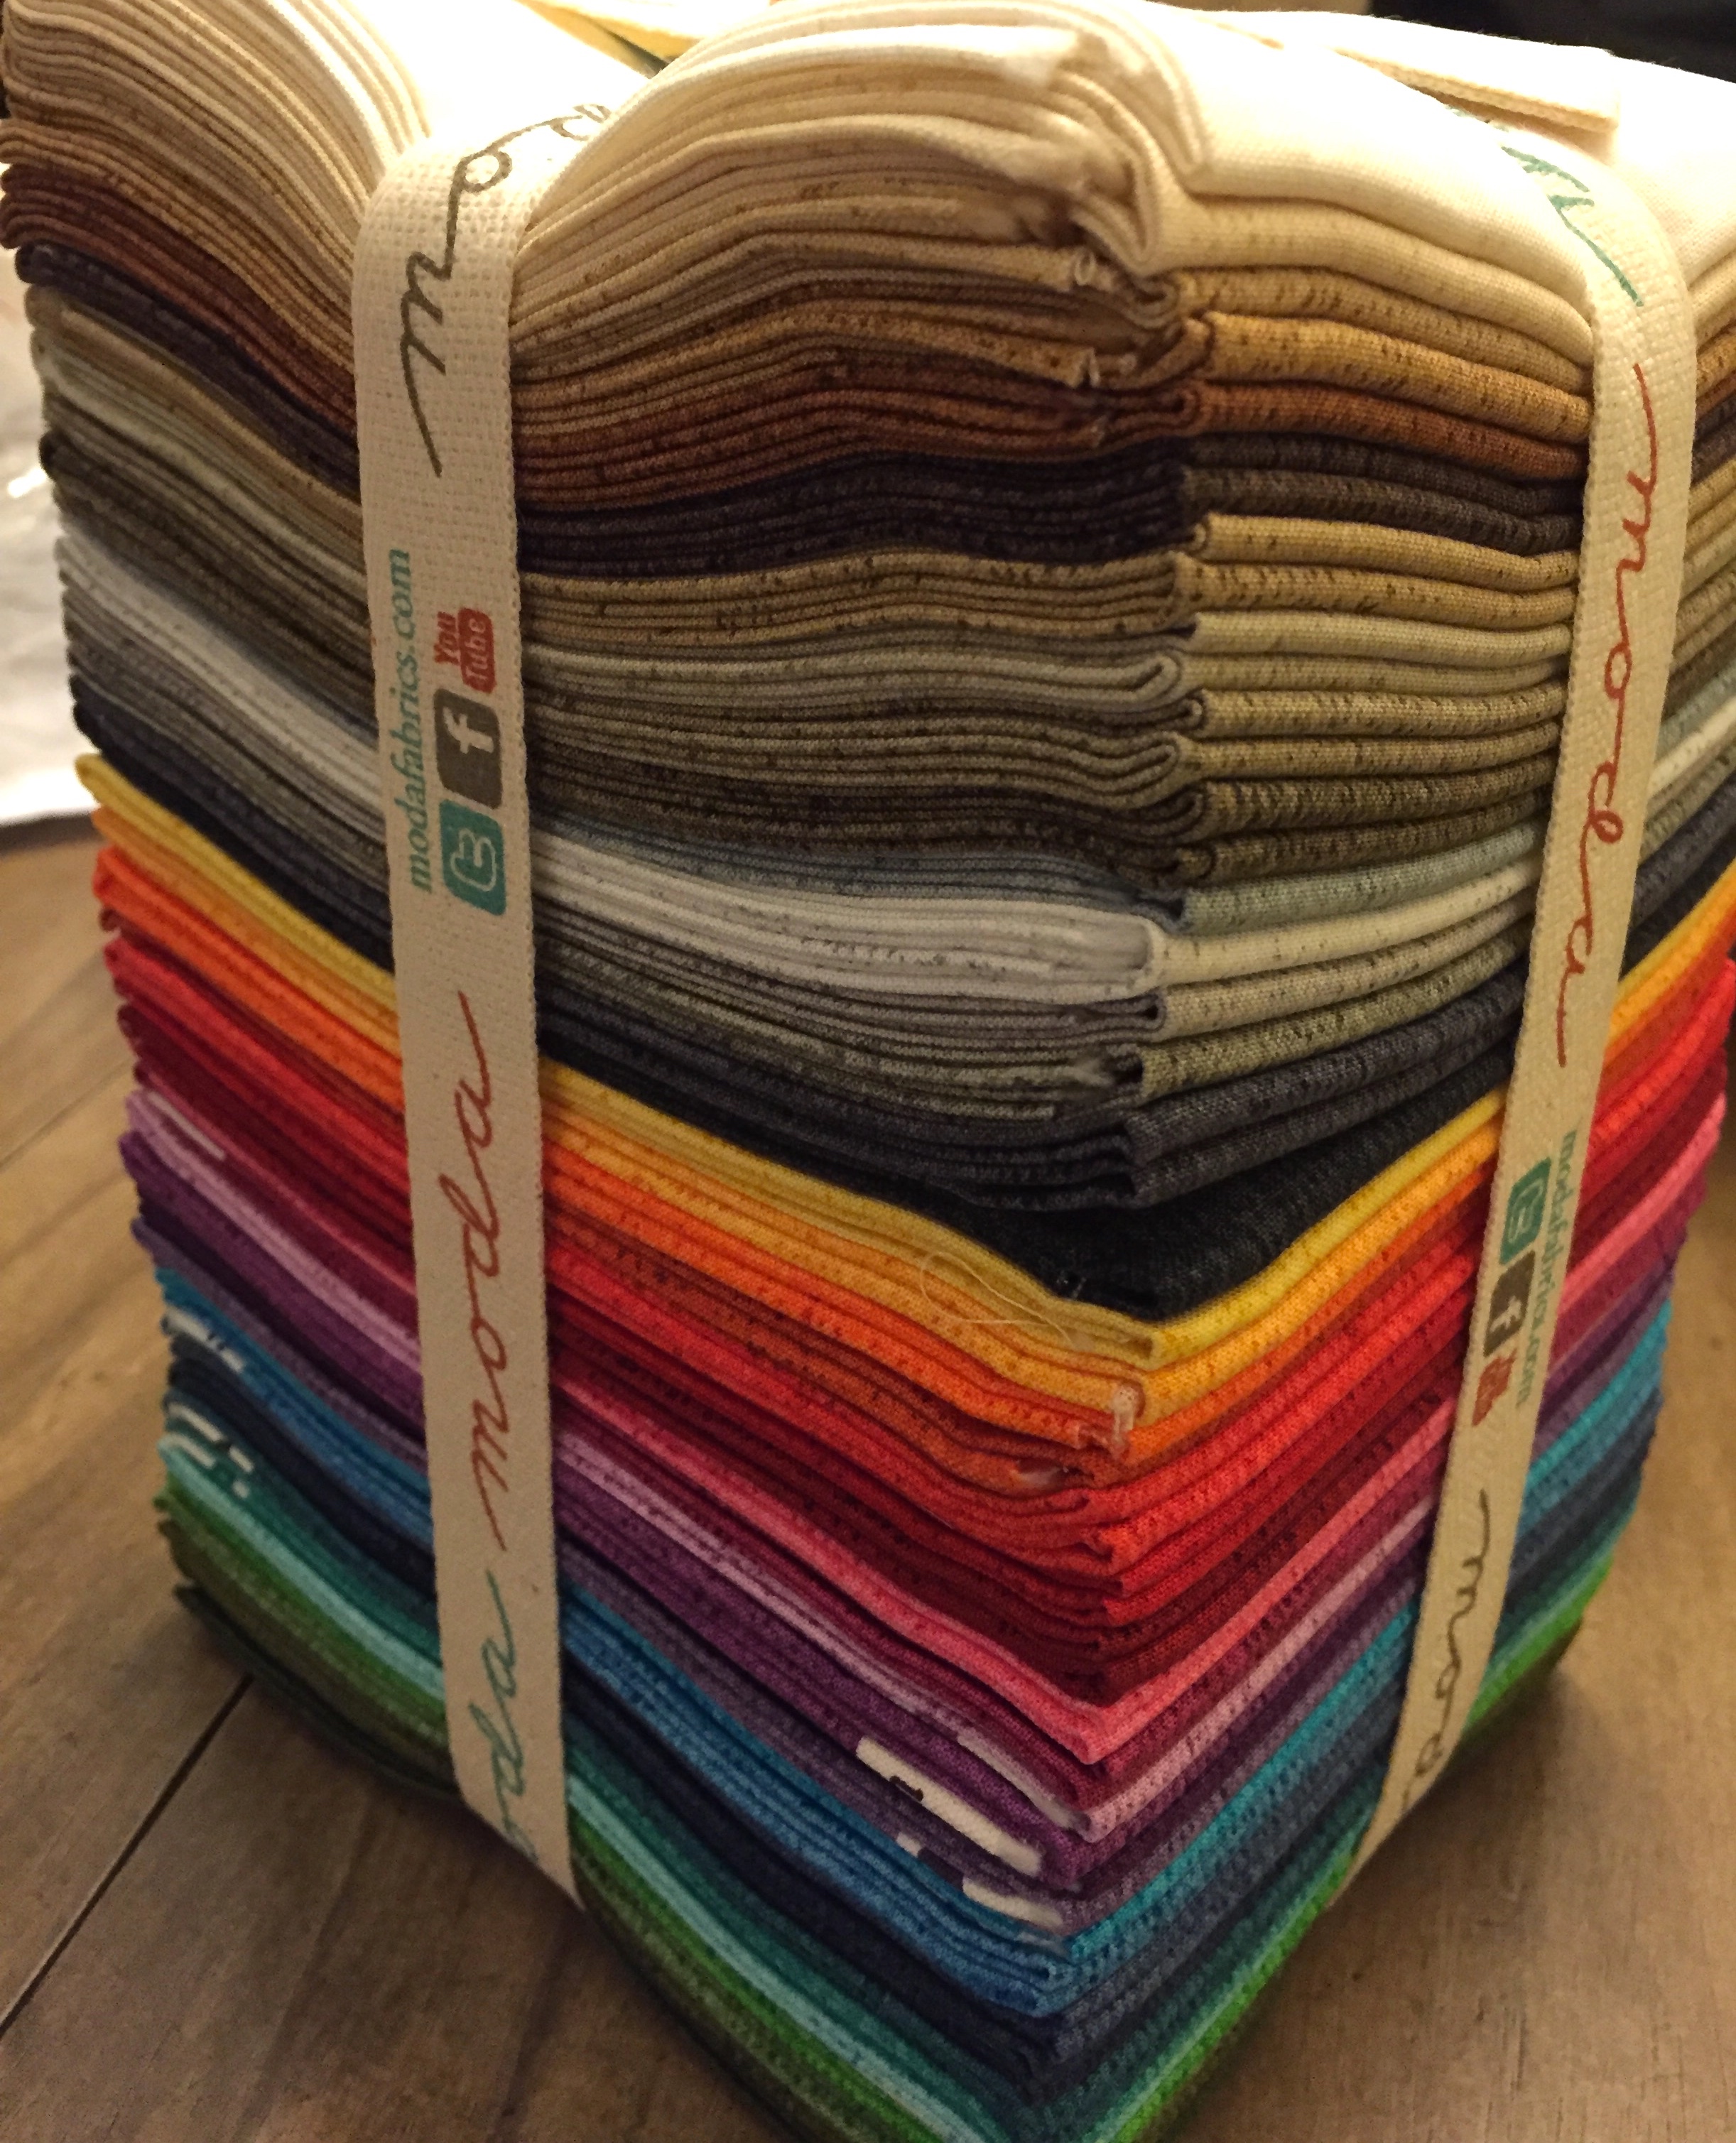
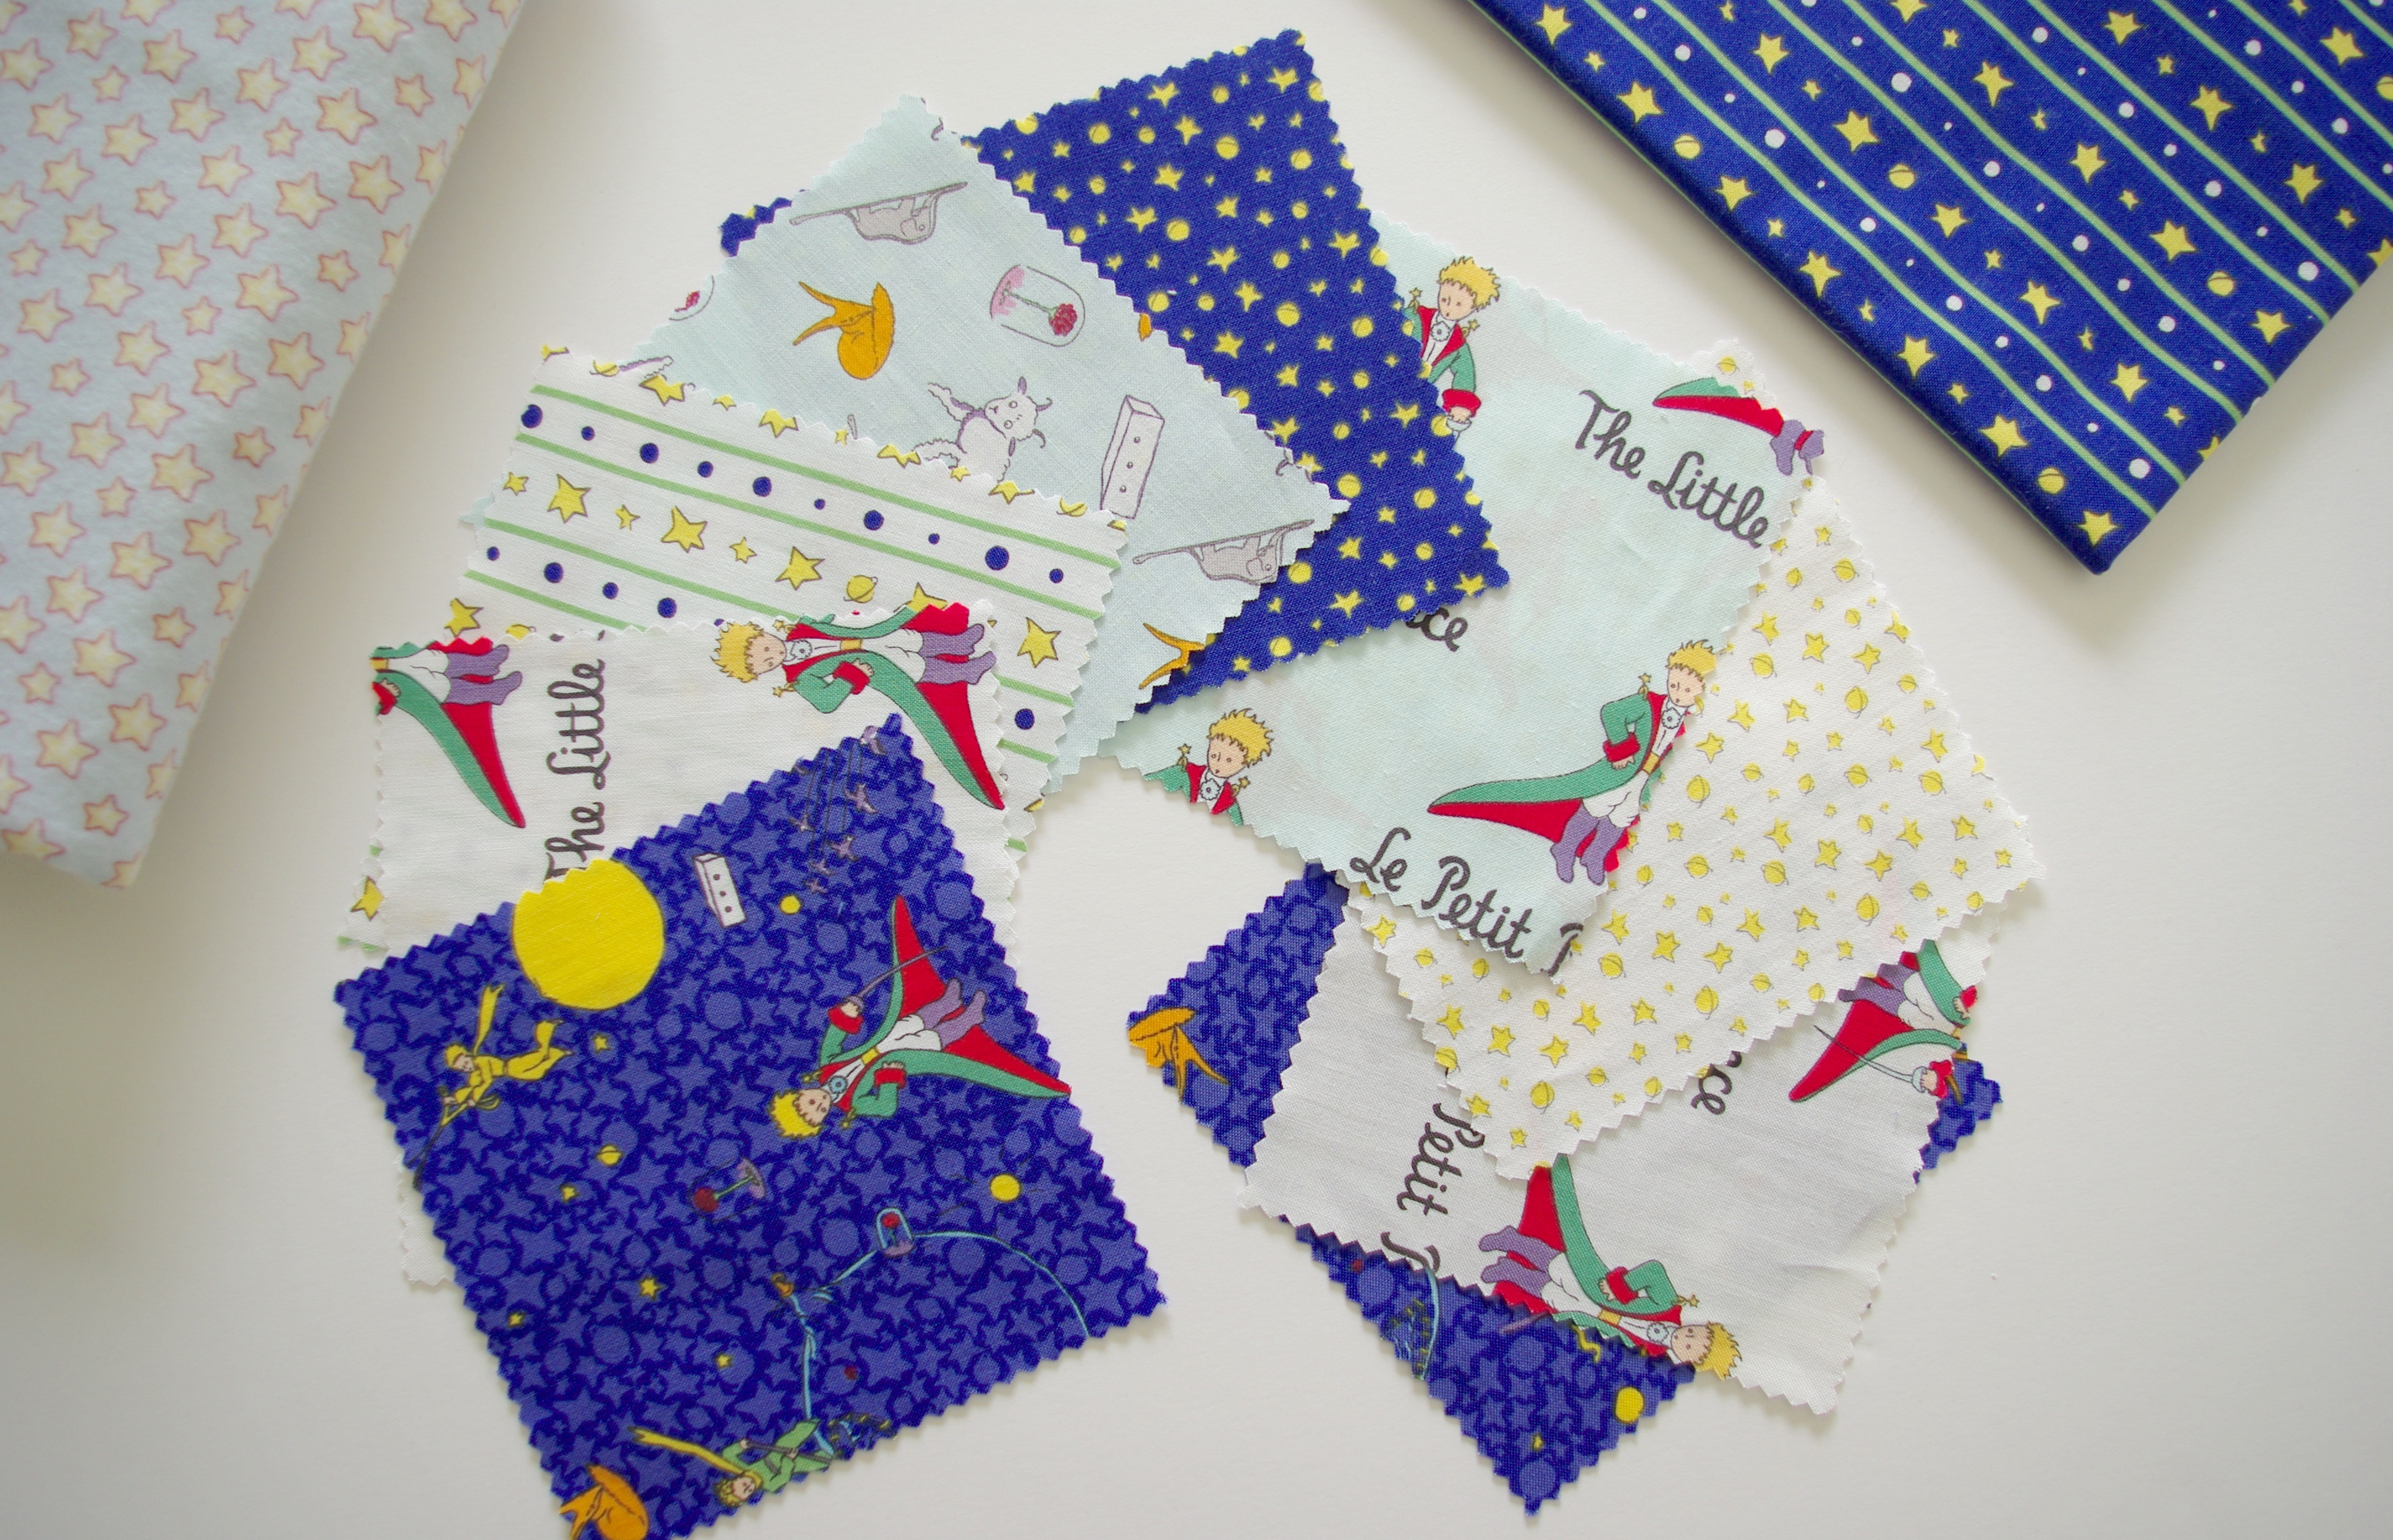
Like all new quilters, I set out to JoAnn Fabrics and bought a small fat quarter bundle and more background, backing and binding fabric than needed. After all my measuring and cutting, it was time for actual sewing. I should mention here at that time, I had a Kenmore (circa 1979) sewing machine. It’s a great workhorse of a sewing machine, but again, from the late 70’s…so there’s no 1/4″ foot, ability to drop feed dogs or anything else ‘quilty’ about it. I’m not sure exactly what I did for my quarter inch accuracy, but if my memory serves me correctly, I put down painter’s tape as a guide.

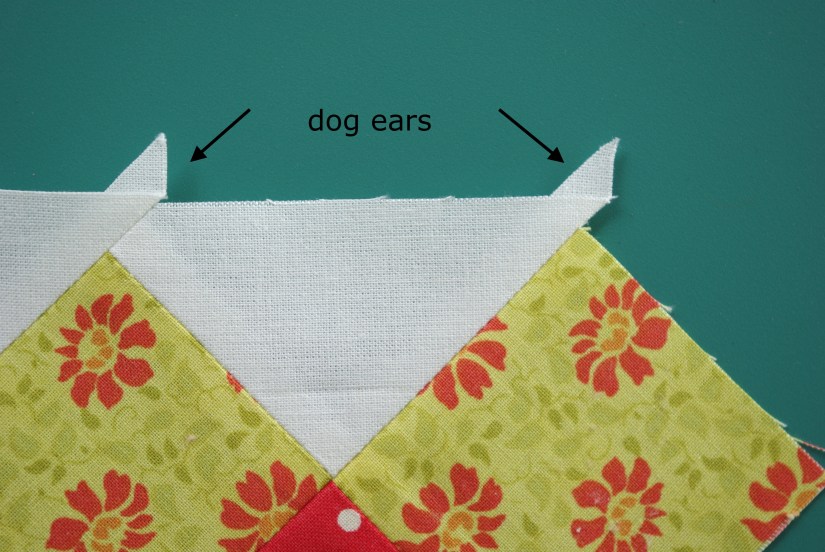
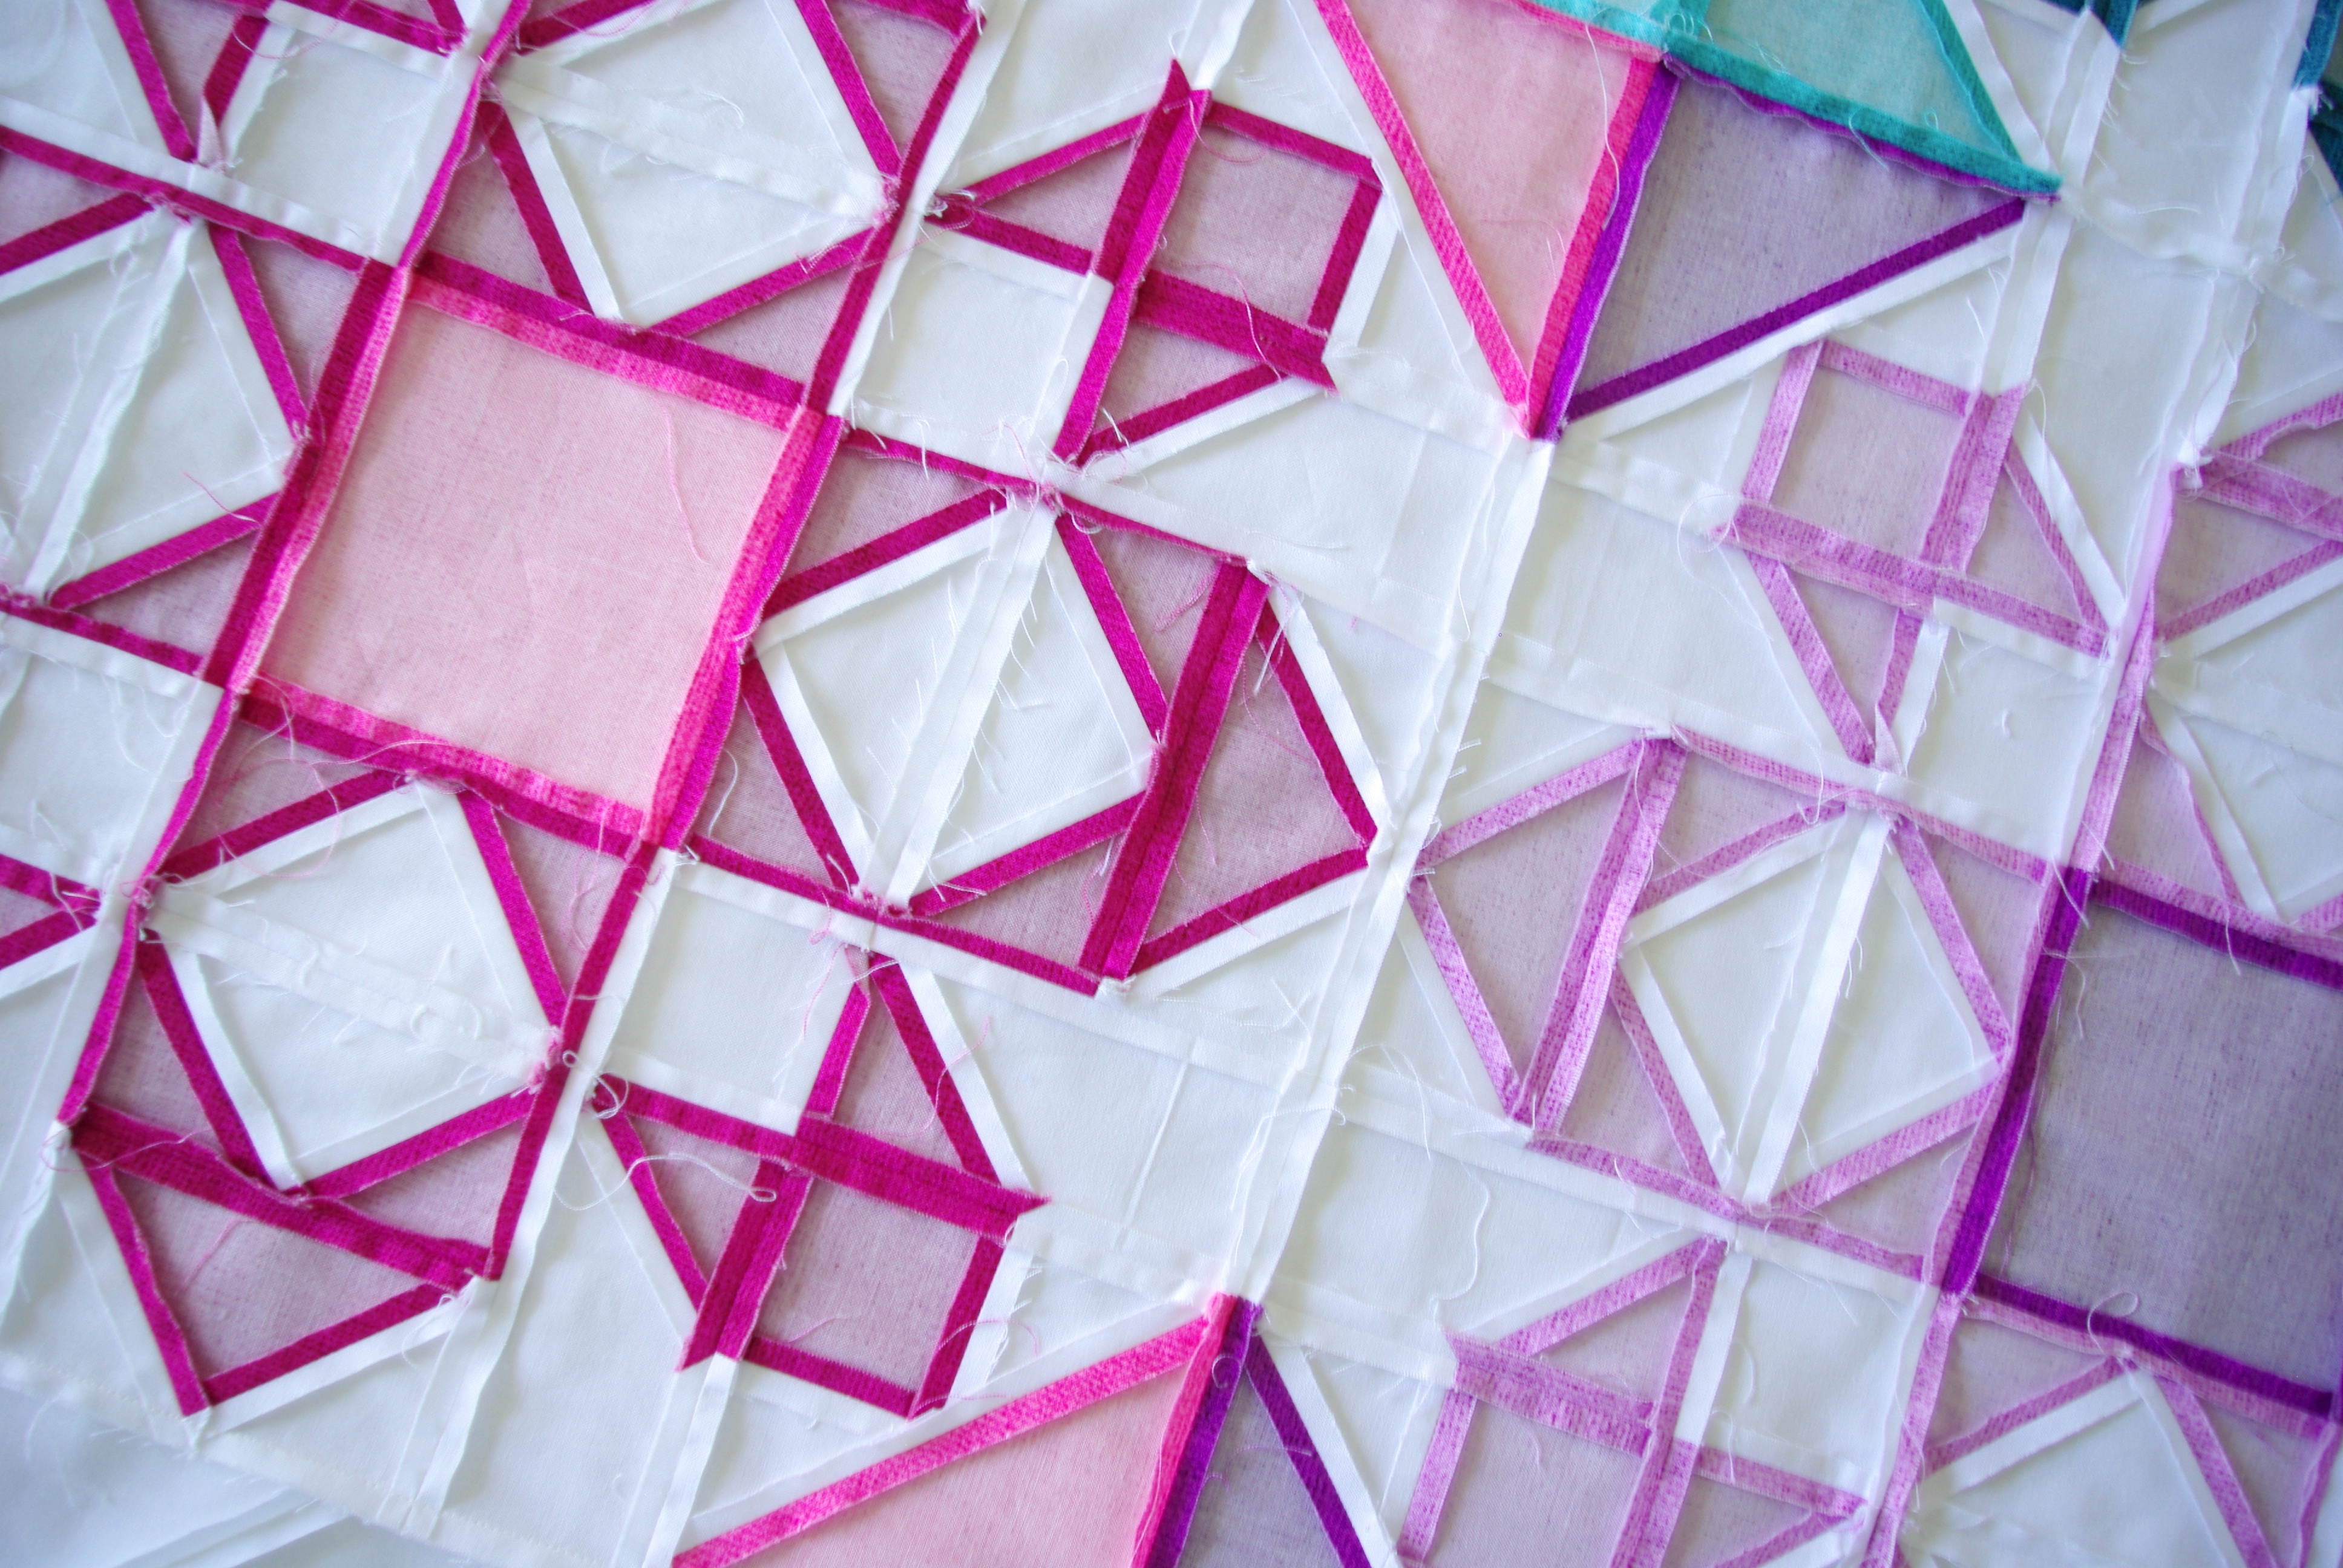
All seemed to go well until it was time to sew my pieces together. Since I was pretty clueless regarding trimming blocks, I do remember a few tears and plenty of frustration when trying to line up everything, but hey, that didn’t stop me and eventually I got it together!

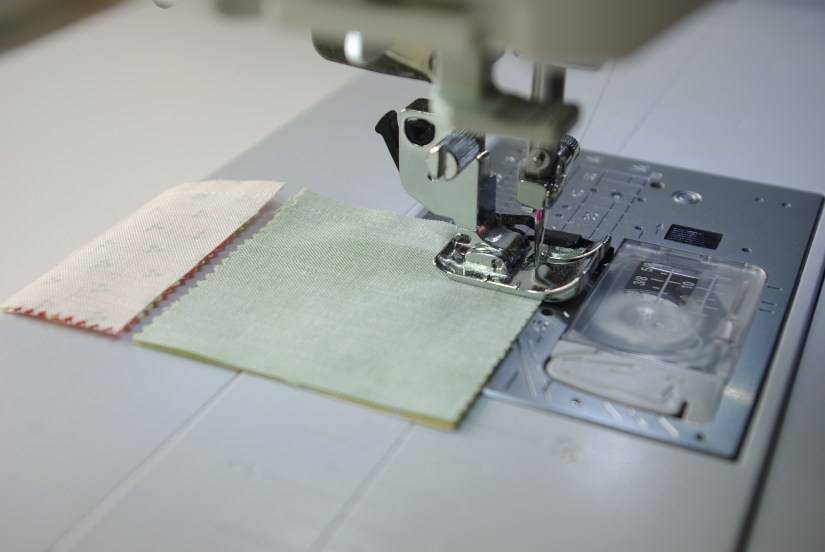
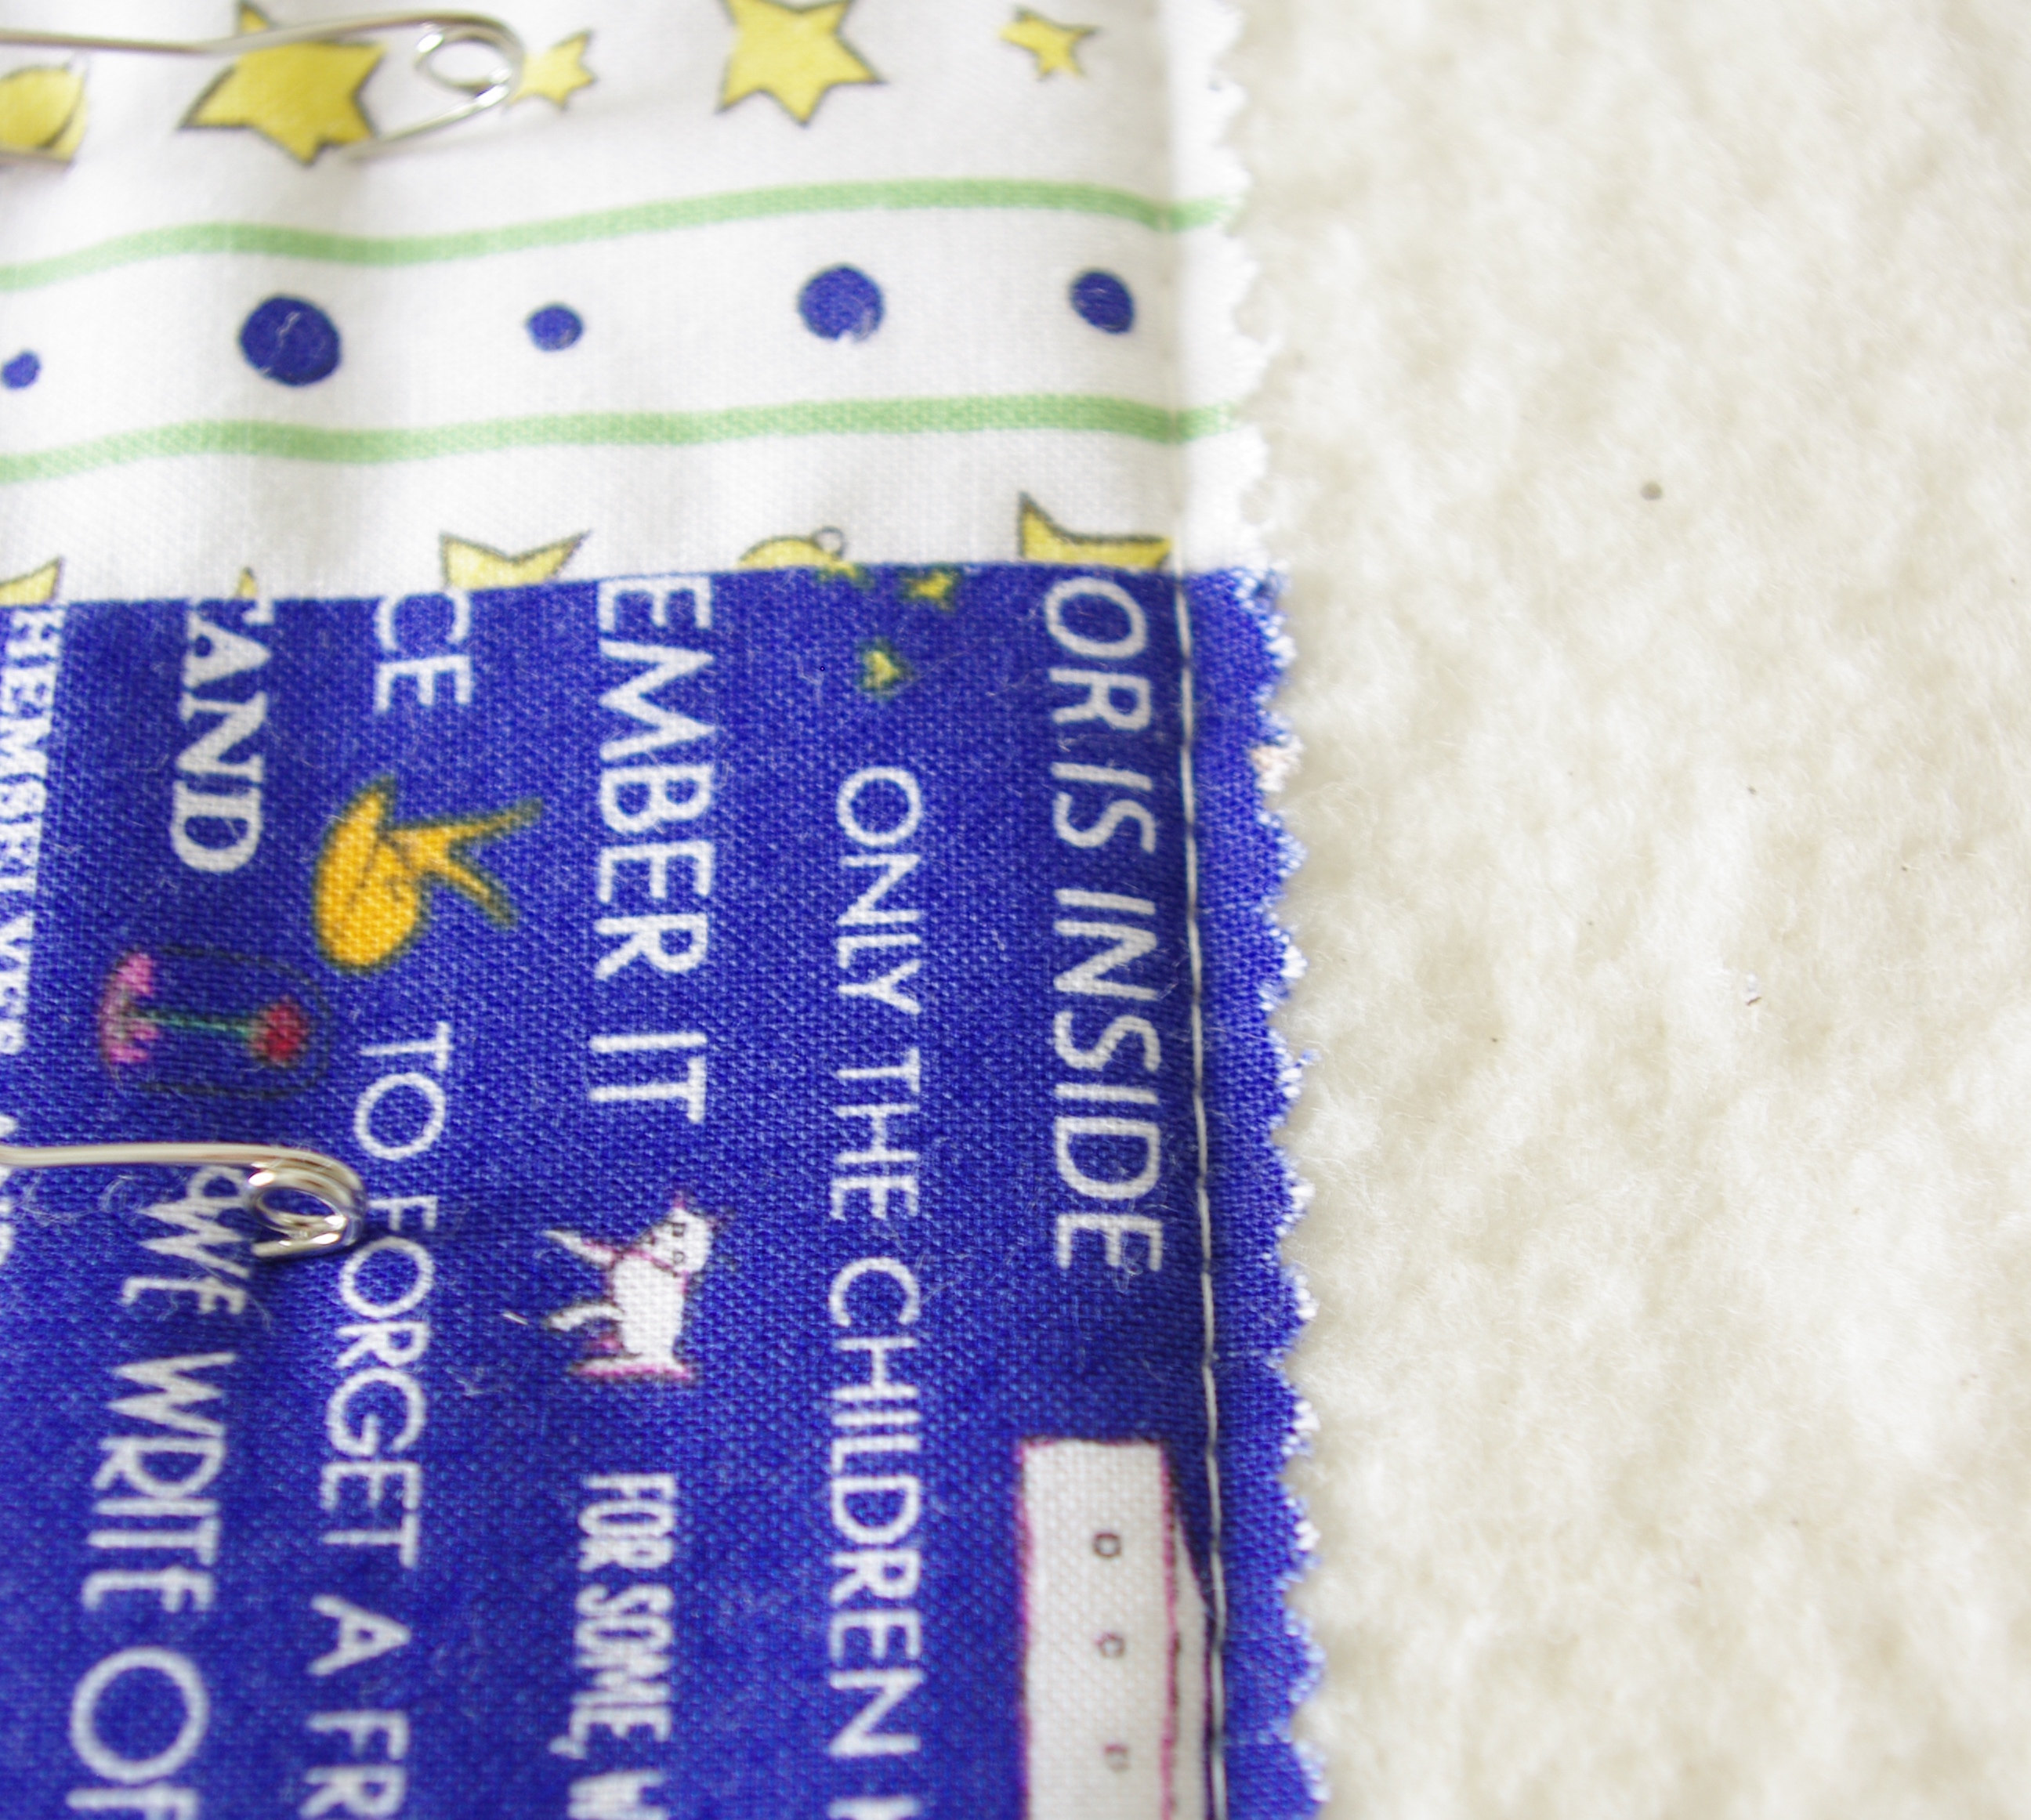
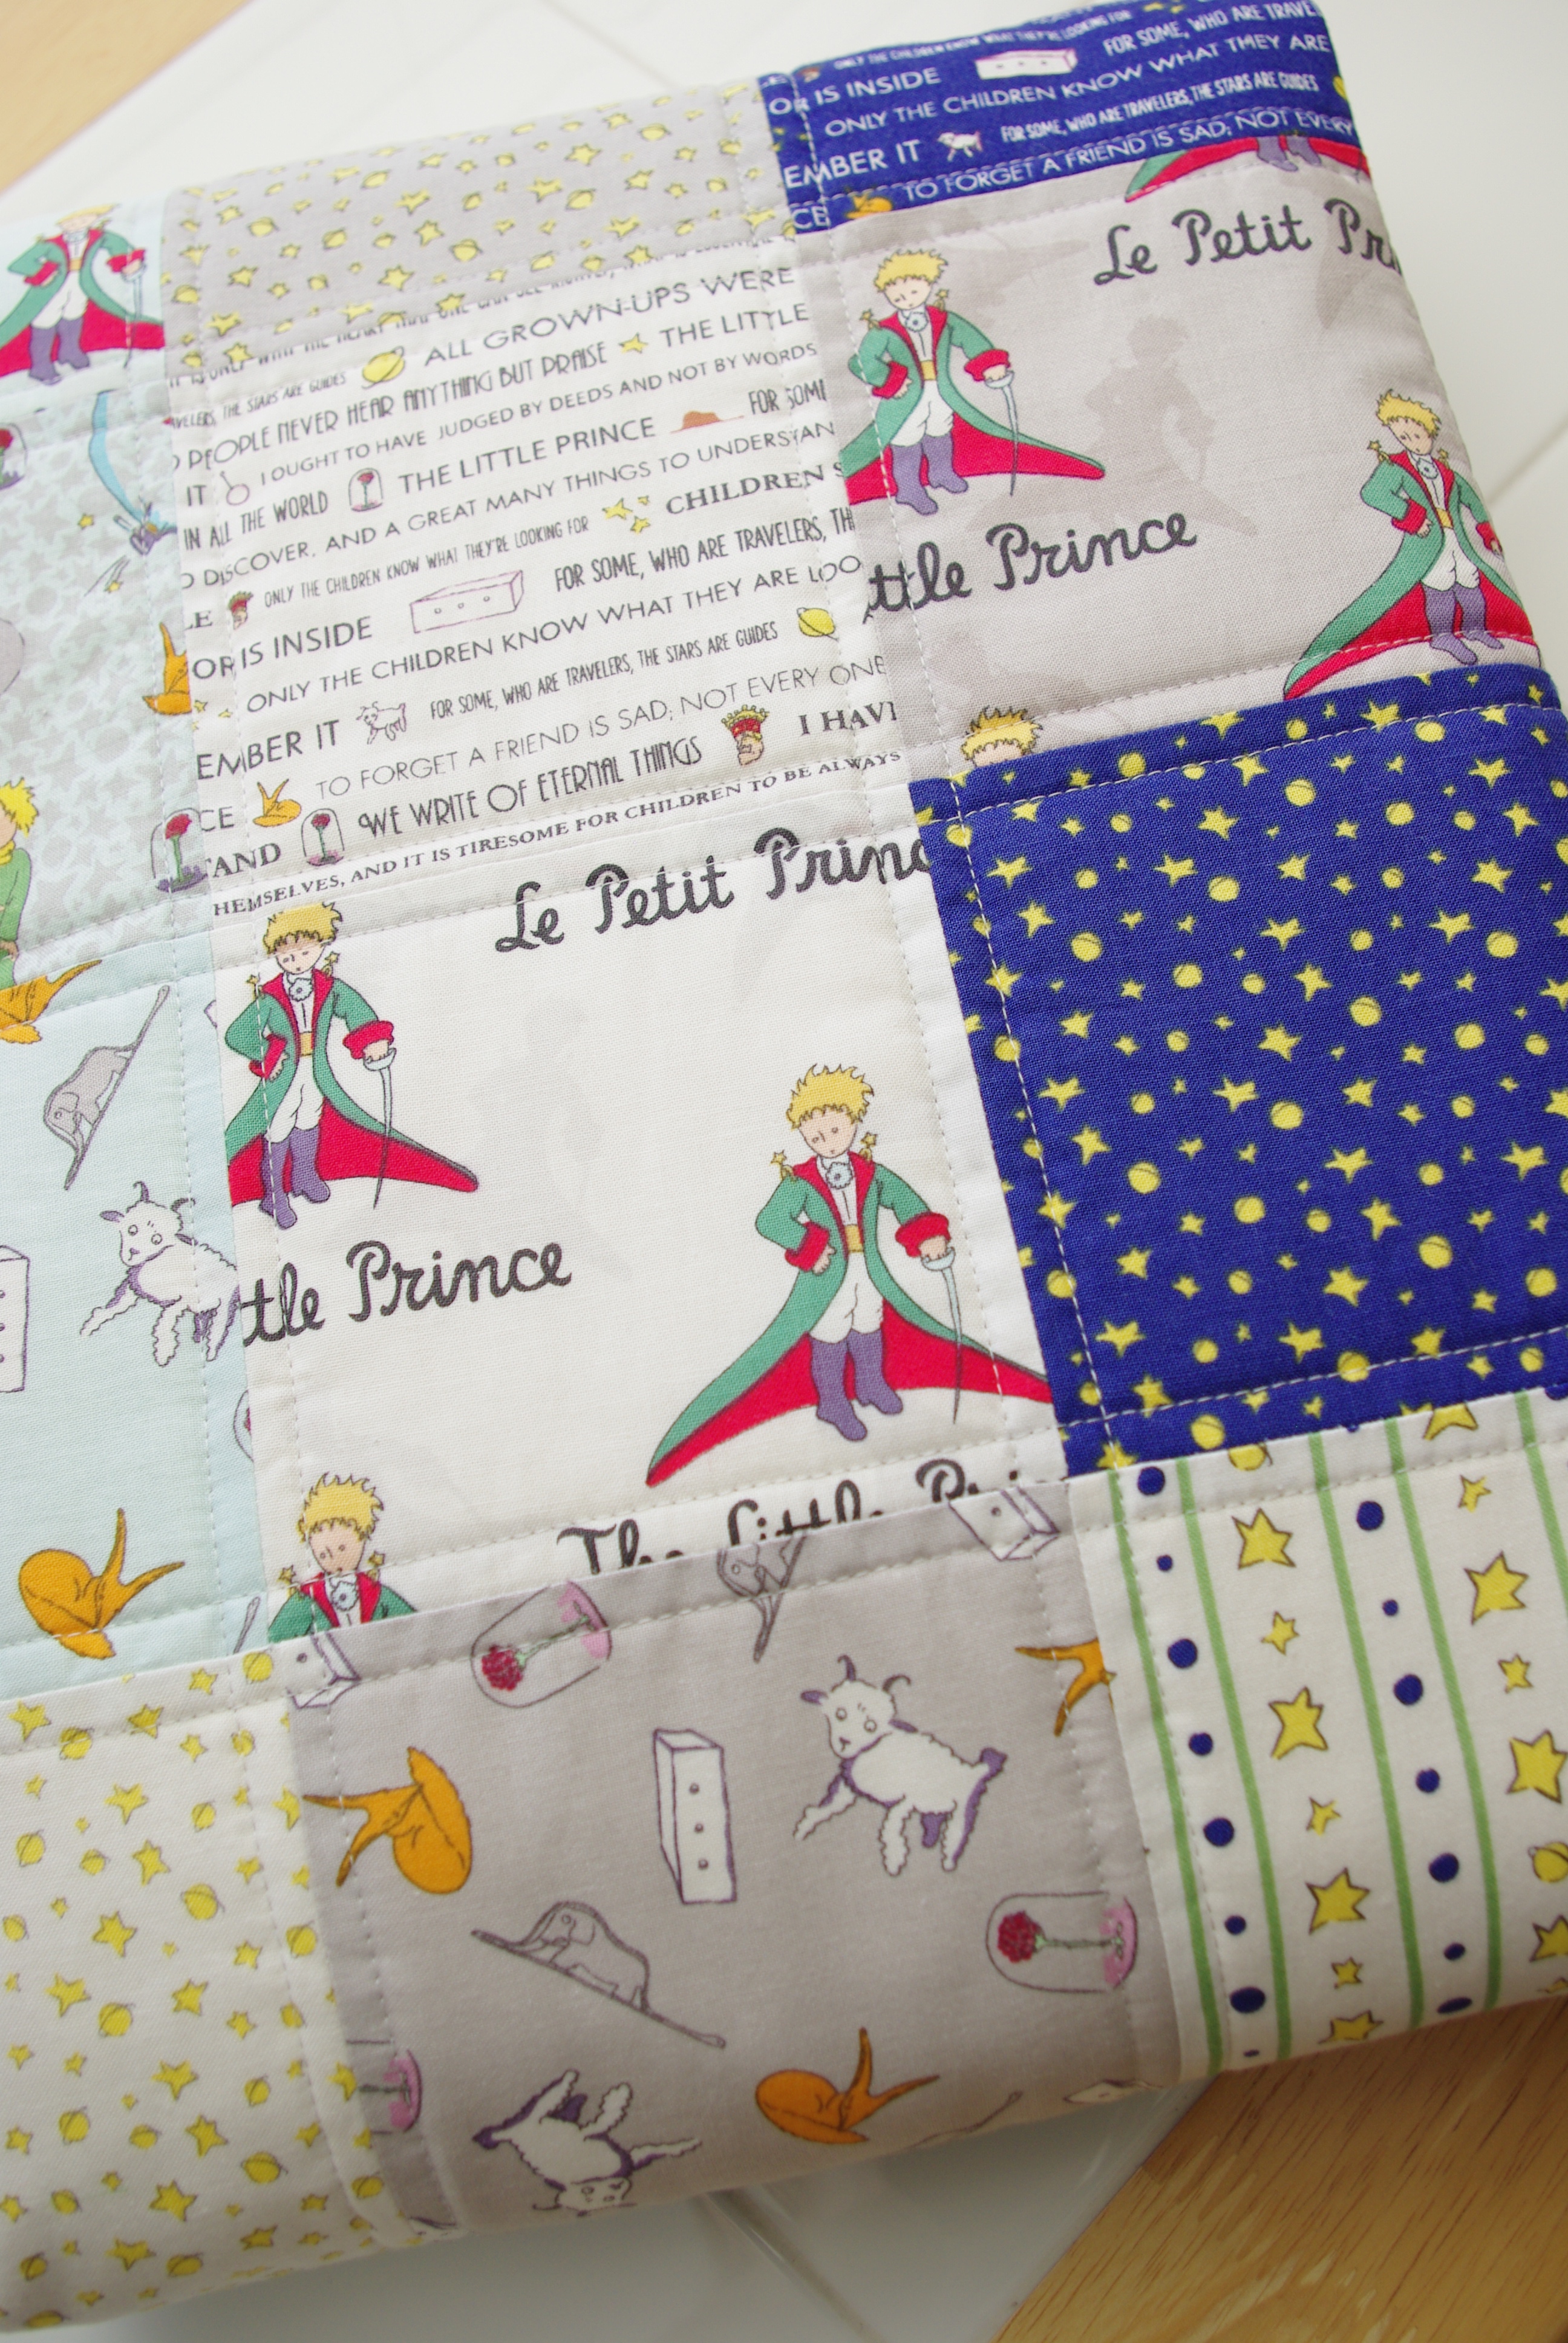
By the time I had the top pieced, I had purchased a small Brother Project Runway sewing machine. At that time I was eager to perfect my free motion quilting (no longer an aspiration of mine) so I lowered my feed dogs and tried out ‘meandering’. I remember having some fun with that, but shortly thereafter I had lost interest in perfecting FMQ,  I simply did not want to practice to get good at it, and I’m more of a ‘piecer’ than a ‘quilter.’

IMGP7472.JPG

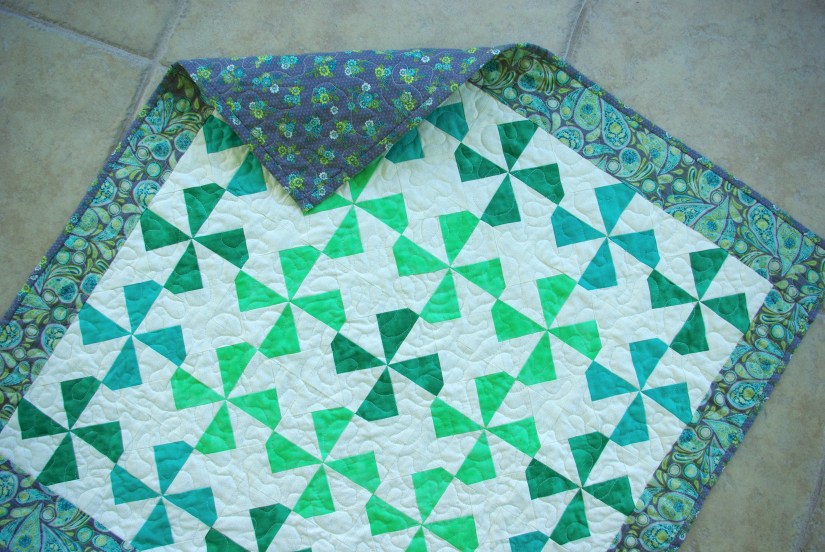
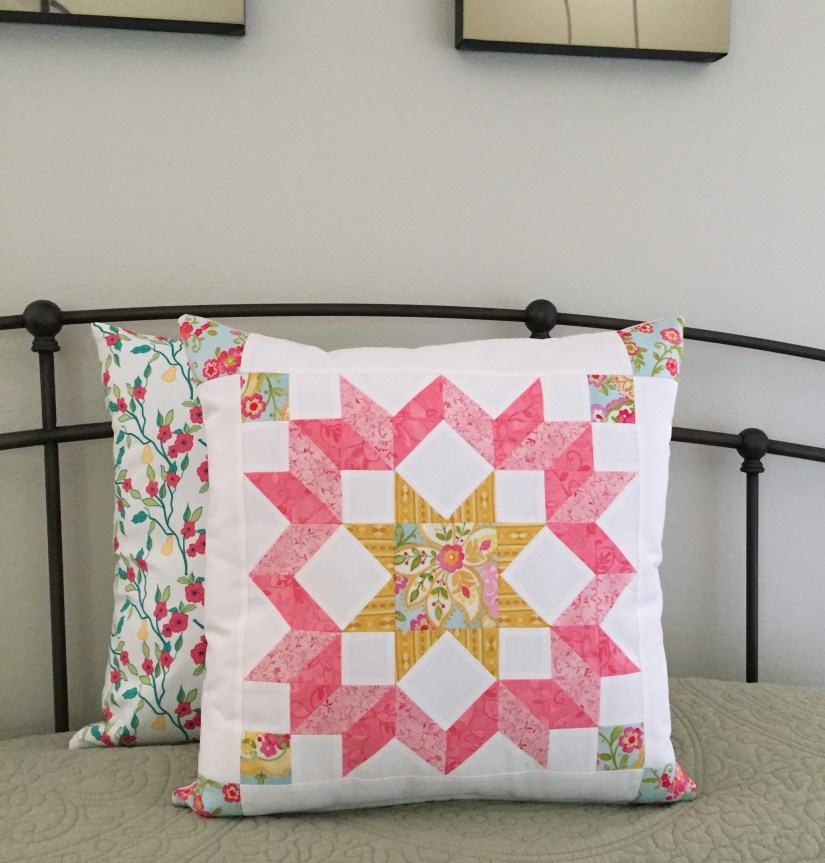
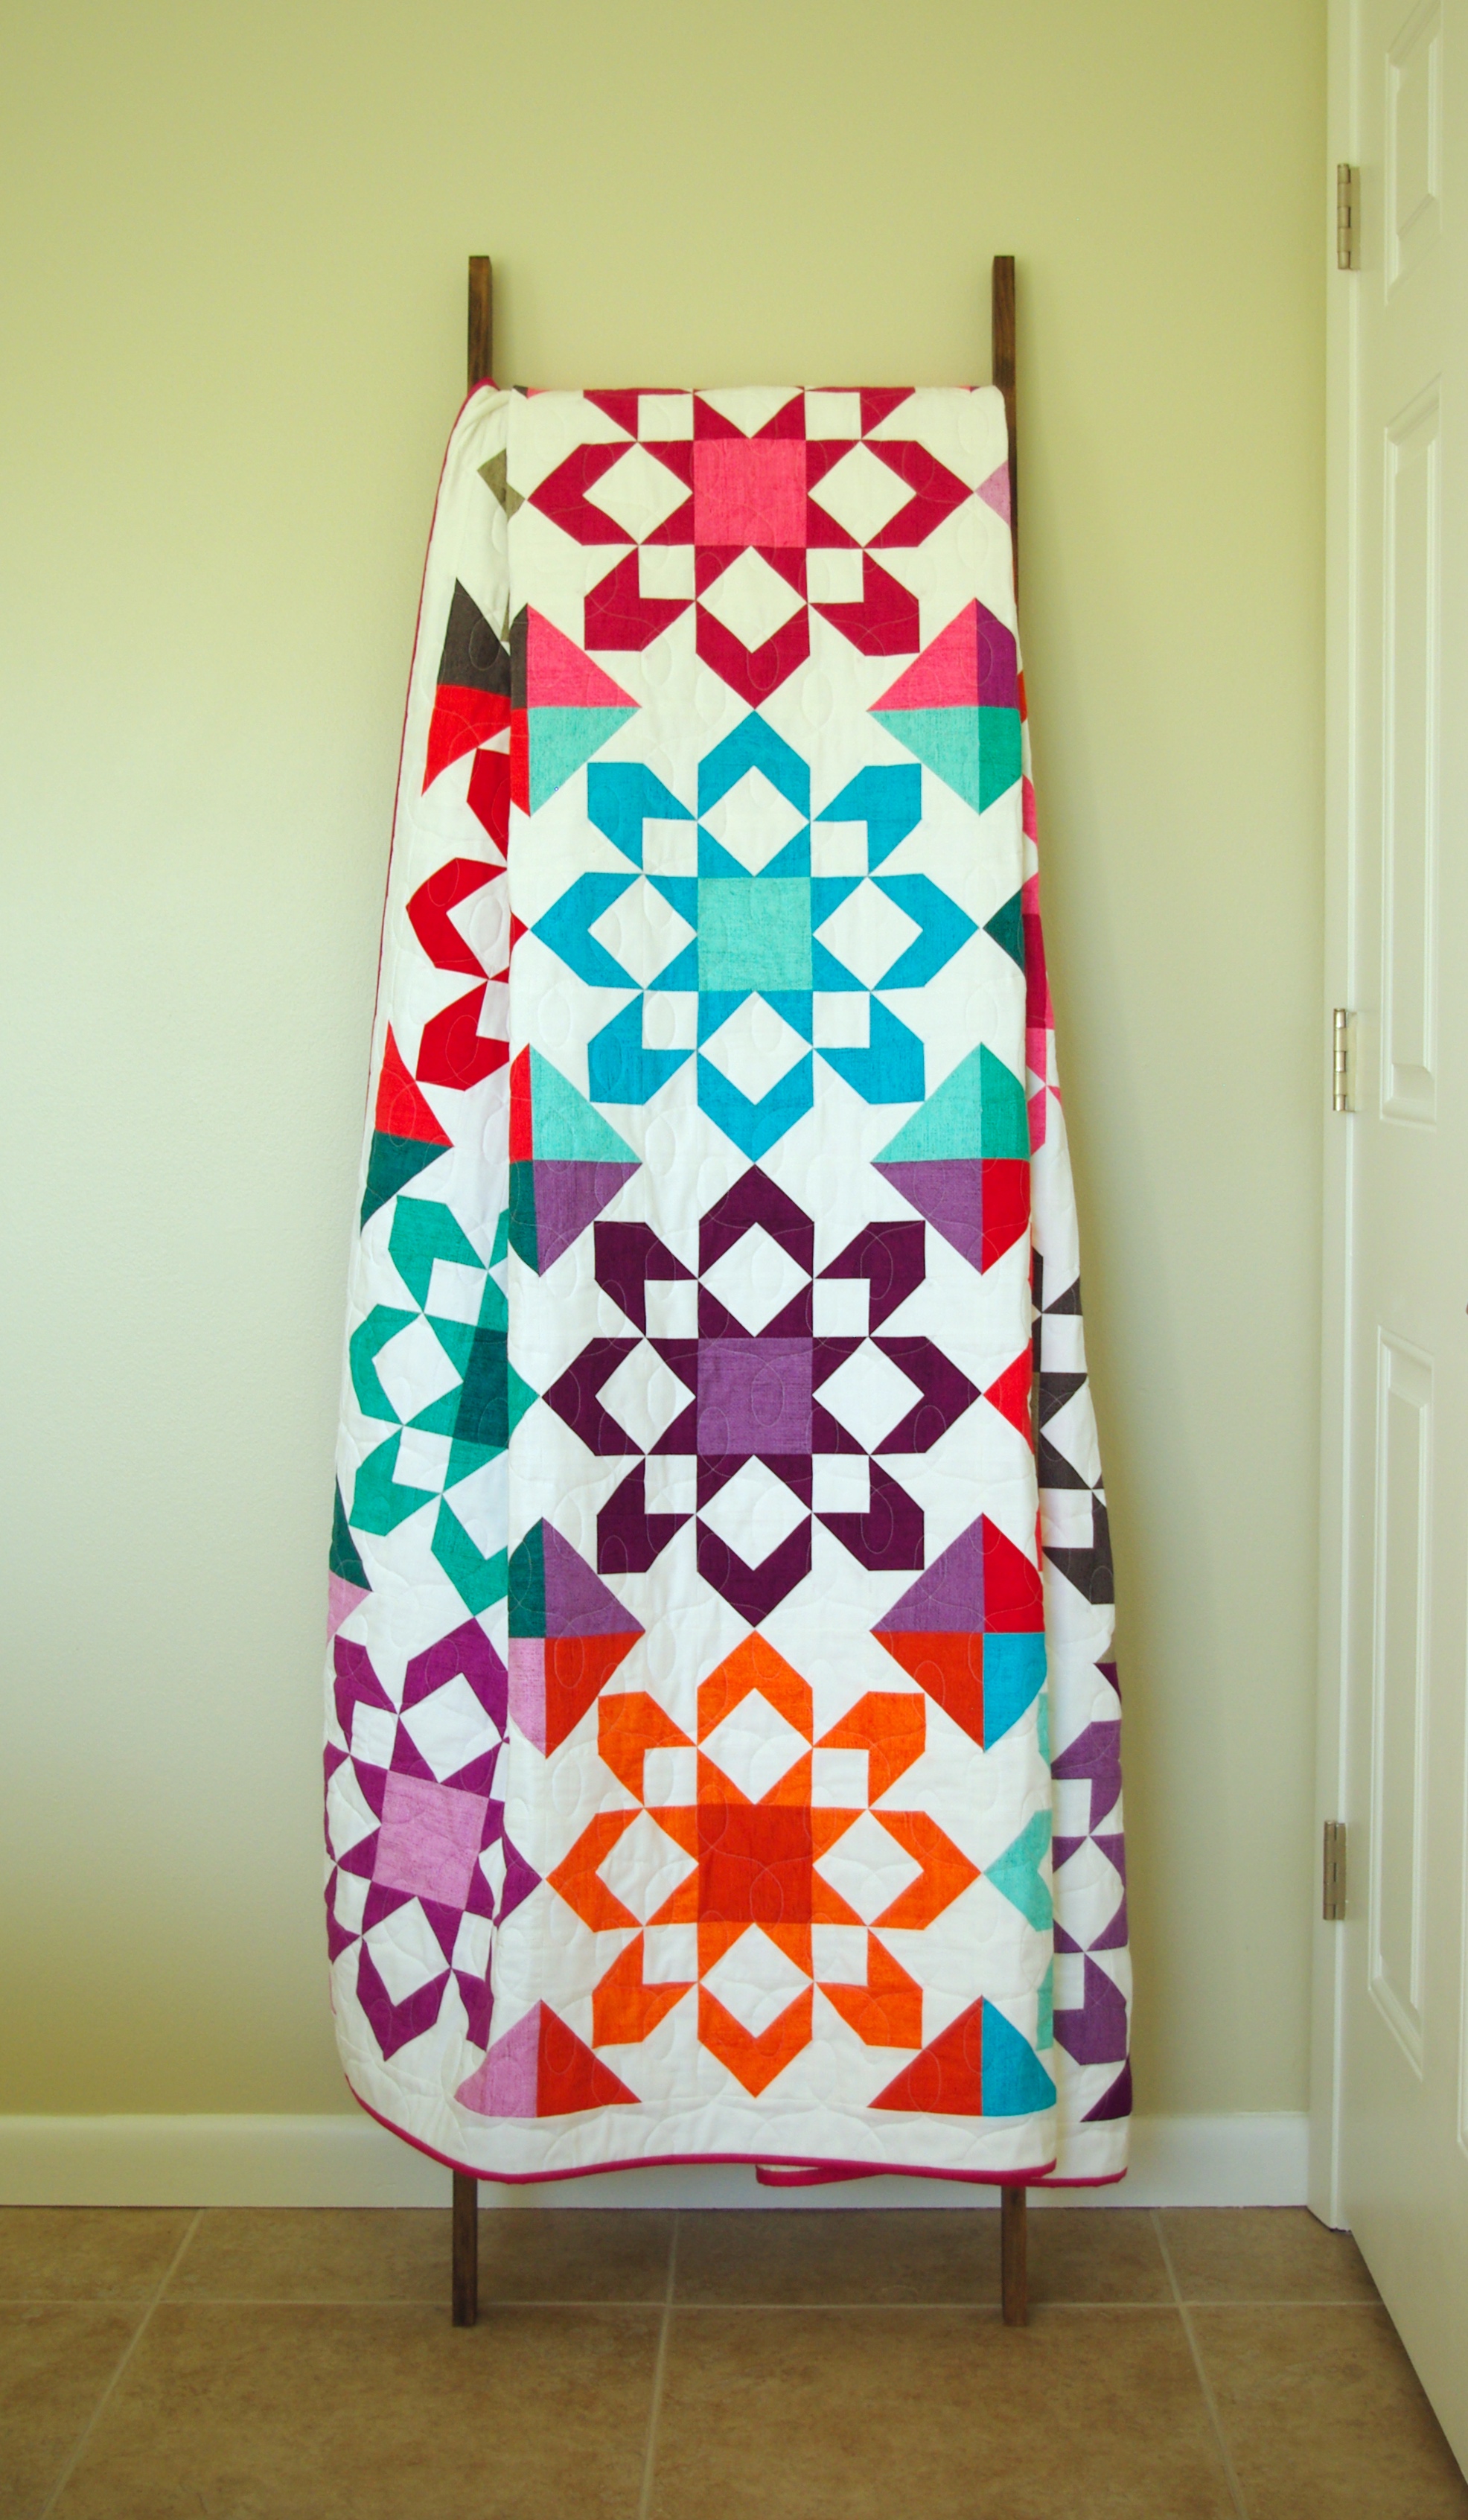
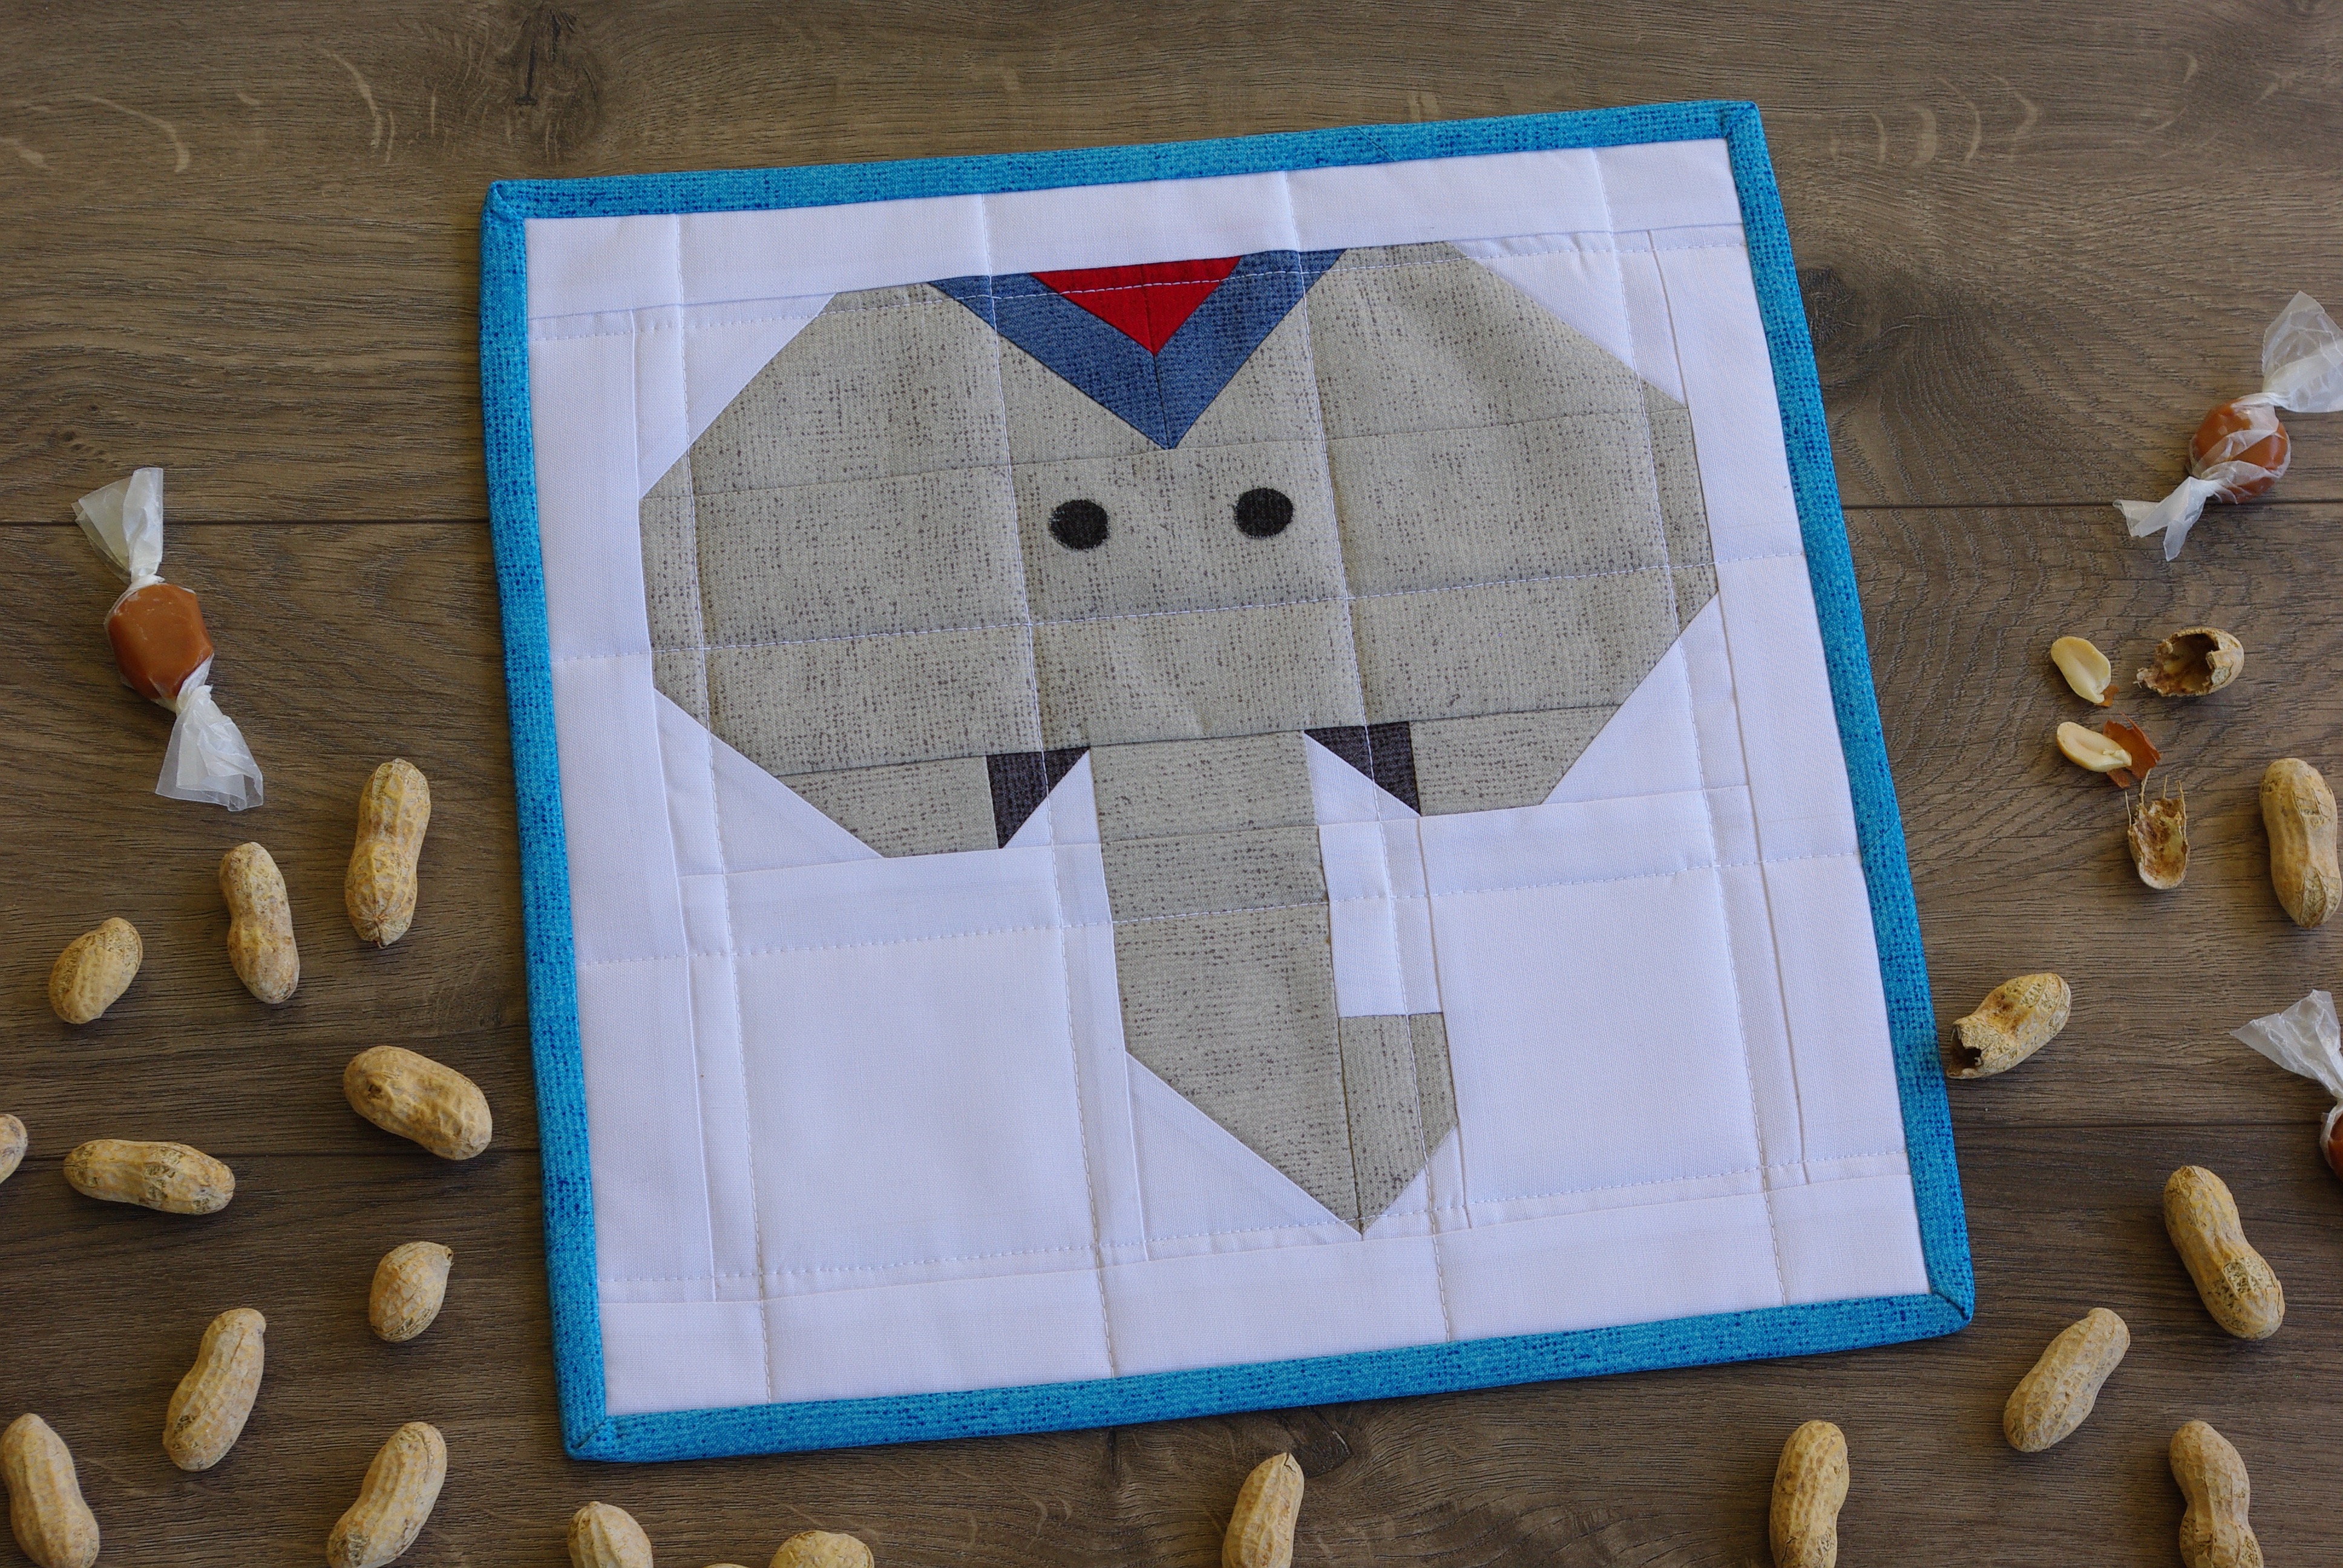
So here she is in all her glory! I chose to make something small, it measures approximately 31″ x 31″ square.

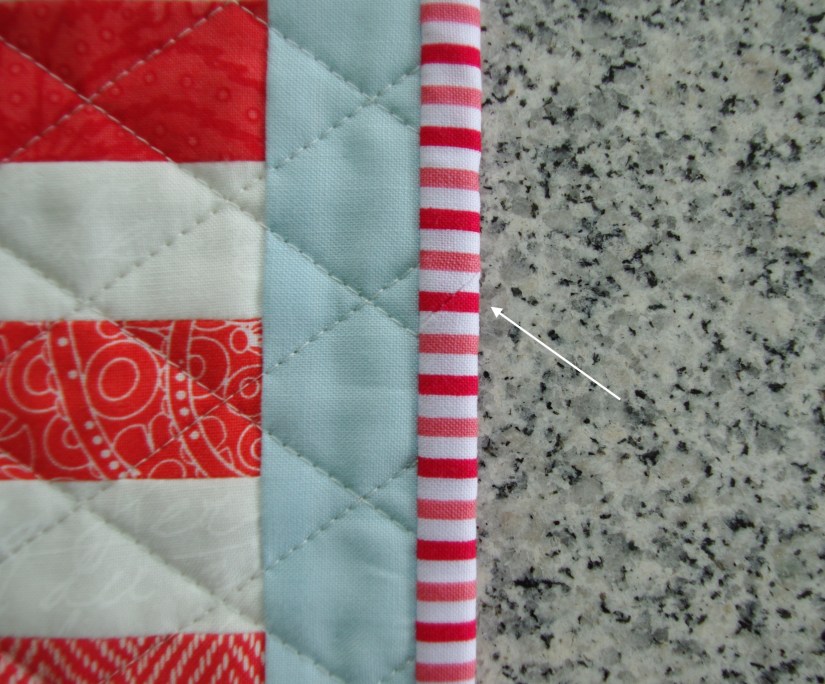
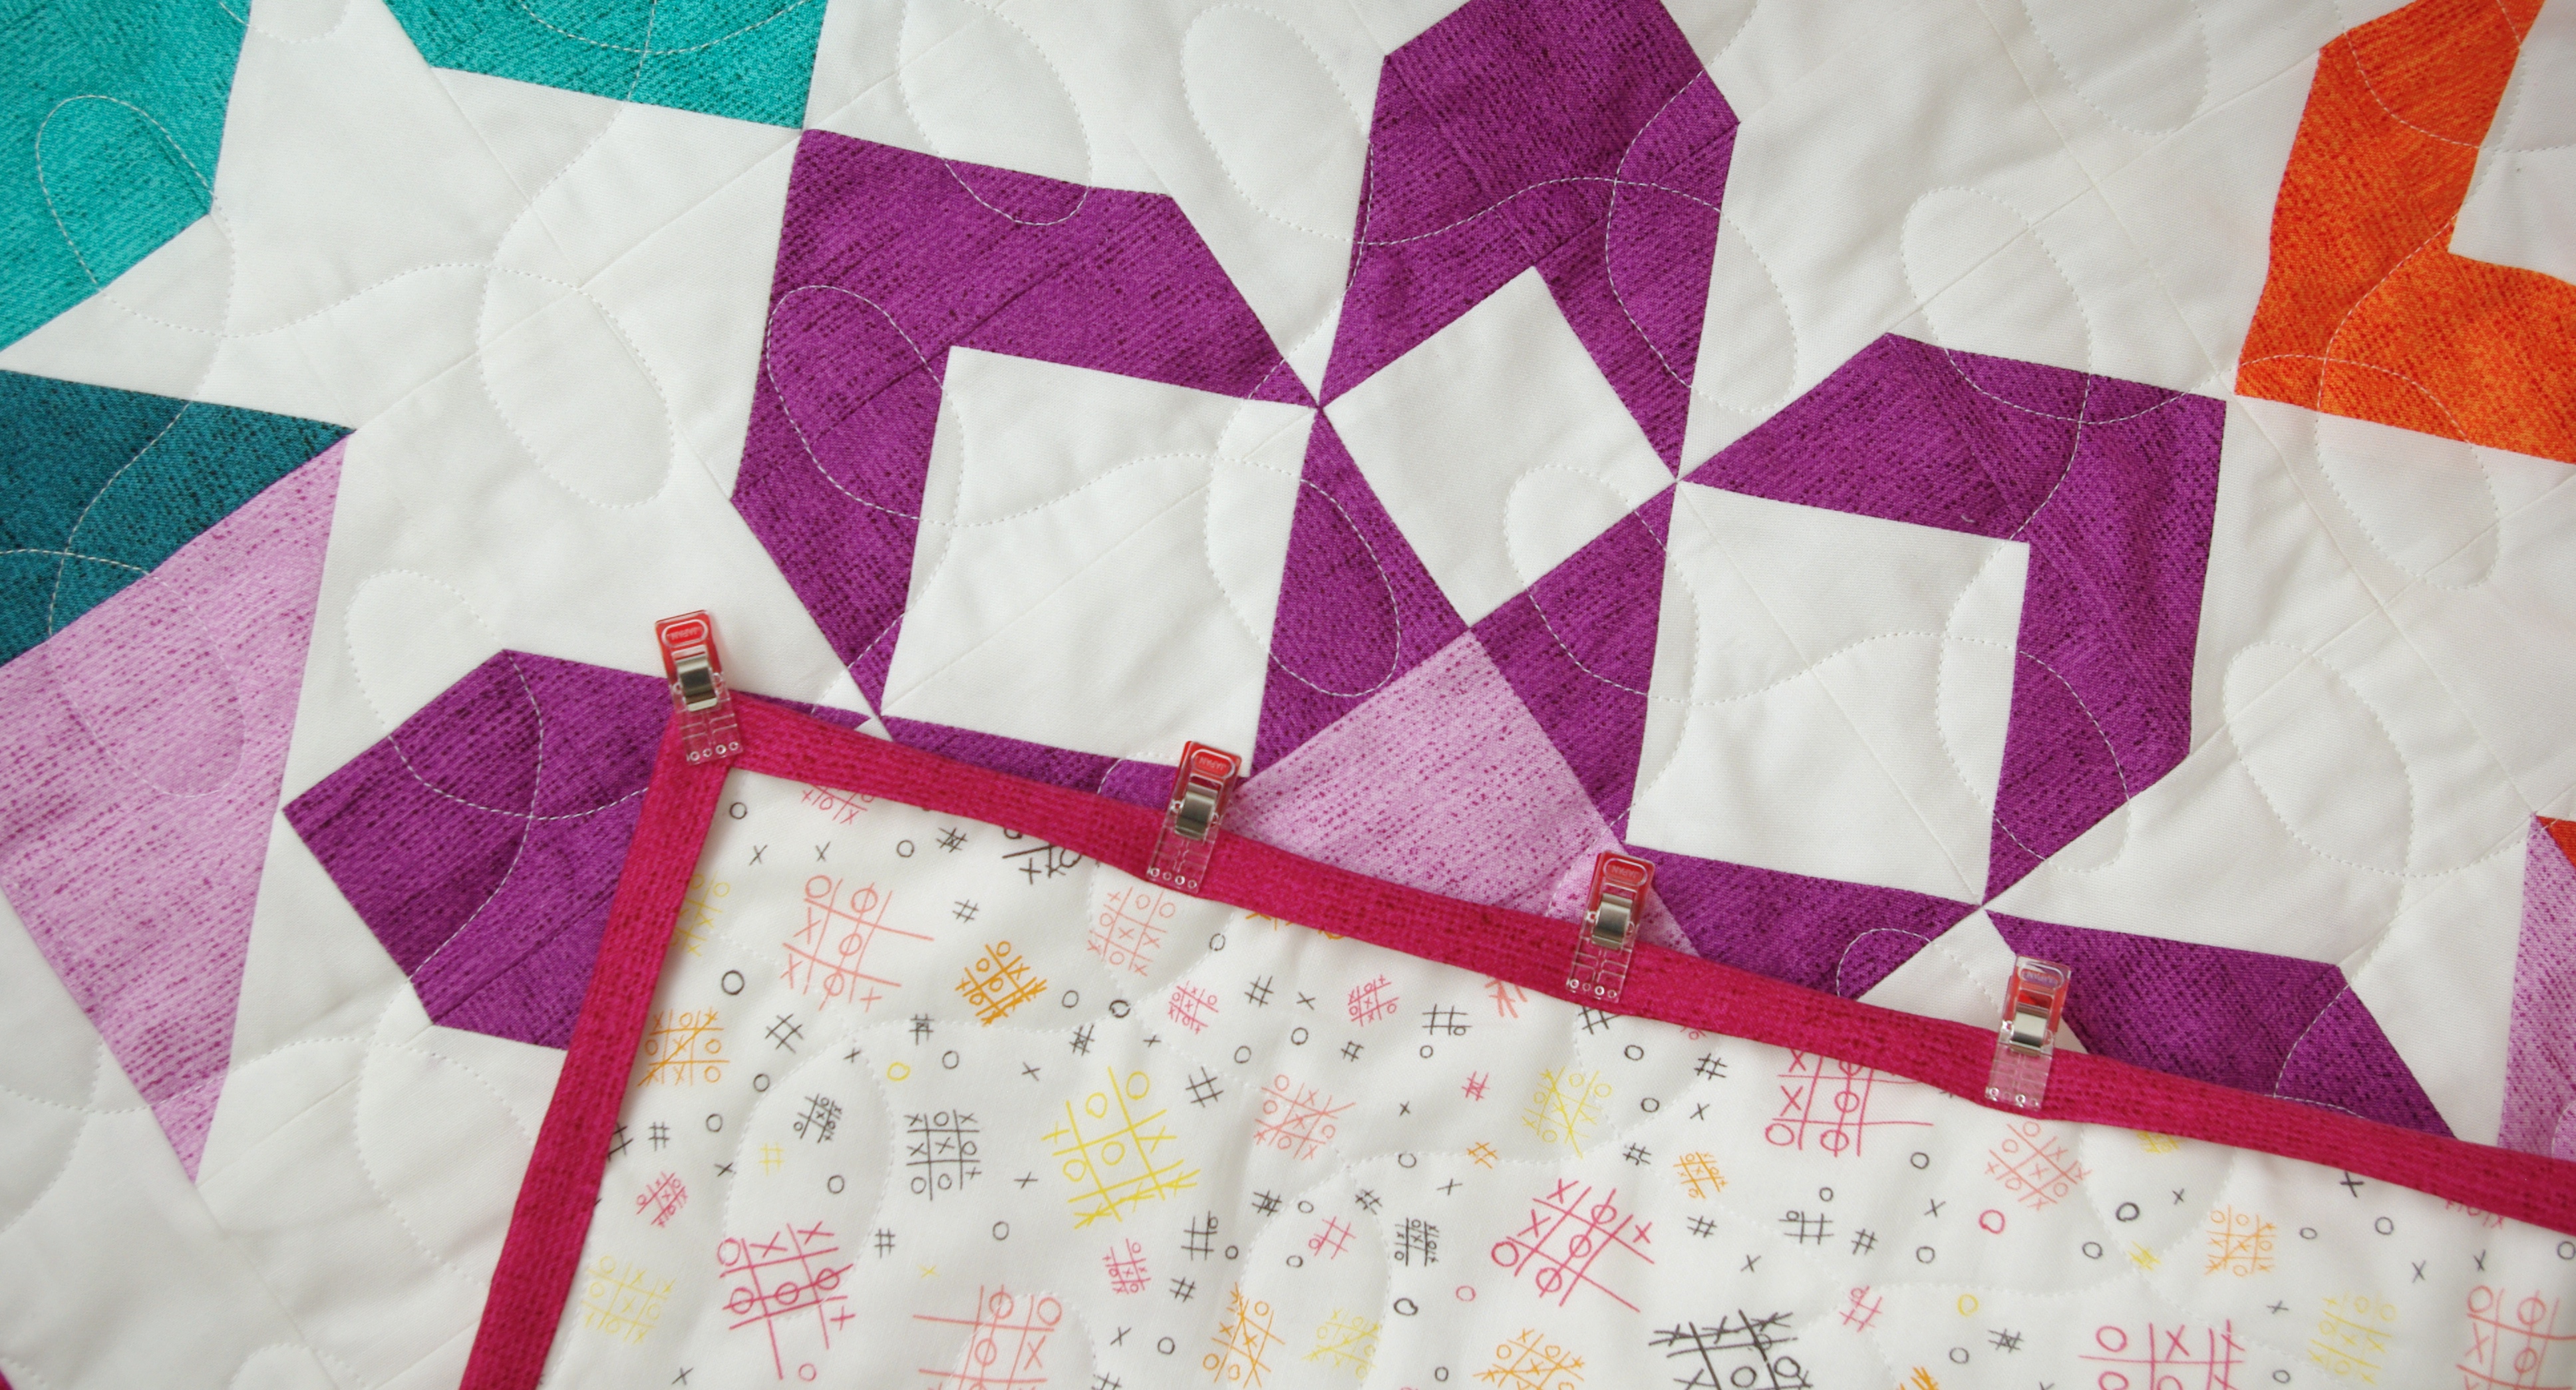
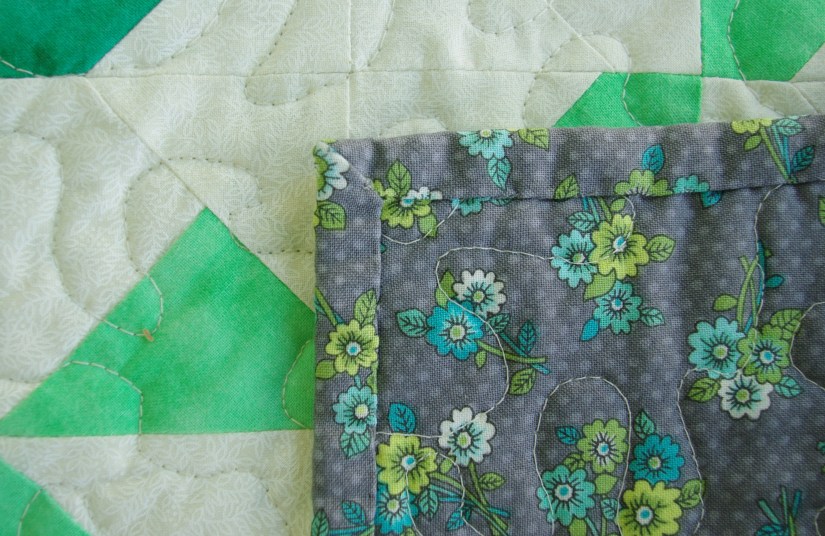
Another MSQC tutorial instructed me on how to get nicely mitered corners with binding!

IMGP7466.JPG

OK, so overall, not too terrible for a newbie. I haven’t gotten this out of my storage chest in forever; it was kind of fun taking a look at it again. Certainly far from perfect but it does hold a bit of sentimentality for me, I doubt I ever get rid of it.

About a year ago I replaced my Brother machine with a Janome Skyline S7. Oh wow, do I love that machine. I gave my Brother to my daughter and my Kenmore is boxed up and stored in the garage. I wish I had a photo to show, it’s a pretty neat machine and definitely has that vintage vibe!

So that’s my trip down memory lane…oh so many quilts ago!

quilting, Uncategorized

Fireworks Quilt Finish

Finally, my Fireworks quilt is done! Last year I saw one posted on Instagram and I knew I had to make one for myself. As usual, I like to use my stash and my Moda Rustic Weave fat quarters came to mind immediately. I bought this bundle two years ago for my Circus Trio mini patterns. It’s bright and colorful with a woven pattern that gives it texture, just a bit more than a solid.

IMG_3249

Another neat thing about this collection is the light and dark coordinating colors that allowed me to make light colored blocks with dark centers and vice versa. It isn’t widely available anymore, but I did find enough online for the binding.

The quilt pattern (by Thimble Blossoms) wasn’t difficult, there’s just a lot of precision involved. The blocks go together pretty fast despite the fact it took me several months from start to finish. I guess it was all the Christmas sewing in between, given I started this quilt last August.

Sometimes I think of the whole quilt making process and the time involved—going from just fabric, to cutting, to sewing, to a completed quilt. I posted this photo on Instagram after a few hours of cutting fabric.

IMG_6128

Not to mention the time spent trimming threads off the back before quilting…

IMGP6796
before eight+ hours of trimming…
IMGP6854
after eight+ hours of trimming…

What a difference and well worth the effort!

Because of the white front, I chose mellow backing. This fabric is Tic Tac Go by Sarah J. Maxwell for Studio 37 Marcus Fabrics. It has some of the same colors as the front, and I love how it’s so fun.

IMGP7117.JPG

I hand-sewed the binding, which I do most of the time; I love how it looks.

IMGP7121

Here’s the finished quilt…

IMG_6815
IMGP7129

It’s definitely bold and bright!

It measures 68″ square. I opted for professional long arm quilting with up and down loops to compliment all the angles.

IMGP7203
IMGP7215

That wraps up my first lap sized quilt finish in 2018. What to do next…?

baby quilts

Another Checkered Baby Quilt

Recently, a friend of mine asked me to make her a quilt as a gift for her friend who just had a baby boy. I don’t usually make commissioned quilts, but of course, for a friend! The baby’s dad is a huge fan of The Little Prince story so I set out to find themed fabric, and to my surprise, I found a Riley Blake collection.

IMGP6772

After mulling over pattern designs and how to best showcase all the fabrics, we decided on the easy, basic Checkered Baby Quilt. I like to use flannel backing on baby quilts, so we chose a cute star print that blended nicely with the others. And because I am one who certainly can’t turn down striped binding, we settled on the blue, with yellow stars and green stripes.

IMGP6793.JPG

Upon the arrival of new fabric, I immediately got to work (more like ‘play’). As in making any quilt, I used some helpful techniques. After pin basting and before any quilting, I ran a long basting stitch across the top edge of the quilt, about an 1/8″ down. This helps to eliminate any pull from quilting and it helps reduce shifting. Also, if the stitches are sewn less than 1/4″ from the edge, you won’t have to remove them before attaching the binding.

IMGP6790.jpg

Initially, I did the top only but I ended up adding a basting stitch along both sides because of slight puckering when sewing on the binding. It only took a few minutes and solved the problem.

And lastly, if you have labels, be sure to sew one on the backing before quilting!

IMGP6784.JPG

Here are a few photos of the finished quilt. My friend was pleased with the results, and I hope the new mom and dad are too.

IMG_6626

IMGP6824.JPG

IMGP6834.jpg

I’d also like to mention that if you’re a beginner quilter or know someone who is, I highly recommend this pattern. Not only is it easy, it’s fun! It’s straight-forward, there are no bias edges, no half square triangles, and no cutting if you use precuts!

Last spring I made a Checkered Baby Quilt as a gift, and at that time I made a tutorial. If you or a friend would like to give it a try, here’s the link to my easy-to-follow tutorial: Checkered Baby Quilt PDF

mini quilts, quilting, Uncategorized

Mini Mania

Doesn’t everyone pretty much love mini quilts? I’m a big fan because they’re cute, they’re not a huge commitment, they go together fast and they’re fun! I enjoy whipping one up in between bigger projects when I feel I need a break.  While I’m not one to hang them all over my sewing room walls, I do like to decorate my door with one at a time; as seasons and holidays change, I change my door decor. Since I’m ready to put up a Valentine’s Day mini, I thought it would be a good time to post ones I’ve made. I’ve given some away but I still have a small collection, and of course I intend to add more.

First up are my circus minis. I released the patterns for these nearly two years ago (my first patterns). They measure roughly a foot square each and for sure would brighten up anyone’s room!

IMGP5426
Circus Lion Mini

IMGP5506
Circus Elephant Mini

IMGP5376 copy
Circus Tent Mini

I blogged about these in my last entry (more information if you scroll to my last post). I made them as gifts, using a Moda Concrete mini charm pack for each.

I also mentioned this mini in my last entry; I kept it for myself because I absolutely love this Riley Blake collection, Floriography.

IMG_6121

I found this free pattern on Instagram and had to make one for myself. It’s available from The Family Hearth, found here: Full Bloom Mini Quilt Pattern. I used my absolute favorite, Art Gallery Fabrics, Etno by Pat Bravo—that’s why I couldn’t part with it!

IMG_4755
Full Bloom Mini Quilt

These butterfly minis were given to my mom as a gift. I made them out of scraps and free motion quilted them, which actually came out pretty decent since it’s not a strong suit of mine! The pattern is by Lella Boutique.

IMG_3134.jpg
Social Butterfly Mini Quilt

I mentioned these last time too…

My latest finish is this Friendship Star Mini Quilt, found on Pinterest. I couldn’t get the free pattern to download so I made it by looking at the photo. I am going to donate it to my local guild for the quilt show boutique, hopefully it’ll sell, but since I really like the way it came out I wouldn’t mind keeping it for myself…

IMG_6543

That’s it so far. I’m always looking for something cute and fun so if you’ve got any suggestions, please send them my way!