modern quilts, quilting, quilts

Published in Pre-Cut Patchwork Premier Issue Diamond Jubilee Quilt

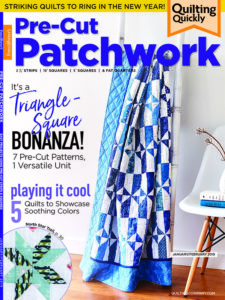
Hurray! It’s finally here, the January/February 2019 issue of Pre-Cut Patchwork magazine. This is the premier issue and I’m happy to be part of it. Pre-Cut Patchwork was previously known as Quilting Quickly but it still offers plenty of great patterns for using those precuts we know and love.

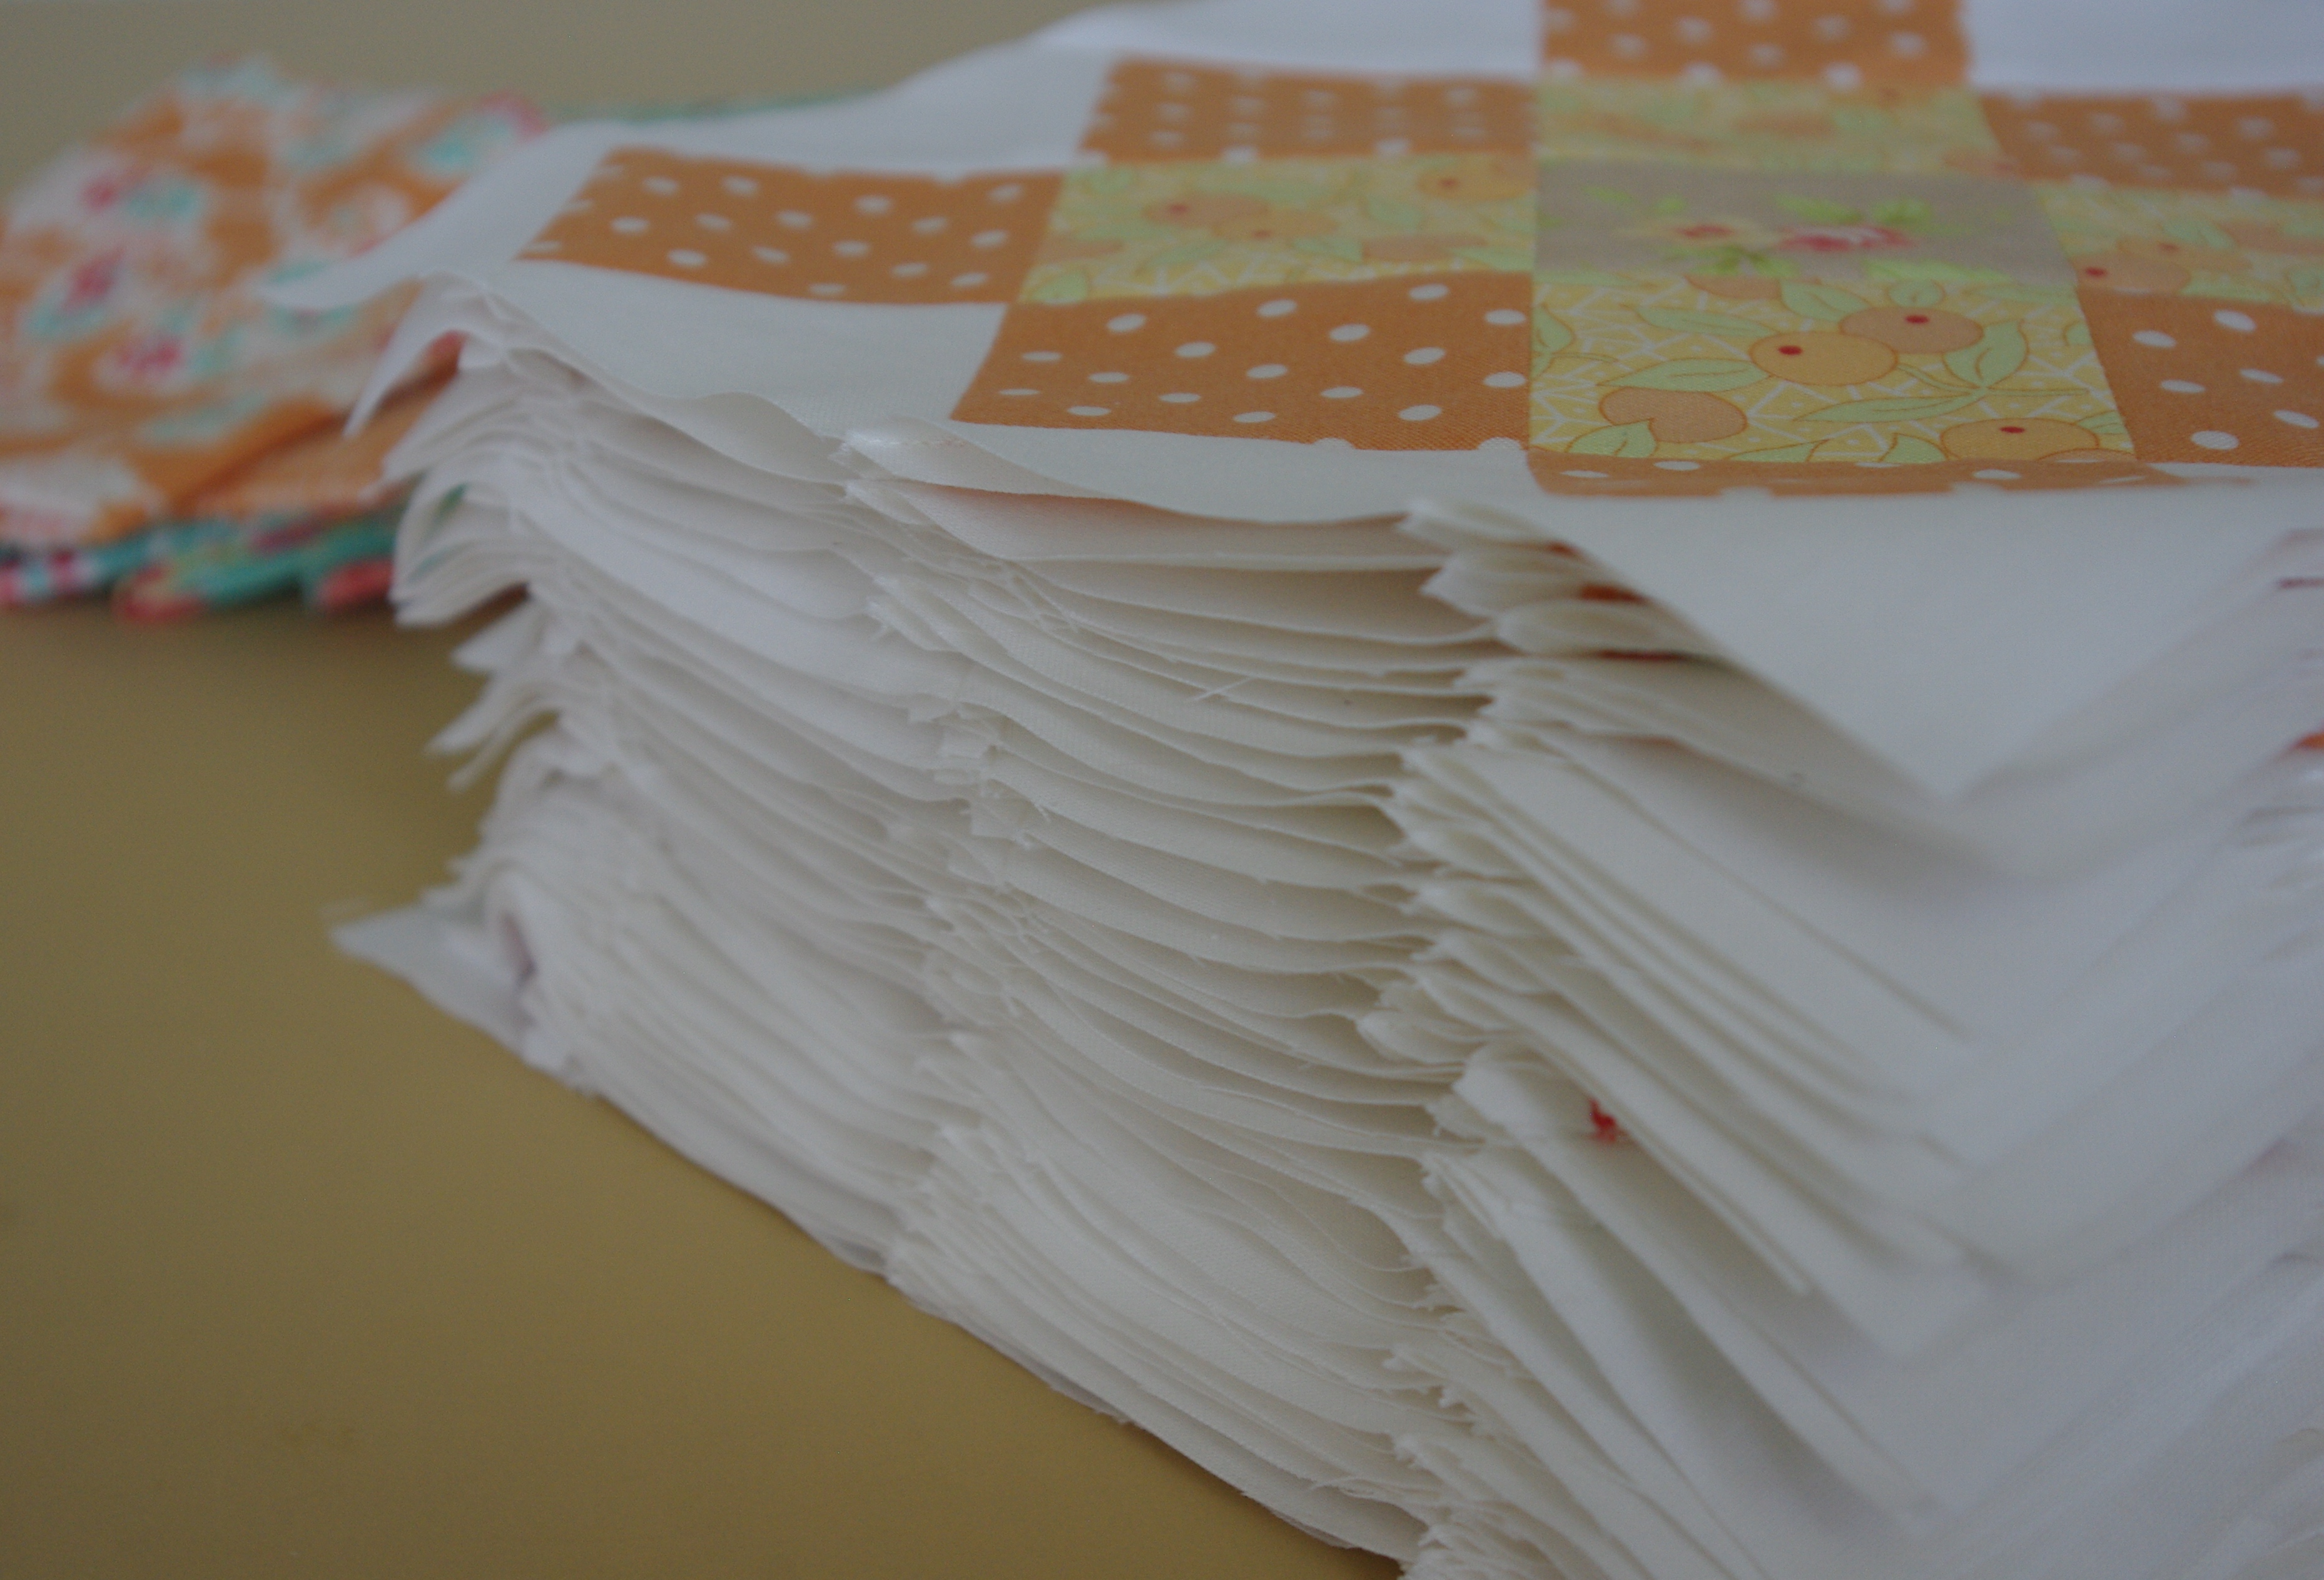
I’d like to share a bit of my publishing process…it took a long time but it was really fun. While I had been published in the September/October 2017 issue of Modern Patchwork, it was for small mug rugs that were accepted as finished projects. Pretty easy. But this time, because I had written the quilt pattern and tested it long before submitting, by the time it was accepted the fabric was no longer available so I had to remake it. Deadlines and all. Yikes!

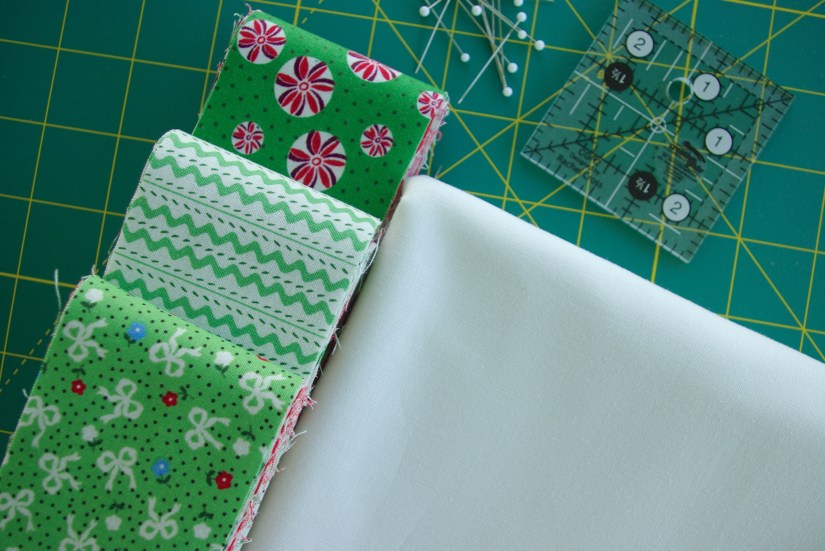
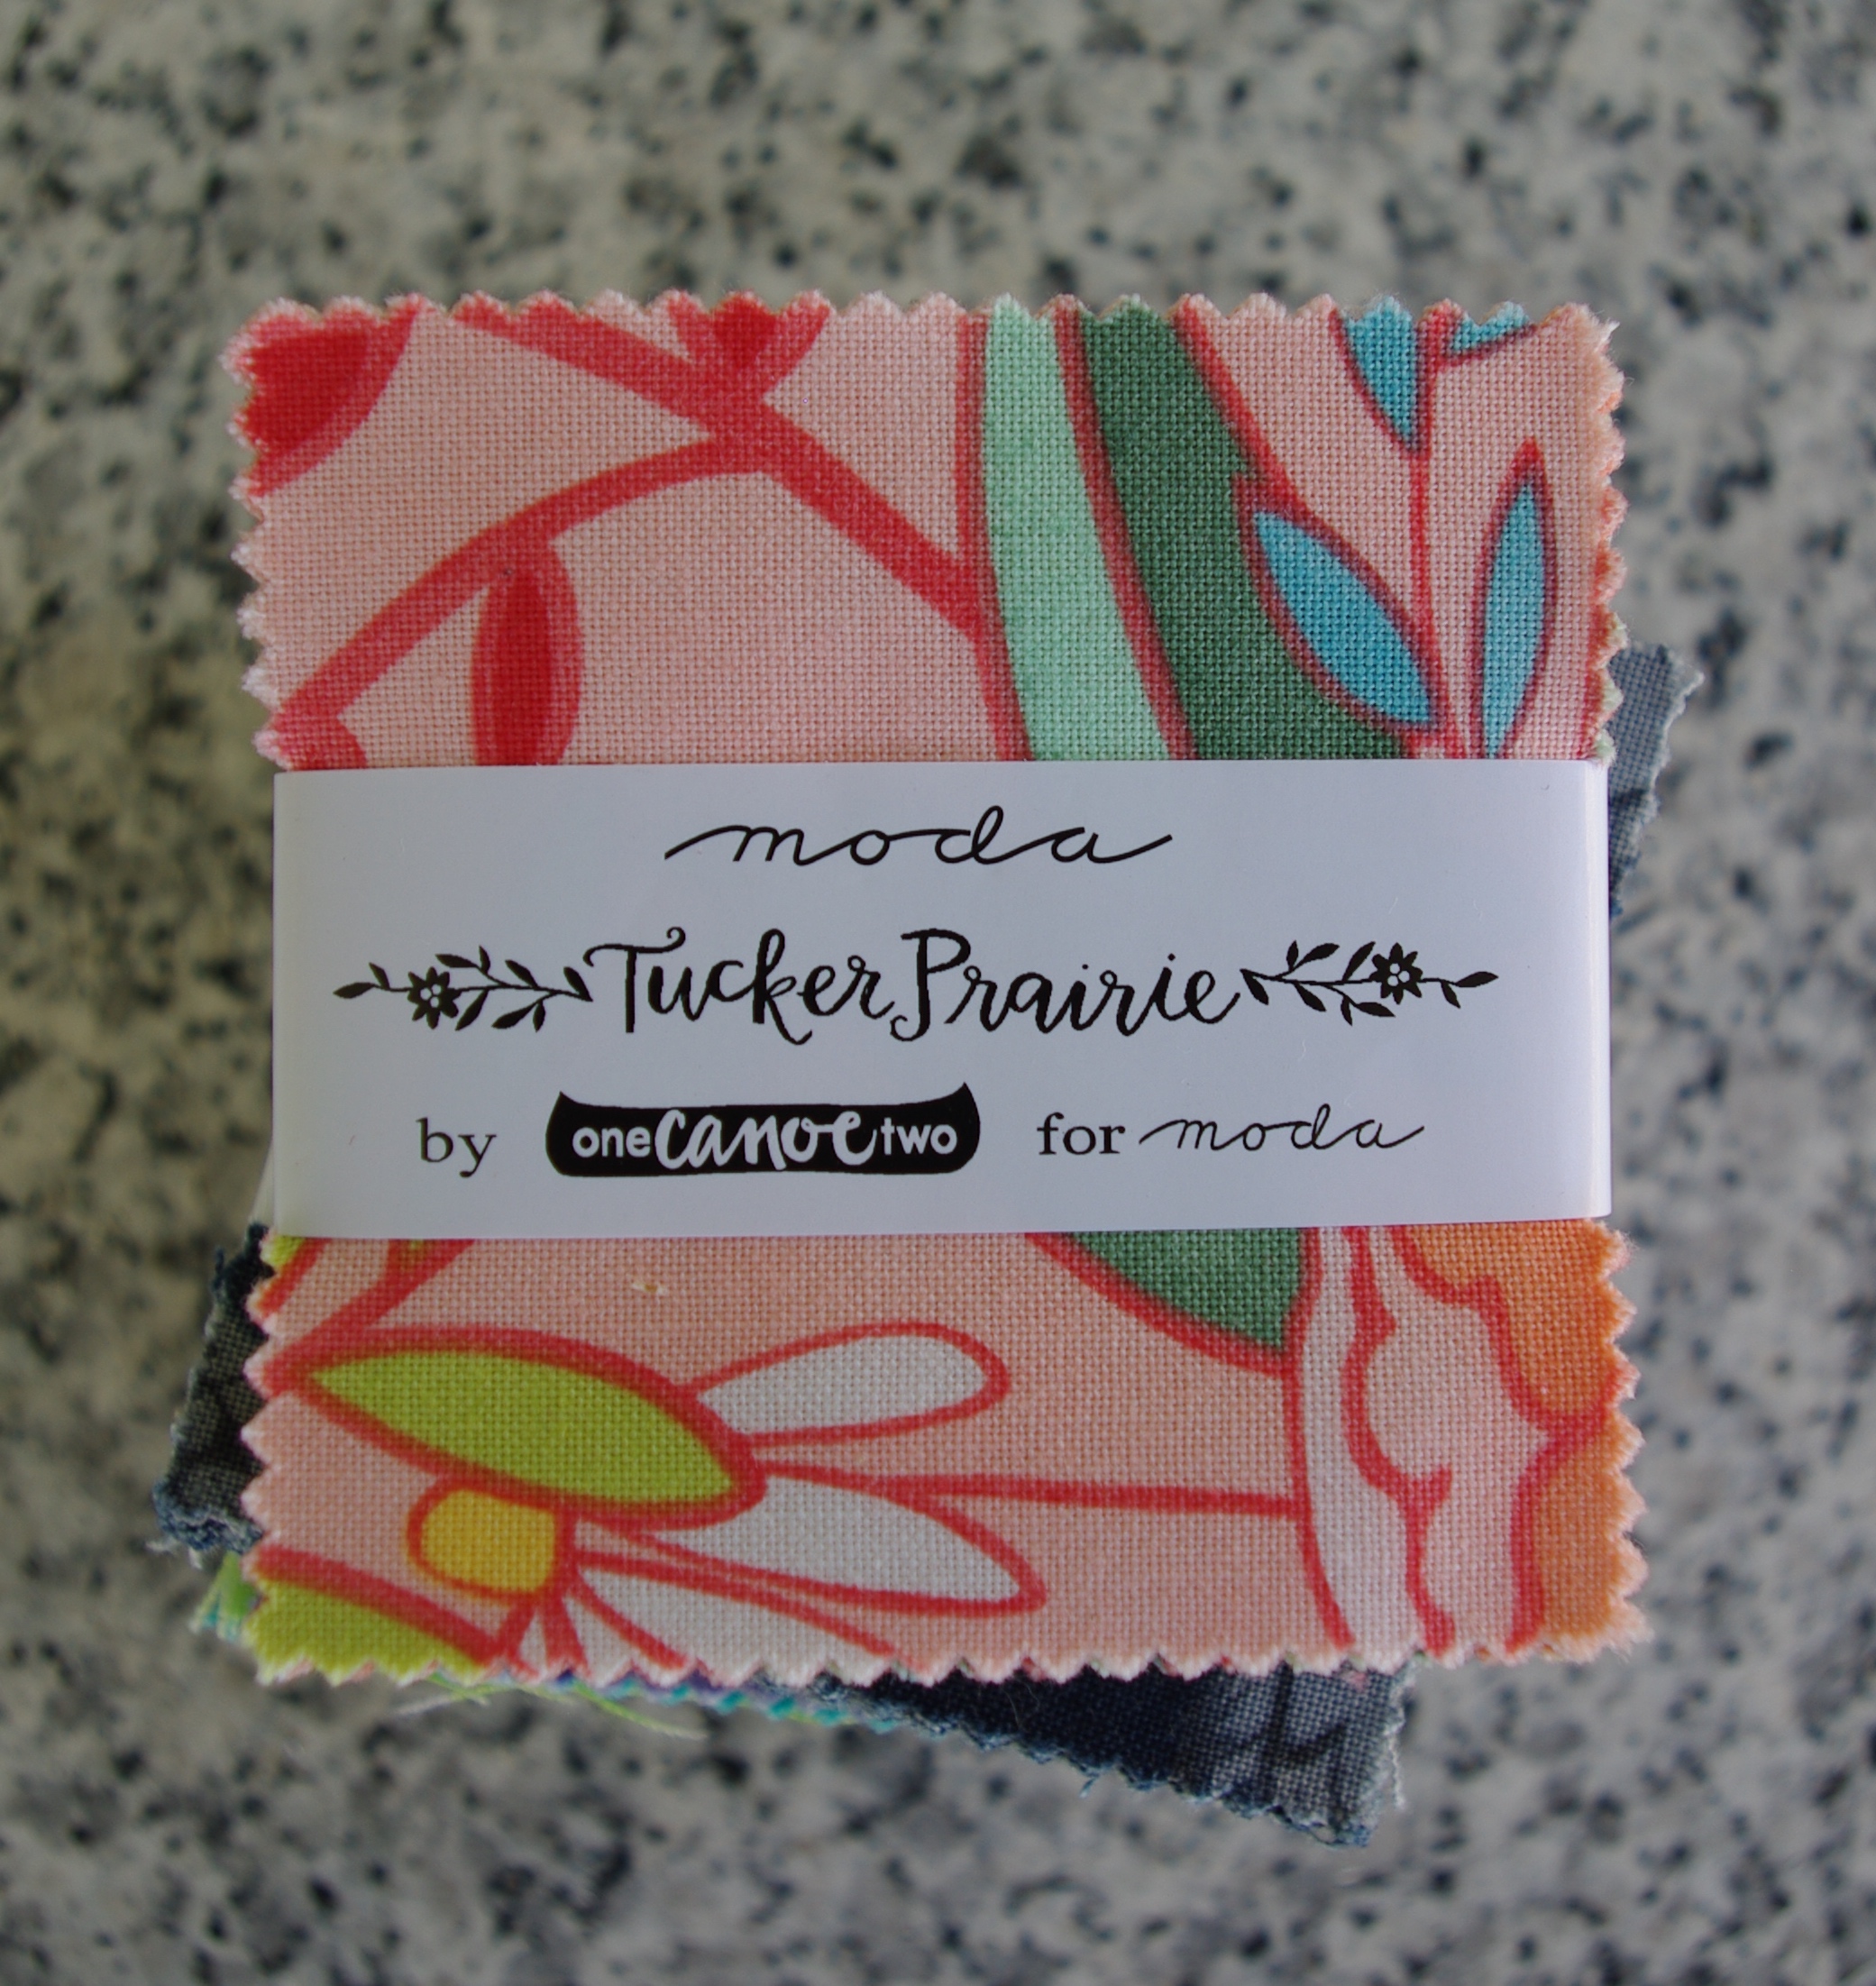
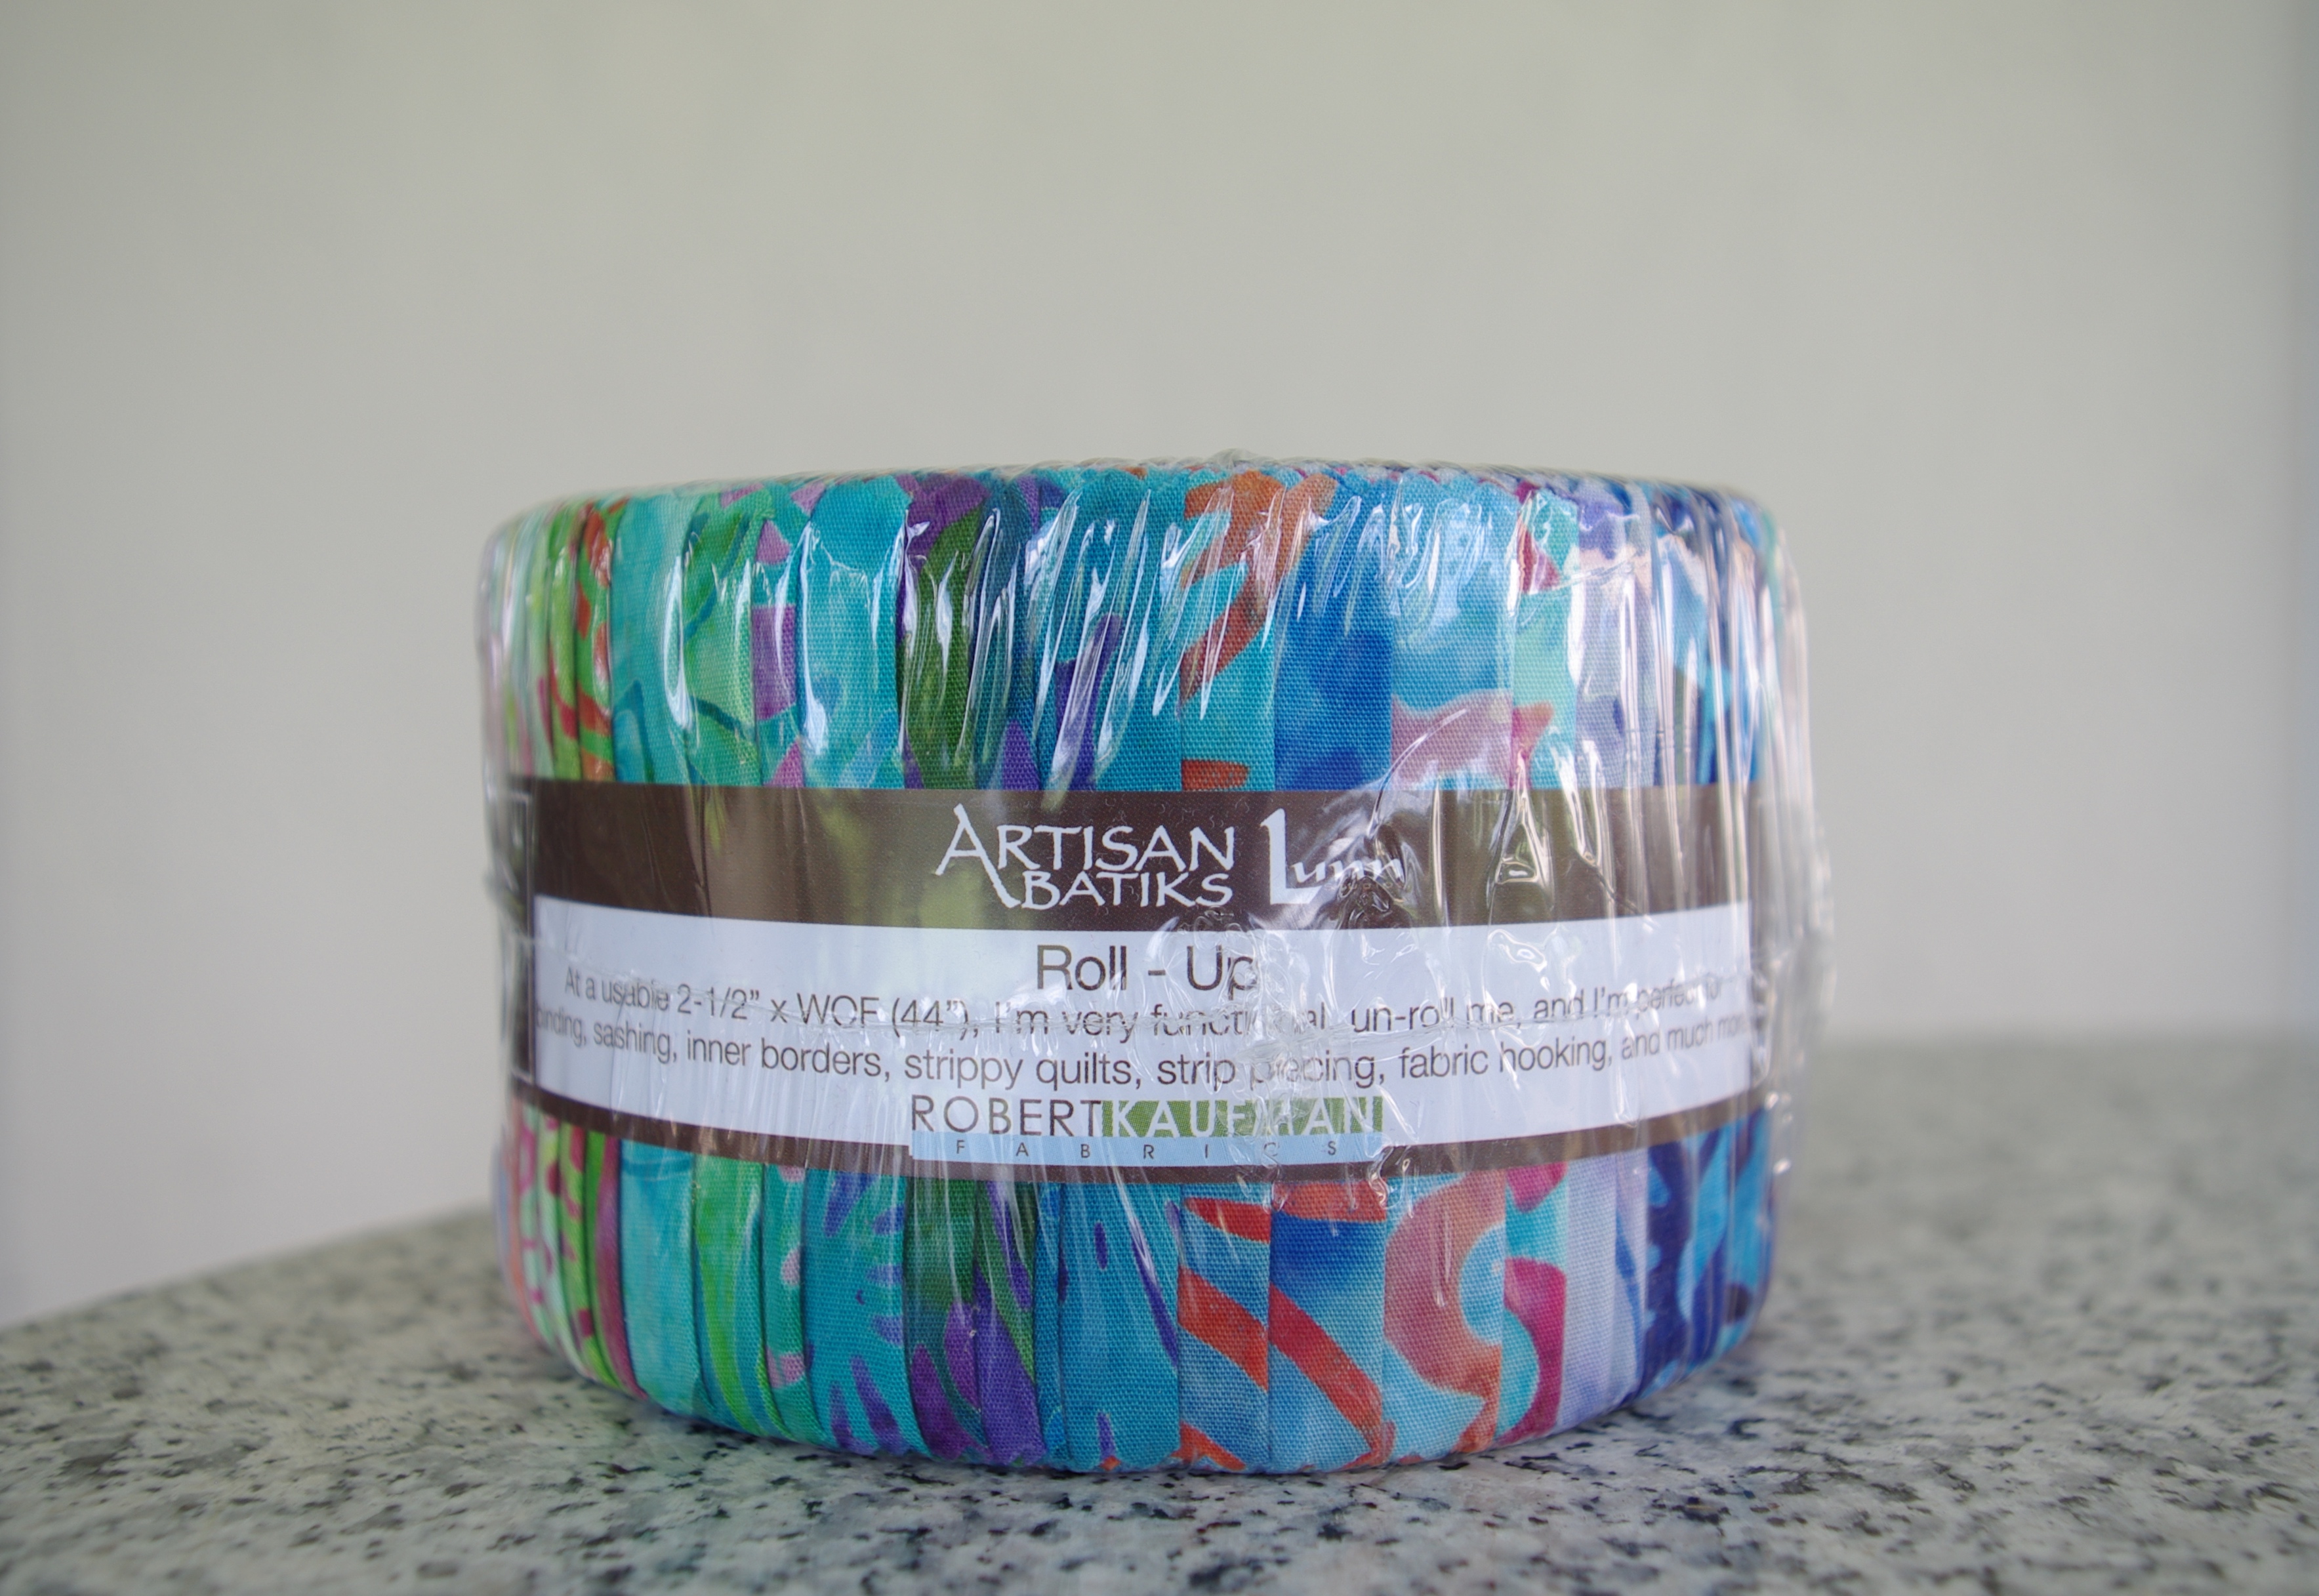
After sending in some necessary paperwork, I was assigned an editor who helped me with my fabric options yet I ultimately got to choose. I went with Bright Blooms by Lunn Studios and let me tell you, it was so fun to get fabric before it was released to the public, but it was also nerve-racking!

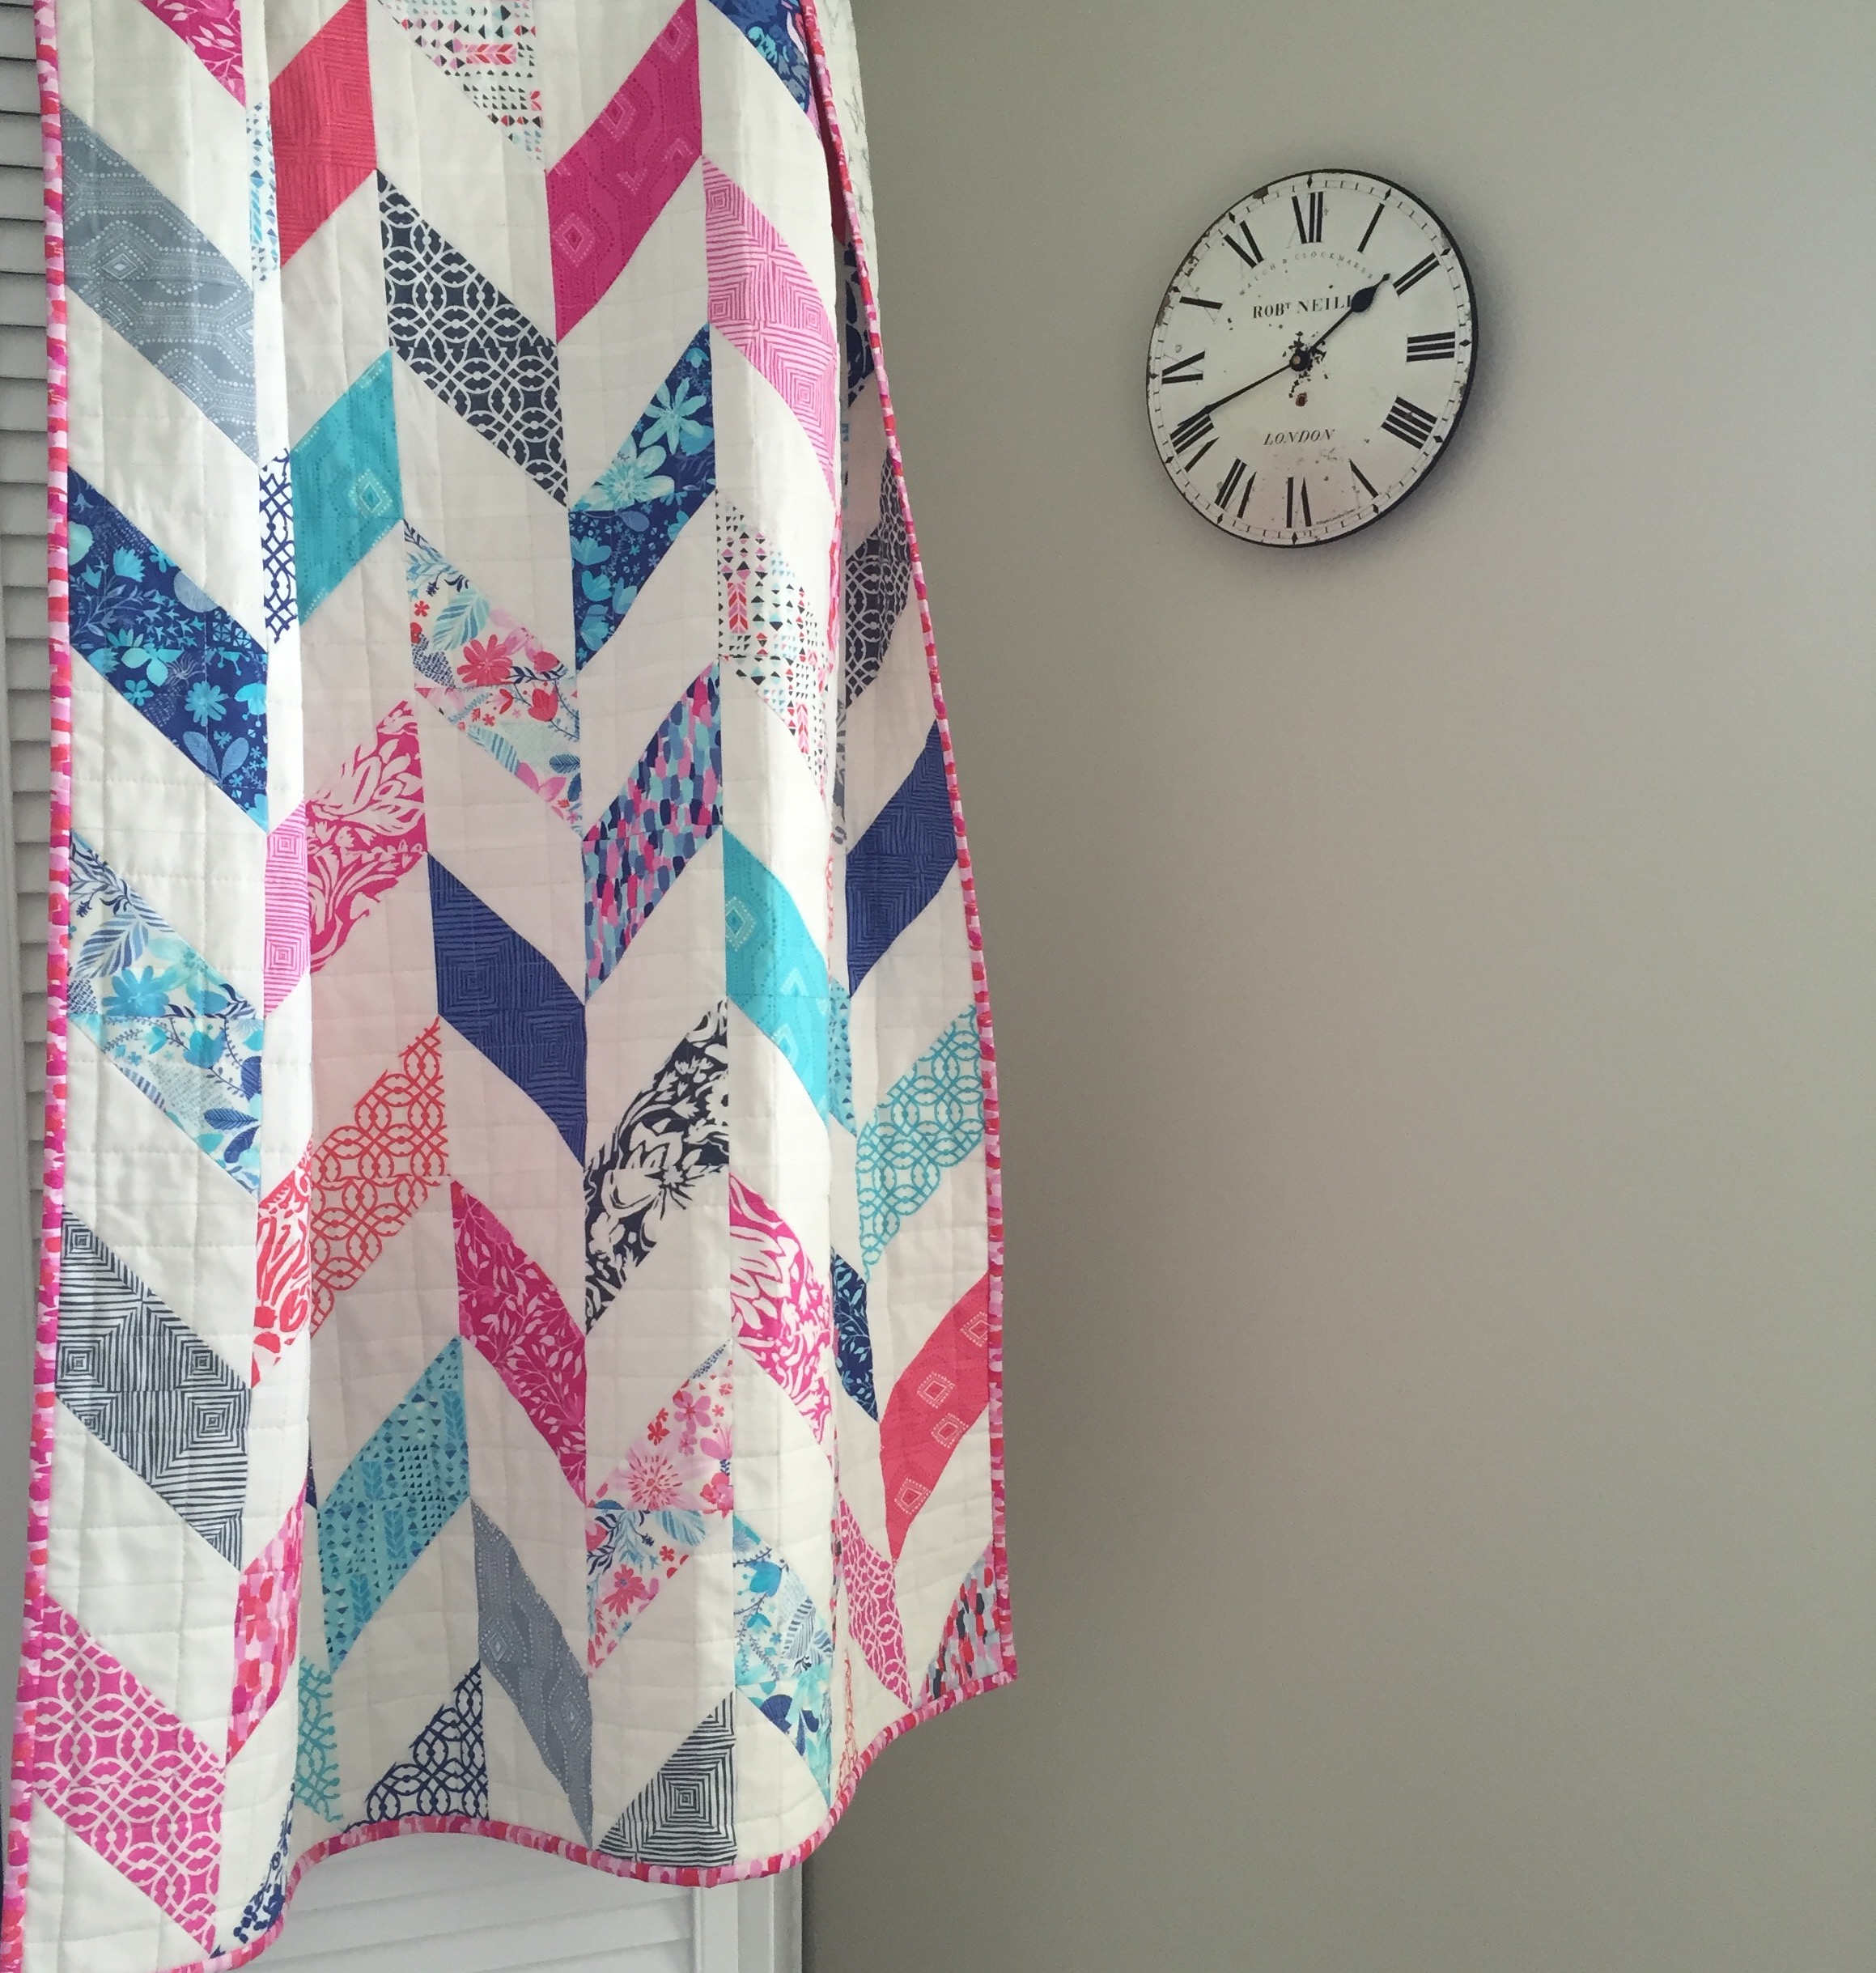
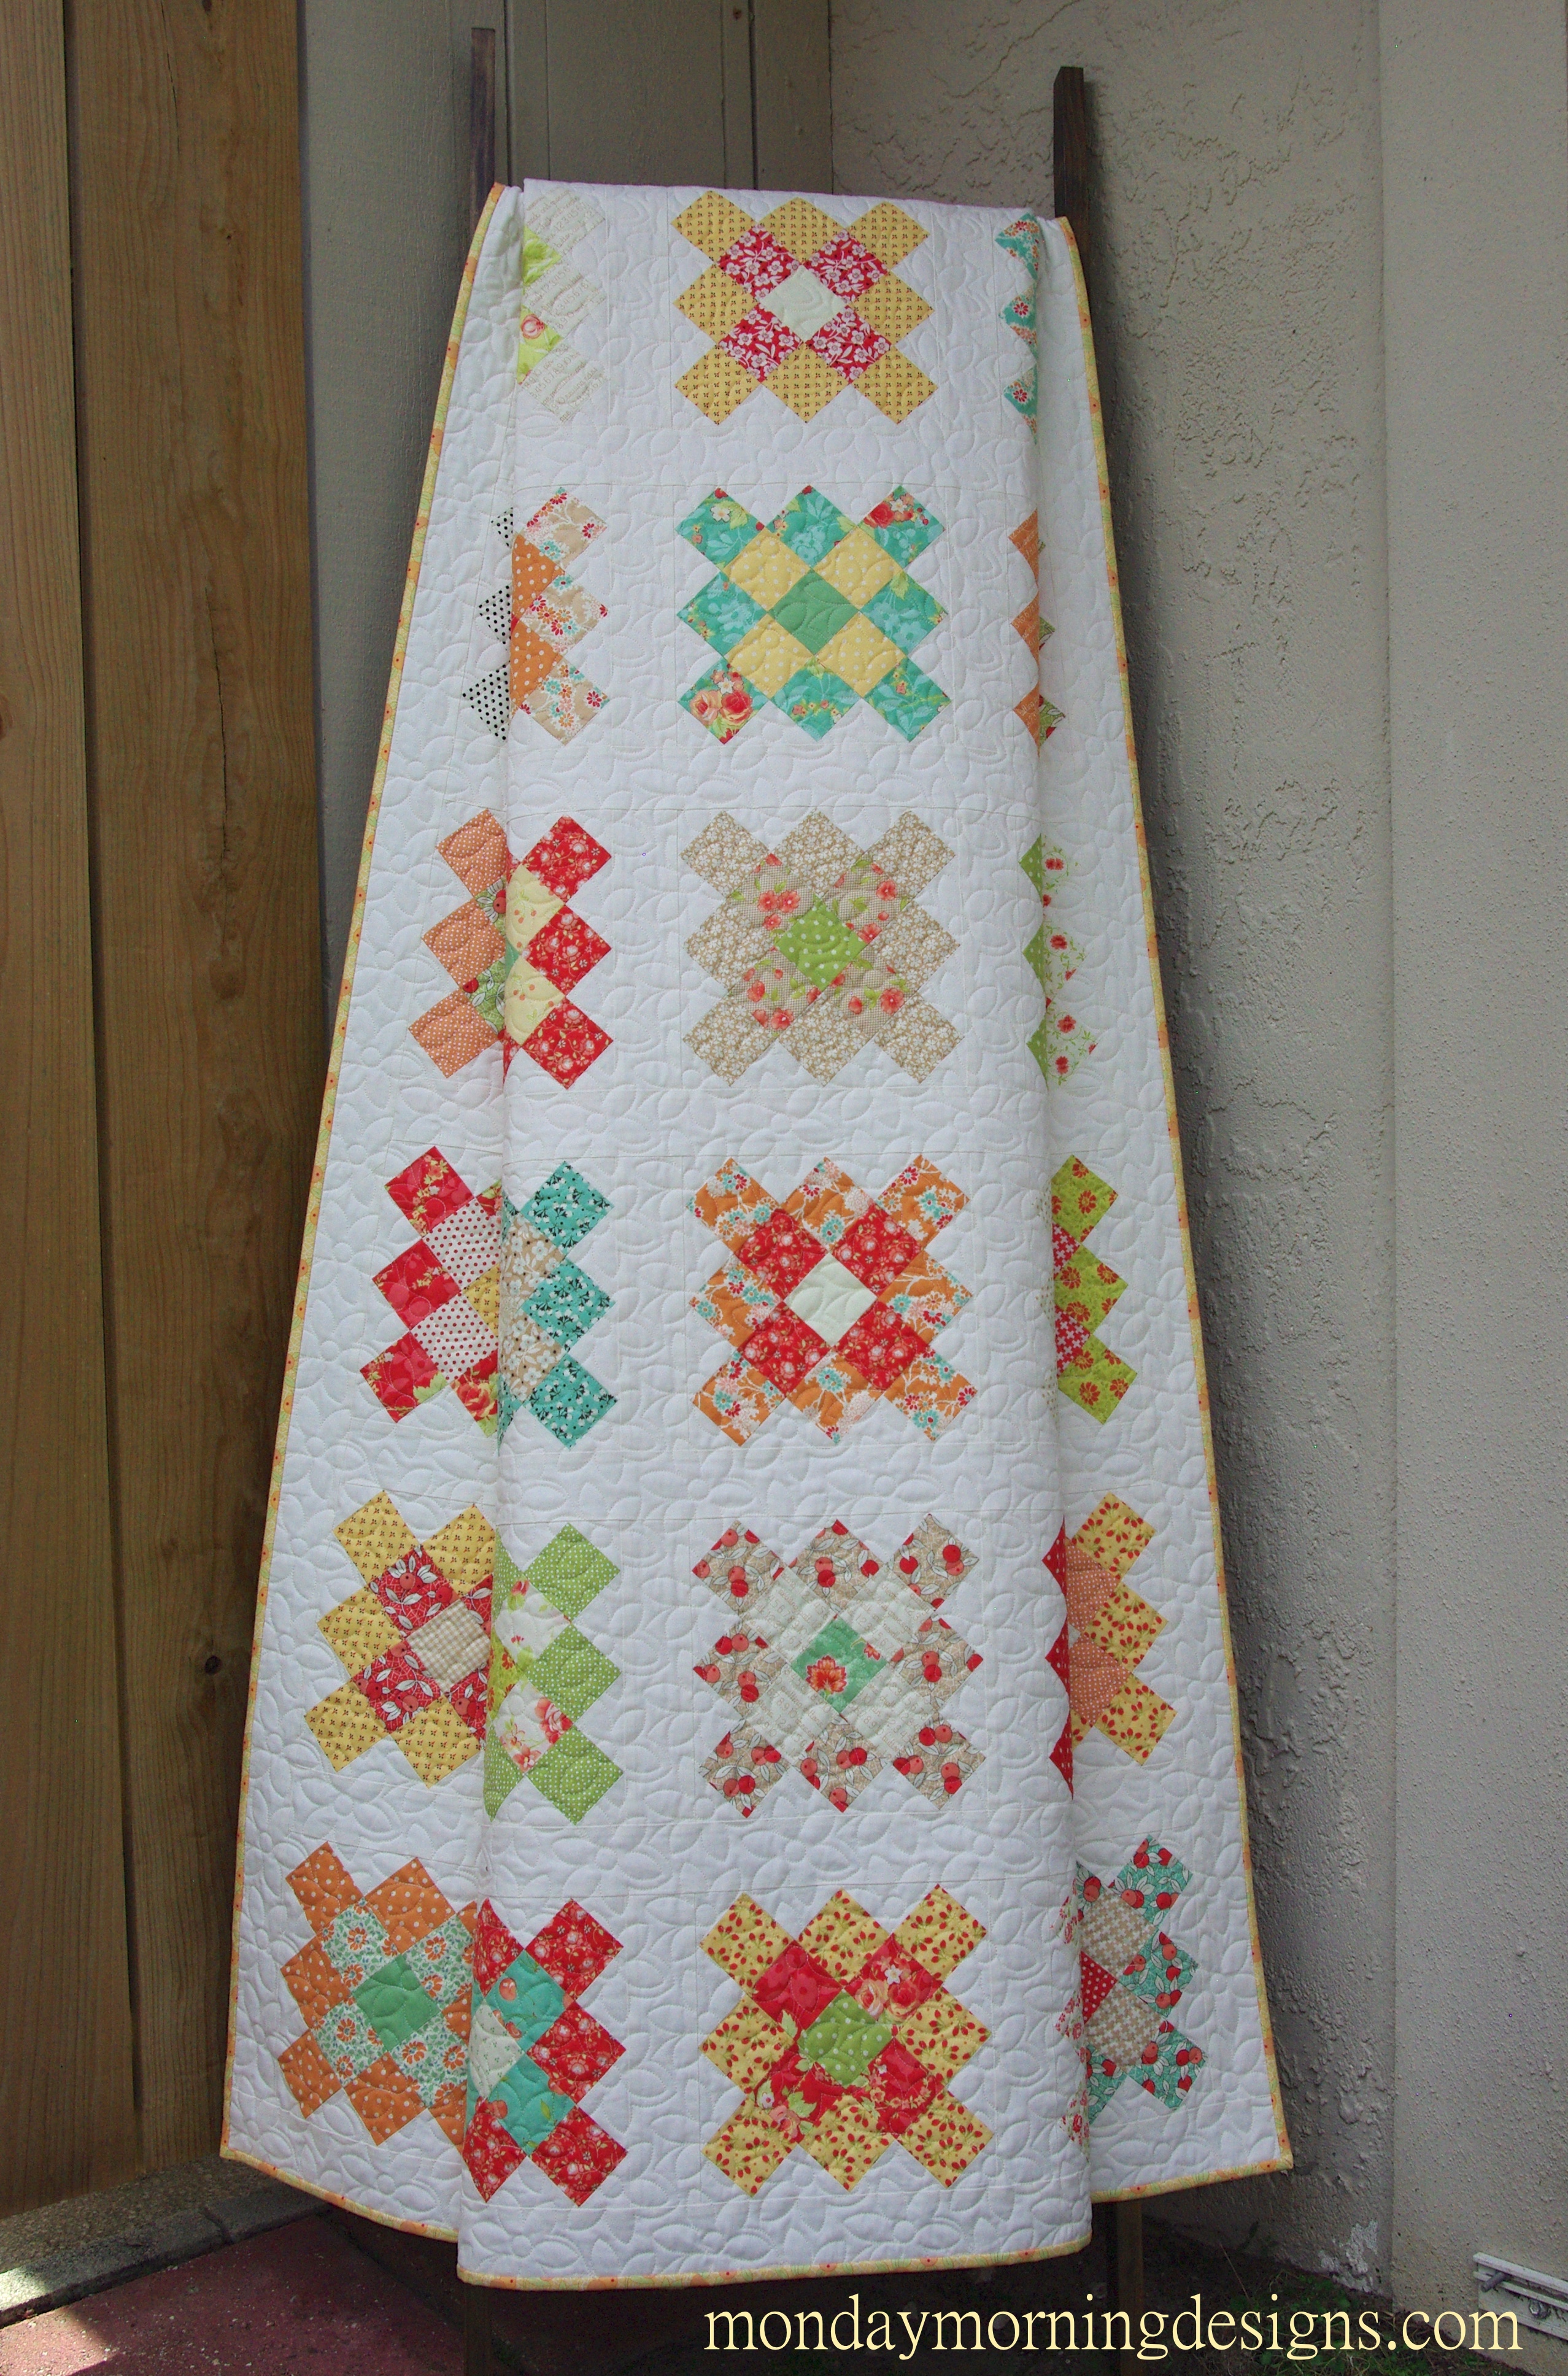
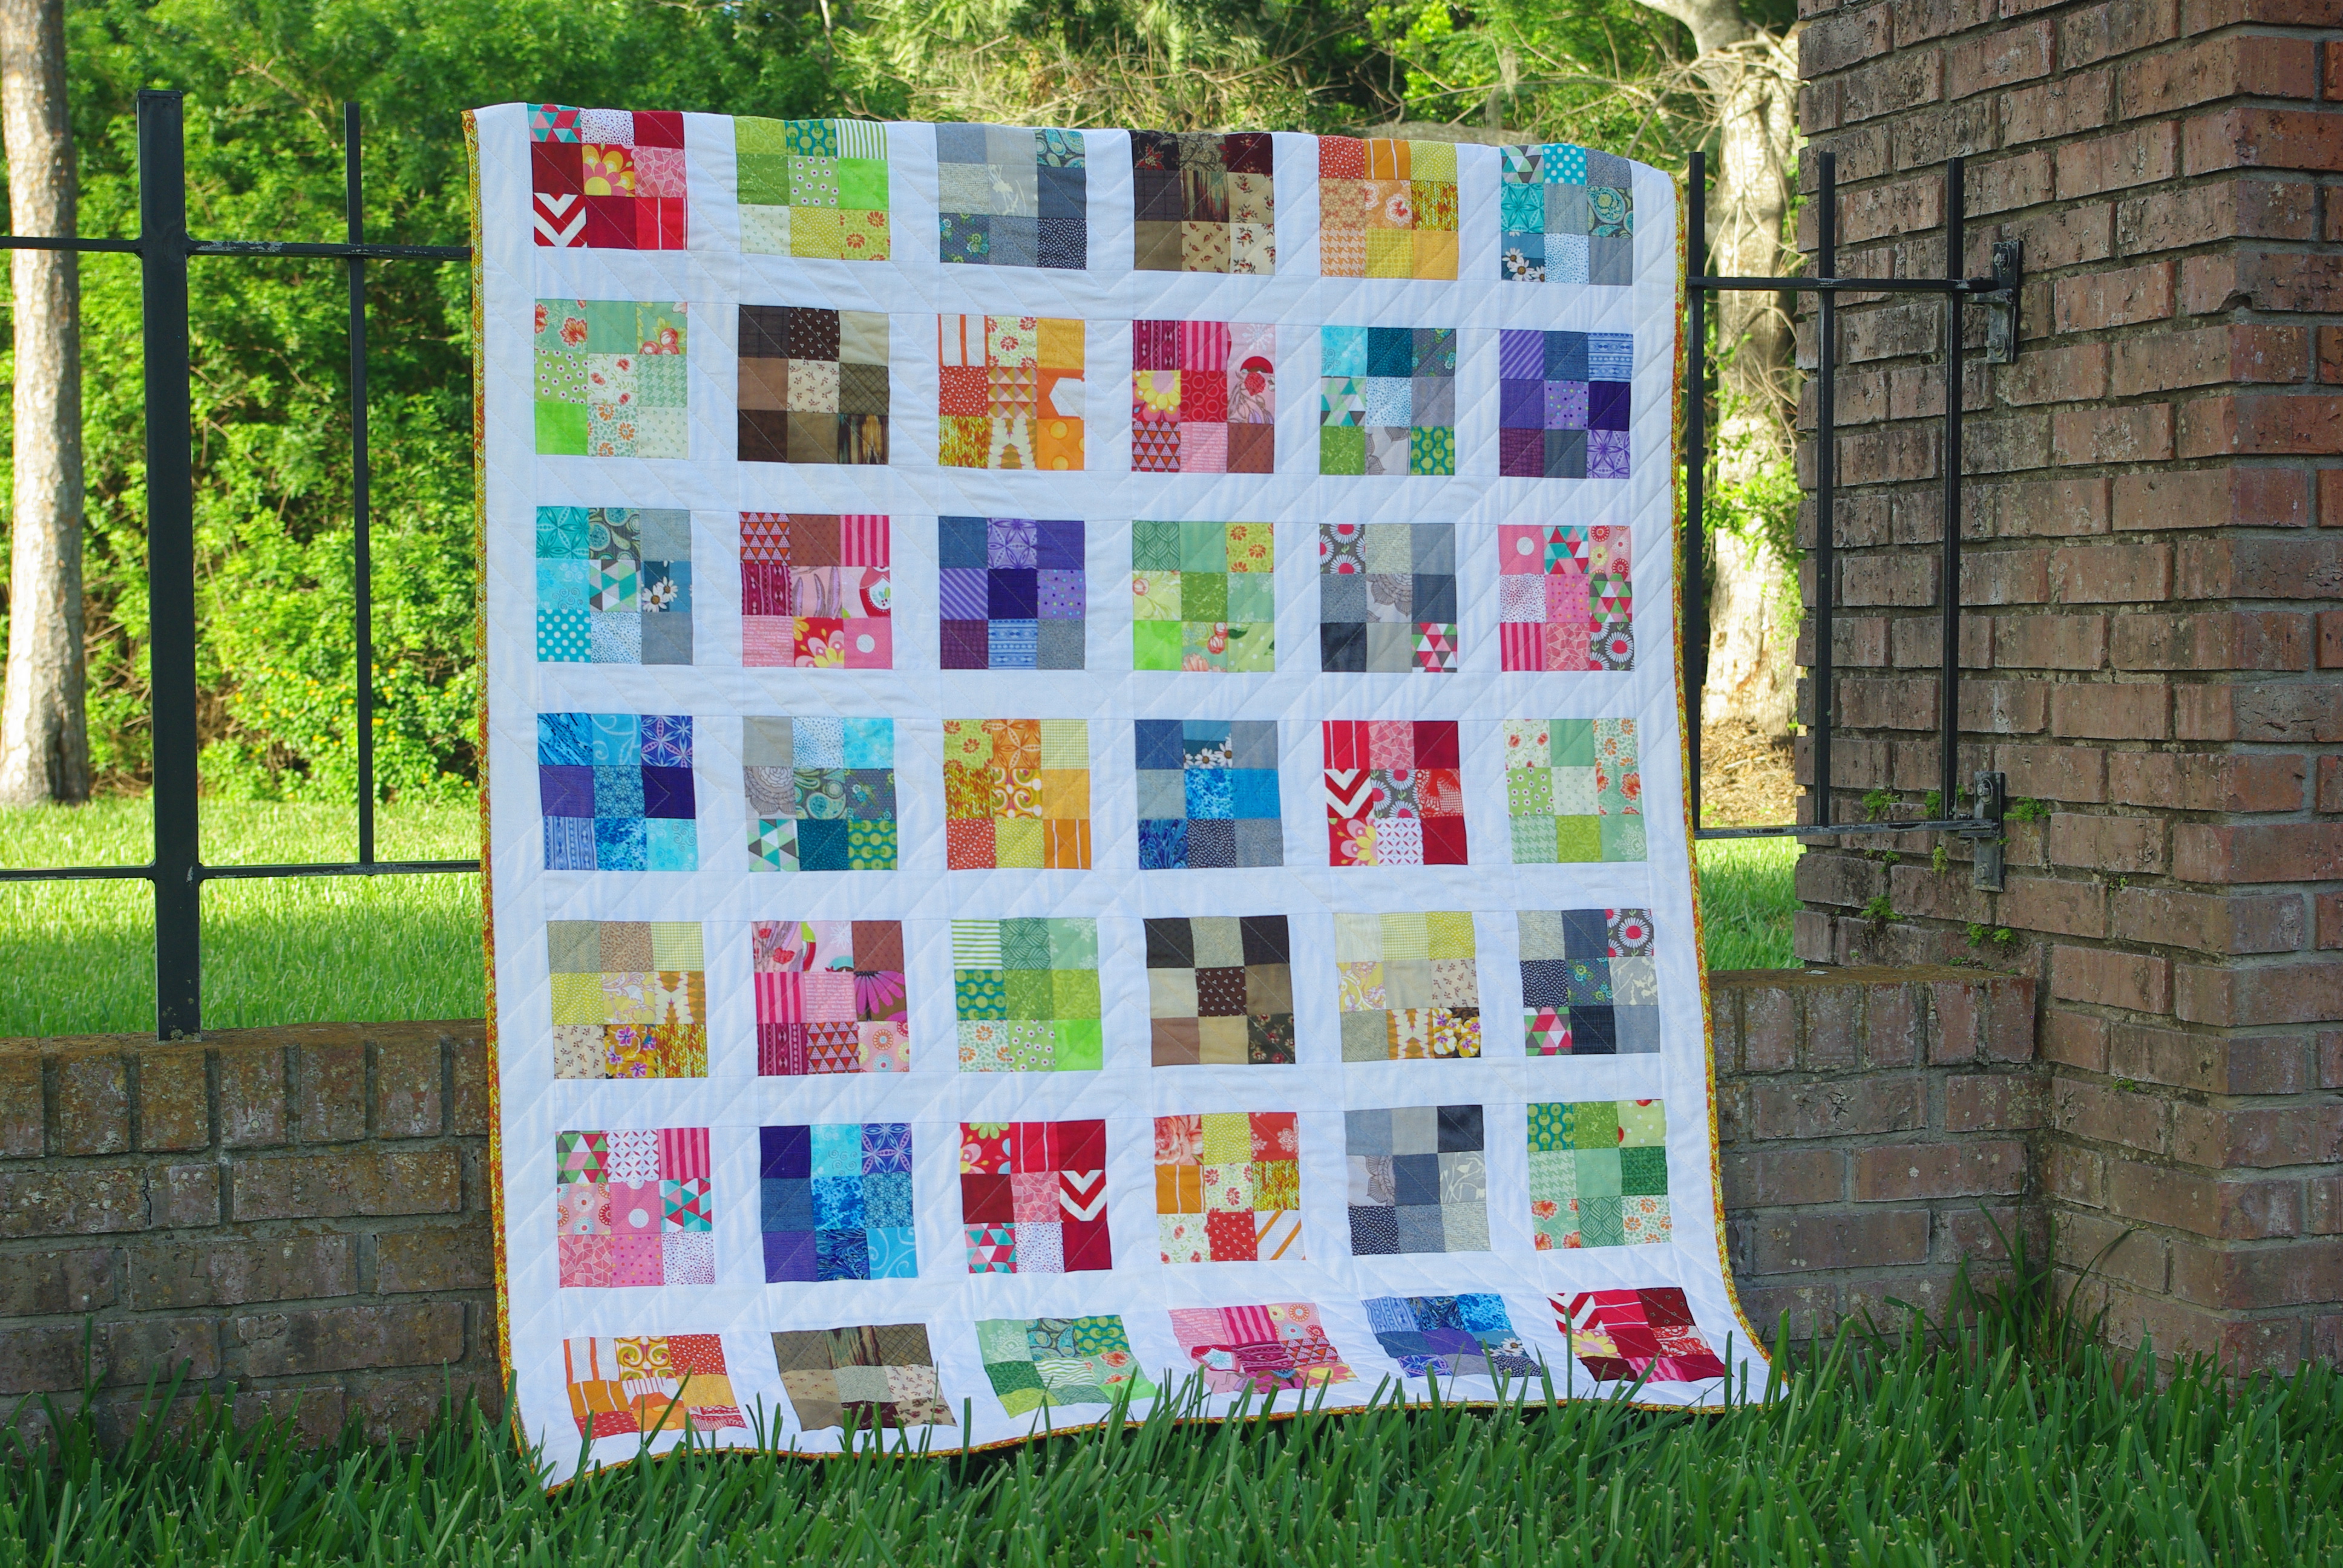
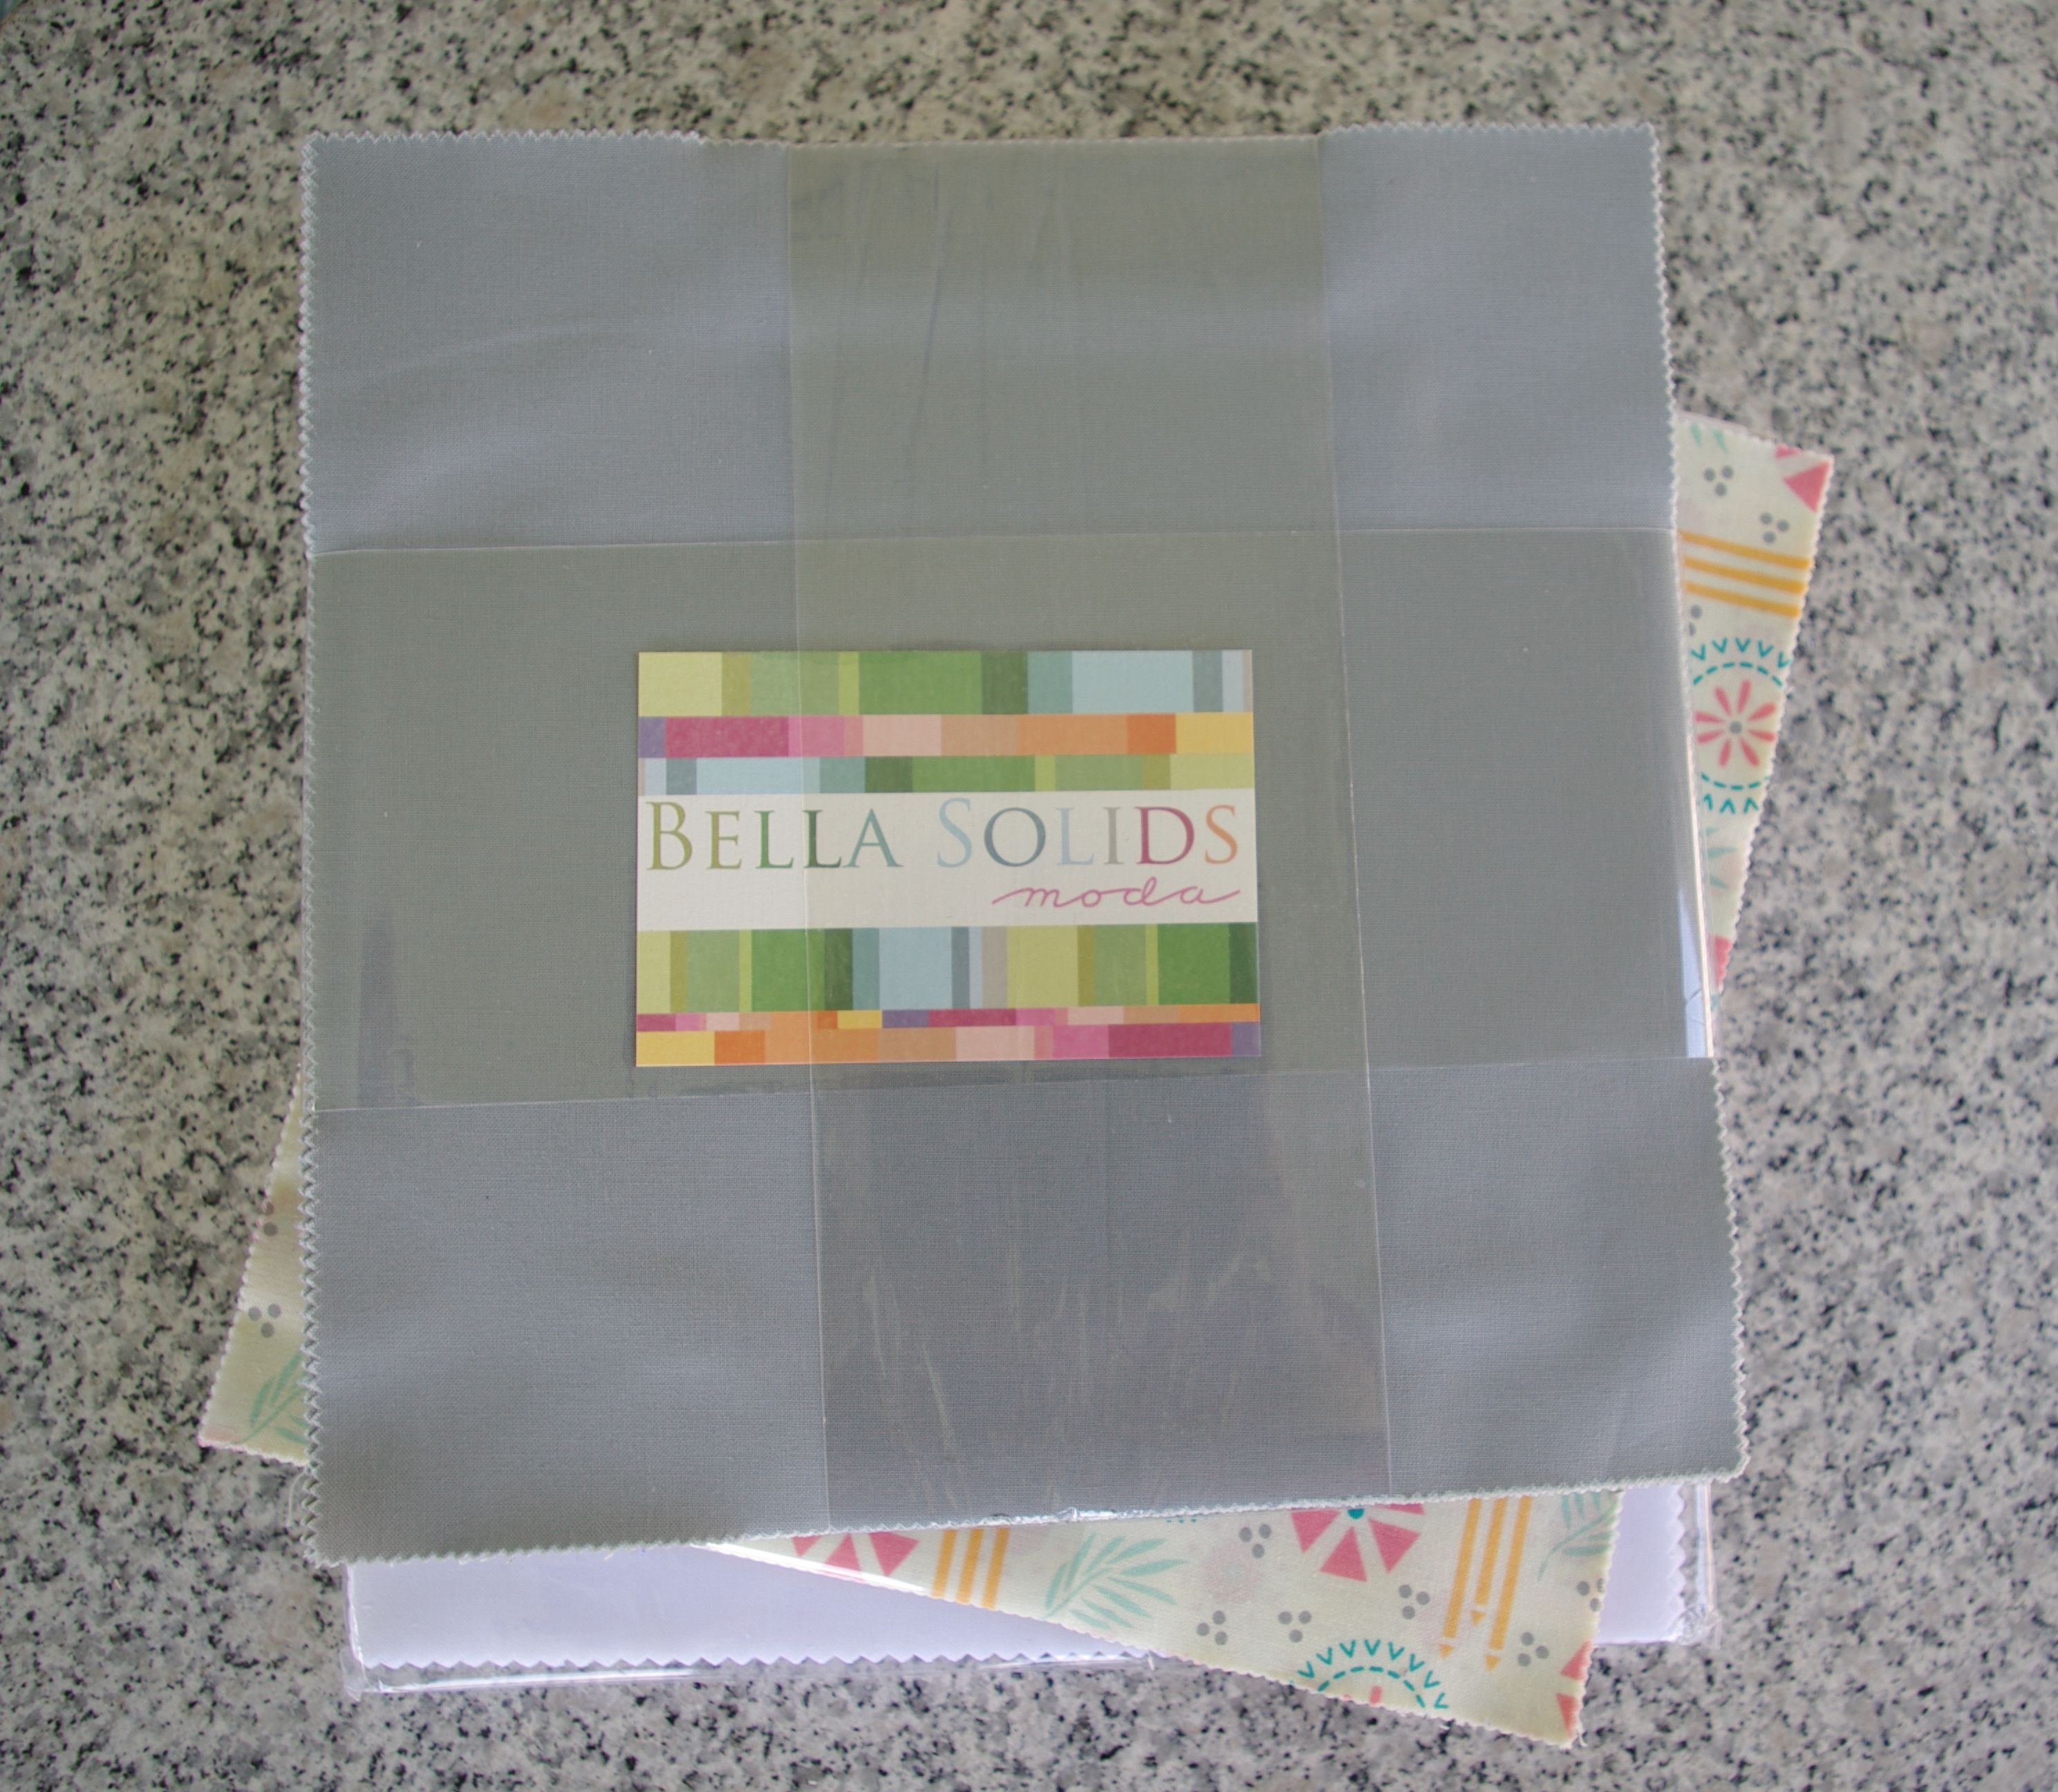
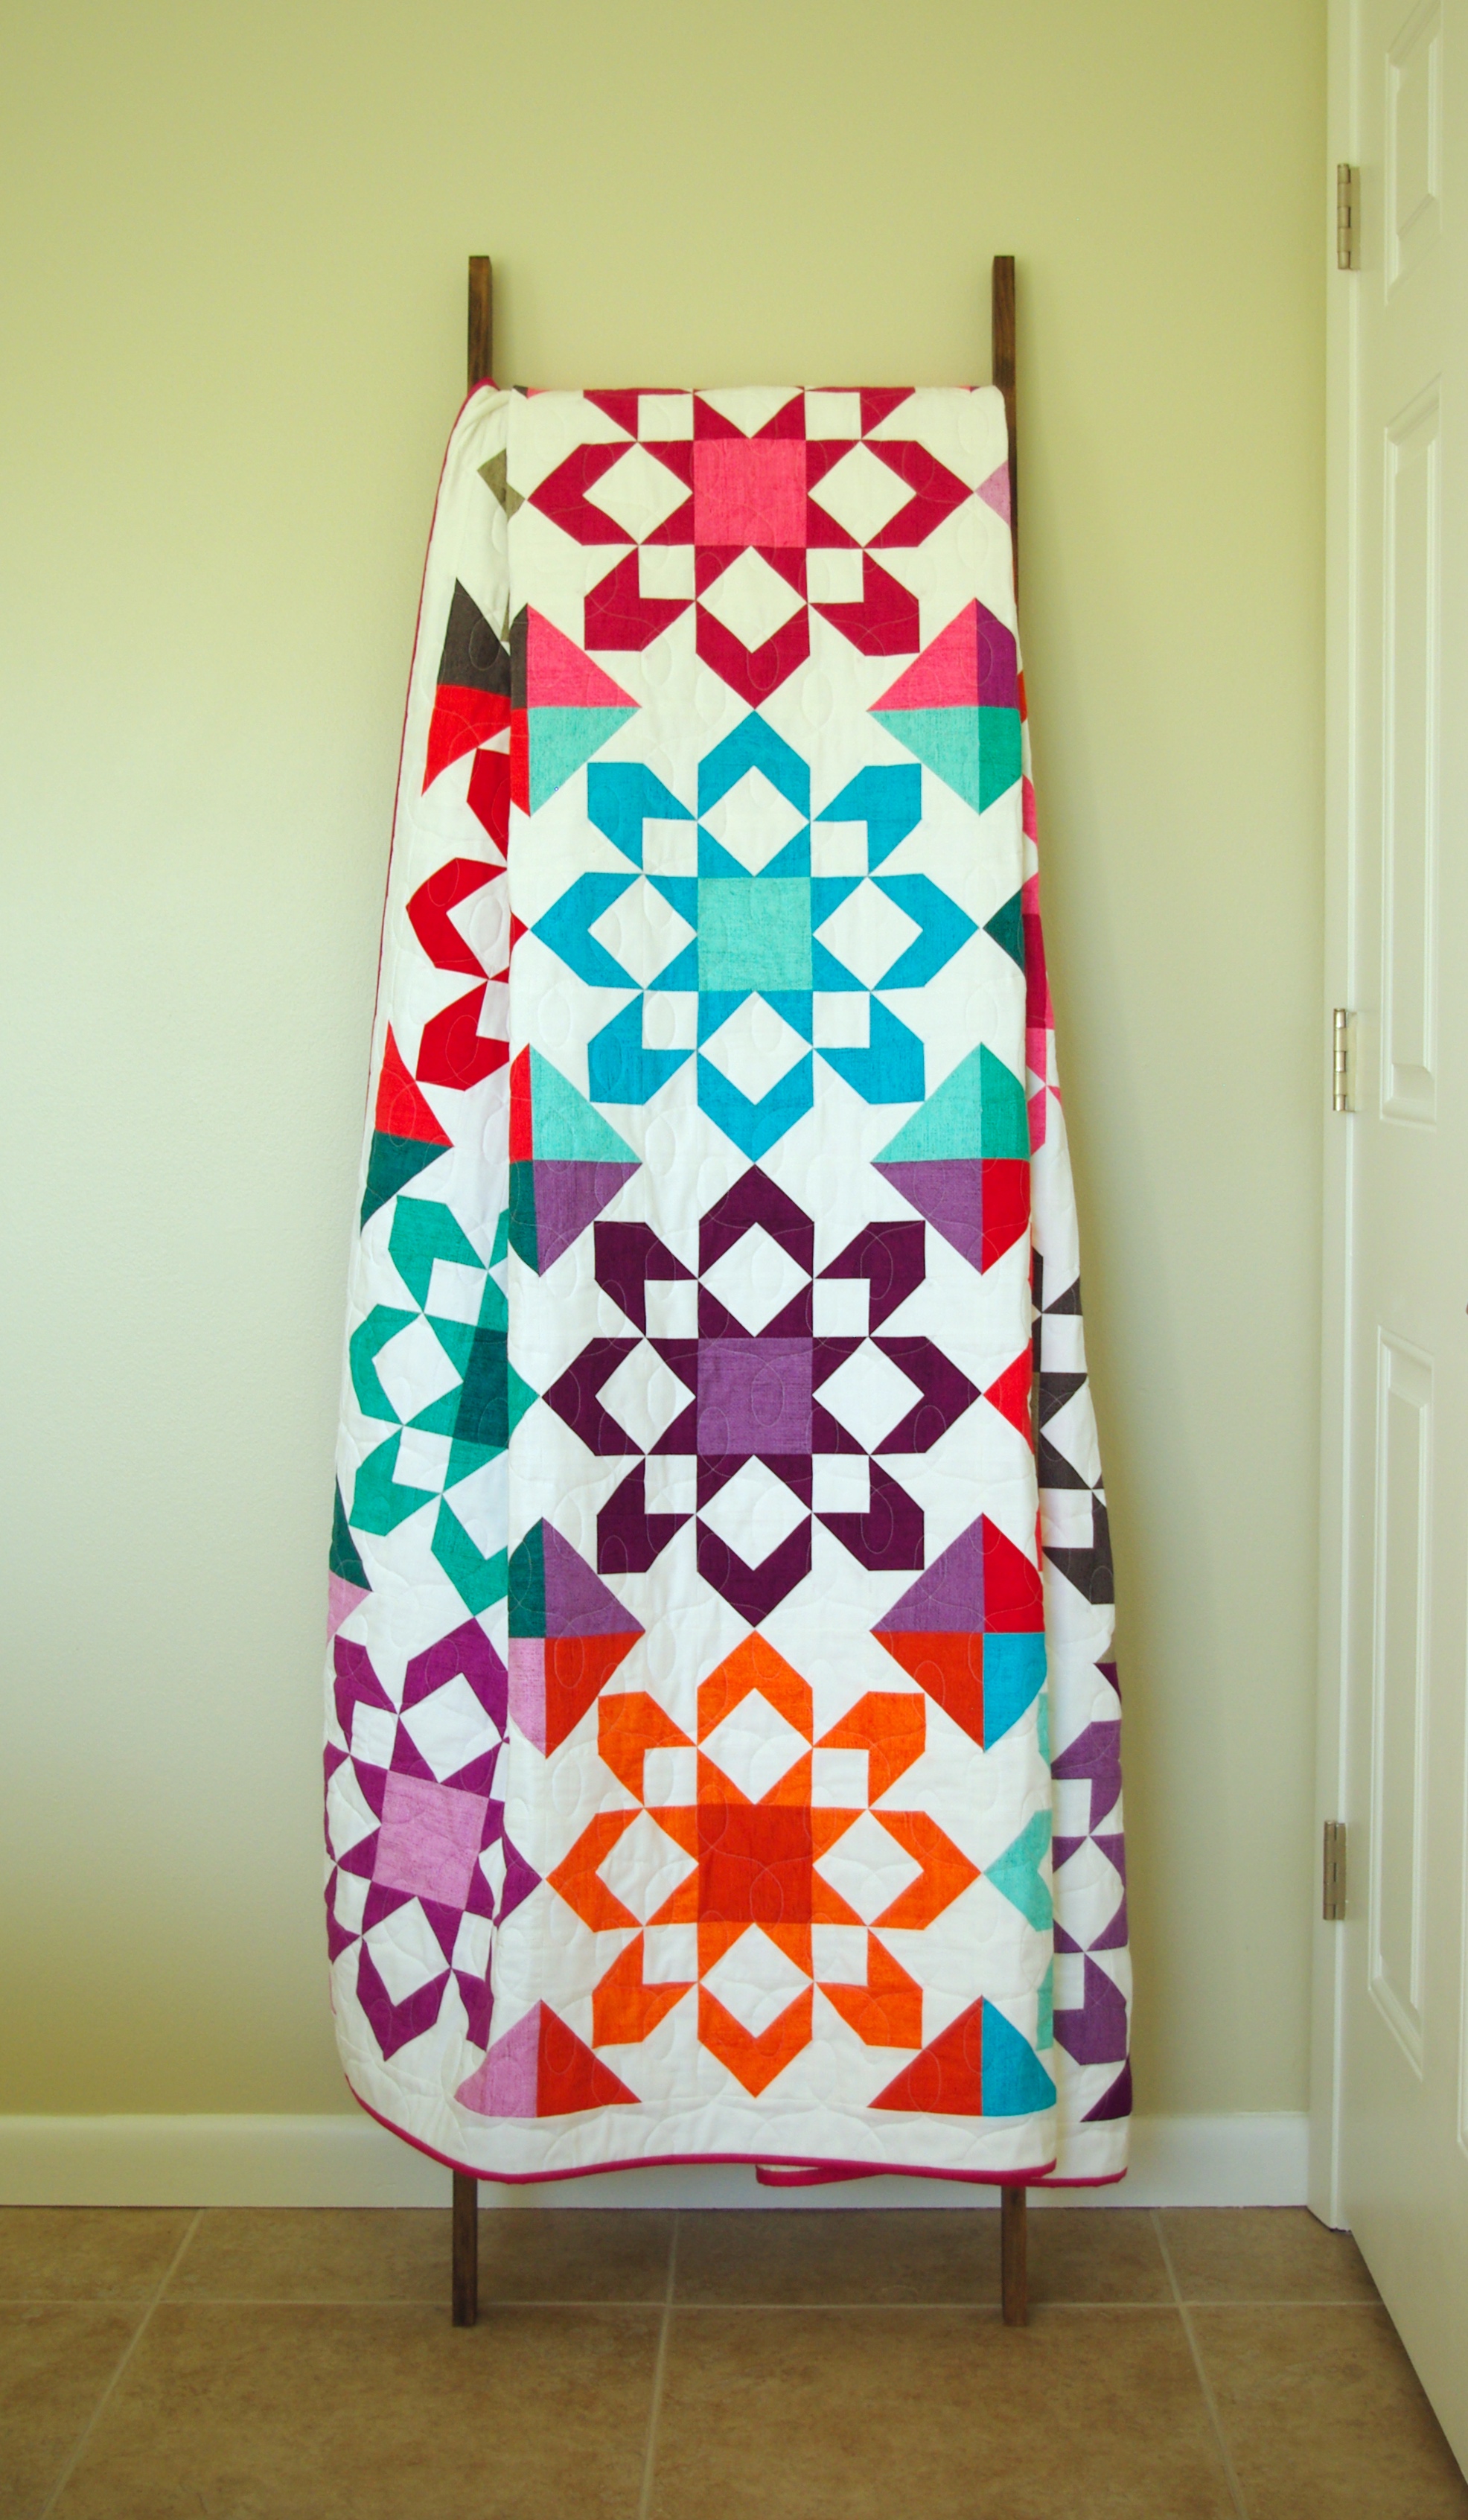
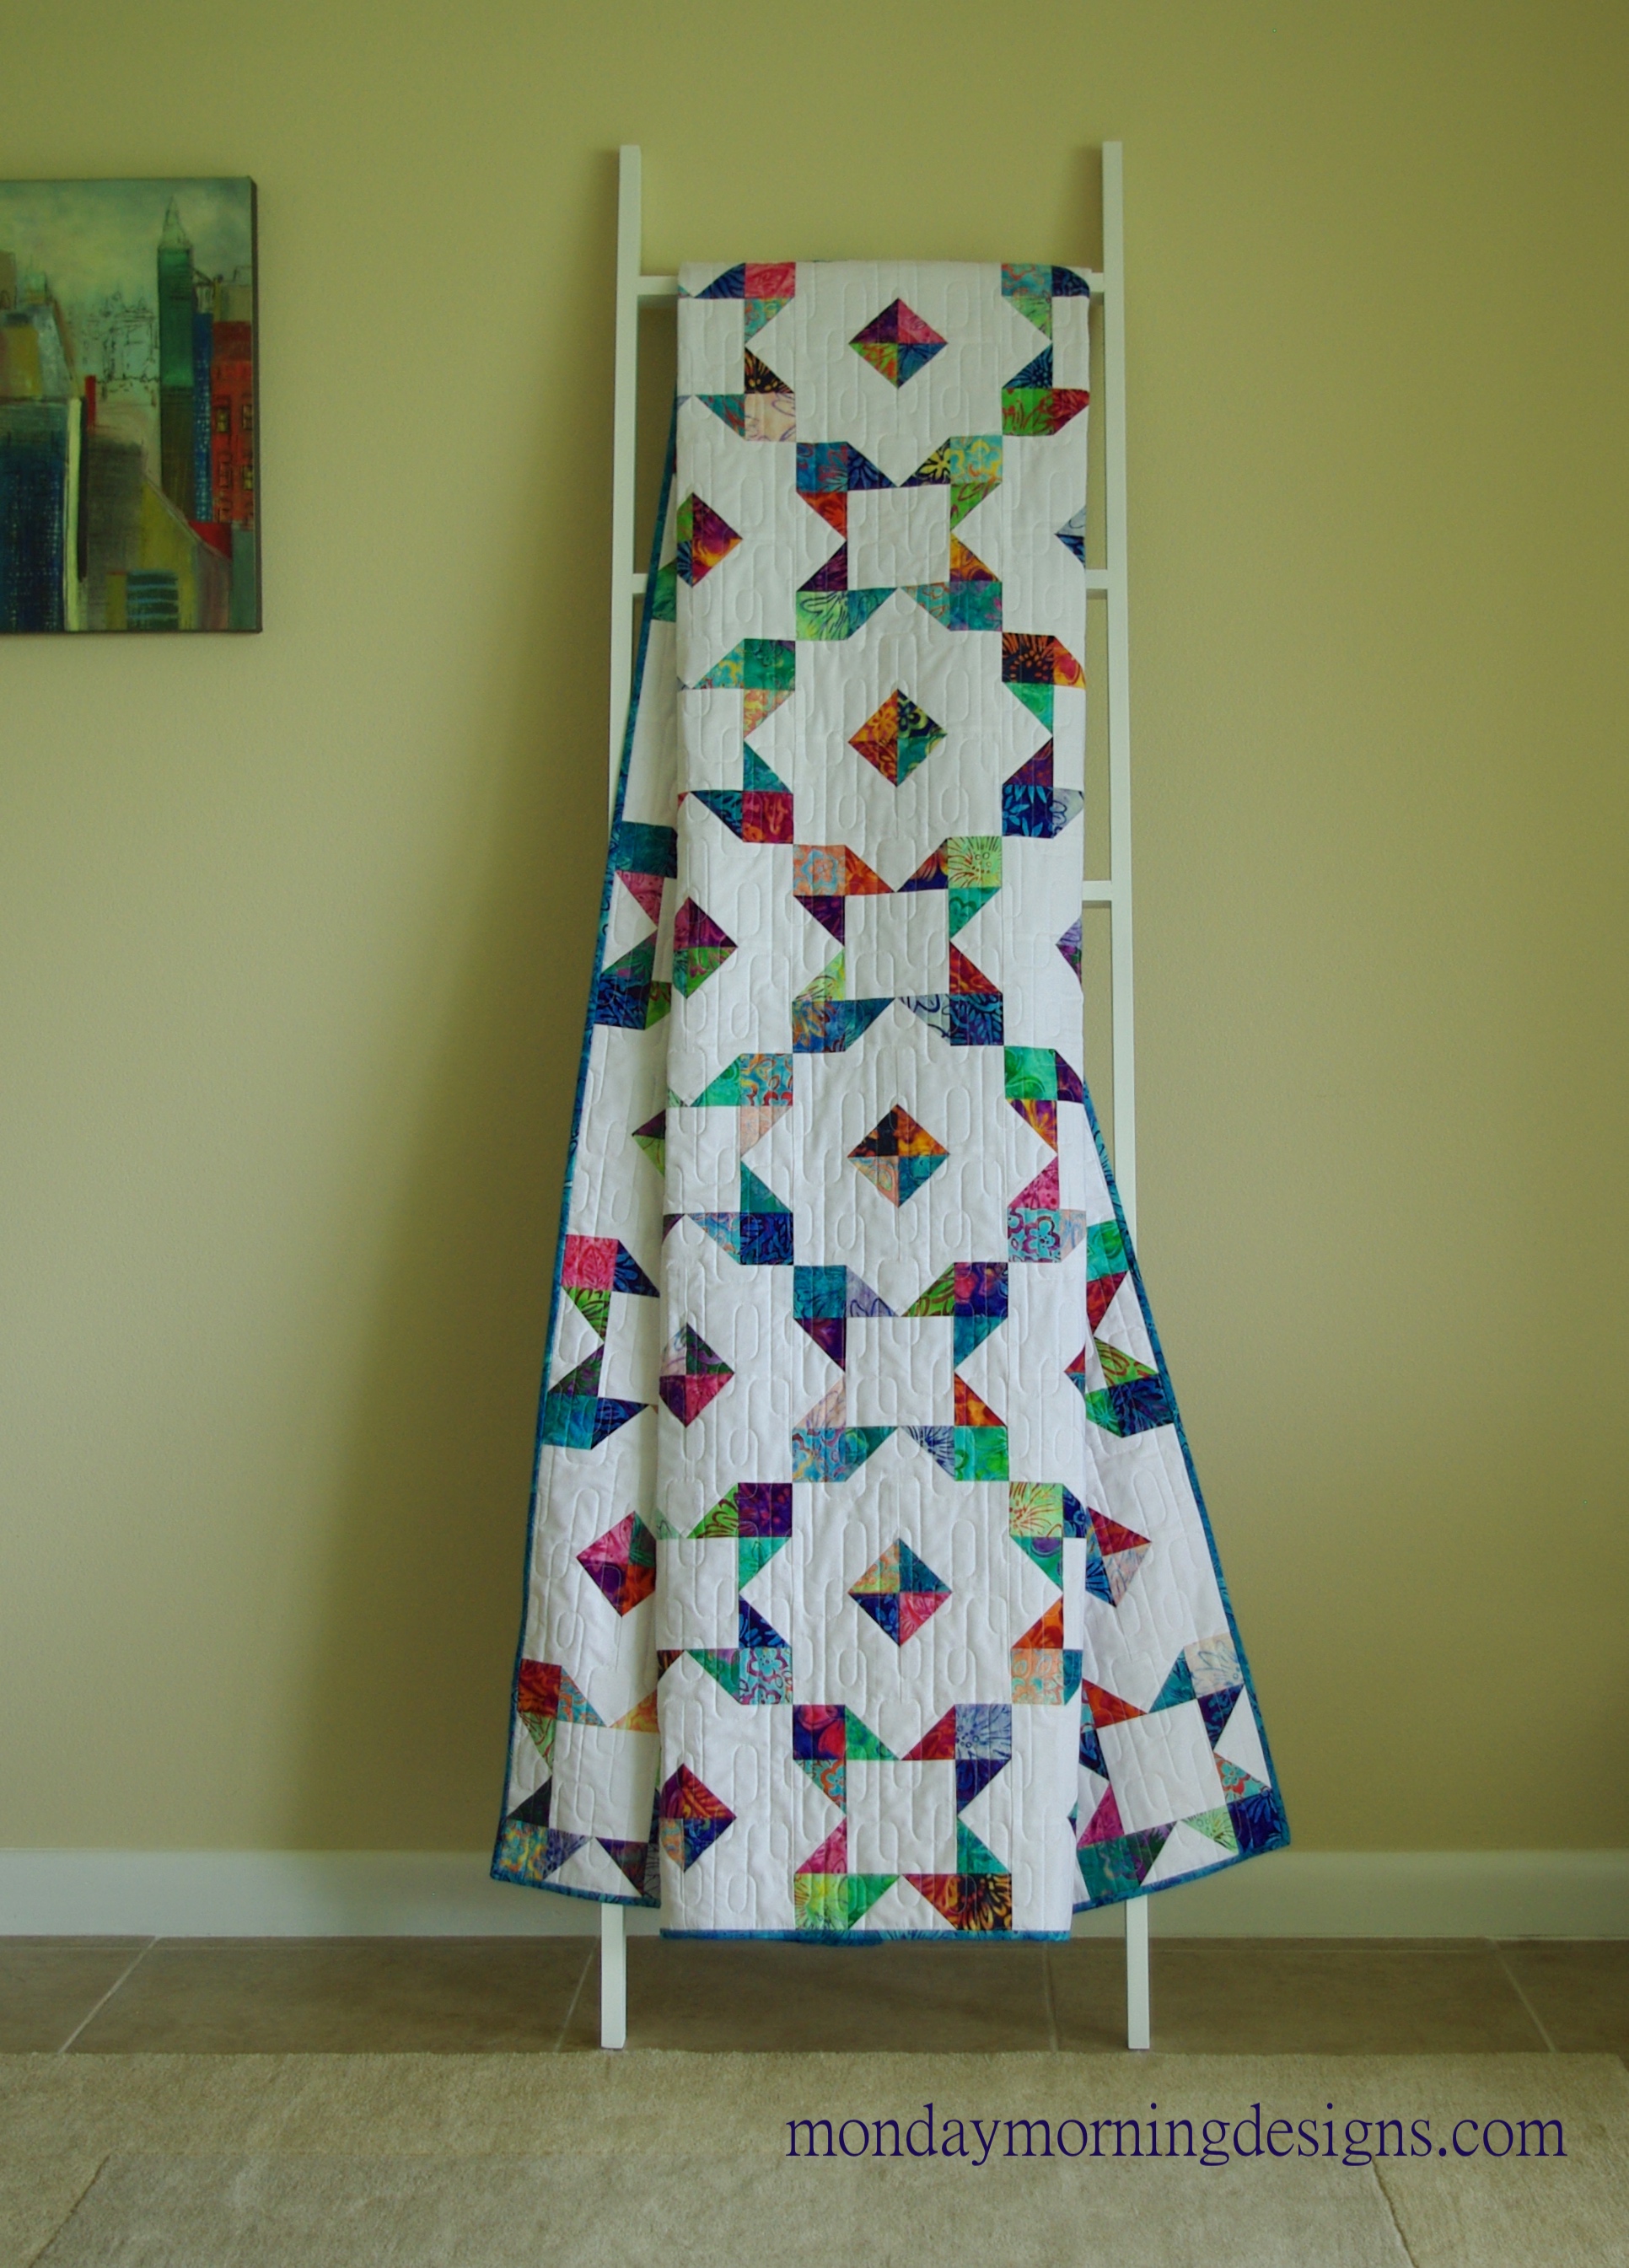
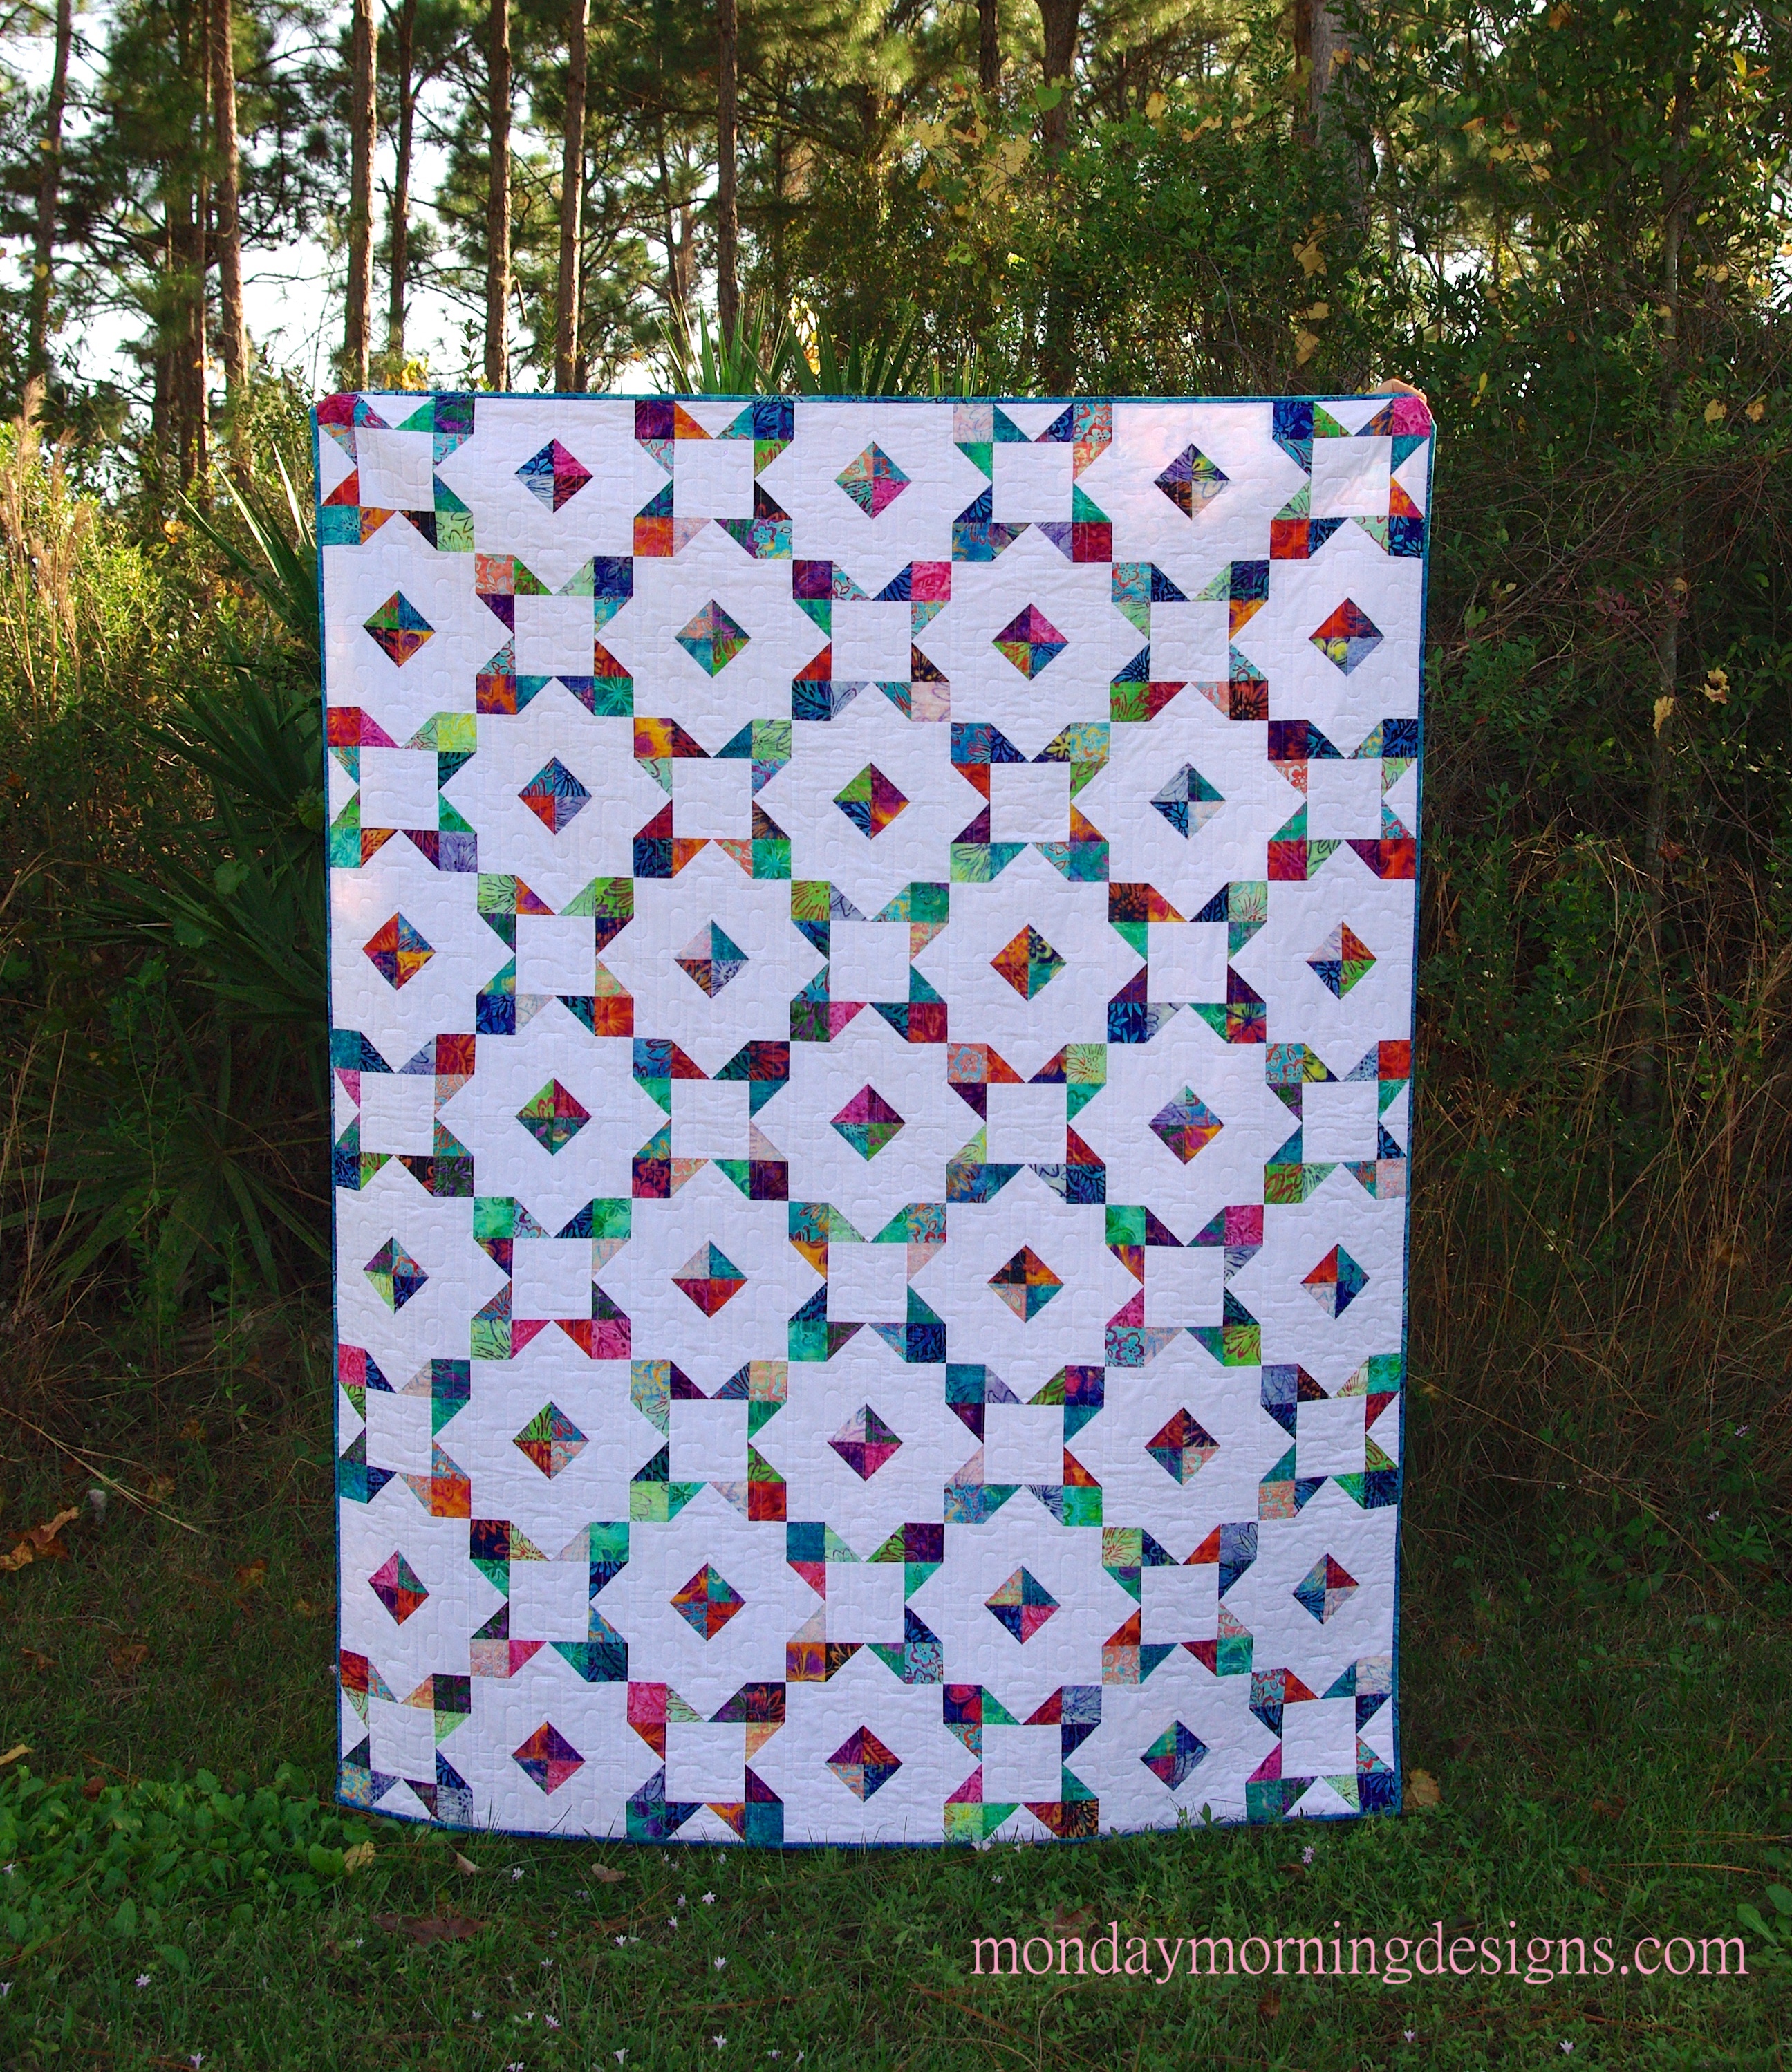
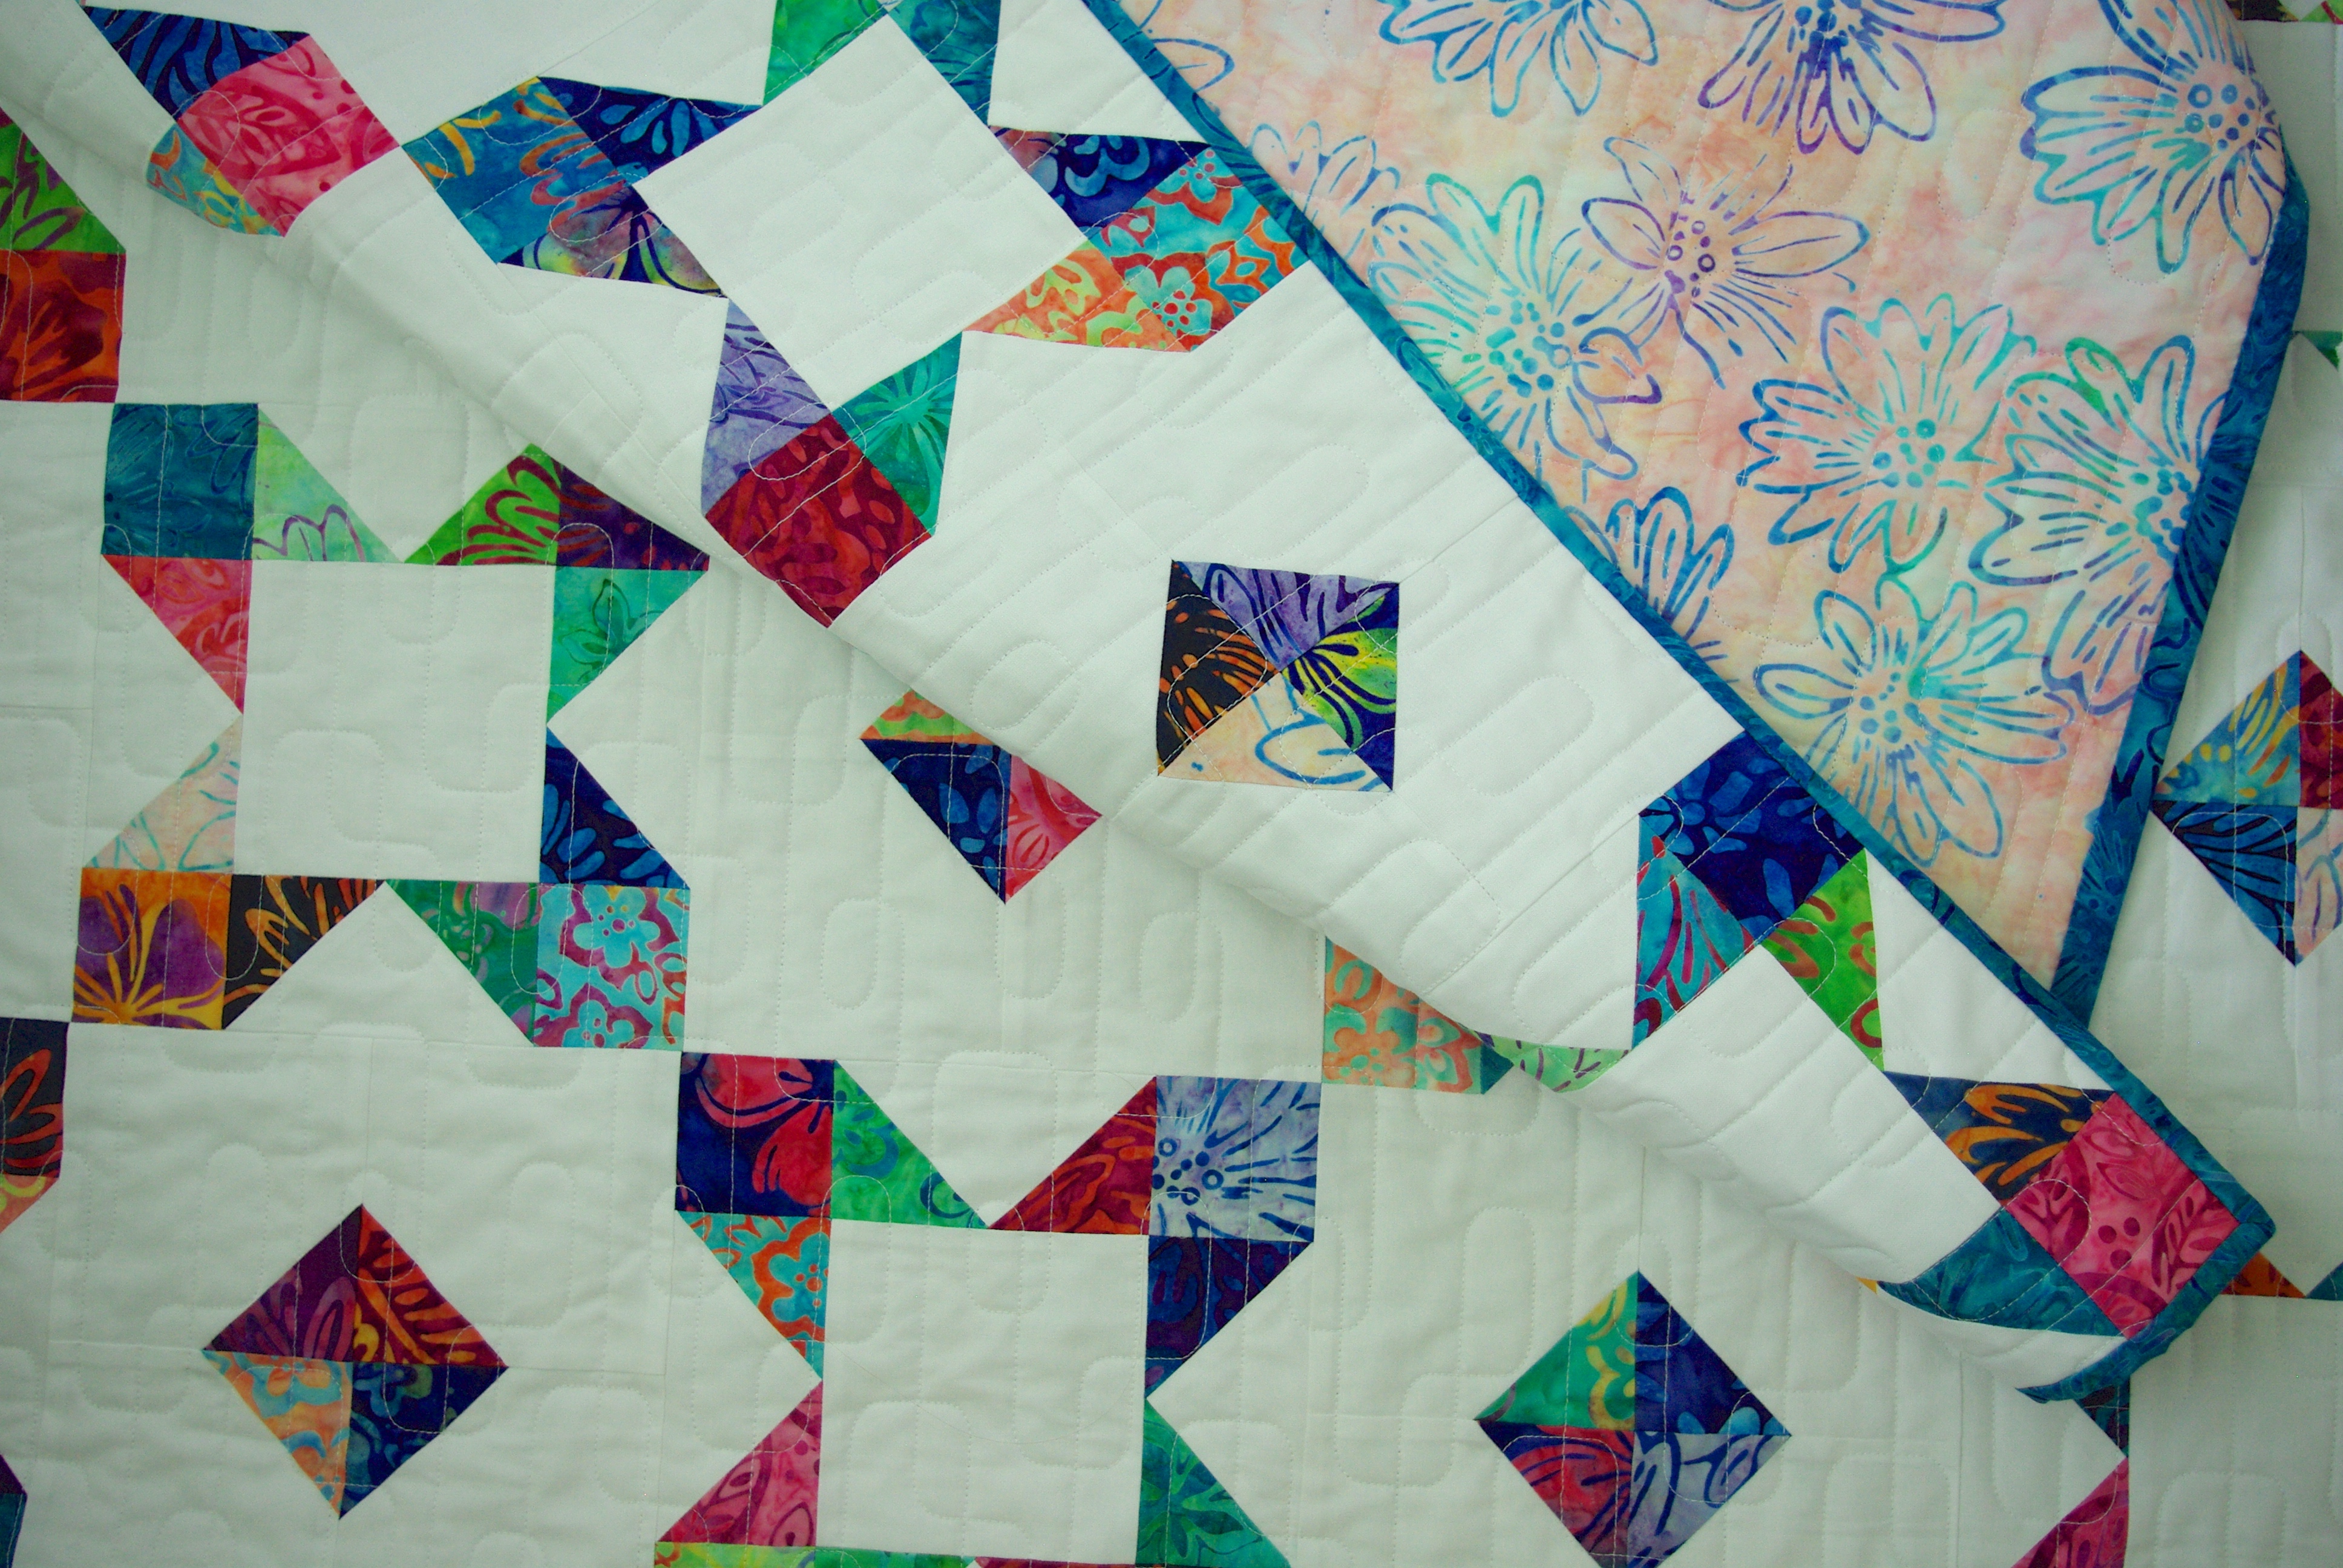
Because I had time restraints, I didn’t take any other photos of the process. The name of my quilt is Diamond Jubilee, it’s a throw size that finishes at 56″ x 72″. Fabric requirements include one roll up and background yardage (I used Kona Cotton White). I chose a medium blue batik from the collection for the binding and a light pink for the backing. My longarmer quilted it with a rounded squares motif. 

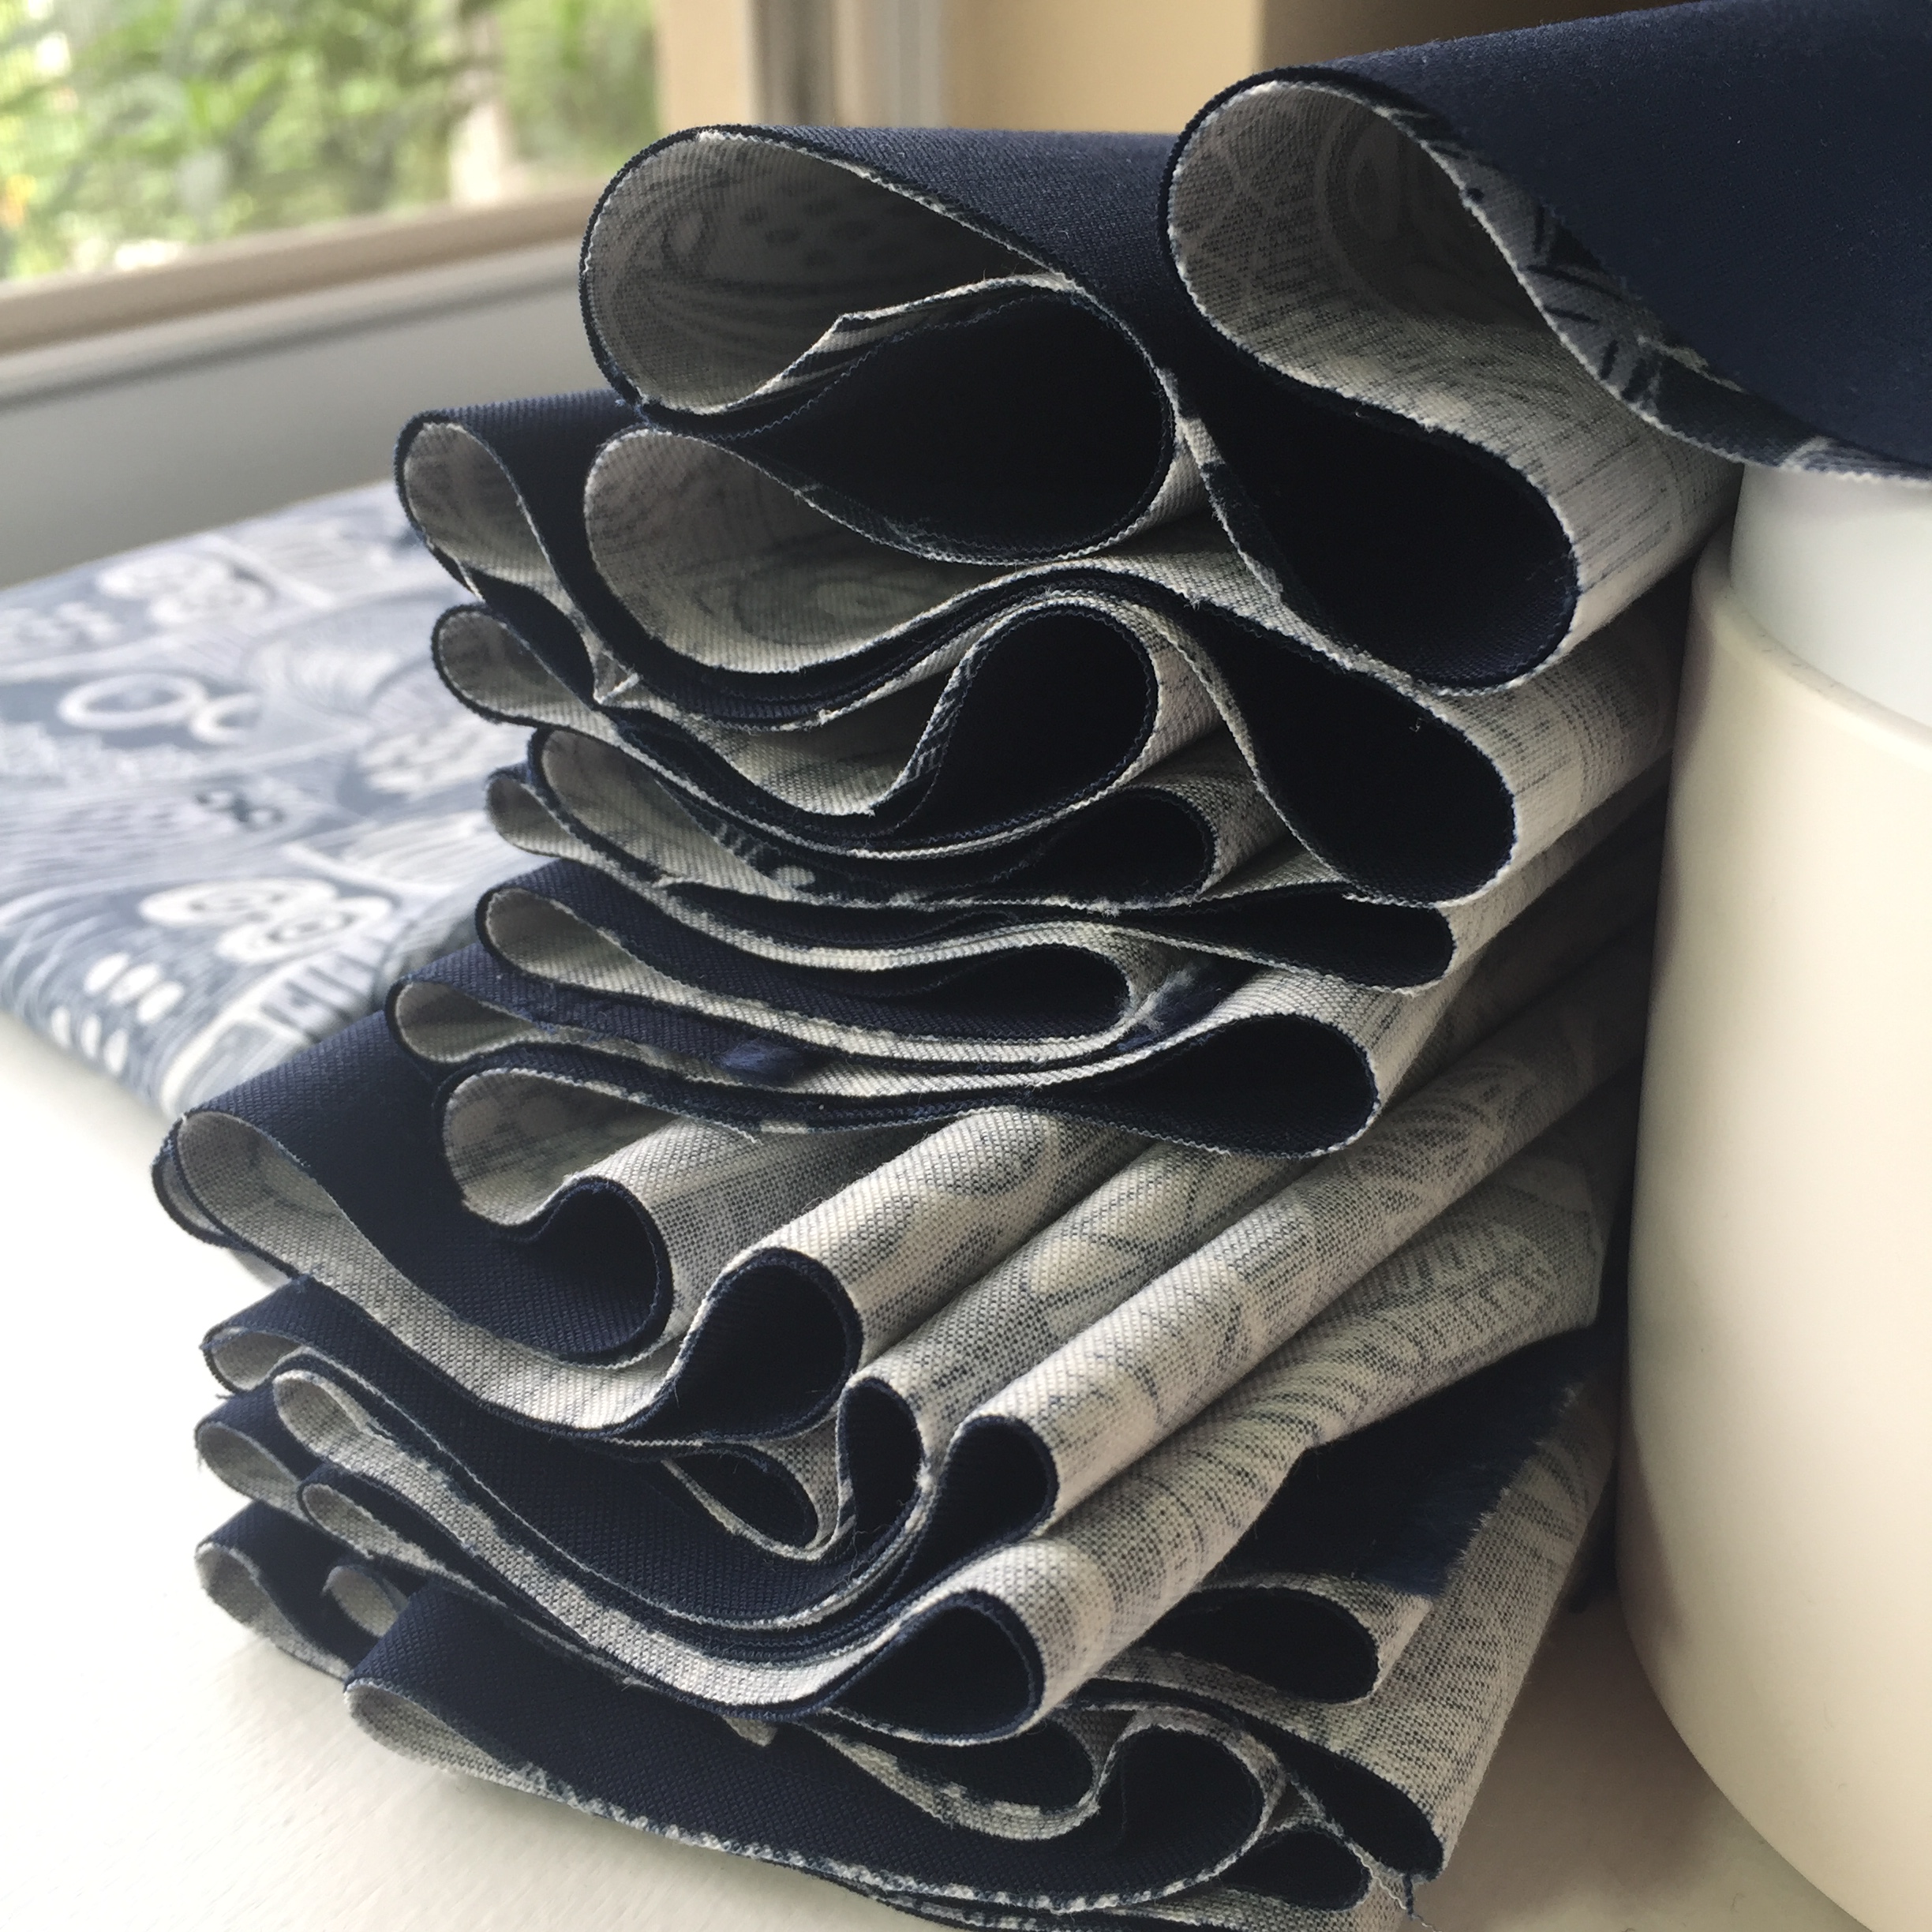
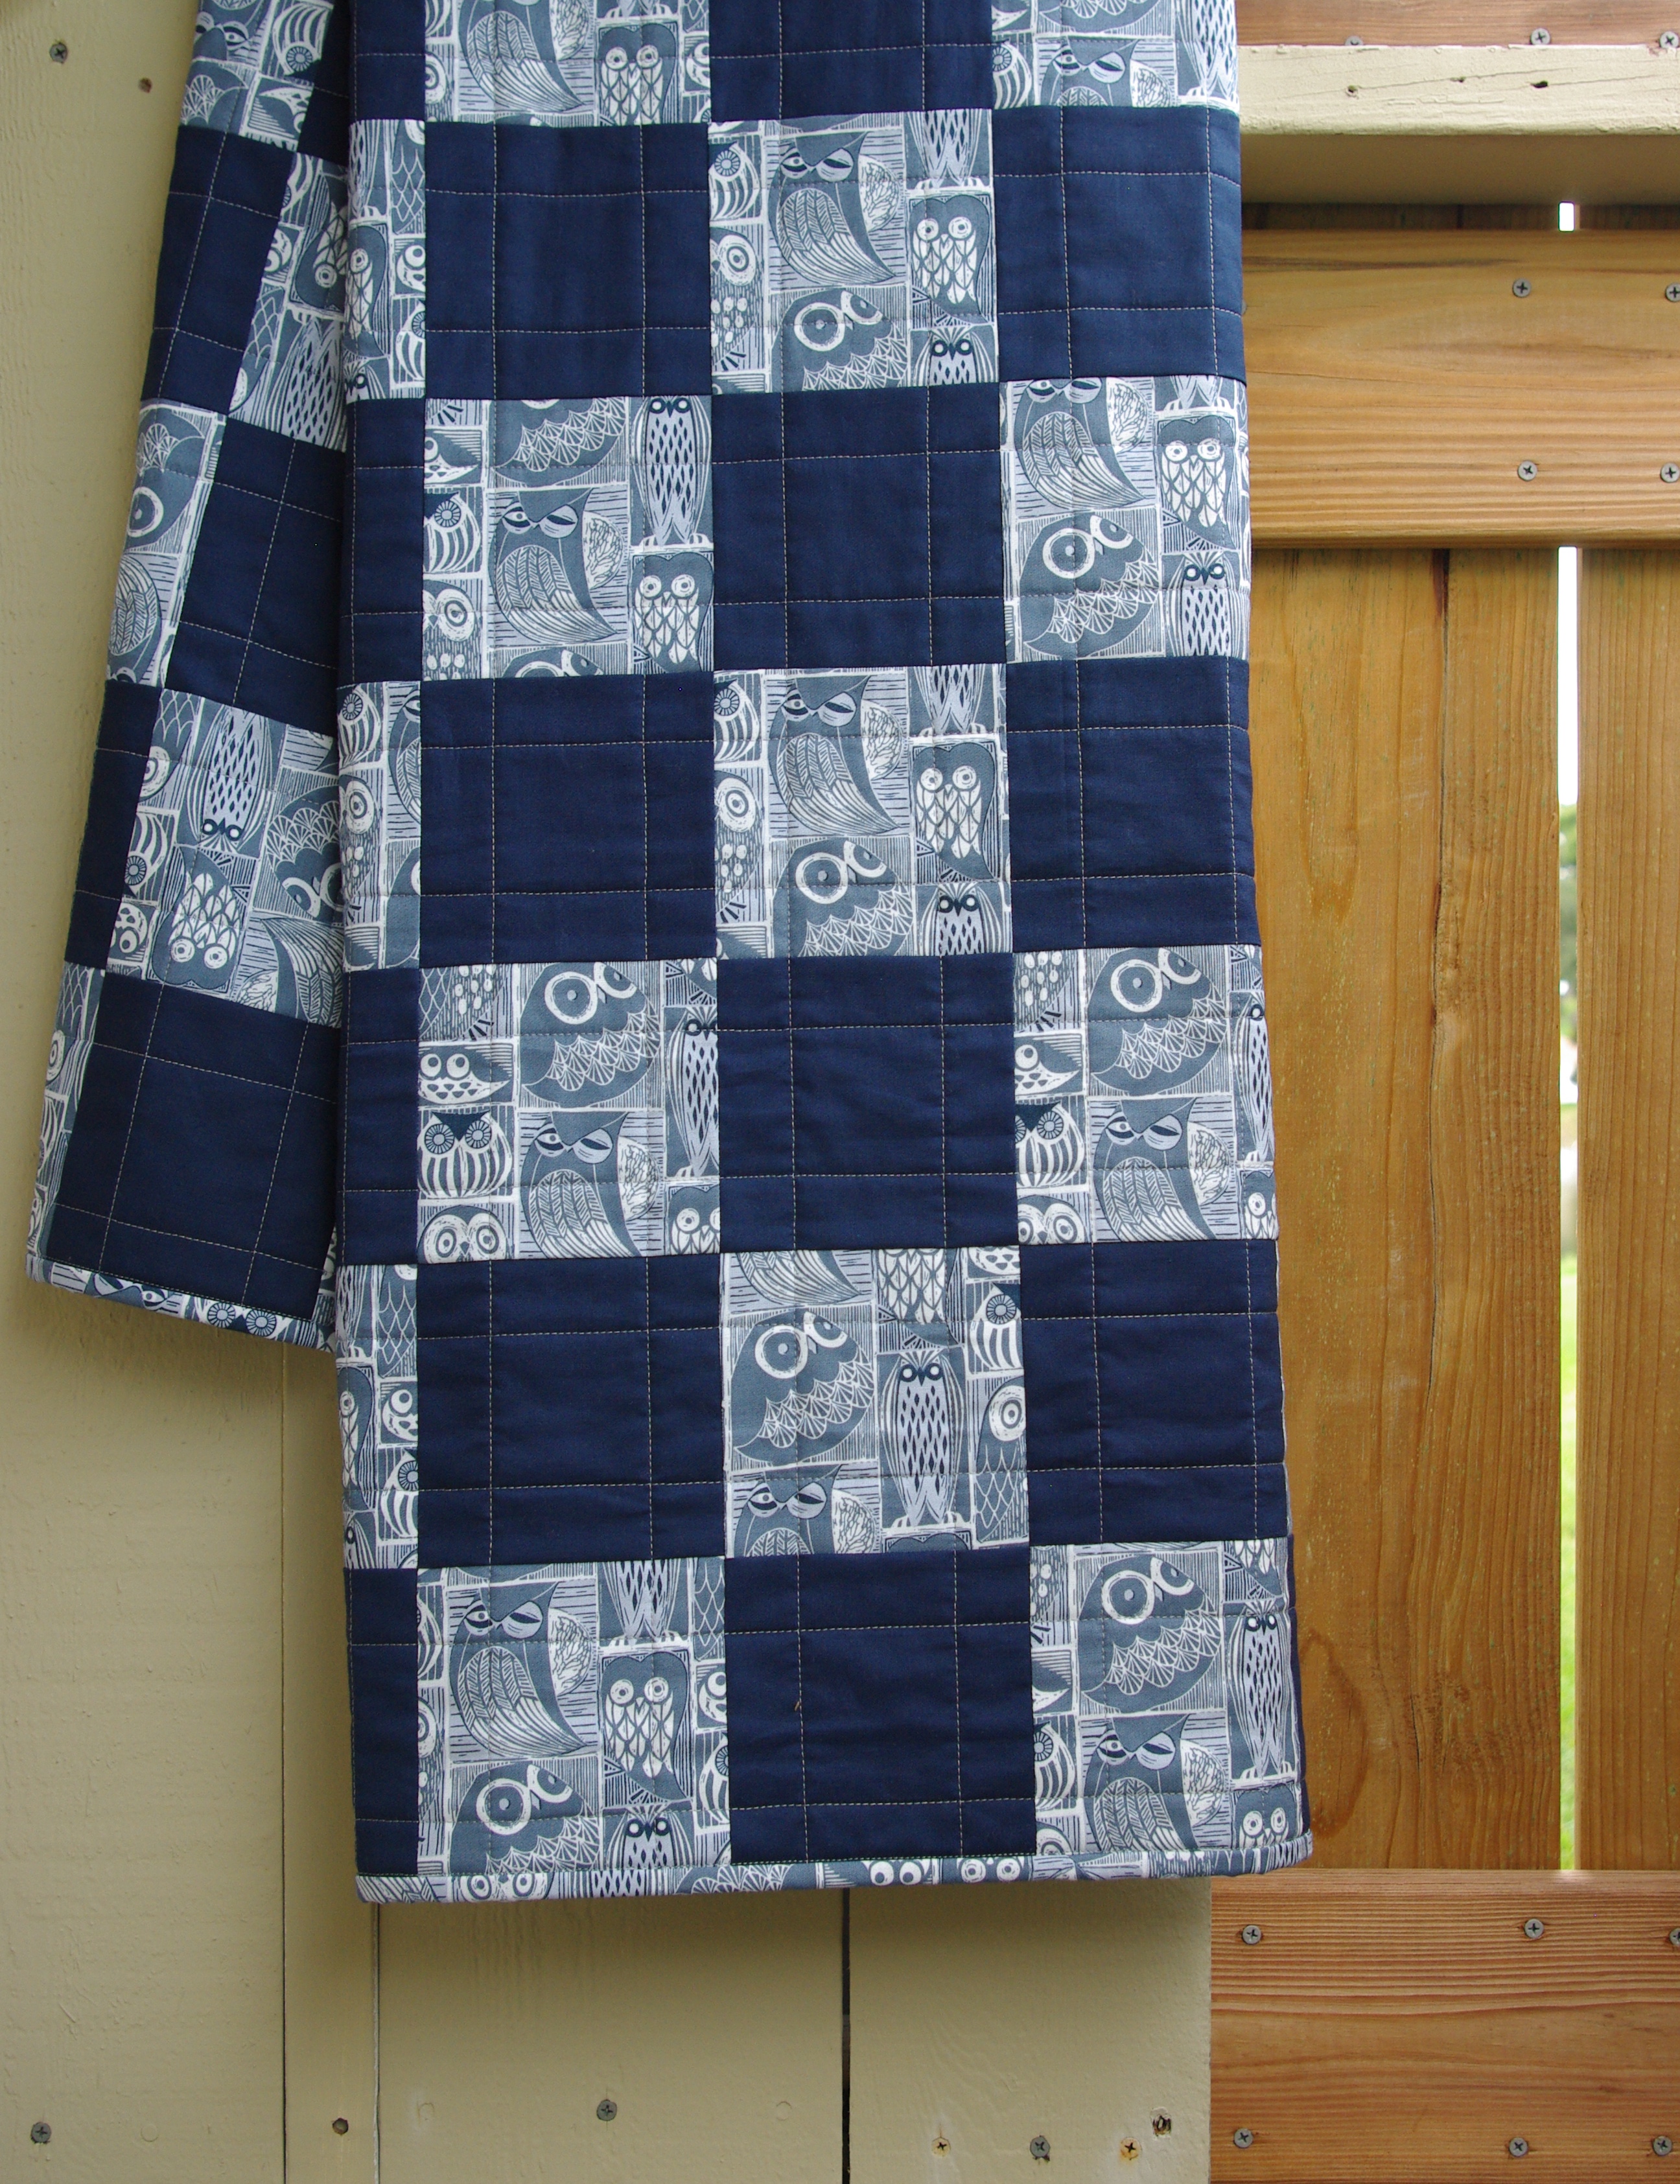
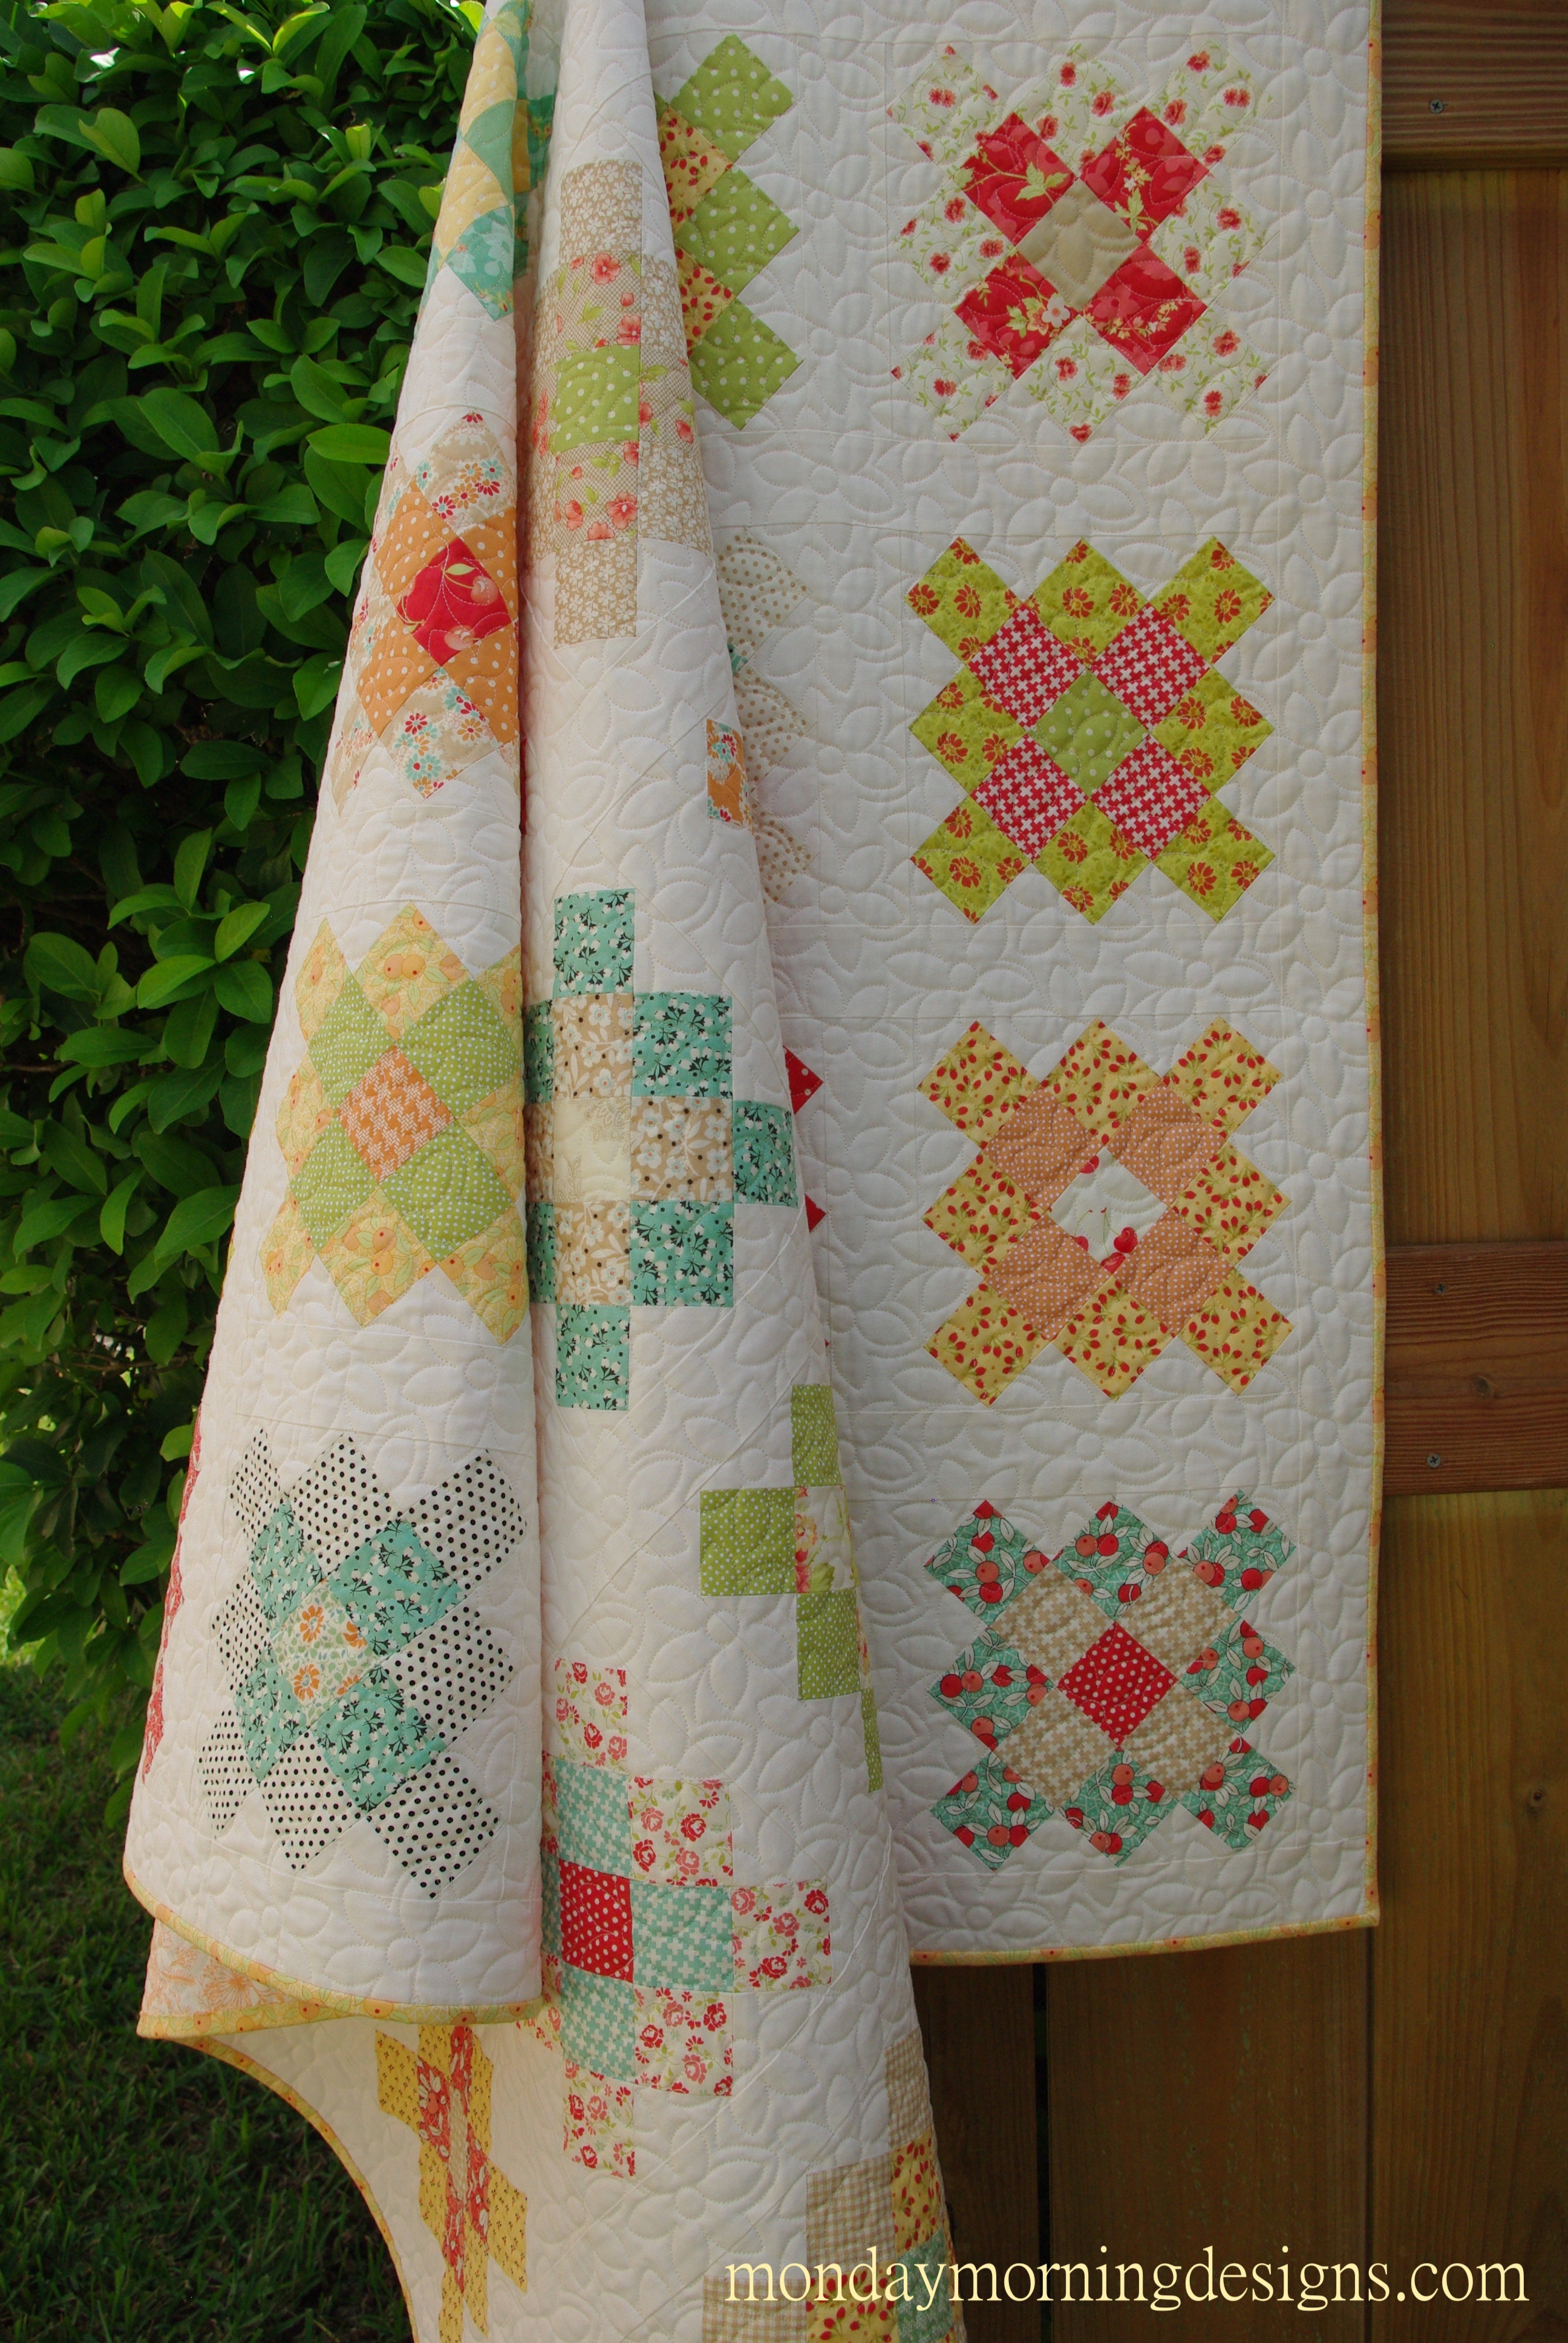
Here it is on my quilt ladder but I think this pattern is best showcased if the quilt is opened all the way.

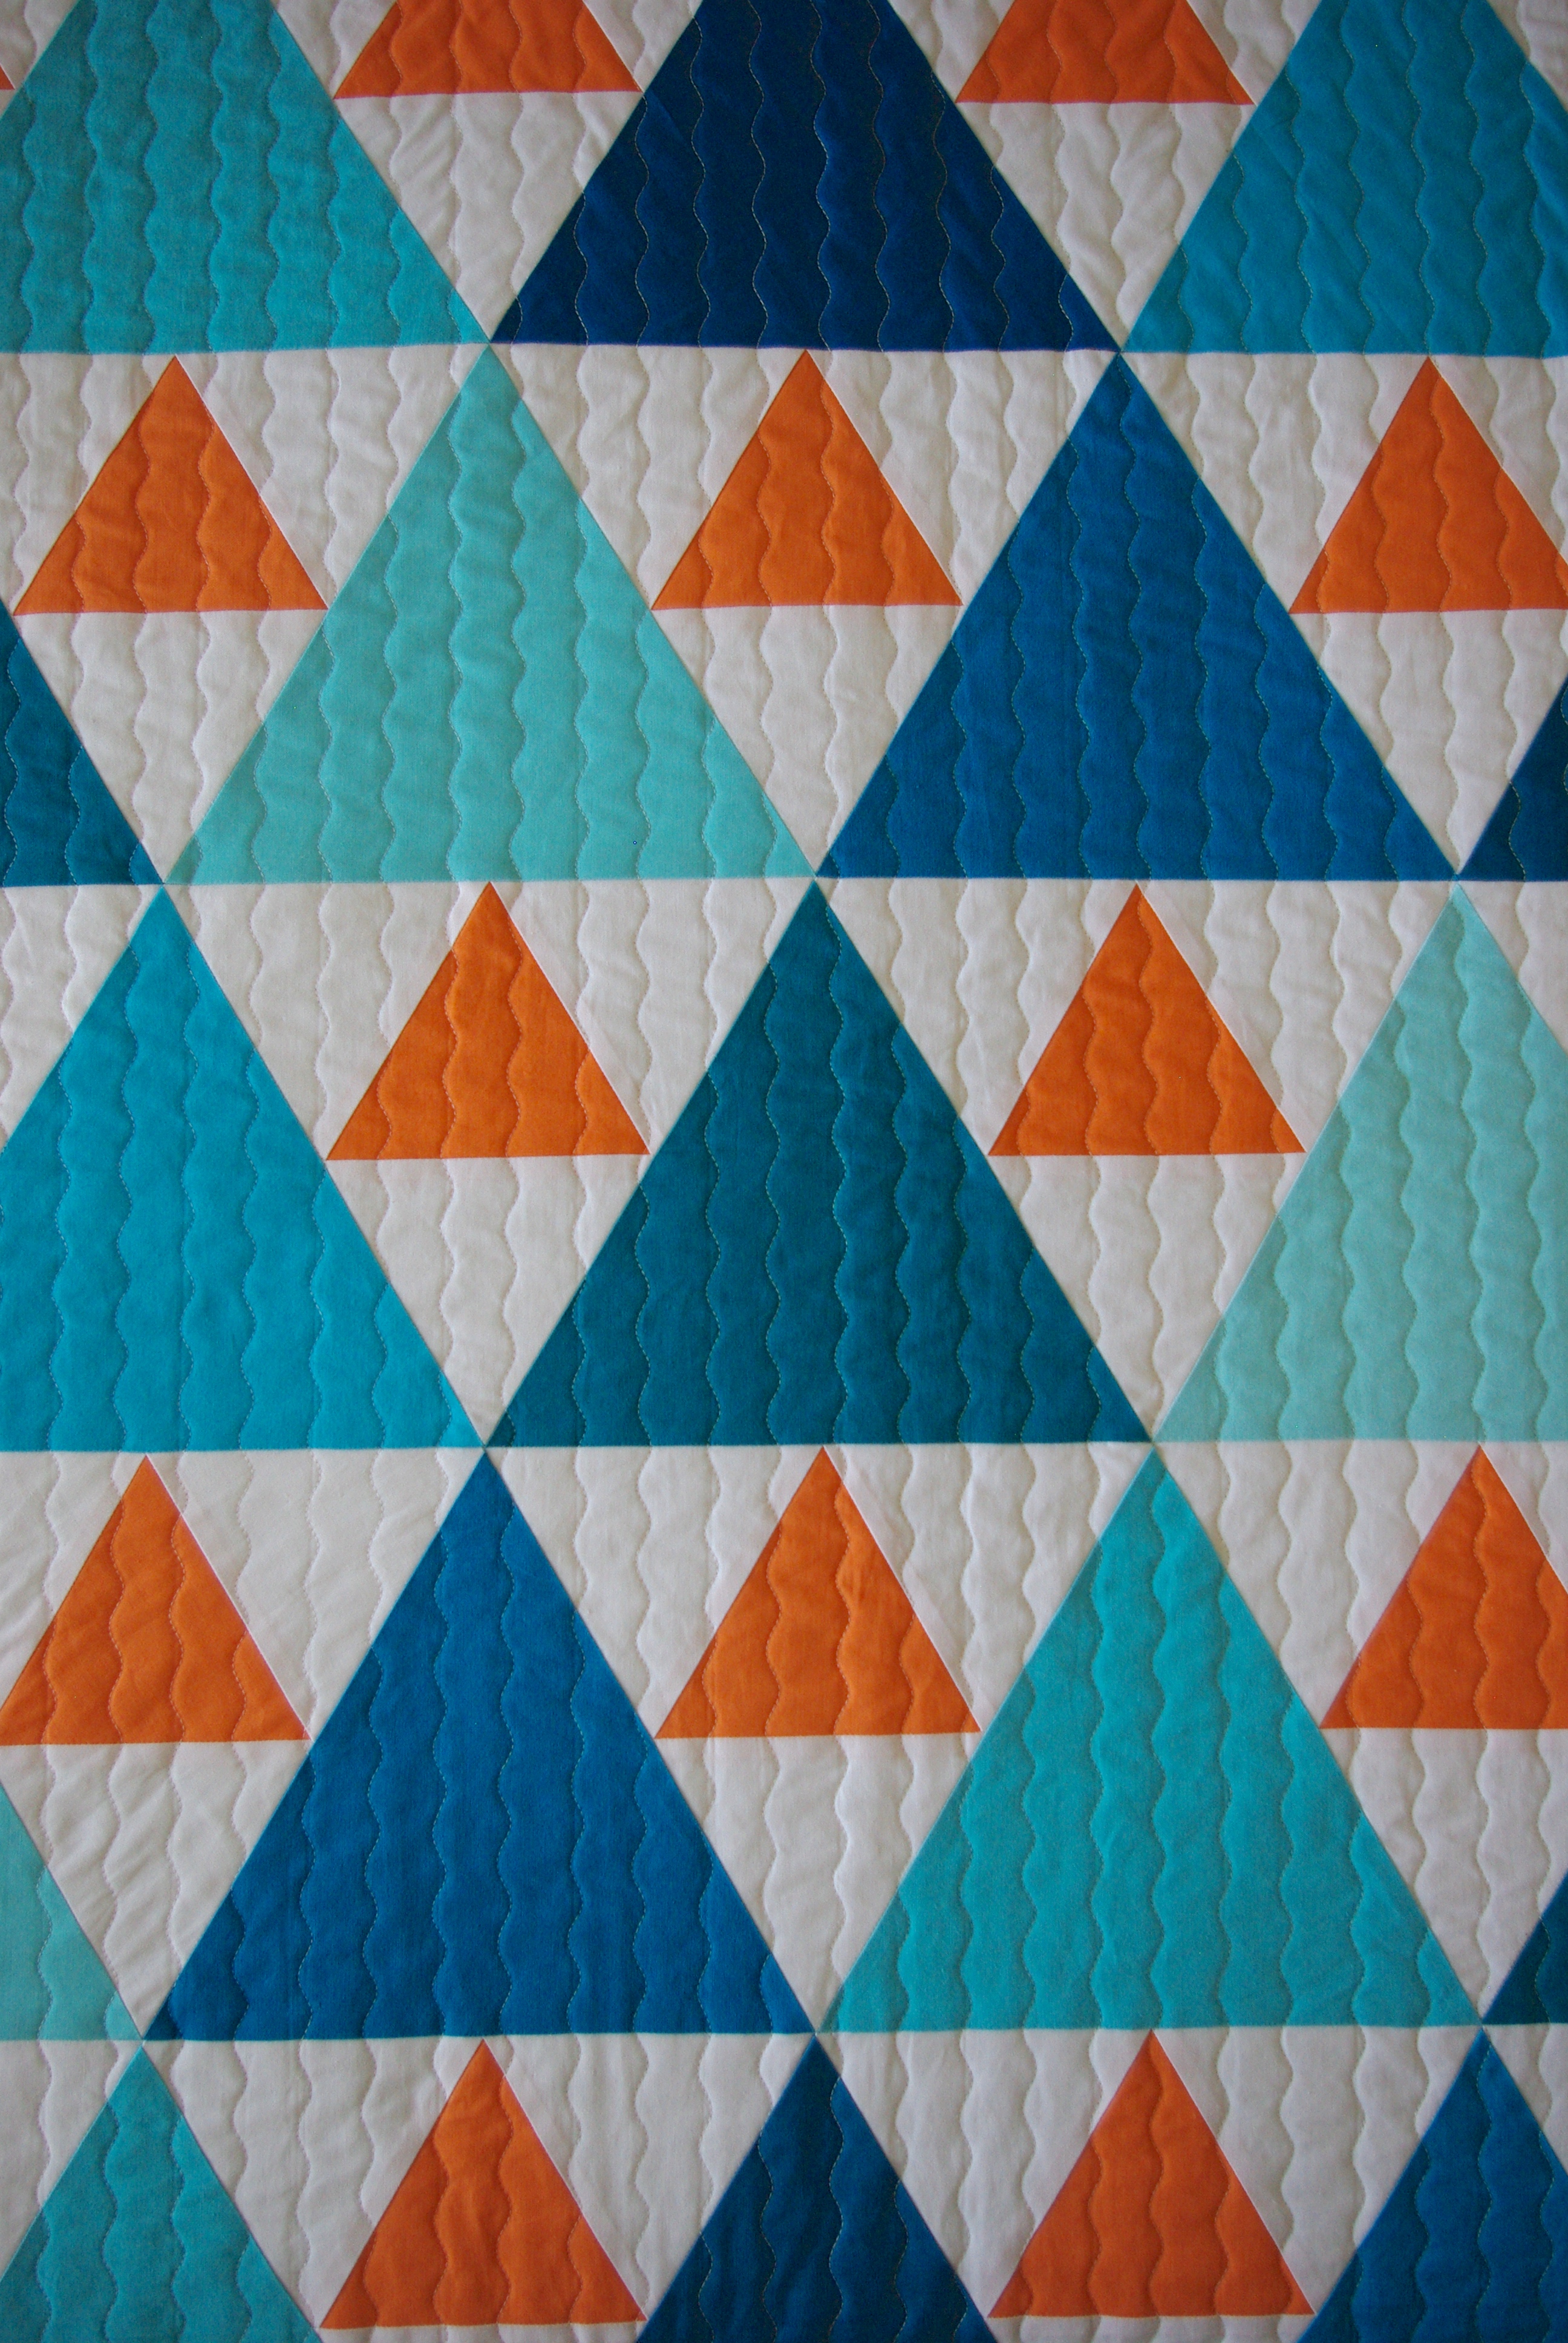
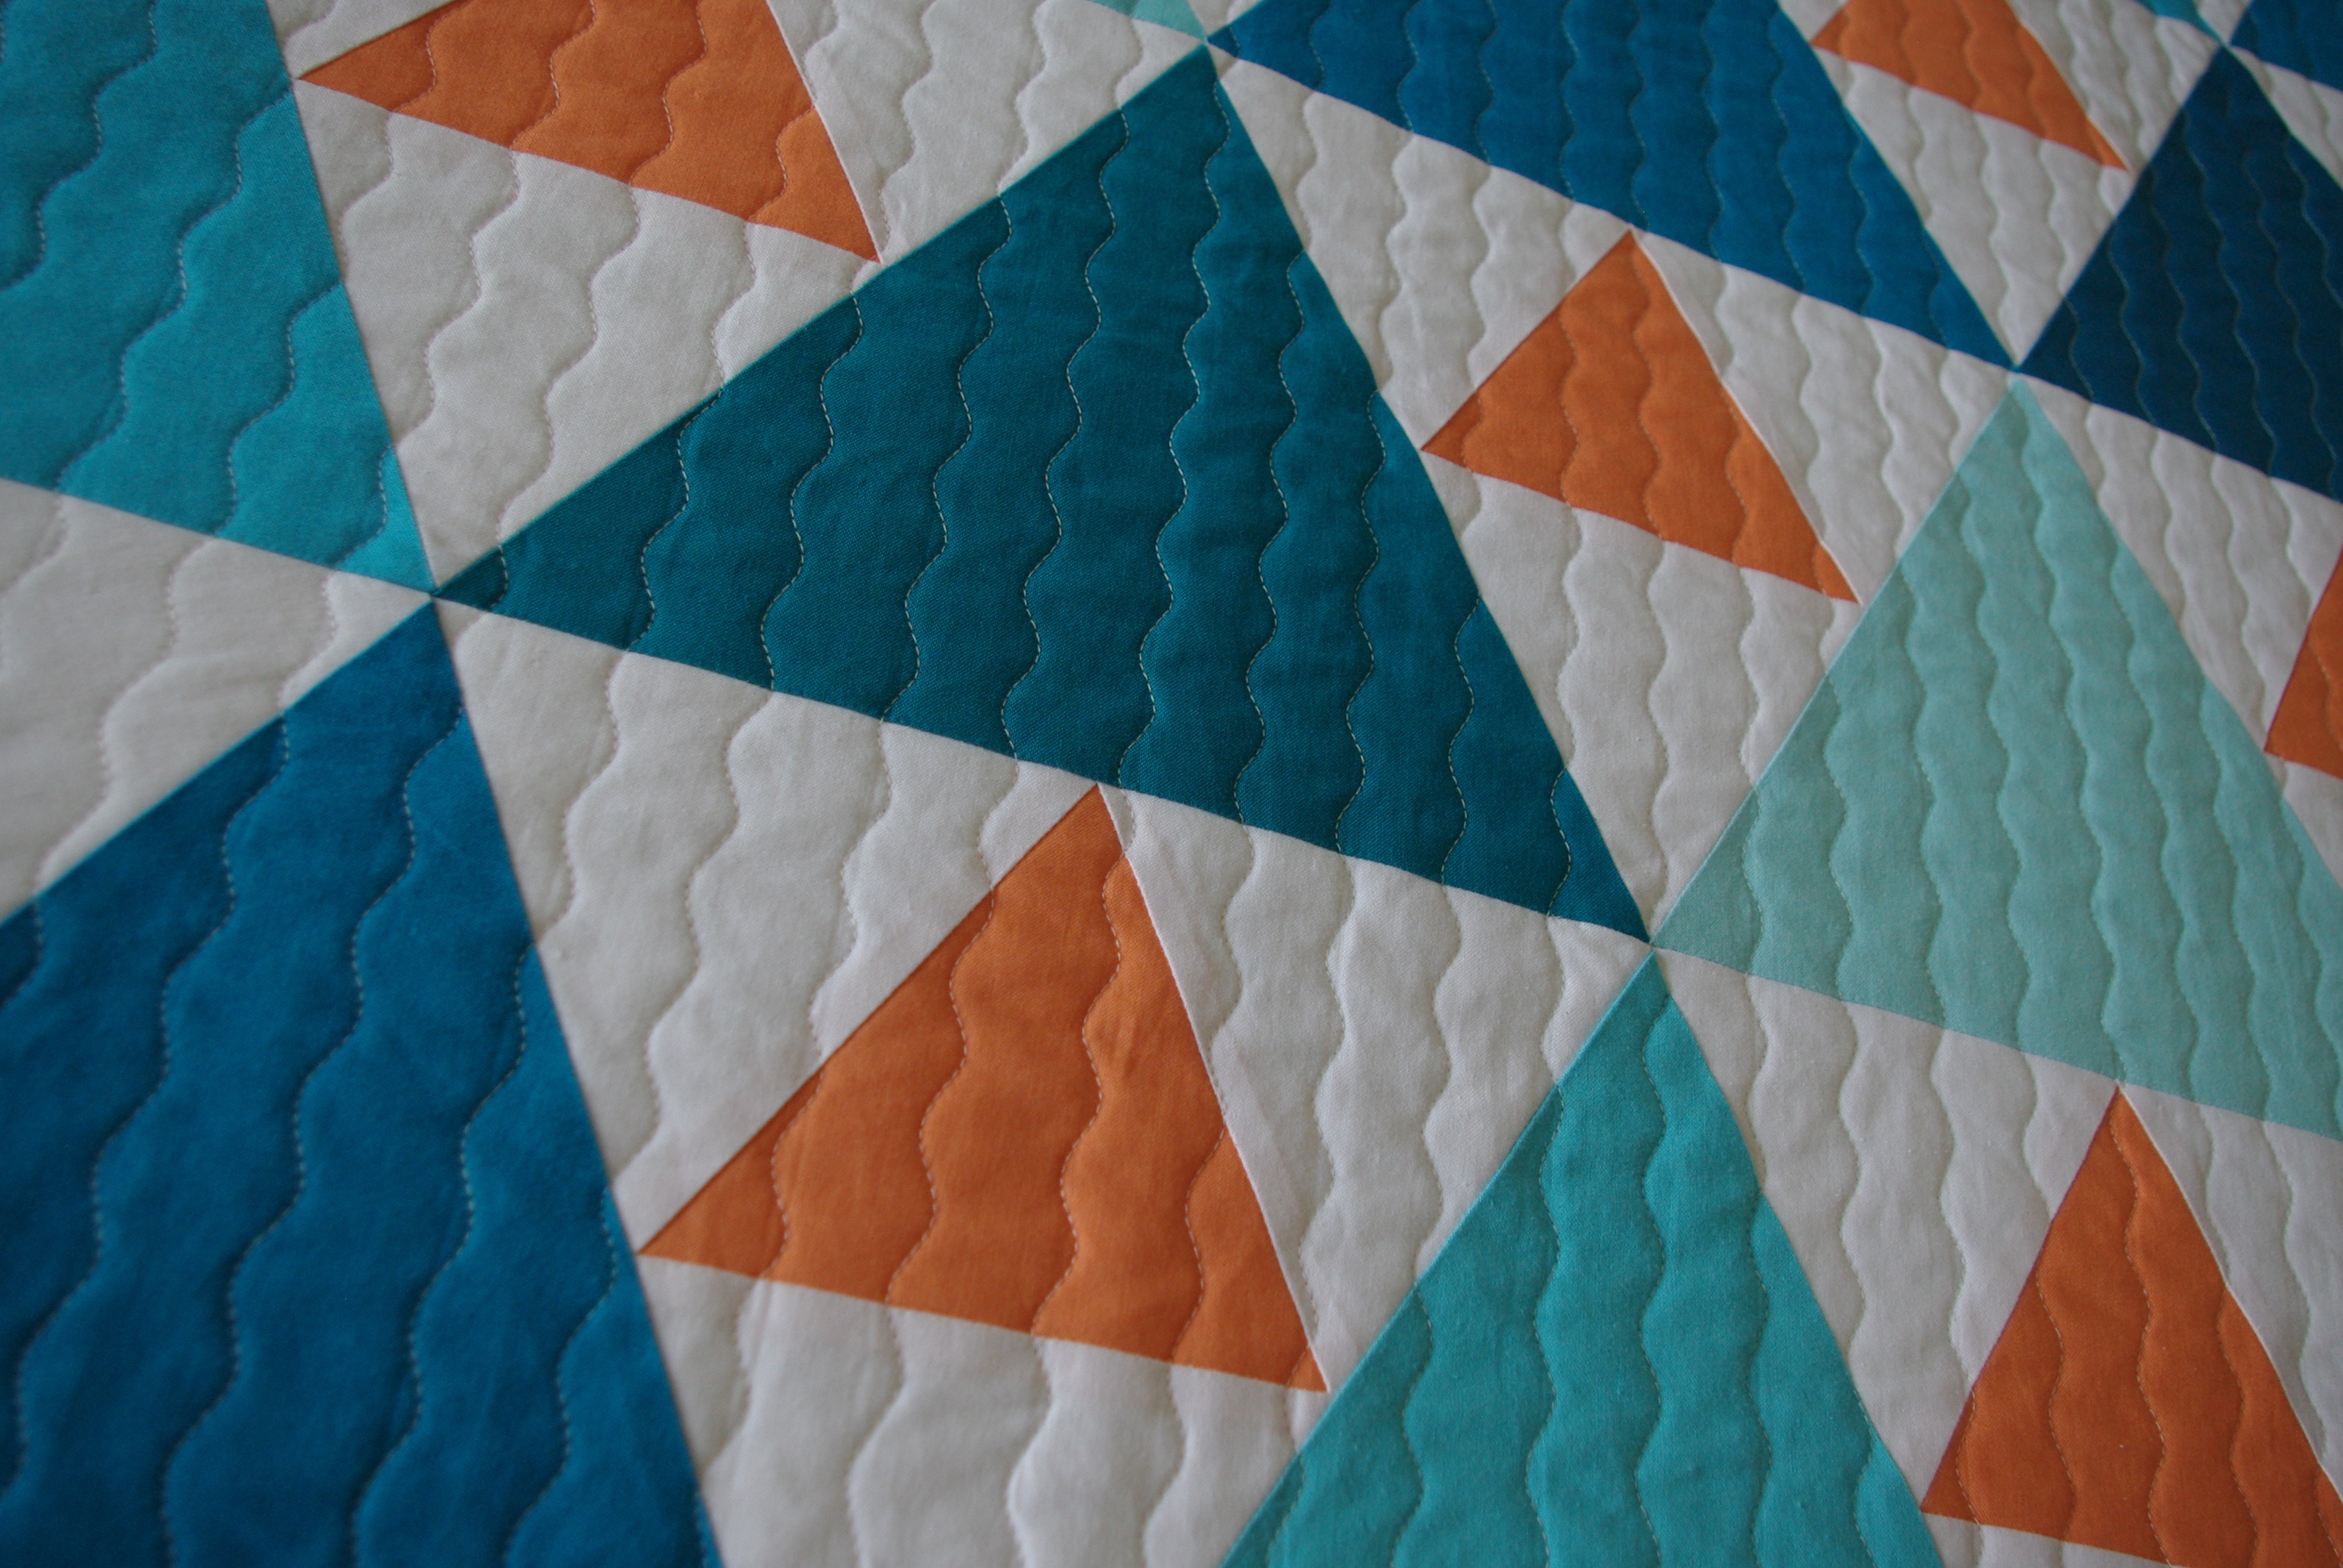
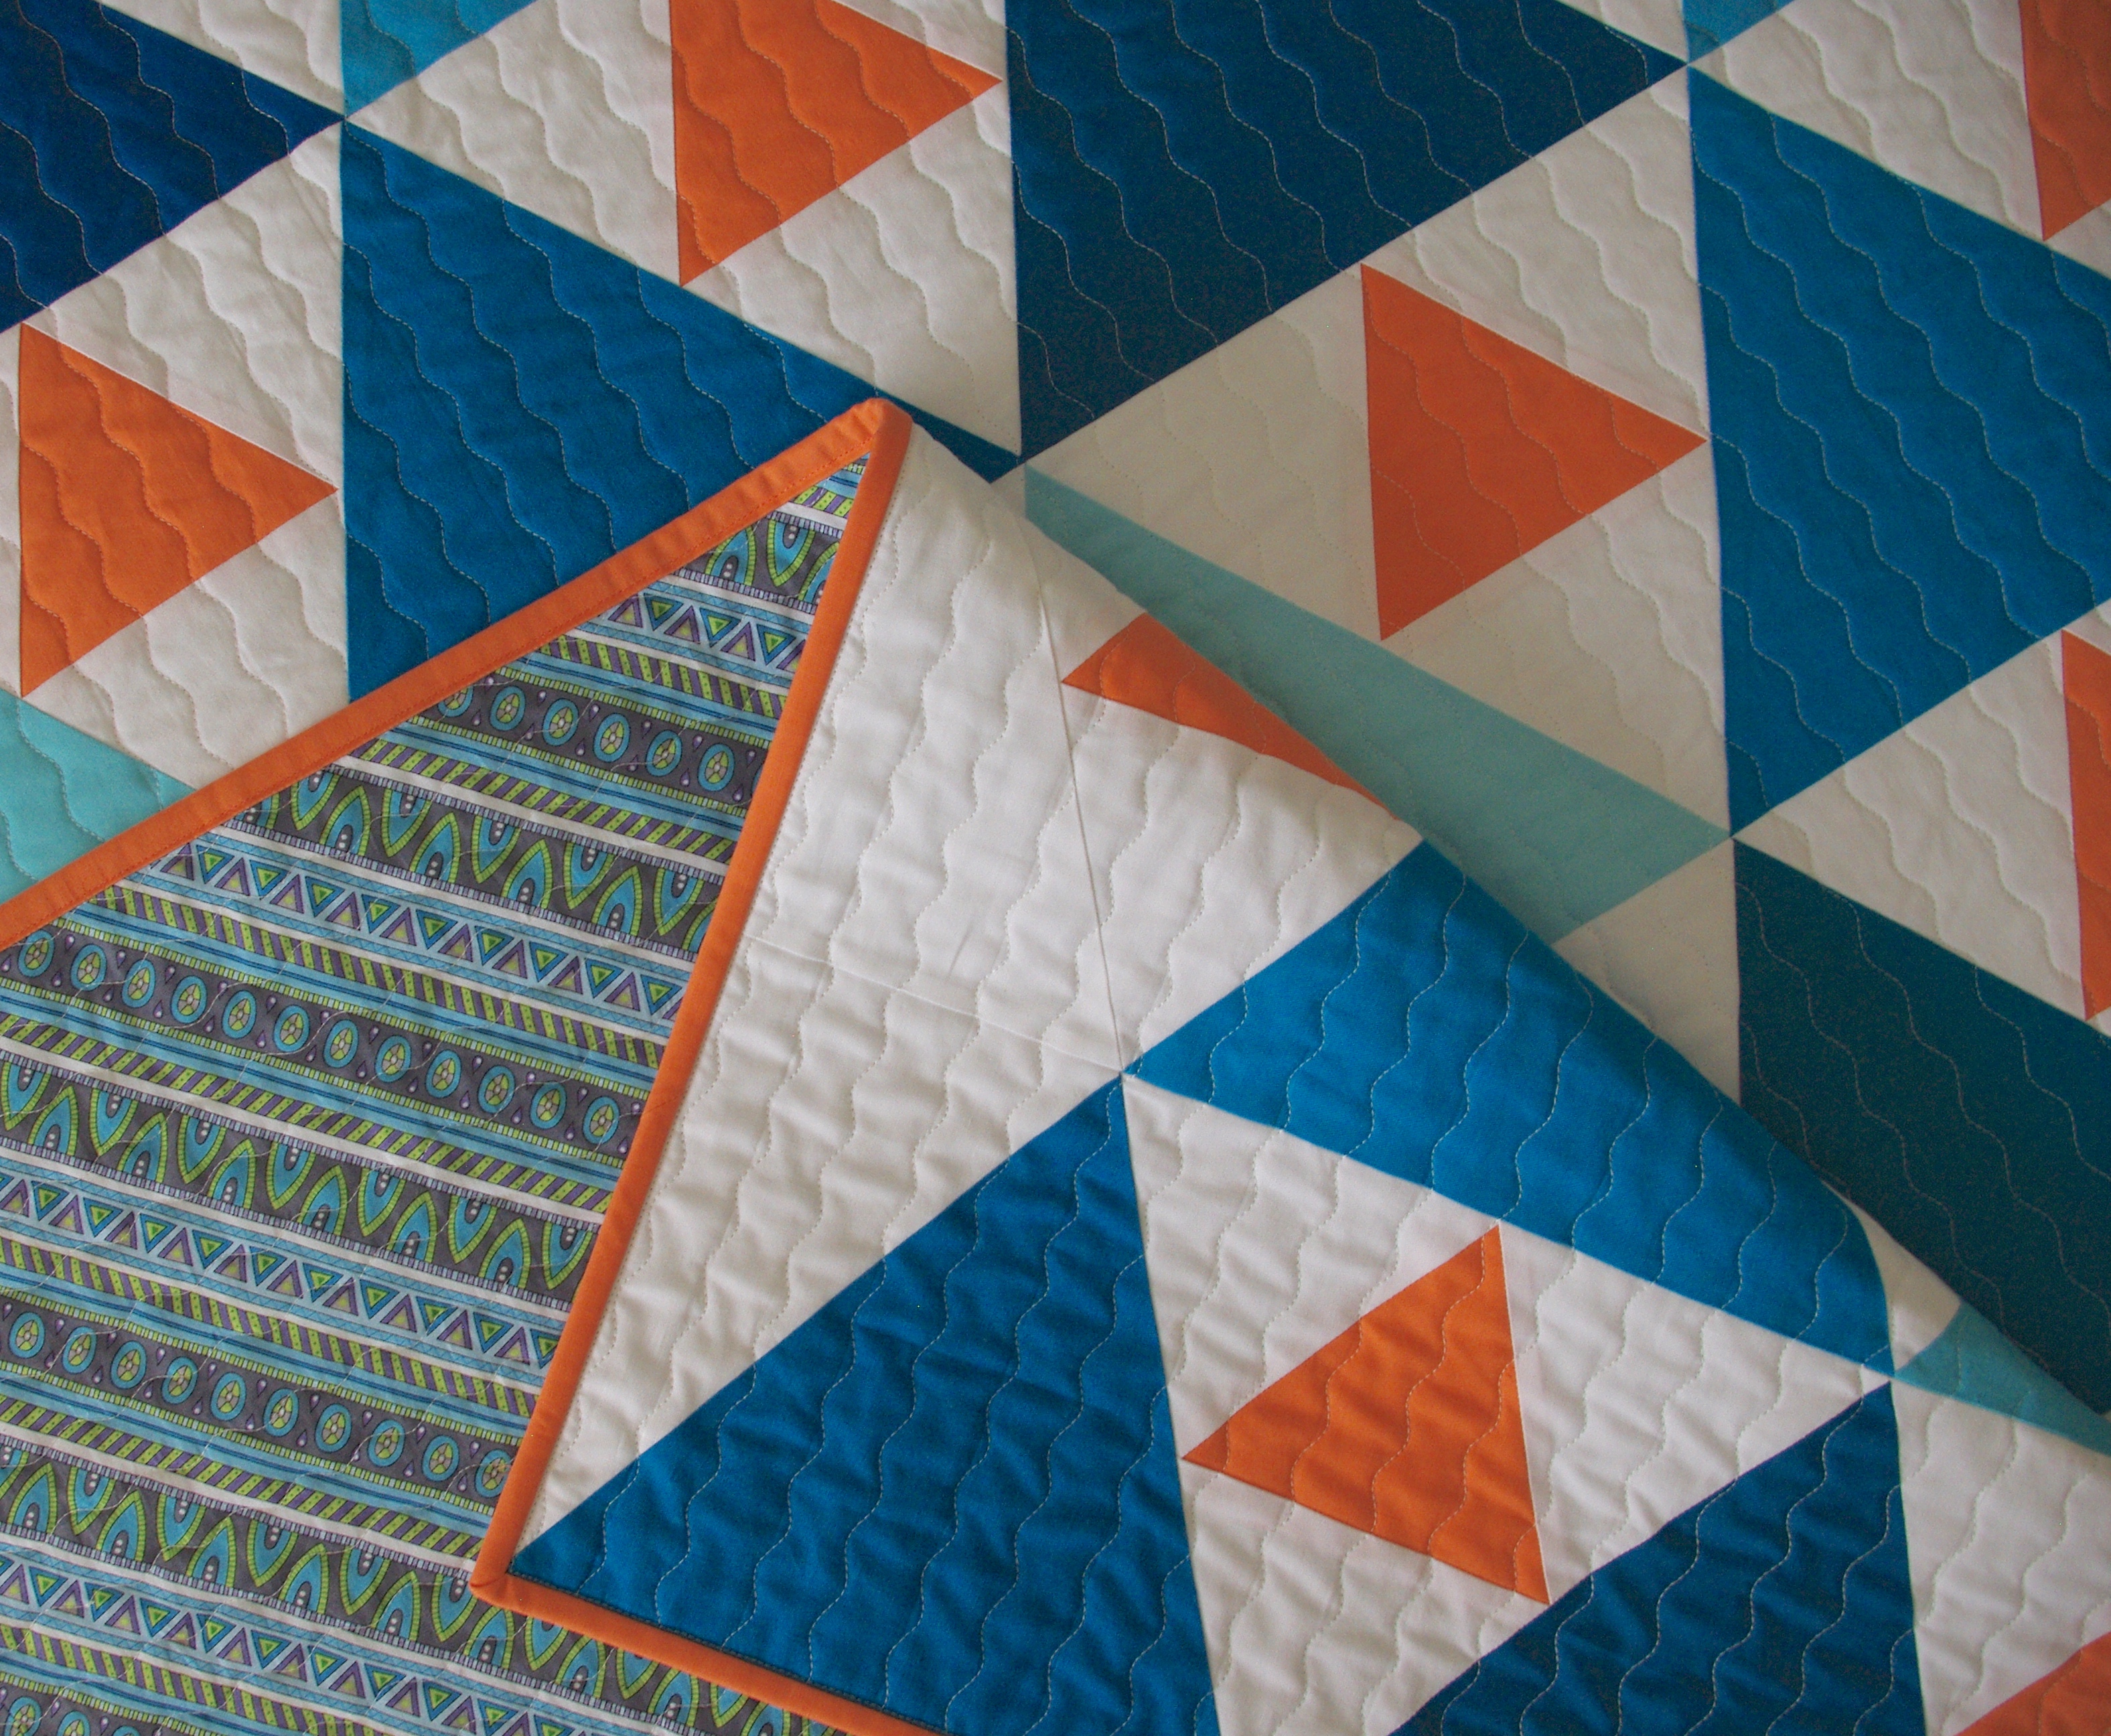
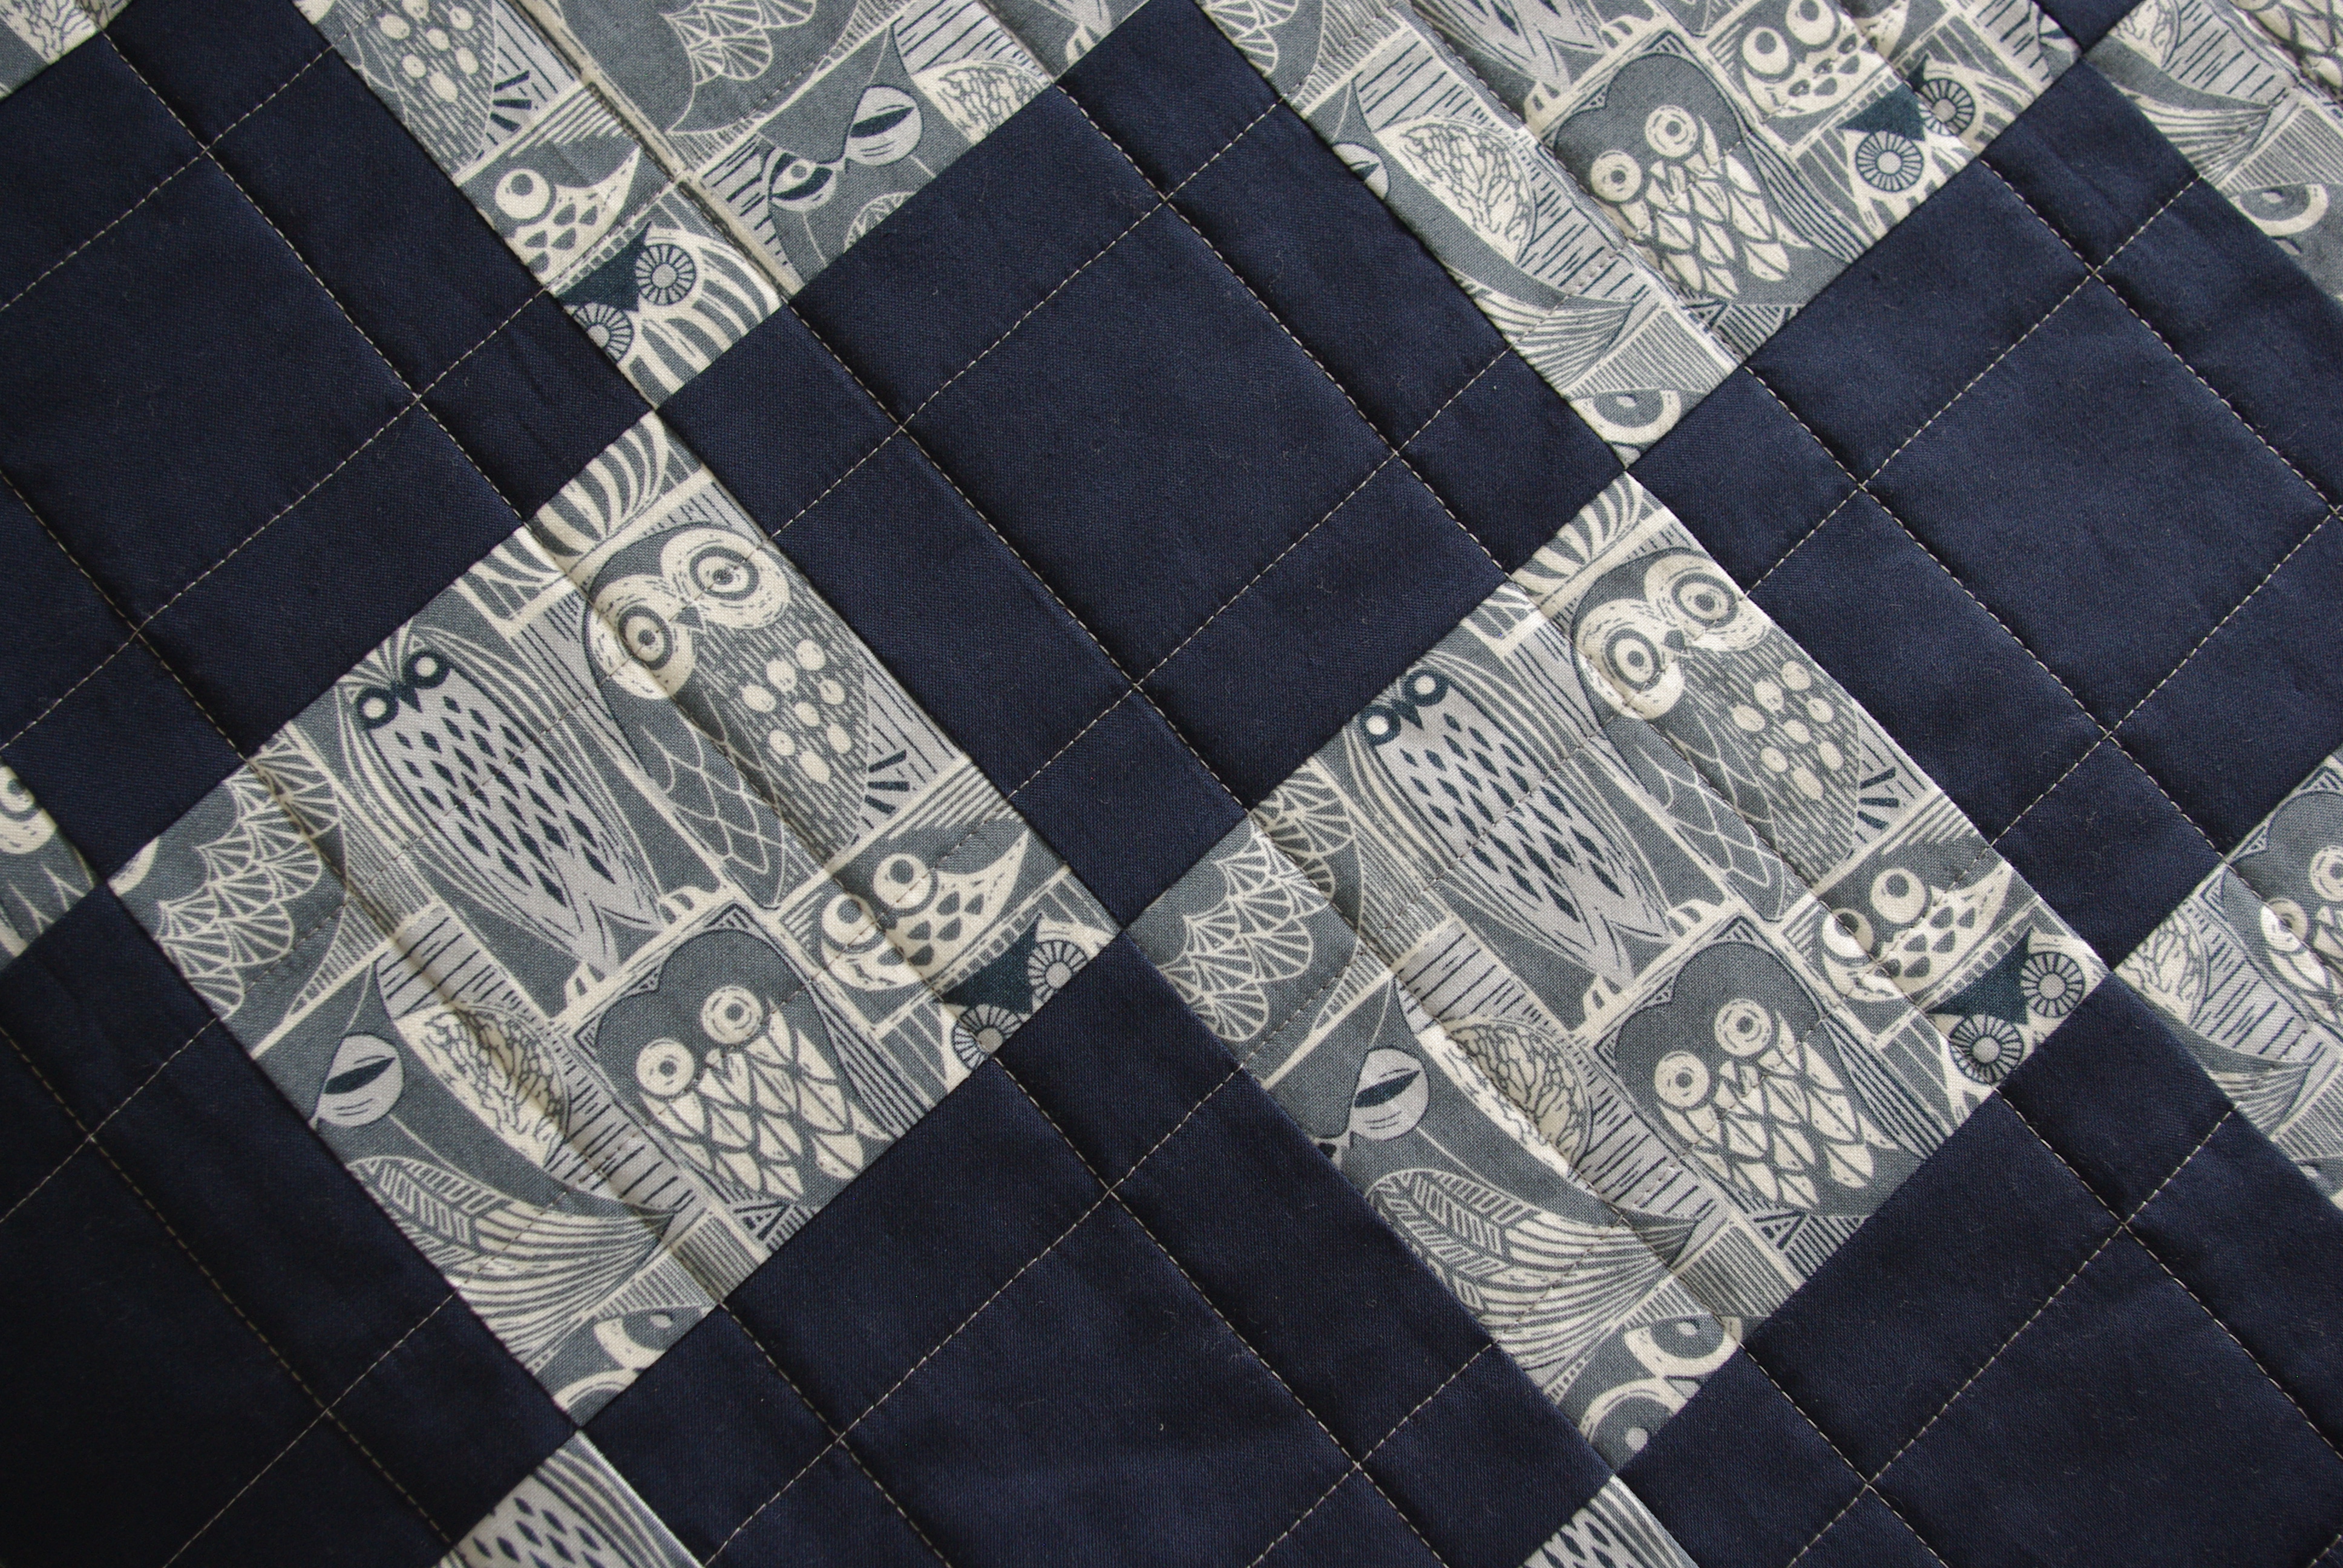
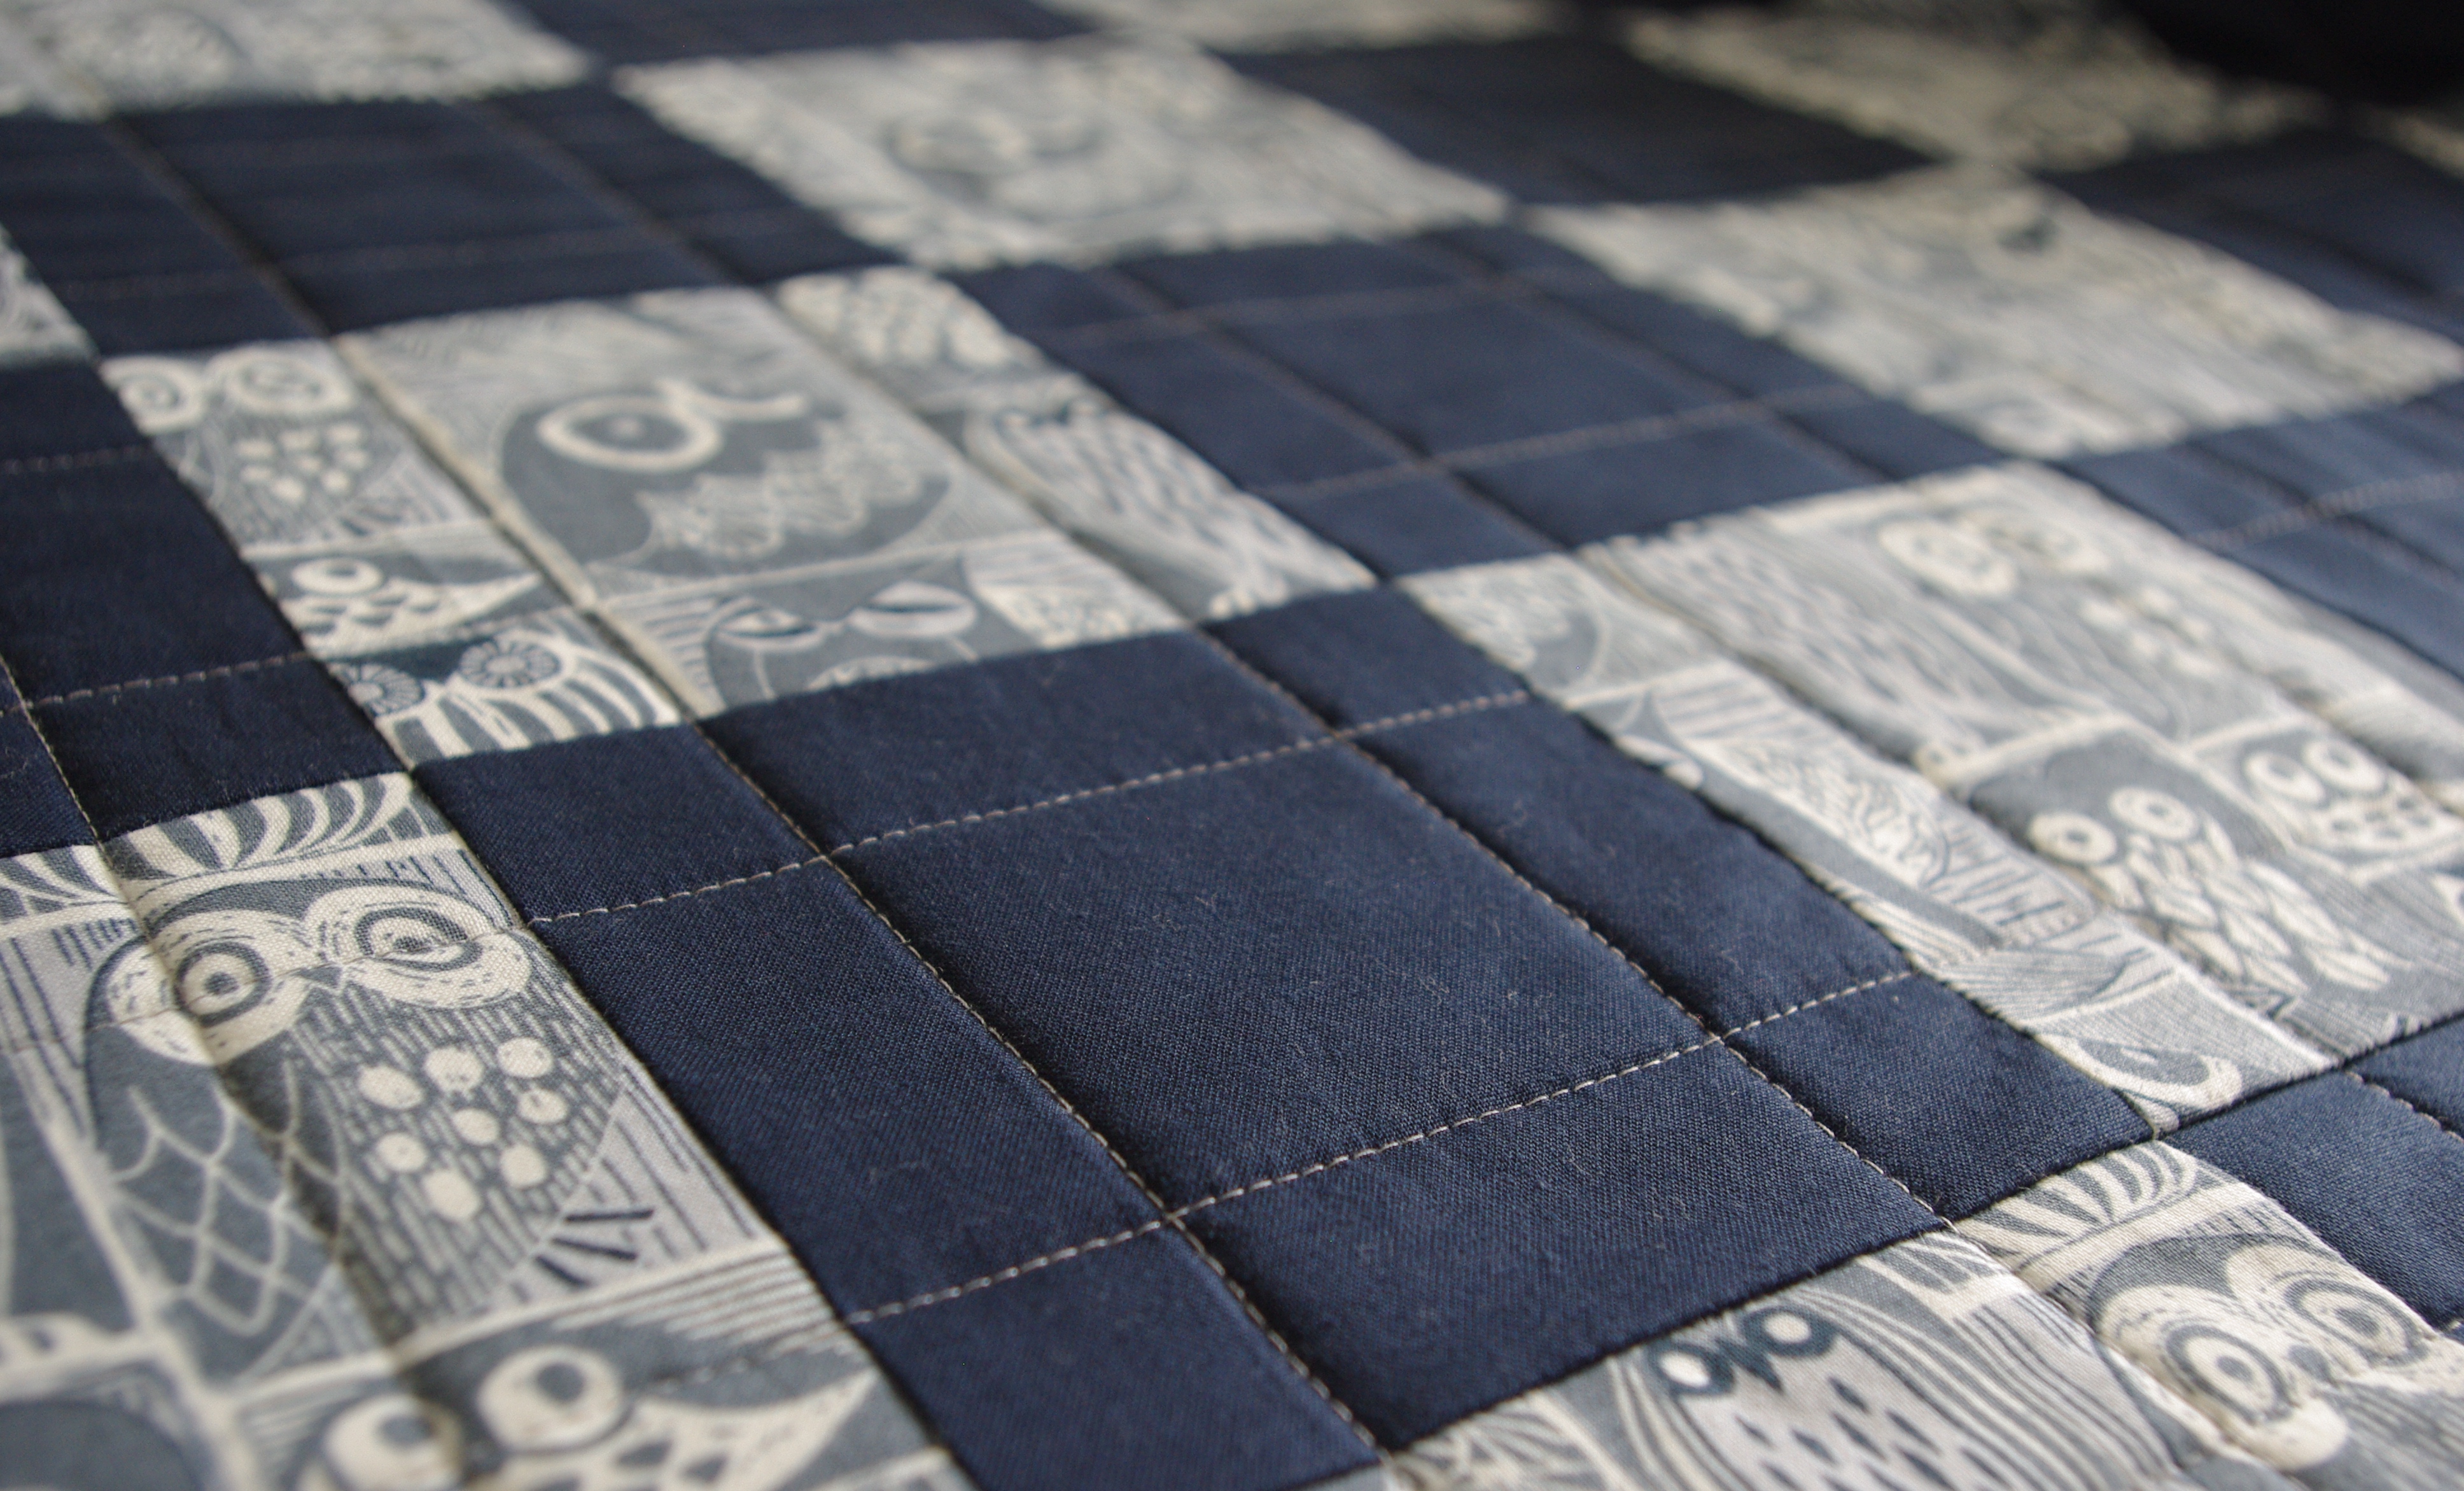
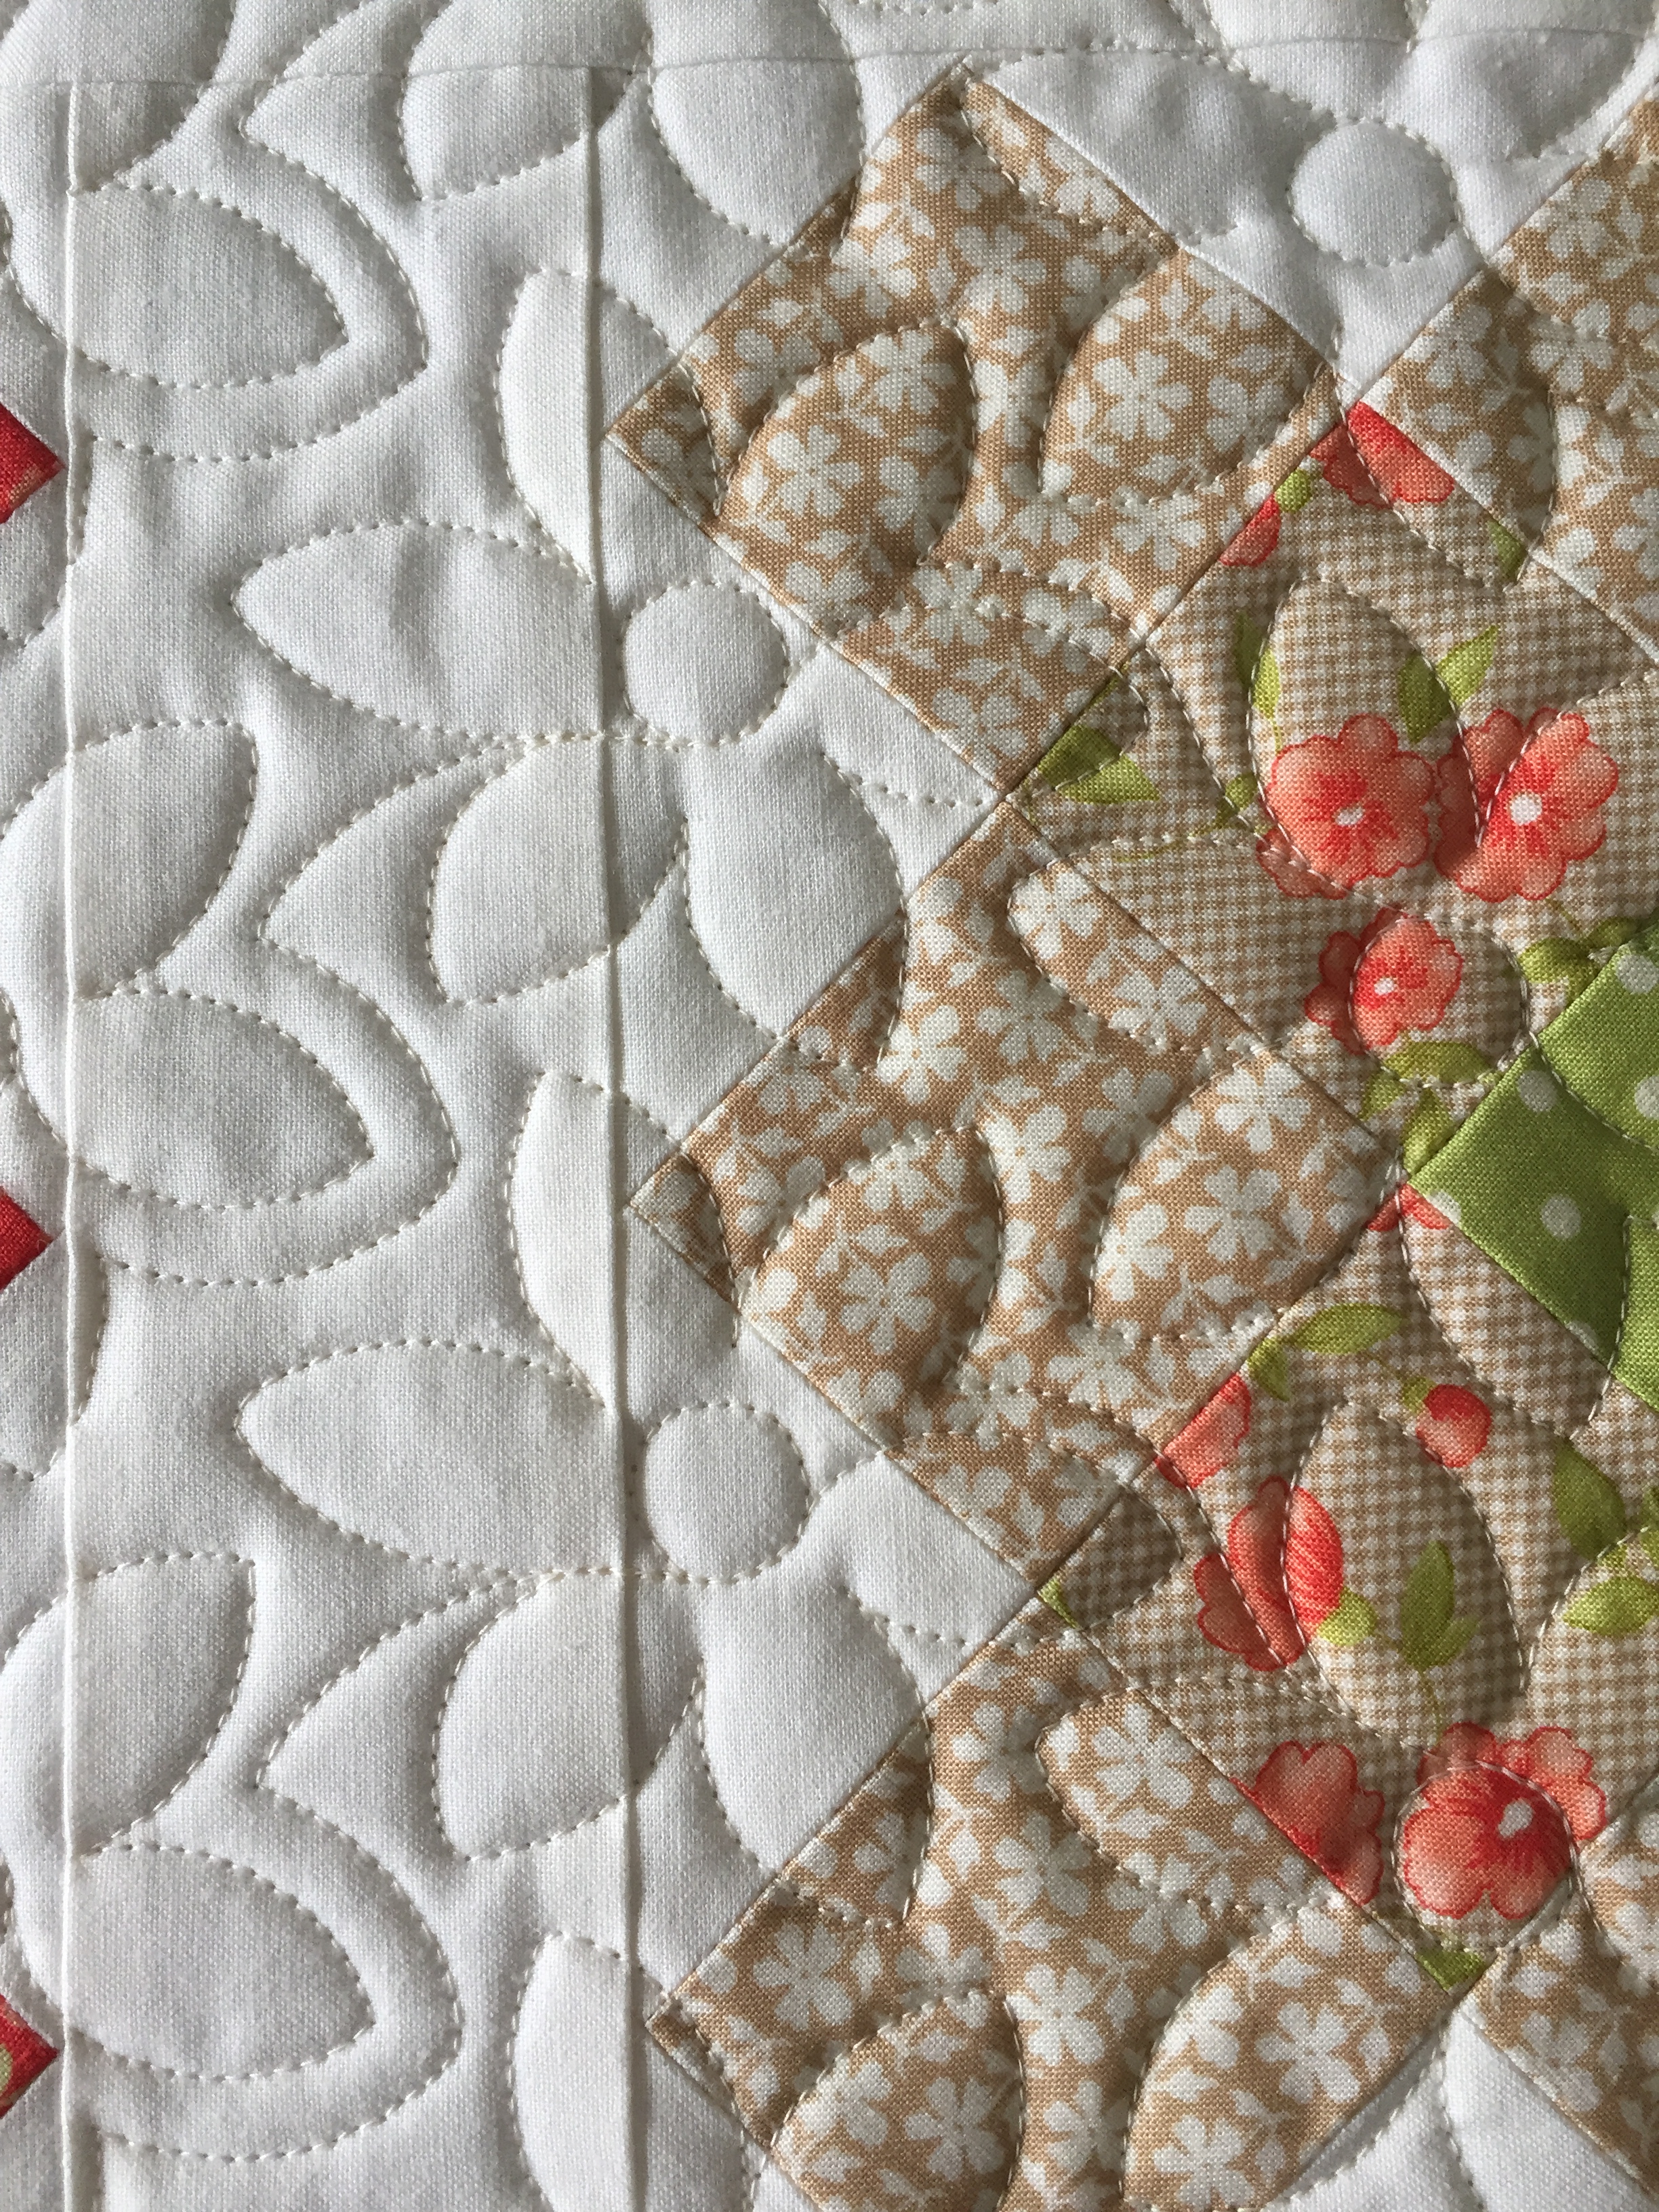
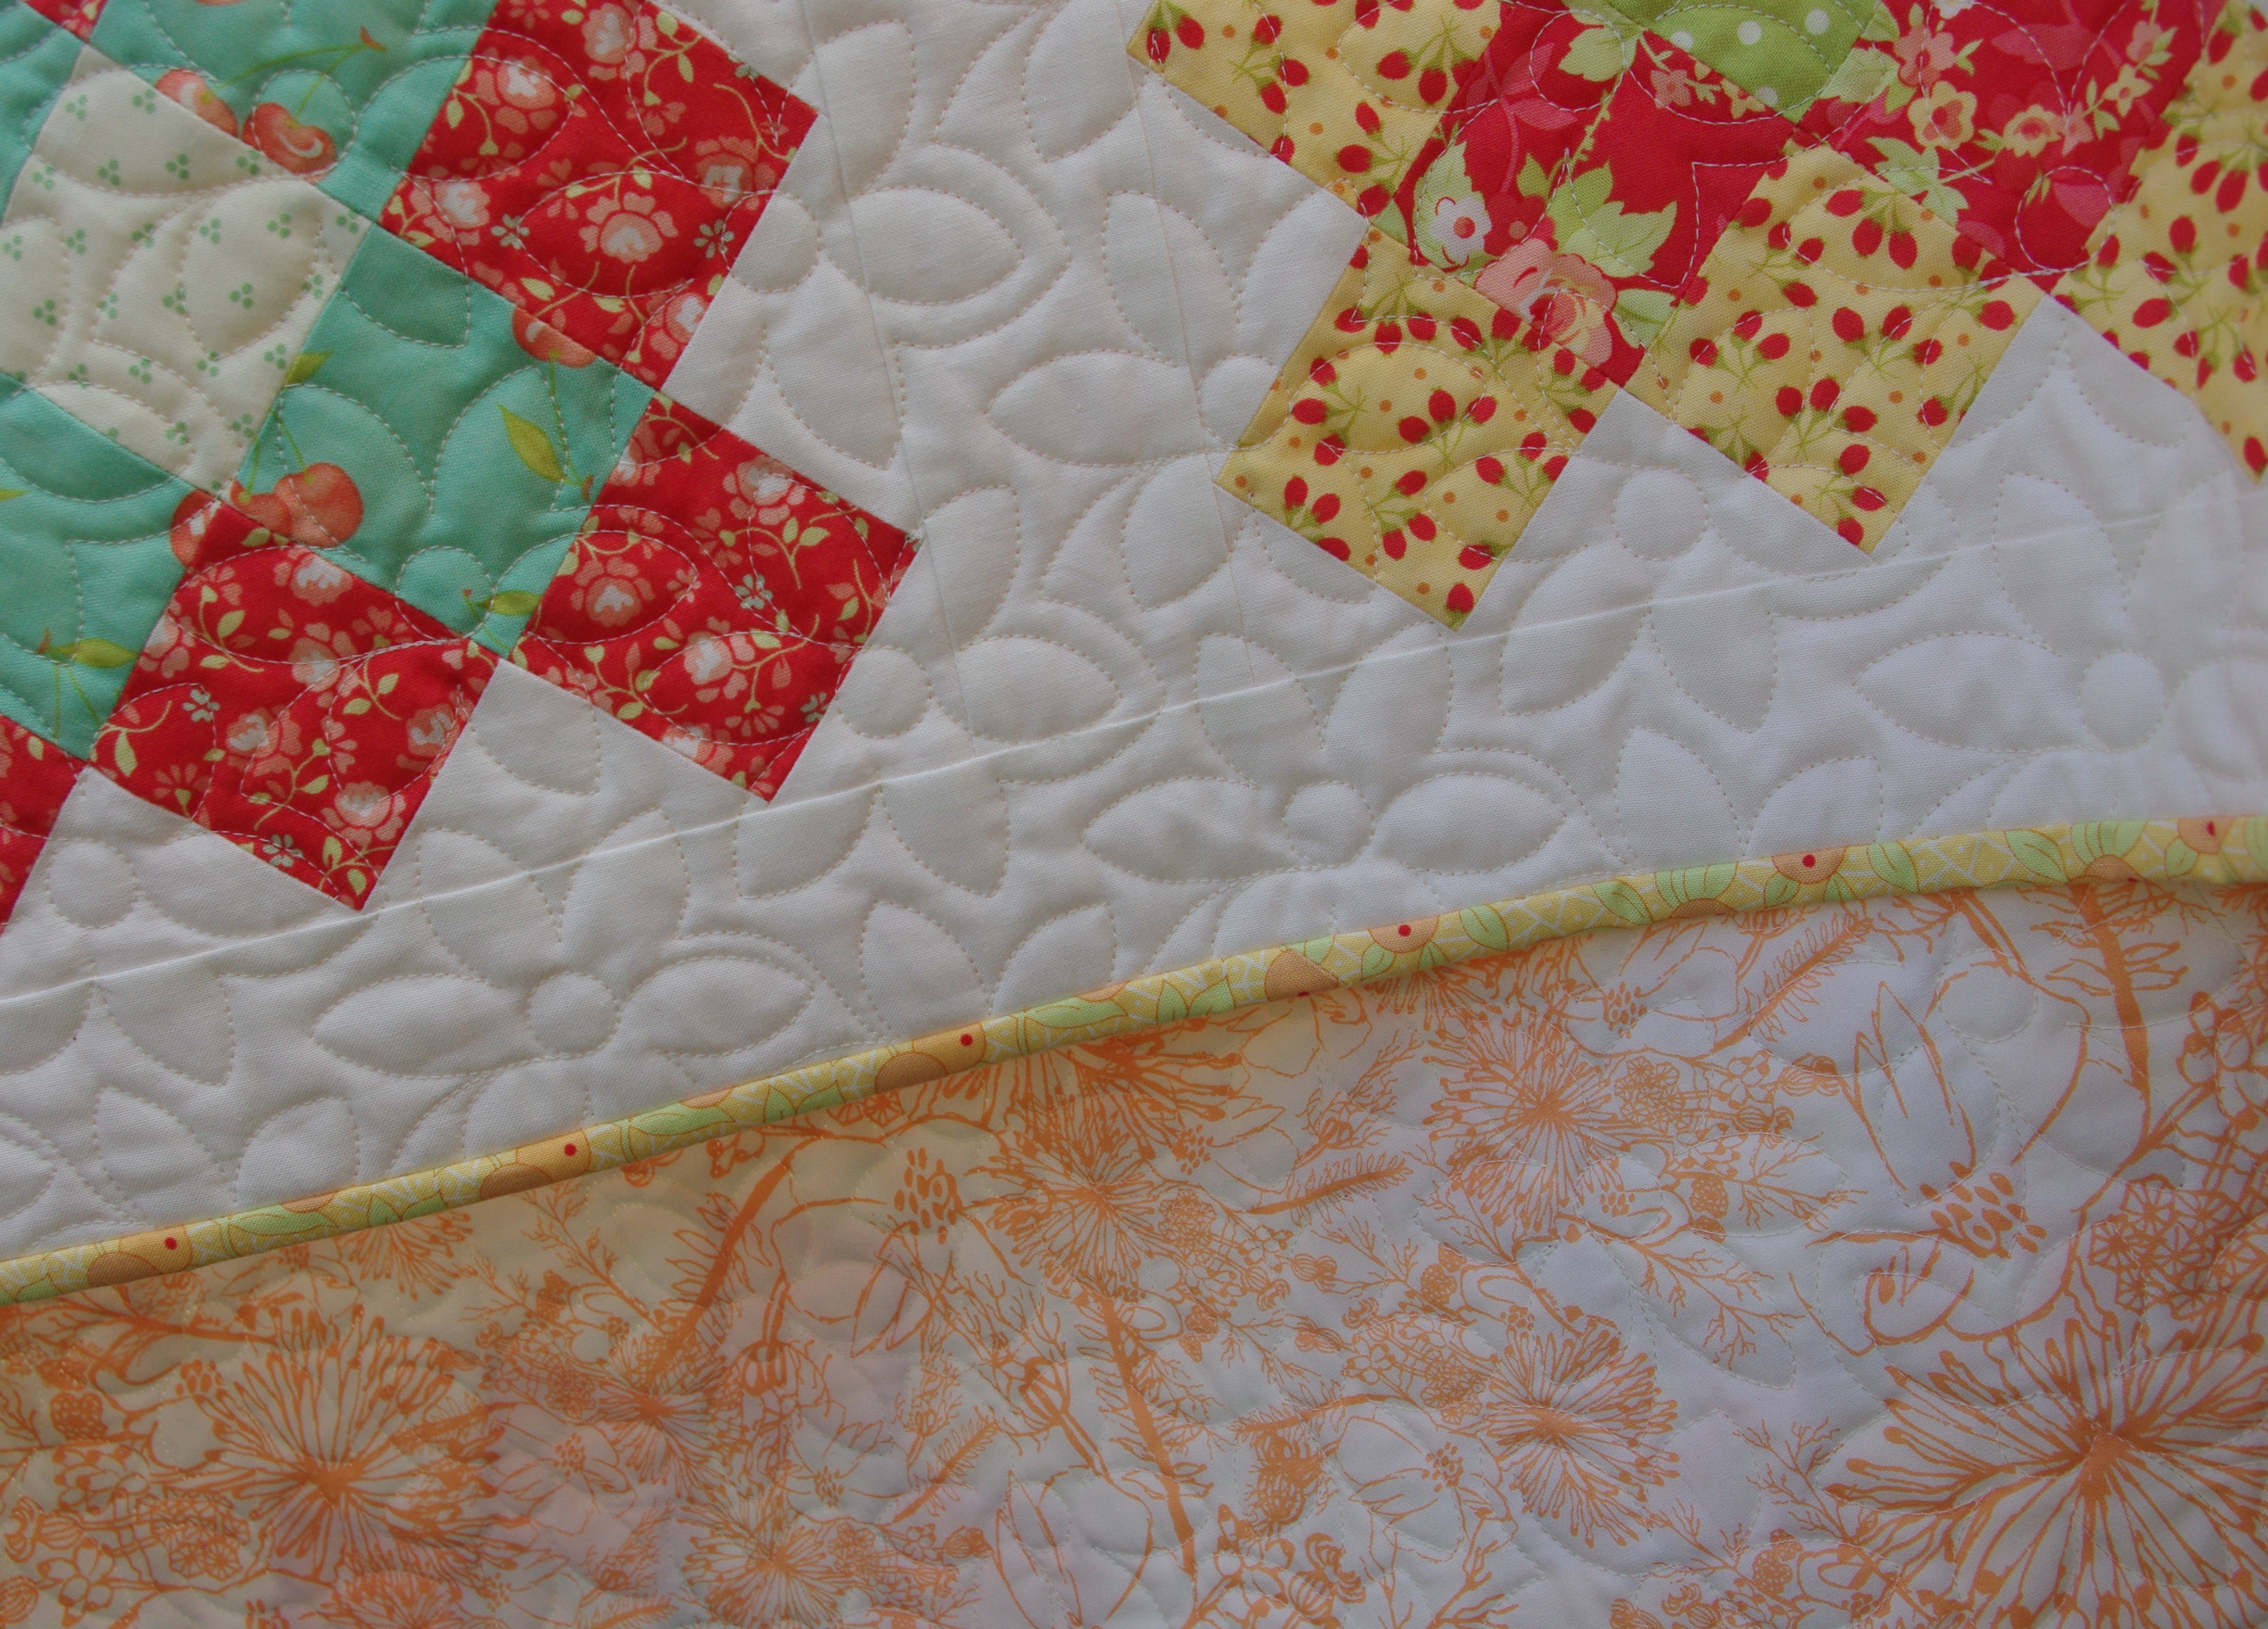
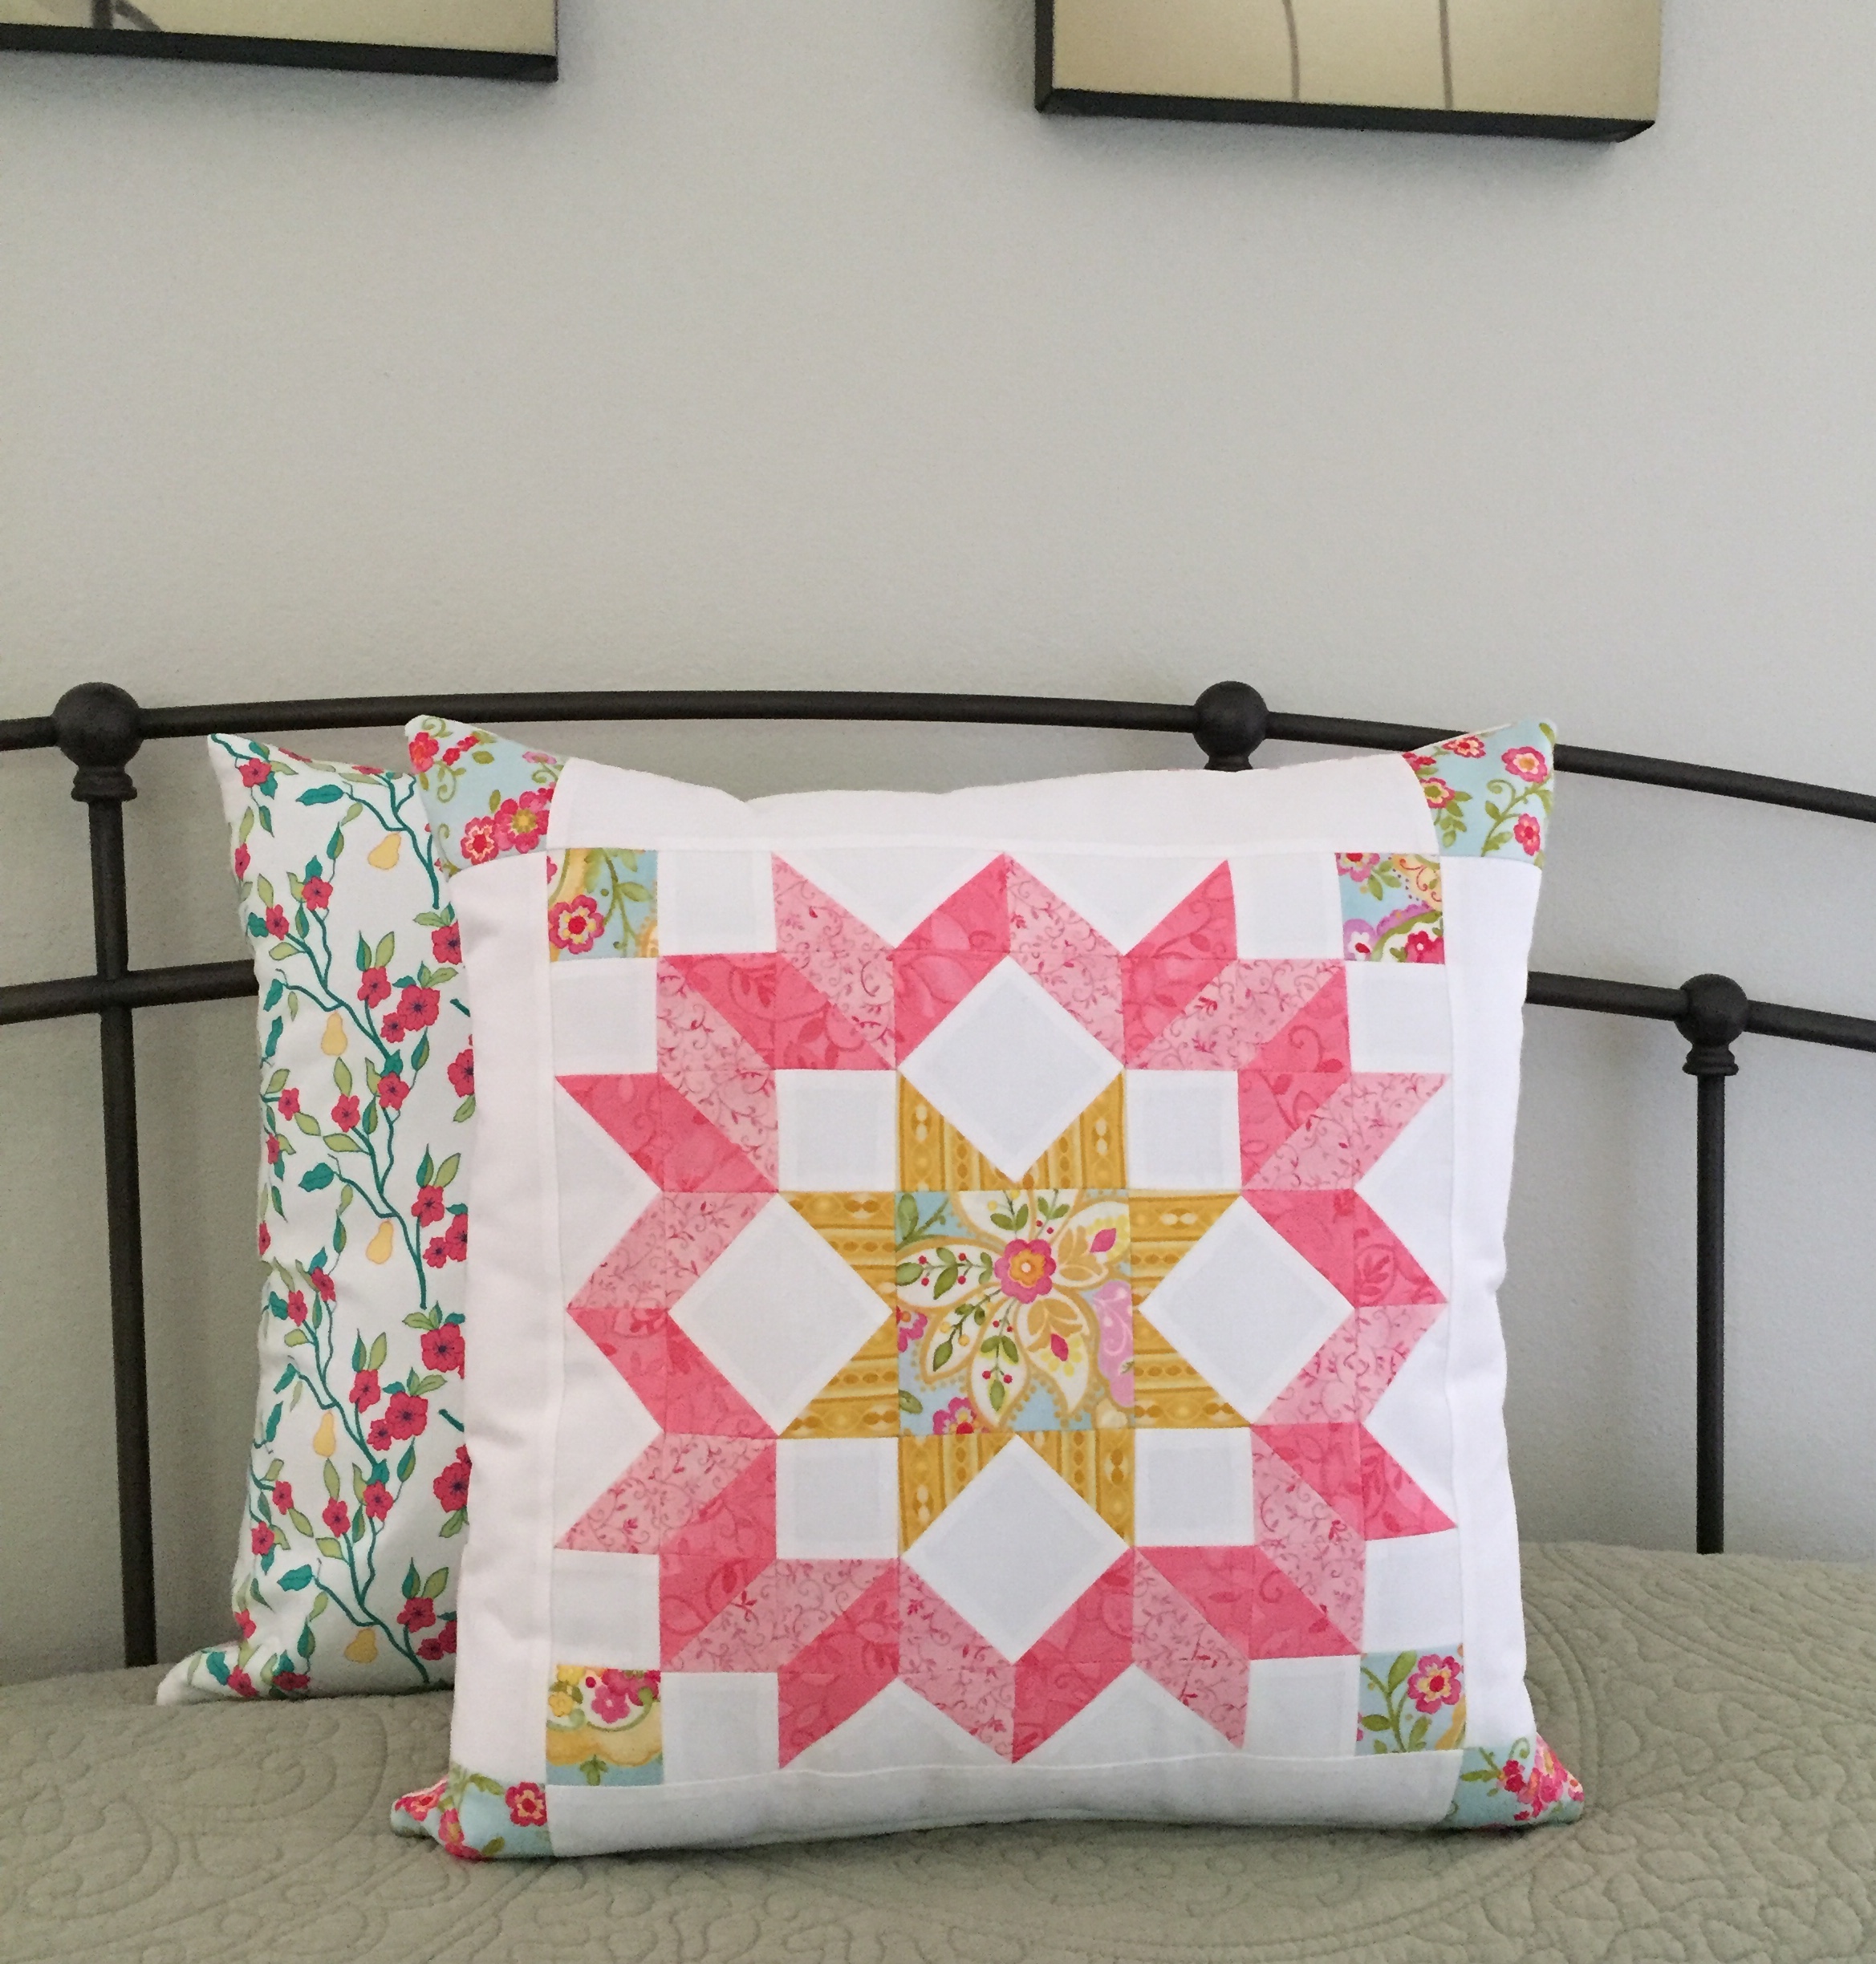
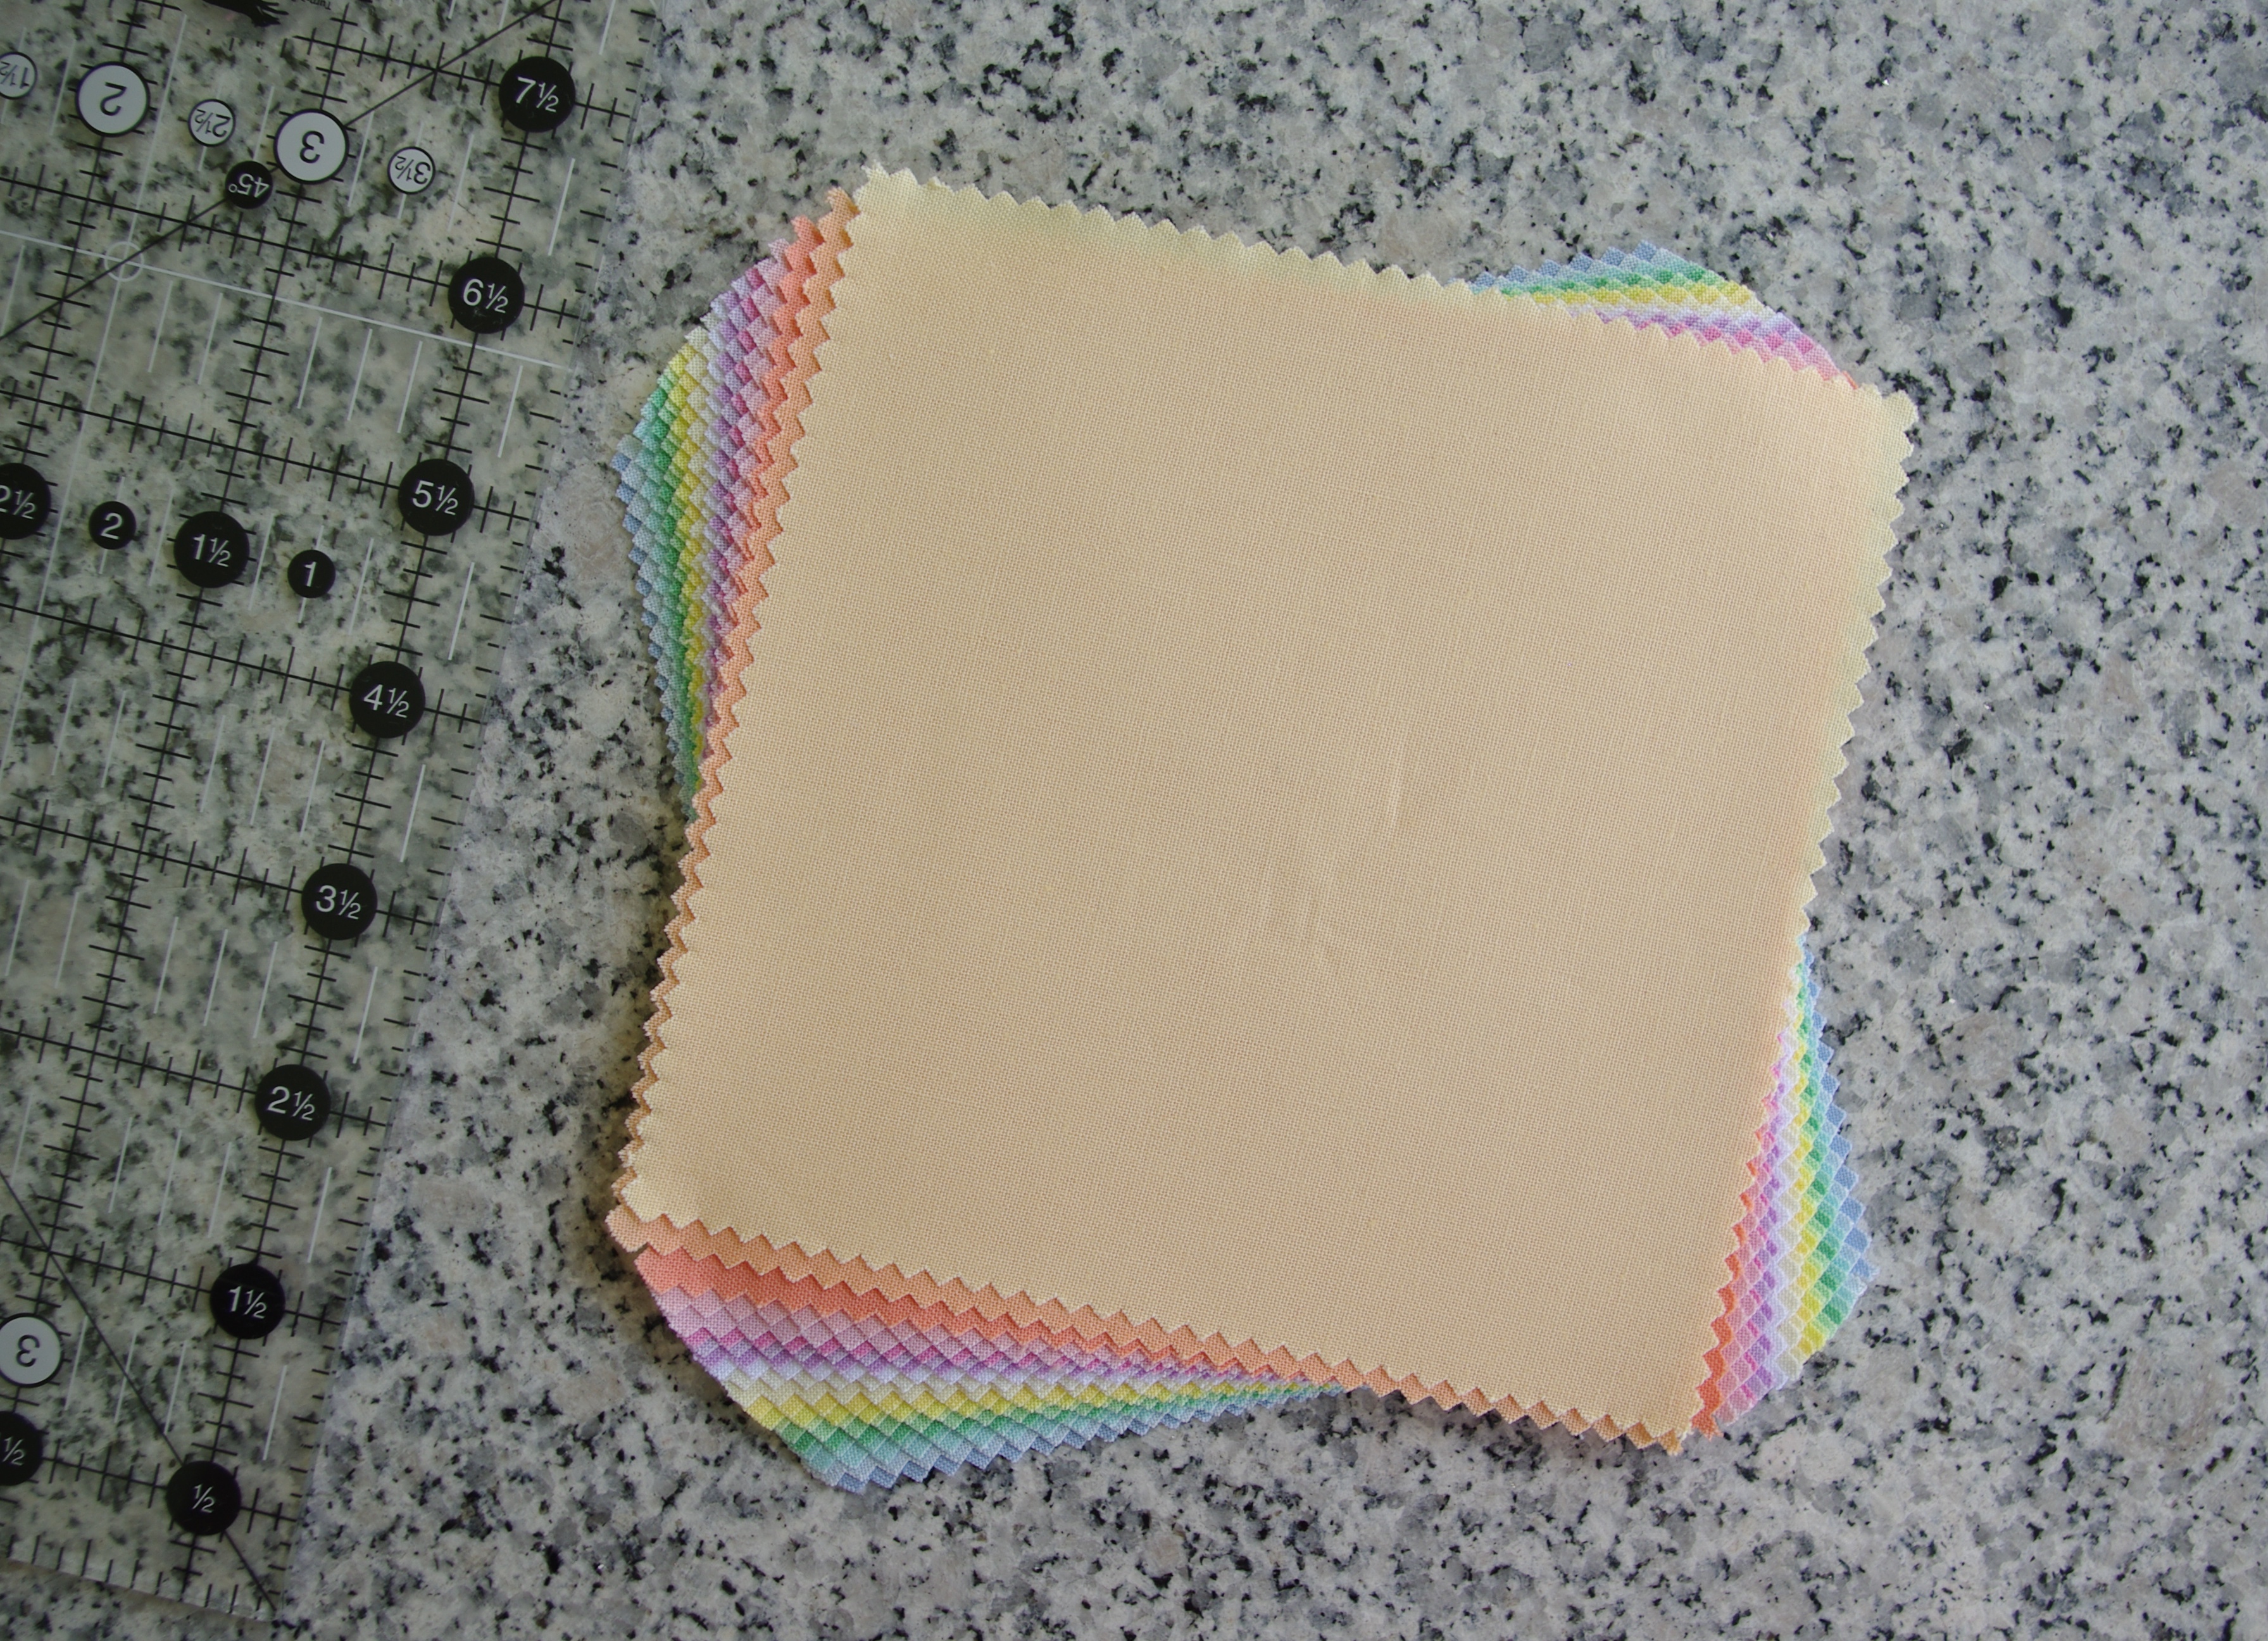
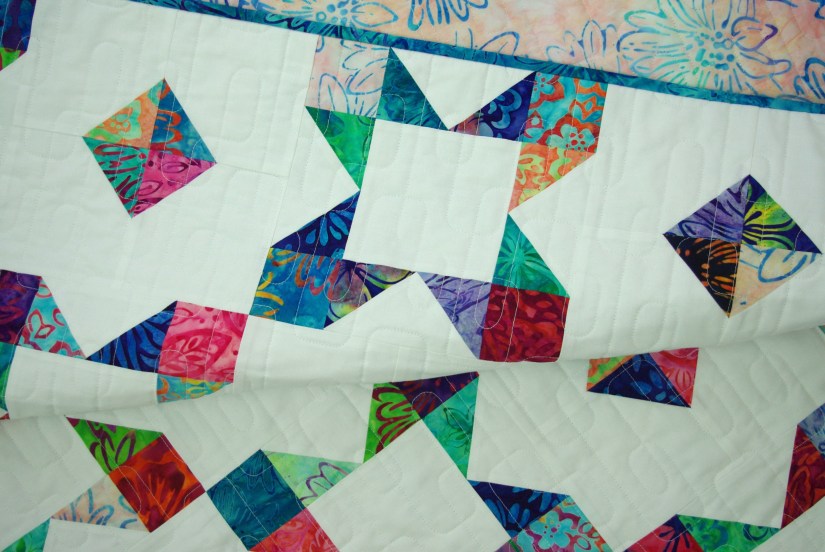
And a couple of close up images…

As seen in Pre-Cut Patchwork 

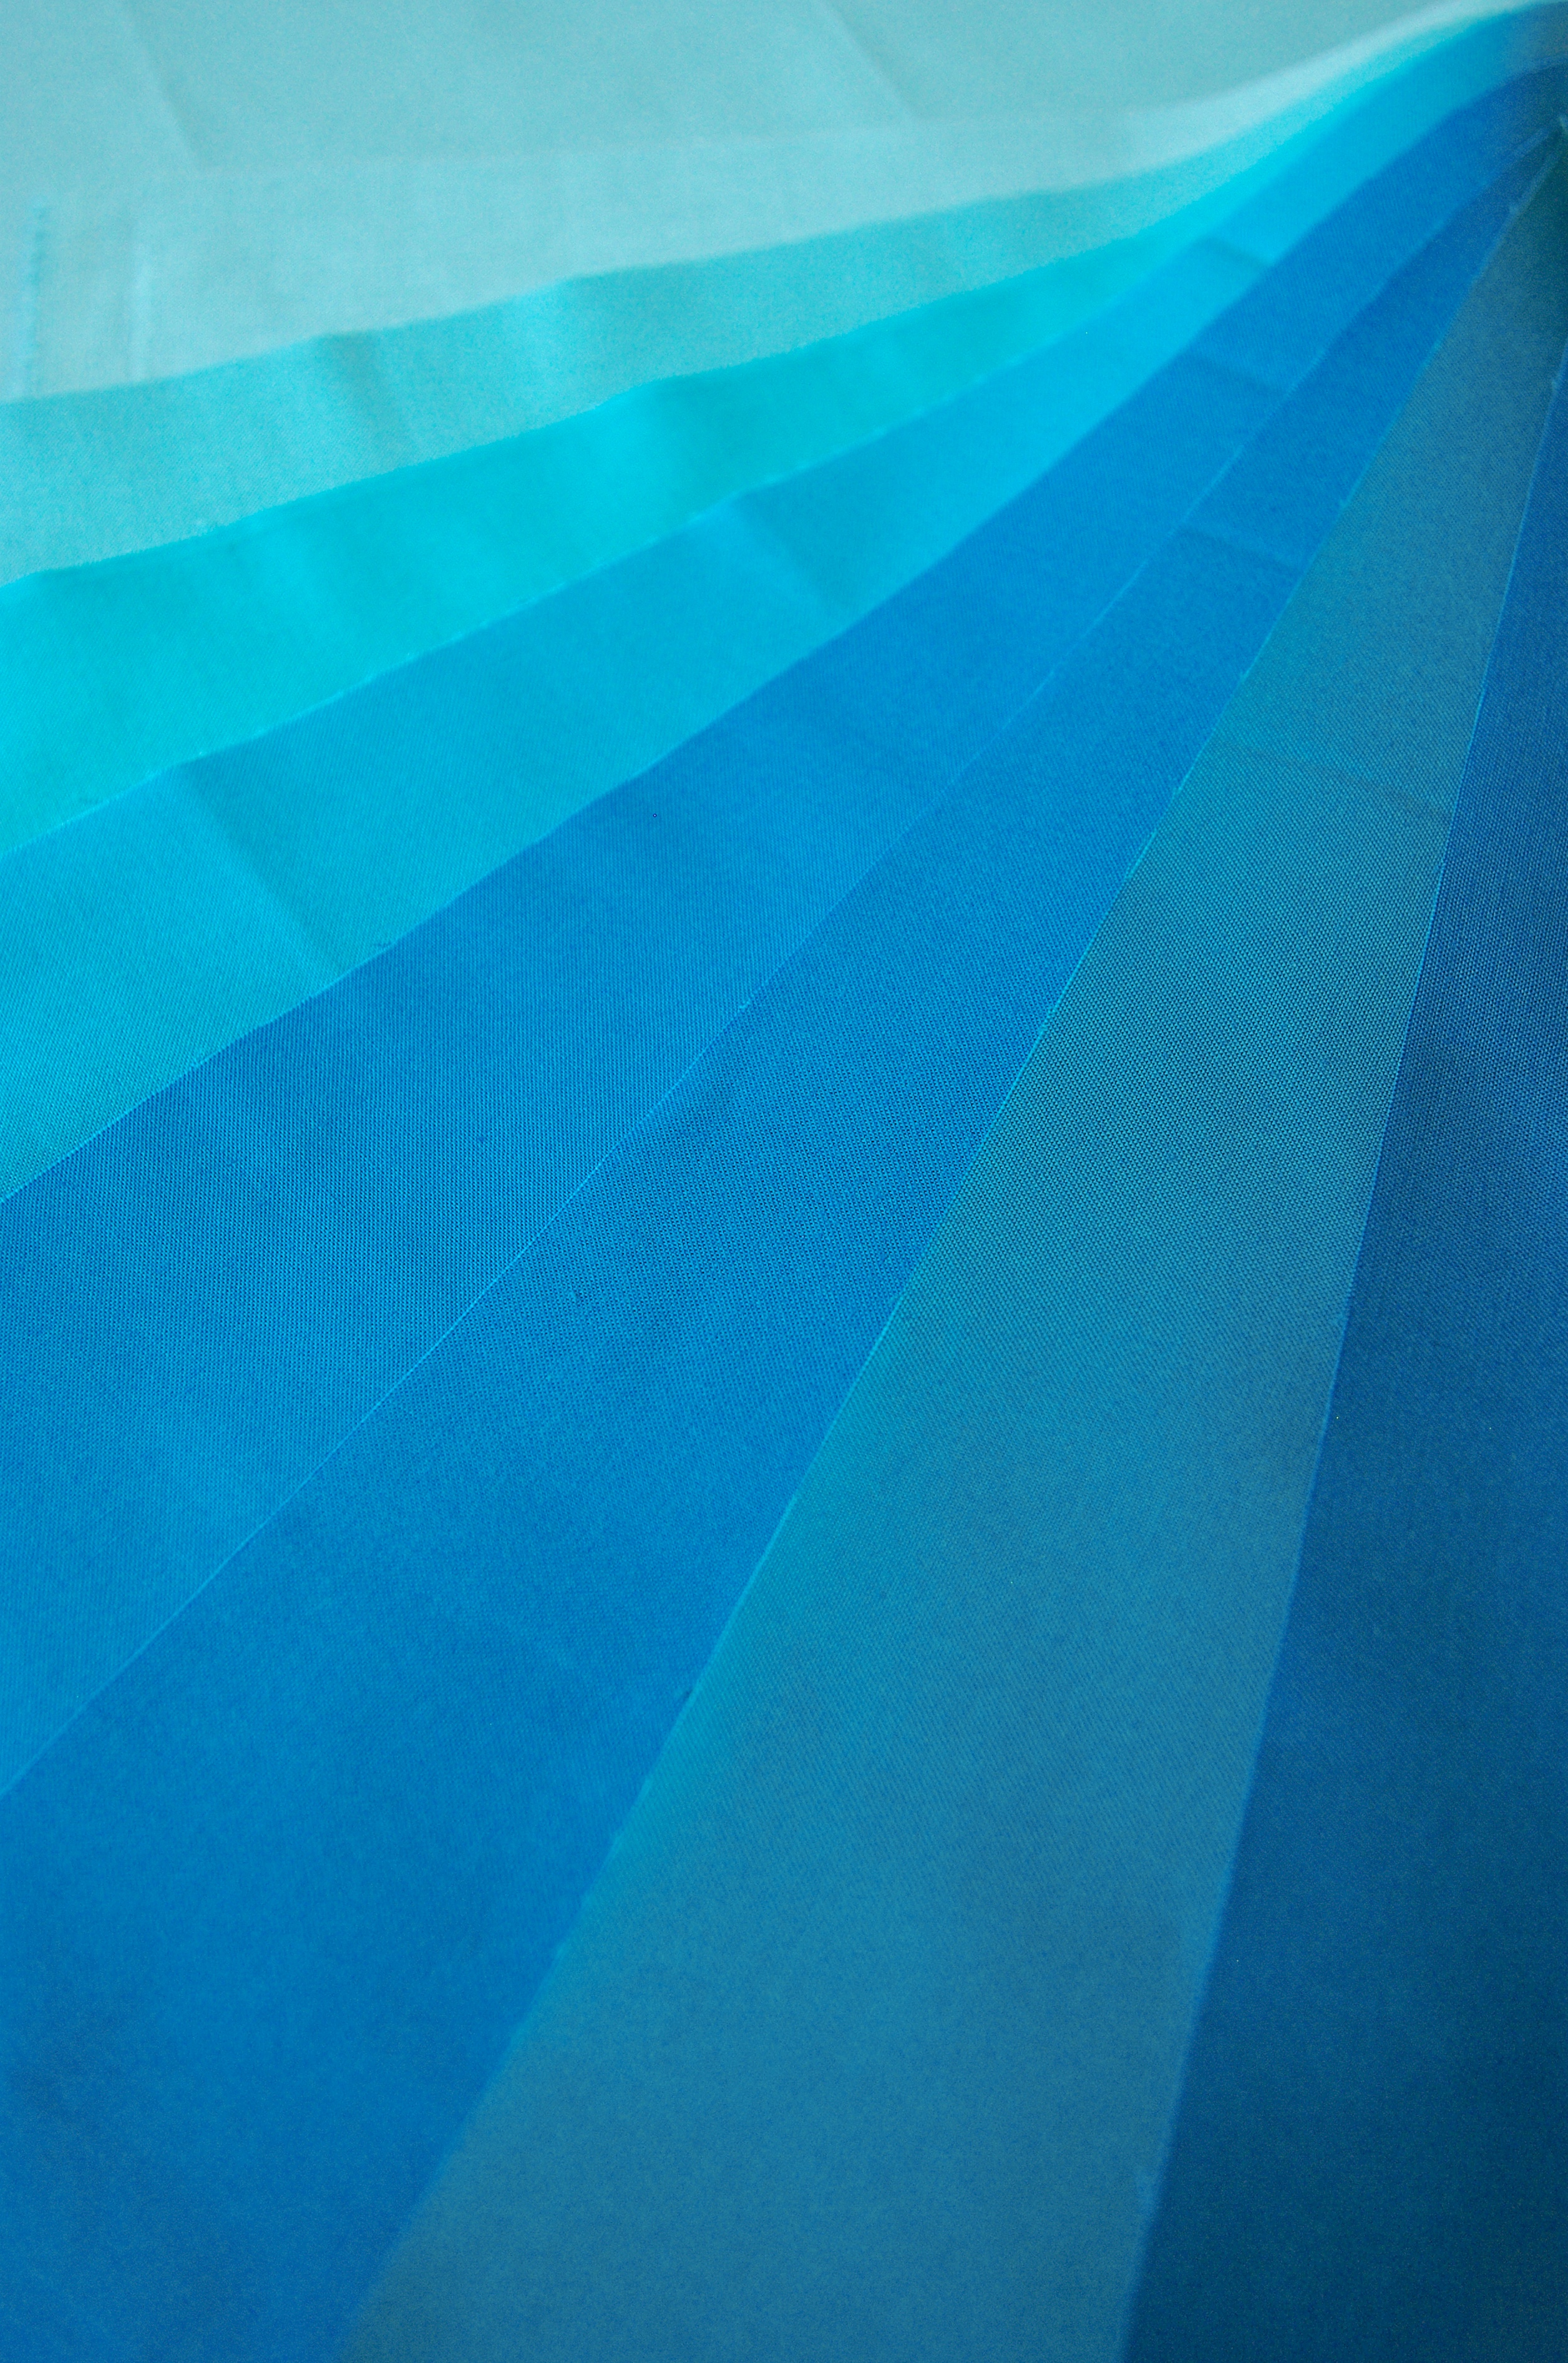
This is the second quilt I’ve made with batiks and I absolutely love working  with them. 

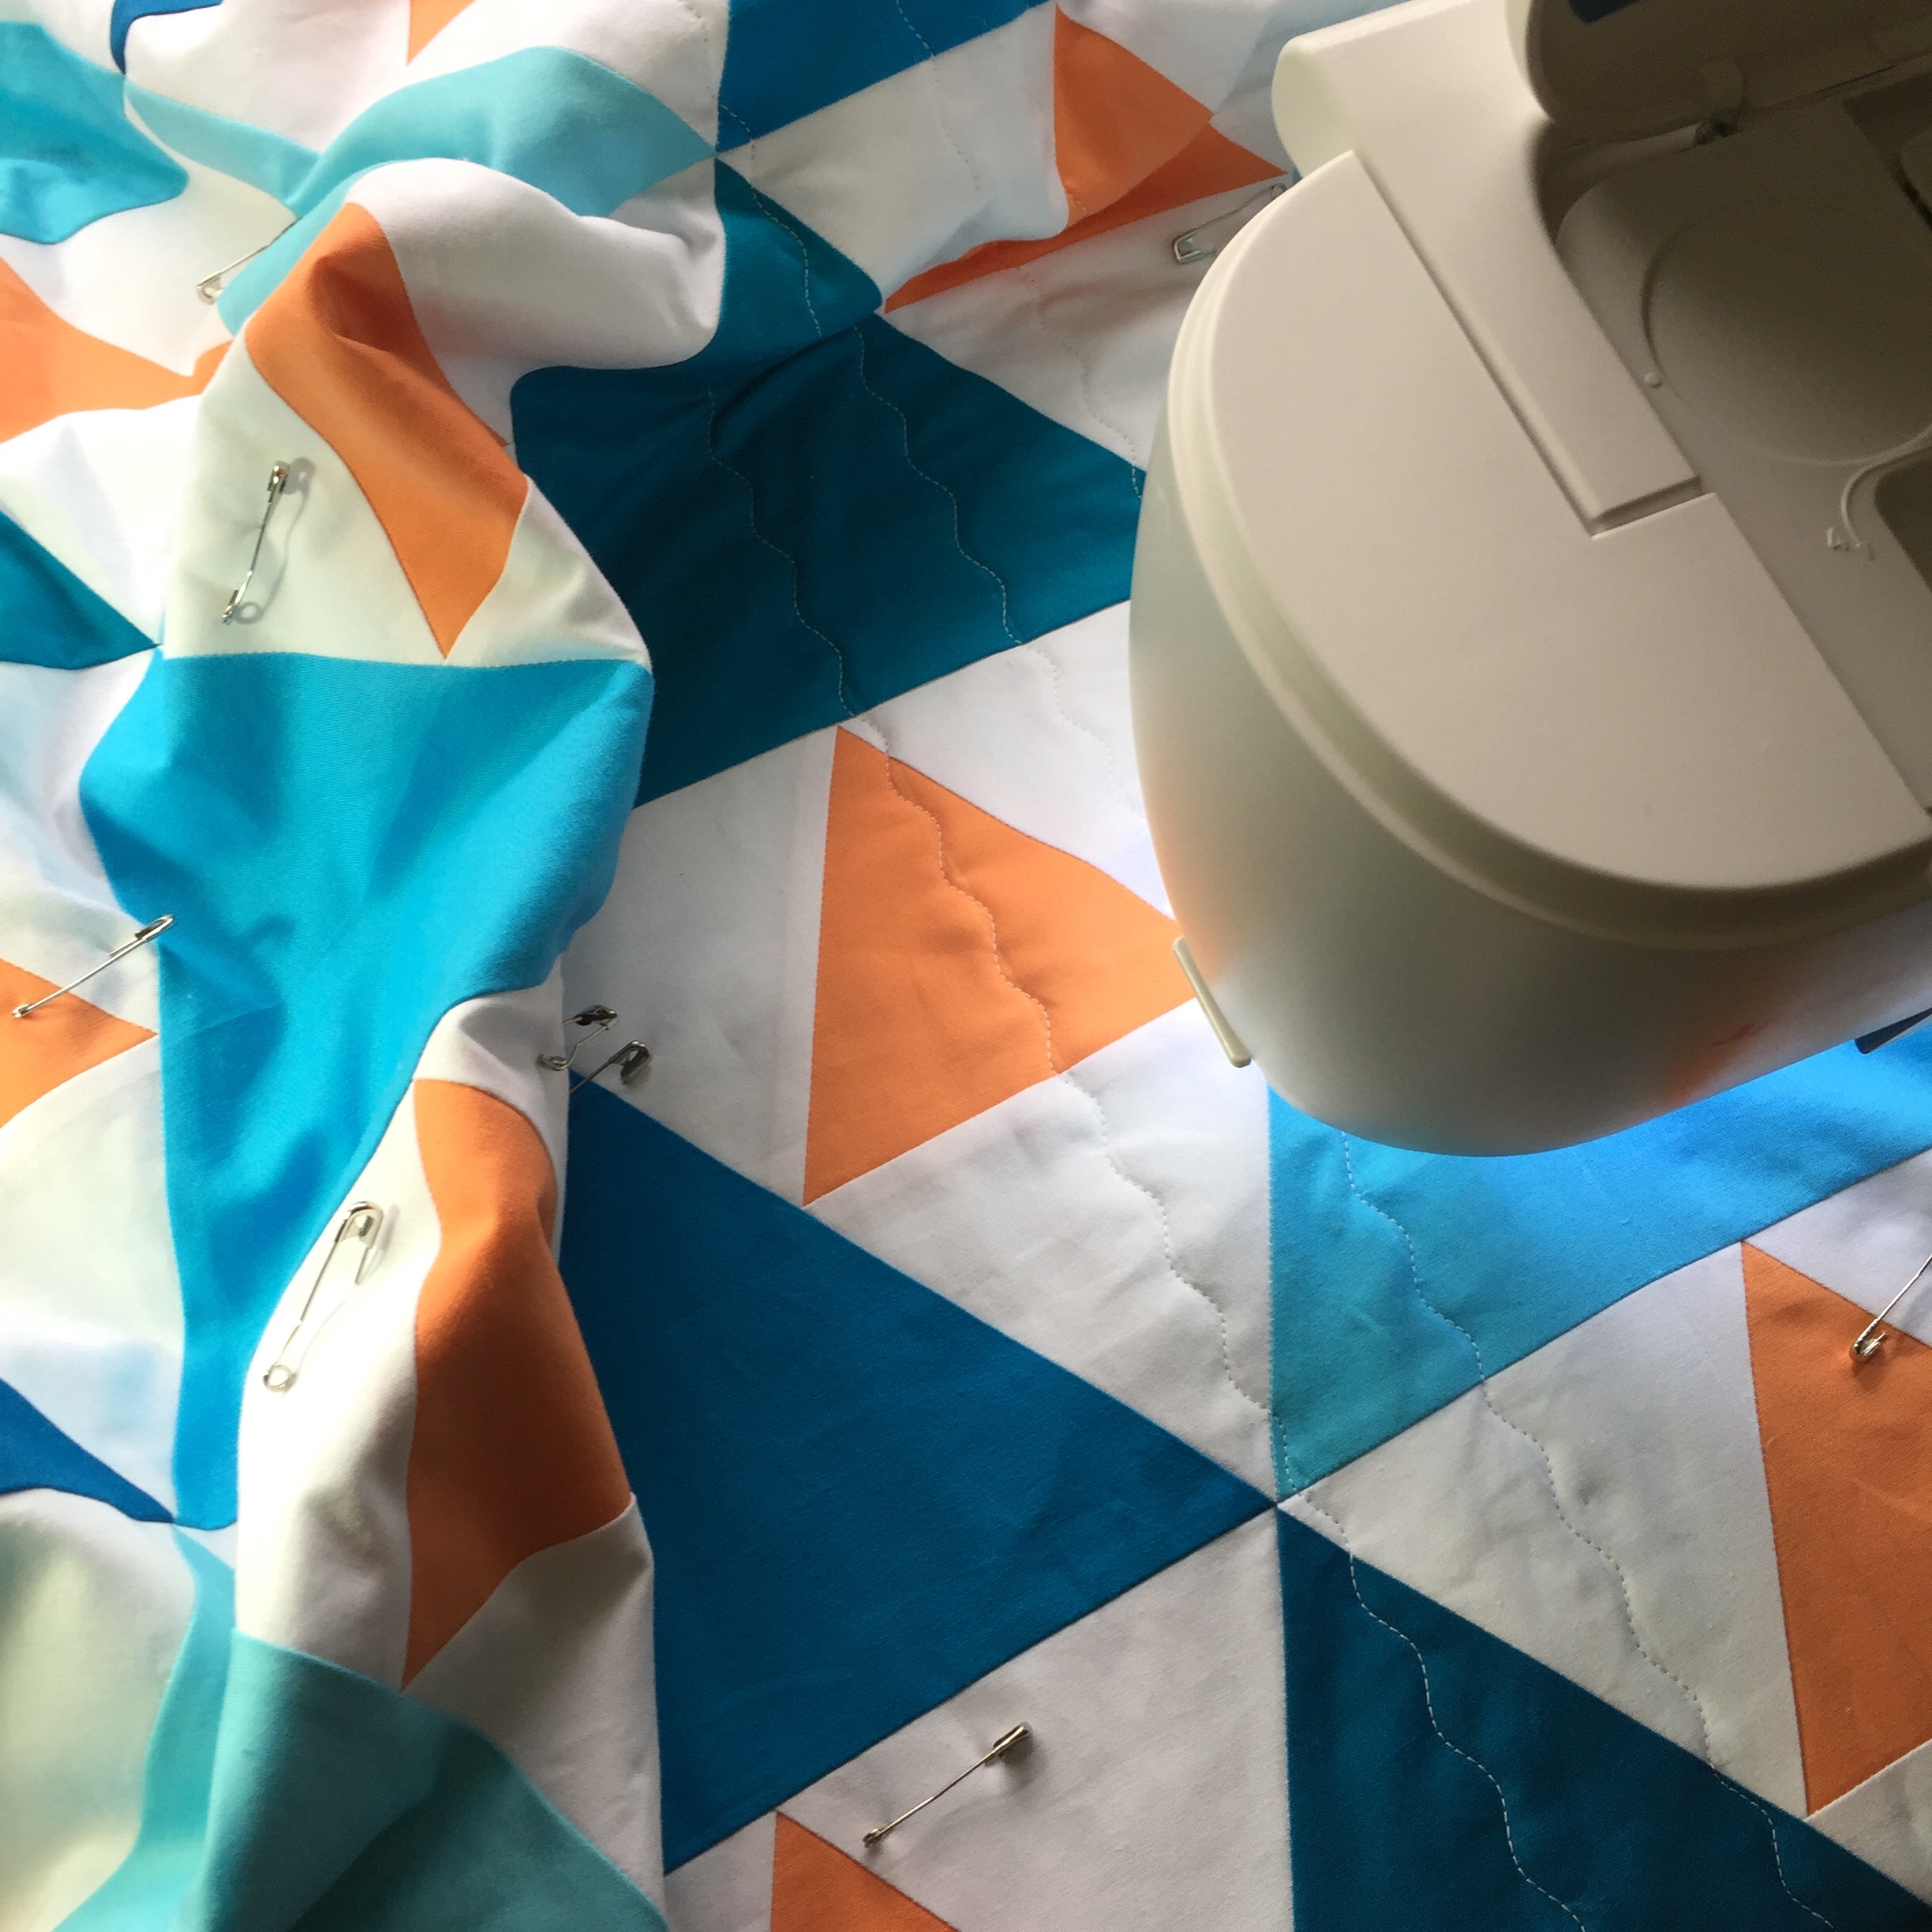
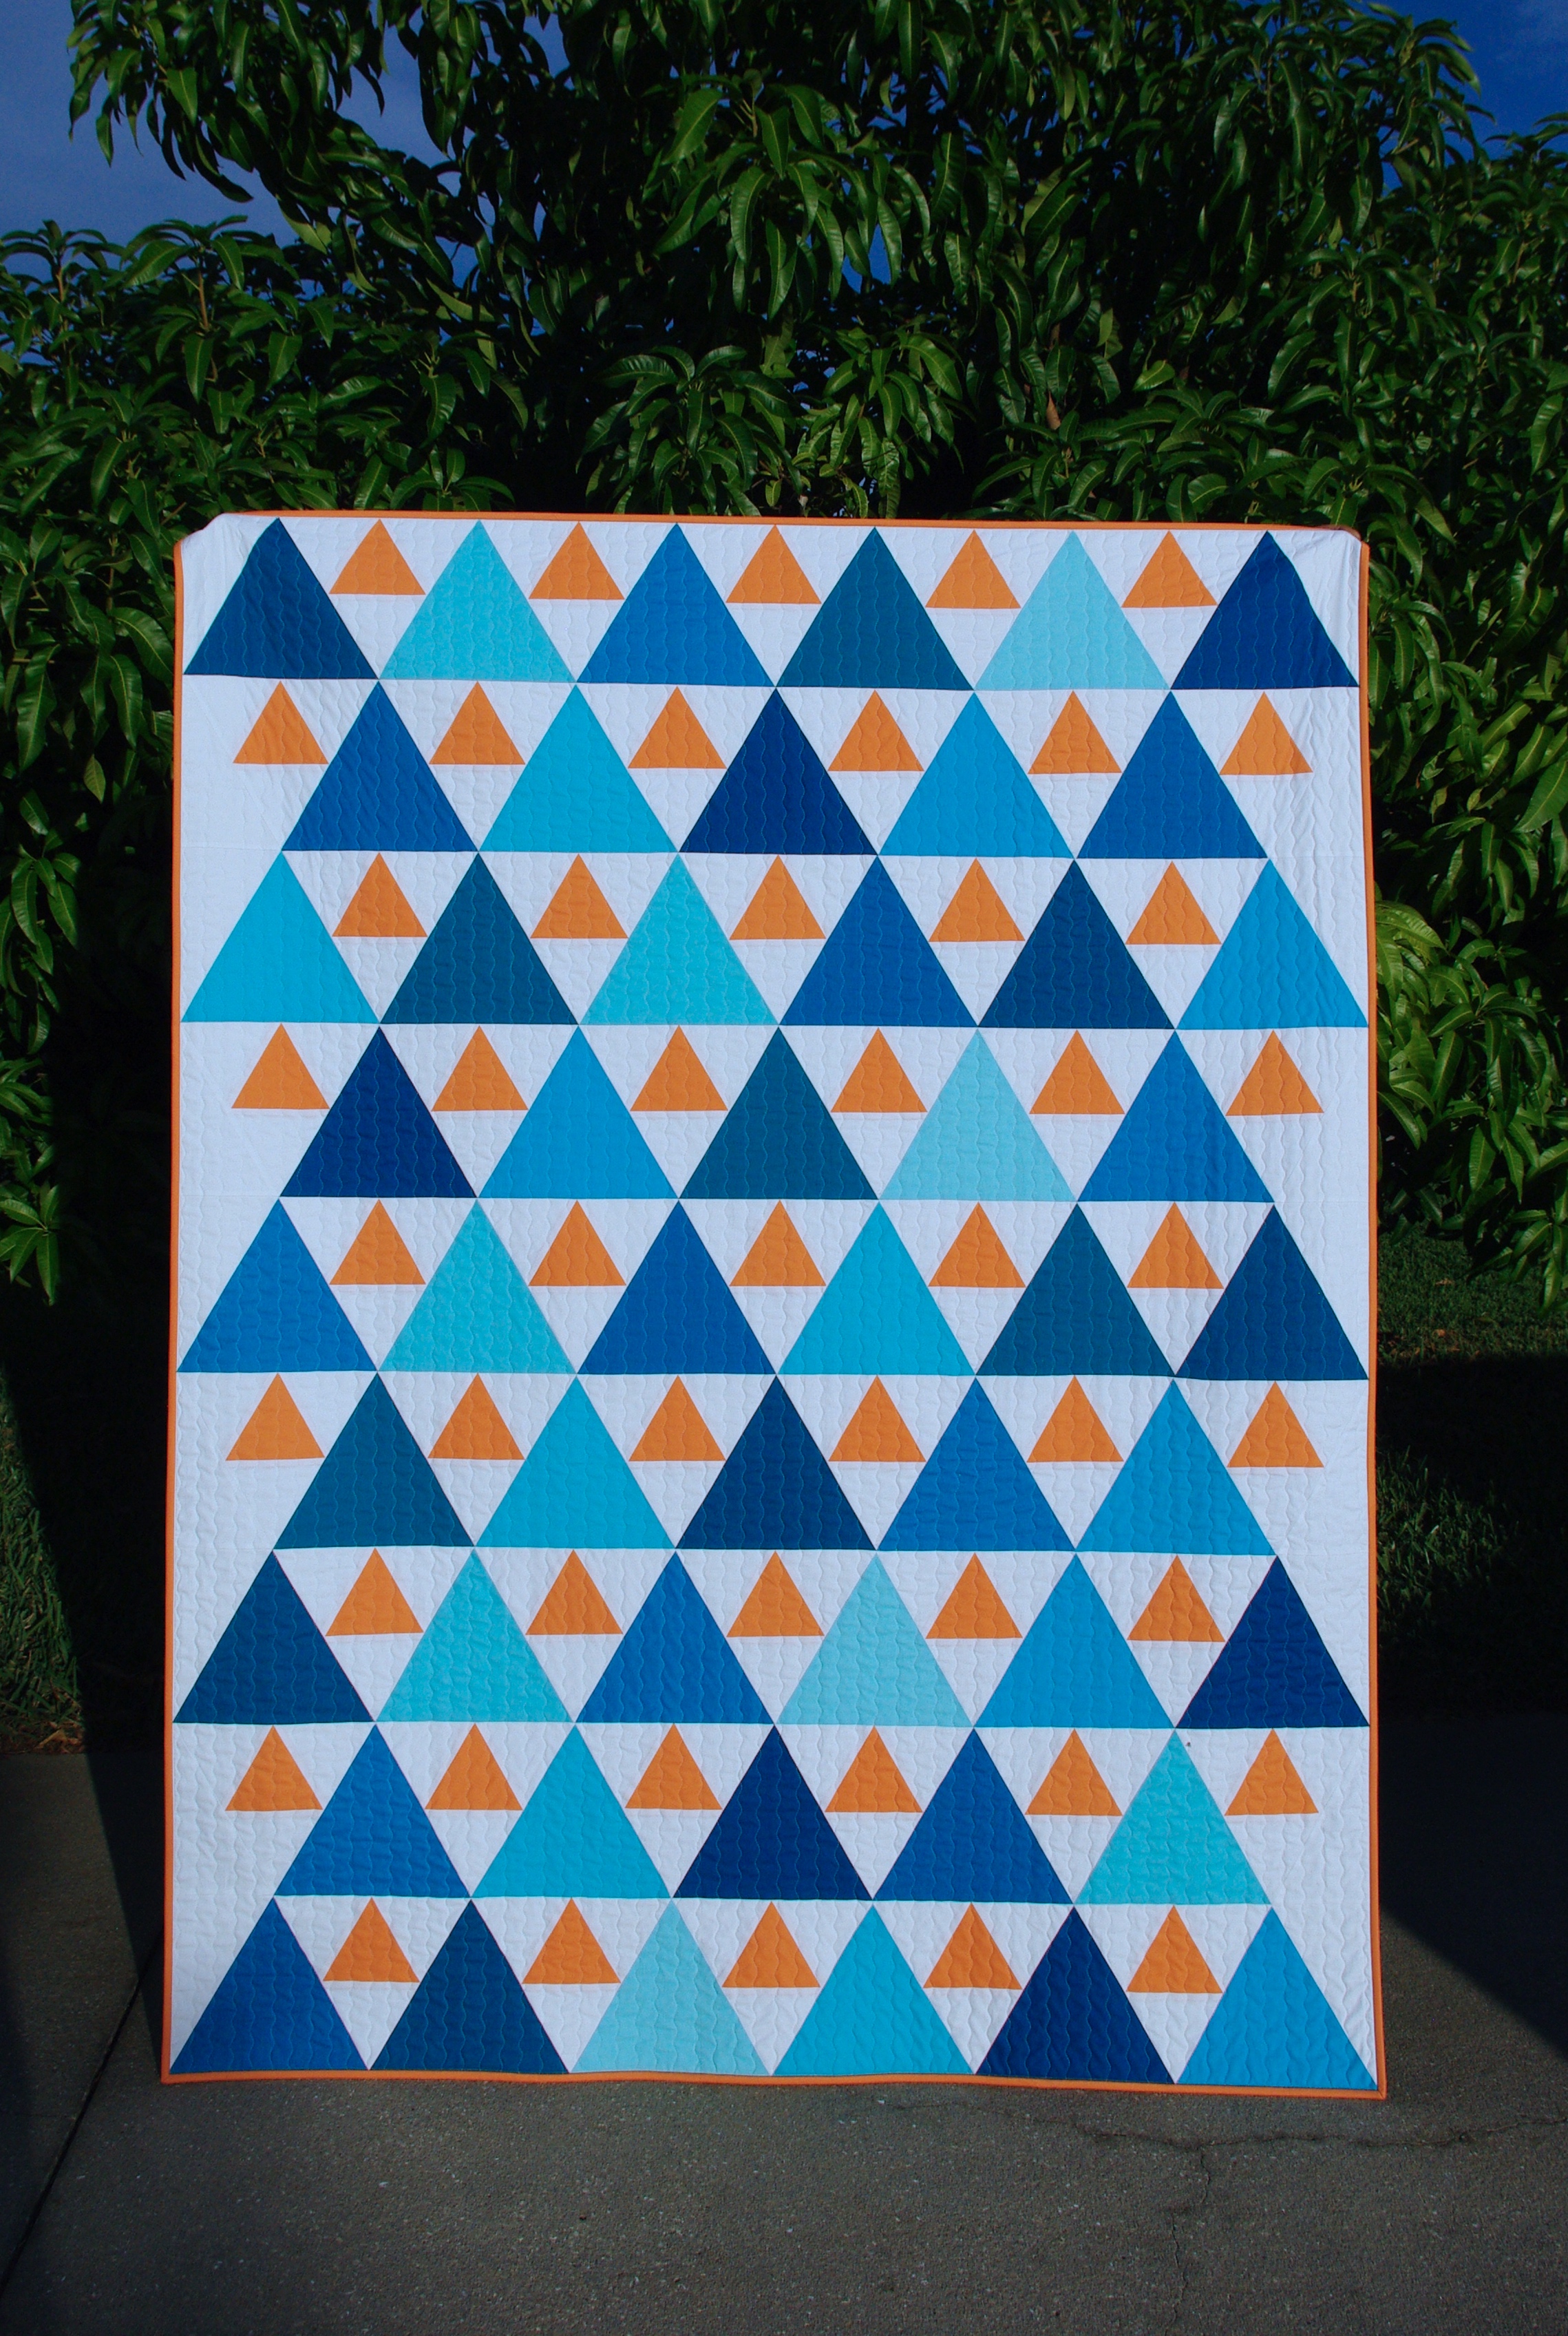
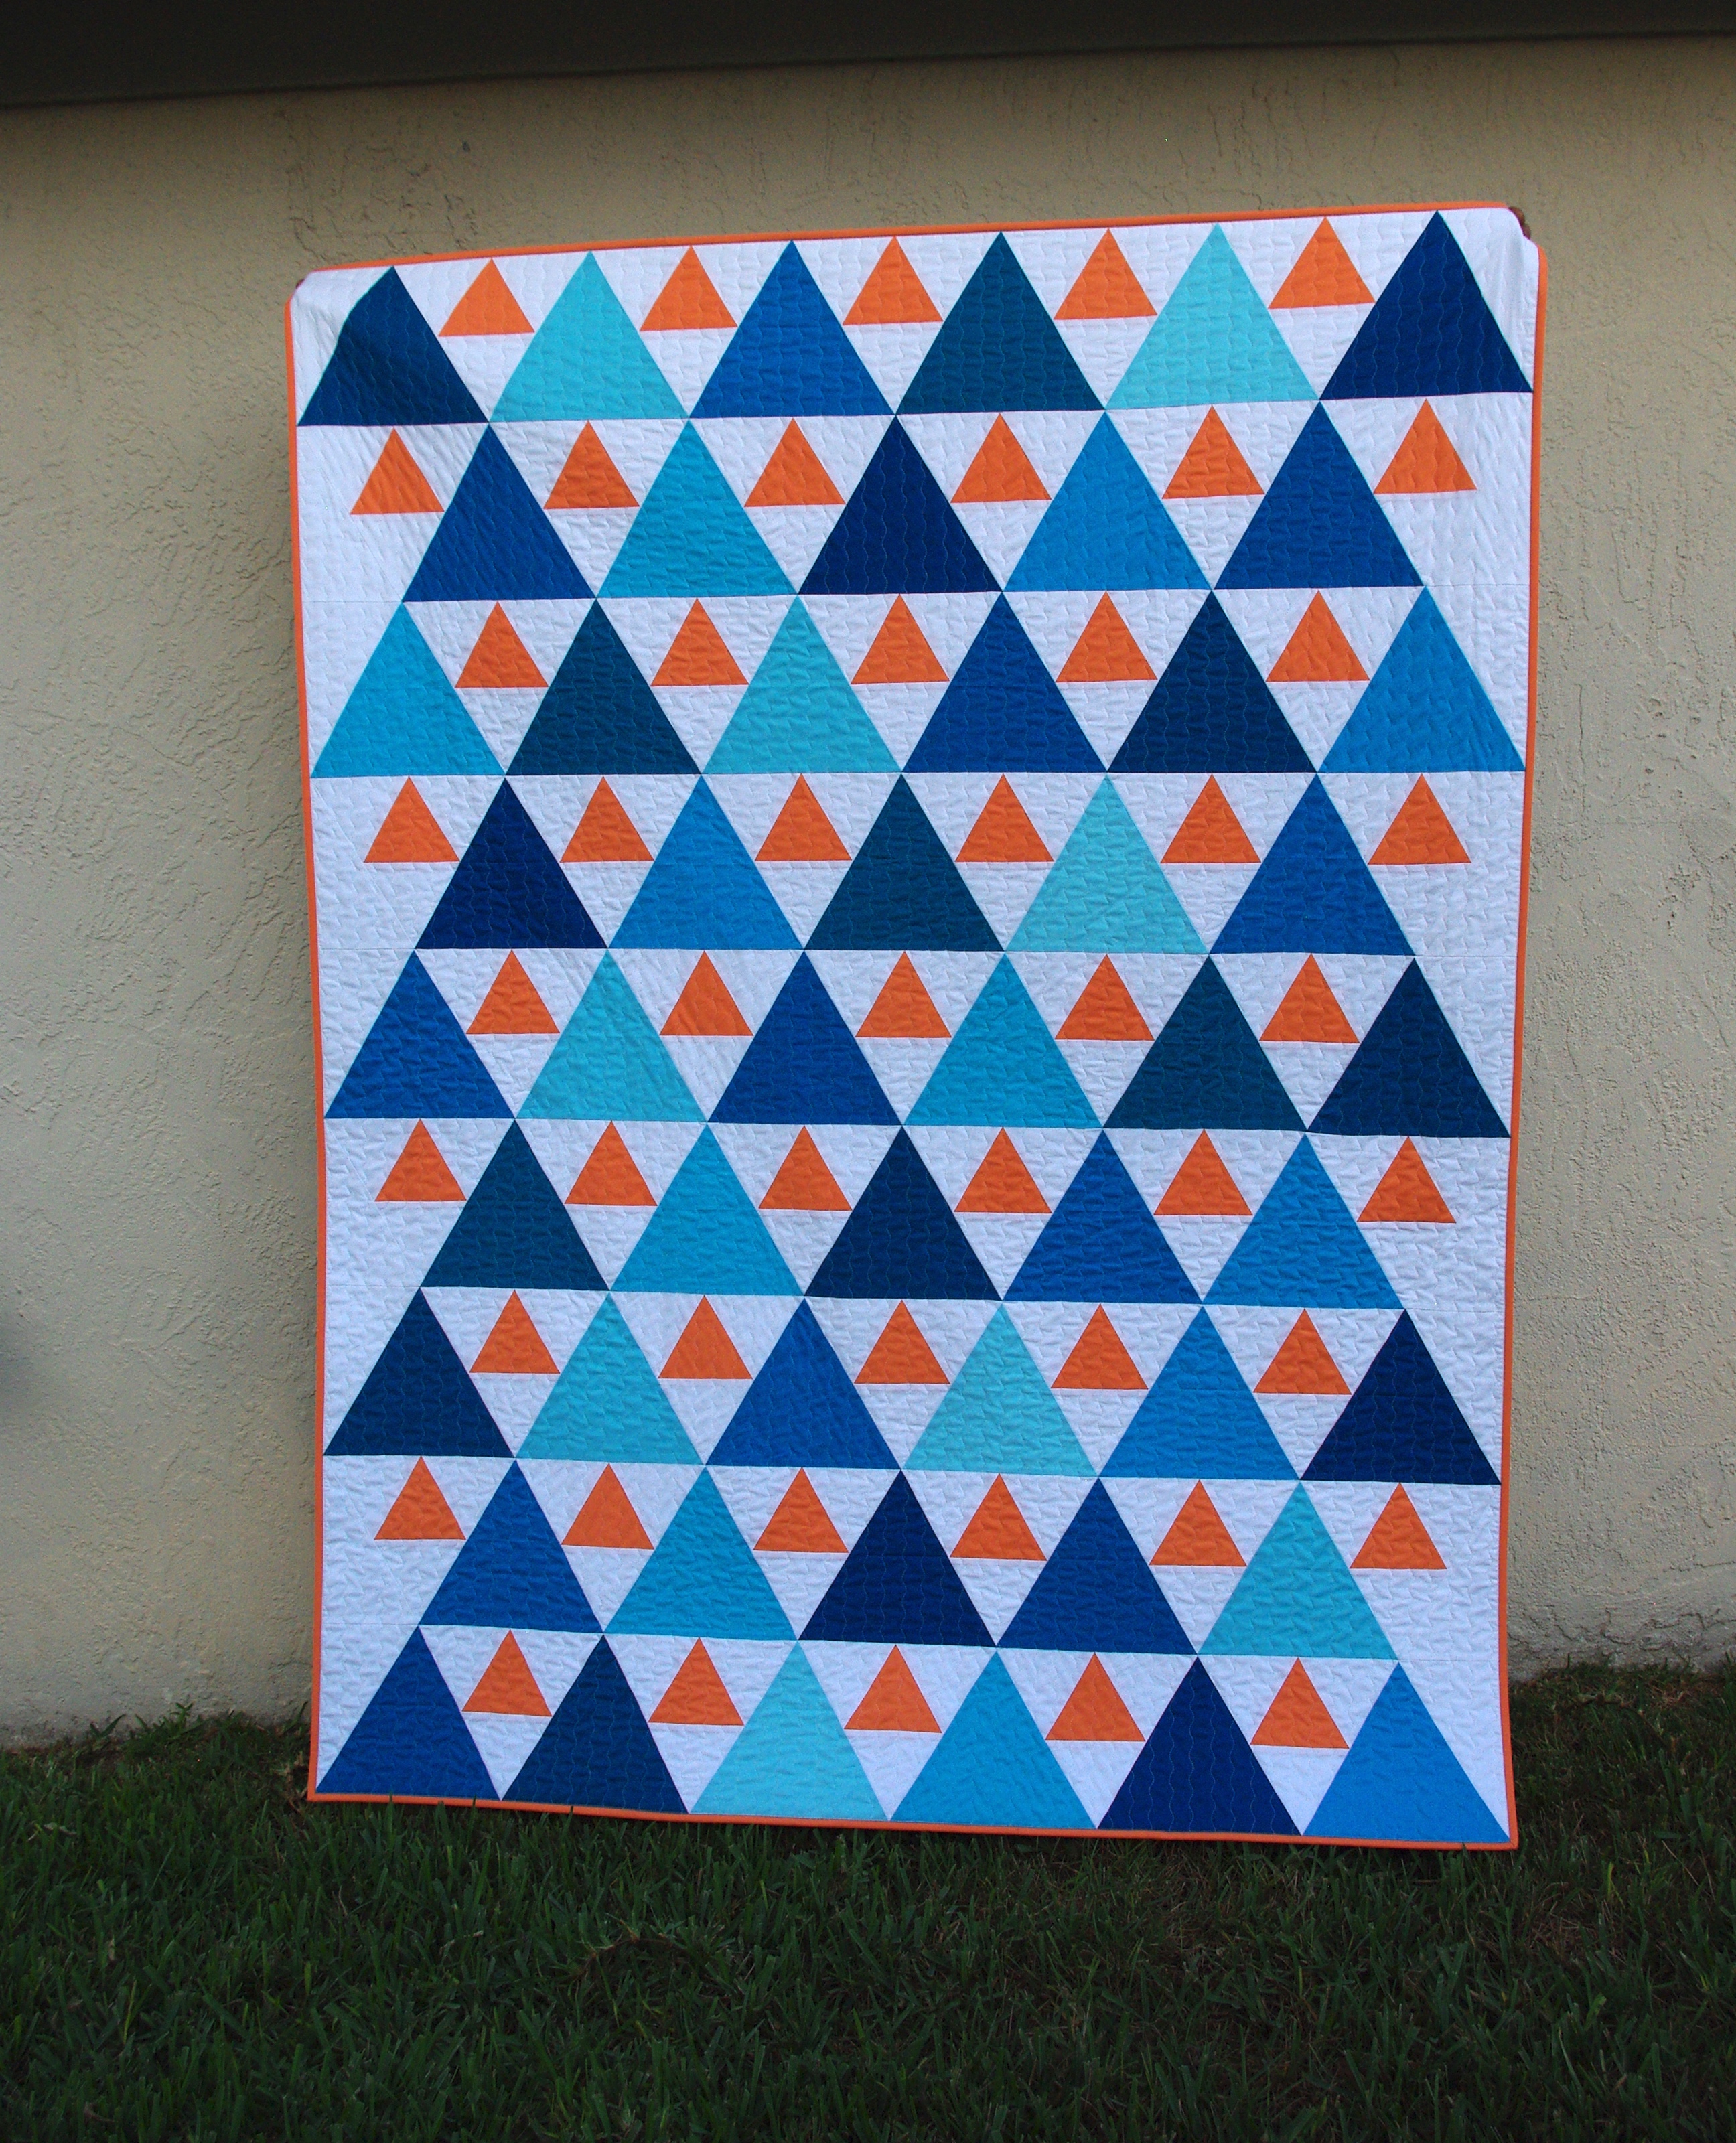
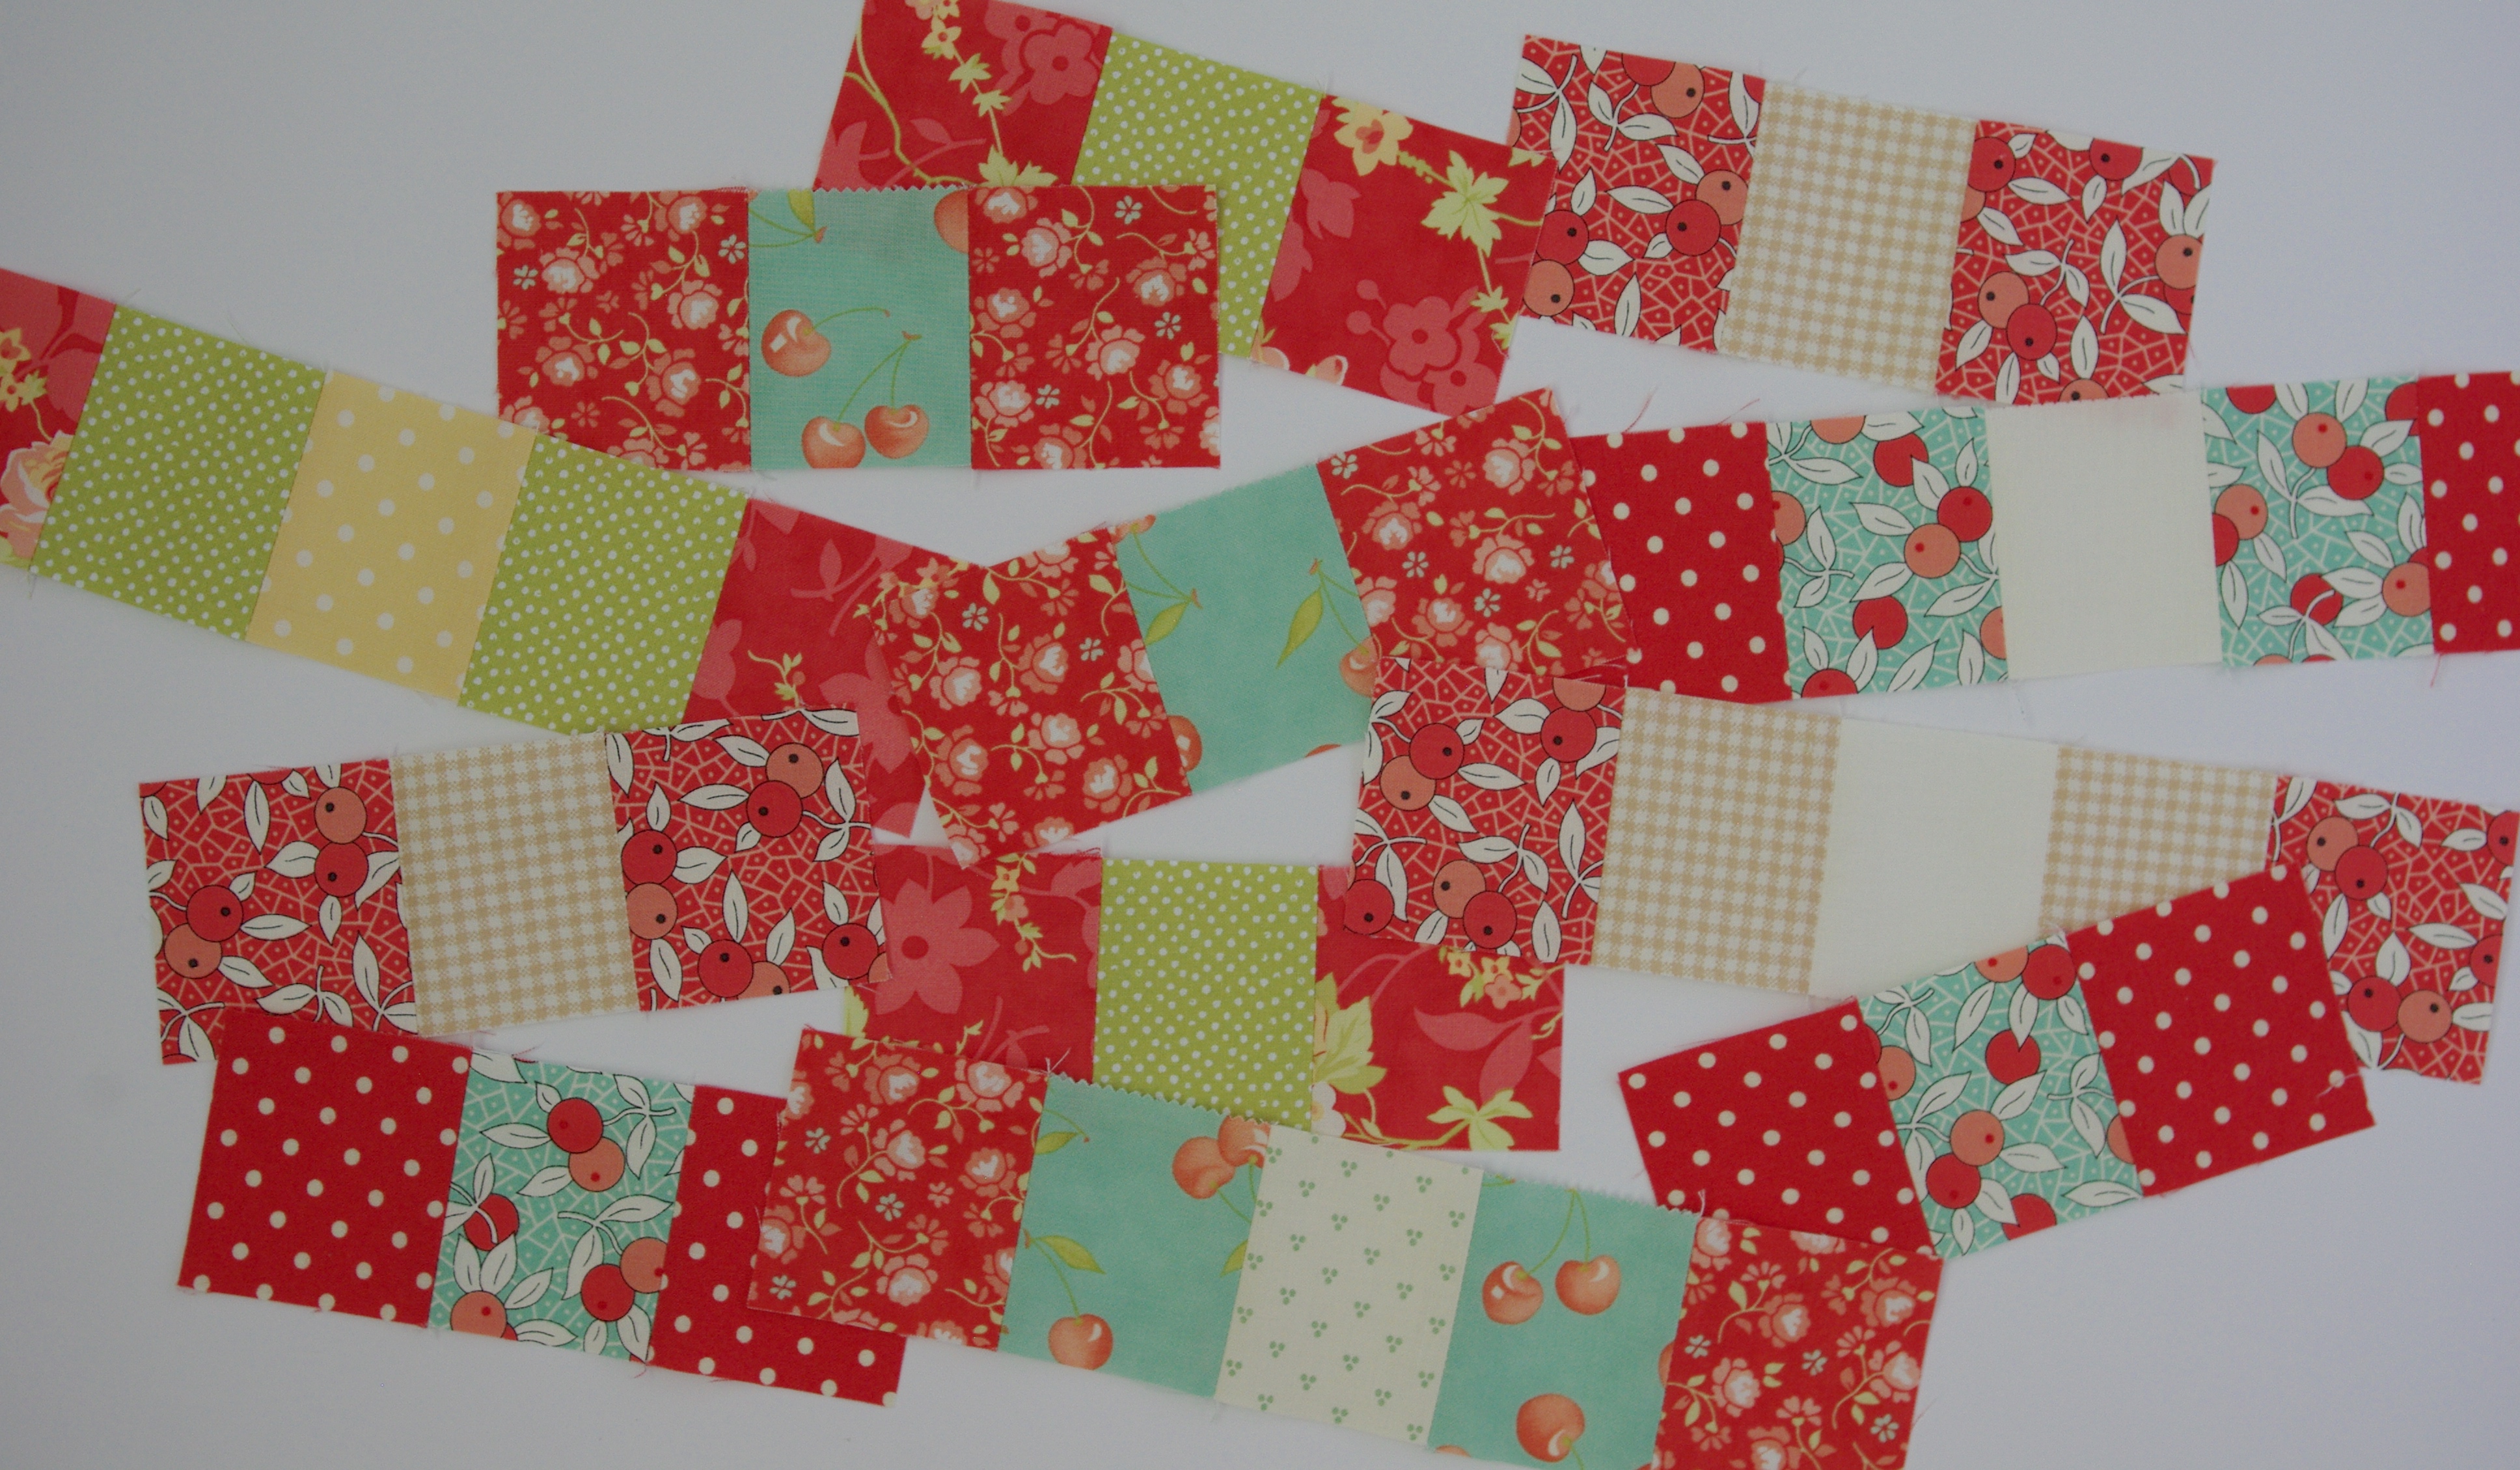
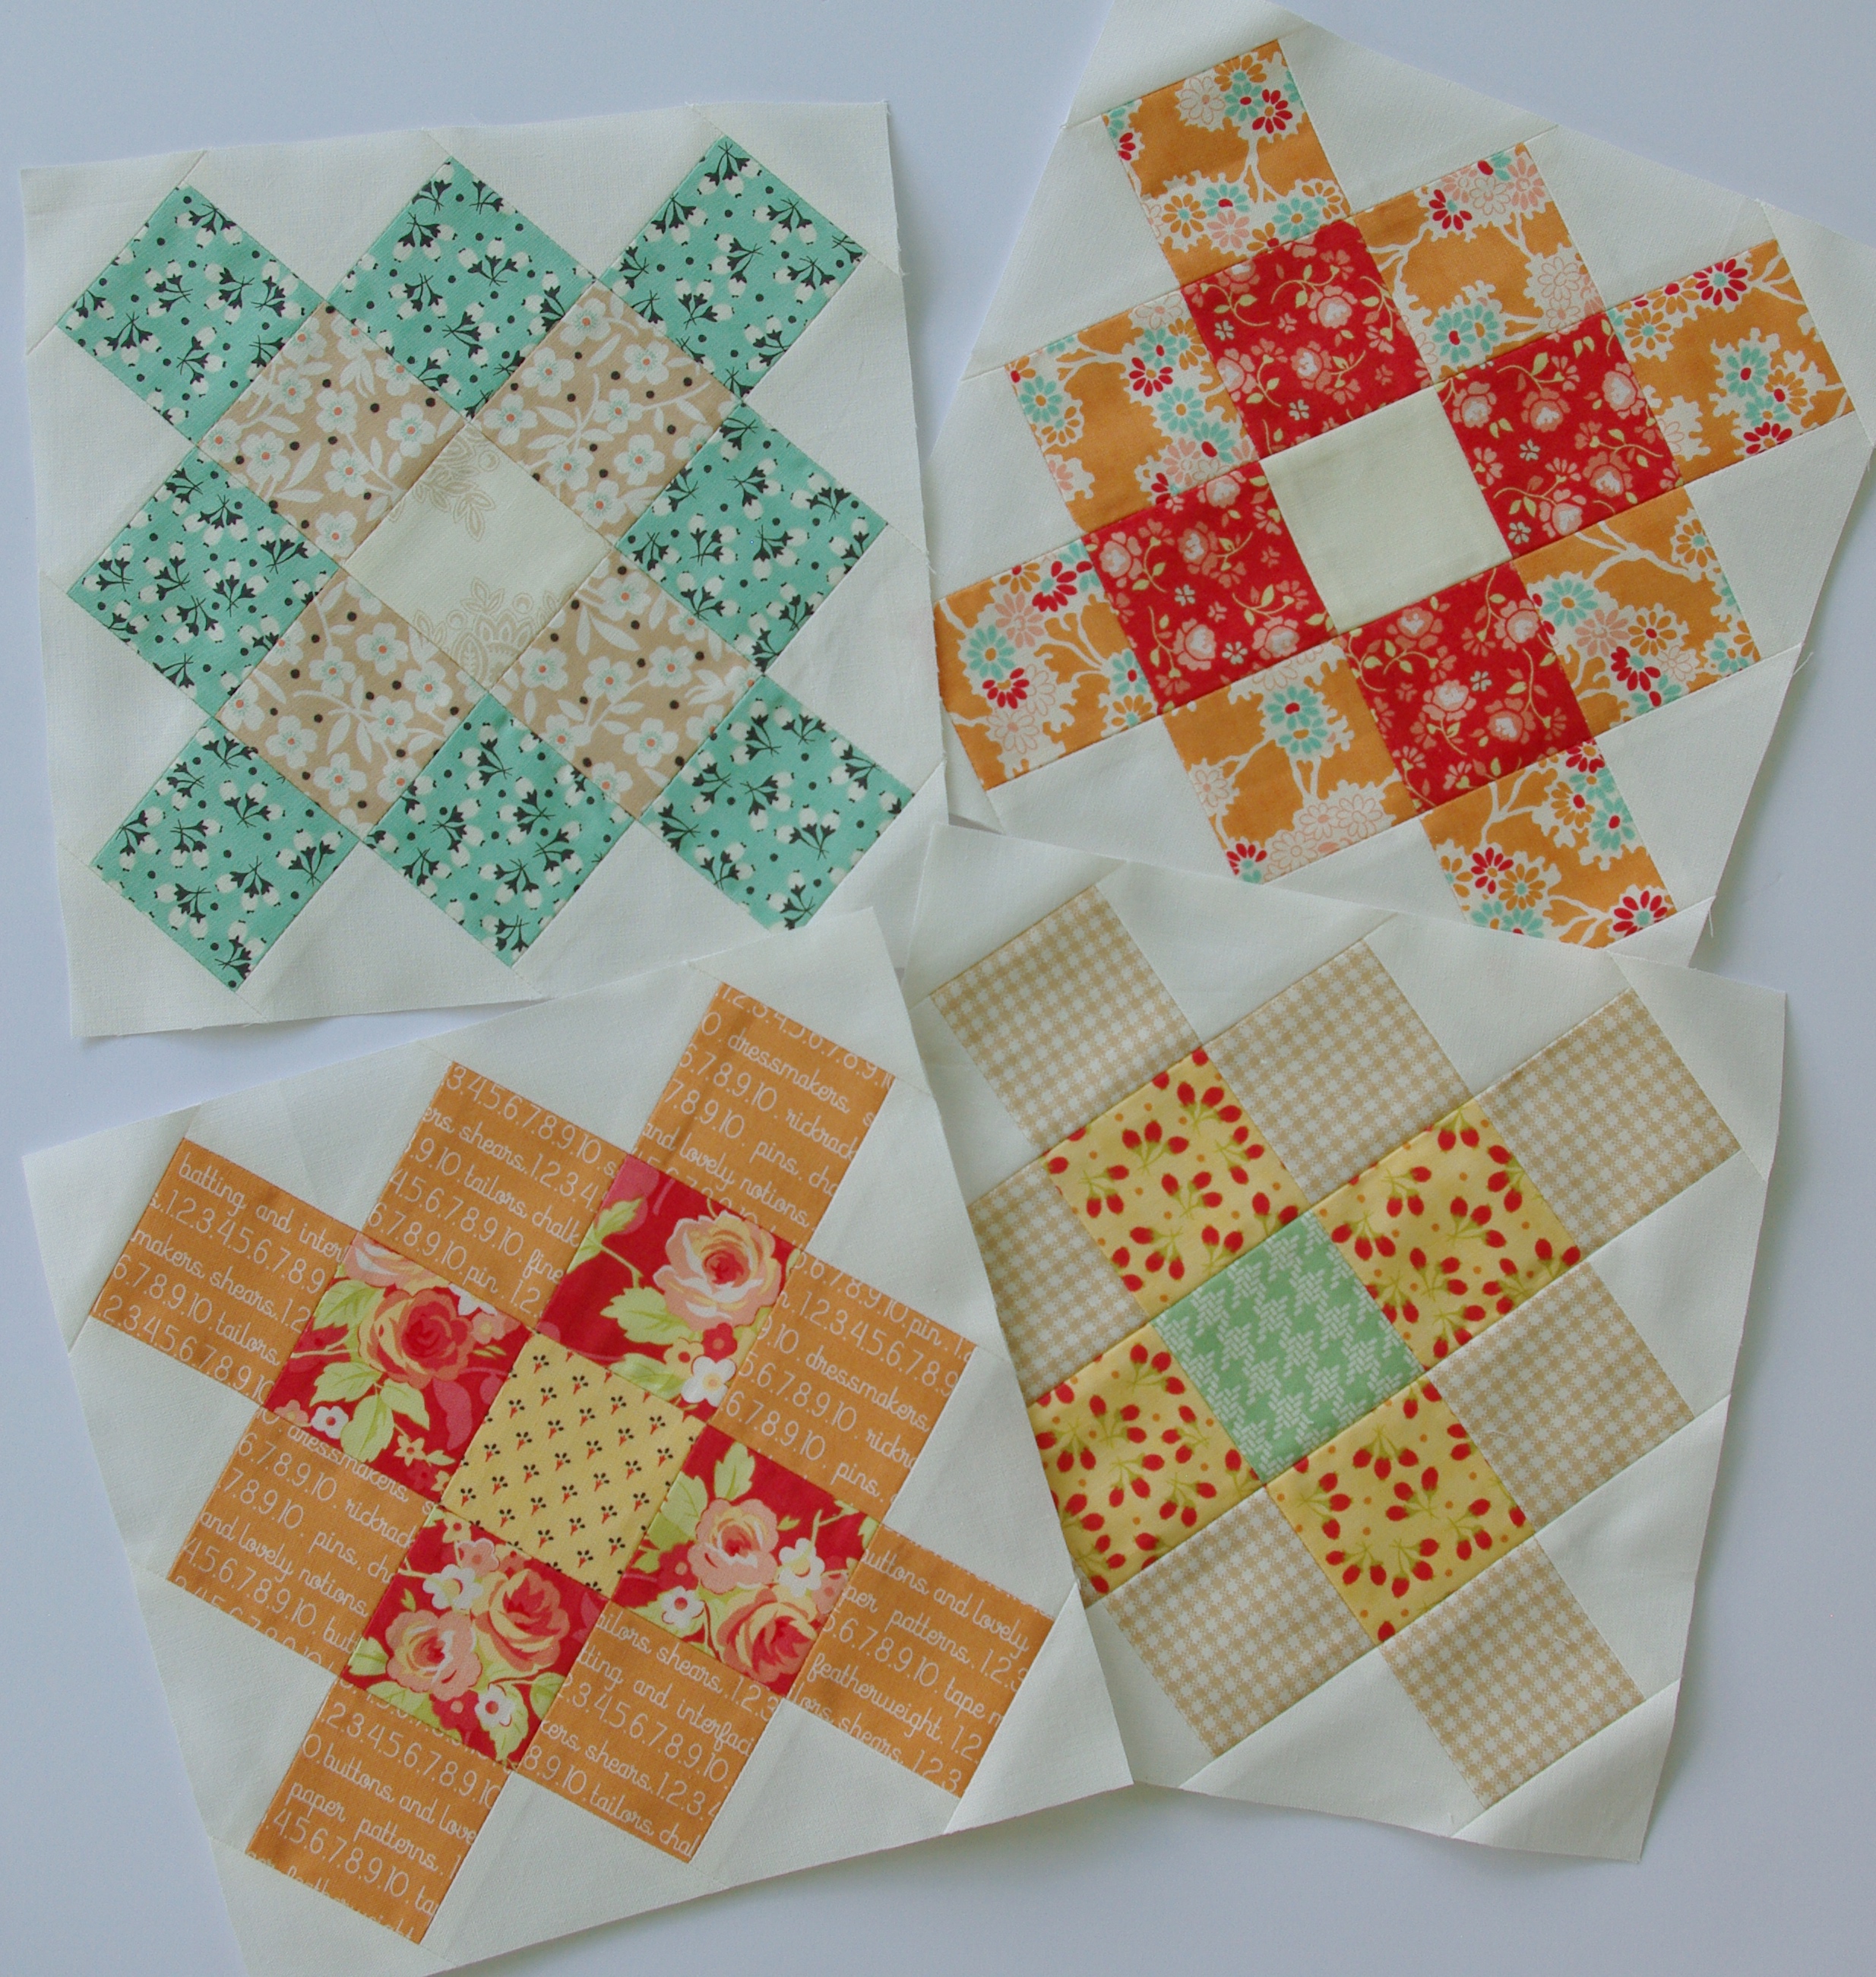
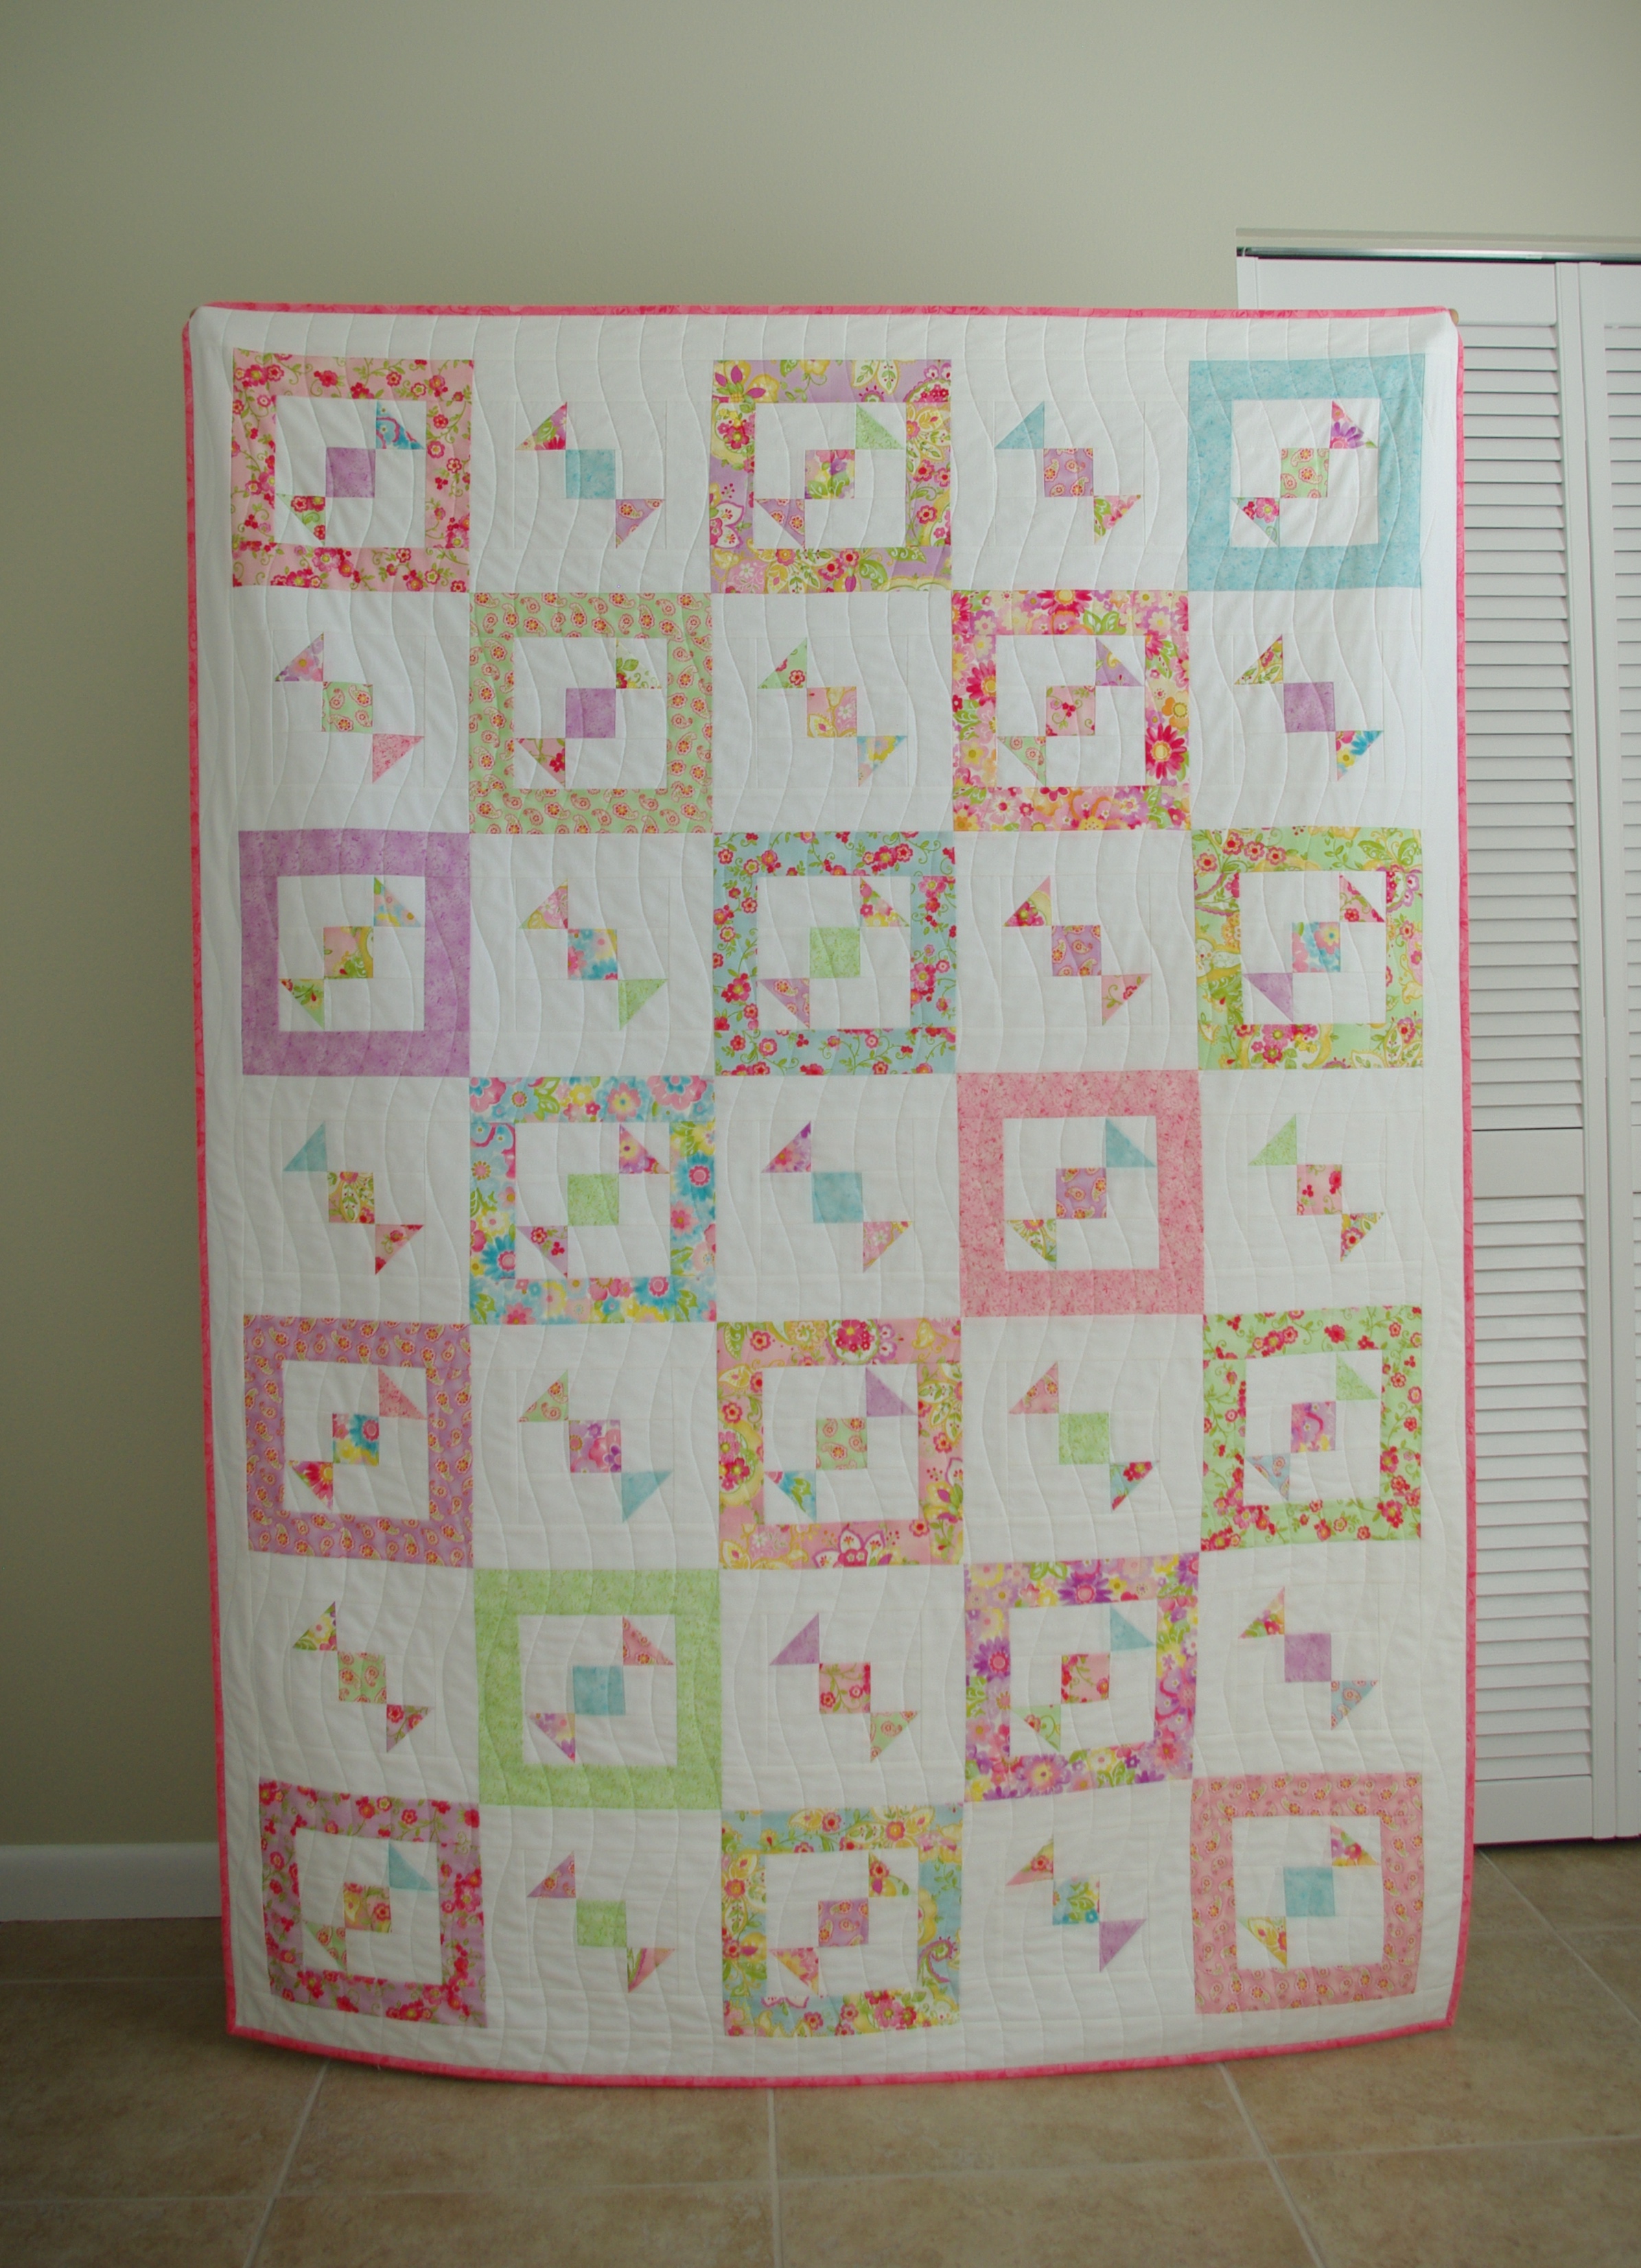
Here are a few shots of the first Diamond Jubilee quilt I made with the Transformation collection by Benartex. Such rich, bright colors.

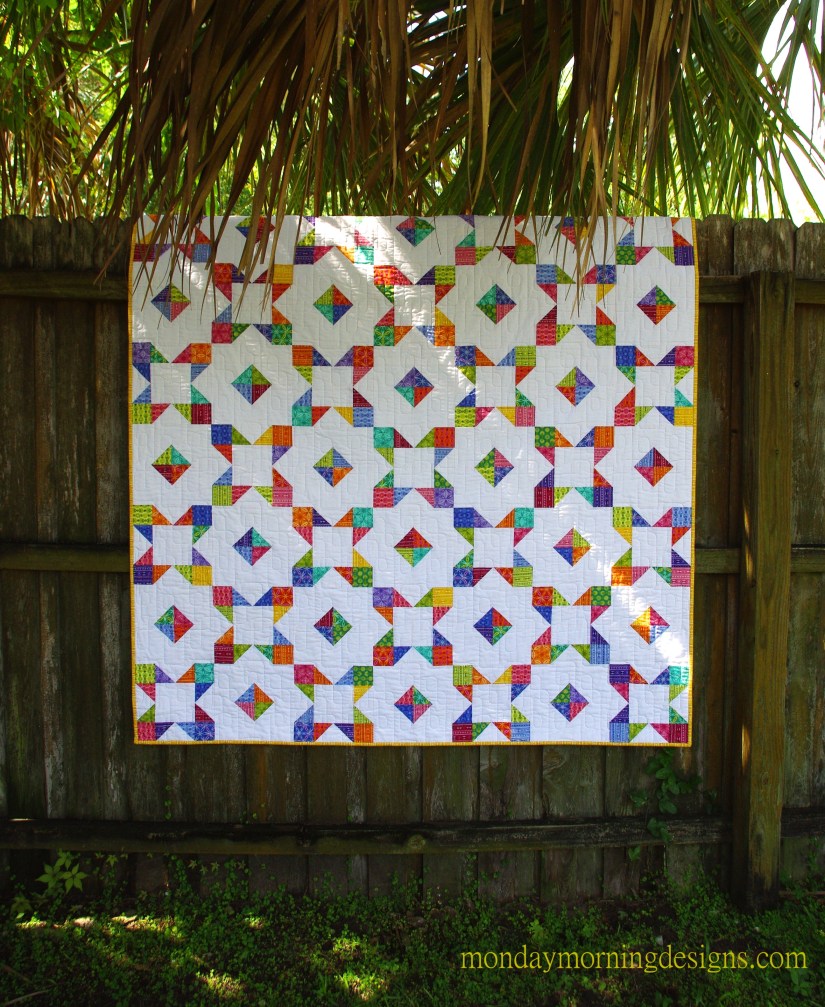
Now I have two of the same quilt…the first one I use around the house, the second one I’ll probably keep for displaying on my quilt ladder.

So that was my first quilt publication experience. If you have an idea and are considering getting it published, send it in, it’s definitely worth trying.

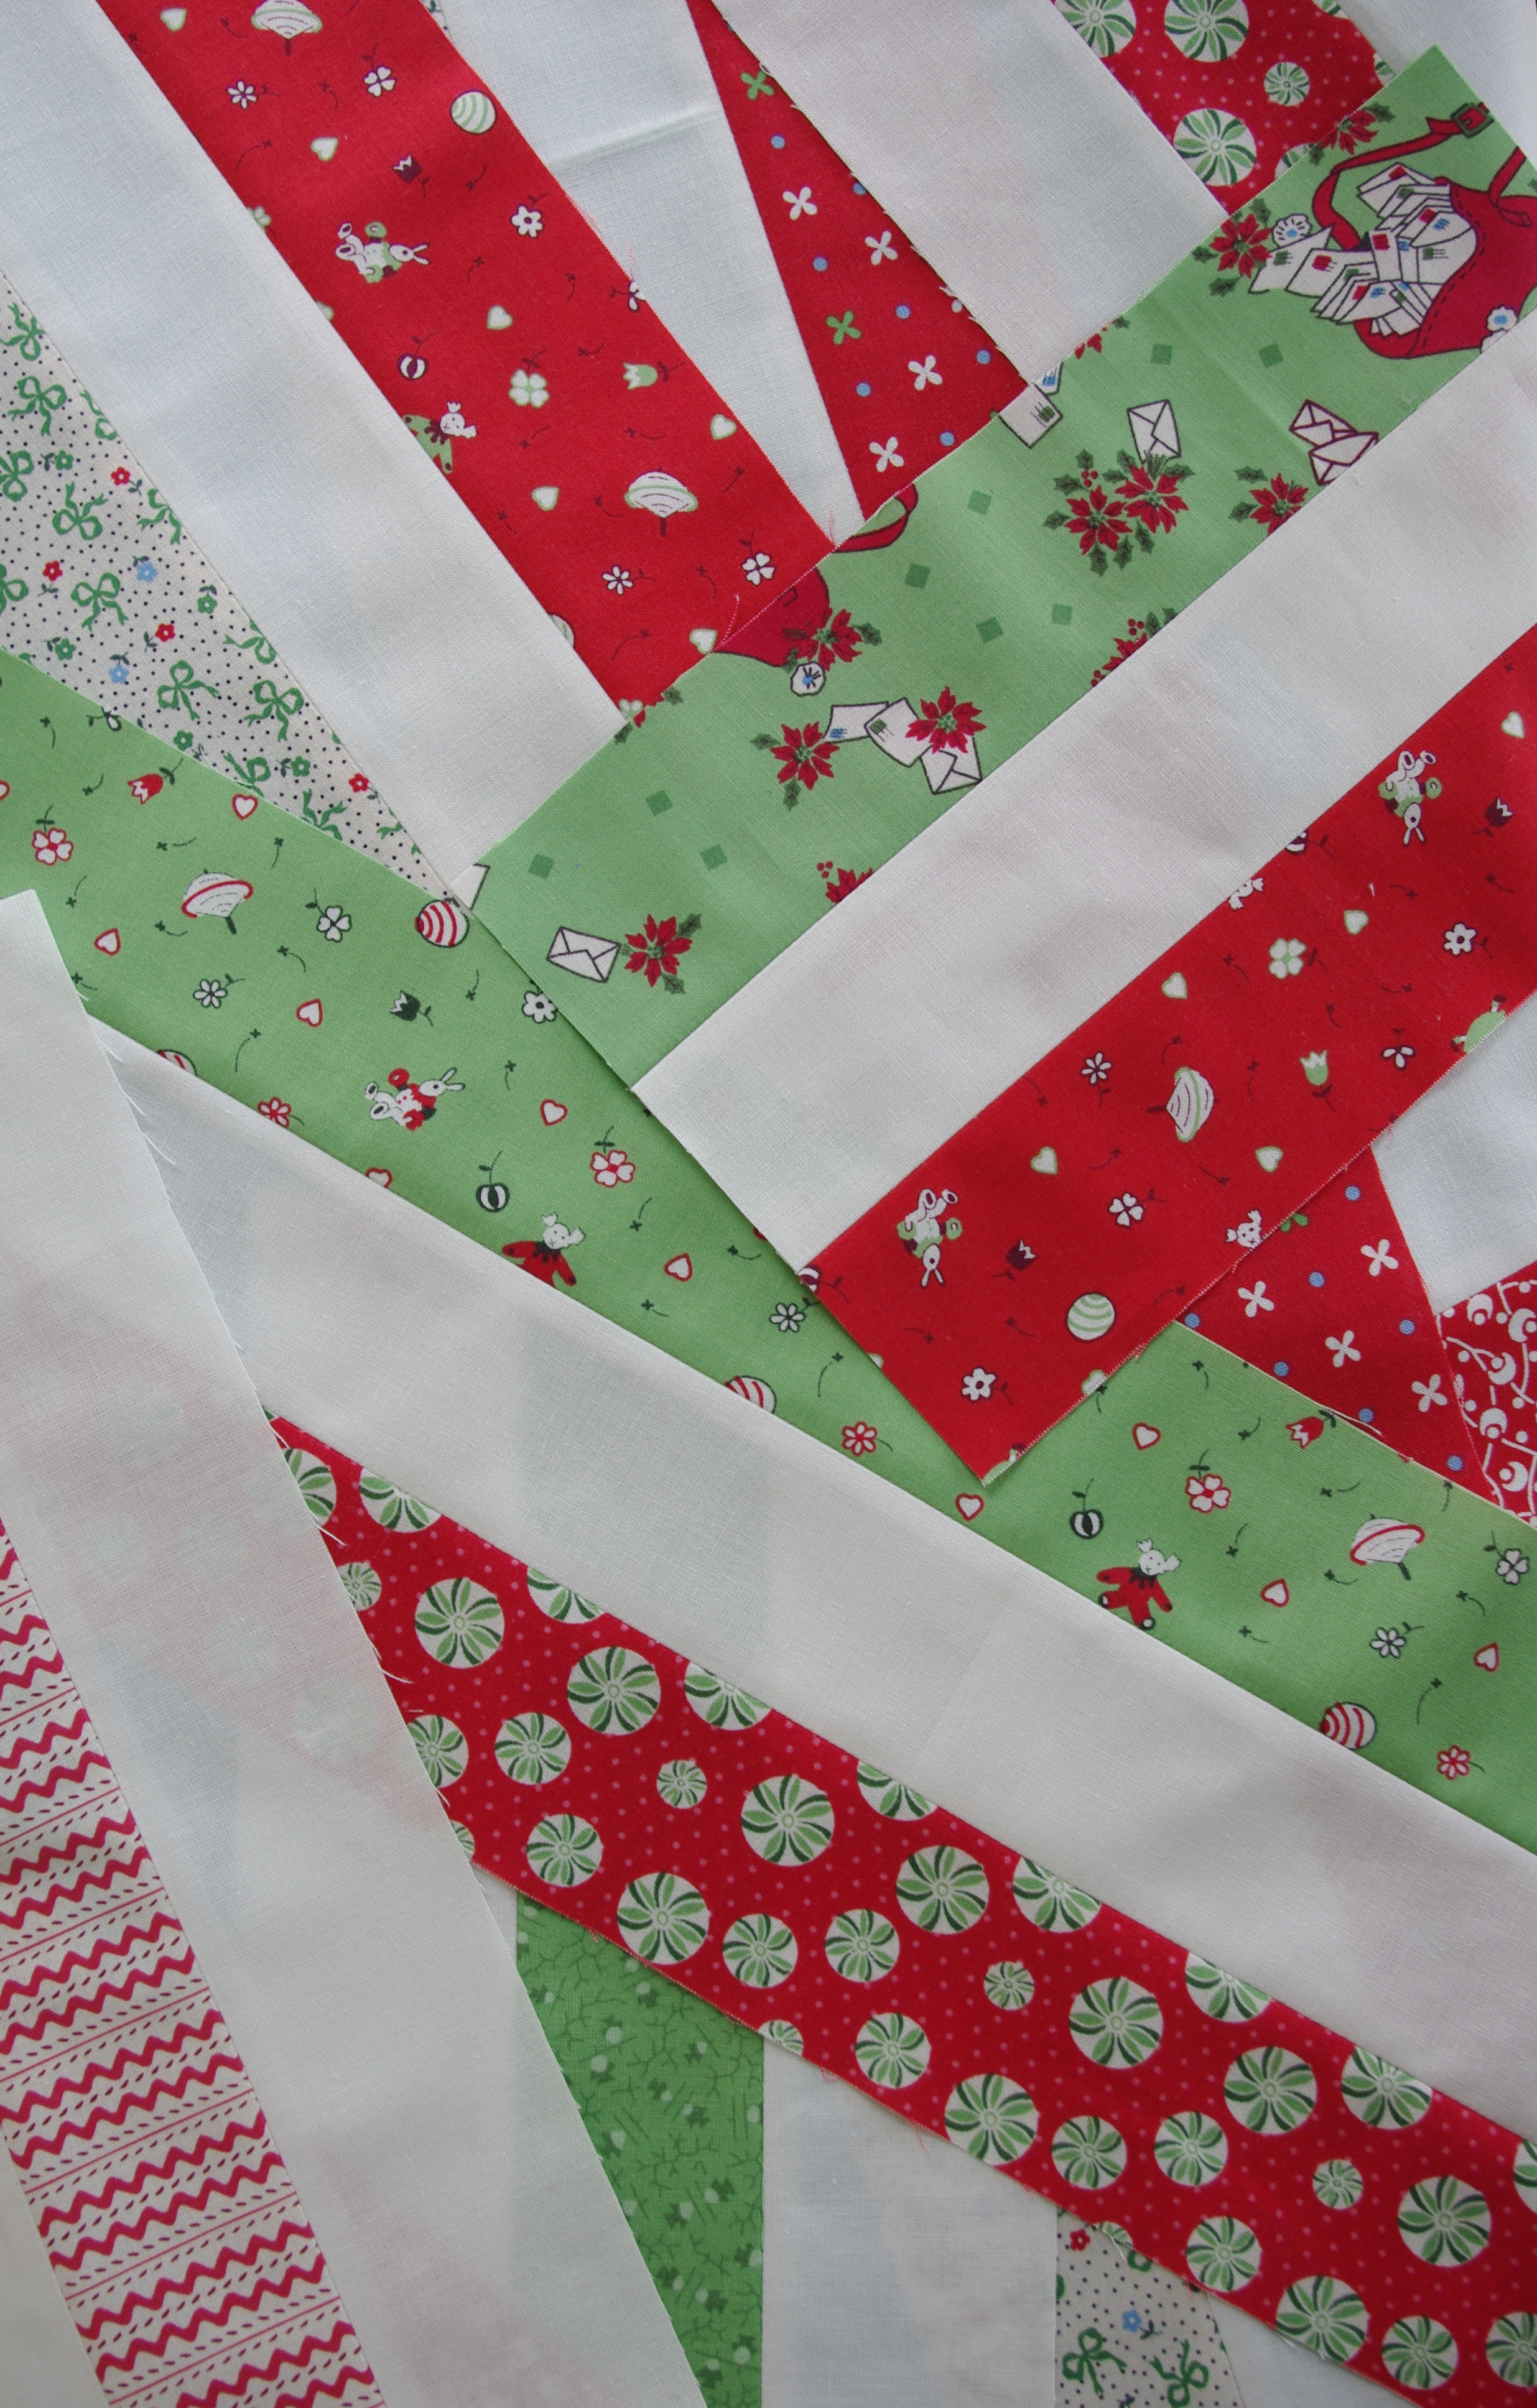
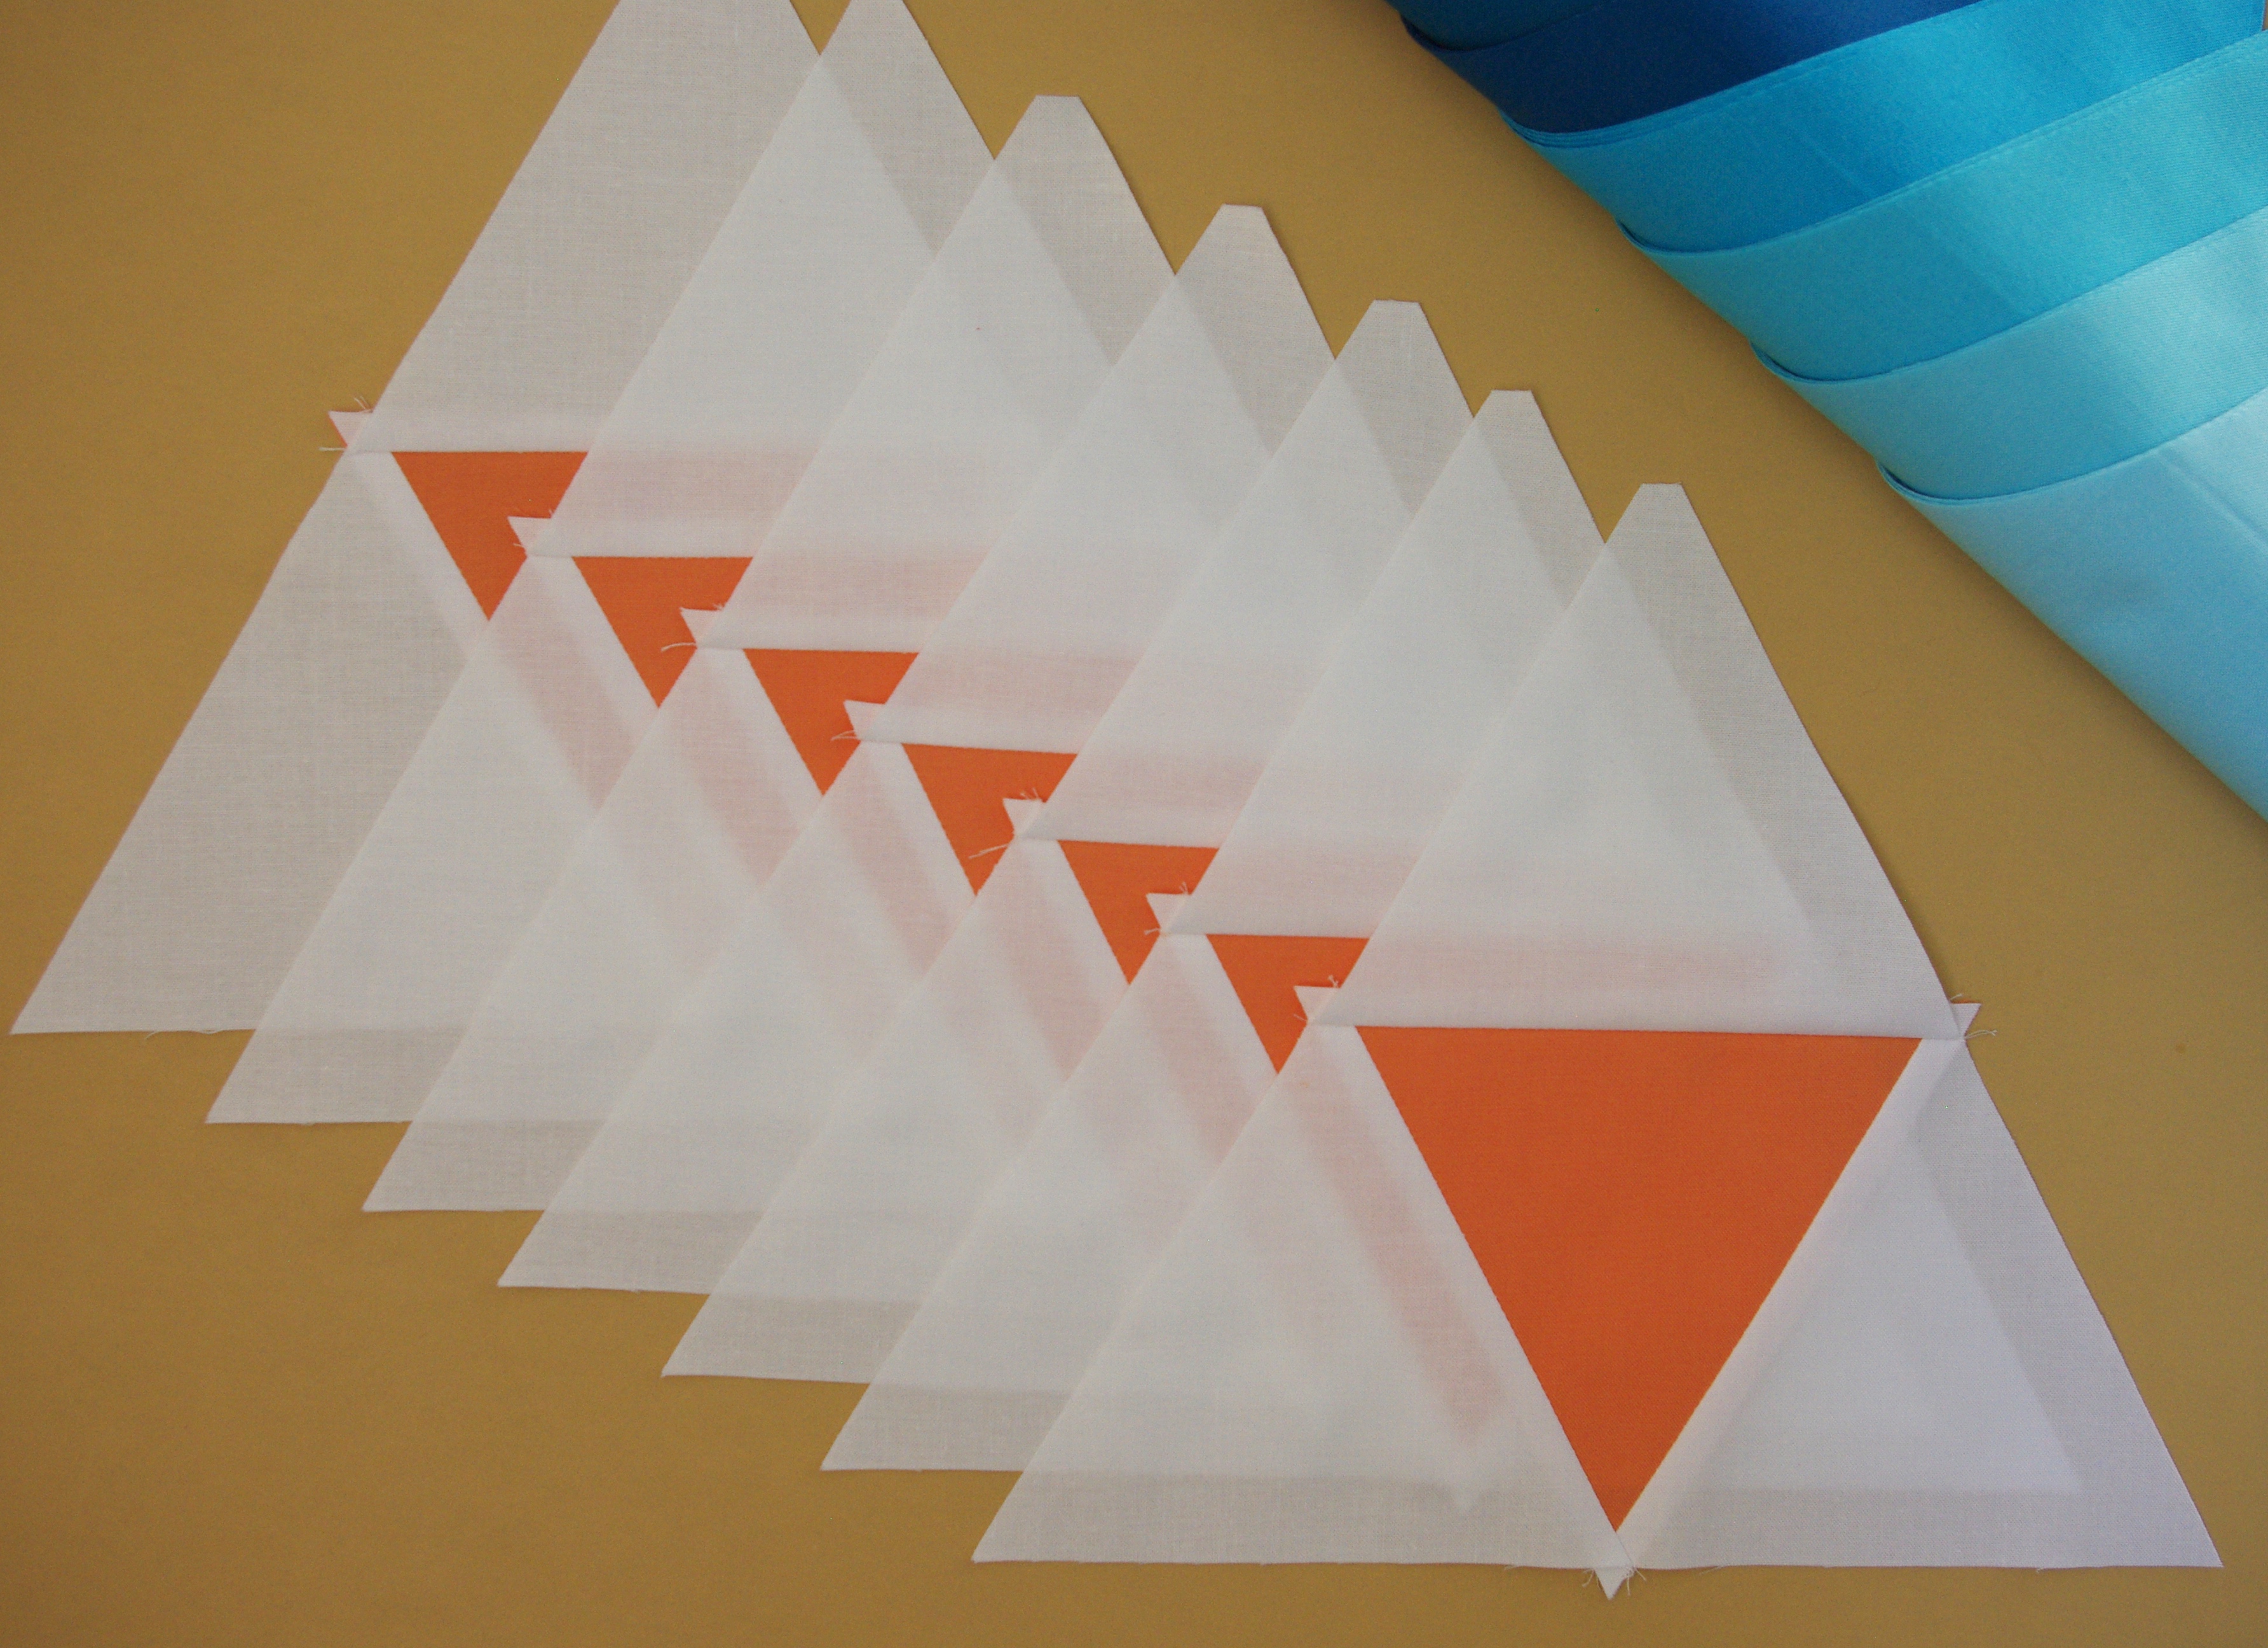
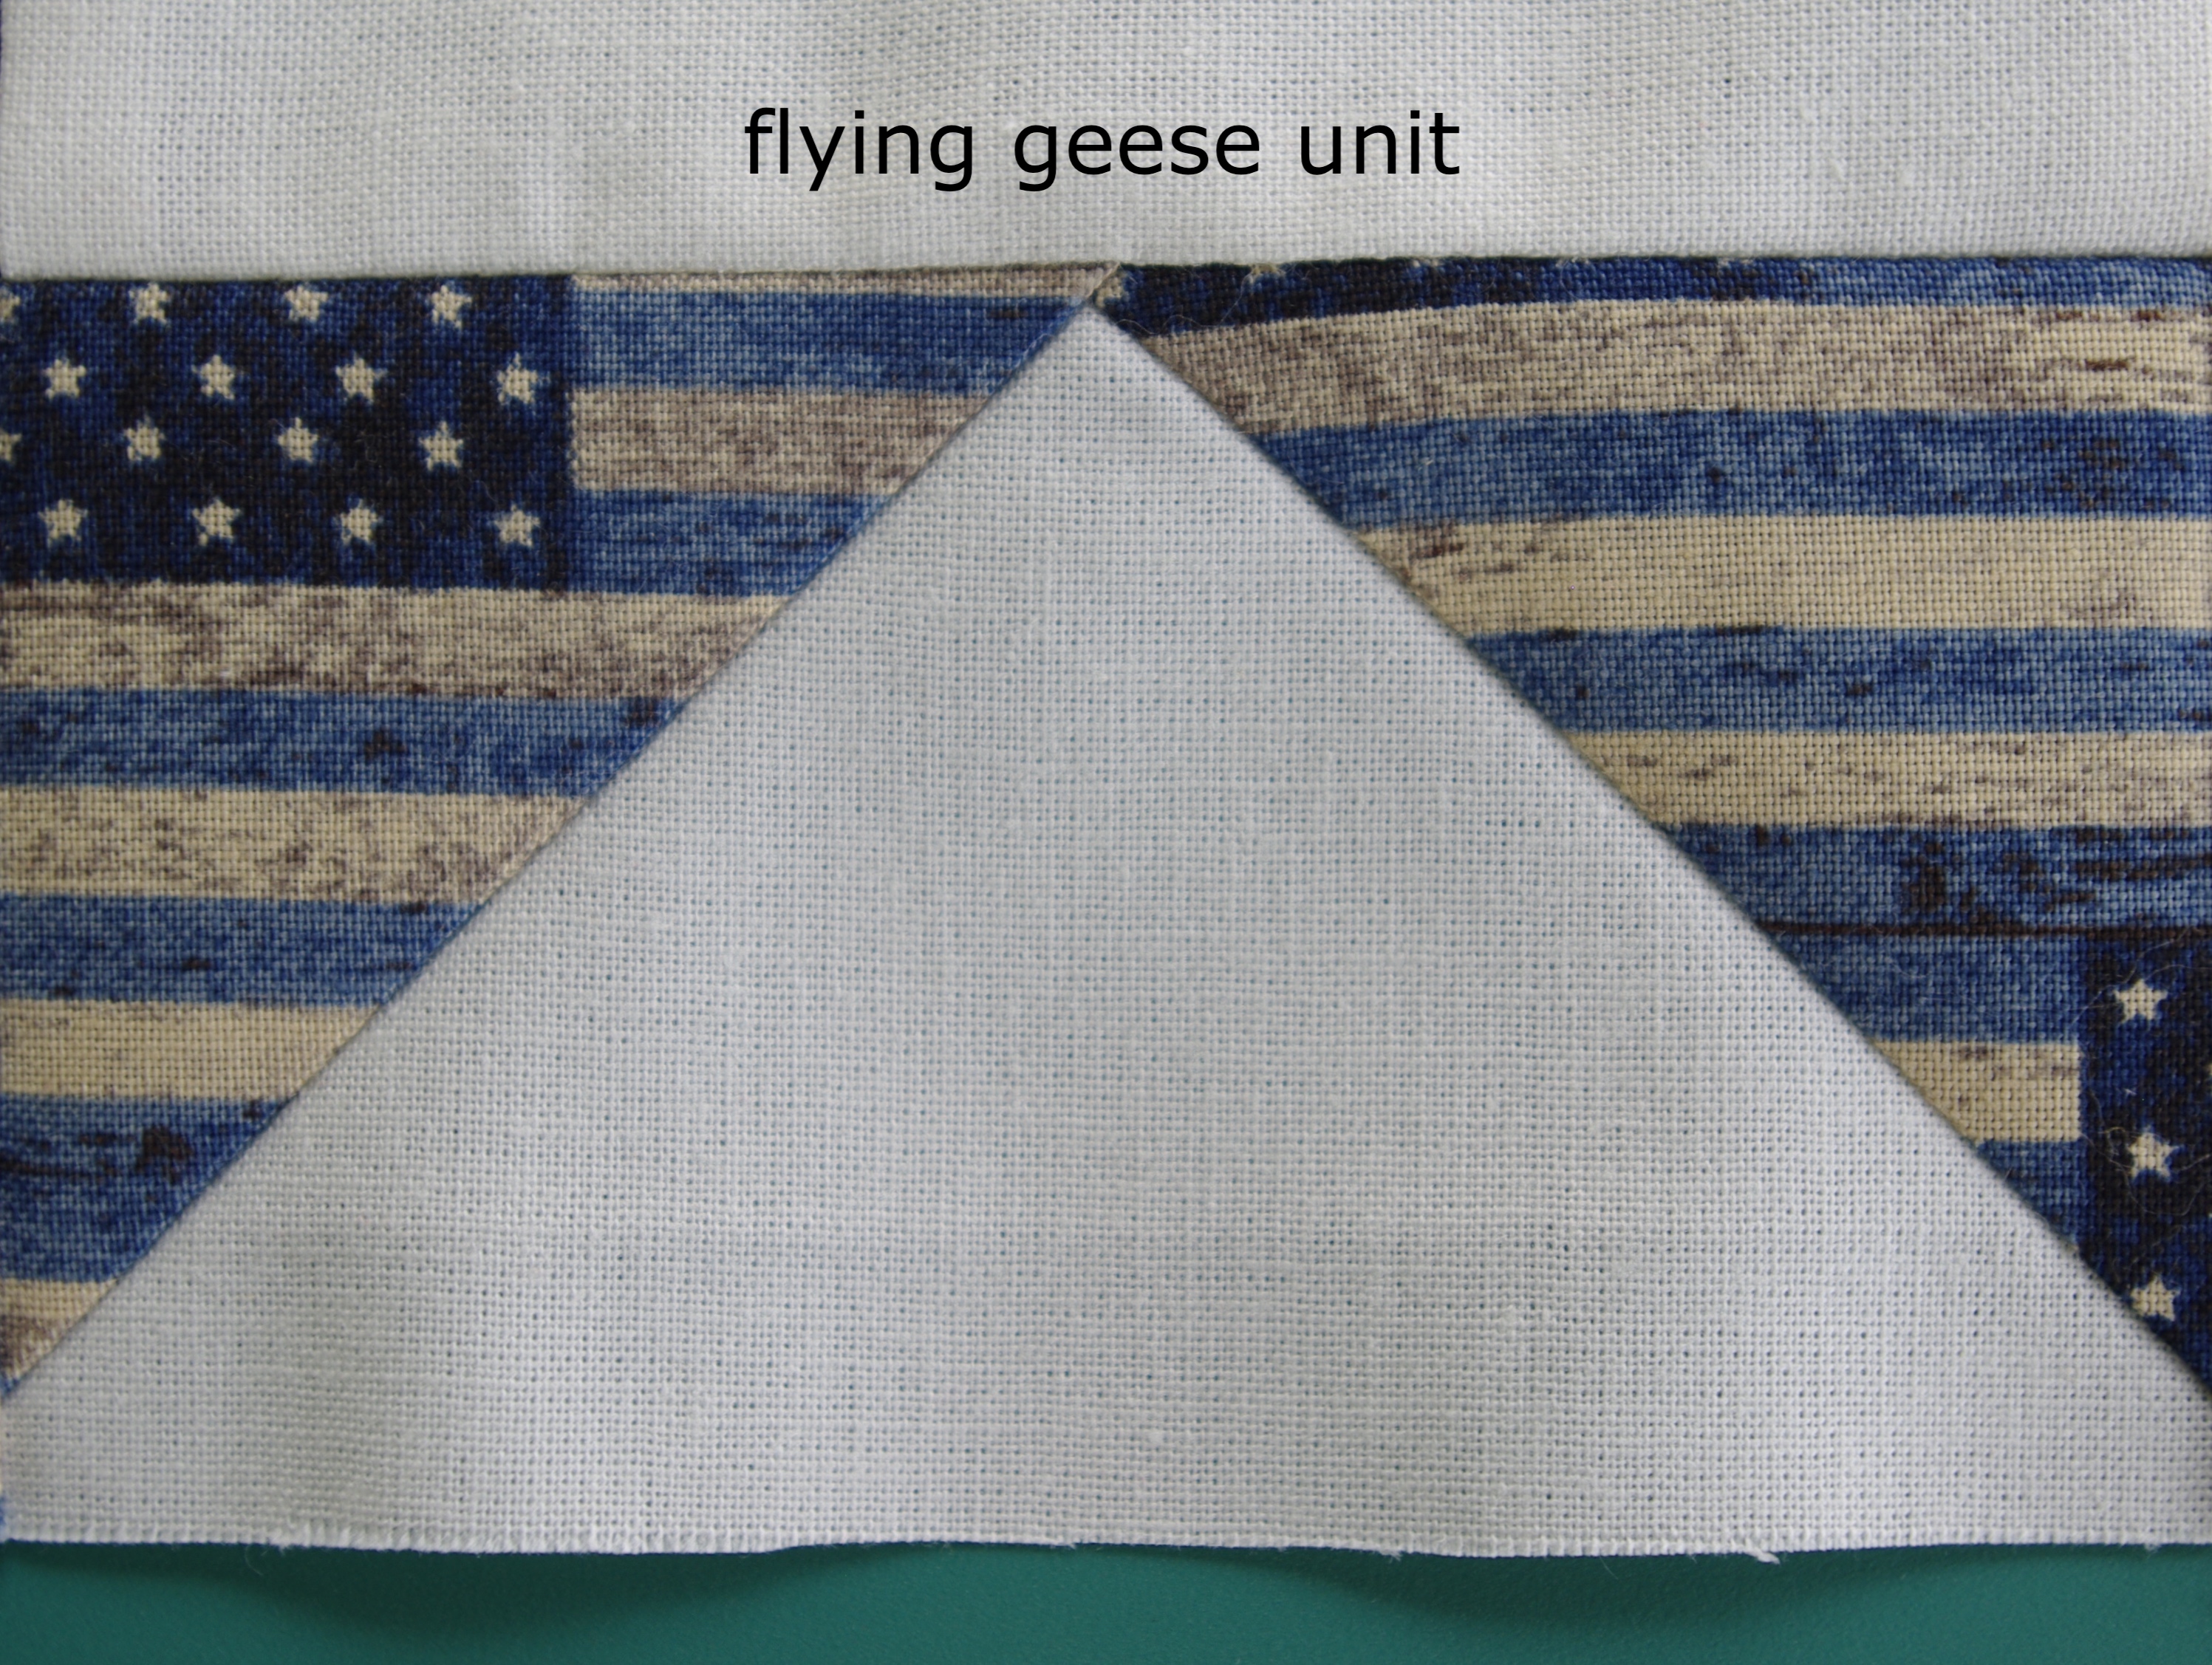
I hope to see other versions of this quilt, it’s a great choice for the quilter who enjoys making flying geese. There are several lovely projects in this issue so if you don’t have a copy grab one and use those precuts! Should you decide to make a Diamond Jubilee quilt, please post it and mention me on Instagram as I’d love to see your take on it. 🙂

Christmas, quilting, quilts, Uncategorized

Christmas Irish Chain Quilt

I’ve always wanted to make an Irish Chain quilt, so I finally did. I just love their simplicity. Earlier this year I purchased fabric for a Christmas tree mini quilt pattern, Wee Three Trees, and since it didn’t require a lot of fabric, I luckily had enough left for an entire quilt, scrappy binding included!

Greetings by Kaye England for Wilmington Prints

I definitely prefer traditional red and green Christmas colors and this fabric was a perfect choice as it offered peppermints, poinsettias, old-fashioned toy tops and letters to Santa for some old-style fun.

I started piecing this in May and finished in August which seems like it took me a long time, but I made a couple of other quilts in between, and overall, it went together relatively quick. I used precut 2 ½” strips so I was able to strip piece and chain piece the nine patch blocks.

IMGP7961.jpg

The background fabric is Kona Cotton Snow, which blended nicely with the light colors in the printed fabric. For quilting, I went with my ever-so-popular (and quite possibly ‘overdone’) crosshatch. I made my marks using a hera marker and as usual, it took a lot of time from start to finish.

IMGP8726.JPG

I thought the crosshatch would give the plain blocks some texture and I quilted my lines 1 ½” apart. I’m pretty happy with the results! It’s also a generous size, finishing at 64 ½” x 76 ½”.

IMGP9085.JPG

It’s hard to discern, but the backing is white with a faint gray/silver snowflake print. And for some reason that fabric is so soft!

Well, now I’ve got my traditional Irish Chain quilt that I can finally enjoy this holiday season.

IMGP9093.jpg

Merry Christmas!

modern quilts, quilting, quilts, Uncategorized

A Triangle Peaks Quilt

When I saw the Triangle Peaks quilt made by Emily Dennis I knew I needed to make one for myself. Lately I’ve been using fabric I have on hand, which isn’t a whole lot and is probably considered a relatively small stash for a quilter, but I was determined to make this pattern using what I had.

A couple of years ago, with another project in mind, I purchased a 12-piece Kona Cotton fat quarter bundle entitled Pool Party. This lovely collection offered a range of blues and aquas from light to dark with a few deep blue-greens mixed in.

While I don’t consider myself a ‘blue’ person, I really took a liking to this combination. And since that particular project never came to fruition, I pulled my fabric and set out to make my version of a Triangle Peaks quilt. To compliment the blues, I decided on Kona Cotton Mango for my ‘accent’ color (the small triangles) which I did have to purchase, along with backing fabric.

IMGP8870.jpg

This was my first time working with triangles, which I enjoyed, but bear in mind if you make anything with triangles every one has two bias edges that are prone to stretching if you’re not careful.

I completed the accent triangles first then everything else was ready to sew together. For me, deciding on the layout was the most difficult part. I used only nine of the twelve colors of blue which was enough to spread them out evenly, but it still took some time to make sure the like-colors were far enough away from one another.

IMGP8994.jpg

Once the top was finished it was time for quilting. If you’ve read my blog posts in the past you know I don’t exactly love the quilting aspect. If I could afford it I would have just about everything longarmed! But since I can’t, I end up doing quite a bit myself.

Since this quilt is so modern and angular, I felt the quilting needed to softened it up. That said, I decided on vertical lines using my serpentine stitch. Maybe subconsciously I thought it would give it a wavy, watery feel. 🙂

After sewing my basting stitches across the top (to help reduce shifting and pulling) I started quilting from the middle then to the right, marking lines every 1 ¾” with a hera marker. This process took forever! But I admit, I’m pretty slow.

IMG_8128.jpg

Once all the 1 ¾” lines were finished, I used my guide to quilt the lines in between. This saves time from marking rows, and it works well, my lines were fairly accurately spaced.

IMGP9037
Quilting with Aurifil thread 2026/Chalk

I think the serpentine stitch was a great choice.

It ended up that I didn’t mind quilting this one at all. I kind of went into auto pilot mode, just plugging away row after row. It took me more hours than I could count but I love the results.

I used Kona Cotton Mango for the binding.

Here’s my finished throw size quilt.

I’m really happy with this one and plan to get some good use out of it!

quilting, quilts, Uncategorized

My ‘Half Quilt’ Invention

Does this scenario sound familiar to you? The weather is cooling down so you get out all the necessary blankets and quilts. You have them nicely made into the bed only to hear your partner exclaim it’s too many covers. My husband and I simply cannot agree when it comes to this topic, he’s usually too hot and I’m usually too cold. This has been going on forever and it was time the problem ended!

After doing some thinking, I came up with an easy solution—the ‘half quilt.’ The half quilt is basically a quilt half the size of a bed quilt width-wise, made wide enough to cover just one person. Each person gets one so they can use it at their own discretion. Personal choices won’t affect anyone else; you can’t beat that!

I recently made one for my husband by strip piecing just two fabrics. Because he’s an avid bird watcher, I chose Blue Moon Owl fabric by Dear Stella and Kona Cotton Navy.

IMGP8843.JPG

IMG_7984

It’s a simple 5″ patchwork design, nothing flashy or complicated, made mainly for functionality. I quilted it in simple squares and machine sewed the binding figuring it would hold up better to frequent laundering.

IMGP8999

IMGP8997

There’s not a lot of math involved, just figure out how wide and long it needs to be to cover the person comfortably. This quick quilt finished at 40 ½” x 71″.

IMGP9005.jpg

My half quilt idea is not entirely new, I made one for myself two years ago. I chose a classic herringbone pattern made with Moda’s Paradiso charm packs and Kona Cotton Snow. It measures 40 ½” x 63 ½”.

IMG_4603.jpg

Just to illustrate differences, I’ve had mine out for a couple of weeks now and my husband hasn’t even used his yet.

The weather is getting chilly and it’s time for warmth. I highly recommend making a couple of these half quilts, they’re the perfect solution for the ‘too hot, too cold’ sleeping issue! And of course it’s a great excuse to make another quilt. 😉

quilting, Uncategorized

Should You Cut Up Your Kona Color Card?

Instagram images of cut up Kona Color Cards got me wondering if that was something I wanted to do with mine. Was it better to leave it as is or cut it up? I needed some time to think about it, weighing two things—ease of use and storage.

While I love how the card looks in its fold-out format with all the colors in perfect order (referring to the New 340 Kona Cotton Solids Color Card), but it is cumbersome to use when trying to chose a color. However, if colors were available in individual swatches, choosing would be much easier.

The book-type card is awkward for me to store as I don’t have anywhere to stand it up in my closet due to wire shelving. That said, I have to lay it flat and I always end up putting something on top of it making it difficult to find. For me, there are only two options for storage once cut into swatches, either a divided box allowing for organization or just a plain box with everything thrown in; either way I have room to store a box and with easy access.

Overall, cutting it up would make it easier to use and store, so one afternoon while in between projects I decided it was time to take the plunge. I grabbed my ruler and rotary cutter and got down to business.

IMGP8963.JPG

The first thing to do is to cut it into strips. I left a bit of cardboard on top so the pieces would be easier to hold since there won’t be any cardboard along the sides. Also, if I need to clip the swatches onto anything, I’ll have that little edge.

Next, cut into individual colors. This took some time! And I should mention, take breaks in between cutting. Cutting through all that cardboard does put a bit of strain on your wrist and arm (at least it did on mine).

IMGP8976.JPG

Here’s a lovely sampling of what you get. Oh so colorful!

Lastly, what to store everything in. I am using this cute little bin temporarily. This shows just the bottom row but I cut a piece of the excess cardboard and made a divider. Eventually I’ll get something with a lid, but I’m not sure whether I’ll go with a divided box or not. I was thinking maybe an embroidery floss box might work so I’ll check that out at my local craft store next visit.

IMGP8983.JPG

So, there you have it, 340 Kona Solid Color swatches. You may be asking yourself, should I cut up my Kona Color Card? I say yes, definitely recommended!

quilting, quilts, tutorials, Uncategorized

Quilting on a Whim (A Granny Square Quilt)

I admit, this is the first time I’ve ever made a quilt on impulse. It happened while scrolling Instagram and granny square posts kept showing up from the Moda Bake Shop. Almost instantly it clicked—I knew I wanted to make a granny square quilt and I had the perfect fabric for it. And since I recently finished a rather challenging and labor intensive queen size quilt, I needed something easy!

A while back I ordered a fat quarter bundle of Moda’s Chestnut Street for a fall quilt. While I cut what was needed for the pattern, I never made the quilt because I couldn’t decide on a background fabric. Since I had plenty of Chestnut Street left over, along with additional fabrics from other Fig Tree collections, I knew I had enough fabric and variety (plus I added two Dear Stella Mini Dots). I’d also been intent on stashing down, so it was definitely a go! I stopped what I was working on and started pulling fabric. And let me tell you, it was FUN. 🙂

Image-1.jpg

IMGP7220

There were so many things about making this quilt that made it fun…for example, I had no plan, it was literally on a whim. I randomly mixed and matched fabric, whatever I felt went together got put together. I was using what I had, and of all cuts – an older charm pack, scraps, fat quarters, yardage…including the background fabric, Kona Cotton Snow. I truly enjoyed the entire process.

IMGP8567.jpg

Once I finished 28 squares, I figured it was time for a plan. I decided on a throw quilt with six blocks per row, seven rows (42 squares total), 2″ sashing and a background border.

IMGP8601

IMGP8636

Because it came out so lovely, I had it professionally quilted with the digital pattern Daisy Delight.

IMG_7815.JPG

I did have to purchase binding fabric, luckily I found what I wanted from the Chestnut Street line. I also had to purchase the backing. Since the quilt has a lot of orange in it, I wanted to incorporate it onto the back as well. I decided on Tule Quietude in Sunset by Leah Duncan for Art Gallery Fabrics. I loved how this print blended nicely with the colors on the front.

IMGP8814.JPG

My Granny Square quilt finished at 64 ½” x 74 ½”. And I just love it!

IMGP8794.JPG

I mentioned that the granny squares popped up on IG from the Moda Bake Shop, so I visited their site for block instructions. Because I wanted to use scraps that I had already cut into 2 ½” squares, I had to do some recalculating for a more petite block. Also, this size block is great because it can be easily made with precuts, including 2 ½” strips, 5″ squares and 10″ squares.

IMGP8409

IMGP8478

Here’s a quick tutorial on how to make a granny square block with the dimensions I used. My blocks finished at roughly 8 3/8″ square.

FROM COLOR/PRINT FABRIC, CUT:

(1) 2 ½” x 2 ½” square (center square)

(4) 2 ½” x 2 ½” squares (inner squares)

(8) 2 ½” x 2 ½” squares (outer squares)

FROM BACKGROUND FABRIC, CUT:

(2) 2 ½” x 2 ½” squares

*subcut diagonal once

(2) 4 ¼” x 4 ¼” squares

*subcut diagonal twice

Lay out fabric as illustrated below:

IMGP8576.jpg

Sew pieces together into rows using ¼” seam allowance. I recommend pinning! Be sure to trim away dog ears. Pressed rows will look like this:

IMGP8577.jpg

Because sewn pieces are relatively small, I pressed all my seams open to reduce bulk. It definitely helps the blocks to lay nice and flat.

Next, turn the block sideways, as shown. Place the remaining triangle pieces in the four corners. Sew and press.

IMGP8585.JPG

The final step, trimming your block (and the remaining dog ears). Line up your ruler with the ¼” mark placed at the corners of the outer squares, as shown. Trim.

IMGP8590

Give your block one last press and you have a beautiful granny square!

IMGP8592.jpg

I know it’s common for quilters to finish a quilt and say it’s their new favorite, but this one really is for me. It’s different from most of the quilts I’ve made, mainly because of the fabrics, many were soft and feminine floral prints.

IMGP8810.jpg

I think every quilter needs to make a granny square quilt, well, just because…don’t you agree?

mini quilts, quilting, Uncategorized

Modern Meets Traditional

Isn’t it interesting how colors can make all the difference? Recently my son asked me to make him a mini quilt for his music room. He requested the Dutch Rose block, and for a few good reasons…he liked the center star along with how the formation around it looks ‘folded’ and of course, the block has timeless style! I couldn’t agree more.

8042_pattern_img-1

A while back I made a zippered pillow cover using the Dutch Rose block knowing that the block itself is traditional. I think the soft colors I used in my pillow accented that fact, but for this mini-quilt I wanted a modern, updated look. Masculine, too.

Overall, I find that one of the most fun parts of quilting is choosing fabrics. Sometimes I have very specific ideas, other times I forage through my (limited) stash trying to find what looks good. For this project, I knew to avoid any pastels, pinks and purples. I had just finished a quilt using Sun Print 2018 by Alison Glass for Andover Fabrics and I knew my son would like the rich, deep colors in the collection plus I had plenty leftover. After much deliberation, I narrowed it down to four hoping the combination would work.

I used Kona Cotton White for an extra pop and I quilted it with my go-to pattern, crosshatch, spacing lines 1 ½” apart, using Aurifil cotton 50wt 2024 (White).

IMGP8723

I’ve been stitching that a lot lately, and it never gets old. And I feel the color combination worked—I love it and my son was happy with it, too. I’m tempted to use these colors in a triangle quilt!

In the end, I think I achieved my goal of giving this block a mod update just by using bold, modern colors.

IMGP8713

:.,bcxz

Same block, but what a different feel you get from the colors and fabrics you choose… because that’s what it’s all about, right?

quilting, Uncategorized

Quilting 101: Precuts

Fact: Quilters love precuts. 🙂

IMGP8318

If you’re new to quilting you might be asking, “What are precuts?” It’s pretty straightforward, precuts are fabrics cut to specific sizes and quantities and usually feature fabric from the same collection. Precuts came into existence as a way for fabric manufacturers to promote their new lines. Luckily for us quilters, these gems are available from a variety fabric manufacturers such as Moda, Robert Kaufman, Riley Blake, RJR Fabrics and Windham Fabrics—just to name a few.

Here’s a list of information on available precuts along with some examples of projects I’ve made with them.

Note: Manufacturers have named precuts differently as noted below.

IMGP8334.JPG

Mini Charm Pack
2 ½” x 2 ½” squares; 42 per pack

IMGP8481.jpg

IMGP8483.jpg

IMGP8176
Scrappy Nine Patch Quilt made with 2 1/2″ squares

IMG_5959
Summer Star Mini Quilt made with a mini charm pack

Charm Pack, Stacker
5″ x 5″ squares; 42 per pack

IMGP8493.JPG

IMG_6626
Checkered Baby Quilt made with a charm pack (A Monday Morning Design tutorial)

Layer Cake, Patty Cake
10″ x 10″ squares; 42 per pack

IMGP8492.JPG

IMGP6709
Boxed Candy Toss Quilt is layer cake friendly (A Monday Morning Design tutorial)

Jelly Roll, Roll Up, Rolie Polie
2 ½” x 44″ strips; 40-42 per roll

IMGP8499.JPG

Honey Bun
1 ½” x 44″ strips; 40-42 per roll

Fat Quarter
18″ x 22″; bundle sizes vary

IMG_3249

IMGP7215
Fireworks Quilt made with fat quarters

Fat Eighth
9″ x 22″; bundle sizes vary

Turnover
6″ triangles

There’s a whole world of quilting fun out there using precuts. If you haven’t given them a try, put it on your ‘to do’ list. You’ll find that they’re a great choice by saving you a lot of cutting time making your quilting projects easier and faster!

quilting, Quilting 101, Uncategorized

Quilting 101: Quilting Terminology for Beginners

When I started to quilt, some of the quilting language had me really confused. Everyday words referring to animals, winter and food with a quilting-related meaning….huh? It just didn’t make sense. If your experience is one of the same, this post will help clarify some of the terminology used that has other meanings.

I chose my top ten favorites, or I should say, my top ten most confusing quilting terms. 🙂

1. Dog ears – Dog ears are those small pieces of fabric that appear in quilt block corners and edges when two triangular pieces are sewn together—results of a diagonal seam. Always trim dog ears before finishing a quilt block.

IMGP8415.JPG

2. Feed dogs – The feed dogs are the metal teeth located in the slots in a sewing machine’s needle plate. Feed dogs are comprised of metal bars, crosscut with diagonal teeth that move back and forth; they grip fabric and pull it through the machine and away from the needle.

IMGP8411.JPG

3. Flying geese – Flying geese is a traditional quilt block pattern created by sewing a triangle at each end of a rectangular piece of fabric, forming a peak in the middle. Finished flying geese blocks resemble geese flying in formation, hence the name.

IMGP8428.JPG

4. Nesting seams – Seams that line up precisely at an intersection of a block or quilt are known as nesting seams. To achieve nesting, press seams in opposite directions to reduce the bulk created by the seam allowance.

IMGP8450

IMGP8454.JPG

5. Snowball – The snowball technique is used when a quilter chooses to give a square a rounded effect (like a snowball). To achieve this result, the quilter draws a diagonal line on a background fabric square (white or light colored), sews on the line, cuts away the corner and presses back the triangle. This process can also be done in reverse, using a central white square and a color triangle in the corner.

IMGP8457
Preparation to snowball a corner

IMGP8462
Snowballed corner

6. Quilt sandwich or sandwiching – Sandwiching is assembling the quilt top, batting and backing, then securing the layers together by basting with either quilting pins or glue–readying it for quilting. The batting and quilt backing are always cut a few inches larger than the quilt top to allow for fabric shifting while quilting.

IMGP8436

7. Chain piecing – Chain piecing is sewing together squares in one continuous length of thread instead of sewing piece by piece. This method saves time and is popular among quilters. Once multiple squares have been sewn in a strand, the thread is easily cut to separate individual pieces.

IMGP8432.JPG
chain piecing

8. Sashing – Sashing is a strip of fabric sewn between blocks on a quilt top. It gives a windowpane effect and shows off blocks individually. Most often lighter-colored fabric is used for sashing to make the other colors pop. As a variation, sashing can be used to contrast quilt block colors.

IMGP8159 (2).JPG

9. Stitch in the ditch – Stitching in the ditch is a technique where the quilting stitches on the quilt top are minimized by quilting ‘in’ the seams that were created when the quilt blocks were pieced together. Using a specialized foot helps makes this process neater with more accurate results.

IMGP8418.JPG

10. Fussy cut – A fussy cut is used when a quilter wants to showcase a specific section or element of a fabric pattern, e.g. a flower, an animal, etc. A fussy cut should always include a seam allowance.

IMG_7159.jpg

I hope this blog post helped clarify some quilting terminology confusion.

I plan to continue my Quilting 101 series with my next post delving into the variety of precut fabric.

quilting, Uncategorized

Quilting 101: Acronyms

If you’ve been bitten by the quilting bug, you probably have already heard quilting references that use everyday language (e.g. quilt sandwich, snowballing) and your mind could be swimming in quilting-related acronyms. All the abbreviations and terminology can be really confusing. When I first started, I was baffled over all the different terms used when watching how-to videos and looking at Instagram posts.

If you’re a confused beginner like I was, this post offers some help. I have listed the most common quilting acronyms, their meaning, and a few examples.

IMGP8299.JPG

WOF – Width Of Fabric – The width of the fabric from selvage to selvage (side to side). It’s important to know what that measurement is when purchasing, cutting and sewing fabric.

RST – Right Sides Together – When quilting, fabrics are sewn with the ‘right’ sides facing. ‘Right’ sides are the printed side, or what some call ‘the pretty side.’ You’ll see this term used in patterns and tutorials.

WIP – Work In Progress – Any project in the works. Many quilters tend to have several at once. 🙂

UFO – UnFinished Object – Just what it says…something you haven’t yet finished. A lot of the time UFOs are abandoned projects, usually due to something else that’s caught a quilter’s eye. 😉

IMGP8307.JPG

FMQ – Free Motion Quilting – This is a quilting process where you drop the feed dogs on your sewing machine and move your quilt sandwich around freely. Stippling or meandering is commonly the first design beginners learn to quilt. Here’s an example of what meandering looks like:

IMGP7451
This is the extent of my FMQ abilities…however, some people are phenomenal at this! 🙂

HST – Half Square Triangle – HSTs are one of the most popular quilt block units used in quilting. There are a variety of methods to making HSTs.

IMGP6934
half square triangle

QAL – Quilt Along – A quilt along consists of a host posting tutorials on a blog/website for other quilters that join in at home. Goals are set, example: make blocks 1-10 this week, and everyone makes the same project. Often times I see QALs taking place on Instagram but I’ve never participated in one.

LQS – Local Quilt Shop

TBQ – To Be Quilted – (I just learned this one!)

Hopefully this helps clear up some of the obscurity in the quilting world! I will continue to provide information for beginning quilters in my Quilting 101 series. My next post will provide a rundown on other popular terms you’ll come across throughout your quilting journey.